mtb-bar carbon - syntace carbon removal of bars first, remove the existing bar from your bike the...
TRANSCRIPT

Syntace GmbH, Dammweg1, 83342 Tacherting, Germany. Tel. (49) 8634-66666, Fax: 6365. [email protected] , www.syntace.de
We congratulate you to your Syntace bar. You made a good choice!
Please read the entire assembly instructions as they contain a lot of important informa-
tion and many practical tips. Your Syntace bar has been designed and manufactured
with outmost care. It is necessary, though, to follow the instructions and to care for it
accordingly.
Keep in mind that all parts relevant for the safety of your bike have an “elephantine”
memory: any damage (through crashes or overload), even if long ago, will add up over the
lifetime of the product. At Syntace we added a large portion of “overload protection,” but
even our parts are not indestructible.
A regular exchange (every 2 year, for example) is, according to our current knowledge,
not necessary. But after a crash you should check especially stem and handle bar for
small fractures, grooves and dents. Check if stem or bar are bent. Replace those parts on
the slightest sign of damage! Never try to straighten or “patch” damaged parts, replace
them! If you don’t, parts can fail and a crash with severe injuries may be the result.
Intended and proper use The Syntace MTB bar has been designed for use with mountain bikes.
Note: Since 2005 the entire Syntace handlebar selection has been approved for 4-bolt
stems, but can still be used with 2-bolt stems.
Stems made of steel or titanium with sharp edges from welding or machining act like
knife edges on a bar. We do advise against using them. If you still want to do it, please
deburr the edges that have contact with the bar and take a lot of care to round all edges
as well. Before you do, ask the manufacturer if working on the stem would void the
warranty.
It is also necessary to check, if the stem does have the correct clamping diameter of
25.4 / 31.8 mm +/- 0.10 mm. If not, use a correctly dimensioned stem.
Attention: A few components on the market ( SRAM X.O for example) are, due to less
than perfect clamping design with a very asymmetrical clamping slit or tilted clamping
screws (see pics), not very well suited for carbon fiber bars. A maximum torque of 1.5
Nm is admissible. Therefore we highly recommend the use of Syntace adhesion paste.
The same is valid for brake levers. The torque values stated by manufacturers are usually
only for aluminum bars and maximum values to boot. To mount bar ends (don‘t cut bar,
use CRB plugs) use adhesion paste as well and tighten only enough for the levers not to
twist. Never use manufacturers torque values without prior evaluation.
AppearanceSyntace mtb bars have a visible carbon UD finish. If you turn the bar against the light
light, you can distinctively see the fiber layers and their edges like shadows. It is quite
normal for the surface clear coat layer to be scraped off somewhat when assembling
components.
Mounting compatibilityYou can use the Syntace carbon bar in all conventional stems.
The diameter of the clamping area on the carbon bar and the stem must be
25.4 / 31.8 mm +/- 0.15 mm.
Exeptions:• The model Syntace Vector Lowrider Carbon is also usable in Syntace
VRO-Systems.
• The VRO Bar Carbon is exclusively usable in Syntace VRO-Systems.
Mtb-bAR cARbon
Removal of barsFirst, remove the existing bar from your bike the following way:
• Remove any bar ends, end plugs and grips.
• Remove bike computers and any other accessories attached to the bar.
• Loosen screws of shifter pods and brake levers.
Installation of bars In conventional stems (only Duraflite 25.4/31.8, Vector Lowrider Carbon and Vector 31.8 Carbon):• First mount the shifter pods and brake levers onto the bar
Tip: In case you use a stem with a closed clamp, first insert the bar into the clamp and
then mount shifter pods and brake levers.
• Now bring the bar into the desired position and align it. Make sure the bar is centered
(look for the markings).
• Now press the bar into “snap seat” (a feature of Syntace stems) and tighten screws
alternately to required torque, however with a maximum of 8 Nm by using M6-screws
(6 Nm by using M5).
Tip: To increase safety and life span, all Syntace stems feature a greater than 180° “snap
seat”.
Attention: With some stem designs it is possible that the eye of the stem and the bar
get deformed from high torque or repeated tightening. Bars “strangled” like this do not
last their full life span and have to be exchanged, preferably with the stem!
Pro tip: Apply a little Syntace Dynamics friction paste to the clamping surfaces. This
way bar and stem are more protected against twisting and the required torque can be
further reduced!
In the VRO-System (only VRO Bar Carbon and Vector Lowrider Carbon):• Slide the connector clamps (X-Ray, ECO, Peanut) onto bar. Not all the way to the
center rings, though, only far enough so that the clamps can still move freely on the
smaller diameter of the bar.
Pic. 1
• Widen the connector clamps (X-Ray, ECO,
Peanut) with a plastic tire lever by about 1-2
mm (Pic. 1) and now slide them onto stem
and bar all the way to the center rings.
• Slide shifter pods and brake levers onto bar.
• Remove tire levers an insert greased (threads
and head contact area) clamping screws.
• Before you tighten the clamping screws of the connector clamps, adjust bar to desired
position.
• Tighten the connector clamps but not beyond inscribed torque.
Installation of bars (continuation): • Now align shifter pods and brake levers and tighten with the required torque.
Tip: Old motocross trick: only tighten brake levers enough so that they can still twist in
case of a crash. You will save a lot of time and money by avoiding bent or broken levers.
• Now install grips., bike computer and all other accessories to bar.
Tip: Problems mounting/removing grips? The Syntace Screw-on Gripz slide easily onto
the bar. Tighten slightly (3Nm) with a 5mm Allen wrench –done!
Current: 22.06.2012
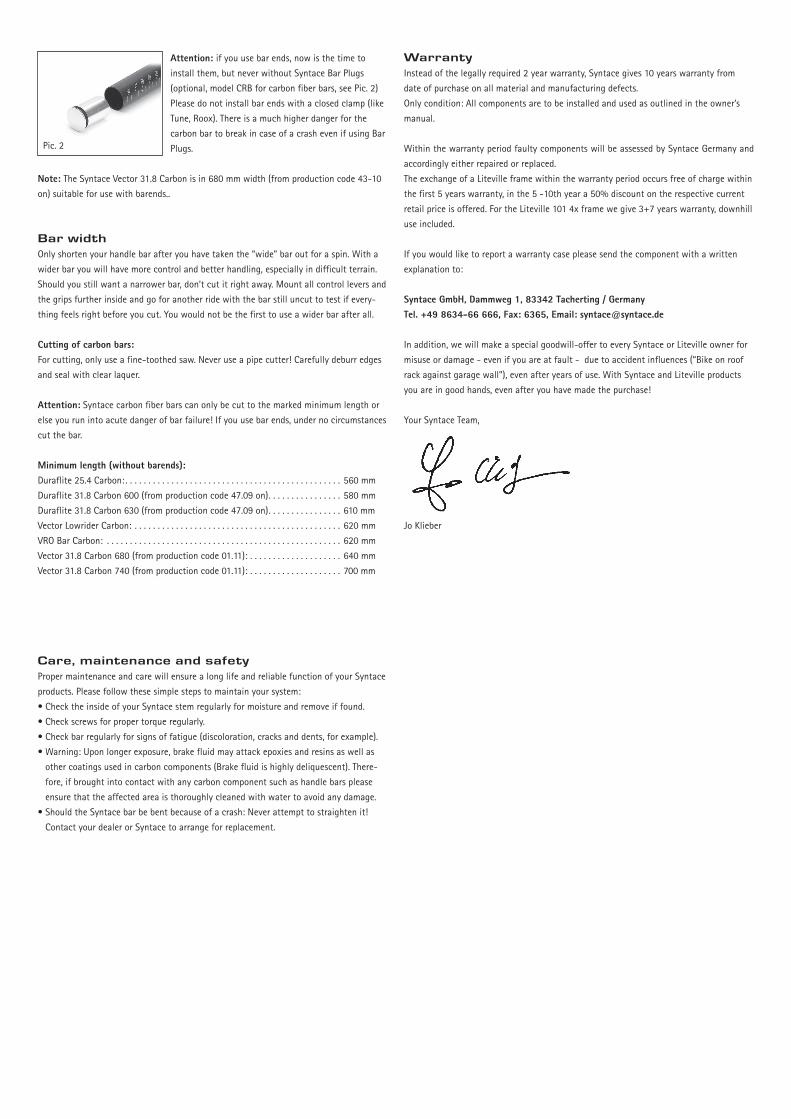
Pic. 2
Attention: if you use bar ends, now is the time to
install them, but never without Syntace Bar Plugs
(optional, model CRB for carbon fiber bars, see Pic. 2)
Please do not install bar ends with a closed clamp (like
Tune, Roox). There is a much higher danger for the
carbon bar to break in case of a crash even if using Bar
Plugs.
Note: The Syntace Vector 31.8 Carbon is in 680 mm width (from production code 43-10
on) suitable for use with barends..
bar width Only shorten your handle bar after you have taken the “wide” bar out for a spin. With a
wider bar you will have more control and better handling, especially in difficult terrain.
Should you still want a narrower bar, don’t cut it right away. Mount all control levers and
the grips further inside and go for another ride with the bar still uncut to test if every-
thing feels right before you cut. You would not be the first to use a wider bar after all.
Cutting of carbon bars:For cutting, only use a fine-toothed saw. Never use a pipe cutter! Carefully deburr edges
and seal with clear laquer.
Attention: Syntace carbon fiber bars can only be cut to the marked minimum length or
else you run into acute danger of bar failure! If you use bar ends, under no circumstances
cut the bar.
Minimum length (without barends): Duraflite 25.4 Carbon: . . . . . . . . . . . . . . . . . . . . . . . . . . . . . . . . . . . . . . . . . . . . . . . 560 mm
Duraflite 31.8 Carbon 600 (from production code 47.09 on) . . . . . . . . . . . . . . . . 580 mm
Duraflite 31.8 Carbon 630 (from production code 47.09 on) . . . . . . . . . . . . . . . . 610 mm
Vector Lowrider Carbon: . . . . . . . . . . . . . . . . . . . . . . . . . . . . . . . . . . . . . . . . . . . . . 620 mm
VRO Bar Carbon: . . . . . . . . . . . . . . . . . . . . . . . . . . . . . . . . . . . . . . . . . . . . . . . . . . . 620 mm
Vector 31.8 Carbon 680 (from production code 01.11): . . . . . . . . . . . . . . . . . . . . 640 mm
Vector 31.8 Carbon 740 (from production code 01.11): . . . . . . . . . . . . . . . . . . . . 700 mm
care, maintenance and safetyProper maintenance and care will ensure a long life and reliable function of your Syntace
products. Please follow these simple steps to maintain your system:
• Check the inside of your Syntace stem regularly for moisture and remove if found.
• Check screws for proper torque regularly.
• Check bar regularly for signs of fatigue (discoloration, cracks and dents, for example).
• Warning: Upon longer exposure, brake fluid may attack epoxies and resins as well as
other coatings used in carbon components (Brake fluid is highly deliquescent). There-
fore, if brought into contact with any carbon component such as handle bars please
ensure that the affected area is thoroughly cleaned with water to avoid any damage.
• Should the Syntace bar be bent because of a crash: Never attempt to straighten it!
Contact your dealer or Syntace to arrange for replacement.
WarrantyInstead of the legally required 2 year warranty, Syntace gives 10 years warranty from
date of purchase on all material and manufacturing defects.
Only condition: All components are to be installed and used as outlined in the owner’s
manual.
Within the warranty period faulty components will be assessed by Syntace Germany and
accordingly either repaired or replaced.
The exchange of a Liteville frame within the warranty period occurs free of charge within
the first 5 years warranty, in the 5 -10th year a 50% discount on the respective current
retail price is offered. For the Liteville 101 4x frame we give 3+7 years warranty, downhill
use included.
If you would like to report a warranty case please send the component with a written
explanation to:
Syntace GmbH, Dammweg 1, 83342 Tacherting / GermanyTel. +49 8634-66 666, Fax: 6365, Email: [email protected]
In addition, we will make a special goodwill-offer to every Syntace or Liteville owner for
misuse or damage - even if you are at fault - due to accident influences (“Bike on roof
rack against garage wall”), even after years of use. With Syntace and Liteville products
you are in good hands, even after you have made the purchase!
Your Syntace Team,
Jo Klieber

• SRAM X.0 – Trigger (according to manual 4 Nm) are to be mounted with a max. torque of 1.5Nm. Do not forget to apply friction paste to avoid those creaking noises.• Reduced torque must also be applied to shifters and brake levers of other manufacturers if they exhibit an asymmetric clamping slit and/or clamping bolts which are not perpendicular to the handle bar centerline.
• Caution! Gripshift type shifters which do not exhibit a symmetric clamping mechanism, but instead apply a point pressure on a small surface area of the handlebar, or use a very narrow clamp, are not designed for use in combination with carbon handlebars. Examples are some SRAM and Rohloff shifters. These are to be used in combination with aluminium bars exclusively.
Mounting Components on Carbon Handlebars
Dear Syntace Customer,
Several components which have come onto the market possess undesirable clamping mechanisms for carbon handlebars by either having a strongly asymmetric clamping slit or clamping bolts which are not perpedicular to the handlebar centerline (see diagrams). In addition, the max. torque values given by manufacturers generally refers to aluminium handlebars, therefor we strongly recommend using friction paste and applying a much lower torque to mount compon-ents.
1/2
Some examples:
symmetric asymmetric
Syntace GmbH Dammweg 183342 Tacherting Germany
Tel.: (49) 8634 - 66 666Fax: (49) 8634 - 63 65
E-Mail: [email protected]
MTB Shifters and Brake Levers:
OKNO
NO
OK
OK
NO
NO
symmetric asymmetric
symmetricasymmetric with clamping slit in force transfer region
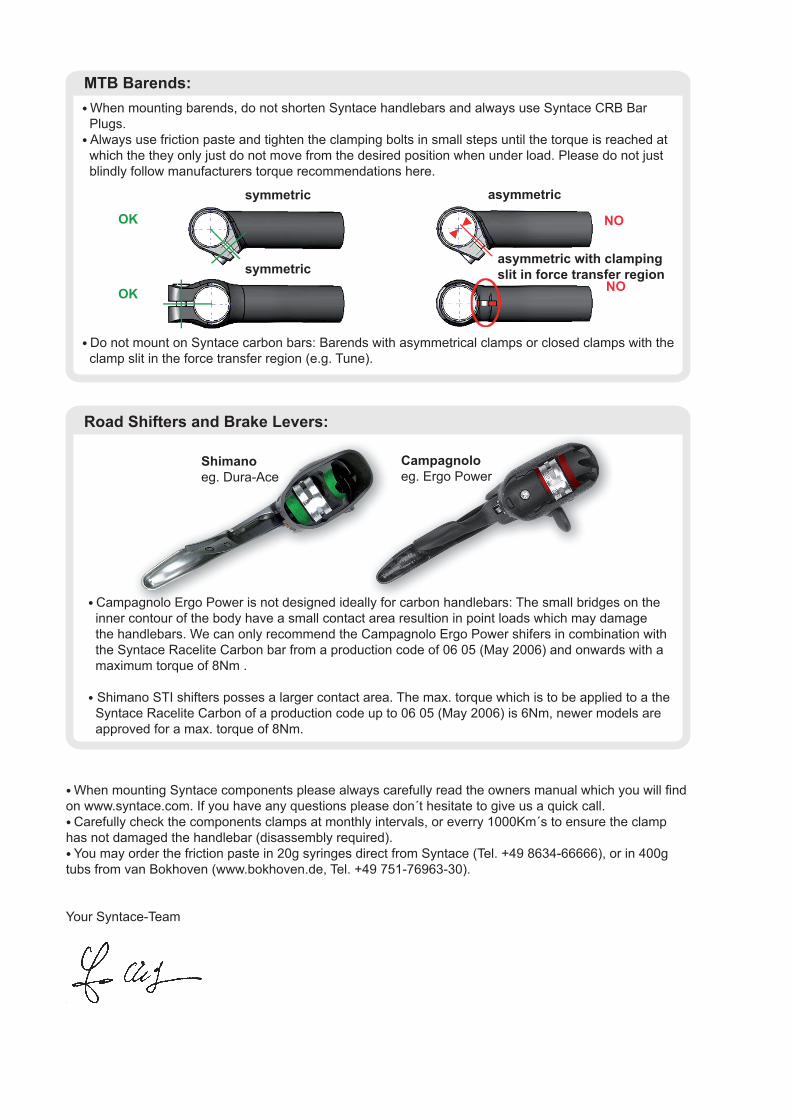
• When mounting barends, do not shorten Syntace handlebars and always use Syntace CRB Bar Plugs.• Always use friction paste and tighten the clamping bolts in small steps until the torque is reached at which the they only just do not move from the desired position when under load. Please do not just blindly follow manufacturers torque recommendations here.
• Do not mount on Syntace carbon bars: Barends with asymmetrical clamps or closed clamps with the clamp slit in the force transfer region (e.g. Tune).
• When mounting Syntace components please always carefully read the owners manual which you will fi nd on www.syntace.com. If you have any questions please don´t hesitate to give us a quick call. • Carefully check the components clamps at monthly intervals, or everry 1000Km´s to ensure the clamp has not damaged the handlebar (disassembly required).• You may order the friction paste in 20g syringes direct from Syntace (Tel. +49 8634-66666), or in 400g tubs from van Bokhoven (www.bokhoven.de, Tel. +49 751-76963-30).
Your Syntace-Team
2/2Jo Klieber
• Campagnolo Ergo Power is not designed ideally for carbon handlebars: The small bridges on the inner contour of the body have a small contact area resultion in point loads which may damage the handlebars. We can only recommend the Campagnolo Ergo Power shifers in combination with the Syntace Racelite Carbon bar from a production code of 06 05 (May 2006) and onwards with a maximum torque of 8Nm .
• Shimano STI shifters posses a larger contact area. The max. torque which is to be applied to a the Syntace Racelite Carbon of a production code up to 06 05 (May 2006) is 6Nm, newer models are approved for a max. torque of 8Nm.
Road Shifters and Brake Levers:
Campagnolo eg. Ergo Power
Shimanoeg. Dura-Ace
MTB Barends: