“mollier-h,x” for ios. - robatherm€¦ · “mollier-h,x” for ios. ... the robatherm app:...
TRANSCRIPT

The robatherm App “Mollier-h,x” for iOS.
Brief Description of the “Mollier-h,x” App
Draft: 01/2010

Page 2 © robatherm 02/2014
The robatherm App: “Mollier-h,x”
User Interface
Nr. Description 1 Adding an additional h,x-diagram
2 Renaming of the h,x-diagram
3 Title of the currently selected h,x-diagram
4 Selection of the desired change in air condition (heating, humidifying, etc.)
5 Selection of the airflow (various airflows can be drawn into one h,x-diagram)
6 Setting of the diagram limitations (maximum/minimum temperatures, max. humidity)
7 Setting of the comfort range (this can be individually repositioned)
8 Import weather data
9 Export the selected h,x-diagram as a PDF-file and send
10 User settings (registration, user name)

Page 3 © robatherm 02/2014
Basic Settings Diagram Settings Set the h,x-diagram’s limitations in reference to minimum and maximum temperatures as well as maximum humidity. The air pressure as well as the airflow volume can be defined.
Comfort Range The position of the comfort range can be altered individually.

Page 4 © robatherm 02/2014
Initial calculations within the h,x-diagram Setting an airflow Begin the processing by clicking on a starting point. Run your finger over the diagram until you’ve reached the general point you’d like to start at.
To finish, click on “set air condition” and if necessary, manually correct the point.
By clicking on your airflow now has a starting point, from which you can now make further changes in state.

Page 5 © robatherm 02/2014
Carrying out a change in state From the previously entered starting point, you can now carry out various changes in state, which are available under the Icon . Select a change in state and define a target point (as previously done during the selection of a starting point).
After completion, the exact temperature and humidity of the target point can be manually adjusted.
By pressing the icon , the change in state is complete.

Page 6 © robatherm 02/2014
Processing an Airflow Airflows By pressing the icon , a further airflow can be added or, as soon as several airflows have been set, an existing airflow can be selected.
Nr. Description 1 The selected airflow is check marked.
Changes in state are assigned to the marked airflow.
2 Tabular presentation of the changes in state within an airflow. The entire list of the selected airflow’s previous changes in state will be displayed. Set air conditions can also be deleted here.
3 Adapation of the name and the color of the airflow 1 Renaming of the airflow 2 Arbitrary selection of the airflow’s color 3 Selection from four default colors

Page 7 © robatherm 02/2014
Import of Weather Data Unregistered users only have access to Munich’s weather data. After completing the free registration, the user will be granted access to the weather data in its entirety. Selecting a weather data set The desired weather data set can be selected via the map view The red markings show the available weather data sets that you have not yet loaded. An Internet connection is required.
Nr. Description 1 Selection of the weather data set by clicking on the icon .
2 Alphabetical list of all weather data
3 Remove the selected weather data set from the diagram.
Please note: The importing of weather data could take a moment. The depiction of all weather data will reduce the application’s speed. For this reason, we
recommend that the weather data be imported AFTER all changes in state within the h,x-diagram have been entered.
robatherm assumes no warranty or liability for the correctness and completeness of any information provided within this document. Illustrations and descriptions may contain accessories going beyond the standard configuration. Subject to technical modifications. Issue 02/2014. Copyright by robatherm.
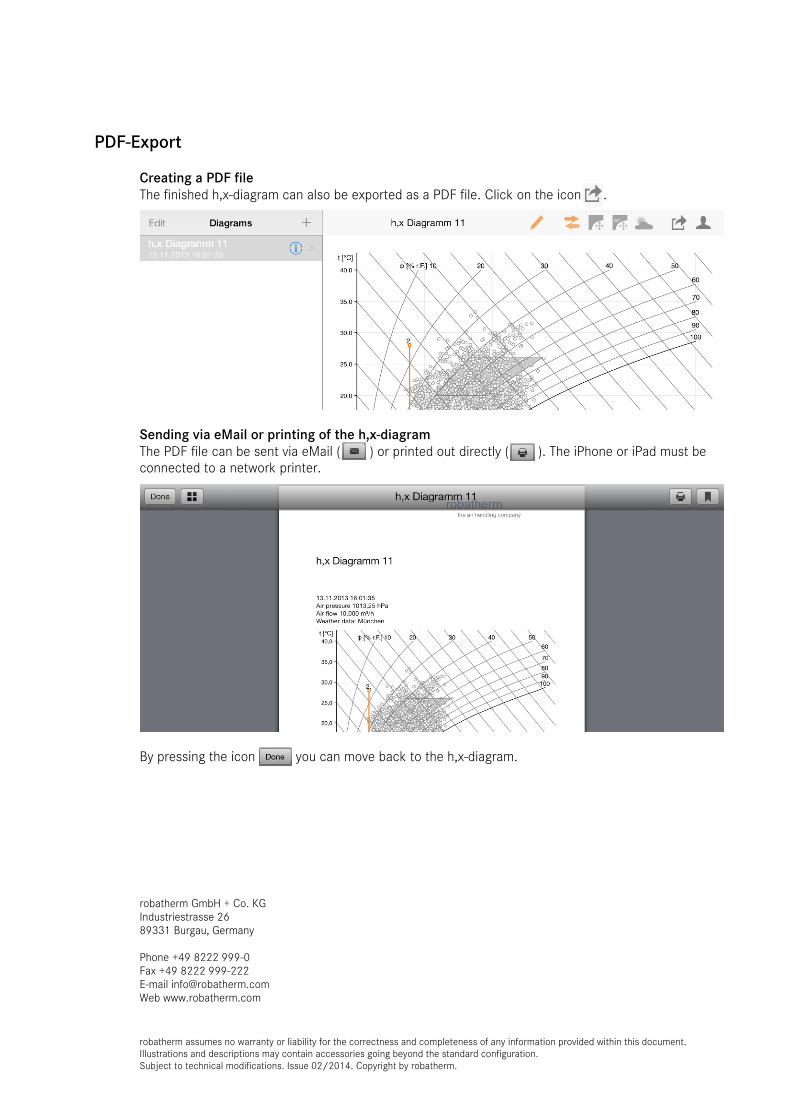
PDF-Export Creating a PDF file The finished h,x-diagram can also be exported as a PDF file. Click on the icon .
Sending via eMail or printing of the h,x-diagram The PDF file can be sent via eMail ( ) or printed out directly ( ). The iPhone or iPad must be connected to a network printer.
By pressing the icon you can move back to the h,x-diagram. robatherm GmbH + Co. KG Industriestrasse 26 89331 Burgau, Germany Phone +49 8222 999-0 Fax +49 8222 999-222 E-mail [email protected] Web www.robatherm.com