milne bay to morotai the expeditionary air force 1942...
TRANSCRIPT
MILNE BAY TO MOROTAI THE EXPEDITIONARY AIR FORCE 1942-45
Ladies and gentlemen, thanks for coming along today.
On this day, 75 years ago, the Battle of Milne Bay was at its most critical stage. RAAF Kittyhawks of Nos 75 & 76 Squadron were taking off from No 1 Strip Milne Bay, in New Guinea to strike against Japanese troops who were attacking along the North East parameter of No 3 strip. A transit distance of less than four kilometres.
It seems fitting then to mark this day acknowledging the RAAF’s contribution to battle and its ultimate conclusion.
I say ‘contribution’ because while the RAAF was a significant element of the forces that won the engagement, they were very much part of a joint allied force which all came together to generate the effects needed for victory.
Allied land and air power each added their specific capabilities at the operational and tactical levels to ultimately win the battle. My focus will be on the RAAF component—while, I hope, not in any way diminishing the contribution of the land forces.
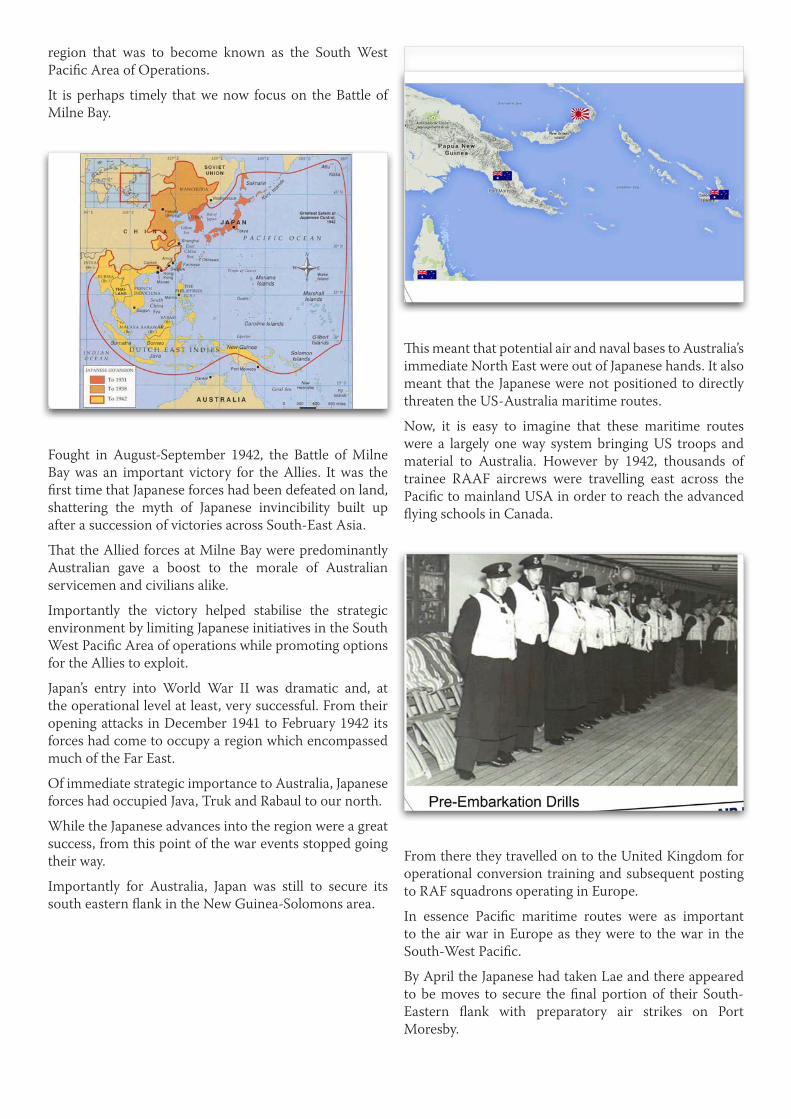
However, I do want to broaden this discussion a little further. September 1942 marked something of a transition point for the Air Force. Just after the battle ended the RAAF formed No 9 Operations Group; a formation specifically structured, manned and equipped for offensive operations.
This was an important milestone. This was the first time the RAAF structured a command focused on offensive mobile operations. Prior to this date the RAAF’s command structure was centred on defensive, static area commands.
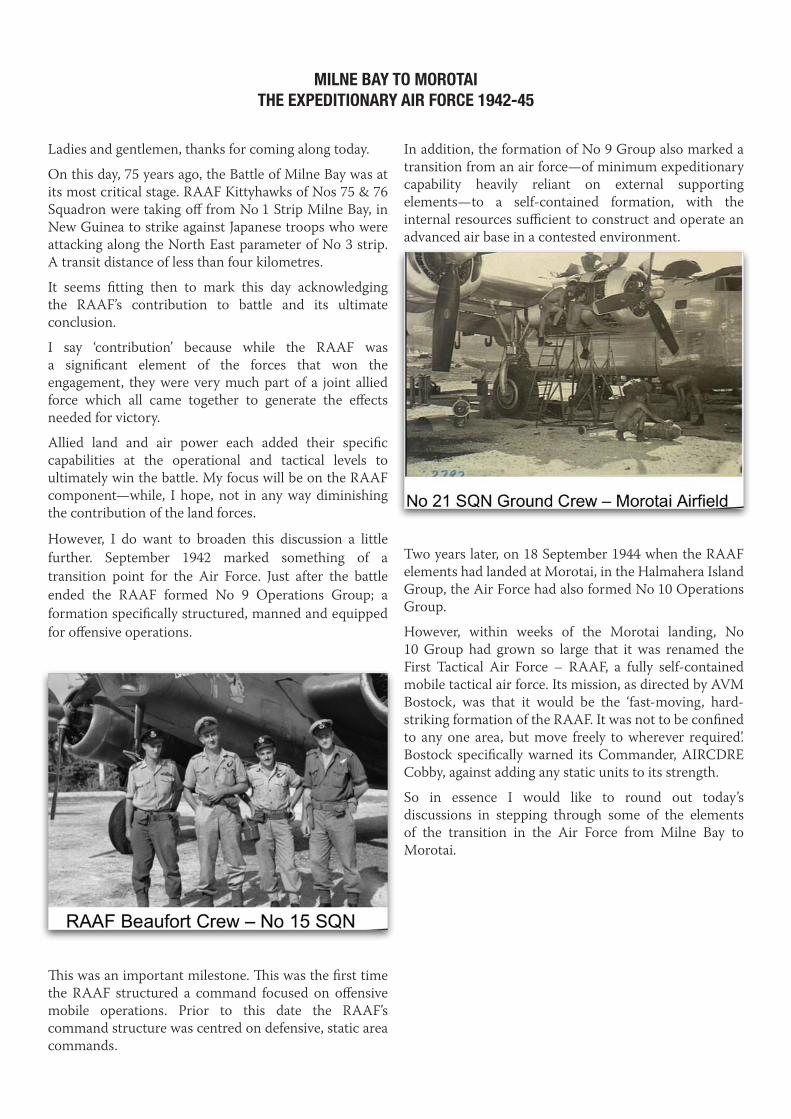
In addition, the formation of No 9 Group also marked a transition from an air force—of minimum expeditionary capability heavily reliant on external supporting elements—to a self-contained formation, with the internal resources sufficient to construct and operate an advanced air base in a contested environment.
Two years later, on 18 September 1944 when the RAAF elements had landed at Morotai, in the Halmahera Island Group, the Air Force had also formed No 10 Operations Group.
However, within weeks of the Morotai landing, No 10 Group had grown so large that it was renamed the First Tactical Air Force – RAAF, a fully self-contained mobile tactical air force. Its mission, as directed by AVM Bostock, was that it would be the ‘fast-moving, hard-striking formation of the RAAF. It was not to be confined to any one area, but move freely to wherever required’. Bostock specifically warned its Commander, AIRCDRE Cobby, against adding any static units to its strength.
So in essence I would like to round out today’s discussions in stepping through some of the elements of the transition in the Air Force from Milne Bay to Morotai.

First point worth noting is that in 1939 the RAAF numbered a mere 3489 personnel and 246 aircraft none of which were modern combat types and certainly none could be considered an effective fighter.
While manning and aircraft were an obvious deficiency being addressed by the Air Board at the time, a less evident deficiency was that the Air Force had no means of deploying a self-contained force into anything short of an established, protected air base.
The entire air strategy from Australia’s point of view at that time was that it would only need to fight from the few established airfields close to capital cities.
This deficiency in thinking was evident from the very cusp of the formation of the RAAF in 1921. The Air Board’s planning document of 1920—titled the Report on the Air Defence of Australia—simply assumed that sustained operations would be from established facilities. An odd decision given that Defence operated only one airfield at the time—in Melbourne.
Little additional thought is evident in the Memorandum Regarding the Air Defence of Australia drafted in 1924. Which, while acknowledging the limited aviation
infrastructure across Australia, failed to address the requirement for operations away from already established bases.
In 1928 and again in 1938 when reviews of the Australian Air Force were conducted by senior Officers of Britain’s RAF, the discussion on sustained deployed operations was conspicuous in its absence.
To be fair, in 1928 the RAAF had no money to spend on much more than keeping what it already had flying, and by 1938 was desperately trying to modernise a long moribund force. Adding to its troubles with suggestions of capability far beyond its means may have seemed a waste of effort.
However, by 1939 the RAAF began to get on to the front foot in establishing a means to sustain operations in the strategic approaches to Australia’s north and north-east.
In a joint venture with New Zealand, the RAAF established a line of advanced operational bases in the Pacific islands in the form of an outer defence ring.

From 1939, sites were surveyed and the development of suitable bases was undertaken.
The object was to form a chain of advanced bases through the islands to the north of Darwin, extending through New Guinea and the island archipelagos to the east as far as New Caledonia.
These advanced operating bases (AOBs) were primarily used for flying-boat operations, from which the Catalina aircraft of the RAAF’s Nos 11 and 20 Squadrons conducted early intelligence, surveillance and reconnaissance (ISR), search and rescue and eventually some strike missions when the Japanese captured Rabual and advanced into the Coral Sea.
It is worth noting that the AOBs, with few exceptions, were seaplane bases. The means to construct and sustain airfields was simply not available at the time. It is also noteworthy that the AOB concept was centred on a static defensive posture.
When the RAAF sent units and personnel to North Africa, the UK, and later to Singapore and Malaya, the Australian units became embedded with RAF Commands and were effectively sustained by its Allies.
However, the RAAF was expanding. With the increase in wartime funding, and a willing pool of volunteers came the means to address long established deficiencies. Lessons were also being learned based on the overseas experiences.
For example, the advent of Radar in the 1930s and its role during encounters such as the Battle of Britain, demonstrated the essential requirement to employ the same technology in Australia.
Accordingly, the means to construct and employ radar domestically was jointly developed between civilian and Military organisations. For the RAAF, the potential to develop a deployable early warning system seemed a logical step.
Through 1940–41 training schools were established to qualify operators and mechanics. By 1942, transportable early warning radar sets were being deployed. For example, an early warning radar was sent to Darwin just prior to the first air raid on 19 February 1942. Sadly, it was still under construction when the attack was carried out.
However, a radar unit was established and deployed to the airfield network at Milne Bay in mid-1942. And this station was operational by the time the battle began in August of that year.
So the RAAF was clearly developing from the low capability base of 1939.
Considerable work was being done to ensure that the means to deploy and sustain a wider range of capability to the north of Australia was available to contribute to the Allied plans to eject the Japanese forces from the
region that was to become known as the South West Pacific Area of Operations.
It is perhaps timely that we now focus on the Battle of Milne Bay.
Fought in August-September 1942, the Battle of Milne Bay was an important victory for the Allies. It was the first time that Japanese forces had been defeated on land, shattering the myth of Japanese invincibility built up after a succession of victories across South-East Asia.
That the Allied forces at Milne Bay were predominantly Australian gave a boost to the morale of Australian servicemen and civilians alike.
Importantly the victory helped stabilise the strategic environment by limiting Japanese initiatives in the South West Pacific Area of operations while promoting options for the Allies to exploit.
Japan’s entry into World War II was dramatic and, at the operational level at least, very successful. From their opening attacks in December 1941 to February 1942 its forces had come to occupy a region which encompassed much of the Far East.
Of immediate strategic importance to Australia, Japanese forces had occupied Java, Truk and Rabaul to our north.
While the Japanese advances into the region were a great success, from this point of the war events stopped going their way.
Importantly for Australia, Japan was still to secure its south eastern flank in the New Guinea-Solomons area.
This meant that potential air and naval bases to Australia’s immediate North East were out of Japanese hands. It also meant that the Japanese were not positioned to directly threaten the US-Australia maritime routes.
Now, it is easy to imagine that these maritime routes were a largely one way system bringing US troops and material to Australia. However by 1942, thousands of trainee RAAF aircrews were travelling east across the Pacific to mainland USA in order to reach the advanced flying schools in Canada.
From there they travelled on to the United Kingdom for operational conversion training and subsequent posting to RAF squadrons operating in Europe.
In essence Pacific maritime routes were as important to the air war in Europe as they were to the war in the South-West Pacific.
By April the Japanese had taken Lae and there appeared to be moves to secure the final portion of their South-Eastern flank with preparatory air strikes on Port Moresby.

In May, the first attempt to take Port Moresby by sea was foiled during the Battle of the Coral Sea—the first maritime battle to be fought without the opponent’s vessels ever seeing each other and the first battle to be fought through the use of air power projected by sea power.
However, the Japanese were successful in taking the southern island group of the Solomons and began fortify the islands of Tulagi, Gavutu and, most significantly, began to establish an airfield on the Guadalcanal Island.
In some measure the Japanese were better positioned to interdict the vital Pacific maritime routes.
However, any further Japanese plans to attack Port Moresby by sea were shelved after the disaster of the Battle of Midway in which the Japanese lost four fleet carriers along with the cream of their aircrews and up to 330 aircraft—another air-sea battle largely won by air power projected by sea power.
So by June 1942 there remained a gap in the south-eastern permitter of the Japanese area of control. In order to close this gap a series of operations were planned.
First it was decided to attack Port Moresby overland along the Kokoda Track.
In order to support this overland approach, and to help project sea and air power into the Coral and Solomon Seas, the Japanese decided to establish a base of operations centred on Milne Bay. The first phase of which was to be the occupation of the nearby island of Samarai.
When reconnaissance aircraft identified signs of allied airfield construction in the western reaches of Milne Bay itself, the Japanese accelerated their plans to occupy the whole bay.

In many ways the desire of both the Japanese and the Allies to take and hold Milne Bay was based on a similar rationale. The bay itself was deep, well sheltered and provided good anchorage for shipping.
The bay also had terrain at its western end that was suitable for airfields and the isolation afforded by the surrounding mountain ranges made for a good defensive positions for the ground forces.
The first phase of the wider regional Japanese plans was enacted on 22 July 1942 when elements of the 17th Army landed just north of Buna and began an advance on Kokoda with the ultimate intention of seizing Port Moresby.
However before the next phase of capturing Milne Bay was begun, everything changed.
On 7 August 1942, the US Marines under LTGEN Alexander Vandergrift landed at Guadalcanal—thus beginning the long awaited counteroffensive in the Pacific.
This landing shifted the priorities of the Japanese High Command and effectively split their attention across three lines of operations – the planned offensives along the Kokoda Trail, the landings at Milne Bay, and an unplanned counteroffensive to regain control of Guadalcanal and the southern Solomon Island group.
In determining their priorities, the Japanese decided to leave in place the brigades of the 17th Army already committed to the Kokoda operation, but had to commit the Army component of the Milne Bay invasion force, known as the ‘Kawaguchi Detachment’ to the retaking of Guadalcanal.
While records vary, this force could have been as many as 6 000 personnel.
This resulted in only the Japanese Navy’s marine forces being available to take Milne Bay. A force later estimated to have been 1900 to 2000 strong.
An additional problem facing the Japanese was the lack of warships and troop transports.
In this shortage we see the first contribution of the RAAF to the Battle of Milne Bay.

From the first days of the conflict the RAAF began what we would refer to today as Intelligence, Surveillance and Reconnaissance or ISR operations across the region. These operations were increasingly effective in locating and tracking Japanese shipping activity in the Solomon and Coral Seas.
When combined with the Allies’ wider ISR network and growing number of attack aircraft, the ability to find, fix and sink Japanese shipping was becoming increasing adept.
Consequently, the combination of high operational demands and the losses from Allied air attacks meant that the availability of Japanese maritime forces was steadily reducing.
It also meant that any Japanese vessels that entered into Milne Bay could only do so under cover of darkness or bad weather. The very real risk of air attacks was to be graphically demonstrated during the later part of the battle when one of the transport ships was sunk by a RAAF aircraft.
A Japanese POW who survived the sinking estimated that up to 300 troops went down with the transport.
So with Japanese warships unable to remain in the bay during daylight hours, there could be no effective naval gunfire support for their ground forces.
While enemy warships were able to bombard the shoreline during hours of darkness, this fire was rarely effective as the Japanese were unable fix the Australian positions with a high degree of certainty or to correct their fall of shot when off target.
It cannot be overestimated the difference naval gunfire support would have made to the overall outcome of the battle had the Japanese cruiser and destroyers that were committed to the landings been able to hold their positions within the Bay itself.
So we come now to the Allies at Milne Bay.
With its obvious attractions, the Allies had been formulating plans for developing the area for some months, and from June 1942 they began serious construction work, moving in ground troops and engineers.
The Australian Army deployed its 7th and 18th Infantry Brigades to the area, complemented with American airfield engineers and anti-aircraft elements, in total a force of around 8,800 personnel—of which about 4500 were infantry.
In the case of the 7th Brigade, the troops were mostly untested militia personnel with little or no previous military experience.
In overall command was LTGEN Cyril Clowes, an extremely experienced and competent officer. His cool head under the pressure of the battle itself, as well as from Macarthur’s frantic directions to eject the Japanese, is a testament to both his abilities and his temperament.
By late July 1942 RAAF units also began arriving into the area.

The RAAF’s commitment to the Milne Bay force was Nos 75 and 76 Squadrons equipped with Kittyhawk P-40 fighters, and elements from Nos 6 and 32 Squadron operating the Hudson reconnaissance/light attack aircraft.
All of these units had varying degrees of experience.
In the case of No 75 SQN, the unit had seen extensive operations in the air defence of Port Moresby and actually had a superior win-loss ratio in air-to-air engagements with the formidable Mitsubishi ‘Zero’ fighter.
Newly established RAAF ground units included a HQ element, No 37 Radar Station and No8 Fighter Control Unit. A mobile torpedo unit was also pre-positioned to cater for a future deployment of No 100 Squadron’s Beaufort torpedo bombers should the opportunity arise. Again, a newly developed capability within the RAAF being deployed on operations for the first time.
Most of the RAAF arrived in Milne Bay just as the first Japanese air raid began on 4 August, an attack by four Zeros and a dive bomber.
As the radar station was still under construction there was almost no warning of the attack, and it was only by coincidence that eight of No 76 Squadron’s Kittyhawks were in the air at the time and able to limit the destruction to just one Kittyhawk on the ground.
While only minor damage was done, the speed with which the raid occurred from first warning to the start of the actual attack had the effect of hastening the completion of the Radar Station’s facilities. So, by the time of the next air raid on 11 August, P-40 Kittyhawks were in the air and well positioned to intercept the incoming raid.
Once established, the Kittyhawks were available for the air defence of the area throughout daylight hours —always contesting air superiority and preventing air attacks on Allied ground forces.
This was just as well, since from August to September Japanese air raids became a regular occurrence until wider regional air superiority was achieved.
Initially plans called for the construction of a single airfield. However, by early August the Allies expanded their intentions and decided to construct two additional airfields.

Consequently, on the eve of the Japanese landings at Milne Bay, the Allies had three airfields at various stages of completion—initially, if somewhat unimaginatively, named Nos 1, 2 and 3 Strip.
The preparations by the Allies proved well justified.
On 25 August 1942, acting on information provided by an Australian Coastwatcher, aircrew of No 75 Squadron attacked a force of seven Japanese landing barges that were temporarily ashore on Goodenough Island, just 100 kilometres northwest of Milne Bay.
The raid was an unqualified success, with all seven barges destroyed (along with their cargoes) and the 353 marines of the Sasebo Special Naval Landing Force left marooned.
While a successful attack, it was not appreciated until later just how much influence this attack would have on the outcome of the Battle of Milne Bay.
Later on the same day, a Japanese invasion convoy of two cruisers, three destroyers, two submarines, two
transport ships and various smaller vessels was spotted moving into the area immediately outside of Milne Bay.
Attacks on this convoy were conducted by Nos 6, 75 and 76 Squadrons, with additional attacks conducted by Hudsons of No 32 Squadron flying from Horn Island and USAAF B-17 Flying Fortresses based at Mareeba, North Queensland.
Unfortunately, bad weather made it difficult to locate and target the ships and very early on the morning of 26 August, the Japanese were able to move into Milne Bay and begin landing troops on the northern shore.
Here again the RAAF was able to play a small but surprising role in the defence of the area. The RAAF’s crash rescue boat had been directed by Clowes to patrol the entrance to the bay.
A little after 1 am, this boat was able to raise the alarm when the Japanese convoy entered the harbour.
Sunrise revealed that the invasion fleet had left the bay and that an extensive beachhead consisting of a large number of troops, headquarters and supply dumps had been established a little over 10 kilometres east of No 3 Strip near Gili Gili.
With the elements of the 61st Battalion of 7 Brigade having already been in contact with the Japanese forces overnight, the Kittyhawks of Nos 75 and 76 Squadrons and Hudsons of Nos 6 and 32 Squadrons commenced what was to become their second most enduring role through the battle—that of battlefield air interdiction—attacking enemy troop concentrations, stores, vehicles, and other targets.
No 75 Squadron alone made 26 attacks that day, expending 1500 to 2000 rounds of ammunition with each attack.
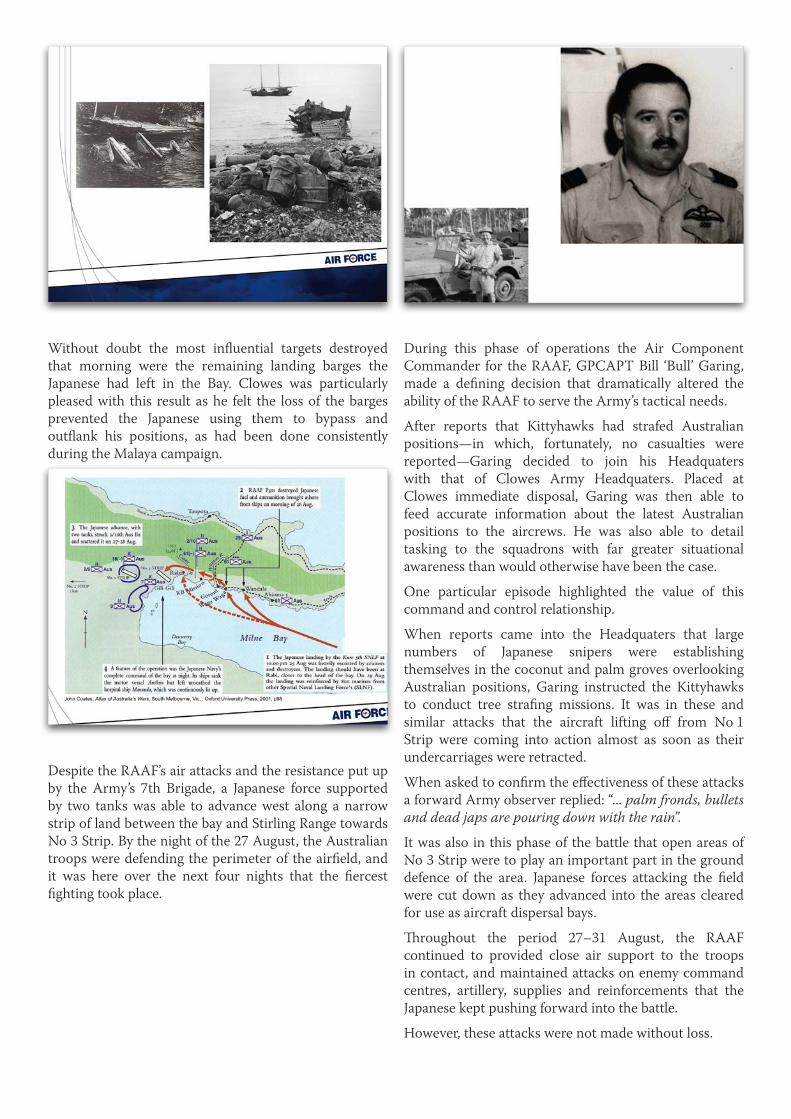
Without doubt the most influential targets destroyed that morning were the remaining landing barges the Japanese had left in the Bay. Clowes was particularly pleased with this result as he felt the loss of the barges prevented the Japanese using them to bypass and outflank his positions, as had been done consistently during the Malaya campaign.
Despite the RAAF’s air attacks and the resistance put up by the Army’s 7th Brigade, a Japanese force supported by two tanks was able to advance west along a narrow strip of land between the bay and Stirling Range towards No 3 Strip. By the night of the 27 August, the Australian troops were defending the perimeter of the airfield, and it was here over the next four nights that the fiercest fighting took place.
During this phase of operations the Air Component Commander for the RAAF, GPCAPT Bill ‘Bull’ Garing, made a defining decision that dramatically altered the ability of the RAAF to serve the Army’s tactical needs.
After reports that Kittyhawks had strafed Australian positions—in which, fortunately, no casualties were reported—Garing decided to join his Headquaters with that of Clowes Army Headquaters. Placed at Clowes immediate disposal, Garing was then able to feed accurate information about the latest Australian positions to the aircrews. He was also able to detail tasking to the squadrons with far greater situational awareness than would otherwise have been the case.
One particular episode highlighted the value of this command and control relationship.
When reports came into the Headquaters that large numbers of Japanese snipers were establishing themselves in the coconut and palm groves overlooking Australian positions, Garing instructed the Kittyhawks to conduct tree strafing missions. It was in these and similar attacks that the aircraft lifting off from No 1 Strip were coming into action almost as soon as their undercarriages were retracted.
When asked to confirm the effectiveness of these attacks a forward Army observer replied: “... palm fronds, bullets and dead japs are pouring down with the rain”.
It was also in this phase of the battle that open areas of No 3 Strip were to play an important part in the ground defence of the area. Japanese forces attacking the field were cut down as they advanced into the areas cleared for use as aircraft dispersal bays.
Throughout the period 27–31 August, the RAAF continued to provided close air support to the troops in contact, and maintained attacks on enemy command centres, artillery, supplies and reinforcements that the Japanese kept pushing forward into the battle.
However, these attacks were not made without loss.

For example, late on 27 August on receiving reports that Japanese tanks were on the move and heading towards Australian positions, the Commanding Officer of No 76 Squadron, SQNLDR Peter Turnbull, took off in the failing light in an attempt to attack the tanks.
His wing man, FLTLT Kerville, later reported that, having been unable to locate the tanks, Turnbull instead attacked an enemy troop concentration. During the attack Turnbull’s aircraft suddenly rolled over and crashed into the ground.
Probably hit by ground fire, Turnbull was killed in the crash, his body recovered from the wreckage eight days later.
A further complicating factor in sustaining the RAAF’s efforts to maintain direct support to the Army were the persistent air raids conducted by Japanese fighters and dive bombers on the airfields.
To assist, RAAF and other Allied aircraft from the broader region also conducted attacks on the Japanese forces. This included Beaufighters from No 30 Squadron in Townsville, and the torpedo armed Beauforts from No 100 Squadron.
It should be noted that No 100 Squadron staged from Laverton, Victoria to Milne Bay over a 24 hour period in order to launch its attacks.
Of great significance to the air effort was the work carried out by the ground crews. Despite suffering attacks by Japanese aircraft, the work of the maintenance and support personnel at the Milne Bay airfields was magnificent.
Repair and maintenance work was a continuous round-the-clock operation, repairing damage caused not just by the enemy, but by the persistent rain that found its way into fuel and electrical systems, and by the mud that tore away undercarriage components and damaged flight controls during landings.

Working out in the open, under fire, and with the most basic of tools, the ground crews consistently made sufficient numbers of aircraft available to fly on every day of the battle. When it was felt that the aircraft on No 1 Strip were under threat from ground attack, the aircraft were flown out on the night of 28 August to return at first light the next day.
However this still left the ground crews in place, untrained in infantry tactics, working on the remaining aircraft in order to put them back into the fight the next day.
In total, the ground crews were to load over 195 000 rounds of ammunition into the aircraft over the course of the battle and conducted nearly 300 machine gun barrel replacements on the Kittyhawks.
The turning point of the battle came when Clowes realised that the Japanese had only one line of attack and that no force would be able to threaten the flanks or rear of the Australian positions.
In effect, the destruction of the landing barges on Goodenough Island had marooned the overland force that was intended to mount a surprise attack on the
bay from the north west—from the general direction of Taupota—while the destruction of the barges in the bay itself prevented any outflanking manoeuvres on Clowes’ eastern and south eastern flanks.
With this certainty, Clowes was able to commit the full strength of his brigades to forcing the Japanese back to their initial landing point. Over the night of 6–7 September, the last of the Japanese troops were forced to evacuate under the cover of darkness.
The enemy had failed in their attempt to take the Australian positions with over 1500 personnel killed, wounded or missing in action. The RAAF and Army had combined into an effective joint force that dealt a decisive blow on an enemy that had never before been defeated on land.
In a measure of the significance of the RAAF contribution to the Battle of Mine Bay, the Commander Australian Forces New Guinea, LTGEN Sydney Rowell, reported to Generals Blamey and Macarthur: “I think that the action of 75 and 76 Squadrons RAAF on the first day was probably the decisive factor.”
In his after action report, LTGEN Clowes wrote: “I wish here to place on record my appreciation of the magnificent efforts on the part of our RAAF comrades. The success of the operations was in a great measure due to their untiring and courageous work which has earned the admiration of all who have been associated with them here”.
In detailing the final days of the battle, Clowes wrote of the RAAF air attacks, “incessant attacks over three successive days proved the decisive factor in the enemy’s decision to re-embark what was left of his forces.”
Clearly the RAAF contribution to the outcome of the engagement was significant.

However, it is worth asking what could have been done better?
First, the only means available to construct the Milne Bay airfields was through an American airfield engineer unit. As US air forces in the region were also growing in number, it was evident that there was no guarantee that the means to construct and sustain airfields in remote parts of New Guinea would be available in the future.
Already being formed in Australia were units initially known as Mobile Works Squadrons, later renamed Airfield Construction Squadrons. Equipped with diverse equipment—such as gravel crushing plants, bulldozers, cranes and graders—the Airfield Construction Squadrons were to play an increasingly important role in General Macarthur’s plans to retake the SWPA.
This strategy, sometimes referred to as an Island Hopping Campaign, sought to gain local air and sea control at strategic points along the New Guinea coast and up through to the Philippines.
The Allies would then seize these points, repair captured airfields or construct new ones. Aircraft could be brought in to further extend the area of Allied air control ready to move on to the next strategic point.
Critical to this strategy was the ability to rapidly construct airfields in order to retain the initiative in the air war.
As an example of the work carried out, it is instructive to review a report drafted by the Commanding Offer of No 65 Air Field Construction Wing in the weeks after the Allied landing at Noemfoor Island on 2 July 1944.
At 0830 hours on D-day, No 62 Works Wing and No 13 Survey and Design Unit landed on Kamiri Beach. Immediately after landing, a reconnaissance and survey was made of a recently captured Japanese airfield. On the evening of D-day, preliminary work was commenced grading the strip.
Within days the Wing began work on a second airfield and on new infrastructure as additional elements of the Wing arrived. No 4 & 5 Mobile Works Squadrons and the sawmill section of No 10 Works Supply Unit all commenced work by 6 July.

Along with the expansion of the airfields, additional work such as the construction of an AVGAS jetty was completed and new control towers, sealed roads and bomb dumps were commenced. By 25 July the airfields were accepting aircraft.
From these new airfields, strikes were conducted against Japanese positions around the Vogelkop Peninsular in the extreme North-West of Dutch New Guinea and into the Dutch East Indies.
These raids were the part of the process of gaining air and sea control of the area and the isolating the Japanese garrison at Morotai.
However, once the airfields were constructed, the units operating out of the airfields had to be sustained. To this end Operational Base Units (OBUs) were formed and deployed to remote bases across Australia and into the SWPA. In total some 82 OBUs were formed.
Each OBU was tailored to provide a range of services as needed. For example, No 38 OBU established a centre of operations at Morotai airfield. It provided airfield
services, accommodation and messing, but only limited logistics and medical facilities—due to the proximity of No 9 Local Area Supply Unit and an American medical unit.
One of the lessons learned from the earliest days of the SWPA campaign, and particularly at Milne Bay, was the need to have trained personnel to conduct airfield defence duties. From October 1942, No 1 Security Guard Unit—later renamed No 1 Airfield Defence Squadron—was the first of the specialised units providing ground combat personnel to defend RAAF airfields and other deployed facilities.
While much of the capability so far described can still be found within the RAAF, there was one rather significant capability developed in the SWPA that can no longer be found in the modern era. By 1945 the RAAF had developed a force of nearly 2000 marine vessels. These vessels were employed in diverse tasks such as logistics support, maintenance barges employed within flying boat units, through to search and rescue vessels.
Crewed by a mix of civilian, navy and RAAF personnel, one such vessel, the MV Wanaka, was a lucky survivor

of the first bombing raid on Darwin and later escaped damage in Port Moresby, successfully evading 18 bombs as it manoeuvred through the harbour.
Clearly, the RAAF developed in both size and capacity throughout the SWPA Campaign. This growth is evident in its manning figures during this period. On the eve of the Japanese entry into the war, the RAAF had 2805 enlisted personnel. On the eve of the Battle of Milne Bay that number had grown to 77 231, of which 9956 were members of the Women’s Auxiliary Australian Air Force. By the time the RAAF landed at Morotai the force was approaching 132 000.
In terms of skills, the RAAF went from 66 separate musterings in 1941 to 132 by 1945, with new musterings such as radar mechanics, signals intelligence specialists and an emerging EW capability reflecting the impact technology was having on the force.
The sophistication and capability of the RAAF to conduct remote area operations is perhaps illustrated by the example of the American landings in the Philippines in late 1944. The only Australian units that landed as part of the US forces, were included to make up for a shortfall in American capability.
The two units were the Air Force’s No 3 Airfield Construction Squadron (No 3 ACS) and No 6 Wireless Unit (No 6 WU). While the role of No 3 ACS is self-evident, that of No 3 WU is less so. A highly specialised radio intercept unit, No 3 WU’s work during the Philippines operation is credited with the destruction of 17 enemy ships and the interception of numerous air raids.
In the closing days of World War II the Air Force had turned around the expeditionary equation. From elements requiring a broad range of external support services, the RAAF had transformed itself into a highly effective independent force capable of supporting any campaign.
Ladies and Gentlemen thank you for your attention.
