microsoft publisher tutorial ms. carino’s class grade 3 march 8, 2009 1
TRANSCRIPT
Microsoft Publisher Tutorial
Ms. Carino’s ClassGrade 3
March 8, 2009
1

Open Microsoft Publisher
Click here to open
Start - Programs
To begin, go to Start – Programs – Microsoft Office – Microsoft Officer Publisher
2

Open Publisher Brochures
Click on Getting Started
Click on Brochures
If window appears below, simply double click on brochures icon as shown below.
3

Choosing a Brochure Style
At the top left of the screen you will see this menu
Select Newer
OR Classic Designs
Select ONLY informational templates since you
are doing an informational brochure
Examples of Newer Designs to choose from
Examples of Classic
Designs to choose from
4

Microsoft Publisher Workspace
Options
Workspace
BrochureNote: For purposes of demonstration I have
chosen the Classic – Borders design
Toolbar
Page #
5

Page Options – Choose an Object
Use scrollbar to select an object to insert
into brochure
For purposes of this demonstration, I’ve selected “Kid Stuff” as my object, which was inserted here. Click on object, hold mouse down, and drag object
to desired location in brochure.
6

Choose a Color Scheme
Use scrollbar to select a color scheme
For purposes of this demonstration, I’ve selected the “Clay” color scheme which has changed the color in the brochure (refer back to Slide 6 for
color comparison)
7
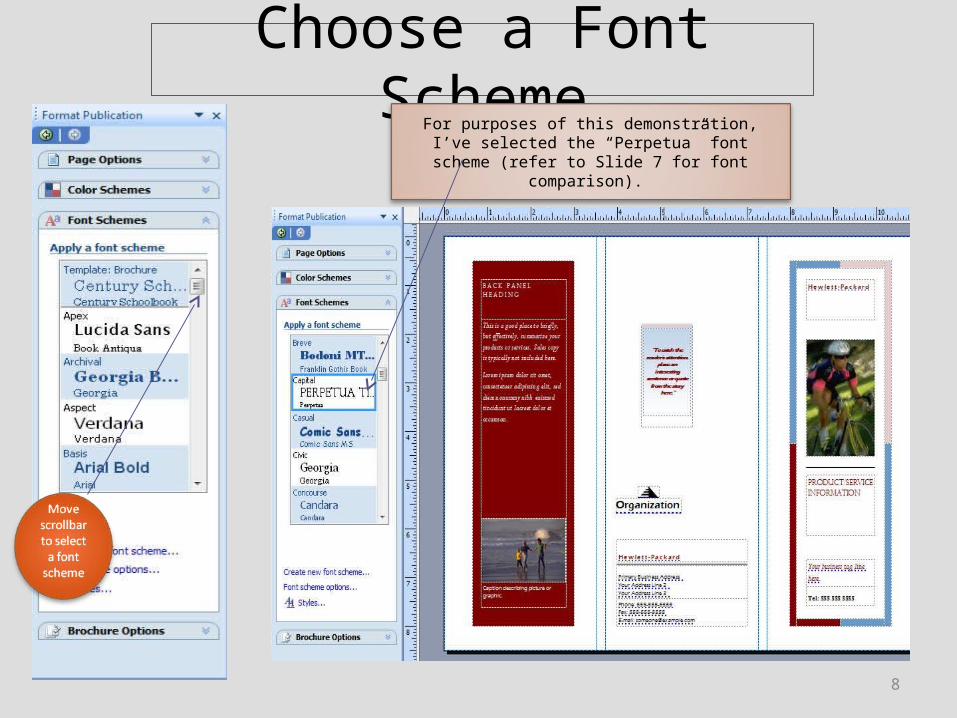
Choose a Font SchemeFor purposes of this demonstration, I’ve selected the
“Perpetua” font scheme (refer to Slide 7 for font comparison).
8

Brochure Options – Change Template
At this point, you may choose to change the brochure template. Double Click on “Change Template” and this
window will pop up:
Scroll through and change template if
desired
9

Brochure Options – Change Page Size
You may also choose to change the page size. Double Click on “Change Page Size” and this window will pop up:
Scroll through and change page size if
desired.
10

Adding TextClick on any of the text boxes
within the brochure. Once the text is highlighted, you can type
into the text box
Text Box
Text Box
Text Box
Text Box
Text Box
You can add more text boxes by going to Insert – Text – Text Box
Don’t forget the text on page 2 of the brochure!
11

Adding Pictures
Picture Box
Picture Box
Click on any of the picture boxes within the brochure. Then go to
Insert – Picture – From File You can also add picture boxes within the brochure. Go to Insert – Picture –
Empty picture frame. A box will appear as such. Click on box and follow these
directions.
12

relating to Chinese history. The brochure must include a minimum of two images (pictures or clip art). Your group will present the brochure to the class and your parents on March 20, 2009. Refer to the Process section of the WebQuest for further detail on your assignment.
13
Assignment Using Microsoft Publisher
Now that I’ve demonstrated how to create a brochure in Microsoft Publisher, here is your assignment:
You are to create a brochure to summarize the research your group has completed relating to your assigned aspect of Chinese culture. For example, if you group was assigned to research Chinese history, then your brochure would highlight some of the key facts

Example Brochure
Page 1
Page 2
Include at least two images
Summarize key facts from your
research
Title
Include group
members’ info here
14

End of Tutorial
15
This completes the Microsoft Publisher Tutorial.
Now, get to work and have fun!