melting ice teacher guidance learning structure of the … ice... · learning outcomes students...
TRANSCRIPT

Melting ice – Teacher guidance
Nuffield Practical Work for Learning: Argumentation • Melting ice • Teacher guidance page 1 of 8 © Nuffield Foundation 2013 • downloaded from www.nuffieldfoundation.org
Learning structure of the lesson
The big picture
This lesson is designed to exemplify an argumentation approach to practical work, using a ‘predict-observe-explain’ framework.
Students often think that some materials are intrinsically warm (wood, plastic, wool) while others are intrinsically cold (metals, glass, water). This lesson challenges these ideas by presenting observations which many will find counter-intuitive. Through argumentation, students predict the outcome of an experiment, observe the result, and discuss how scientific ideas about energy transfer can explain what they see.
Age range: 12-14
(Could be adapted for 14-16)
Timing: 50 minutes
Learning episode 1 (teacher-led) 5 mins
Introduce lesson objectives. Explain what makes a good argument. Pass the metal and plastic blocks around. In small groups students discuss how the blocks feel to touch.
Learning outcomes
Students will be able to:
Equipment and materials
Teacher guidance
Practical guidance
Slide presentation
Student sheet
Per group Metal and plastic blocks (one of each) Supply of ice cubes
Optional Camera linked to data projector
Refer to the health and safety advice and practical guidance
Learning episode 2 (student-led) 15 mins
Introduce the practical. Students discuss and write down their prediction. Groups must justify their prediction with an explanation using scientific ideas.
A few groups report back to the class. The rest of the class say whether they agree or disagree and whether they can improve the predictions and justifications.
• generate and evaluate scientific arguments
• present a scientific argument using words and diagrams
Learning episode 3 (teacher-led) 5 mins
Students carry out practical activity and make observations. Alternatively the practical can be carried out as a teacher demonstration.
Learning episode 4 (student-led) 30 mins
Groups discuss their observations and decide whether their prediction was correct. They agree an explanation for what they have seen, and develop an argument for why they think their explanation is correct.
A few groups report back to the class. The rest of the class say whether they agree or disagree, and whether they have something to add.
Groups self assess their explanation against the model answer. Allow groups to improve their explanations.
Ask students what makes a good argument and how they went about developing their own arguments.
• describe how energy is transferred through a solid conductor from higher to lower temperature
• apply ideas about energy transfer by thermal conduction in unfamiliar situations.
Key words
Melting, conduction, energy transfer, temperature, argument, claim, evidence / data (For a discussion of the terms heat and temperature see www.nuffieldfoundation.org/practical-physics/heat-and-temperature).
Melting ice – Teacher guidance
Nuffield Practical Work for Learning: Argumentation • Melting ice • Teacher guidance page 2 of 8 © Nuffield Foundation 2013 • downloaded from www.nuffieldfoundation.org
Prior knowledge This lesson makes use of ideas about energy transfer, in particular, conduction of heat. It could be used to consolidate these ideas, or (with some adaptation) as an introduction to conduction.
It is assumed that students know the following:
• Ice melts at 0C
Other relevant background knowledge that supports this lesson includes:
• Energy must be supplied to make ice melt
• Energy is transferred from higher to lower temperature
• Energy is transferred through solids by conduction
• Some materials are better conductors than others
• They may also be familiar with the mechanisms of conduction.
Background information To melt ice, energy must be supplied. Energy is transferred from hotter to colder places by conduction, convection and radiation; i.e. temperature difference results in energy transfer. Metals are better conductors than plastics.
Terminology The terms which students need to understand and use in this lesson are:
melting – the change from solid to liquid; energy must be supplied to cause a solid to melt
conduction – the transfer of energy through a solid or liquid without the material itself moving
energy transfer – the movement of energy from one place to another
temperature – a measure of the hotness or coldness of an object
argument – the process that students use to articulate, support and justify claims or conclusions
claim – a conclusion, idea, proposition or assertion
evidence / data – the observations and accepted scientific theories used to support the claim
Note that in this resource we have used the term energy throughout. Energy which is transferred due to a temperature difference is sometimes known as heat or heat energy (or even thermal energy, although this is not a standard term). Conduction is sometimes described as a thermal energy transfer. You will have to decide if any of these terms are appropriate to your own scheme of work.

Melting ice – Teacher guidance
Nuffield Practical Work for Learning: Argumentation • Melting ice • Teacher guidance page 3 of 8 © Nuffield Foundation 2013 • downloaded from www.nuffieldfoundation.org
Differentiation
• For less confident students, the lesson can be used after they have learned about thermal conduction. They can then be challenged to use what they have learned – that metals are better conductors than plastics, and so on.
• Additional scaffolding could be provided as a description and explanation of the experiment as a series of statements on separate cards, for students to sequence.
• Add greater challenge to the lesson by using it to introduce ideas about thermal conduction. The lesson can challenge students to address the conflict between their everyday ideas (plastic is warm, etc.) and the observation that ice melts more quickly on metal.
Optional extension activities
• Pass round samples of other materials (e.g. wood, glass, acrylic, expanded polystyrene, copper) similar to the plastic and metal blocks and ask ‘On which of these would ice melt quickly, and on which more slowly?’ If time allows, try it out.
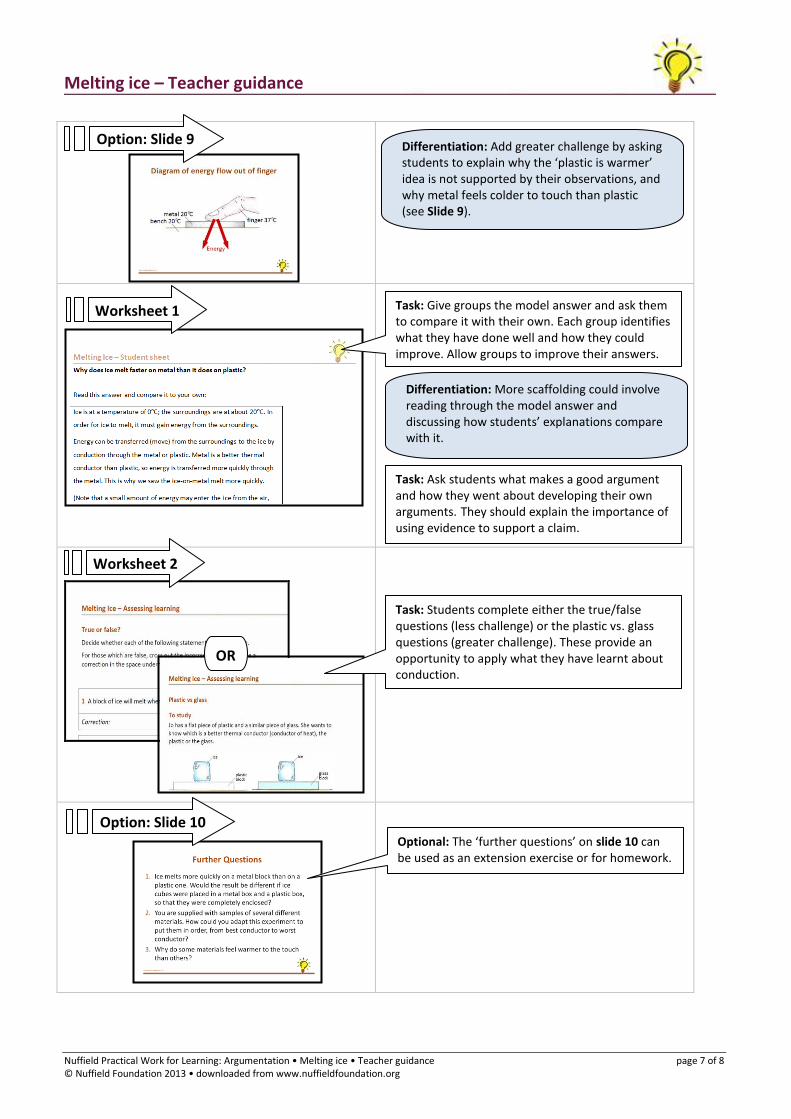
• Use the ‘further questions’ on slide 10.
Answers to further questions
1 The results would be the same, because the metal box would conduct energy from the surroundings to the inside of the box more quickly than the plastic box.
2 Place an ice cube on a sample of each material, making sure that the samples are all in the same environment. Time the ice cubes melting. The best conductor will result in the fastest melting ice cube.
3 When you touch a material which is a good conductor, energy escapes from your finger. This cools the skin and receptors in the skin detect a decrease in temperature. Diamond shows this effect and so must be a good conductor – its thermal conductivity is higher than any metal.
• You could repeat the practical as a demonstration with temperature probes attached to the blocks. Can students predict how the readings will change? There is a video of this here: www.nationalstemcentre.org.uk/elibrary/resource/2087/thermal-conductivity

Melting ice – Teacher guidance
Nuffield Practical Work for Learning: Argumentation • Melting ice • Teacher guidance page 4 of 8 © Nuffield Foundation 2013 • downloaded from www.nuffieldfoundation.org
Lesson details
Putting students in groups of three rather than pairs is more likely to result in debate in the next part of the lesson.
Explain: Introduce objectives for lesson, and explain what makes a good scientific argument.
Task: In groups of three, students discuss (and could also write down) words which describe how the two blocks felt to the touch.
Explain: Explain that you are going to place an ice cube on each block. Ask the first two questions on Slide 4. Give students 1 minute to discuss in their groups.
Task: Pass the metal and plastic blocks around so that students can feel them.
Discussion should concentrate on ‘similarities’ and ‘differences’. Encourage students to think about the materials the blocks are made of rather than the shape of the blocks.
Where one person in a group disagrees with the other two, they should be given priority to explain their ideas.
The lesson is about energy transfers and working together to develop scientific arguments. A good scientific argument uses evidence and scientific ideas to justify a claim. At the end, students will be able to give better explanations of phenomena which involve conduction.
Slide 2
Slide 3
Slide 4
Task: Check students understand key terminology – heat, temperature, energy, energy transfer etc.
Task: While students are discussing, give out the ‘Predict, Observe, Explain’ A3 placemats.

Melting ice – Teacher guidance
Nuffield Practical Work for Learning: Argumentation • Melting ice • Teacher guidance page 5 of 8 © Nuffield Foundation 2013 • downloaded from www.nuffieldfoundation.org
Task: Direct students towards the ‘Predict’ section of the A3 placemats.
Task: Give groups a further 2 – 3 mins to finish their discussion and complete the ‘Predict’ section.
Use the prompt questions (also on Slide 4) to ensure groups justify their prediction with an explanation using scientific ideas. Initial explanations may include the idea that ‘metals are cold’. Asking why ice melts should prompt thoughts about energy transfer.
Task: Students carry out the practical activity (see practical guidance). Alternatively demonstrate the phenomenon.
The ice on metal melts first. Ask ‘who is surprised?’
Task: Two groups give a 30-60 second report to the class, explaining their thinking; if possible, choose one proposing plastic, the other metal. After this allow each group to say why they consider the other argument to be incorrect.
Ask the rest of the class to suggest whether they agree or disagree with the presented arguments and whether they can improve them.
Task: Give groups 2 mins to discuss in their groups what they have seen and to decide whether their prediction was correct.
If their prediction was incorrect, ask them to try and explain what they saw.
Each group will need a pair of blocks and two ice cubes. They place the ice cubes simultaneously on the blocks, then leave them
to observe what happens.
A3 placemat
A3 placemat
Slide 5
Practical
Differentiation: Students may already be thinking in terms of energy. You may need to remind some students that metals are conductors and plastics are insulators, and how energy is transferred through solids.
Task: Students write their observations on the A3 placemat.
Melting ice – Teacher guidance
Nuffield Practical Work for Learning: Argumentation • Melting ice • Teacher guidance page 6 of 8 © Nuffield Foundation 2013 • downloaded from www.nuffieldfoundation.org
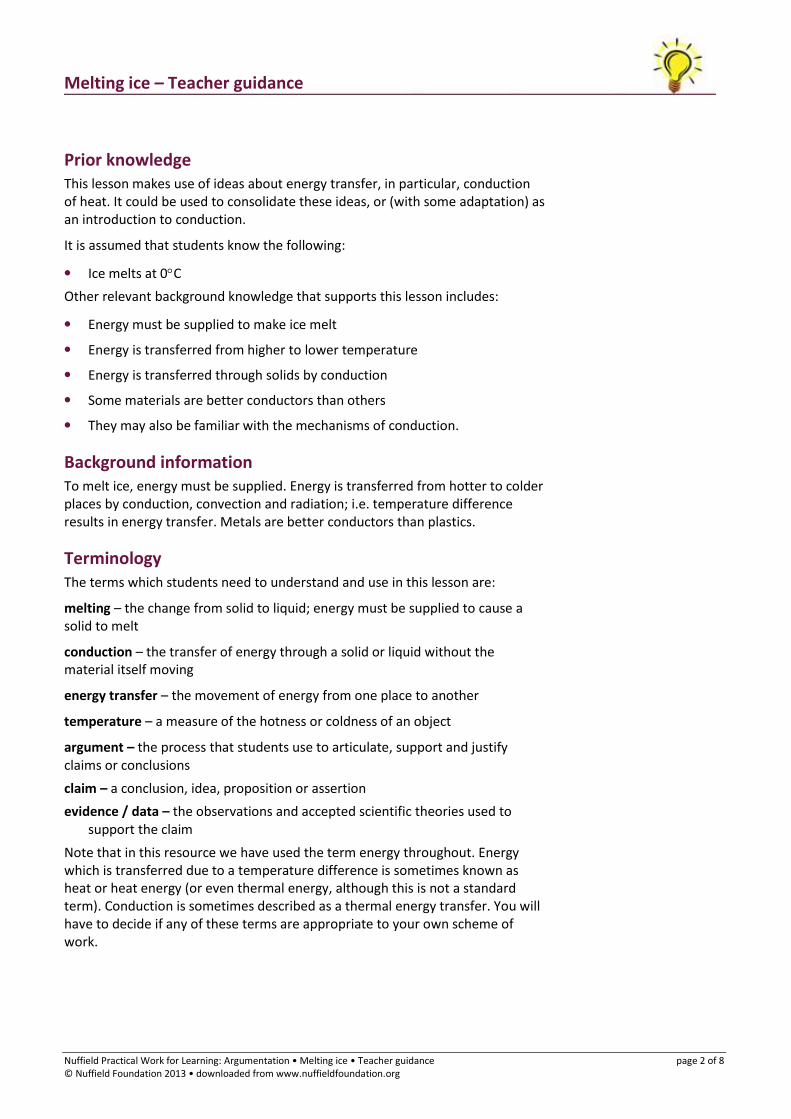
Task: After 2 mins, each group should agree an explanation for what they have seen, and develop an argument for why they think their explanation is correct.
To develop an argument, students will need to support their explanation with evidence (i.e. what they saw happening and their existing knowledge of melting ice). Use the prompt questions (on Slide 6) to direct their thinking.
Challenge students to justify their explanations by offering up counter-claims for them to address e.g. Ask questions such as ‘Why don’t you think it was the temperature of the metal which made the ice melt faster?’.
Task: Get one or two groups to share their explanations with the class. Ask others where they disagree, or where they have something to add.
Slide 6
You could give students coloured cards to hold up to indicate if they disagree (red card) or if they have something to add (orange card).
Option: Slide 7
Optional: A video of the practical activity may be used to remind students of what they have seen (Slide 7).
Differentiation: You could provide a description and explanation of the experiment as a series of statements on separate cards, for students to sequence.
A3 placemat
Option: Slide 8
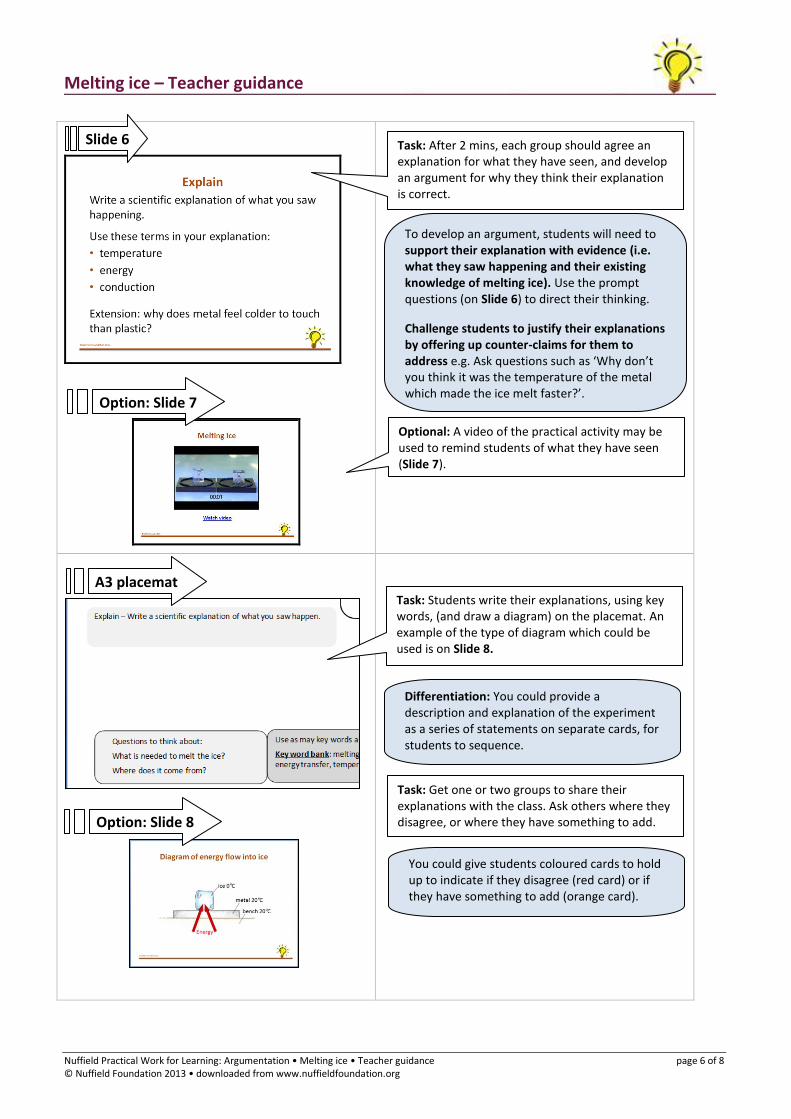
Task: Students write their explanations, using key words, (and draw a diagram) on the placemat. An example of the type of diagram which could be used is on Slide 8.
Melting ice – Teacher guidance
Nuffield Practical Work for Learning: Argumentation • Melting ice • Teacher guidance page 7 of 8 © Nuffield Foundation 2013 • downloaded from www.nuffieldfoundation.org
Task: Ask students what makes a good argument and how they went about developing their own arguments. They should explain the importance of using evidence to support a claim.
Worksheet 2
OR
Differentiation: More scaffolding could involve reading through the model answer and discussing how students’ explanations compare with it.
Option: Slide 9
Task: Students complete either the true/false questions (less challenge) or the plastic vs. glass questions (greater challenge). These provide an opportunity to apply what they have learnt about conduction.
Optional: The ‘further questions’ on slide 10 can be used as an extension exercise or for homework.
Worksheet 1 Task: Give groups the model answer and ask them to compare it with their own. Each group identifies what they have done well and how they could improve. Allow groups to improve their answers.
Option: Slide 10
Differentiation: Add greater challenge by asking students to explain why the ‘plastic is warmer’ idea is not supported by their observations, and why metal feels colder to touch than plastic (see Slide 9).

Melting ice – Teacher guidance
Nuffield Practical Work for Learning: Argumentation • Melting ice • Teacher guidance page 8 of 8 © Nuffield Foundation 2013 • downloaded from www.nuffieldfoundation.org
Assessing learning: Answers to questions on the student sheets
True or false
true / false
1 A block of ice will melt when energy escapes from it. false
Correction: is transferred into
2 Plastics are good conductors of heat energy. false
Correction: poor/bad (or change conductors to insulators)
3 Ice cream will melt more quickly if it falls on a metal bench than on a wooden one.
true
Correction:
4 Frozen food will thaw quickly if placed on a ceramic (china) plate. false
Correction: metal (or change ‘quickly’ to ‘slowly’)
5 Energy is conducted from a place where the temperature is higher to a place where the temperature is lower.
true
Correction:
Plastic vs. glass
a The ice is colder than its surroundings. Energy from the warmer surroundings is conducted through the glass or plastic to the colder ice, melting it.
b Glass is a better conductor. Energy moves more quickly through the glass than the plastic, causing the ice to melt more quickly.
c The pieces of plastic and glass should be the same thickness (and area); the ice cubes should be the same mass (and at the same temperature).
Note: This experiment would only be a fair test if the two materials also had similar values of specific heat capacity, but we can ignore this.
d The plastic will feel warmer. This is because, when you touch the glass, energy from your finger is conducted into the glass, lowering the temperature of your finger. The glass feels cold. Energy is conducted only very slowly into the plastic because it is a better thermal insulator, so your finger does not cool, and so it does not detect a lower temperature.