m&p trigger work - burwell guns
TRANSCRIPT
M&P Trigger Work
The S&W M&P may be one of the easiest guns ever to do trigger work
on.
M&P Trigger Job
• Make sure the gun is unloaded.• Follow normal field striping procedures.

What needs to be changed
• Over Travel, trigger has too much over travel from the point the sear breaks.
• Re-set, re-set of trigger can be much shorter.
• To take care of over travel and re-set, you must get the trigger bar to engage the sear later. Note how, where and when the trigger bar contacts the sear.

Take out the sear housing block
• Use proper size punch to drive rear role pin out of frame.

Take out the sear housing block
• Role pin can be removed in either direction.
• Use some type of support under frame and drive pin all the way out with hammer and punch.
Take out the sear housing block
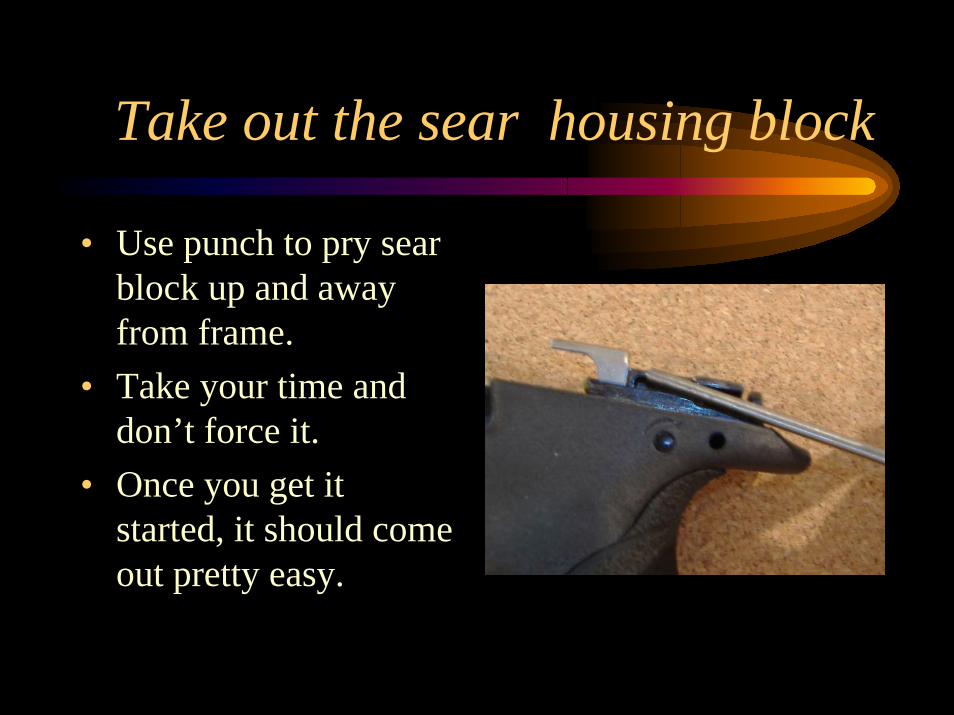
• Use punch to pry sear block up and away from frame.
• Take your time and don’t force it.
• Once you get it started, it should come out pretty easy.

Take out the sear housing block
• Once sear housing block starts to come up out of the frame, pull the trigger to take tension off the trigger bar.

Take out the sear housing block
• Once the sear housing block clears the frame, it will slide right off the back of the trigger bar.
Take out the sear housing block
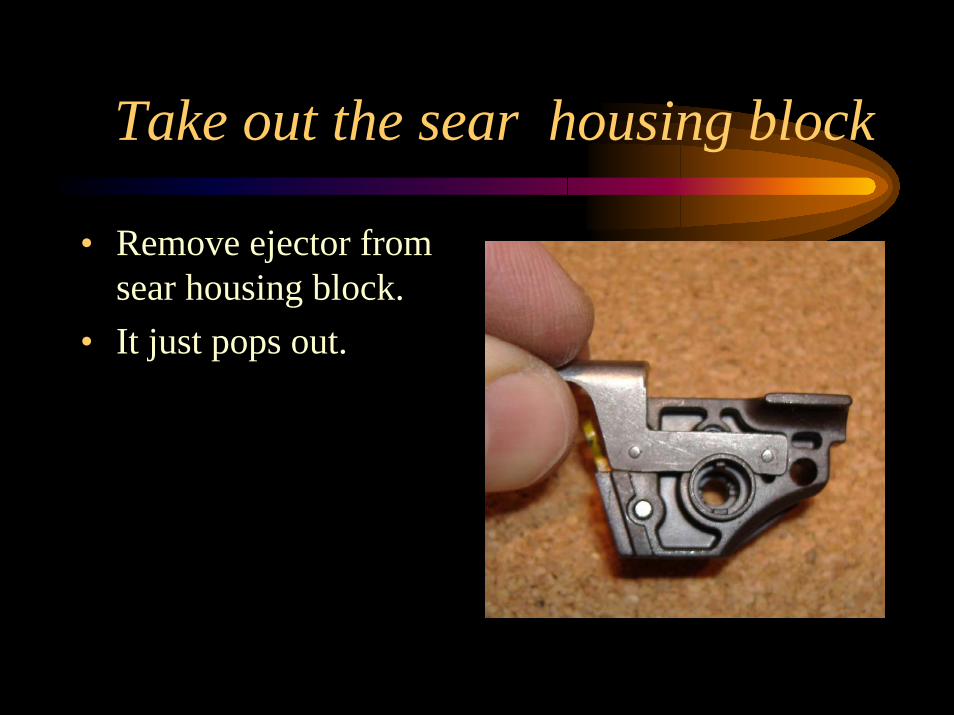
• Remove ejector from sear housing block.
• It just pops out.

Take sear out of searhousing block
• Locate the sear pin.
Take sear out of searhousing block
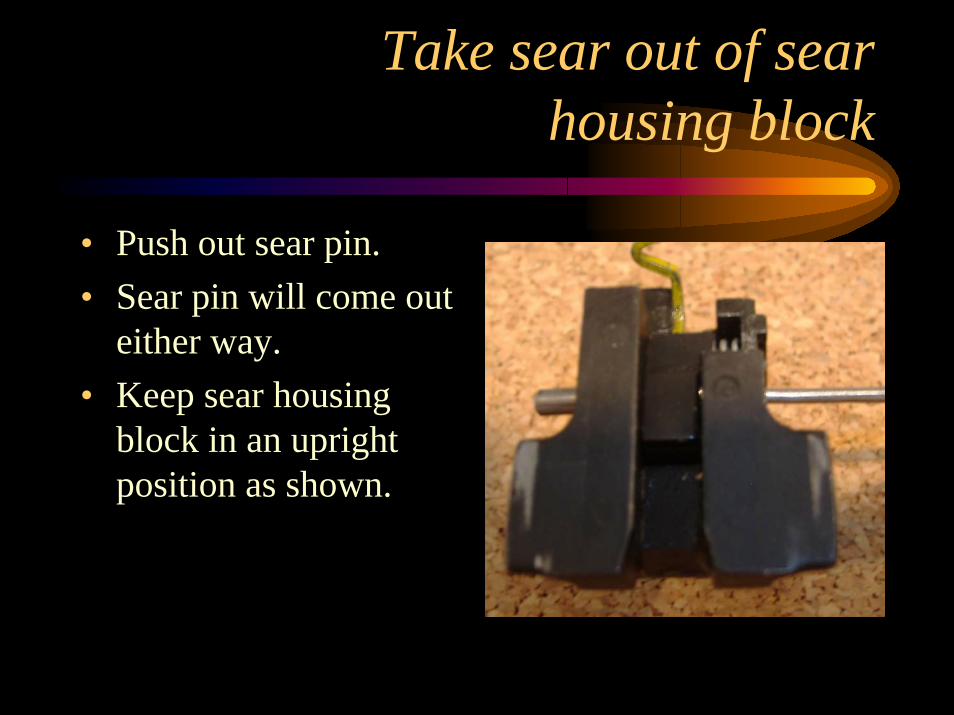
• Push out sear pin.• Sear pin will come out
either way.• Keep sear housing
block in an upright position as shown.

Take sear out of searhousing block
• Keep Block upright to keep sear spring and plunger in place.
• They are hell to get back in.
• Do not cut sear spring, there is no need!

Sear modification for over travel
• This is how the trigger bar and sear look when they are in the frame.
• Arrow shows where material will be removed to cause trigger bar to contact sear later in its travel.

Sear modification for over travel
• Arrow points to location of cut.

Sear modification for over travel
• Cut with file first.

Sear modification for over travel
• Then Cut with Stone.

Sear modification for over travel
• Then Polish to mirror finish.

Sear modification for over travel
• Sear on right has over travel cut.

Sear modification for over travel
• Over travel Cut on bottom.
• Every gun is a little different.
• Take you time an don’t over do it, you cannot put material back on!
• Test fit as you go.

Sear modification for over travel
• Make sure to get nice final polish on the outside edge.
• Arrow shows where trigger bar contacts the sear.
• This area should be a compound angle. Sear moves and angle changes during trigger pull.
• Make sure you round corners to and make this a radius from front to back.

Polish Trigger Bar for smooth action and lighter pull
• Polish this area.• This is where the
trigger bar contacts the sear.

Level One Trigger is done
• This much work will improve trigger feel and should give you a pull weight of about 6 lbs.
• You will now have less over travel shorter reset and a more positive reset.

Sear modification for reduced trigger weight
• Stock sear has hump on striker engagement area that cams striker back when pulling trigger.
• Polishing this area will cut down weight.
• Cutting the hump down will also improve the weight.
• Do not cut to a negative angle.

Sear modification for reduced trigger weight
• This sear has been cut and polished. Note that it still has a slight hump to it.
• This will take the trigger weight down to under 5 lbs.

Striker modification for reduced trigger weight
• For best results, the striker should be polished as well.

Striker modification for reduced trigger weight
• End cap is removed just like brand G.
• Striker sleeve must be pushed down to take tension off end cap.

Striker modification for reduced trigger weight
• Once striker sleeve is pushed forward, end cap will slide off as shown.

Striker modification for reduced trigger weight
• Release striker by pushing down on firing pin block.

Striker modification for reduced trigger weight
• Here is stock striker in set up for polish.
• Do not clamp down hard on plastic sleeve, it will break!

Striker modification for reduced trigger weight
• Polish Striker with stone. No need to change angle on this part.
• Keep stone flat and keep the striker square.

Striker modification for reduced trigger weight
• Polish to a mirror finish with fine cut stone.
• This is really all that needs to be done here.
• Leave the striker spring alone.

Firing pin block modification for reduced trigger weight
• For best trigger pull, the firing pin block needs a little work.
• Rear sight must be removed to get FP block out of slide.
• Sight moves from right to left. As shown.
• Do not go the other way, dove tail has a tapered cut.

Firing pin block modification for reduced trigger weight
• Back out set screw in rear sight and tap out from left to right.
• Once sight is almost out, look out for FB spring cap and spring!

Firing pin block modification for reduced trigger weight
• Note spring and flat spring cap.
• Take out spring cap and spring, then push out FP Block up through sight dove tail.
• Note that the striker should be out of the gun for this to happen!

Firing pin block modification for reduced trigger weight
• This is how the stock trigger bar and FP block looks in the gun.
• Note fairly square angle on FP block.

Firing pin block modification for reduced trigger weight
• Put FP block on punch that is just small enough to fit into spring hole.
• Use a 3M Polishing wheel. Don’t use hard cutting stone.
• Note angle to wheel. This will let the FB block rotate as it is cut and polish for a smooth radius cut.
Firing pin block modification for reduced trigger weight
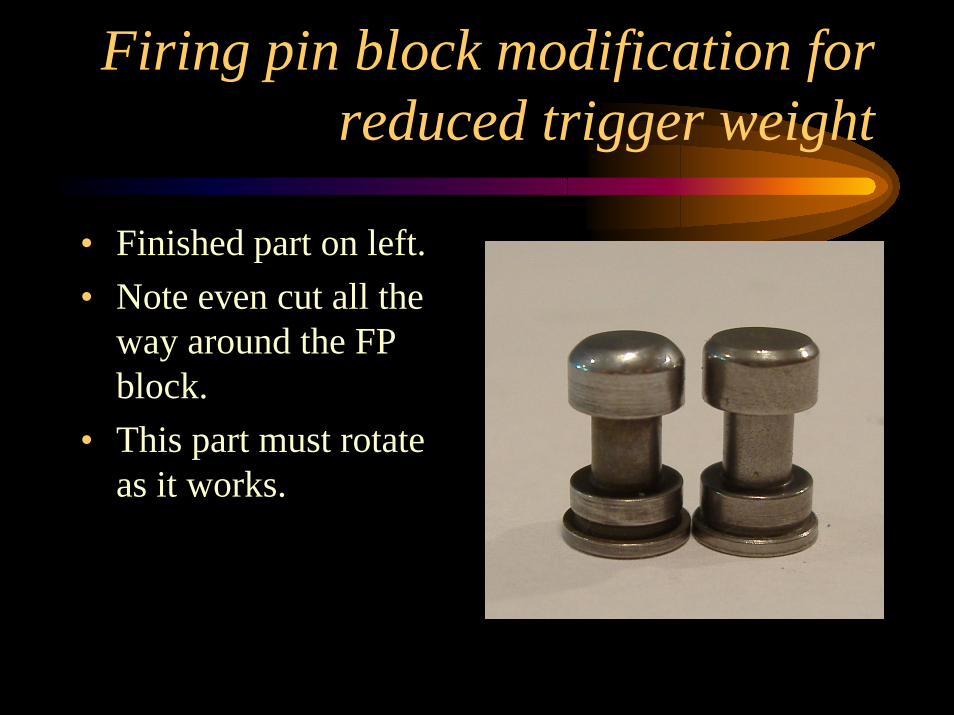
• Finished part on left. • Note even cut all the
way around the FP block.
• This part must rotate as it works.

Firing pin block modification for reduced trigger weight
• Here is modified FP block and trigger bar.
• Note improved angle of engagement.
• Also, polish engagement area on trigger bar.
• Do not remove metal from top of trigger bar or top of FP block.

Firing pin block modification for reduced trigger weight
• Clean and re install FP block and spring.
• Start the sight into the dove tail.
Firing pin block modification for reduced trigger weight
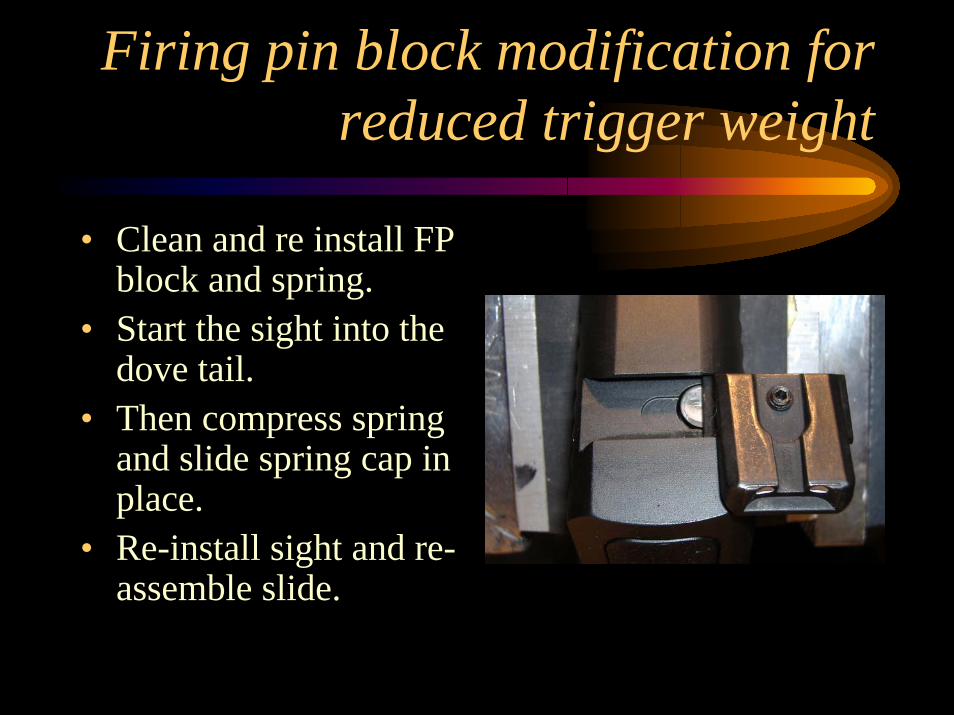
• Clean and re install FP block and spring.
• Start the sight into the dove tail.
• Then compress spring and slide spring cap in place.
• Re-install sight and re-assemble slide.

Sear modification for reduced trigger weight
• Stock sear has between .050” and .060” of engagement with the striker.
• Cutting this engagement down will also reduce trigger weight.
• Sear on left has been cut down to about .028”, I would not go less!
• Note that when this is done you have to make a larger cut on the other side of the sear for over travel as the trigger will break sooner.
• I have gotten reliable trigger pulls of 2.75 lbs with these modification and no spring changes!
• Make sure you cut all the way along the top of the sear so that the striker does not drag across the top. This is not just a simple angle cut.

Put it all back together
• After putting the sear back in the sear housing block. Make sure you put the ejector back in place.

Put it all back together
• Slide leg of trigger bar into slot on on sear housing block. It is just below the sear.
Put it all back together
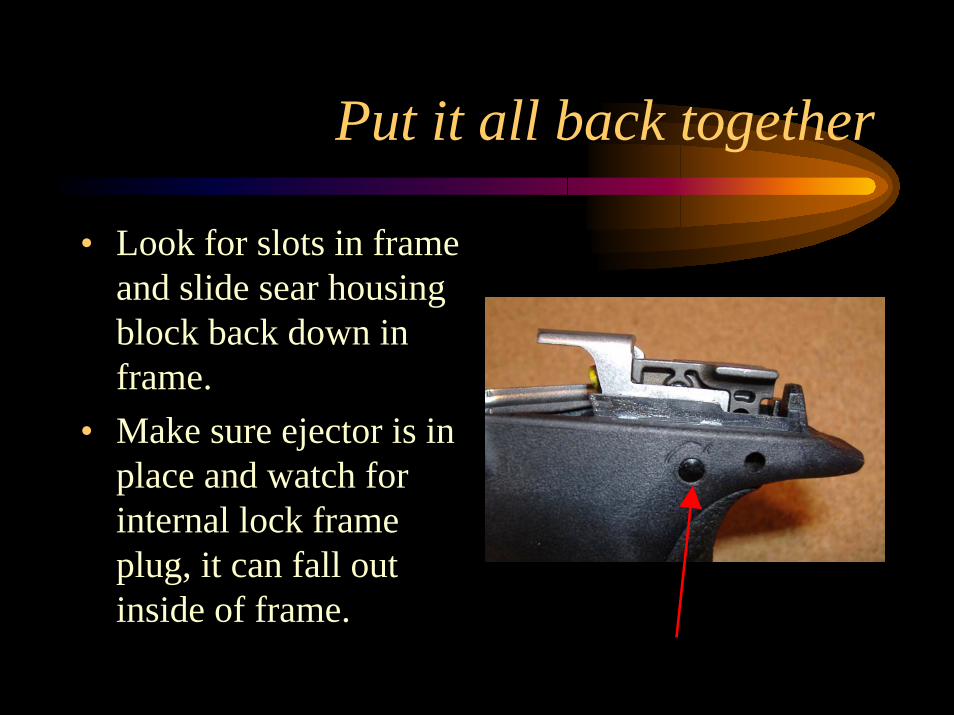
• Look for slots in frame and slide sear housing block back down in frame.
• Make sure ejector is in place and watch for internal lock frame plug, it can fall out inside of frame.
Put it all back together
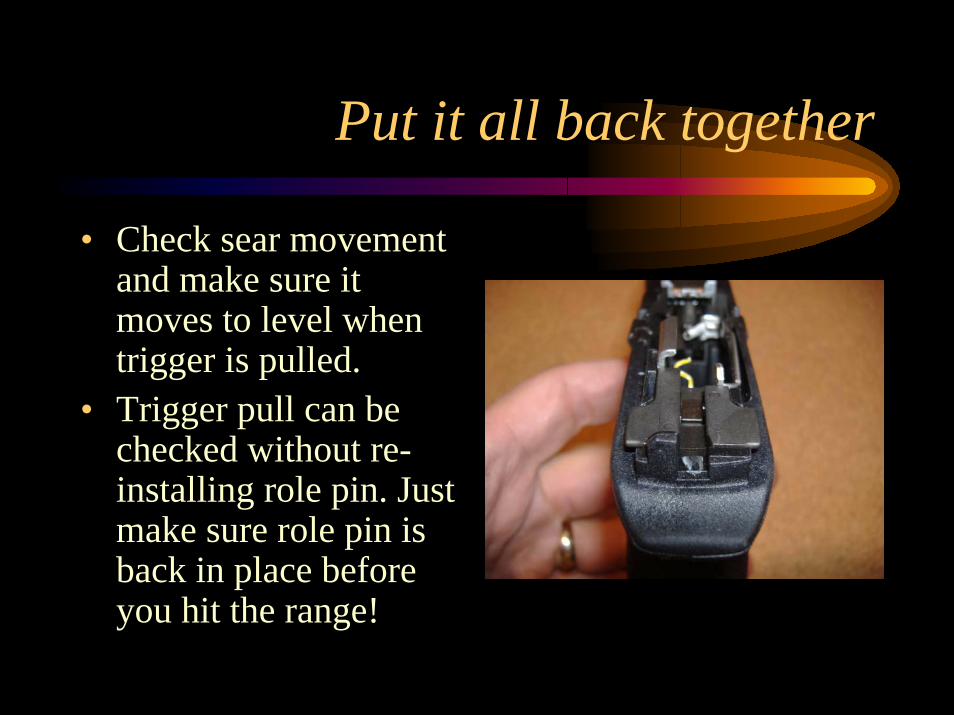
• Check sear movement and make sure it moves to level when trigger is pulled.
• Trigger pull can be checked without re-installing role pin. Just make sure role pin is back in place before you hit the range!

Test it out, and have fun!
• Make sure you check everything once it is all back together.
• You can use some, or all of these modifications depending on how light you want the trigger to be.