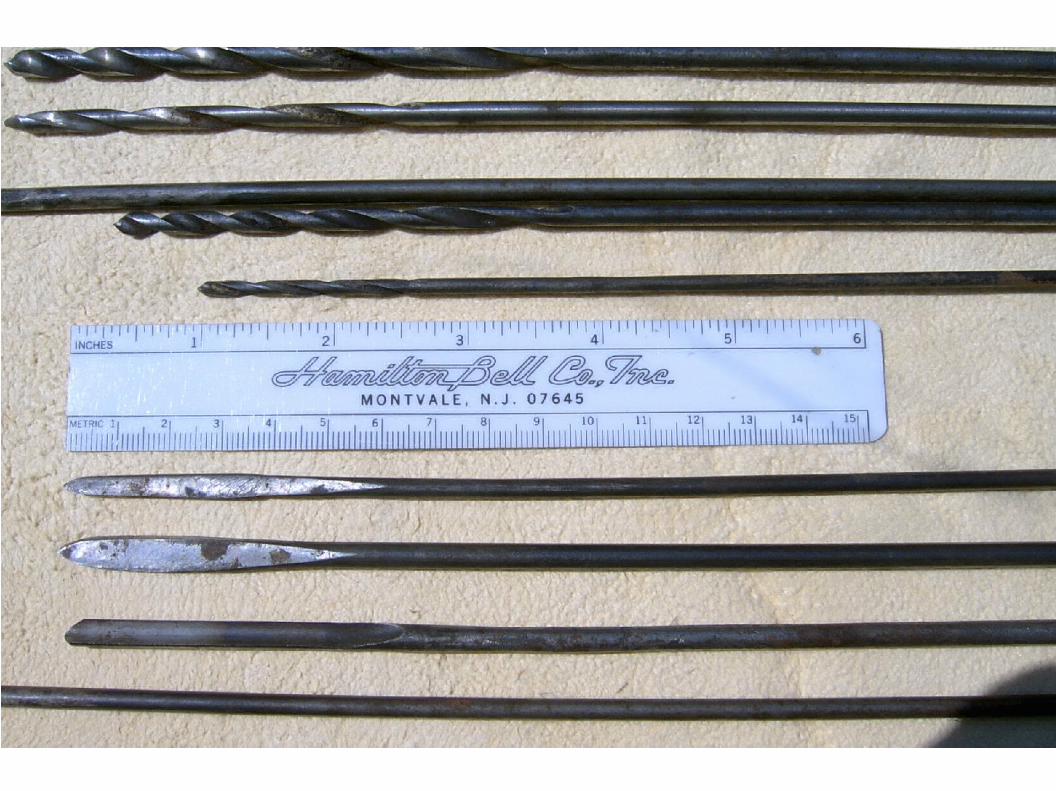
making and using reamers - bill haneman · socket reamers i use commercial lefthandspiral fluted...
TRANSCRIPT

Making and Using Reamers
part 1
Bill Haneman

D bits
if end is formed properly, they are selfcentering require frequent chip clearing use relatively slowly relatively easy to keep sharp

simple boring tools
see D.M.Quinn, “Low tech bits”, Pipes and Pipemaking CDROM
− parrotnose bit− D bit
angled nose, relief in cutting edge

gun drills fast, selfcentering and cool running
− still, better finish and centering if not pushed
chip clearing is automatic
− ideally want 90110 psi− 3 m3/hr if using larger bits, large reservoir
helpful− not all the same; get 'modified highland'
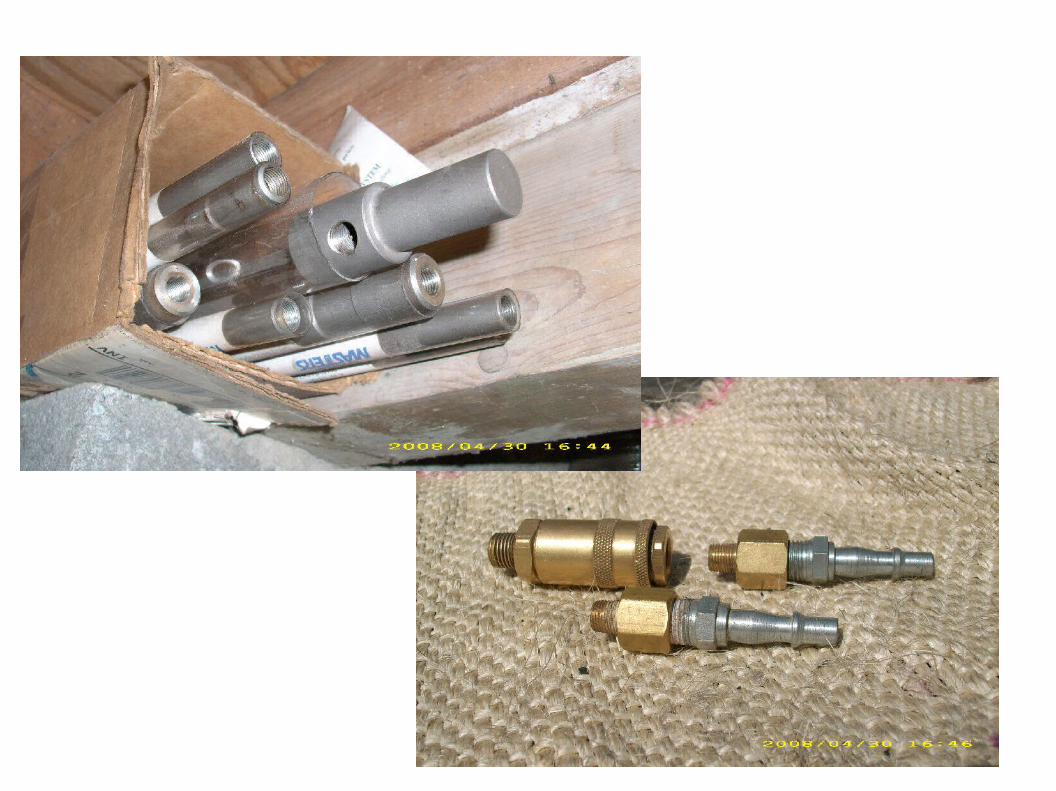
profile different couplings available


using gun drills to stepbore
bore from large to small− smalltolarge causes drift, as larger hole tends to
run tangent to previous hole piloting bits are important
− there are reports of speciallyprofiled gun drills that selfpilot largetosmall (pilot on nose)
remember, speed is overrated− even though surface finish for stepboring probably
is not important


step drilling (cont.)
allow for any nonconcentricity− my approach is to step drill with 0.5mm clearance
on sides

fixed steady

socket reamers I use commercial lefthandspiral fluted straight reamers for final reaming of
drone sockets and in a few other places
− hole is prebored to at most 1mm undersize
− only the first mm or so actually cuts
− reamer should spin slowly, with frequent chip clearing
− when boring drone sockets, I guide the slide with the tailpiece, onto the reamer (aids parallelism and concentricity)

Making conical reamers
first decide what your reamer profile(s) should look like
multiple reamers give flexibility, also solve problem of different tool edge speeds
− on narrower parts of bore, reamer moves more slowly
− also easier to correct for a mistake, less work to discard if you screw up
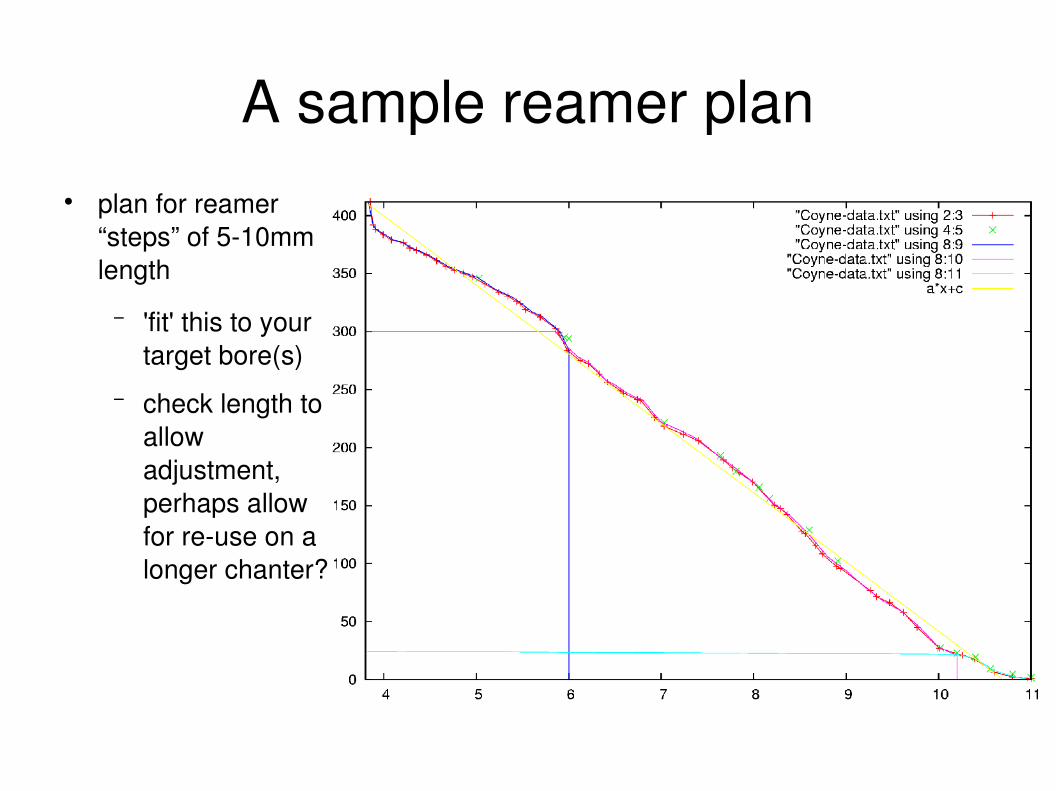
A sample reamer plan plan for reamer
“steps” of 510mm length
− 'fit' this to your target bore(s)
− check length to allow adjustment, perhaps allow for reuse on a longer chanter?

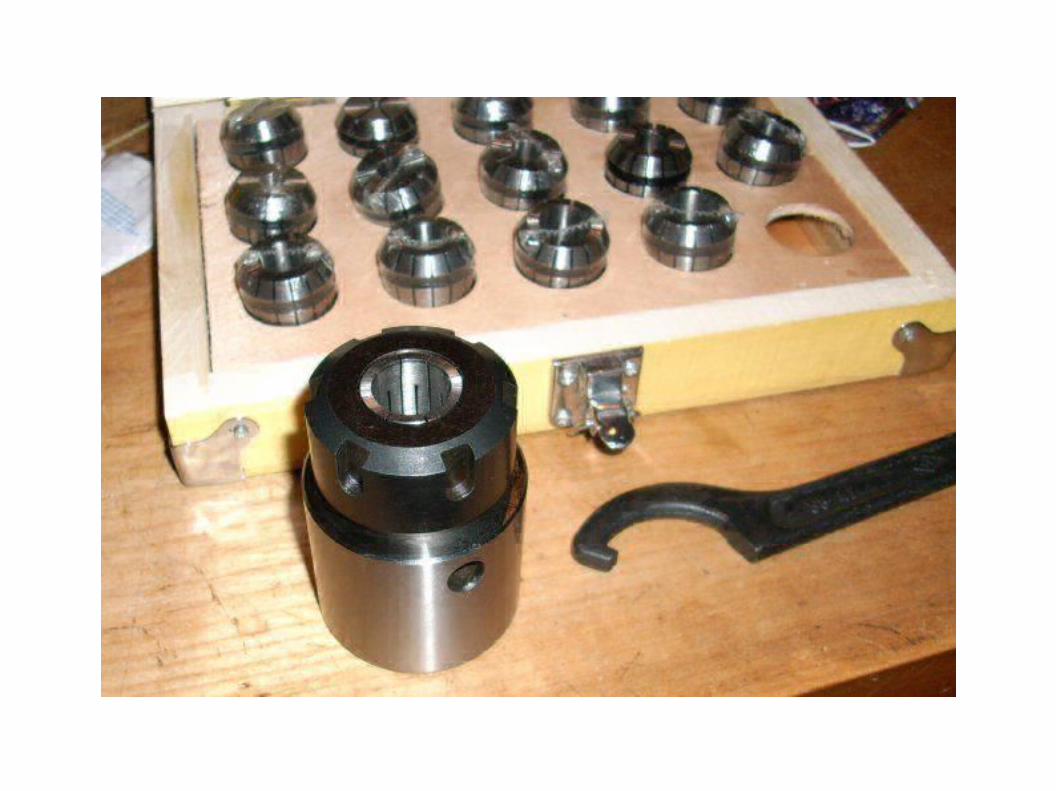
turn suitable tool steel rod in 'steps' chuck securely with minimum overhang
− collet chucks are ideal, an independent, handcentered 3jaw is fine but slow, selfcentering 3jaw probably OK
first “step” may be a cylindrical 'nose'
− must be undersize to avoid higher parts of bore
− helps when clamping piece for milling
bore pilot hole for tailstock
nose may need to be turned without tailstock support


one step at a time turn each step to the 'maximum' size for the segment, or ~0.001”/0.03mm
oversize
carbide is OK but decent tool steel seems even better, for cutting nonheattreated rod
check with micrometer as you go
− stop the lathe of course


take off the 'steps' engineer's bluing is good
careful not to go undersize
− can be corrected, painfully, by moving your target diameters laterally
go slow when only lines remain – abrasives are best at this point
accuracy will improve with practice, but is limited mostly by your patience


remeasure and finetune remeasure with micrometer – one with a ratchet is a good idea
− best is one with flat anvils, but can make do with round ones if you are careful
− mark the distances from the tip with a thin indelible marker
check against your target bores, looking for best insertion depth
you can put back on lathe and adjust with files/abrasives if you don't like the results
− this is the last chance to fix this, as you can't really do it once the reamer has been milled down to a D profile


(calibrated) vernier micrometer, 0.001mm increment with ratchet

from 'cone' to reamer
milling operation only needs to be approximately midline
− but not over midline!− just over 50% thickness allows for sharpening
initial clamping is tricky, but shims of soft metal should do it
− there shouldn't be much lateral force on the blank anyway, since cutting speeds and depths should be modest


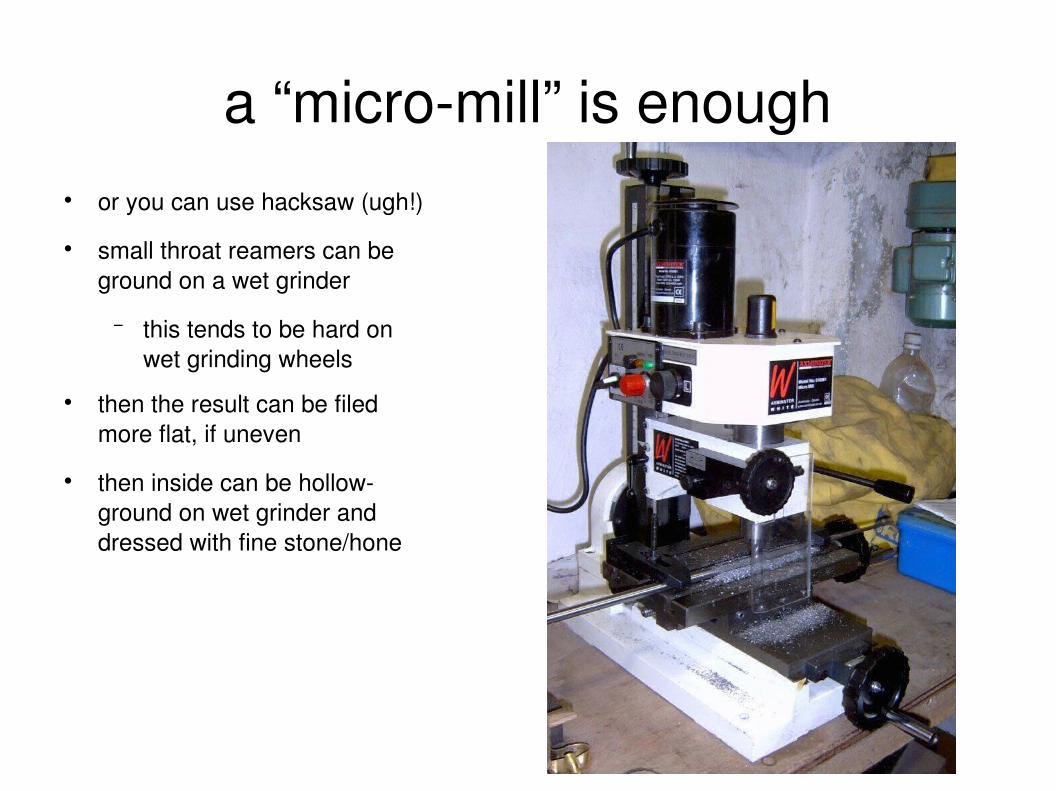
a “micromill” is enough or you can use hacksaw (ugh!)
small throat reamers can be ground on a wet grinder
− this tends to be hard on wet grinding wheels
then the result can be filed more flat, if uneven
then inside can be hollowground on wet grinder and dressed with fine stone/hone


with luck, you can reuse reamers for another design...

there are other forms of reamers
for instance flat reamers 'bayonet' reamers 'square section' reamers fluted reamers
− spiral fluted reamers that aren't straight are very hard to sharpen
'spoon' reamers

John Hughes reamer – 4 straight flutes
as described in 'A Method of Making Reamers', Sean Reid Society Journal v. 2, Mar. 2002

Michael Carney tools

flat reamers
used to good effect by some makers resharpening changes their dimensions may be prone to chatter or create 'lobes' dimensioning them in the first place can be
difficult− they cut on the diagonal, which changes with
thickness/width ratio

initial reaming a blank
I like to hold the reamer in the lathe at slow speed (125 RPM or less)
allows control over blank go slow
− avoid overheating clear chips often
− ditto use nonwaterbearing lubricant
− I like linseed oil, have used paste wax

finish reaming
check bore with gauges to judge final reaming depth
− reamer insertion depth can be misleading, due to wood movement and elasticity
some thermal movement, remember most billets will shrink a bit
− give some time to settle – months ideally handream until spot checks match up
− you may wish to reduce lubrication at this step, to avoid buildup


cautions
careful with billets that may have warped− ream too gently, and your bore may not match
reamer profile − use enough pressure, if practical, that the reamer
flexes when necessary− too much pressure or speed can cause
overheating, or even with handreaming can cause uneven results due to timber elasticity
oval bores can result