making a bangle bracelet using a metal core from arizona ... instructions.pdf · making a bangle...
TRANSCRIPT
Making a Bangle Bracelet using a Metal Core from Arizona Silhouette©
Supplies needed: Metal Core (stainless steel (BG200SS) or copper (BG201CU), bangle core blanks made from stabilized
wood or acrylic material and adhesive (liquid nails – home projects – this adhesive will flex slightly while offering
maximum strength)
Tools needed: lathe with four jawed chuck, turning tools, drill press, hole saws 3 ½” and 2 ¼”
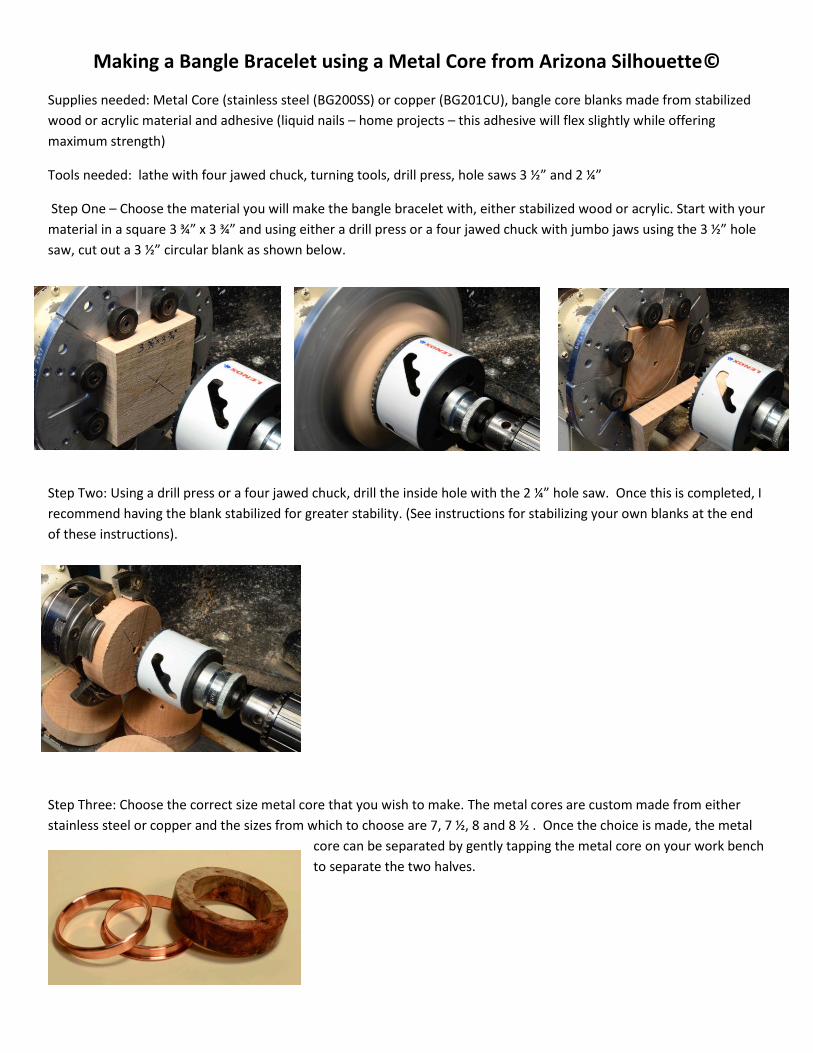
Step One – Choose the material you will make the bangle bracelet with, either stabilized wood or acrylic. Start with your
material in a square 3 ¾” x 3 ¾” and using either a drill press or a four jawed chuck with jumbo jaws using the 3 ½” hole
saw, cut out a 3 ½” circular blank as shown below.
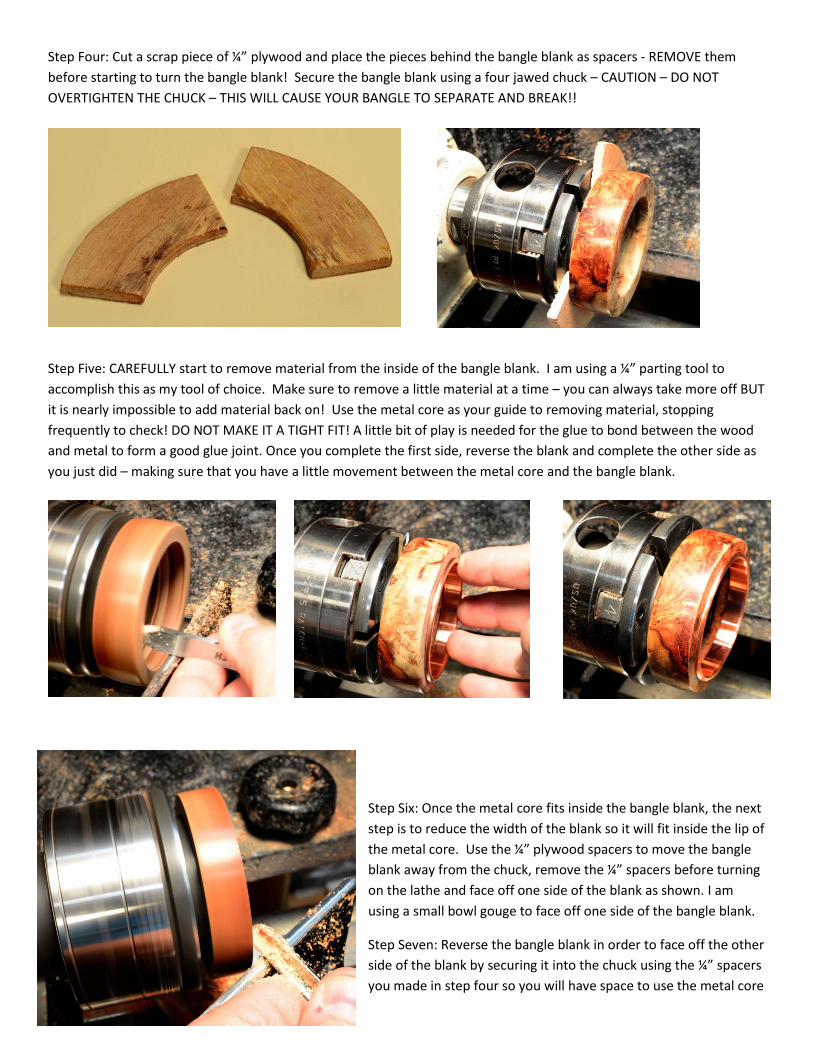
Step Two: Using a drill press or a four jawed chuck, drill the inside hole with the 2 ¼” hole saw. Once this is completed, I
recommend having the blank stabilized for greater stability. (See instructions for stabilizing your own blanks at the end
of these instructions).
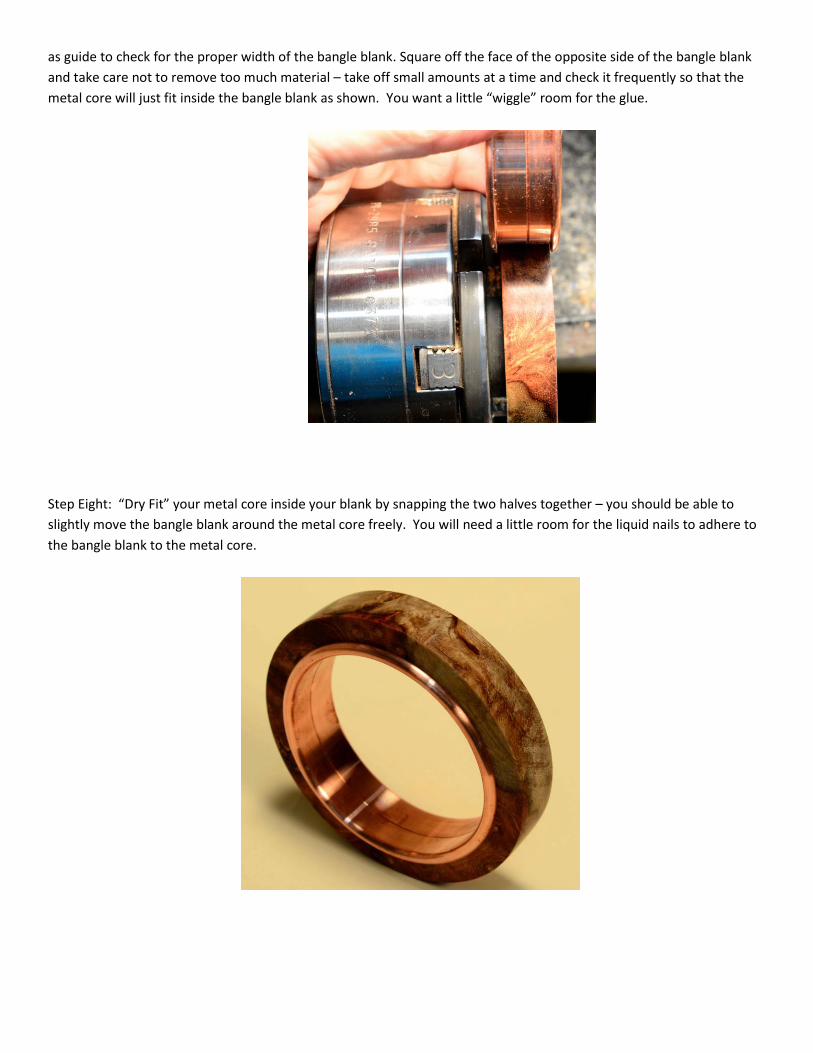
Step Three: Choose the correct size metal core that you wish to make. The metal cores are custom made from either
stainless steel or copper and the sizes from which to choose are 7, 7 ½, 8 and 8 ½ . Once the choice is made, the metal
core can be separated by gently tapping the metal core on your work bench
to separate the two halves.
Step Four: Cut a scrap piece of ¼” plywood and place the pieces behind the bangle blank as spacers - REMOVE them
before starting to turn the bangle blank! Secure the bangle blank using a four jawed chuck – CAUTION – DO NOT
OVERTIGHTEN THE CHUCK – THIS WILL CAUSE YOUR BANGLE TO SEPARATE AND BREAK!!
Step Five: CAREFULLY start to remove material from the inside of the bangle blank. I am using a ¼” parting tool to
accomplish this as my tool of choice. Make sure to remove a little material at a time – you can always take more off BUT
it is nearly impossible to add material back on! Use the metal core as your guide to removing material, stopping
frequently to check! DO NOT MAKE IT A TIGHT FIT! A little bit of play is needed for the glue to bond between the wood
and metal to form a good glue joint. Once you complete the first side, reverse the blank and complete the other side as
you just did – making sure that you have a little movement between the metal core and the bangle blank.
Step Six: Once the metal core fits inside the bangle blank, the next
step is to reduce the width of the blank so it will fit inside the lip of
the metal core. Use the ¼” plywood spacers to move the bangle
blank away from the chuck, remove the ¼” spacers before turning
on the lathe and face off one side of the blank as shown. I am
using a small bowl gouge to face off one side of the bangle blank.
Step Seven: Reverse the bangle blank in order to face off the other
side of the blank by securing it into the chuck using the ¼” spacers
you made in step four so you will have space to use the metal core
as guide to check for the proper width of the bangle blank. Square off the face of the opposite side of the bangle blank
and take care not to remove too much material – take off small amounts at a time and check it frequently so that the
metal core will just fit inside the bangle blank as shown. You want a little “wiggle” room for the glue.
Step Eight: “Dry Fit” your metal core inside your blank by snapping the two halves together – you should be able to
slightly move the bangle blank around the metal core freely. You will need a little room for the liquid nails to adhere to
the bangle blank to the metal core.
Step Nine: Using denatured alcohol, wipe off the metal core and the inside of the bangle blank to prepare the surfaces
to be glued with the “Liquid Nails”(BG211) home projects glue.
Step Ten: Wearing gloves to protect your hands from the glue, apply the glue to both the inside of the bangle blank and
the metal core. Make sure you get the glue on all the inside edges of the bangle and the metal core for a strong bond.
Once the glue is applied, snap the core together and make sure it is pressed firmly together. Wipe off some of the excess
glue with a paper towel before you clamp your bangle bracelet.

Step Eleven: Use clamps to hold the pieces together while the glue dries overnight. The glue will dry completely in 8
hours.
Step Twelve: After the glue is dry, you can rub some of the excess glue off the inside of the bangle bracelet with your
fingers as shown-

Step Thirteen: Secure the bangle blank with the four jawed chuck using the ¼” spacers, slowly turn down the blank to
your desired shape. You can either make the bangle with a slight crown or turn it flat across the width of the metal core.
Step Fourteen: The nature of “Burls” is that they may have an inclusions or holes that will have be treated in some way.
You may fill them with natural material such as turquoise or coral or use the shavings from the burl itself as a filler
material. Here, turquoise is rubbed into the hole and then thin CA glue is dripped onto turquoise filler. The thin CA glue
will penetrate into the filler and secure it in the void. Once it is dry, it is turned down flush ready to be sanded.

Step Fifteen: If you have excess glue on the rim of the metal core, you can rub it off or use your fingernail or use the tip
of an exacto knife to remove the excess glue. If you use an exacto knife care should be taken not to scratch the metal
core.
Step Sixteen: Sand the blank to 800 grit and then apply a finish of choice – a medium CA glue finish is applied to this
bangle bracelet.
TIP: Turn down a scrap piece of wood to act as a “jam chuck” and place the bangle bracelet on this jam chuck to apply
the CA glue finish. A jam chuck is used so CA glue will not get on the metal four jawed chuck. Six coats of medium CA
(BG052) glue is applied to the bracelet using a paper towel and a plastic parts bag covering my finger with the lathe
speed set to approximately 500 rpm.

Step Seventeen: If your CA glue finish is not smooth, use the 1000 grit Abralon (BG114) sanding pad to lightly sand any
“bumps or lumps” from the finish before you wet sand the bracelet.
Step Eighteen: Using the Acrylic Sanding Pads (BG115) wet sand the medium CA glue finish and then buff it with the
Acrylic Buffing System (BG012) to a high gloss scratch free shine.
Step Nineteen: If you want to add a brushed finish to the inside of your bangle bracelet then use the deburring wheel
and lightly polish the inside of your bracelet.

Finished Bangle using Amboyna Burl and a copper metal core.
Other Bangle Bracelets:
Instructions intended for use with metal cores from Arizona Silhouette and not to be published without express written
consent from Arizona Silhouette or Barry Gross©.