macarbon ferrari 360 instrument cluster installation · ferrari 360 carbon fiber door panel...
TRANSCRIPT

Ferrari 360 Carbon Fiber Door Panel Installation Instructions
Tools Required
2.5MM Allen Wrench 3MM Allen Wrench Screw Driver Detail Cloth Detail Spray
Installation Steps Step Instructions Photo
1. Locate the five screws holding the steering column clamshell together. Note the front two and rear screw attach the clamshell onto the steering column. The middle two hold the top and bottom together. To reach the rear passenger side screw, push the wheel in till you can see the screw in the hole in the dash (blue arrow). You will be using the telescoping feature of the steering column extensively during this process.
2. The 'normal' lowest position of the steering column
does not provide sufficient clearance to remove the cluster. The column adjustment strap must be loosened in order to allow the column to be lowered further. Remove the front bolt using the 8MM wrench. Simply loosen the second bolt. DO NOT REMOVE THE SECOND BOLT.

Step Instructions Photo 3. Using the 3MM Allen, remove the top two screws.
4. Using the 3MM Allen, remove the bottom two
screws.
5. Apply painters tape to the dash on the passenger side
of the cluster. This will protect the leather when removing the cluster.
6. Remove the cluster from the dash. It is still a tight fit especially on F1 cars. Take your time and it will come out.

Step Instructions Photo 7. Disconnect the four cables leading to the cluster.
8. Remove the four Philips head screws that hold the
cluster ace onto the cluster body.
9. Lift off the cluster face plate.
10. Clean any dust from the 'outside' face of the cluster
body.
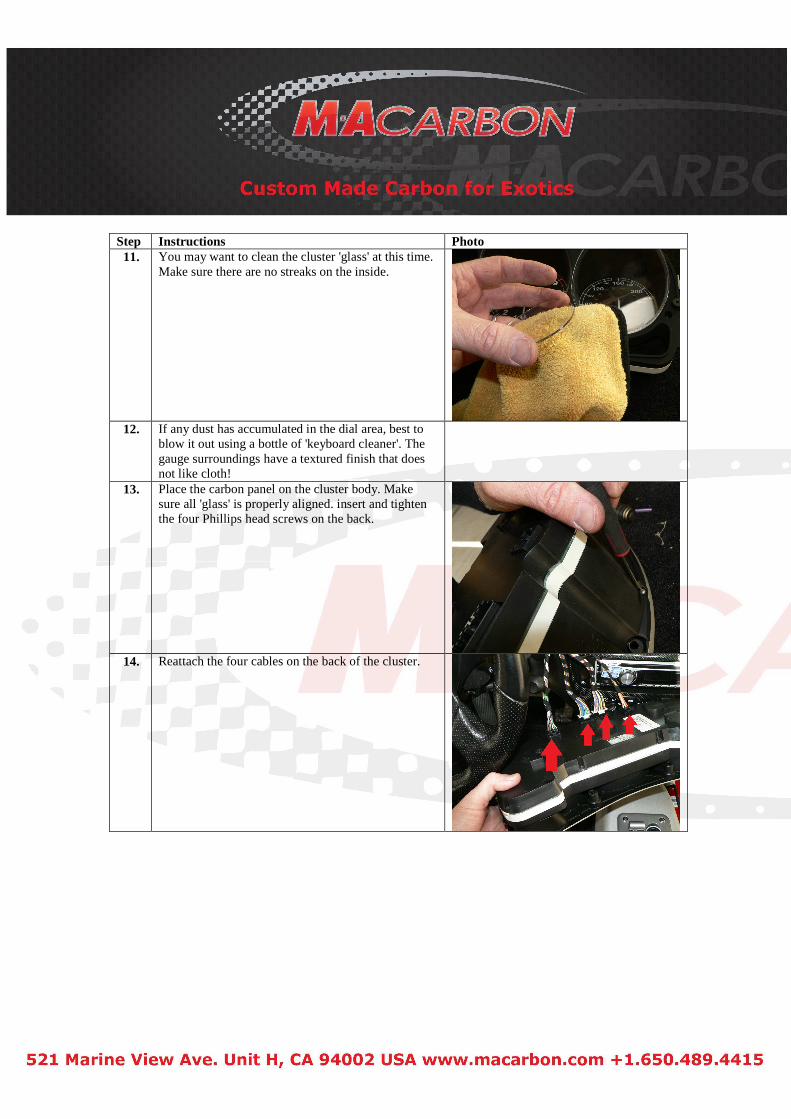
Step Instructions Photo 11. You may want to clean the cluster 'glass' at this time.
Make sure there are no streaks on the inside.
12. If any dust has accumulated in the dial area, best to
blow it out using a bottle of 'keyboard cleaner'. The gauge surroundings have a textured finish that does not like cloth!
13. Place the carbon panel on the cluster body. Make sure all 'glass' is properly aligned. insert and tighten the four Phillips head screws on the back.
14. Reattach the four cables on the back of the cluster.

Step Instructions Photo 15. Place the cluster back into the nacelle.
16. Insert and tighten the four retaining screws. Silver
panel shown!
17. Insert and tighten the steering column retaining bolt.
Tighten the second bolt.
18. Reinstall the steering column clamshell. 19. Enjoy your hard work!