low disk space warning windows made
TRANSCRIPT
Low Disk Space Warning
Windows

Usually junk files appear as a result ofincomplete application installations,caches, browser
activities like downloads, and so on. It’swise to erase duplicate and obsolete filespermanently.
The process is indeed easy whenperformed with a duplicate file cleaner.

Reclaim your Space Using Disk
CleanUp
1. Press Windows Key.
2. This opens up the Start Screen.
3. Type “Free up disk space by deleting
unnecessary files” in Search Box. Click
Settings icon.


4. Now you have Search Results page on
your screen. Open the keyword.
5. Select a random drive. Remember you
have to select all drives one-by-one.
6. Click OK.

7. This starts analysing total recoverable
space. Please stand by until it finishes
analysing selected drive.

8. Here you are with detailed analysis
report. Disk CleanUp app shows how
much space is recoverable. You also get
information about files to delete.

9. Click OK button. Repeat the whole process for remaining drives.

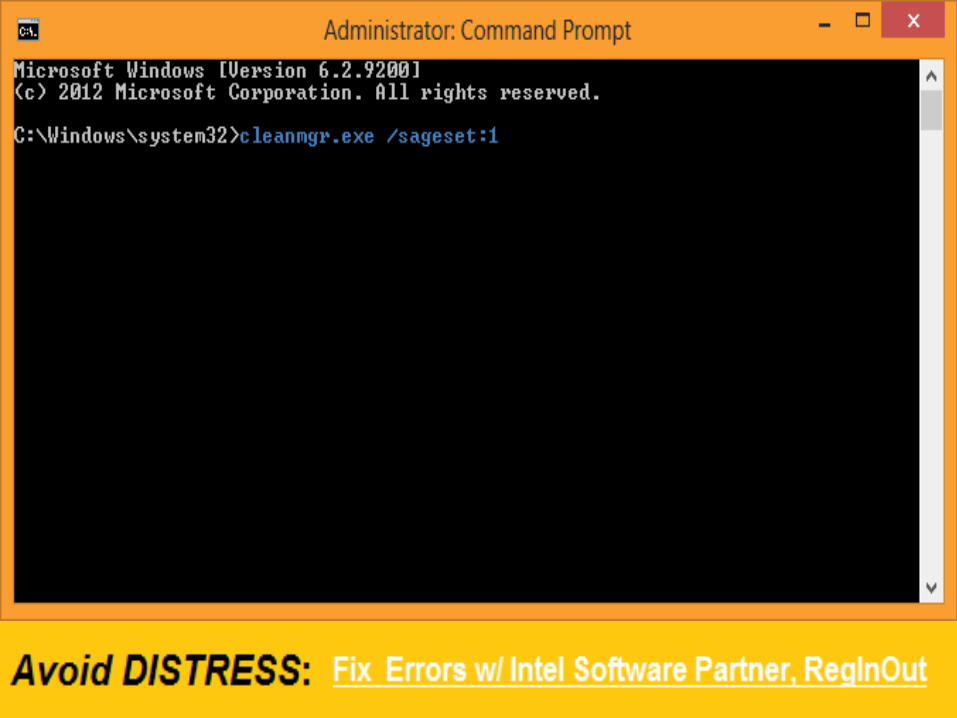
SCHEDULE IT USING ADVANCED COMMAND LINE SWITCHES
Running a couple of command line
arguments will enable you to schedule
Disk CleanUp task. It creates a Registry
key, retrieves saved settings from time to
time. You won’t have to interact with the
application at all.

1. Press Windows Key + X.
2. Select Command Prompt (Admin).
3. Now you have Command Prompt opened
with security privileges.
4. Type following command and press
ENTER:
5. Here you go: You’ll notice there are a lotmore options than normal graphical userinterface. Check-up the file types you want todelete.
6. Click OK to exit out of the screen.

7. Refer Steps # 1-2 from Using Disk CleanUp section.
8. Type “Schedule Tasks” in Search Box
and click Settings icon.
9. You’ll want to click on the keyword to
open up the program.
10. Click Action menu, select Create basic
task.

11. A new wizard comes up on your screen.
Here you type a name and a short
description for your task. Example:
Name: Scheduled Disk CleanUp
Description: Reclaims hard disk space byremoving various temporary, junk files

12. Click Next button.13. Select a time interval. Specify when you want the task to start. Example: Weekly.
12. Click Next button.13. Select a time interval. Specify when youwant the task to start. Example: Weekly.

14. Click Next.

15. Since we set it up to execute on weekly
basis, here comes a new page with days and
timings. Set up them accordingly. Specify
whether you want the program to synchronize
across time zones.

16. Click Next.
17. It then displays a task selection page. Select “Start a program” option and click Next.
16. Click Next

17. It then displays a task selection page.
Select “Start a program” option and click
Next.

18. Type “C:\Windows\system32\cleanmgr.exe”
in subsequent page. The actual path may vary
in case your Windows is installed in a different
drive.

19. Type “/sagerun:1” in Add Arguments textbox.
Click Next.

20. Click OK. Now you’re shown a
summary. Make sure everything looks
correct and click Finish.


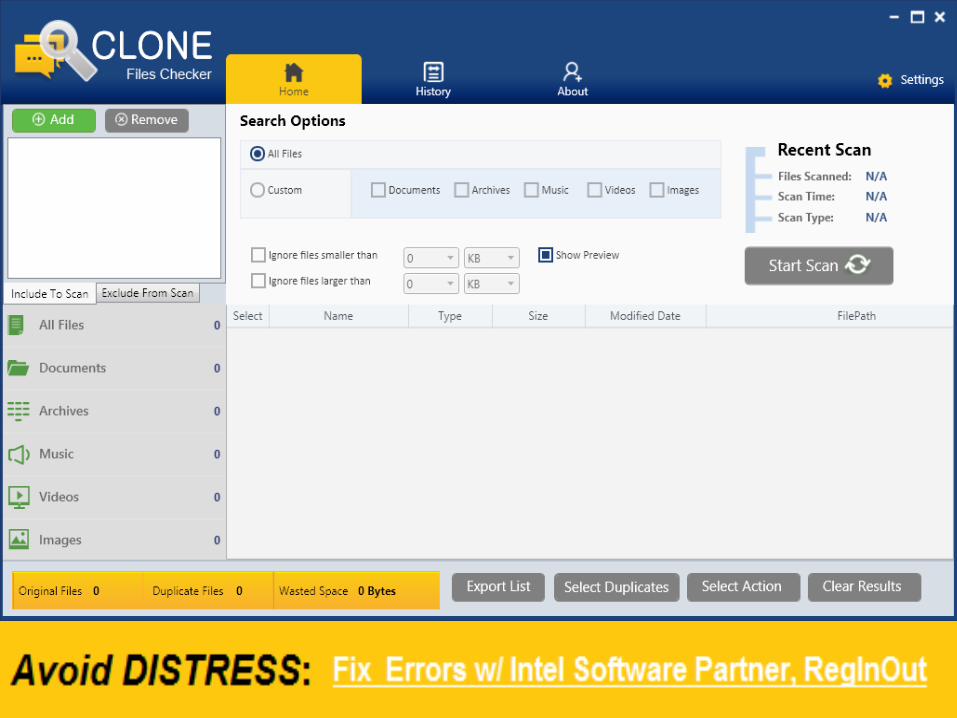
USING CLONE FILES CHECKER
Delete obsolete duplicate files with Clone
Files Checker. It is quite useful if all sorts of
duplicate files are wiped out from time to
time. This may save a considerable amount
of your disk space.

There are two ways. If you’re a beginner,
you may use Auto-Fix feature and use
program’s default settings to quickly delete
duplicate files. Advanced users can erase
individual files. When taking an action,
you’ll be prompted to delete files
permanently, move them to Recycle Bin or
to a new folder. It also works safe as files
are backed up.