libgdx notes - brainycode notes 3 figure 3 - bluej start screen 4. from the menu select project new...
TRANSCRIPT
LibGDX Notes
1
LibGDX Notes These notes assume that you have a familiarity with Java programming. If you do program in Java you
probably use an integrated development environment (IDE) already. There are many possible choices
for IDE’s, for beginners we have:
BlueJ (www.bluej.org)
DrJava (www.drjava.org)
For more advanced programmers there is:
Eclipse (eclipse.org)
NetBeans (netbeans.org)
IntelliJ IDEA (www.jetbrains.com/idea/)
The first book I am tackling is “Beginning Java Game Development with LibGDX” which uses BlueJ. I will
detail the steps to get the same “hello world” program with LibGDX up and running on BlueJ, Eclipse and
NetBeans.
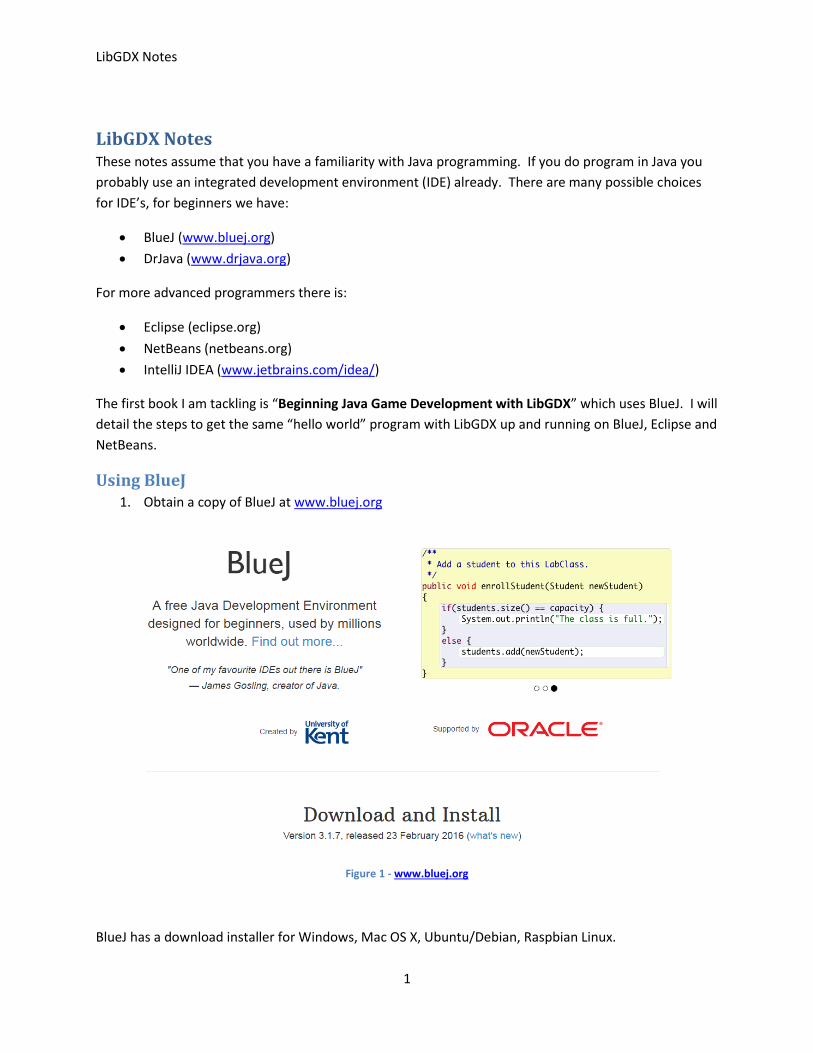
Using BlueJ 1. Obtain a copy of BlueJ at www.bluej.org
Figure 1 - www.bluej.org
BlueJ has a download installer for Windows, Mac OS X, Ubuntu/Debian, Raspbian Linux.

LibGDX Notes
2
Since I already have Java JDK installed I will select “BlueJ Installer”
How to tell if you have Java JDK installed.
Open a command prompt window
Enter “java –version”
If you do not see the above response you probably do not have Java installed or in the PATH1.
2. The Window version for BlueJ is a *.msi file that you can install by double-clicking on it. After
installation you should see a desktop icon for BlueJ – what does it look like?
Figure 2 - Desktop Icon
3. Double-click the desktop icon to get BlueJ started.
The application window for BlueJ is rather basic and simple – especially for all you developers that use
Eclipse and NetBeans!
Figure 3 illustrates what the screen looks like when first started.
1 I am assuming you know how to detect what Java version you have and how to set it up on your computer’s path.
If you need more guidance than I suggest you check out the HTML TRAINING notes we have on brainycode.com. It details how to set up Java and NetBeans (for HTML5 development) for the complete beginner.

LibGDX Notes
3
Figure 3 - BlueJ Start Screen
4. From the menu select Project New Project…
5. A “New Project” file dialog opens up. Navigate to the location of your BlueJ projects. I decided to
place all my BlueJ projects under a directory named BLUEJ and for this specific project to create
a directory named HELLO_WORLD.
Figure 4 - Folder organization for my BlueJ projects
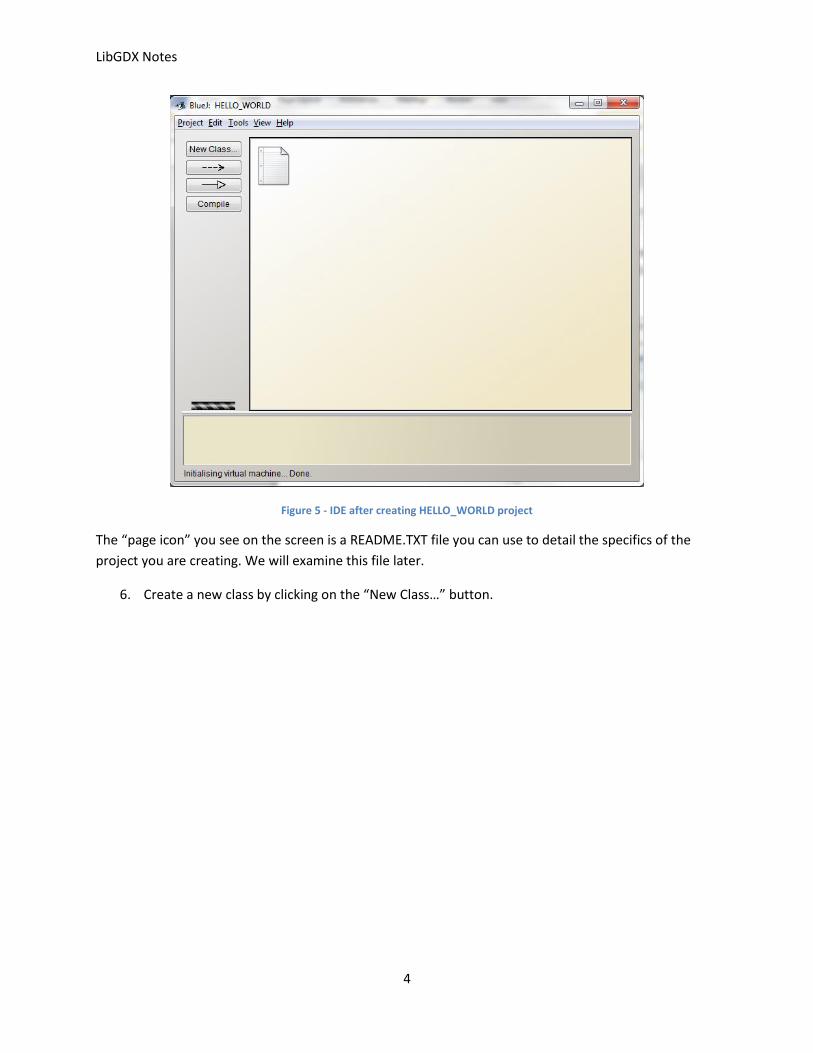
The screen will now appear as:
LibGDX Notes
4
Figure 5 - IDE after creating HELLO_WORLD project
The “page icon” you see on the screen is a README.TXT file you can use to detail the specifics of the
project you are creating. We will examine this file later.
6. Create a new class by clicking on the “New Class…” button.

LibGDX Notes
5
Figure 6 - Enter name of the new class "HelloWorld"
7. Enter the class name “HelloWorld” and click on “Ok”
Figure 7 - Updated BlueJ IDE with new class
You will see a new rectangular icon labeled HelloWorld added to your IDE. The diagonal lines indicate
that the Java class file needs to be compiled.
8. Double-click on the “HelloWorld” rectangle or right-click over the rectangle and select “Open
Editor”
You will see that the class has a lot of template code already inserted for you!

LibGDX Notes
6
Figure 8 - HelloWorld with template code
9. Delete all the code and enter the following code:
Table 1 - HelloWorld.java code
/** * Write a description of class HelloWorld here. * * @author Lorraine Figueroa * @version May 28 2016 */ public class HelloWorld { public static void main() { System.out.println("Hello, World!"); } }
The IDE should look like this:

LibGDX Notes
7
Figure 9 - Our HelloWorld program
10. Click on the “Compile” button
You should see the following message at the bottom of the IDE in the status screen.
Figure 10 - Status message after compilation
Note: If you do not see the message above – check and compare the text to find any possible typos.
When you return to the main IDE screen you will the HelloWorld icon now has the “compiled” rectangle
icon.
11. Return to the main screen with the “HelloWorld” rectangle. Right-click and select “void main()”

LibGDX Notes
8
Figure 11 - Running the class main()
A terminal window will open up with the results of running the program:
Figure 12 - Result of running our HelloWorld program
To the left of your HelloWorld class as illustrated in Figure 13 is a README.TXT file that automatically got
created when we created our BlueJ project.
12. Double-click on the README.TXT file in order to open up the contents of the file in a text editor.

LibGDX Notes
9
Figure 13 - Our Hello World Project
The original contents of the README.TXT file is shown below:
Table 2 - Original README.TXT file
------------------------------------------------------------------------ This is the project README file. Here, you should describe your project. Tell the reader (someone who does not know anything about this project) all he/she needs to know. The comments should usually include at least: ------------------------------------------------------------------------ PROJECT TITLE: PURPOSE OF PROJECT: VERSION or DATE: HOW TO START THIS PROJECT: AUTHORS: USER INSTRUCTIONS:
A good programmer will make sure that the README.TXT is updated and accurate so that years from
now others will be able to find out the purpose of the project and know how to execute it.

LibGDX Notes
10
Table 3 - Update README.TXT file
PROJECT TITLE: HelloWorld PURPOSE OF PROJECT: This is a test project to get acquainted with BlueJ VERSION or DATE: 05/28/2016 HOW TO START THIS PROJECT: Execute the main in the class HelloWorld AUTHORS: L. Figueroa USER INSTRUCTIONS: N
If you plan on using BlueJ I highly recommend that you obtain the reference manual at
https://www.bluej.org/doc/bluej-ref-manual.pdf and spend 15 to 20 minutes going over it in order to
get an idea what features the IDE has and for future reference.
13. Head over to https://libgdx.badlogicgames.com/ to download the jar file for the LibGDX library.
Figure 14 - LibGDX banner
The Java framework library can be used to create programs for desktops, Android devices, iOS and
HTML5.
Learning to use frameworks that work on many different platforms – your Windows OS, your Samsung
phone, a Mac, an iPhone and from any device that supports a browser that also supports
JavaScript/WebGL means that you can build your application one time and be assured that it can run
just about anywhere!
14. Click the “Download” icon and head over to the “Releases” download folder and find the latest
file in the format libgdx-x.x.x.zip.
Figure 15 - Downloading the latest LibGDX zip file
15. Unzip the contents of the zip file into a location we will use to add LibGDX to all our projects
(and across IDEs). I will place it at C:\LibGDX
You will find several jar files in the folder you extracted the zip file into:

LibGDX Notes
11
Figure 16 - Jar files in LibGDX
The files we want to use are:
gdx.jar
gdx-natives.jar
gdx-backend-lwjgl.jar
gdx-backend-lwjgl-natives.jar
Since we want to use these files across many BlueJ projects let’s put the files in a location that will be
available to all our BlueJ projects
16. Find the location of where BlueJ was installed. On my Windows system it was C:\Program Files
(x86)\BlueJ.
Figure 17 - Location of BlueJ installation

LibGDX Notes
12
17. Copy the jar file noted above into the BlueJ \lib\userlib folder.
Figure 18 - Moving LibGDX jar file into BlueJ
18. Start or re-start BlueJ IDE. Close the old HelloWorld project if it automatically opened up.
19. Create a new project called ViewImage
20. Create a new class ViewImage with the contents as shown below:
Table 4 - ViewImage.java
/** * Write a description of class ViewImage here. * * @author Lorraine Figueroa * @version 5/29/2016 */ import com.badlogic.gdx.Game; import com.badlogic.gdx.Gdx; import com.badlogic.gdx.files.FileHandle; import com.badlogic.gdx.graphics.GL20; import com.badlogic.gdx.graphics.g2d.SpriteBatch; import com.badlogic.gdx.graphics.Texture; public class ViewImage extends Game { private Texture texture; private SpriteBatch batch; public void create() { FileHandle worldFile = Gdx.files.internal("pong.png");

LibGDX Notes
13
texture = new Texture(worldFile); batch = new SpriteBatch(); } public void render() { Gdx.gl.glClearColor(1, 1, 1, 1); Gdx.gl.glClear(GL20.GL_COLOR_BUFFER_BIT); batch.begin(); batch.draw(texture, 0, 120); batch.end(); } }
A file in LibGDX is represented by an instance of the FileHandle class. A FileHandle has a type which
defines where the file is located.

LibGDX Notes
14
Figure 19 - The availability and location of each file type for each platform
In the program above we use:
FileHandle worldFile = Gdx.files.internal("pong.png");

LibGDX Notes
15
An image is converted from its original format (e.g *.png file) and saved as a Texture. LibGDX uses
OpenGL therefore every image needs to be transformed into a Texture. A Texture is nothing more
than a decoded image loaded into the GPU’s memory in raw format. To display textures (images) on the
screen, a few things have to be done first. A mesh, usually a rectangular polygon is used to describe the
geometry for the texture mapping to be made on. Texture mapping is the process of working out where
in space the texture (image) will be applied.
In the code we use the following line to convert the file image into a Texture.
texture = new Texture(worldFile);
LibGDX comes with SpriteBatch which takes care of all the steps needed to achieve texture mapping and
displaying texture mapped rectangles on the screen. It is a convenience class which makes drawing onto
the screen extremely easy and it is also optimized.
The render method uses the SpriteBatch object batch to draw our image to the screen
batch.begin(); batch.draw(texture, 0, 120); batch.end();
It works with screen coordinates and uses pixel perfect screen resolution. The lower left corner is the
origin (0,0) with the X axis pointing right and the Y axis pointing up. The above draws our image starting
at X = 0 and Y = 120.
Note: The information above comes frm the github wiki: https://github.com/libgdx/libgdx/wiki.
21. Create another new class named GameLauncher with the contents:
Table 5 - GameLauncher.java
/** * Write a description of class GameLauncher here. * * @author Lorraine Figueroa * @version 5/29/2016 */ import com.badlogic.gdx.backends.lwjgl.LwjglApplication; public class GameLauncher { public static void main(String[] args)

LibGDX Notes
16
{ ViewImage myProgram = new ViewImage(); LwjglApplication launcher = new LwjglApplication(myProgram); } }
All our applications will use a game launcher class to trigger our “game” class.
22. Compile both programs and Run GameLauncher.
Figure 20 - Executing GameLauncher
23. Just click “OK”
Figure 21 - Result of running GameLauncher

LibGDX Notes
17
The bottom left of our image is location (0, 120), where the bottom left of the window or screen is (0,0).
The nice feature in BlueJ is that you can “see” the relationship between files in the IDE.
Figure 22 - BlueJ class relationships
The image above makes it clear that the GameLauncher invokes or includes a reference to the
ViewImage object.
None of the methods in myProgram are actually invoked by ViewImage. It passes the myProgram object
to another class LwjglApplication that manages to get the methods in ViewImage invoked so we see our
image.
There are several advantages to using LibGDX as your Java game framework:
It has methods for handling user input from the keyboard, mouse, game pad or touch screens
It can be used to render 2D graphics
It has methods to play sound effects or play music
It allows you to easily integrate other third party tools
It has methods to render 3D graphics and even load 3D models.

LibGDX Notes
18
Figure 23 - Soldier 3D model
At this time I will admit that using BlueJ for my IDE Java Development does not feel like a good idea. I
will now detail how to get the ViewImage project constructed using Eclipse.
Using Eclipse I will have to admit that BlueJ seems simple and I could see how it can be quite appealing for students
who are starting to learn how to program in Java but as a Java programmer I am used to having to do
less work with respect to getting my imports in and also NOT having to compile every file after I made a
change (Eclipse automatically does this for us). So I will step through how to recreate the LibGDX
ViewImage using Eclipse.
1. Open Eclipse and create a new workspace to hold all our LibGDX project.
Figure 24 - Creating a workspace
Note: I am using a 64-bit OS (Windows 7), with 64-bit Java SDK and 64-bit version of Eclipse.

LibGDX Notes
19
2. Enter the workspace and create a new Java Project – ViewImage by right-clicking in the Project
Explorer and selecting New Project … Java Project and click on Next>.
Figure 25 - Creating new Java Project
3. Enter the project name ViewImage and click on Finish.
Figure 26 - Our Eclipse Project Explorer
4. Highlight the src folder (as shown above) and right-click on New Package and enter the name:
com.att.brainycode.libgdx.examples. Click on Finish.

LibGDX Notes
20
Figure 27 - Project with new package
Before we add our first class let’s add the same four jars files we identified to the project2.
5. Right-click the ViewImage project icon. Select “Properties” from the menu and the “Java Build
Path” option
Figure 28 - Java Build Path dialog
6. Click on “Add External JARs…” button
7. Navigate to the location of the LibGDX jars and select (hold CTRL) the four jar files we want to
add to the project.
2 We will have to add the same 4 LibGDX files to every Eclipse project we create until we start to use a cool build
tool like Maven.

LibGDX Notes
21
Figure 29 - Selecting the four LibGDX JAR files
8. Click Open.
Figure 30 - Adding the JAR to the build
9. Click on “OK”

LibGDX Notes
22
10. Highlight the package and create the Java class by right-clicking and selecting New Class.
Figure 31 - Creating ViewImage class
11. Enter the Name and DO NOT forget to add Game as the superclass by clicking Browse… and
entering the name “Game”
The file contexts for ViewImage will be the same as the version in BlueJ but with the package line. In
addition, Eclipse will assist you when finding and adding the right imports to the file.
Table 6 - Eclipse version of ViewImage.java
package com.att.brainycode.libgdx.examples; import com.badlogic.gdx.Game; import com.badlogic.gdx.Gdx; import com.badlogic.gdx.files.FileHandle; import com.badlogic.gdx.graphics.GL20; import com.badlogic.gdx.graphics.Texture; import com.badlogic.gdx.graphics.g2d.SpriteBatch; public class ViewImage extends Game {

LibGDX Notes
23
private Texture texture; private SpriteBatch batch; @Override public void create() { FileHandle worldFile = Gdx.files.internal("pong.png"); texture = new Texture(worldFile); batch = new SpriteBatch(); } public void render() { Gdx.gl.glClearColor(1, 1, 1, 1); Gdx.gl.glClear(GL20.GL_COLOR_BUFFER_BIT); batch.begin(); batch.draw(texture, 0, 120); batch.end(); } }
12. Create a new class named GameLauncher.
Table 7 - Eclipse version of GameLauncher.java
package com.att.brainycode.libgdx.examples; import com.badlogic.gdx.backends.lwjgl.LwjglApplication; public class GameLauncher { public static void main(String[] args) { ViewImage myProgram = new ViewImage(); LwjglApplication launcher = new LwjglApplication(myProgram); } }

LibGDX Notes
24
13. Try to run the program (I know it will not work since we have not placed the pong.png image in
a location that it can be found). To run either click on the “Run” icon.
Figure 32- Eclipse run icon
Figure 33 - Run As dialog
14. Select Run As “Java Application”
You will see the following expected error message:
Table 8- Eclipse console error message
Exception in thread "LWJGL Application" com.badlogic.gdx.utils.GdxRuntimeException: Couldn't load file: pong.png at com.badlogic.gdx.graphics.Pixmap.<init>(Pixmap.java:140) at com.badlogic.gdx.graphics.TextureData$Factory.loadFromFile(TextureData.java:98) at com.badlogic.gdx.graphics.Texture.<init>(Texture.java:100) at com.badlogic.gdx.graphics.Texture.<init>(Texture.java:92)

LibGDX Notes
25
at com.att.brainycode.libgdx.examples.ViewImage.create(ViewImage.java:18) at com.badlogic.gdx.backends.lwjgl.LwjglApplication.mainLoop(LwjglApplication.java:143) at com.badlogic.gdx.backends.lwjgl.LwjglApplication$1.run(LwjglApplication.java:120) Caused by: com.badlogic.gdx.utils.GdxRuntimeException: File not found: pong.png (Internal) at com.badlogic.gdx.files.FileHandle.read(FileHandle.java:136) at com.badlogic.gdx.files.FileHandle.readBytes(FileHandle.java:222) at com.badlogic.gdx.graphics.Pixmap.<init>(Pixmap.java:137) ... 6 more
15. Highlight the project and create new folder New Folder. Name it res (for resources)
16. Copy the pong.png image to the res folder.
Figure 34 - New "res" folder
We will need to add this directory to the class path so that all our resources are located.
17. Again right-click the project and select “Properties” and Java Build Path. Click on “Add External
Class Folder…” button on the Libraries tab.
18. Navigate to the res folder in your project and click “OK”

LibGDX Notes
26
Figure 35 - Navigating to the res project
You will now see res added to the classpath:
Figure 36 - Adding res to the classpath
19. Run GameLauncher again you will now see the pong image.

LibGDX Notes
27
Figure 37 - Pong image from Eclipse.
The eclipse IDE is more complicated that BlueJ but it provides too many advantages that I require when
doing development.
See Appendix A for how to use NetBeans with LibGDX.
The LibGDX Framework
The Game Loop
One of the most fundamental design structures used in game programs is the game loop. A simple and
basic game loop is the following3:
boolean running = true; while (!running) { updateGameState(); displayGameState(); }
There are two things the program does in the game loop update and display. In the
updateGameState() all the monsters are moved, killed, or made to appear and in the
displayGameState() the screen is updated with your new weapon being shown and the last monster
slain now lays on the ground wincing in pain. The running flag is set to false when you win or lose or
pause the game.
Before the game enters the game loop the game resources are processed. For example, the images and
sound effects are read in. This function is done in the create() method in our project. The game loop
3 From http://obviam.net/index.php/the-android-game-loop/

LibGDX Notes
28
above is captured in our render() method. The one issue is how often is the game loop executed?
Usually most programs try for 60 loops per second or more commonly referred to as frames per second
(FPS).
An accurate view of the game loop is the following image4:
Figure 38 - Game Loop
As you can see the first step (outside the game loop itself) is the Initialize the Game Engine (the user
may not be starting at Level 1) and load the resources (images, sounds, etc) and then we get into the
game loop where we process input (check if the user clicked on jump button), simulate the game world
(update positions) and then render or display the screen. We then check if the game should be still
running (is the game over, did use pause, etc). When the game ends all the resources are unloaded and
the game exits.
The nice thing about the LibGDX framework is that it hides the game loop from us (since all games have
it!) and we just have to create and fill in the relevant methods (e.g render()).
The LibGDX Modules
See: https://github.com/libgdx/libgdx/wiki/The-application-framework
LibGDX consists of five interfaces that provide means to interact with the operating system.
Application: runs the application and informs an API client about application level events, such
as window resizing. Provides logging facilities and quering methods (e.g. memory usage).
4 http://gamyguru.files.wordpress.com/2012/07/game-loop2.png

LibGDX Notes
29
Files: exposes the underlying file system(s) of the platform.
Input: informs the API client of user input such as mouse, keyboard, touch or accelerometer
events. The framework supports both polling and event driven processing.
Net*: provides a mean to access resources via HTTP/HTTPS in a cross-platform way, as well as
create TCP server and client sockets.
Audio: provides a mean to playback sound effects and streaming music as well as directly
accessing audio devices for PCM audio input/output.
Graphics: exposes OpenGL ES 2.0 (where available) and allows quering/setting video modes and
similar things.
The only platform specific code are the starter classes (launcher classes). For each platform that is
targeted, a piece of code will instantiate a concrete implementation of the Application interface. In our
desktop example we have:
Table 9- Desktop specific starter class
ViewImage myProgram = new ViewImage(); LwjglApplication launcher = new LwjglApplication(myProgram);
For an Android environment we would have:
Figure 39 - Android starter class
What is OpenGL ES? OpenGL for Embedded Systems (OpenGL ES or GLES) is a subset of the OpenGL computer graphics rendering application programming interface (API) for rendering 2D and 3D computer graphics. Typically we create computer or video games that are hardware-accelerated using graphics processing unit (GPU). The API is designed for embedded systems like smartphones, computer tablets, and video game consoles. The API is cross-language and multi-platform. From: https://en.wikipedia.org/wiki/OpenGL_ES

LibGDX Notes
30
Using Texture
From: https://github.com/mattdesl/lwjgl-basics/wiki/LibGDX-Textures
An image is simply an array of colors, rendered in two dimensions. Let’s take a close look at a very small
image – a heart sprite and a half-heart sprite.
Figure 40 - Heart and half-heart sprite
There a number of ways the above image(s) are stored on a computer. The most common format used is
RGBA with 8-bits per channels. RGB stands for red, green and blue channels. A refers to the alpha
(transparency) channel.
Here are the three different ways of storing the color red:
The RGBA byte array representing the above image (32x16 pixels) might look like this:
Figure 41 - Byte array of heart image
A single pixel is made up of four bytes. The size of the array is WIDTH * HEIGHT * BPP, where BPP stands
for bytes per pixel. An array of bytes can be rather large that is why compression like PNG or JPEG is
used.

LibGDX Notes
31
In OpenGL ES we use textures to store image data. OpenGL ES textures do not only store image data;
they are simply float arrays stored on the GPU, so they are also useful for shadow mapping and other
advanced techniques.
The basic steps of getting an image into a texture are as follows:
1. Decode into RGBA bytes
2. Get a new texture ID
3. Bind that texture
4. Set up any texture parameters
5. Upload the RGBA bytes to OpenGL
Using LibGDX hides all the details for us. A Texture class decodes an image and loads it into GPU
memory. The image file should be powers of two (16x16, 64x256, etc) for compatibility and
performance reasons.
Each texture is created and passed to a SpriteBatch to be drawn.
A TextureRegion
TODO
Using SpriteBatch
From: https://github.com/libgdx/libgdx/wiki/Spritebatch,-Textureregions,-and-Sprites
If you look up the JavaDoc for SpriteBatch you will read: “Draws batched quads using indices.” It
probably does not have much meaning if you are not familiar with OpenGL.
An image that has been decoded from its original format (e.g PNG) and uploaded to the GPU is called a
texture. To draw a texture, geometry is described and the texture is applied by specifying where each
vertex in the geometry corresponds on the texture. For example, the geometry could be a rectangle and
the texture could be applied so that each corner of the rectangle corresponds to a corner of the texture.
A rectangle that is a subnet of a texture is called a texture region.
To do the actual drawing, first the texture is bound (i.e. made the current texture), then the geometry is
given to OpenGL to draw. The size and position on the screen that the texture is drawn is determined by
both the geometry and how the OpenGL viewport is configured. Many 2D games configure the viewport
to match the screen resolution. This means that the geometry is specified in pixels, which makes it easy
to draw textures in the appropriate size and position on the screen.
It is very common to draw a texture mapped to rectangular geometry. It is also very common to draw
the same texture or various regions of that texture many times. It would be inefficient to send each
rectangle one at a time to the GPU to be drawn. Instead, many rectangles for the same texture can be
described and sent to the GPU all at once. This is what the SpriteBatch class does.
SpriteBatch is given a texture and coordinates for each rectangle to be drawn. It collects the
geometry without submitting it to the GPU. If it is given a texture different than the last texture, then it

LibGDX Notes
32
binds the last texture, submits the collected geometry to be drawn, and begins collecting geometry for
the new texture.
It is common to store many smaller images in a larger image and the draw regions for the larger image
to both maximize geometry batching and avoid texture changes (e.g. using a sprite sheet).
Figure 42 - Example use of SpriteBatch
All SpriteBatch drawing class must be made between the begin and end methods. Non-
SpriteBatch drawing cannot occur between begin and end.
SpriteBatch assumes the active texture unit is 0. When using custom shaders and binding textures
yourself, you can reset this with the following code:
Figure 43 - resetting current texture
KeyPresses and Moving an Object
TODO: An example that moves an image on the screen
Collision Detection
TODO: An example where one image remains stable

LibGDX Notes
33
The Sprite Class
Custom Sprite Class
The Stage Class
The Actor Class
TODO: An example using the Actor class and Stage.
Implementing Animation
The Action Class
MathUtils
Using a Camera
Multiple Screens

LibGDX Notes
34

LibGDX Notes
35
References
1. Curry, Michael. Java Game Programming. Self-published.
2. Stemkoski, Lee. Beginning Java Game Development with LibGDX. 2015. APRESS.
3. Nair, Suryakumar Balakrishan. Learning LibGDX Game Development. 2015. Packt Publishing.
4. Marquez, David Saltares. LibGDX Cross-platform Game Development Cookbook. 2014. Packt
Publishing.
5. Cook, James. LibGDX Game Development By Example. 2015. Packt Publishing.
6. Bose, Juwal. LibGDX Game Development Essentials. 2014. Packt Publishing.

LibGDX Notes
36
Appendix A – Using NetBeans and LibGDX
TODO