lesson 7: plastic polymers - calrecycle home page€“6 module, unit 2: reducing, reusing, and...
TRANSCRIPT

4–6 Module, Unit 2: Reducing, Reusing, and Recycling Lesson 7: Plastic Polymers383
4–6 Module
Unit 2
Lesson 7: Plastic PolymersLesson’s Concepts• Properties of different plastics can be identified.• Some plastics can be reused or recycled.
PURPOSEStudents examine the physical properties of different types of plastic and learn ways to reuse plastic products.
OVERVIEWIn this lesson students will:• Conduct a series of tests to determine the
properties of different types of plastics. • Test plastics for decomposition by bury-
ing them for several weeks.• Develop a rubric for assessing the value
of their invention of new uses for a plas-tic item.
• Invent new uses for a plastic item. • Audit the plastic waste generated in their
homes.• Identify new practices which would
generate less plastic waste.
CORRELATIONS TO CALIFORNIA’S CONTENT STANDARDS AND FRAMEWORKS AND TO BENCH-MARKS FOR SCIENCE LITERACY• Students compare the properties of plas-
tics and classify them according to resin type.
- “Many forms of matter are identifi-able by their color, texture, or shape; by their hardness or flexibility . . ..” (Science Framework, page 41)
- “Through science and technology, a wide variety of materials that do not appear in nature at all have become available . . ..” (Benchmarks for Science Literacy, page 188)
- Students “classify objects . . . based on appropriate criteria.” (Science Content Standards, Grades K–12; Grade 5; Investigation and Experi-mentation, Standard 6a)
- Students “analyze problems by iden-tifying relationships, distinguishing relevant from irrelevant information, sequencing and prioritizing infor-mation, and observing patterns.” (Mathematics Content Standards for California Public Schools, Kindergarten Through Grade Twelve, page 19)
• Students invent new uses for a plastic item.
- “Students create original artworks based on personal experiences or re-sponses.” (Visual and Performing Arts Framework, Visual Arts Education: Creative Expression Component, Goal 4, page 101)
SCIENTIFIC THINKING PROCESSESobserving, communicating, comparing, clas-sifying, relating
Time30 minutes to prepare for the lesson; 90 minutes to implement each of the three parts in the lesson, plus time throughout the week for students to work on their inventions; and 45–60 minutes after the decomposition test is completed (about three months later)
Vocabularyplastic, polymer

CLOSING THE LOOP4–6 Module, Unit 2: Reducing,
Reusing, and Recycling384
Preparation___ 1. Read the “Background Information for
the Teacher” at the end of this lesson.___ 2. About a week before you begin this les-
son, ask students to bring to class a vari-ety of plastic containers. Emphasize that these plastic containers should be rinsed out and should not have contained any hazardous substances. From each type of plastic, plastic container codes 1, 2, 3, and 6 (the code is usually embossed on the bottom of the container), cut a piece ap-proximately two inches square and label with the plastic container code number, using a permanent marker. Make a set of these for each group of three or four students.
Note: The terms “plastic container code”, “resin code”, “plastic’s resin number”, “code number”, and “plastic code number” are used interchange-ably to describe the number embossed on the bottom of plastic containers.___ 3. Find out what plastics, if any, are recy-
cled in your community.___ 4. Make a copy of “Test Your Plastic Poly-
mers” (page 391) and “Plastics Coding System” (page 393) for each group of three or four students; and “Plastics at Home” (page 396) and “Plan for Invent-ing a New Use for a Plastic Object” (page 395) for each student.
MATERIALSFor “Pre-Activity Questions”___ Plastic sandwich bag___ Sharpened pencil___ Sink or bucket
For “Part I, Analyzing the Properties of Plastics”___ A piece of 2-inch-square plastic from each
of the following plastic containers, for each group of students:
___ Polyethylene terephthalate (PETE) (plastic container code #1 from 2-liter soft drink bottles)
___ High density polyethylene (HDPE) (plastic container code #2 from gallon jugs for milk or water)
___ Polyvinyl chloride (PVC) (plastic container code #3 from glass cleaner bottles)
___ Polystyrene (PS) (plastic container code #6 from foamed plastic plates, coffee cups, egg containers)
___ Several plastic dish pans or buckets for the float test
___ A copy of “Test Your Plastic Polymers” and “Plastics Coding System” for each group of three or four students
For “Part II, Inventing New Use for a Plastic Item”___ A plastic item for each student ___ A copy of “Plan for Inventing a New Use for
a Plastic Object” for each student___ Art supplies
For “Part III, Testing to Determine Whether Plas-tics Biodegrade or Break Down”___ A piece of 2-inch-square plastic from each
plastic resin used in this lesson___ A piece of 2-inch-square paper from four dif-
ferent types of paper (e.g., cardboard, copy paper, construction paper, and paper towel)
___ Two nylon stockings or mesh bags (e.g., onion bags)
___ Outdoor planter, garden area, or other area in which the bags can be buried; or a large (12- to 16-inch) flower pot
For “Application”___ A copy of “Plastics at Home” for each student
PRE-ACTIVITY QUESTIONSA. Write on the chalkboard or on a piece of
butcher paper: “What We Know About Plastics.” Ask students to describe what they know about plastics, as you record their com-ments on the chalkboard or butcher paper. For example, can they tell you what are plas-tics and from what they are made?
What We Know About PlasticsB. Write on the chalkboard or on a piece of
butcher paper: “What We Would Like to
• Made from chemicals
• Good for storage• Can seal liquids• Can be air
tight—nonpo-rous (air can’t go through)
• Strong• Tough• Durable• Melts• There are differ-
ent kinds• Birds get stuck in
six-pack holders
Submitted by Janet Cohen’s sixth-grade class, Gold Trail Elementary School, Gold Trail Union School District.

4–6 Module, Unit 2: Reducing, Reusing, and Recycling Lesson 7: Plastic Polymers385
4–6 Module
Unit 2
(Use school’s letterhead.)Dear Parent or Guardian,
Please read the following information with your child:
We are studying the properties of different plastics. Please send with your child by one item from each of the following categories of plastic:
___ Polyethylene terephthalate (PETE) (plastic container code #1: 2-liter soft drink bottle)
___ High density polyethylene (HDPE) (plastic container code #2: gallon jug for milk or water)
___ Polyvinyl chloride (PVC) (plastic container code #3: glass cleaner bottle) (Please rinse the bottle.)
___ Polystyrene (PS) (plastic container code #6: foamed plastic plate, coffee cup, egg container)
Please do not send any plastic containers that have held hazardous substances.Thank you,
Know About Plastics.” Record students’ questions. Keep these questions until the end of this lesson. Encourage students to conduct research on any unanswered questions about plastics at the end of this lesson.
C. Conduct the following demonstration: • Fill a plastic sandwich bag with water. • Ask for a student volunteer who is
brave enough to stand under the bag while you push a sharpened pencil through it.
• Hold the bag over the volunteer’s head. Jokingly tell the class that this event has never before been viewed on national television. Slowly rotate the sharp pencil in through one side of the plastic bag and out the other side. No water should leak out. (Do not push the pencil through completely.)
• Ask students to hypothesize why the bag did not leak when the pencil was pushed through.
• Have the volunteer take the bag over to a sink or a bucket and pull the pencil out to demonstrate that a “trick” bag was not used.
• Explain that plastics are formed into long chains, called polymers, by linking together small single chemical units, called monomers. Therefore, polymers are chemical compounds consisting of
repeating monomers that form chains. As the pencil is pushed through the bag, it slips between these chains. Unbroken, the chains slide around the shape of the pencil, sealing in the water. A dull pencil, however, breaks the chains and causes the bag to leak. When the pencil is removed, the poly-mers may move somewhat towards their original shape, but not enough to close the large pencil hole.
PROCEDURE
Part I, Analyzing the Properties of PlasticsA. Provide a set of equal-sized pieces from
four different types of plastics (soda bottle, milk jug, glass cleaner bottle, polystyrene cup or plate) and a copy of the chart, “Test Your Plastic Polymers,” for each group. Ask students to discuss in their groups what type of results they expect to observe from their investiga-tions.
B. Ask students to look at the number found inside a triangle on the bottom of each container. Tell them to record on their charts the plastic container code number on the four types of plastics.
C. Have students investigate properties of plastics by conducting the following four tests on each of the four pieces of plastic:

CLOSING THE LOOP4–6 Module, Unit 2: Reducing,
Reusing, and Recycling386
1. Texture test 2. Flex tests (to determine pliability) 3. Float test 4. Scratch test (Students can use their
fingernails or a paper clip.)D. Distribute a copy of “Plastics Coding
System” to each group. Ask students to complete their charts, “Test Your Plastic Polymers.”
E. Encourage groups to share their results. Discuss the properties of the different types of plastics (e.g., some are stiff, oth-ers are light and flexible). Discuss why a particular type of plastic might be chosen for each type of package.
The following are what students should discover from their tests:
1. Polyethylene terephthalate (PETE), plastic container code #1:
a. Smooth b. Highly resilient c. Sinks in water (specific gravity:
1.40) d. Hard to scratch 2. High density polyethylene (HDPE),
plastic container code #2: a. Textured b. Semirigid to flexible; does not crack
when bent
c. Floats in water (specific gravity: 0.95) d. Hard to scratch 3. Polyvinyl chloride (PVC), plastic con-
tainer code #3: a. Smooth b. Forms white line when bent c. Sinks in water (specific gravity: 1.30) d. Scratches easily 4. Polystyrene (PS), plastic container code
#6: a. It is smooth. b. Foamed PS is semirigid, but breaks
easily. c. Foamed PS floats (specific gravity:
less than 1.00). Note: The specific gravity depends on the extent to which the resin is foamed; unfoamed PS sinks (specific gravity: 1.05).
d. Foamed PS scratches easily.Note: Specific gravity is the ratio of the density of the plastic to the density of water, which is 1.0. Plastics with higher densities than water will sink. However, some plastics that are supposed to sink floated during field tests.F. Once students have charted the different
properties of the four plastics, ask the fol-lowing questions:
• Why are there many different kinds of plastic in use? (One answer, based on the chemistry of plastics, is that differ-ent resins are suited to different uses, depending on their strength, flexibility, and resistance to specific chemicals.)
• Why do plastics have to be separated before they can be recycled? Each plastic has a different set of properties and is used for specific purposes. If mixed and melted together, the plastics would not have the spe-cific properties needed for the specific uses.
• Which plastics are recycled in our com-munity? (You might need to tell stu-dents or ask them to find out.) Note that plastic containers marked with plastic code numbers 1 and 2 are commonly re-cycled. Other plastics, usually not used for beverage containers, can possibly be recycled but are often not accepted at most recycling centers. Many types of plastic are not being recycled because there are not enough companies that
A student in Nona Reimer’s fifth-grade class at John Malcom Elementary School determines a container’s type of plastic resin.

4–6 Module, Unit 2: Reducing, Reusing, and Recycling Lesson 7: Plastic Polymers387
4–6 Module
Unit 2
make products from recycled plastics due in part to the difficulty of separat-ing different types of plastic resin.
G. Explain to students that the recycling process for plastic containers includes: (1) sorting the containers by their resin types; (2) cutting the plastic into tiny pieces, called pellets; (3) melting the pellets; and (4) reshaping into new plastic objects.
Part II, Inventing New Use for a Plastic ItemA. Tell students that they will be developing
a new use for a plastic item that was going to be thrown into a garbage can. They will need to make some adjustment to the way the plastic item looks at this time. Show the different plastic items brought by students. Select one or two items, brain-storm ideas with students for new uses for this plastic item, and list the ideas on the chalkboard.
B. Develop a rubric to help students identify how they will be judged on this project. One way to do this is to complete part “C” of the rubric with minimum basic requirements. Let the students formulate, with your assistance, the “A,” “B,” and “D” parts of the rubric. Proofread the rubric together and carefully go over it to make certain every student understands every part of the criteria that make up the rubric.1 An example of a rubric is provided at the end of this lesson (page 394).
C. Allow students to select a plastic item from those brought in by students. One way to do this is to put all the plastic items in a box and have students select one with their eyes closed.
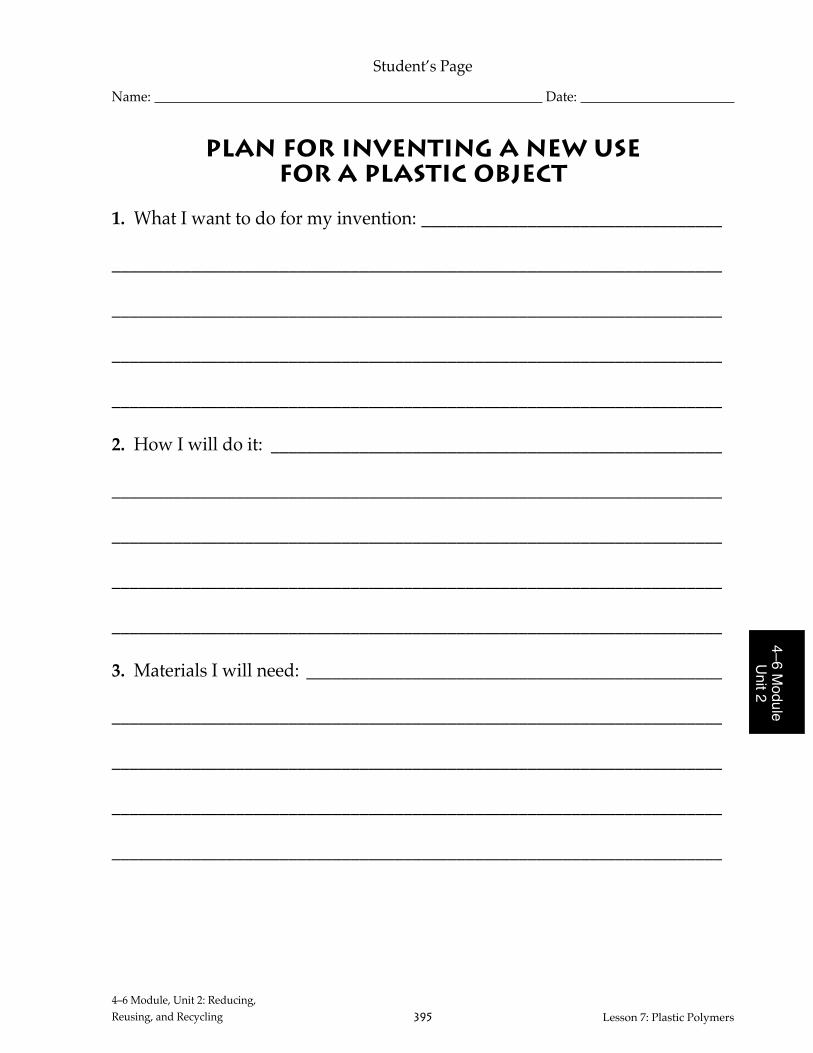
• Provide a copy of “Plan for Inventing a New Use for a Plastic Object” for each student. Students can use an idea from the list brainstormed by the class or come up with another idea. Have students complete their plans about what they are going to make, how they will make it, and what materials they will need to make it.
• Review and approve each plan. • Provide additional materials for stu-
dents to facilitate their inventions.D. Agree on a time when the projects (and
reports, if included in the rubric) are due. Provide time throughout the week for students to complete their projects.
Note: It is recommended that you provide instructions for a related project for students to do if they finish early. E. Allow enough time (usually a day or two)
for students to present their project and for the class to grade each project, using the established rubric as a guideline.
Students from Janet Cohen’s sixth-grade class at Gold Trail Elementary School conduct a float test on differ-ent pieces of plastic.
A group of students from Janet Cohen’s sixth-grade class at Gold Trail Elementary School design a project using 2-liter plastic bottles.
1Jacqueline Faber and Melissa C. Williams, PBL: Beginning Steps—It’s a Process! Paper presented at the Fifth Annual Confer-ence on Project–Based Learning, March 10, 1997.

CLOSING THE LOOP4–6 Module, Unit 2: Reducing,
Reusing, and Recycling388
Part III, Testing to Determine Wheth-er Plastics Biodegrade or Break DownA. Place pieces from the four types of plastics
in a nylon stocking or mesh bag. To have something to compare, also place two-inch pieces of four different types of paper (e.g., cardboard, copy paper, construction paper, paper towel) in another nylon stocking or mesh bag. Bury both stockings or mesh bags in an outdoor planter, garden area, or other area. Do not use sterilized potting soil, because it contains no microorganisms to decompose material. Keep the soil moist. Check the item buried in three months.
Note: The items can also be buried in a large flower pot and kept indoors.Note: Samples from four types of plastic can also be nailed on pieces of wood and placed in the sunlight to see whether they break down in the presence of sunlight.B. Discuss the concept of “biodegradable”
plastic bags. Mention that most “biodegrad-able” plastics are made by splicing mol-ecules of cellulose in between the regular polymer chains. Certain organisms possess the enzymes necessary to break down the cellulose molecules. When conditions are right, they can digest the cellulose, split-ting up the synthetic polymer chains in the process. As a result, the plastic bag breaks into little bits of nonbiodegradable plastic. Ask students what the problems might be with little pieces of plastic.
Three Months LaterC. After three months have students unbury
and check their plastics and paper prod-ucts. Discuss with students:
• What did we find out? • Why do plastics not biodegrade? One
hypothesis is that since plastic poly-mers are synthetic and have existed on Earth for such a short time, few, if any, organisms have developed en-zymes that can break down their long polymer chains. Ask students how a species might evolve or develop such a capability. How might this capability benefit the species that evolves it?
• Should we bury these items for an ad-ditional amount of time?
ApplicationA. Ask students to look at the chart devel-
oped in “Pre-Activity Questions.” What can we add about what we know about plastics? List students’ responses on the chart. Are there any corrections needed to make the statements more accurate?
B. Discuss ways that students can reuse the plastic containers. Generate a list and post it in the classroom. Students can illustrate each use and add new uses. Encourage students to bring plastics from home and think of ways to reuse them for classroom use.
C. Ask students to write in their journals what they can do to generate less plastic waste.
D. Ask students which of the plastic con-tainer code numbers they might select when deciding on what product to buy in a plastic container. Numbers 1 (PETE) or 2 (HDPE.) Ask them to explain their an-swers. These plastics are the ones most often recycled. Share with students that although we may place our plastic containers in a recycling bin, it does not mean that they will be recycled. Several types of plastic containers are not recycled, because prod-ucts made from recycled materials are not always profitable.
Homework Assignment: Provide a copy of “Plastics at Home” for each student. Ask stu-dents to conduct an audit of kitchen cupboards
Two students from Janet Cohen’s sixth-grade class at Gold Trail Elementary School present the project they made from a plastic box.

4–6 Module, Unit 2: Reducing, Reusing, and Recycling Lesson 7: Plastic Polymers389
4–6 Module
Unit 2
in their homes and to complete the chart, “Plas-tics at Home.” They should identify eight plastic containers, such as a milk jug, polystyrene plate, and soda bottle, and record the product and brand (including the size of product); plastic container code number; whether the plastic is recyclable in their community; and the way it will probably be disposed (landfill/recycling center). Then the students should list ways each plastic product can be reused. Finally, they will list some reusable and recyclable substitutes for three of the plastic products that were going to go to the landfill.Note: Some plastic products, such as plastic utensils, or plastic bags might not have a code number.E. Have students share the results of their
homework assignment. Review what plastics are recyclable in your community and what plastics will probably be placed in landfills.
EXTENSIONSA. Students can conduct additional tests on
plastic. • To differentiate plastic container code
#2 (HDPE) from #4 (LDPE) and #5 (PP), use isopropyl alcohol.
Plastic #2 will sink while plastics #4 and #5 will float in isopropyl alcohol.
• To differentiate between plastic con-tainer code #4 and code #5, use Mazola brand corn oil (which has the correct density to separate #4 and #5) to test for buoyancy. Plastic #4 sinks in the oil and plastic #5 floats on the oil.
Safety Note: When using isopropyl alcohol, stu-dents must wear gloves and protective eye gear.B. Ask students to think of some everyday
items made of plastic and the qualities that they ought to possess. Sample items might include car bumpers, cutting boards, ice cube trays, and laptop computer cases. Have students guess what kinds of plastic these items might be made from and then verify—through testing, reading manufac-turer’s specifications, or locating informa-tion in other sources—to learn what type of plastic they are actually made from. What happens to these items once they are no longer wanted? Ask students to report their findings.
C. Look at the chart developed in “Pre-Ac-tivity Questions.” Ask students to select any topic to research listed under “What We Would Like to Know About Plastics.” Have students share their findings with the class.
D. To test whether degradable plastic really degrades, do the following:
• Obtain examples of the following plastics: (1) photodegradable; (2) corn-starch, biodegradable; (3) nondegrad-able from a water or milk jug; and (4) nondegradable plastic wrap.
• Cut four equal-sized pieces from each type of plastic.
• Nail a sample of each type of plastic on four separate blocks of wood. Label each block of wood, “A,” “B,” “C,” and “D.”
• Place “A” in an area that receives a lot of sunlight, but where it will not be disturbed.
• Bury “B” in the ground or in a planter box.
• Place “C” in water. • Allow the students to decide where to
place block “D.” • Have students record any changes ev-
ery week for the first month and every month after that for several months.
RESOURCESVideosKids Talkin’ Trash. San Leandro, Calif.: Alameda County Waste Management Authority, 1995 (14 minutes). Distributed by the California Integrated Waste Management Board
Students learn how to make less garbage and protect the environment by practicing the four R’s: reduce, reuse, recycle, and rot.
Reuse. Protecting Our Environment series. Chatsworth, Calif.: Pied Piper/Aims Media, 1992 (13 minutes).
Shows how household items can be reused. Includes information how to reuse yard trimmings, containers, and appliances. Also available in Spanish. For grades four through six.

CLOSING THE LOOP4–6 Module, Unit 2: Reducing,
Reusing, and Recycling390
WebsiteFor information on plastics, visit the website for the Plastics Marketing Guide at: www.ciwmb.ca.gov/Plastic/Markets/Default.htm.
BookThe Plastic Waste Primer: A Handbook for Citizens. Prepared by the League of Women Voters Educa-tion Fund. New York: Lyons & Burford, Publish-ers, 1993.
Activity GuidePlastic Eliminators: Protecting California Shore-lines (Learning Activities for Youth Groups, Age 10–15). Santa Barbara: California Aquatic Science Education Consortium, nd.
Contains activities that describe for stu-dents how to deal with the problems of plastic debris that affect marine life, how to recycle plastics, and how to participate in the Adopt-a-Beach program sponsored by the California Coastal Commission.
To help consumers identify more easily the different types of plas-tic, the industry has developed a numbered coding system. These

4–6 Module, Unit 2: Reducing, Reusing, and Recycling Lesson 7: Plastic Polymers391
4–6 Module
Unit 2
Stud
ent’s
Pag
e
Te
st Y
ou
r P
last
ic P
oly
me
rs
Plas
tic it
em
Soda
bot
tle
Milk
, wat
er,
or ju
ice j
ug
Gla
ss cl
eane
r bo
ttle
Foam
ed p
last
ic
cup,
egg
carto
n,
or p
late
The
plas
tic
cont
aine
r cod
e
(e.g
., 1,
2, 3
, 6)
Type
of
plas
tic (e
.g.,
PETE
, HD
PE,
PVC
, PS)
Floa
t tes
t: si
nk o
r floa
t
Text
ure
test
: sm
ooth
or
text
ured
Flex
test
(D
oes i
t be
nd?)
: ye
s or n
oSc
ratc
h te
st:
easy
or h
ard

CLOSING THE LOOP4–6 Module, Unit 2: Reducing,
Reusing, and Recycling392
Teac
her’
s Pag
e
an
swe
rs
to
“T
est
Yo
ur
Pla
stic
Po
lym
er
s”
Plas
tic it
em
Soda
bot
tle
1 PE
TE
Sink
s Sm
ooth
Ye
s H
ard
Milk
, wat
er,
2 H
DPE
Fl
oats
Te
xtur
ed
Yes
Har
d or
juic
e jug
Gla
ss cl
eane
r 3
PVC
Sink
s Sm
ooth
Ye
s, fo
rms w
hite
Ea
sy
bottl
e
lin
e whe
n be
nt
Foam
ed p
last
ic
6 PS
(pol
ysty
rene
Fl
oats
Sm
ooth
N
o Ea
sy
cup,
egg
carto
n,
th
at is
in th
e
(b
reak
s eas
ily)
or
pla
te
fo
rm o
f foa
m)
The
plas
tic’s
co
ntai
ner c
ode
(e
.g.,
1, 2
, 3, 6
)
Type
of
plas
tic (e
.g.,
PETE
, HD
PE,
PVC
, PS)
Floa
t tes
t: si
nk o
r floa
t
Text
ure
test
: sm
ooth
or
text
ured
Flex
test
(D
oes i
t be
nd?)
: ye
s or n
oSc
ratc
h te
st:
easy
or h
ard

4–6 Module, Unit 2: Reducing, Reusing, and Recycling Lesson 7: Plastic Polymers393
4–6 Module
Unit 2
code numbers are embossed on the bottom of containers and other plastic items or printed on plastic bags. Number 1 and the unpigmented 2 types of plastics are most commonly recycled.
PETE (polyethylene terephthalate): Plastic is soft, generally clear. This plastic is used for food and beverage containers, such as soda bottles, cooking oil bottles, and peanut butter jars.
HDPE (high density polyethylene): Plastic is translucent or white or colored. This plastic is used for milk, water, and juice bottles, bleach and detergent bottles, margarine tubs, and some grocery bags.
PVC VINYL (polyvinyl chloride): Color of plastic varies. This plastic is used in glass cleaner bottles, some cooking oil contain-ers, and some detergent powders. (PVC has properties of good chemical resistance, which is important for holding household detergents and other harsh materials.)
LDPE (low-density polyethylene): Color varies. This plastic is used in food packaging, shrink wrap, carry-out bags, and heavy-duty bags.
PP (polypropylene): Color of plastic varies. This plastic is used in butter and margarine tubs, yogurt containers, screw-on caps, and drinking straws.
PS (polystyrene): Plastic may be clear, hard, or in foamed form. This plastic is used in cutlery and plates, foamed plastic coffee cups, egg cartons, meat trays, and yogurt cups.
OTHER: Color varies. Containers made of more than one resin type. This plastic is used in squeezable syrup and condiment bottles and in some microwave food trays.
Adapted from National Polystyrene Recycling Company, How-to-Recycle Polystyrene, 25 Tri-State International, Lincolnshire, IL 60069; (707) 945-2139.
Student’s Page
plastics coding system

CLOSING THE LOOP4–6 Module, Unit 2: Reducing,
Reusing, and Recycling394
Rubric for Assessing Work on Invention of a New Use for a Plastic Object
A B C D
1. Complete a plan for inventing a new use for a plastic object.
2. Make your plastic invention.
3. Stay “on task.” If working with partners, each member has more than one job.
4. Invention is complete, and careful work with details is evident. The invention works.
5. Report on the invention is complete and neatly done.
6. Lots of time, creativity, and work have been put into your invention.
1. Complete a plan for inventing a new use for a plastic object.
2. Make your plastic invention.
3. Stay “on task.” If working with partners, each member has more than one job.
4. Invention is complete, and careful work with details is evident.
5. Report on the invention is complete and neatly done.
6. Lots of time and work have been put into your invention.
1. Complete a plan for inventing a new use for a plastic object.
2. Make your plastic invention.
3. Stay “on task.” If working with partners, each member has at least one job.
4. Invention is complete.
6. Some time and work have been put into your invention.
1. Missing any of the parts (1–3) in the plan.
2. Worked a little bit on the plastic invention
3. Did not stay on task.
4. Invention is not complete.
5. Report on the invention is incomplete.
6. Not much time or work has been put into your invention.
5. Report on the invention is complete.
4–6 Module, Unit 2: Reducing, Reusing, and Recycling Lesson 7: Plastic Polymers395
4–6 Module
Unit 2
Student’s Page
Name: Date:
Plan for Inventing a New Use for a Plastic Object
1. What I want to do for my invention: __________________________________
_____________________________________________________________________
_____________________________________________________________________
_____________________________________________________________________
_____________________________________________________________________
2. How I will do it: ___________________________________________________
_____________________________________________________________________
_____________________________________________________________________
_____________________________________________________________________
_____________________________________________________________________
3. Materials I will need: _______________________________________________
_____________________________________________________________________
_____________________________________________________________________
_____________________________________________________________________
_____________________________________________________________________

CLOSING THE LOOP4–6 Module, Unit 2: Reducing,
Reusing, and Recycling396
Student’s Page
Name: Date:
Plastics at Home
Example: For a storage container; gallon of milk 2 Yes Recycling center planter; piggy bank. 1.
2.
3.
4.
5.
6.
7.
8.
List some reusable and recyclable substitutes for three of the plastic containers listed above that are not reusable or recyclable and will probably be sent to a landfill.
1.
2.
3.
Plastic container
code number
Recyclable in your
community? Yes/No
Disposal method for this plastic
(landfill or recycling center)
How can this plastic be reused?
Product and size of product in a
plastic container

4–6 Module, Unit 2: Reducing, Reusing, and Recycling Lesson 7: Plastic Polymers397
4–6 Module
Unit 2
2From Hands on Plastics: A Scientific Investigation Kit. Columbus, Ohio: American Plastics Council Incorporated, 1997, p. 2.
3Written communication from Edgar Rojas, Integrated Waste Management Specialist, Secondary Materials Section, California Integrated Waste Management Board, October 20, 1998.
The very first plastics were made from corn-starch, but most plastics today are made from natural gas and crude oil. Plastics are made by linking together small single chemical units, called monomers, in repetition to build one large chain-like molecule, called a polymer. Some polymers are natural substances that come from vegetables and animal sources. They include the horns of animals, tortoise shell from the hawksbill turtle, rosin from the sap of pine trees, and asphalt from decayed plants and animals.2 The plastic polymers are made from hydrogen and carbon elements, sometimes in combina-tion with small amounts of oxygen, nitrogen, and other organic and inorganic compounds. For example, polypropylene and polystyrene are polymers that contain only carbon and hydrogen. Nylon also contains nitrogen; and polyvinyl chloride contains chlorine. When re-arranged chemically, a solid resin is produced. The resins are used to make hundreds of dif-ferent plastics, all of which fall into two basic categories: thermoplastics and thermosets.
Thermoplastics are formed by combining the same polymer molecules together, like mol-ecules of water. Thermoplastics liquefy at high temperatures and solidify when cool. This property makes it easy to melt the plastic and reform it into new objects. Thermoplastics are used primarily for packaging. Specific types of thermoplastic are polyethylene, polystyrene, polyvinyl chloride, and polypropylene. (For descriptions of these plastics, see “Plastics Cod-ing System” in this lesson.)
Thermosets are formed by combining different polymer molecules. Once linked together in a chemical reaction, they are virtually impossible to separate. They cannot be melted and re-formed into new shapes, and this makes them difficult to recycle. Thermosets are widely used in furniture, toys, tableware, computer casings, and other permanent uses requiring a hard plastic. Polyester, epoxies, and melamine are all thermoset plastics. The various types of rigid plastic containers are coded with numbers to indicate the types of resin from which they were made. These plastic container code numbers are embossed in the bottoms of each container. Plastics with codes 1 and 2 are commonly recycled because they are present in large quantities and have more markets available. At this time only PETE bottles and unpigmented (clear) HDPE bottles are generally recyclable. According to California Integrated Waste Man-agement Board’s estimates, only 3.5 percent of all plastics were diverted from landfills in 1995. Unfortunately, many types of plastic are not being recycled because there are not enough companies that make products from recycled plastic, due in part to the difficulty of separat-ing different types of plastic resin.Although plastics currently comprise about 6.7 percent by weight of California’s solid waste stream, their volume is three times greater than their weight, which means more space is used in the landfill.3 Plastics are the fastest growing segment of the waste stream.The popularity of plastics has increased for several reasons. Plastics are durable; light-weight; waterproof; very resistant to chemicals; easily moldable; require less secondary, protec-tive packaging; add to consumer convenience; and are relatively inexpensive to produce. Their chemical properties can be manipulated to achieve just the right combination of proper-ties for any application. The largest markets for plastics in 1994 were packaging and construc-tion industries.4 However, plastics are made
Background Information For The Teacher

CLOSING THE LOOP4–6 Module, Unit 2: Reducing,
Reusing, and Recycling398
4From Hands on Plastics: A Scientific Investigation Kit. Columbus, Ohio: American Plastics Council Incorporated, 1997, p. 3.
5Evan Hadingham and Janet Hadingham. Garbage! Where It Comes From, Where It Goes. New York: Simon and Schuster, Inc., 1990, p. 22.
from a nonrenewable resource—fossil fuels. Al-though some plastics are relatively inexpensive to manufacture, the crude oil and natural gas from which they are made come from limited supplies, the increasingly complicated extraction of which often has serious, negative environ-mental and/or political impacts.The same characteristics which make plastic an attractive packaging material, also make it a spe-cial problem in the waste stream. Though light-weight, plastic is bulky and difficult to compact for shipping or for burial in landfills. Plastic will not biodegrade. Photodegradable plastics may break down into smaller pieces when exposed to enough sunlight but will never really disappear.The durability of plastics not only makes these synthetic materials very useful but also makes them very difficult for natural systems to recycle. All life forms are dependent on the ability of bacteria, fungi, and other microorgan-isms to break down natural polymers, such as wood, cotton, and dead organisms, so that the resulting monomers can be used as the building blocks for other life forms. This is where plastic polymers become a problem, because they do not readily decompose under natural conditions. Their chemicals are locked out of the life cycles, effectively removing a natural resource from the environment. Compounds in “photodegradable” plastics have a chemical bonding that causes these plastics to disintegrate with prolonged exposure to sun-light. These plastics are being used for bever-age “six-pack” rings, shopping bags, and in some commercial agricultural applications (e.g., drying trays for raisins). They do break down into smaller pieces of plastic but do not actually decompose.
Recently the “biodegradable” label has been used for a number of plastics (particularly shopping bags) that use cornstarch or other organic substances as bonding agents in or in combination with crude oil plastics. Like pho-todegradable plastics, these plastics do break down as their organic matter decomposes, but they degrade into smaller pieces of plastic which do not biodegrade. Biodegradable plastics are generally an impractical solution for disposal of plastic waste. They are typically unable to photodegrade or biodegrade in modern landfills because of the absence of ultraviolet radiation, oxygen, and moisture. Many serious questions also remain about the toxicity of the decomposi-tion by-products associated with biodegradable plastics.The whole idea of “biodegradable” plastics is not just misleading; it could also draw attention away from more promising answers to the waste problem. These include reducing the amount of plastic we use and developing new methods to recycle the plastic we no longer need.5
True biodegradable plastics, plastics that disin-tegrate into organic substances as the result of natural processes, are largely experimental and have not come into wide use because of their relative high cost. Note: Additional information about plastics is included on the website listed in the “Resourc-es” section in this lesson; in the “Background Information for the Teacher” in the K–3 Module, Unit 2, Lesson 1; and in “Appendix C–VIII, Plastics.”