lesson 6 arc welding techniques. there are basic fundamentals of welding that must be understood
TRANSCRIPT
Lesson 6
Arc Welding
Techniques
There are basic fundamentals of welding that must be
understood.
Welding
Welding is the melting and chemical bonding of two metals. 1. Arc welding uses electricity to heat
and melt the metal. 2. A Weldor is the person doing the
welding. 3. A Welder is the machine doing the
welding.

Welding
4. Shielded metal arc welding is welding where the heat for fusion is produced with an electrical arc between a consumable stick electrode and the work piece.

Welding
5. An electrode is a bare metal rod which is usually coated with chemical compounds called flux.
The flux coatings burn in the intense heat and form a blanket of smoke and gas that shields the weld puddle from the air.

There are several other pieces of equipment and supplies
necessary in order to operate the shield metal arc welder.
2. The electrode holder grips the electrode during welding and
should be completely insulated, have a spring-grip release, and
jaws that hold rods in 60, 90, 120, and 180 degree positions in
relation to the handle.
3. The ground clamp is fastened to the work or to the welding table.
4. The chipping hammer, with a straight peen, and straight cone
with a spiral wire-grip, is necessary to remove slag from the
weld bead.
5. A wire brush is used to clean dirt, rust, and slag from metal.
6. Pliers are needed for handling hot metal. Welding gloves will be
ruined by touching hot metal because moisture will be drawn-out and the leather will harden
and shrink.
7. Safety glasses or goggles are required to protect the
operator’s eyes when chipping hot slag, and grinding or cleaning metal for joint
preparation.
8. Full gauntlet leather gloves should always be worn.
9. Upper body protection is necessary to protect against rays,
heat, spatter, and slag while welding.
10. A head shield is necessary for protection from the rays of the electric arc, and the heat and spatter of the molten metal.

11. Use only filter lenses that are clearly labeled with standard
shade numbers and be sure they meet the specifications of the welding you are performing.
A No. 10 lens meets applications up to 200 amps.
12. Electrodes convey electric current from the welding
machine into a hot arc between its tip and the metal being
welded.
13. Electrodes are covered with flux. The flux provides four
important functions.a. Flux protects the molten metal from
the atmosphere.b. The flux-covering burns in the
intense heat of the arc, forming a blanket or shield of gas around the bead. Air contains oxygen and nitrogen which would combine with the metal to cause it to be brittle and weak.

13. Electrodes are covered with flux. The flux provides four
important functions.c. Flux mixes with the weld metal, floating the
impurities to the top in the form of slag. Slag covers the bead to protect it from the air and slow the rate of solidification and cooling.
d. Flux stabilizes the arc. After the arc is started, current flows across the gap between the end of the electrode and the work.

17. Every electrode has been assigned a specific symbol, such as E7014.
a. The “E” indicates the electrode is used for electric welding.
b. The first two digits of a four digit number indicate tensile strength in thousands of pounds per square inch. i. An E7014 electrode produces a weld
with 70,000 psi of tensile strength.
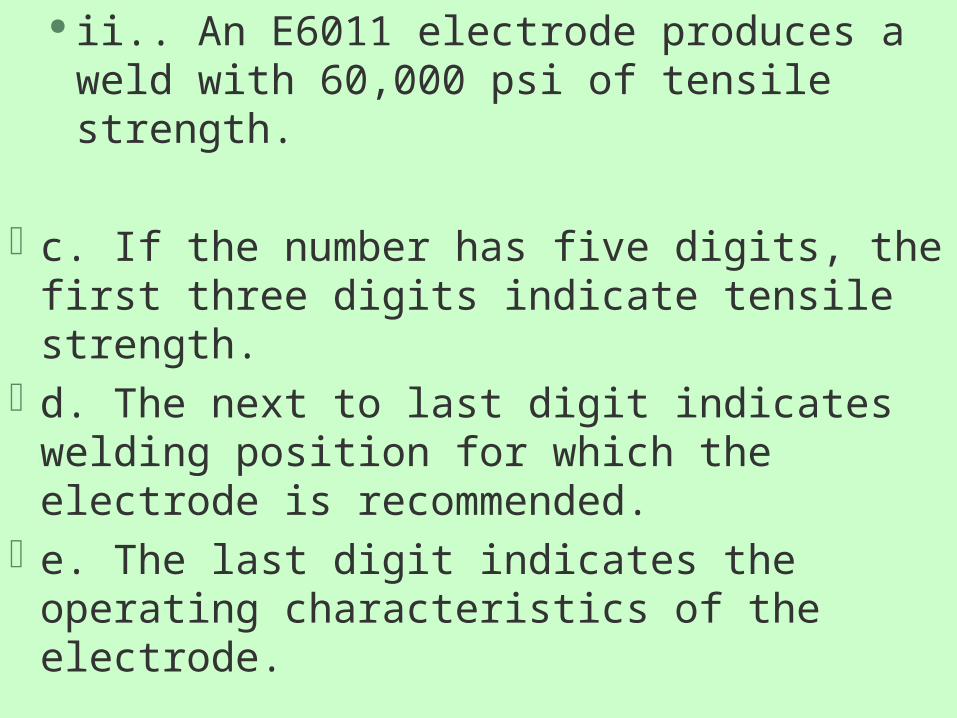
ii.. An E6011 electrode produces a weld with 60,000 psi of tensile strength.
c. If the number has five digits, the first three digits indicate tensile strength.
d. The next to last digit indicates welding position for which the electrode is recommended.
e. The last digit indicates the operating characteristics of the electrode.

How is metal prepared for welding?
One of the most important and most often neglected parts of the welding job is preparation
of the metal for welding.
A. The metal must be free of dirt, grease, rust, paint, or other impurities which may combine with a molten weld bead and
cause it to be weakened. Metal should be cleaned by grinding, brushing, filing, or
cutting before welding.

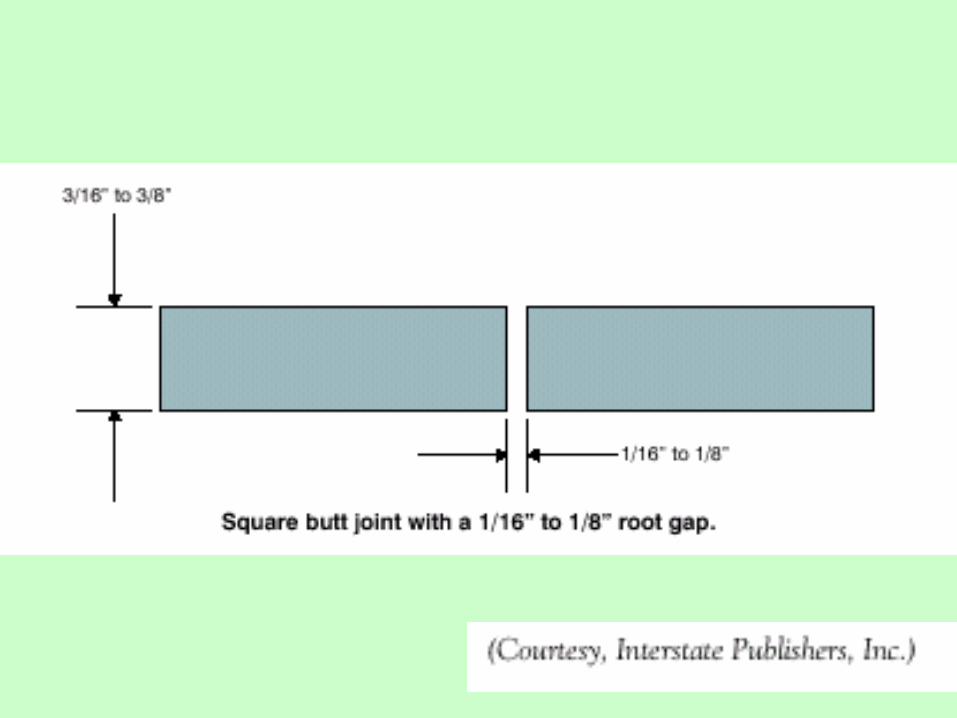
B. Preparing the correct type of joint for each kind of metal is
crucial to securing strong welded structures.
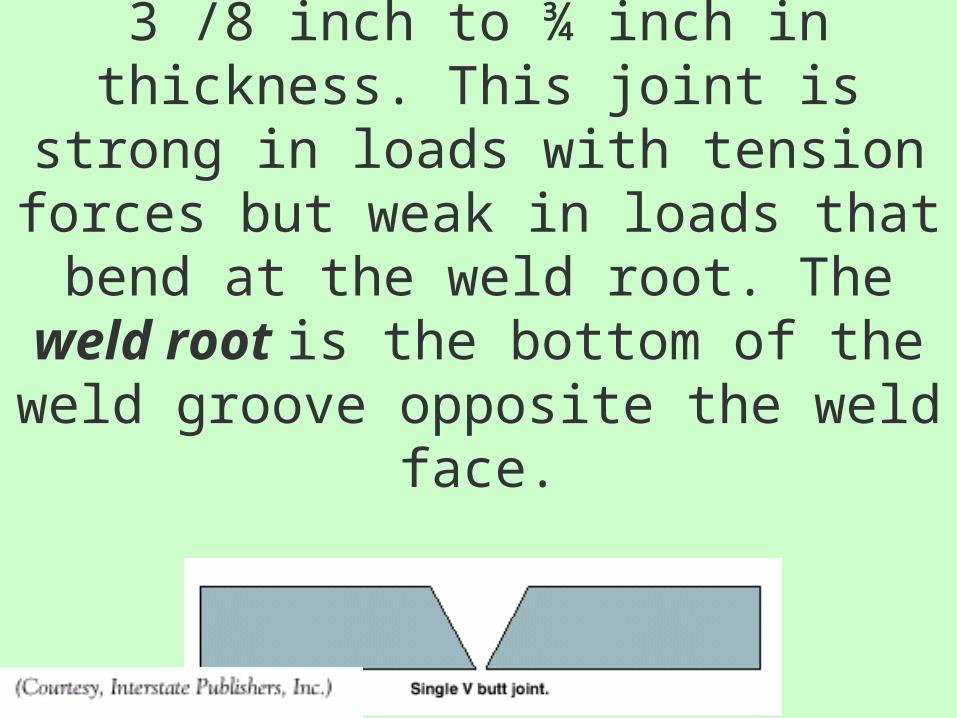
7. The single V butt joint is often used on plate steel 3 /8 inch to ¾ inch in
thickness. This joint is strong in loads with tension forces but weak in loads that bend at the weld root. The weld root is the bottom of the weld groove
opposite the weld face.
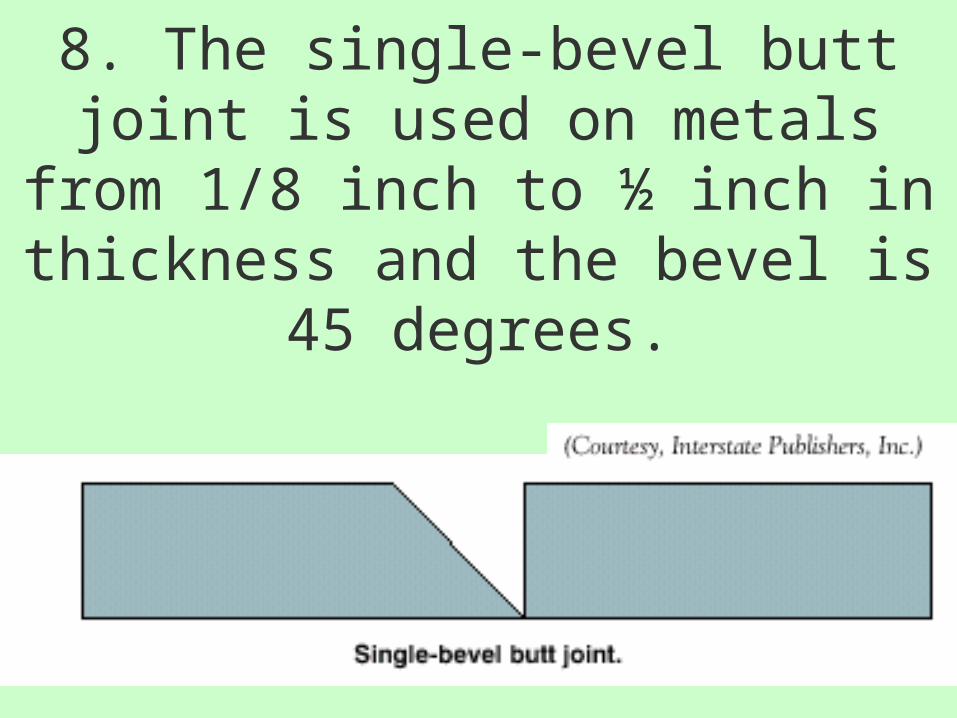
8. The single-bevel butt joint is used on metals from 1/8 inch to ½ inch in
thickness and the bevel is 45 degrees.

9. The double V butt joint is excellent for all load conditions and is often used on metal sections over
¾ inch in thickness.
What are the procedures and techniques for shielded metal
arc welding?

1. The proper amperage
The proper amperage setting for any welding job is necessary to get good penetration with minimum spatter. Correct amperage can be identified somewhat by sound.
a. When the amperage is correct, a sharp crackling sound can be heard.
1. The proper amperage
b. A humming sound will indicate too low an amperage setting and the deposited electrode will pile up, leaving a narrow, high bead that has poor penetration and little strength.
1. The proper amperage
c. A popping sound will indicate too high an amperage setting and the bead will be flat with excessive spatter. The electrode will become red hot, and the metal along the edge of the bead will be undercut.

2. Correct amp setting depends on the thickness of
the base metal and the diameter of the electrode.

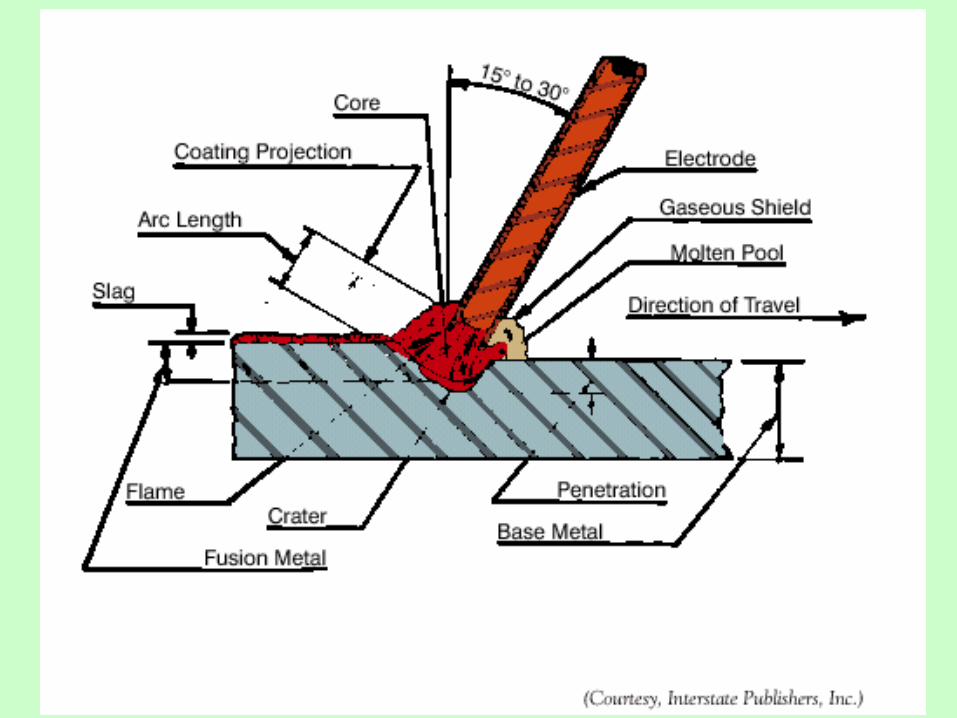
3. Arc LengthLearning to maintain the correct arc
length for the electrode you are using is necessary in order to be successful. Arc length is the distance from the tip
of the bare end of the electrode to the base metal.
Arc length is equal to the diameter of the bare end of the electrode.

Electrode Angle
The correct angle of the electrode will depend on the type of weld that is to be completed.
Hold the electrode at a 90 degree angle to the work as viewed from the end of the two plates being joined, and 5 to 15 degrees in the direction of travel.
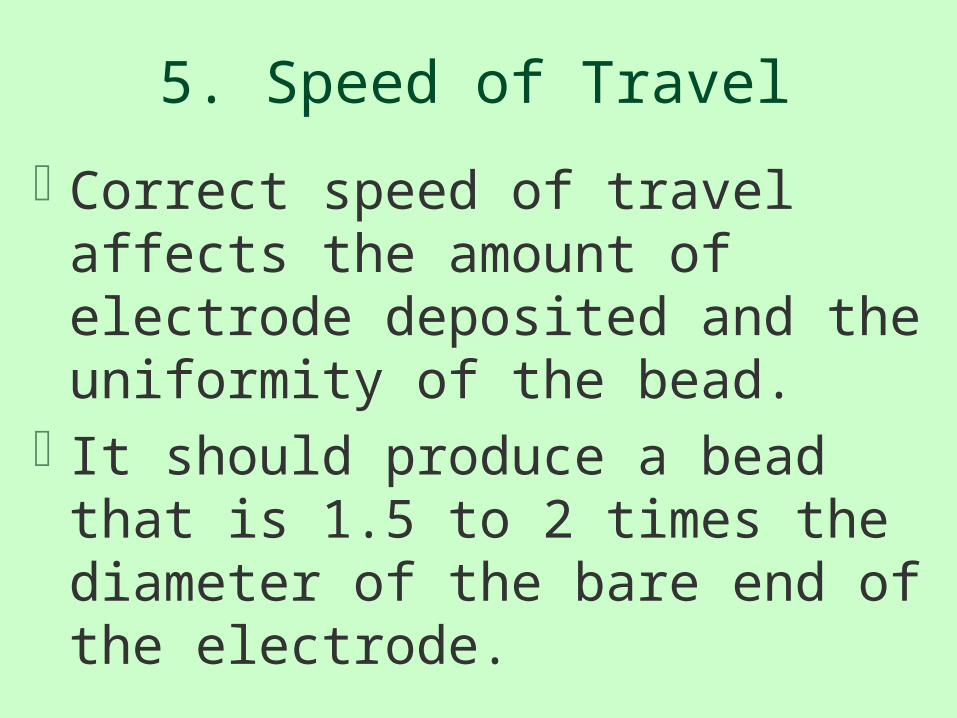
5. Speed of Travel
Correct speed of travel affects the amount of electrode deposited and the uniformity of the bead.
It should produce a bead that is 1.5 to 2 times the diameter of the bare end of the electrode.

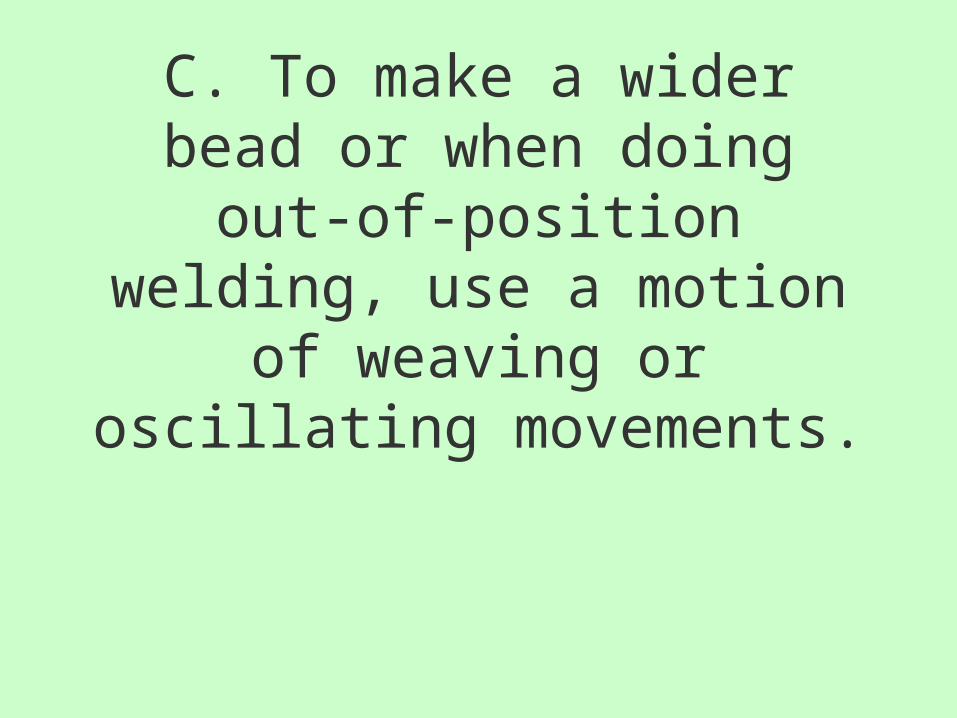
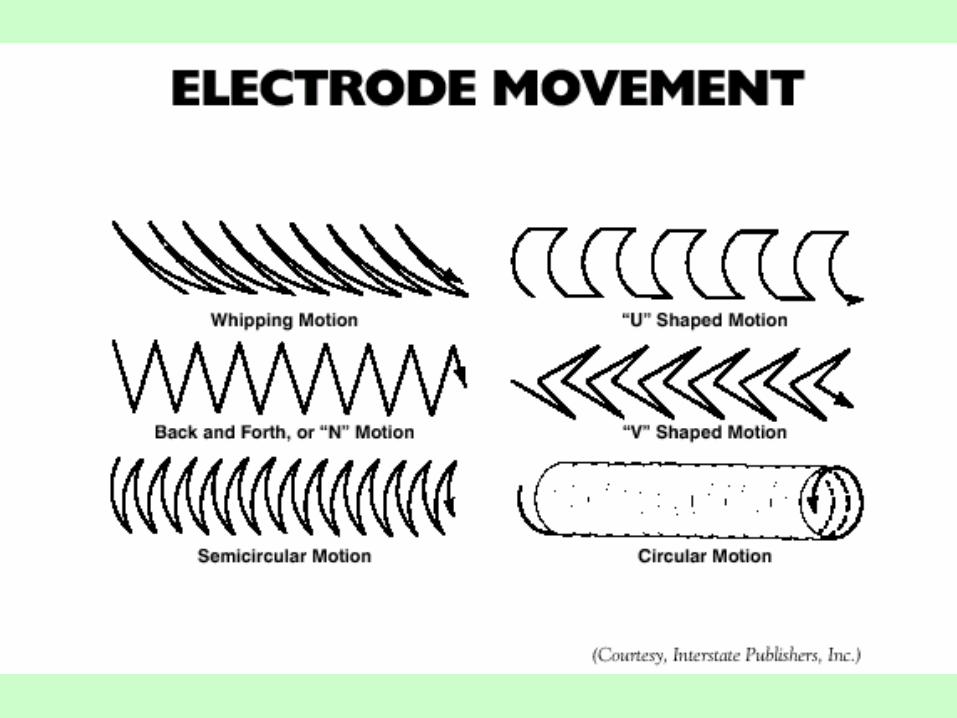
C. To make a wider bead or when doing out-of-position welding, use a motion of
weaving or oscillating movements.

1. Weaving is running a bead with a sideways or oscillating
motion. It is used when covering a wide area with
weld metal or to maintain a large molten weld crater.

2. Padding is the process of building up several layers of weld deposit by running over-lapping
passes. Padding is used to rebuild worn pieces by building up
the piece to an oversized condition and grinding or
machining to the correct size.

3. These movements usually require more time and the beads are shorter per inch of electrode
used.

Flat
The flat position produces welds that are stronger than in any other position.
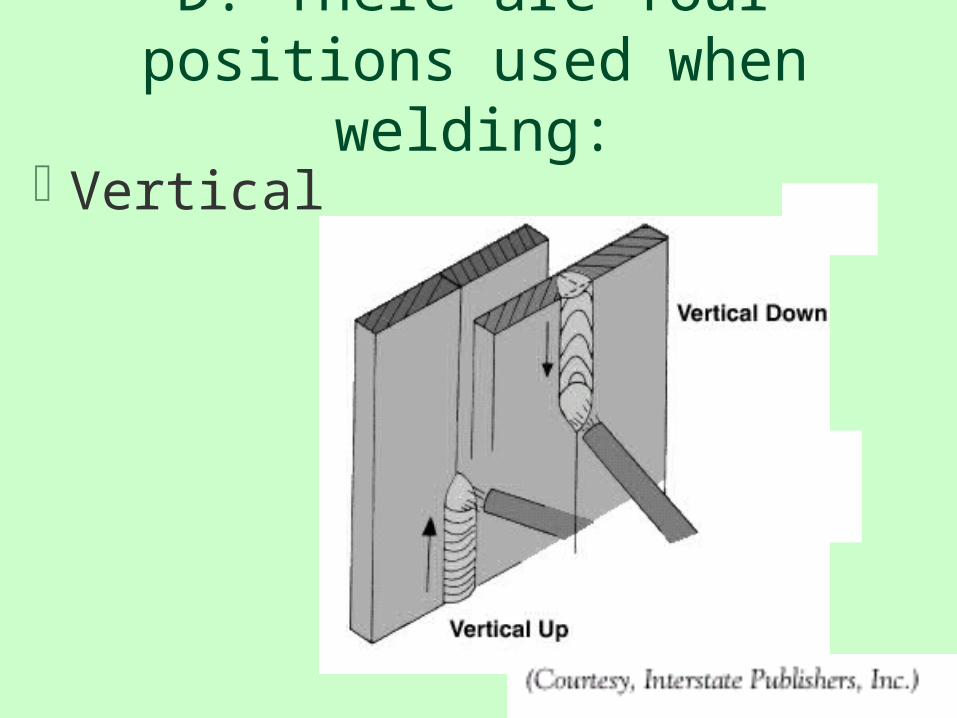
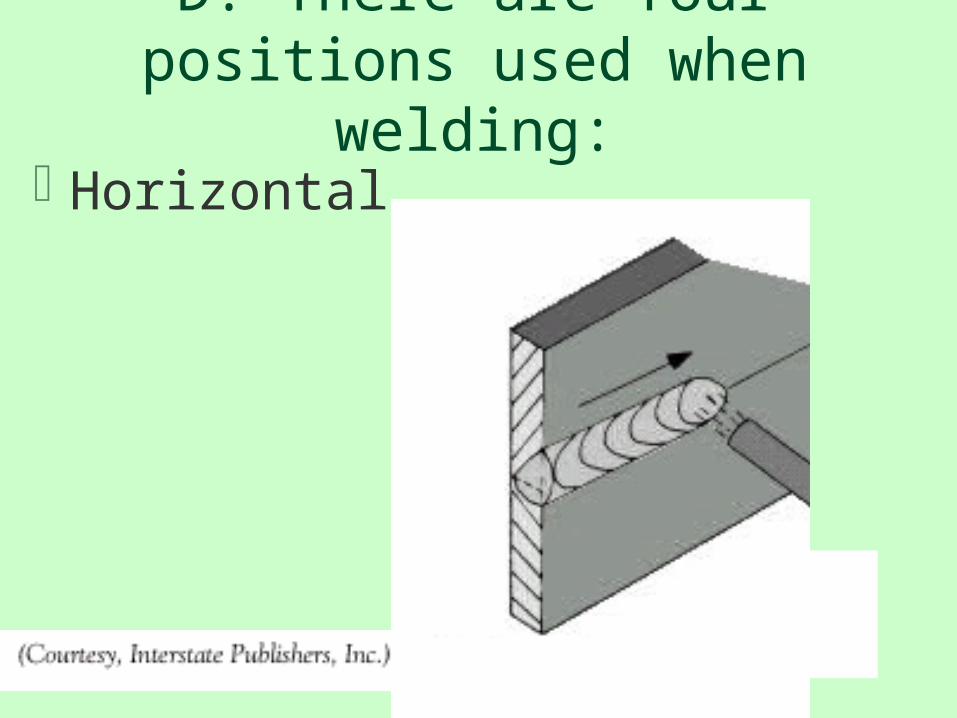
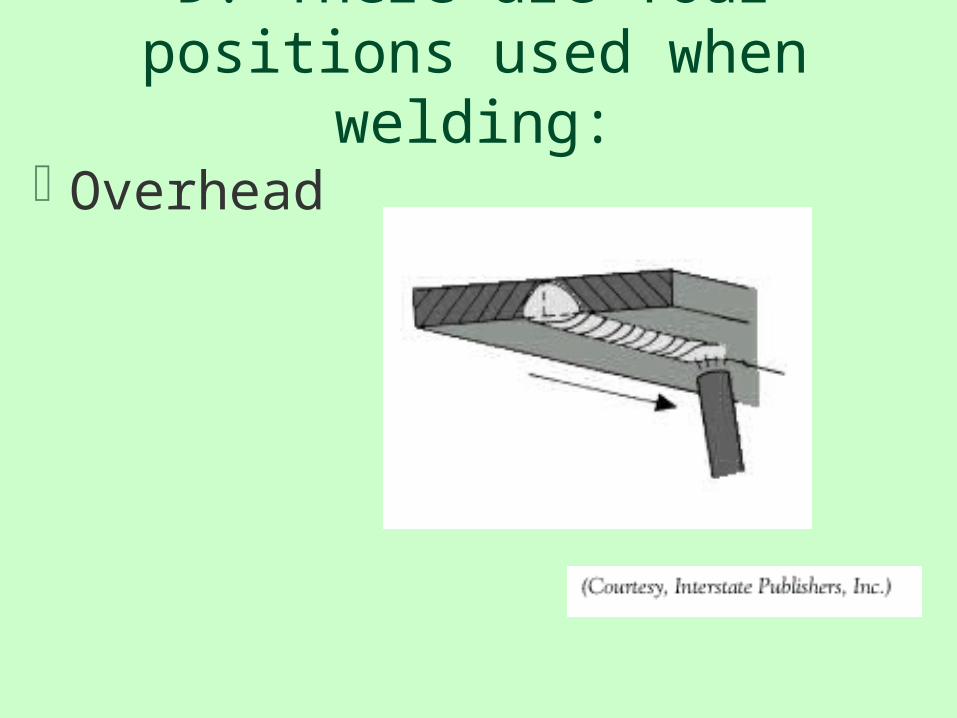
D. There are four positions used when welding:
D. There are four positions used when welding:
Vertical
D. There are four positions used when welding:
Horizontal
D. There are four positions used when welding:
Overhead