learn to drape skirts · drape skirts so many designs start with a simple rectangle y ou don’t...
TRANSCRIPT

DrapeSkirts
So many designs start with a simple rectangle
Y ou don’t need a design degree to drape a closet full of unique, wearable fashions. If you own any kind of fairly sturdy dress form with standard markings, all you need to get started
with draping are some basic guidelines, a willingness to experiment, and a few yards of inexpensive muslin fabric.
Draping is used by designers (just like those on TV’s Project Runway) as a direct, hands-on way to quickly realize a particular garment concept. You can try this method of garment design and, at the same time, create a variety of interesting and pretty skirts. Start-ing your draping efforts with skirts keeps things simple because there’s no bodice or crotch fitting to worry about, and it increases the likelihood of getting wearable results right away.
Draping on a dress form that matches your measurements, or directly on a body, eliminates fitting issues and gives you more time for design play. Once you’ve learned the basic draping techniques described in this article, you can drape just about any simple design you can imagine and eventually move on to more complicated garment draping.
Adapted from Threads no. 93 “A Skirt Draping Primer” by Theresa LaQuey.
Shopping List• 6 to 8 yards muslin• 1⁄4- to 1⁄2-inch-wide
ribbon• Dress form• Fabric marker• Ruler• Pins• Scissors
DESIGNER SECRETS
Learn to
50 sewstylish ◾ SewStylish.com
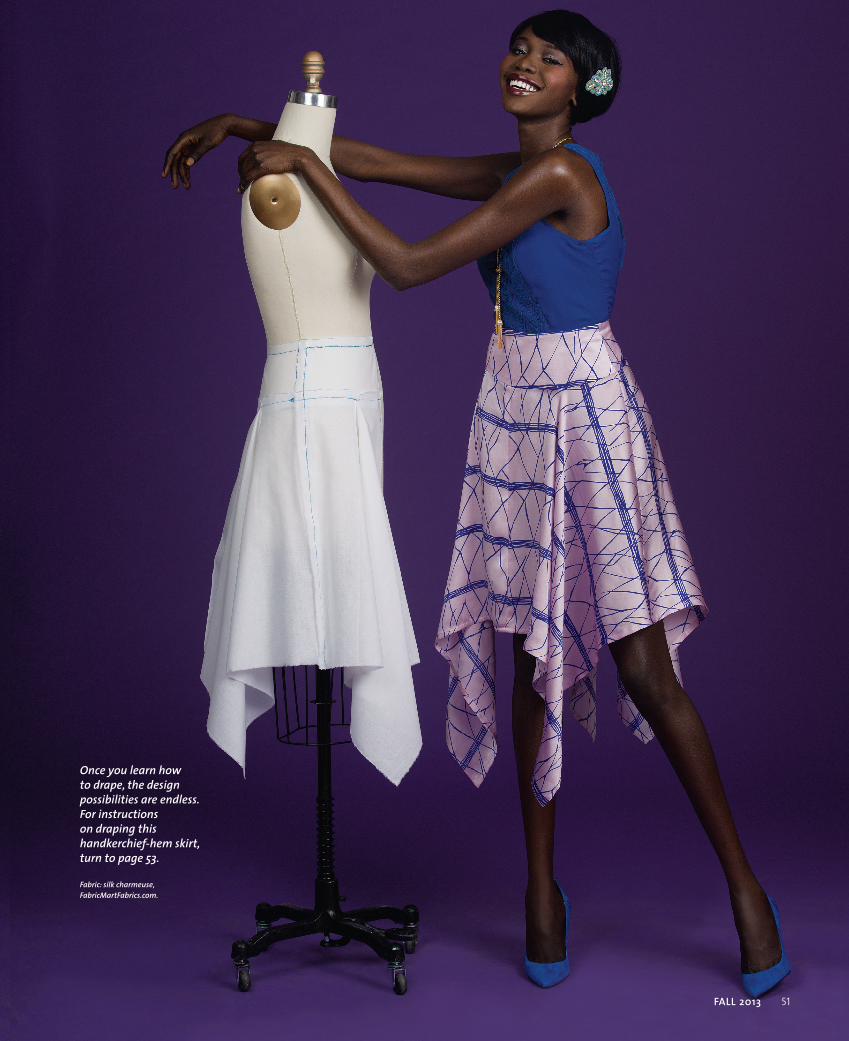
Once you learn how to drape, the design possibilities are endless. For instructions on draping this handkerchief-hem skirt, turn to page 53.
Fabric: silk charmeuse, FabricMartFabrics.com.
FALL 2013 51

Prep the Dress Form and FabricBefore draping, you must properly prepare your materials. No matter what kind of dress form you have, it’s not ready for a draping project without a few clearly marked reference lines. A cheap, lightweight, loosely woven muslin fabric is perfect for draping because you can easily see the individual threads. Before draping fabric, mark its straight grain or cross-grain; you’ll need to first straighten the fabric’s grain for accuracy.
MARK THE FORMUse a narrow, contrasting-color ribbon to mark the dress form at the waistline, center front, center back, and side seams. The waistline marking should follow your natural waistline, while being as horizontal as possible. Make sure the form is firmly supported and oriented as parallel as possible to your own posture. With the form in this position, all vertical lines should be perpendicular to the floor when viewed straight on.
STRAIGHTEN THE FABRIC GRAIN
Solid lines on a dress form are required for skirt draping. Pin contrasting ribbon on the form to mark center front, center back, side seams, and waistline.
2 Fold the fabric in half with selvages aligned. If the torn edges aren’t perfectly parallel, stretch the fabric on the bias to shift the edges in
the direction required. Once all the edges match, mark the straight grain or cross-grain (depending on the direction you intend to drape) by pulling a thread near the center of your fabric. To make it more visible, trace the pulled thread with a marker. When you begin draping, this marked grainline is aligned with the center-front or center-back markings on the dress form.
1 Tear enough fabric for your draping project from the
bolt. You’ll need about 3 yards for each of the skirts described in this article. If the starting edge was cut, snip near the cut and tear across the fabric, from selvage to selvage, so that the cross-grain edge is raw and parallel to the fabric threads. Sometimes, it’s also helpful to tear away (or at least cut) the selvages so that all four fabric edges are raw and can be corrected easily.
Fold the torn fabric in half with its selvages aligned. To correct the grain, stretch the fabric in the direction opposite to the distortion.
Center front
Side seams
Waistline
Tear.
Selvage
Selvages
Torn edges
Cut edge
Stretch.
Selvage
52 sewstylish ◾ SewStylish.com

Start with a Hip YokeIt’s much easier to drape a skirt from the bottom seam of a hip yoke than over the curves at the waistline and hip. Here, you’ll learn to drape a contoured, non-darted hip yoke that fits perfectly. Always start draping at the center front or center back and work toward the sides. As you drape, make sure that the marked grainline on the fabric remains straight. You need to drape only half of a symmetrical design.
1 Begin draping the front. Start with a
straight-grained muslin rectangle several inches wider on each side than your form measures from side seam to side seam. Mark the center front at the pulled thread marking. Center the rectangle over the form’s waist and center-front marks, pin it there to secure it to the form, and loosely pin the sides to hold it in place.
2 Shape the waist. Smooth the muslin
toward one side seam without distorting the center-front grain. Re-pin at the side seam to hold the muslin precisely. Trace the waistline tape, center-front, and side-seam positions onto the muslin.
3 Determine the yoke depth. Measure
down from the waist tape about 4 inches to 5 inches and mark the yoke’s depth evenly from side seam to center front. To ensure the yoke lies smoothly, its bottom edge shouldn’t sit lower than the top of any loose folds that form in the lower part of the muslin. The depth may need adjusting after you’ve draped the back yoke.
4 Drape the back yoke. With a second
rectangle of fabric, repeat steps 1 to 3 on the back of the form. If the back yoke is deeper or shallower than the front, adjust the front to match.
5 True the draped yoke. Unpin the muslins and correct the seamlines to ensure they match and curve smoothly. Mark notches for matching on the seamlines. Add at least 1⁄2-inch-
wide seam allowances to all seams except center front. Mark the center-front line “Place on fold.” (The back yoke receives a zipper at center back.) Cut out the draped and trued front and back yoke sections from the muslin, including the added seam allowances.
6 Go back to the form. Pin the completed yoke in place on the form. Now you’re
ready to drape the rest of the skirt.
Pin.
Traced grainline at center front
RulerPin.
Waistline
Center-front grainline
FRONT YOKE BACK YOKE
Center backPlace on fold.
Pin.
FRONT
Traced center-back grainline
BACK
Center front
Pin.
Side-seam marking
FALL 2013 53

Drape a Straight SkirtIf the lower skirt section’s hip seamline is straight, then the skirt will fall flat against the body, without fullness. However, you can adjust the straight skirt’s fullness to provide wearing ease or give the proper fit over fuller thighs.
2 Drape the skirt front. Align the muslin’s marked center front to the
dress form’s center front, overlapping the yoke’s bottom seamline, allowing a 1⁄2-inch-wide seam allowance, and pin. As you hold the grainline at center front perpendicular to the floor, smooth the muslin toward the side seam and pin it in place. Repeat the process for the skirt back.
3 Establish the length. Mark the side seam and center front and extend
them to the desired skirt length.
4 Add fullness for ease. If you prefer or need more ease
through the thigh, raise the skirt’s hipline seam slightly at center front and center back. This creates a deeper curve at the seam and adds barely noticeable fullness that prevents the skirt from clinging. You can use this technique to add precise amounts of fullness to a straight draped skirt to suit your comfort level.
1 Prepare the fabric. Tear a muslin rectangle several inches longer than
your desired skirt length and wider than one-quarter the total hip circumference. Straighten and mark the grain at center front, running lengthwise on the muslin rectangle.
This draping technique makes it easy to fit a straight skirt on any figure type.
Fabric: silk jacquard, MoodFabrics.com.
YOKE
Center frontSide
seam
YOKE
Center front
Raised hipline seam
Web EXTRAFor details on how to transfer a muslin drape to pattern paper, visit SewStylish.com. PH
OTO
S: (P
. 51;
P. 54
, LEF
T; P.
55,
RIG
HT)
JACK
DEU
TSCH
, STY
LIST
: JES
SICA
SAA
L, H
AIR
AND
MAK
EUP:
PAT
RYCJ
A FO
R H
ALLE
Y RE
SOU
RCES
; ALL
OTH
ERS,
DAVI
D P
AGE
COFF
IN. I
LLU
STRA
TIO
NS:
MIC
HEL
LE P
ENN
EY.
STYL
ING
CRE
DIT
S: (P
. 51)
TOP—
KEN
SIE
(MAC
YS.C
OM
), N
ECKL
ACE—
(JCRE
W.C
OM
), SH
OES
—M
ARC
FISH
ER (M
ACYS
.CO
M);
(P. 5
4) TO
P—D
ENIM
& S
UPP
LY B
Y RA
LPH
LAU
REN
(MAC
YS.C
OM
), N
ECKL
ACE
AND
H
AIR
ACCE
SSO
RY—
(AN
THRO
POLO
GIE
.CO
M),
SHO
ES—
ALFA
NI (
MAC
YS.C
OM
); (P
. 55)
HAI
R BA
ND
AN
D TO
P—(A
NTH
ROPO
LOG
IE.C
OM
), SH
OES
—CA
LVIN
KLE
IN (M
ACYS
.CO
M)
MUSLIN RECTANGLE
Top edge
Desired skirt length plus 4 inches
One-quarter of hip circumference plus 8 inches
54 sewstylish ◾ SewStylish.com

Drape an Angled-Hipline SkirtIf the lower skirt’s hip seamline has an angle cut into it, the skirt will fall with all fullness directly below the angle when it is sewn to the yoke. This shape creates fullness in the skirt only at the point of the angle, which is halfway between center front/center back and the side seam. There are two hem options with this style, each giving a completely different finished look: a curved hem or a square handkerchief hem. Remember, you only need to drape half of the skirt front and half of the skirt back.
1 Cut the skirt’s hip seamline.
Start with two squares of fabric torn 5 inches to 8 inches longer than the desired skirt length. Shape the angled hip seamline by measuring in from one corner on both sides half the length of the hip seamline from the center front or center back to the side seam. Cut away the resulting square. The skirt’s hipline seam must extend around the hipline when clipped from the center front or center back to the side seam with enough excess for 1⁄2-inch-wide seam allowances all around.
2 Drape the skirt. On the front and the back, start by overlapping and pinning one half of the skirt’s angled
hip seamline over the yoke’s hip seamline at center front or center back. Smooth the skirt’s hip seamline, clipping if necessary, along the yoke to the side seam. Mark the hip seamline, center front or back, and side-seam points. At the form’s side seams, mark the skirt side seams by following the muslin’s thread straight down to the desired hem.
An angled hipline seam puts the skirt drape on the bias and creates fullness directly below the angle.
Fabric: polyester hammered charmeuse, Fabric.com.
Hip seamline
Side seam
Handkerchief hem
Cut away the square.
Measure one-half length of the hip seamline.
Center front
3 Shape the hem. You can
leave the hem square to create handkerchief points in the front and back directly below the hipline angle (as shown on page 51), or you can create a curved hem (shown at right). To mark a curved hemline, use a hem marker or measure from the floor to the desired length, with the skirt on the dress form.
Hip seamline
Curved hem
FALL 2013 55