learn photoshop elements - game of thrones effect
DESCRIPTION
This tutorial demonstrates how to turn a portrait picture into a vivid Game of Thrones Season 3 half-blue image. Thanks to Tommy Tommerton for letting me use this image using the Creative Commons licensing. To watch the video, go to http://youtu.be/SYErES17losTRANSCRIPT
Photoshop Elements, Lightroom and More +Photoshop Elements, Lightroom and More +
www.YouTube.com/c130bulldawg www.facebook.com/pseandmore
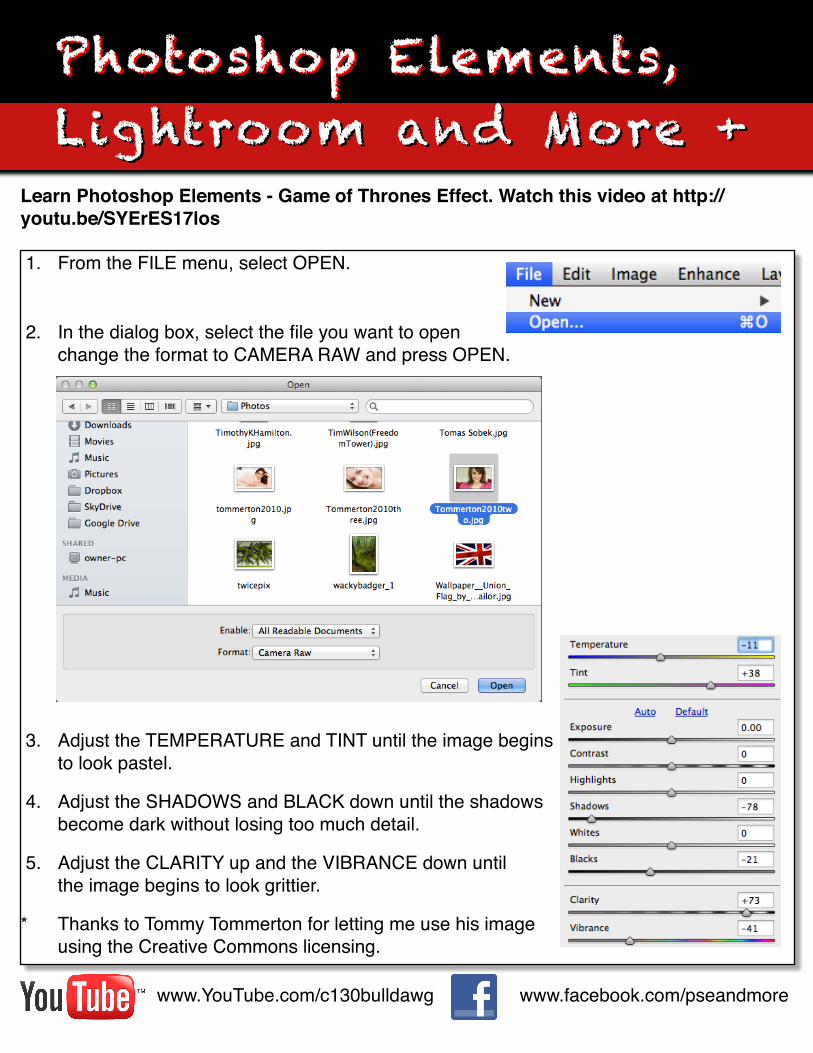
1. From the FILE menu, select OPEN.
2. In the dialog box, select the file you want to openchange the format to CAMERA RAW and press OPEN.
3. Adjust the TEMPERATURE and TINT until the image beginsto look pastel.
4. Adjust the SHADOWS and BLACK down until the shadowsbecome dark without losing too much detail.
5. Adjust the CLARITY up and the VIBRANCE down untilthe image begins to look grittier.
* Thanks to Tommy Tommerton for letting me use his imageusing the Creative Commons licensing.
Learn Photoshop Elements - Game of Thrones Effect. Watch this video at http://youtu.be/SYErES17los
www.YouTube.com/c130bulldawg www.facebook.com/pseandmore
Learn Photoshop Elements - Game of Thrones Effect. Watch this video at http://youtu.be/SYErES17los
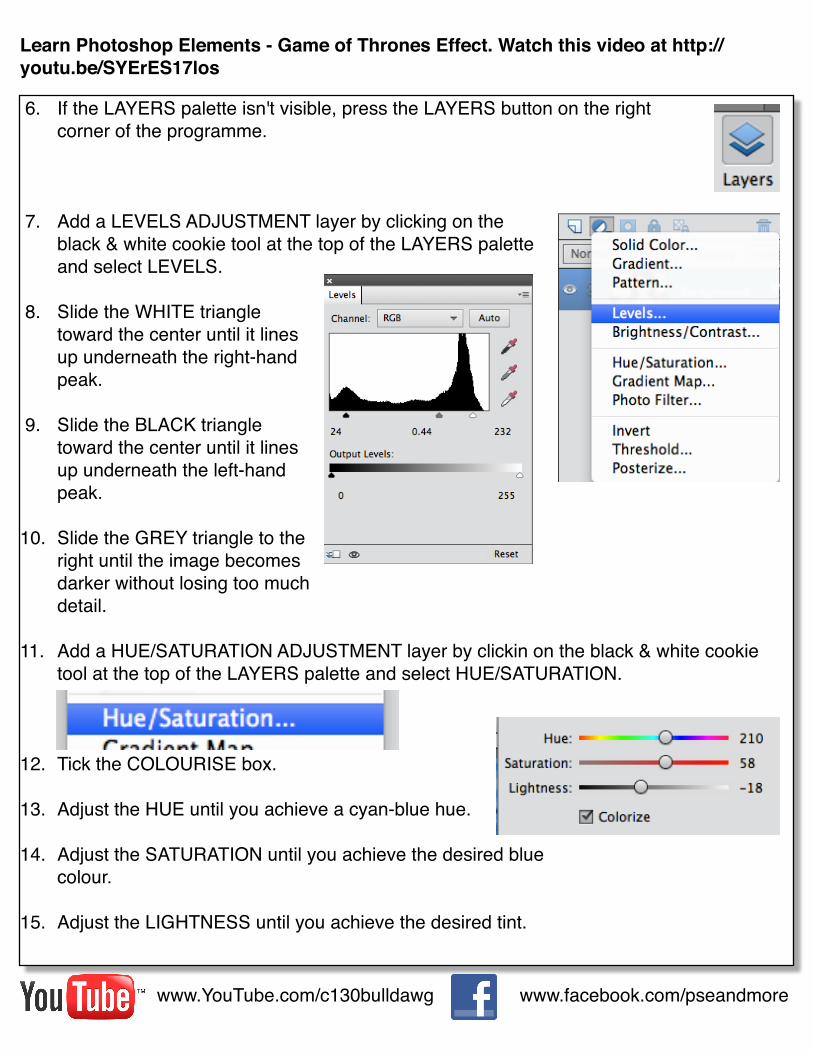
6. If the LAYERS palette isn't visible, press the LAYERS button on the rightcorner of the programme.
7. Add a LEVELS ADJUSTMENT layer by clicking on theblack & white cookie tool at the top of the LAYERS paletteand select LEVELS.
8. Slide the WHITE triangletoward the center until it linesup underneath the right-handpeak.
9. Slide the BLACK triangletoward the center until it linesup underneath the left-handpeak.
10. Slide the GREY triangle to theright until the image becomesdarker without losing too muchdetail.
11. Add a HUE/SATURATION ADJUSTMENT layer by clickin on the black & white cookietool at the top of the LAYERS palette and select HUE/SATURATION.
12. Tick the COLOURISE box.
13. Adjust the HUE until you achieve a cyan-blue hue.
14. Adjust the SATURATION until you achieve the desired bluecolour.
15. Adjust the LIGHTNESS until you achieve the desired tint.
www.YouTube.com/c130bulldawg www.facebook.com/pseandmore
Learn Photoshop Elements - Game of Thrones Effect. Watch this video at http://youtu.be/SYErES17los
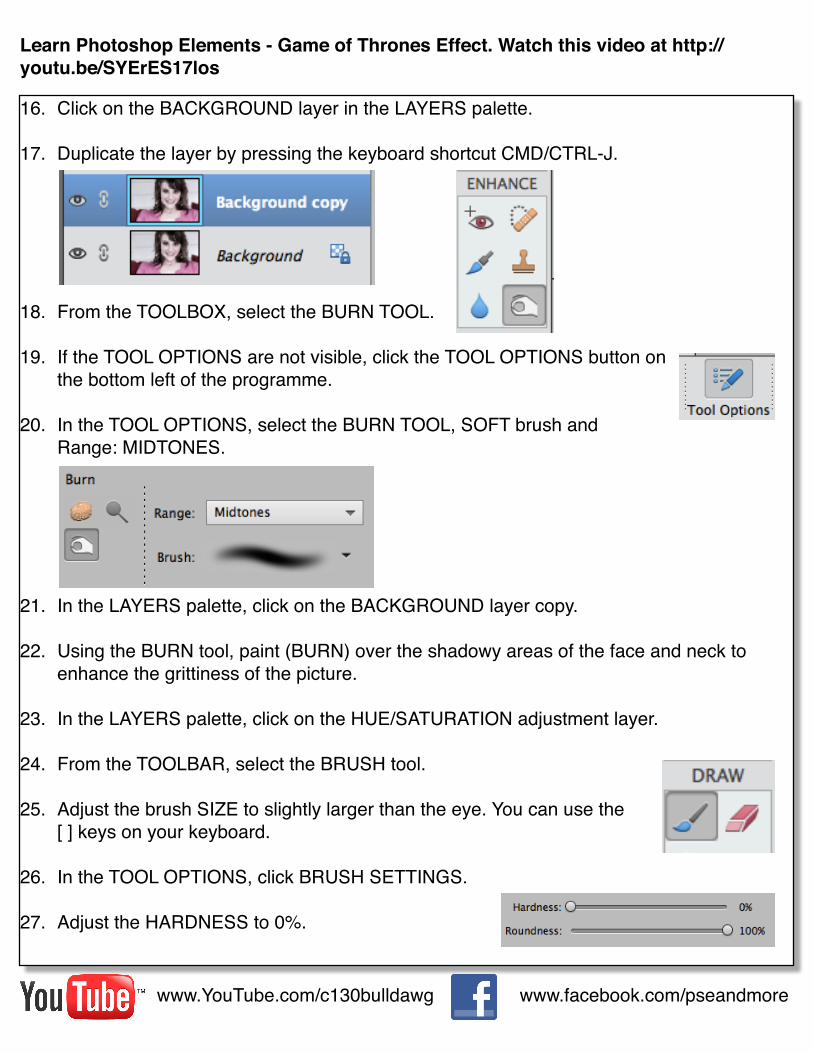
16. Click on the BACKGROUND layer in the LAYERS palette.
17. Duplicate the layer by pressing the keyboard shortcut CMD/CTRL-J.
18. From the TOOLBOX, select the BURN TOOL.
19. If the TOOL OPTIONS are not visible, click the TOOL OPTIONS button onthe bottom left of the programme.
20. In the TOOL OPTIONS, select the BURN TOOL, SOFT brush andRange: MIDTONES.
21. In the LAYERS palette, click on the BACKGROUND layer copy.
22. Using the BURN tool, paint (BURN) over the shadowy areas of the face and neck toenhance the grittiness of the picture.
23. In the LAYERS palette, click on the HUE/SATURATION adjustment layer.
24. From the TOOLBAR, select the BRUSH tool.
25. Adjust the brush SIZE to slightly larger than the eye. You can use the[ ] keys on your keyboard.
26. In the TOOL OPTIONS, click BRUSH SETTINGS.
27. Adjust the HARDNESS to 0%.
www.YouTube.com/c130bulldawg www.facebook.com/pseandmore
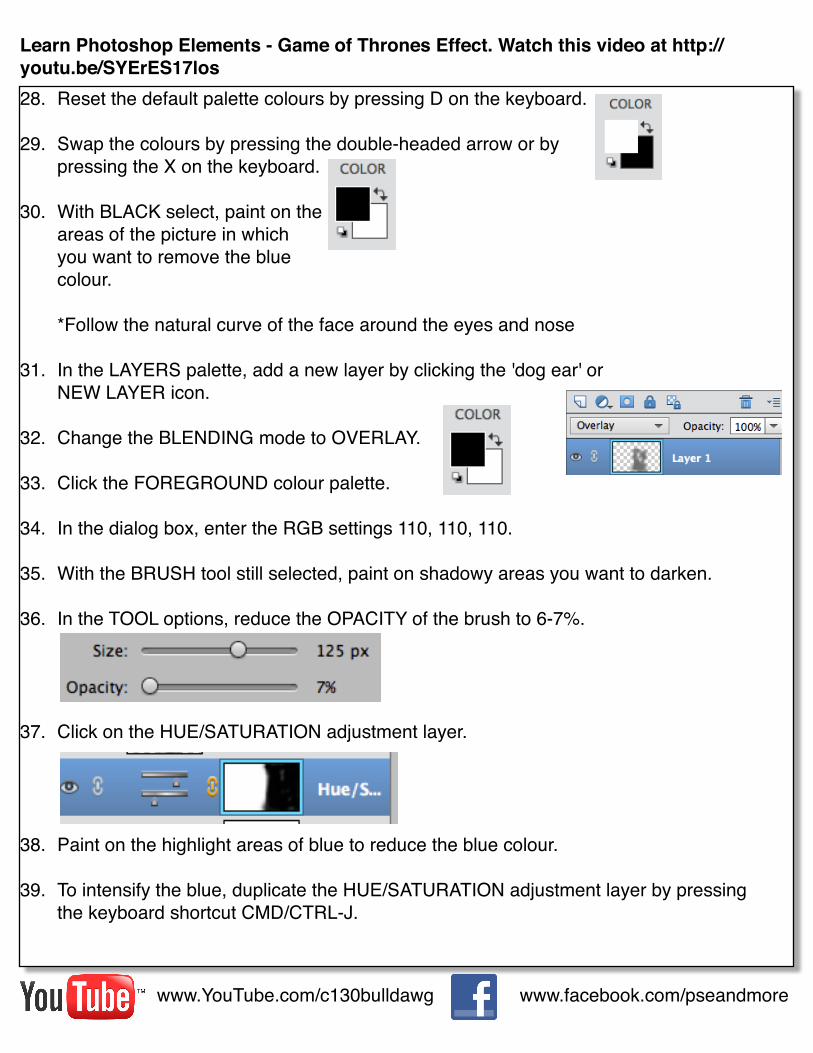
Learn Photoshop Elements - Game of Thrones Effect. Watch this video at http://youtu.be/SYErES17los28. Reset the default palette colours by pressing D on the keyboard.
29. Swap the colours by pressing the double-headed arrow or bypressing the X on the keyboard.
30. With BLACK select, paint on theareas of the picture in whichyou want to remove the bluecolour.
*Follow the natural curve of the face around the eyes and nose
31. In the LAYERS palette, add a new layer by clicking the 'dog ear' orNEW LAYER icon.
32. Change the BLENDING mode to OVERLAY.
33. Click the FOREGROUND colour palette.
34. In the dialog box, enter the RGB settings 110, 110, 110.
35. With the BRUSH tool still selected, paint on shadowy areas you want to darken.
36. In the TOOL options, reduce the OPACITY of the brush to 6-7%.
37. Click on the HUE/SATURATION adjustment layer.
38. Paint on the highlight areas of blue to reduce the blue colour.
39. To intensify the blue, duplicate the HUE/SATURATION adjustment layer by pressingthe keyboard shortcut CMD/CTRL-J.

www.YouTube.com/c130bulldawg www.facebook.com/pseandmore
Learn Photoshop Elements - Game of Thrones Effect. Watch this video at http://youtu.be/SYErES17los40. To reduce the intensity of the blue, reduce the OPACITY of the HUE/SATURATION
adjustment layer.
NOTES