learn how to efile t1 returns using...
TRANSCRIPT

�
Learn How to EFILE T1 Returns Using ProFile
Intuit Canada PO Box 4182 Edmonton, AB T6E 4E2 Telephone 1.800.452.9970 Fax 1.800.792.4044 www.profile.intuit.ca
Contents
Prepare to Internet file T1 returns ................................................... 2
Configure T1 EFILE .......................................................................... 2
Make client returns eligible for EFILE ............................................ 2
Transmit T1 files via the Internet (EFILE On-Line)......................... 2
Build EFILE files (EFILE On-Line Plus) .......................................... 2
Delete an EFILE file .......................................................................... 3
Transmit an EFILE On-Line Plus file ............................................... 3
Manage acknowledgement files ...................................................... 4
Troubleshoot EFILE problems ........................................................ 5
EFILE options for networks.............................................................. 5
Print EFILE Reports .......................................................................... 5
Print with the T7DRA template ........................................................ 5
Use Internet SEND ............................................................................ 6
Types of electronic file types (and file extensions)........................ 6
Welcome to the ProFile Professional Tax Suite
Electronic filing allows you to submit tax data to the Canada Revenue Agency (CRA) or to a provincial ministry in an electronic format. Electronic filing is an alternative to filing printed (paper) returns.
Tax professionals considering electronic filing options will need to be aware that some returns are not eligible for electronic filing. For example, when filing T1 returns, you cannot EFILE an amended return, a bankruptcy return, a non-resident return, a return reporting income from multiple jurisdictions or a return for a previous year. For a complete list of exclusions, visit www.pro.netfile.ccra-adrc.gc.ca/eol-exclusions-e.html.
This document explains the T1 EFILE process.There are two online systems available for T1 returns: EFILE On-Line Plus and EFILE On-Line. EFILE On-Line Plus is an Internet system for professionals to file T1 returns in batches. EFILE On-Line is another Internet T1 filing alternative that does not allow batch filing of returns, but does offer the advantage of instant acknowledgement. Access to EFILE On-Line is included in ProFile T1 Basic. With a Premier license you can batch file T1 returns using EFILE On-Line Plus.
Depending on your ProFile li-cense, you can electronically file:• T1 returns
• TP1 returns (Québec)
• T3 slips
• TP-646 RLs (Québec)
• FX slips (federal)
• FX/Q slips (Québec)
• T2 returns
• CT23 returns (Ontario)
EFILE On-Line and EFILE On-Line Plus are the CRA systems for professionals to file on behalf of their clients. NetFile is the system for taxpayers filing their own tax returns.
To transmit for others you must have an EFILE transmit-ter number and use the pro-fessional systems. The CRA does not permit professionals to use a taxpayer’s web ac-cess code (WAC) to transmit using NetFile on behalf of the taxpayer.
Note: Throughout this document, we refer to dif-ferent types of EFILE files using the three-letter file extension. The last page of this document is a chart of all the different file types and their related extensions.
2
If you plan to EFILE returns, complete these steps:
1 Complete an RC153 form for professionals who file returns electronically on behalf of clients (obtain this form from the CRA). The CRA will assign you an EFILE On-Line number and password.
2 If you don’t already have one, set up an Internet account with an Internet Service Provider (ISP) (high-speed connection recommended).
3 Confirm that you have MicrosoftTM Internet Explorer 5.5 or greater, with Strong Encryption (128-bit), a requirement for secure data transmission using EFILE On-Line.
4 Acquire pre-printed copies of the T7DRA form so that taxpayers with a balance owing can make payments directly at the bank. ProFile formats client data to print directly on this form, but make sure you do a test-run in advance. Some configuration may be required, depending on your printer model.
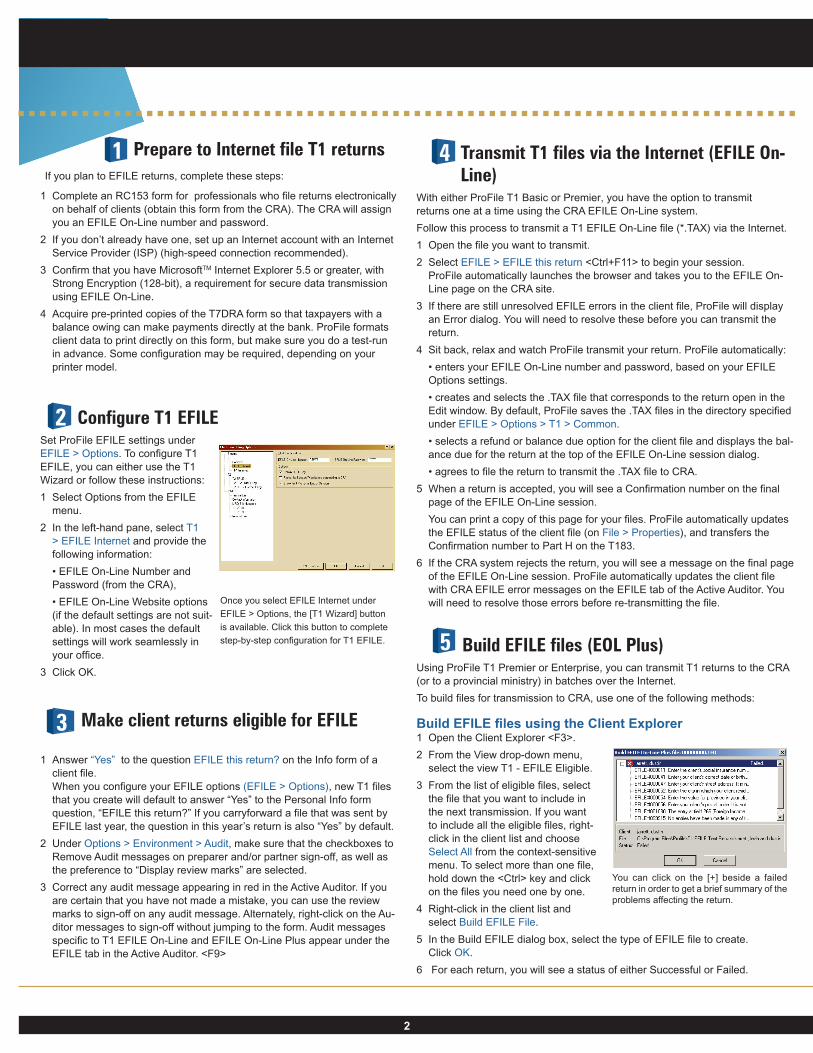
Configure T1 EFILE Set ProFile EFILE settings under EFILE > Options. To configure T1 EFILE, you can either use the T1 Wizard or follow these instructions:
1 Select Options from the EFILE menu.
2 In the left-hand pane, select T1 > EFILE Internet and provide the following information:
• EFILE On-Line Number and Password (from the CRA),
• EFILE On-Line Website options (if the default settings are not suit-able). In most cases the default settings will work seamlessly in your office.
3 Click OK.
2
Make client returns eligible for EFILE
1 Answer “Yes” to the question EFILE this return? on the Info form of a client file. When you configure your EFILE options (EFILE > Options), new T1 files that you create will default to answer “Yes” to the Personal Info form question, “EFILE this return?” If you carryforward a file that was sent by EFILE last year, the question in this year’s return is also “Yes” by default.
2 Under Options > Environment > Audit, make sure that the checkboxes to Remove Audit messages on preparer and/or partner sign-off, as well as the preference to “Display review marks” are selected.
3 Correct any audit message appearing in red in the Active Auditor. If you are certain that you have not made a mistake, you can use the review marks to sign-off on any audit message. Alternately, right-click on the Au-ditor messages to sign-off without jumping to the form. Audit messages specific to T1 EFILE On-Line and EFILE On-Line Plus appear under the EFILE tab in the Active Auditor. <F9>
3
4 Transmit T1 files via the Internet (EFILE On-Line)
With either ProFile T1 Basic or Premier, you have the option to transmit returns one at a time using the CRA EFILE On-Line system.
Follow this process to transmit a T1 EFILE On-Line file (*.TAX) via the Internet.
1 Open the file you want to transmit.
2 Select EFILE > EFILE this return <Ctrl+F11> to begin your session. ProFile automatically launches the browser and takes you to the EFILE On-Line page on the CRA site.
3 If there are still unresolved EFILE errors in the client file, ProFile will display an Error dialog. You will need to resolve these before you can transmit the return.
4 Sit back, relax and watch ProFile transmit your return. ProFile automatically:
• enters your EFILE On-Line number and password, based on your EFILE Options settings.
• creates and selects the .TAX file that corresponds to the return open in the Edit window. By default, ProFile saves the .TAX files in the directory specified under EFILE > Options > T1 > Common.
• selects a refund or balance due option for the client file and displays the bal-ance due for the return at the top of the EFILE On-Line session dialog.
• agrees to file the return to transmit the .TAX file to CRA.
5 When a return is accepted, you will see a Confirmation number on the final page of the EFILE On-Line session.
You can print a copy of this page for your files. ProFile automatically updates the EFILE status of the client file (on File > Properties), and transfers the Confirmation number to Part H on the T183.
6 If the CRA system rejects the return, you will see a message on the final page of the EFILE On-Line session. ProFile automatically updates the client file with CRA EFILE error messages on the EFILE tab of the Active Auditor. You will need to resolve those errors before re-transmitting the file. Once you select EFILE Internet under
EFILE > Options, the [T1 Wizard] button
is available. Click this button to complete
step-by-step configuration for T1 EFILE.
1 Prepare to Internet file T1 returns
5 Build EFILE files (EOL Plus) Using ProFile T1 Premier or Enterprise, you can transmit T1 returns to the CRA (or to a provincial ministry) in batches over the Internet.
To build files for transmission to CRA, use one of the following methods:
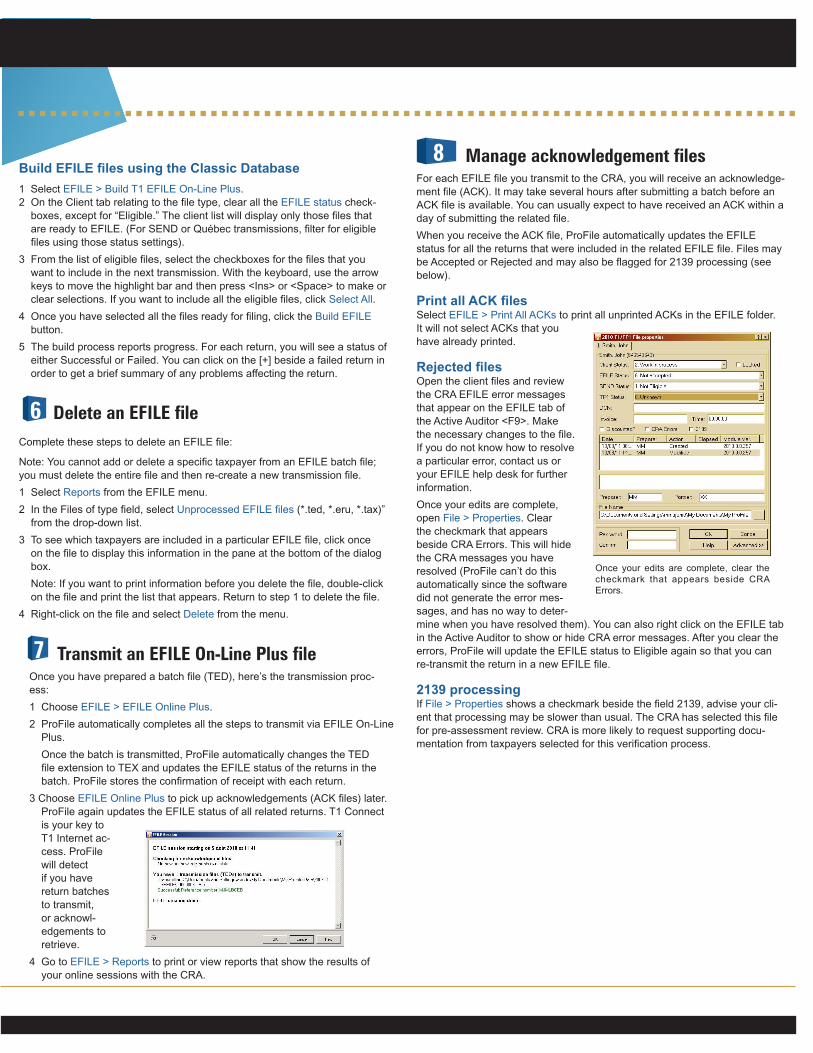
Build EFILE files using the Client Explorer 1 Open the Client Explorer <F3>.
2 From the View drop-down menu, select the view T1 - EFILE Eligible.
3 From the list of eligible files, select the file that you want to include in the next transmission. If you want to include all the eligible files, right-click in the client list and choose Select All from the context-sensitive menu. To select more than one file, hold down the <Ctrl> key and click on the files you need one by one.
4 Right-click in the client list and select Build EFILE File.
5 In the Build EFILE dialog box, select the type of EFILE file to create. Click OK.
6 For each return, you will see a status of either Successful or Failed.
You can click on the [+] beside a failed return in order to get a brief summary of the problems affecting the return.
Build EFILE files using the Classic Database
1 Select EFILE > Build T1 EFILE On-Line Plus. 2 On the Client tab relating to the file type, clear all the EFILE status check-
boxes, except for “Eligible.” The client list will display only those files that are ready to EFILE. (For SEND or Québec transmissions, filter for eligible files using those status settings).
3 From the list of eligible files, select the checkboxes for the files that you want to include in the next transmission. With the keyboard, use the arrow keys to move the highlight bar and then press <Ins> or <Space> to make or clear selections. If you want to include all the eligible files, click Select All.
4 Once you have selected all the files ready for filing, click the Build EFILE button.
5 The build process reports progress. For each return, you will see a status of either Successful or Failed. You can click on the [+] beside a failed return in order to get a brief summary of any problems affecting the return.
Transmit an EFILE On-Line Plus file Once you have prepared a batch file (TED), here’s the transmission proc-ess:
1 Choose EFILE > EFILE Online Plus.
2 ProFile automatically completes all the steps to transmit via EFILE On-Line Plus.
Once the batch is transmitted, ProFile automatically changes the TED file extension to TEX and updates the EFILE status of the returns in the batch. ProFile stores the confirmation of receipt with each return.
3 Choose EFILE Online Plus to pick up acknowledgements (ACK files) later. ProFile again updates the EFILE status of all related returns. T1 Connect is your key to T1 Internet ac-cess. ProFile will detect if you have return batches to transmit, or acknowl-edgements to retrieve.
4 Go to EFILE > Reports to print or view reports that show the results of your online sessions with the CRA.
7
Delete an EFILE fileComplete these steps to delete an EFILE file:
Note:.You cannot add or delete a specific taxpayer from an EFILE batch file; you must delete the entire file and then re-create a new transmission file.
1 Select Reports from the EFILE menu.
2 In the Files of type field, select Unprocessed EFILE files (*.ted, *.eru, *.tax)” from the drop-down list.
3 To see which taxpayers are included in a particular EFILE file, click once on the file to display this information in the pane at the bottom of the dialog box.
Note: If you want to print information before you delete the file, double-click on the file and print the list that appears. Return to step 1 to delete the file.
4 Right-click on the file and select Delete from the menu.
6
Manage acknowledgement files For each EFILE file you transmit to the CRA, you will receive an acknowledge-ment file (ACK). It may take several hours after submitting a batch before an ACK file is available. You can usually expect to have received an ACK within a day of submitting the related file.
When you receive the ACK file, ProFile automatically updates the EFILE status for all the returns that were included in the related EFILE file. Files may be Accepted or Rejected and may also be flagged for 2139 processing (see below).
Print all ACK files Select EFILE > Print All ACKs to print all unprinted ACKs in the EFILE folder. It will not select ACKs that you have already printed.
Rejected files Open the client files and review the CRA EFILE error messages that appear on the EFILE tab of the Active Auditor <F9>. Make the necessary changes to the file. If you do not know how to resolve a particular error, contact us or your EFILE help desk for further information.
Once your edits are complete, open File > Properties. Clear the checkmark that appears beside CRA Errors. This will hide the CRA messages you have resolved (ProFile can’t do this automatically since the software did not generate the error mes-sages, and has no way to deter-mine when you have resolved them). You can also right click on the EFILE tab in the Active Auditor to show or hide CRA error messages. After you clear the errors, ProFile will update the EFILE status to Eligible again so that you can re-transmit the return in a new EFILE file.
2139 processing If File > Properties shows a checkmark beside the field 2139, advise your cli-ent that processing may be slower than usual. The CRA has selected this file for pre-assessment review. CRA is more likely to request supporting docu-mentation from taxpayers selected for this verification process.
Once your edits are complete, clear the checkmark that appears beside CRA Errors.
8

4
How do I identify a missing ACK file?If there was any obstacle to downloading a particular ACK file from the CRA system, that file may not be saved to your EFILE folder, and may no longer appear as a new file available for download on the T1 EFILE On-Line Plus system.
Depending on your operating system, Windows™ configuration or system speed, it may not be possible to automate transmission and processing of T1 EFILE On-Line Plus files.
These steps are helpful if you are missing an acknowledgement file that did not download correctly. You’ll know that’s the case if particular client files do not show updated EFILE status (of Accepted or Rejected), and there has been an entry in the file history to show that an ACK is available.
If you are waiting for an acknowledgement that has taken longer than usual, you can check the client file to see if the ACK download process has been interupted.
Troubleshoot EFILE problems ProFile automatically updates the EFILE status to Eligible as soon as there aren’t any “prevent filing audit messages” in the Active Auditor. (See below for an explanation of prevent filing messages.)
• Make sure that the option to EFILE is selected for this client under the Filing heading on the Personal information (Info) form.
• Review the audit messages in the Active Auditor using <F9>. Correct any er-rors or use the sign-off review marks to clear any messages that do not apply.
If you are unable to connect to CRA• Re-check your EFILE configuration (EFILE > Options) to be certain that you
have not missed any necessary information or entered a password incor-rectly.
• Make sure your Internet connection is working. Try accessing another web site, such as www.profile.intuit.ca, to test.
• Make sure your firewall is not preventing ProFile from accessing the Inter-net. Visit Support > ProFile > InfoBase on our website. Type “firewall” in the search field.
• Make sure that Internet Explorer is your default Internet browser.
Resubmit after resolving CRA EFILE errors ProFile detects many EFILE errors before you submit a tax return. The proc-ess of preparing an EFILE return includes reviewing and resolving these errors. However, there are errors that ProFile cannot detect. For example, perhaps the date of birth of the taxpayer in your tax return data does not match the date of birth in CRA’s database. In these cases, CRA would reject the tax return and provide an error number in an acknowledgement file (or instantly on the Web, for EFILE On-Line).
If you receive an acknowledgement file that identifies errors in a tax return, you may be able to fix the errors and resubmit the corrected return (by EFILE) to CRA. Follow these steps to resubmit the return:
1 Open the tax return and display the Active Auditor <F9>.
2 Select the EFILE tab.
There are two types of EFILE errors. The EFILE errors that ProFile generates and those that CRA generates. The Active Auditor shows both types. Mes-sages generated by the CRA include the text “CRAEFILE’.
3 Double-click on the error. If possible, ProFile will circle the field causing the difficulty.
4 Resolve the issue causing the EFILE error. When you resolve a ProFile-generated EFILE error, the error will disappear from the Active Auditor. When you resolve a CRA generated CRAEFILE error, the error will NOT disappear from the Active Auditor. Since ProFile cannot detect these errors in the first place, the software also cannot detect if you’ve fixed them.
5 After reviewing the errors in the Active Auditor and resolving the issues, go to File > Properties and clear the CRA errors checkbox. ProFile will automatically reset the EFILE status flag to “Eligible”, and then you can rebuild and resubmit the return.
If all else fails, you may have to submit the tax return on paper. Remember, not all returns are eligible for EFILE!
Follow these steps to identify a particular ACK file that ProFile has not yet processed:
1 You will need the reference number to retrieve a particular ACK file. Open the file for a client whose return you included in an EFILE transmission.
2 Go to File > Properties.
3 Check the File History. Find the entry called: T1 EFILE Transmitted, and select that event.
4 In the memo field below, ProFile displays the reference number you need to retrieve the missing ACK file. Copy that number so you can enter it during your next session.
Manually retrieve an EFILE On-Line Plus ACK fileYou may occasionally need to retrieve a particular ACK file that did not download correctly from the CRA during an earlier session.
Follow this process to manually retrieve the ACK file:
1 Under EFILE > Options > T1 > EFILE Internet, select Prompt for Session Type before connecting to CRA.
2 Click OK.
3 Go to the EFILE menu and select EFILE Online Plus.
4 In the EFILE On-Line Plus Session Type dialog, select Automated Retrieval of a Specific Acknowledgement.
Enter the ACK name as it appears in the related client File History (File > Properties). You can copy and paste the name from File > Properties to locate the particular file you require.
5 Click OK.
6 Repeat these steps for each missing ACK file.
9

10 EFILE options for networks
Set interchange and group controls Interchange and group control numbers uniquely identify every data transmission formatted for electronic filing. This is necessary to maintain complete records.
If you EFILE from more than one workstation, you must set a unique inter-change control number for each workstation under EFILE > Options > Gen-eral. This identifies the source for an electronic file created at that station.
The second part of the interchange control number is the starting number used when creating Internet files on the workstation. If you do not change the starting point, ProFile will assign 0 to the first transmission file (of any ProFile file type) that is built at this machine. ProFile then automatically increments this number by one. When the preparer builds another file at this workstation, ProFile automatically assigns the transmission the next number.
For convenience, the first field in the group control can match the first part of the interchange control number.
Do not change these numbers after your first transmission or you may dupli-cate the number used for an earlier transmission. Keep a backup of the files you have transmitted and received for audit purposes.
Share an EFILE report directory on a network server You may want to create a central folder for storing the various files associ-ated with electronic filing (reports, return transmission units, acknowledg-ment files).
If you install ProFile into a shared server folder, you can use the default fold-ers created during the install. For each module that offers EFILE, you will find an EFILE folder within the folder for that module.
Alternately, you can use Windows® to create a shared EFILE folder any-where on your server.
1 Go to EFILE > Options.
2 Choose Common to set a T1 folder.
3 Click the [Browse] button next to the EFILE Directory field and browse through the Network Neighborhood to select the EFILE folder from your shared server. By browsing through Network Neighborhood (vs using a mapped network drive), you ensure the pathway follows the universal naming convention (UNC) and will be recognized at any workstation. ProFile option packages include the pathway to the EFILE folder, so if you have already created an option package, re-save the package after you’ve selected the EFILE folder.
Prevent filing messagesSome error messages in ProFile will display a notice at the time of printing or when you select to include a file with these errors in an EFILE transmission. EFILE errors automatically notify you when a file is not eligible for transmission.
You may also include other types of errors in the “prevent filing” notice when you print or EFILE. For example, if you use review marks, a file that contains any Correction review marks can alert you at the time you print or create your EFILE transmission. On Options > Environ-ment > Audit, select the error types that you would like to display a prevent filing warning.
11 Print EFILE Reports With ProFile, you can print full reports that follow the CRA guidelines. You
can also print a quick report summary. ProFile will save session log reports only if you have chosen Retain EFILE log in your EFILE Options (EFILE > Options > T1 > EFILE Internet).
1 Select EFILE > Reports to display the Report dialog box. All your EFILE reports are stored in the same directory, as defined under EFILE > Options > T1.
2 From the Files of type drop-down list, select the type of report file you would like to view or print.
3 Highlight a report in the file list. A summary of the report appears in the pre-view panel. To view a session log, highlight a file with the extension .SLG.
4 Click Open to view the full EFILE report.
5 Click Print to produce a hard copy of the report for your records. We recommend that you keep printed copies of all EFILE reports.
6 In the event that you see an un-processed .ACK (.TAC or .EAC) file, this indicates that ProFile has not automatically changed the file extension to .ACX (.TXA or .EAX) to show processing is complete. You can open the file and click Update.
The Techlog file is a session summary report that is often useful when troubleshooting your connection or transmission. You can find the Techlog.txt file in your EFILE folder, but you need to browse for the file through Windows™, not ProFile.
Print with the T7DRA template
Taxpayers who EFILE their returns and have balances owing can pay their tax bills at financial institutions using form T7DR(A). These institutions require the taxpayer information on a pre-printed T7DR(A), therefore, we cannot include the form in ProFile T1 as a laser facsimile.
However, we have added a T7DR(A) template in the Filing category of the Form Explorer. This template will print the required information on a pre-printed T7DR(A) form that you can feed into your laser printer.
The T7DRA template isn’t very exciting to look at on screen but the ability to print this information on pre-printed T7DR(A) forms is a great time-saver!
Since different printers may produce slightly different output, we recommend that you closely check the first T7DRA form that you print. If the fields are not aligned correctly on the pre-printed form, you can adjust the formatting of the template to correct the alignment.
Refer to online help (search on “templates”) for instructions to adjust the align-ment on the T7DR(A). Use Style > Paragraph in the word processor to change vertical spacing. Use tabs, or change the margins of the template (File > Print setup) to correct horizontal alignment of the printing in the fields.
12
Click [Open] to view the full EFILE report. You will then be able to print the session log.
6
© 2010 Intuit Canada. All rights reserved. ProFile and the Intuit logo are trademarks of Intuit Canada ULC, registered in Canada and/or United States and other countries. Microsoft and Windows are either registered trademarks or trademarks of Microsoft Corporation in the United States and/or other countries. Adobe and Acrobat Reader are either registered trademarks or trademarks of Adobe Systems Incorporated in the United States and/or other countries. All other brand or product names are trademarks or registered trademarks of their respective holders.
SEND (System for the Electronic Notification of Debt) was originally devel-oped to allow discounters to access client information to determine whether the client had outstanding debts which might affect the amount of the refund they pay out.
The system is available now to all authorized EFILE transmitters, and consid-ers a wider scope of information to better reflect a client’s debt situation. Use the SEND system to confirm whether or not your clients owe money to a government agency, or whether any of the following tax-affecting situations apply:
• Social assistance and workers’ compensation benefits (T5007)
• Employment insurance and other benefits (T4E)
• Reassessment details
• Debt owing to the CRA
• Claims by other government authorities against any refund
• Clients not on record with the CRA
• Whether the client has already filed a return
• Record of bankruptcy with the CRA
For more information on Internet SEND, visit the CRA website at: http://www.pro.netfile.ccra-adrc.gc.ca/eol-send-text-e.html
Prepare to use Internet SEND If you plan to use CRA SEND system over the Internet, complete these steps:
1 Register with CRA to receive your authorization to file electronically (agent number and password). Complete an RC153 and indicate in the Certifica-tion section that you will be using Internet SEND.
2 For each client whose records you will access through SEND, complete a form T1153. The CRA monitors the activities of electronic filers to ensure they comply with this requirement. If you do not comply, the CRA may suspend your EFILE/SEND privileges.
3 Use the T1/TP1 Wizard to configure ProFile to use Internet SEND under EFILE > Options.
Access Internet SEND Complete the following steps to access Internet SEND:
1 Open the client file for which you want to access SEND.
2 Select EFILE > Internet SEND request. ProFile automatically connects to EFILE On-Line Plus and enters your agent number and password.
3 Follow the instructions on screen. ProFile will automatically enter the required information for your client.
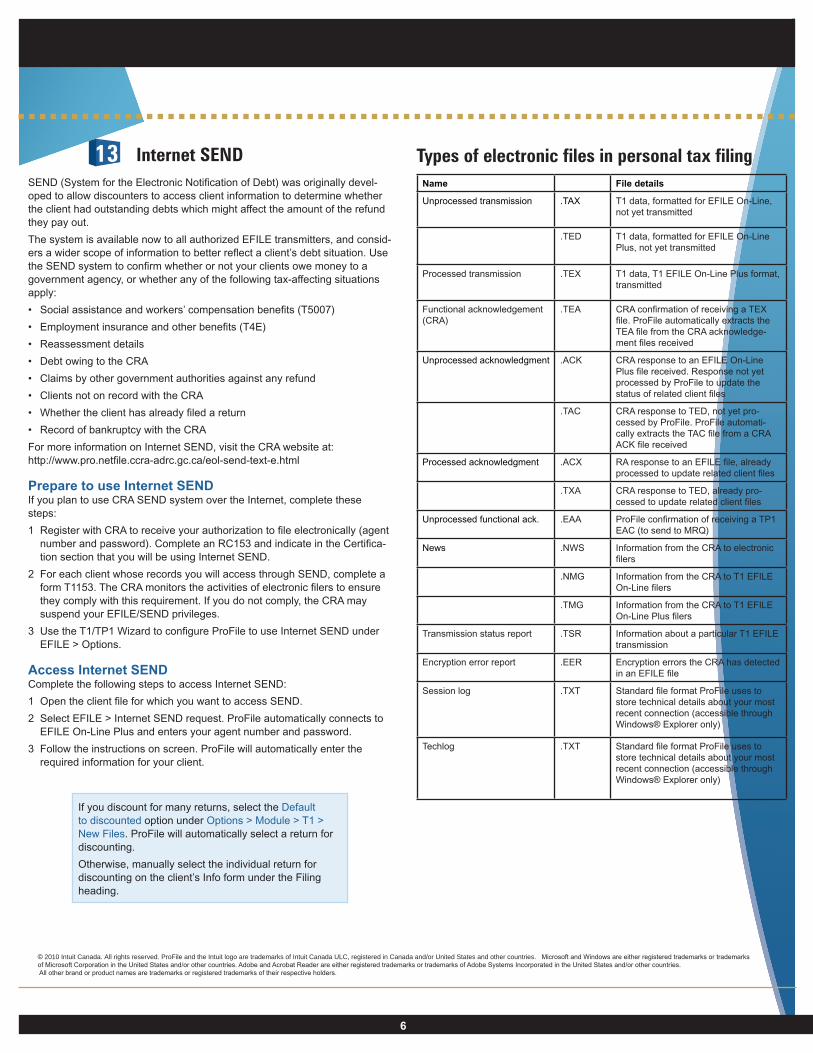
Types of electronic files in personal tax filing
If you discount for many returns, select the Default to discounted option under Options > Module > T1 > New Files. ProFile will automatically select a return for discounting.
Otherwise, manually select the individual return for discounting on the client’s Info form under the Filing heading.
13 Internet SEND Name Extension File details
Unprocessed transmission .TAX T1 data, formatted for EFILE On-Line, not yet transmitted
.TED T1 data, formatted for EFILE On-Line Plus, not yet transmitted
Processed transmission .TEX T1 data, T1 EFILE On-Line Plus format, transmitted
Functional acknowledgement (CRA)
.TEA CRA confirmation of receiving a TEX file. ProFile automatically extracts the TEA file from the CRA acknowledge-ment files received
Unprocessed acknowledgment .ACK CRA response to an EFILE On-Line Plus file received. Response not yet processed by ProFile to update the status of related client files
.TAC CRA response to TED, not yet pro-cessed by ProFile. ProFile automati-cally extracts the TAC file from a CRA ACK file received
Processed acknowledgment .ACX RA response to an EFILE file, already processed to update related client files
.TXA CRA response to TED, already pro-cessed to update related client files
Unprocessed functional ack. .EAA ProFile confirmation of receiving a TP1 EAC (to send to MRQ)
News .NWS Information from the CRA to electronic filers
.NMG Information from the CRA to T1 EFILE On-Line filers
.TMG Information from the CRA to T1 EFILE On-Line Plus filers
Transmission status report .TSR Information about a particular T1 EFILE transmission
Encryption error report .EER Encryption errors the CRA has detected in an EFILE file
Session log .TXT Standard file format ProFile uses to store technical details about your most recent connection (accessible through Windows® Explorer only)
Techlog .TXT Standard file format ProFile uses to store technical details about your most recent connection (accessible through Windows® Explorer only)