lay blocks conc st - wikieducator · push the block into place in the mortar and make it ... now...
TRANSCRIPT
Lay blocks with mortar — Student
1
Copyright © Commonwealth of Learning
Lay blocks with mortarWhat you will learnWhen you have fi nished this section, you should be able to:
❏ Mix mortar
❏ Lay blocks with correct mortar joints.
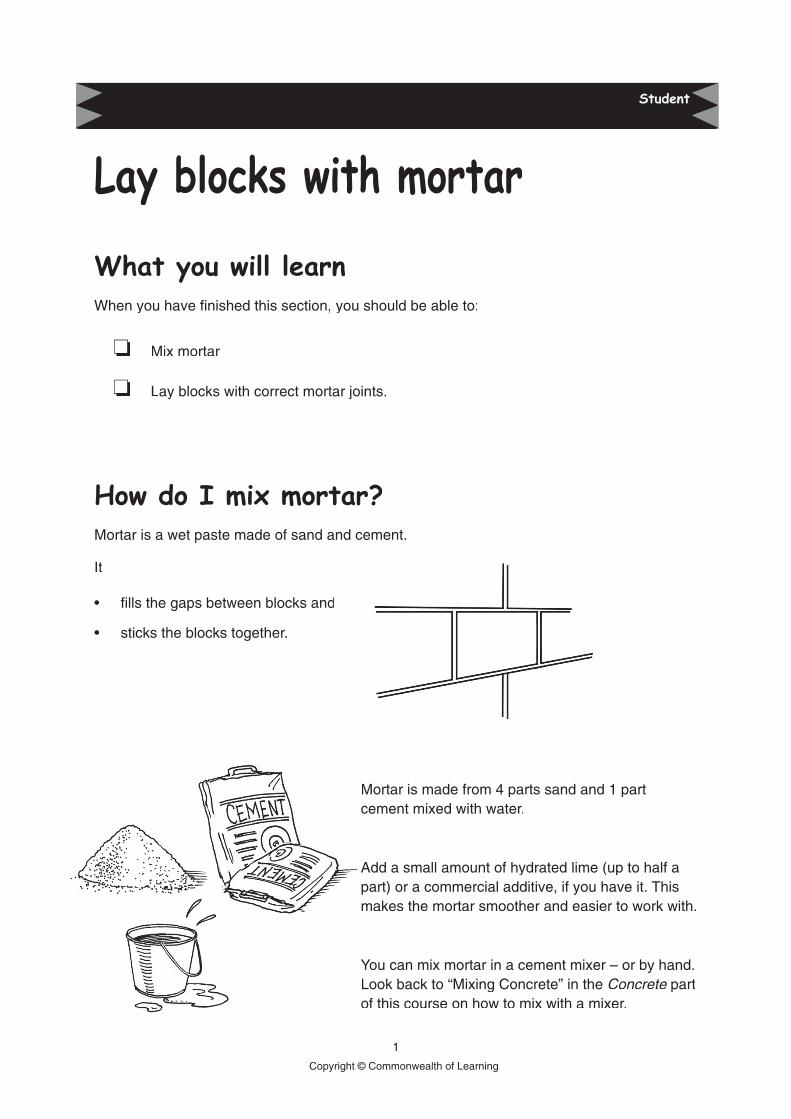
How do I mix mortar?Mortar is a wet paste made of sand and cement.
It
• fi lls the gaps between blocks and
• sticks the blocks together.
Mortar is made from 4 parts sand and 1 part cement mixed with water.
Add a small amount of hydrated lime (up to half a part) or a commercial additive, if you have it. This makes the mortar smoother and easier to work with.
You can mix mortar in a cement mixer – or by hand. Look back to “Mixing Concrete” in the Concrete part Concrete part Concreteof this course on how to mix with a mixer.
StudentStudent

Lay blocks with mortar — Student
2
Copyright © Commonwealth of Learning
2. When mixed properly, all of the mix will be the same colour.
4. Put water in the hole.
6. Mix it all together. Keep mixing for at least fi ve minutes.
1. Put the dry sand and cement on a board and mix them together very well very well verywith a trowel or shovel.
3. Make a heap of the mix and make a hole in the middle
5. Lift the dry mix into the water — a little bit at a time until all the water is used up
To mix a small amount of mortar by hand:

Lay blocks with mortar — Student
3
Copyright © Commonwealth of Learning
7. The mortar needs to be a paste like mashed plantain or taro.
Only mix enough mortar for the number of blocks you can lay in about 30 minutes. In hot weather, the mortar will start to “go off” and be unworkable in less than 40 minutes.
You can work with the mortar straight from the mixing board, but many tradespeople put the mortar into a bucket. It is easier to carry in a bucket and the mortar lasts a little bit longer before it goes off.
If the mortar is too dry it won’t spread or stick to the blocks properly. If it is too wet, the water will separate from the sand and the mortar will run off the blocks.
Add more water or sand/cement until your mix is right.

Lay blocks with mortar — Student
4
Copyright © Commonwealth of Learning
TrowelsA good trowel is the most important tool when you are working with mortar and blocks.
You will use your trowel to
• mix small batches of mortar
• spread mortar onto blocks
• tap blocks into place with the handle
• clean off spare mortar
• clean up
Look after your trowel:
The blade must be ‘shiny’ clean or the wet mortar will catch and make the trowel diffi cult to use. Never let mortar go hard on the blade.
Dry the trowel — and cover in grease or oil if you will not use it for a while — but clean it before using it again.
Mortar jointsThe mortar joint running along the top and bottom of the blocks is called the bed joint.bed joint.bed
The up-and -down, vertical joints are sometimes called “perpends” by tradesmen.
All fi nished joints should be 8–10mm thick.

Lay blocks with mortar — Student
5
Copyright © Commonwealth of Learning
To make jointsMaking joints looks very simple when you see it done by an expert!
You:
• spread a bit more mortar than you need
• place your block into the mortar
• push and tap the block to the exact position you need
• cut off any mortar that squeezes out.
It takes a lot of practice to do this quickly, accurately and with a good-looking fi nish, but you can get good results if you work slowly and carefully and follow the steps in this course.
Lay blocks with mortar — Student
6
Copyright © Commonwealth of Learning
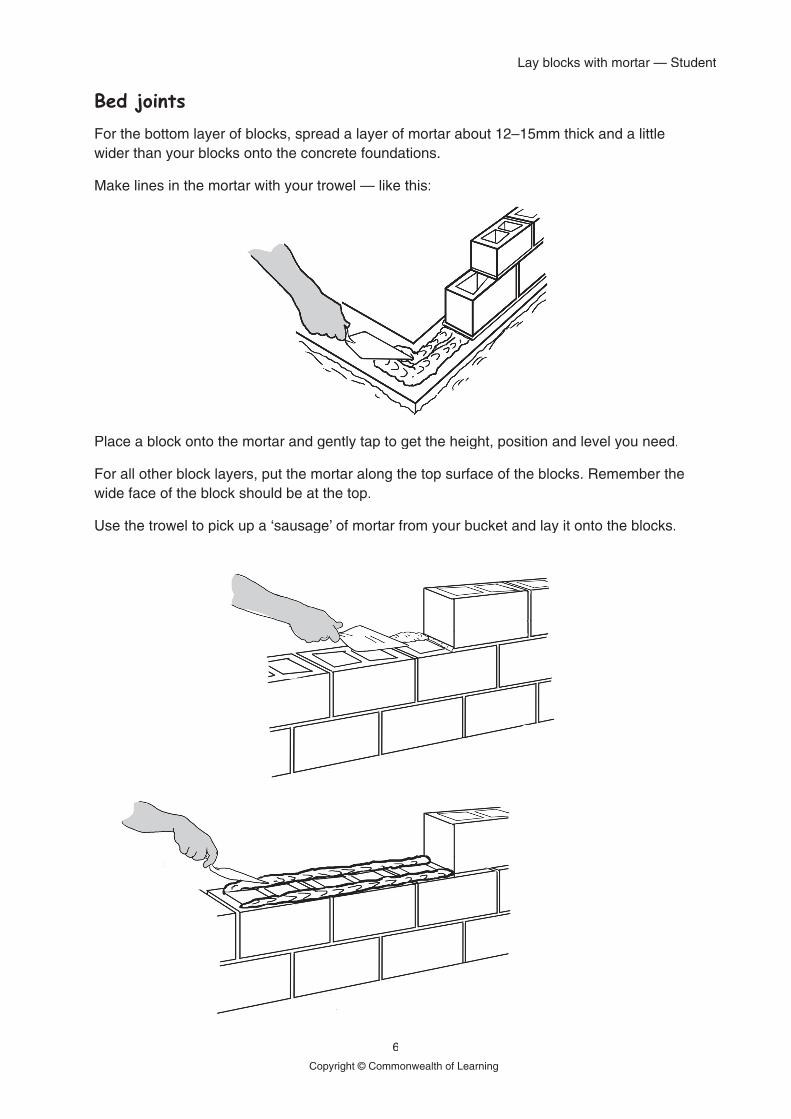
Bed jointsFor the bottom layer of blocks, spread a layer of mortar about 12–15mm thick and a little wider than your blocks onto the concrete foundations.
Make lines in the mortar with your trowel — like this:
Place a block onto the mortar and gently tap to get the height, position and level you need.
For all other block layers, put the mortar along the top surface of the blocks. Remember the wide face of the block should be at the top.
Use the trowel to pick up a ‘sausage’ of mortar from your bucket and lay it onto the blocks.

Lay blocks with mortar — Student
7
Copyright © Commonwealth of Learning
Place a block onto the mortar and gently tap to get the right height, position and level you need.
Cut off mortar that squeezes out of the joint.Cut off mortar that squeezes out of the joint.

Lay blocks with mortar — Student
8
Copyright © Commonwealth of Learning
Upright joints (perpend or head joints)Pick up ‘sausages’ of mortar and push or spread them onto the end shell of the block.
You can mortar the block that is in place on the wall, or mortar the end of block youare going to place.
Push the block into place in the mortar and make it level.
Cut off mortar that squeezes out of the joint.
Make all adjustments to the block while the mortar is soft. If you move the block once the mortar has “gone off” you will break the bond of the joint. If this happens, take off the block — and all the mortar, and start again.
Don’t try to re-use mortar that has been squeezed out of the joints. It will be too dry and have bits in it — and it won’t bond properly.
Mix and stir the mortar in your bucket every few minutes. This will mix the water and sand together again and keep the mortar ‘workable’.

Lay blocks with mortar — Student
9
Copyright © Commonwealth of Learning
Finishing jointsAbout 20 –30 minutes after you lay the blocks, the mortar will start to go hard and it will be fi rm if you touch it.
This is the time to ‘fi nish’ the joint.
Finishing a joint:
• makes the surface of the mortar harder so it lasts longer and keeps out water
• pushes the mortar against the top and bottom surfaces of the blocks
• makes the joint look neater.
A fi nishing toolMake a fi nishing tool for yourself from a piece of scrap round 12mm reinforcing steel.
Bend it into the shape of an “S” like this — and then push it along the joints
Use a jointer (fi nishing tool).
• Push it along each bed joint fi rst and then the upright joints.
• Scrape off any spare mortar with a trowel — or brush lightly with a stiff brush.
Your fi nished joint should look like this

Lay blocks with mortar — Student
10
Copyright © Commonwealth of Learning
Activity
Mix a batch of mortar.
Practise taking rolls of mortar from a bucket
• lay on the top face for bed joints
• spread onto the ends of blocks
Push blocks into the mortar and tap gently with the handle of the trowel to get a 10mm fi nished joint.
Did you have enough mortar to fi ll the joint?
or
Did you have a lot of mortar squeezed out and wasted?
Practise putting in different amounts of mortar until you get it about right
— a well fi lled joint of 10mm, without too much wastage.

Lay blocks with mortar — Student
11
Copyright © Commonwealth of Learning
Laying blocksYou have just practised making mortar and laying it to make bed and upright joints.
Earlier, you practised building with blocks with no mortar — and how to keep the layers level and plumb.
Now you can put these together — and lay blocks for a wall.
Work with the project and plan supplied by your tutor.
You will need to make and lay the foundations if this has not been done already. You may have made the foundations in the earlier Concreting part of this course.Concreting part of this course.Concreting
You worked out the number of blocks and mortar you will need in an earlier activity.
Get everything ready and put it near your wall before you start:
• Blocks
• ToolsToolsT
• Mix for your mortar
Lay the fi rst layer of blocks on the foundations, leaving space for the mortar. Mark the position of the blocks on the foundations.
Move the blocks out of the way.
Spread a bed of mortar — use plenty for this fi rst course.
Put the two end/corner blocks in place. Check they are
• the right way up — with the thicker face shell on top
• exactly on your marks
• level
• the right height.

Lay blocks with mortar — Student
12
Copyright © Commonwealth of Learning
Place the rest of the blocks for this fi rst layer.
• Mortar the end faces and push down into the mortar bed.
• Check alignment with your marks on the foundations — or use a string line.
• Adjust the blocks by tapping them with the handle of the trowel.
Build the two ends/corners of your wall, two or three blocks high. Check each layer for:
• bed mortar thickness (10mm)
• height (height stick)
• level and plumb (spirit level)
Fill in the wall between the ends/corners:
• Use a string line between corner blocks to align each layer.
• Bed and end mortar each block.
Cut off extra mortar from all joints with a trowel as you go.
Once the mortar has started to harden, fi nish the joints with a jointer.