lab1: machine language and assembly programming
TRANSCRIPT

Lab1: Machine Language and
Assembly Programming
Dimitar Nikolov

Lund University / Electrical and Information Technology / 1
Goal
• Learn how to write an assembly program for a MIPS
architecture
• Understand how instructions are executed
• Understand the usage of the Program Counter (PC) register
• Where data and instruction reside during program execution

Lund University / Electrical and Information Technology / 2
Tools
• Tools used for this exercise:
– MipsIt.exe
– Mips.exe
Used for program editing
Used for simulation

Lund University / Electrical and Information Technology / 3
Online test
• The online test is scheduled on Monday 04th November
• Access the test from the course web-page
• Example of an online test will be provided soon
Lund University / Electrical and Information Technology / 4
Overview
• Background
• MIPS architecture
• Writing an assembly program for a MIPS architecture
• Writing an assembly program using MipsIT toolset

Lund University / Electrical and Information Technology / 5
Programmers vs. computers
• Programmers can write programs in a high-level language,
or assembly language
• Computers can only execute programs written in their own
native language (machine code)

Lund University / Electrical and Information Technology / 6
Programming
High-level language (we don’t need to know the architecture)
Machine language (native to
the architecture)
Assembly language (we need to know the architecture)

Lund University / Electrical and Information Technology / 7
Machine Language
• CPU can only execute machine instructions
• The instructions reside in memory along with data
• Machine instruction is a sequence of bits
• There is a set of machine instructions that are supported
by a given computer architecture (Instruction Set)
00001
Opcode Operand (register) Operand (minne)
011 101010111101110
Lund University / Electrical and Information Technology / 8
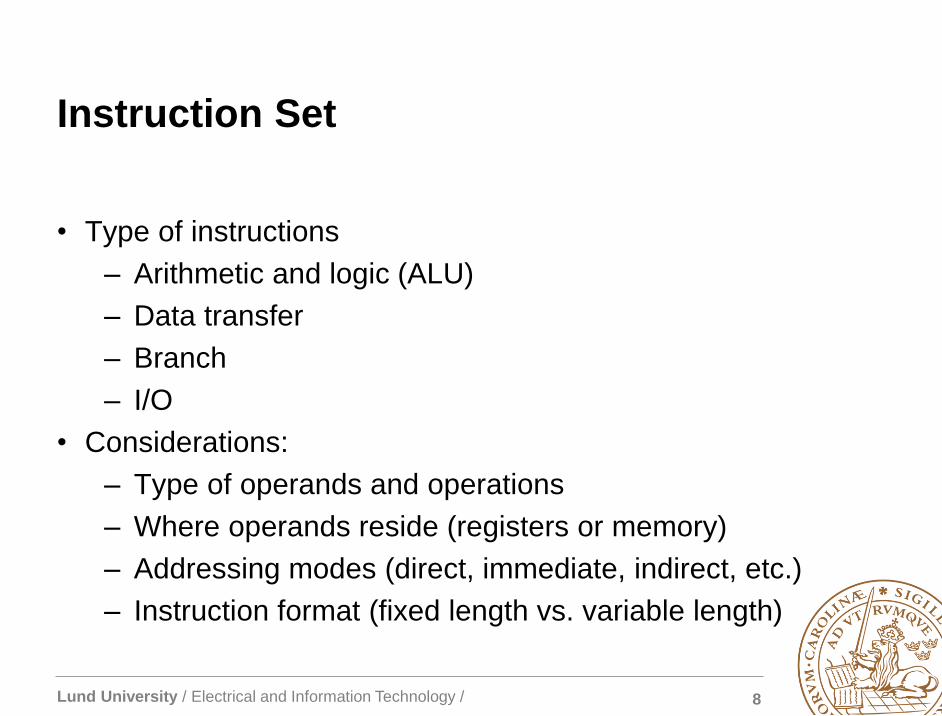
Instruction Set
• Type of instructions
– Arithmetic and logic (ALU)
– Data transfer
– Branch
– I/O
• Considerations:
– Type of operands and operations
– Where operands reside (registers or memory)
– Addressing modes (direct, immediate, indirect, etc.)
– Instruction format (fixed length vs. variable length)

Lund University / Electrical and Information Technology / 9
Overview
• Background
• MIPS architecture
• Writing an assembly program for a MIPS architecture
• Writing an assembly program using MipsIT toolset

Lund University / Electrical and Information Technology / 10
MIPS architecture
• A register file which consists of 32 general-purpose
(programmer visible) 32-bit registers
• Registers are denoted as $0-$31
• Register $0=0, is a constant (can not be modified by the
programmer)
• Register $31 is used to store the return address
• Special registers Lo and Hi, not directly accessible by the
programmer, are used to store result of multiplication or
division
Lund University / Electrical and Information Technology / 11
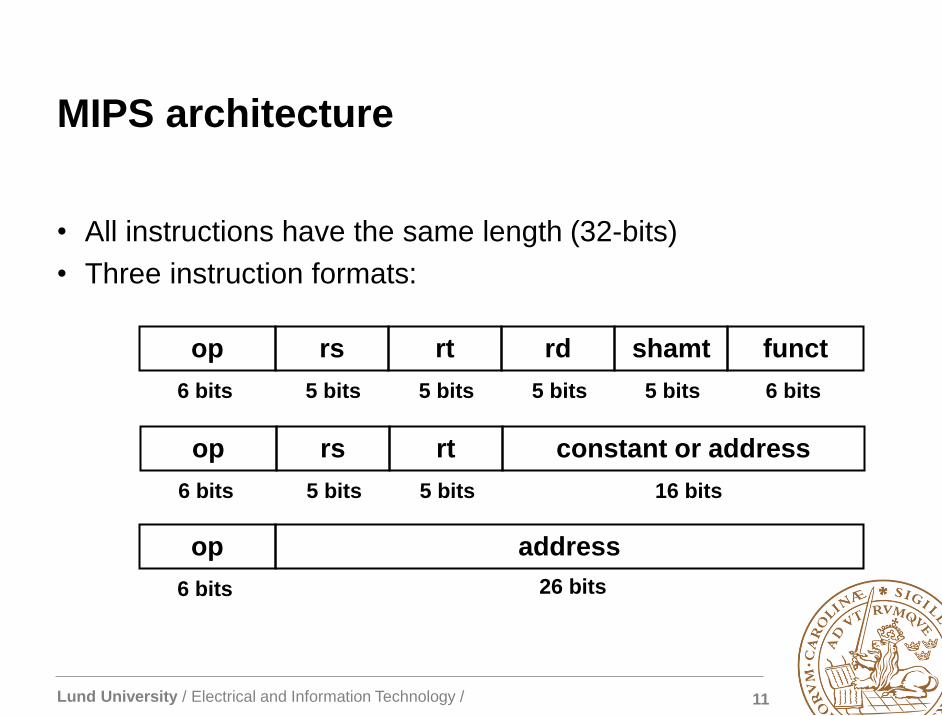
MIPS architecture
• All instructions have the same length (32-bits)
• Three instruction formats:
op rs rt rd shamt funct
6 bits 6 bits 5 bits 5 bits 5 bits 5 bits
op rs rt constant or address
6 bits 5 bits 5 bits 16 bits
op address
6 bits 26 bits
Lund University / Electrical and Information Technology / 12
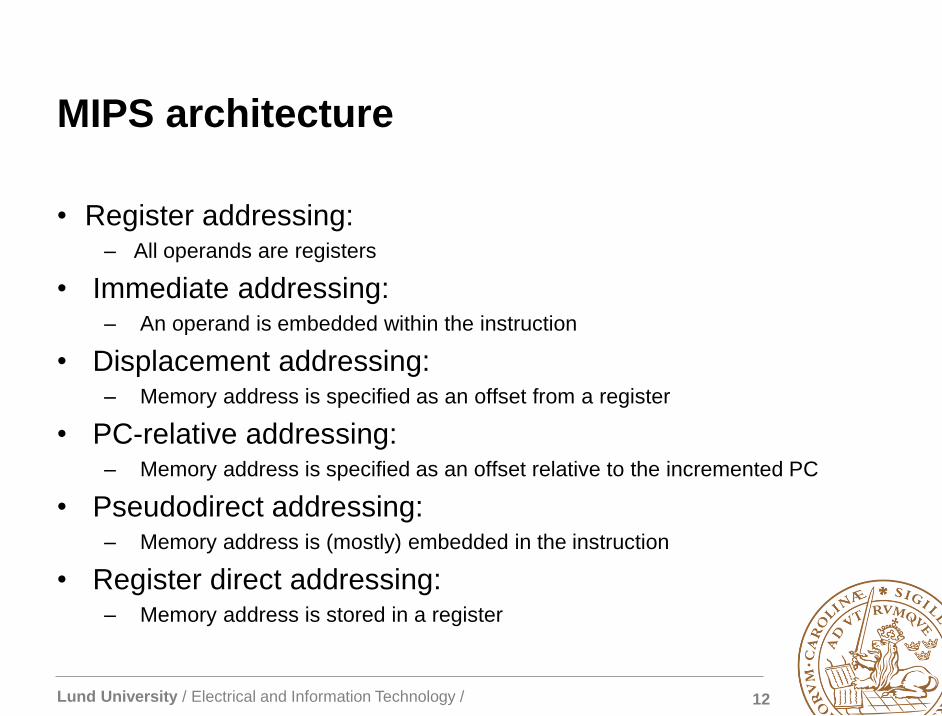
MIPS architecture
• Register addressing: – All operands are registers
• Immediate addressing: – An operand is embedded within the instruction
• Displacement addressing: – Memory address is specified as an offset from a register
• PC-relative addressing: – Memory address is specified as an offset relative to the incremented PC
• Pseudodirect addressing: – Memory address is (mostly) embedded in the instruction
• Register direct addressing: – Memory address is stored in a register
Lund University / Electrical and Information Technology / 13
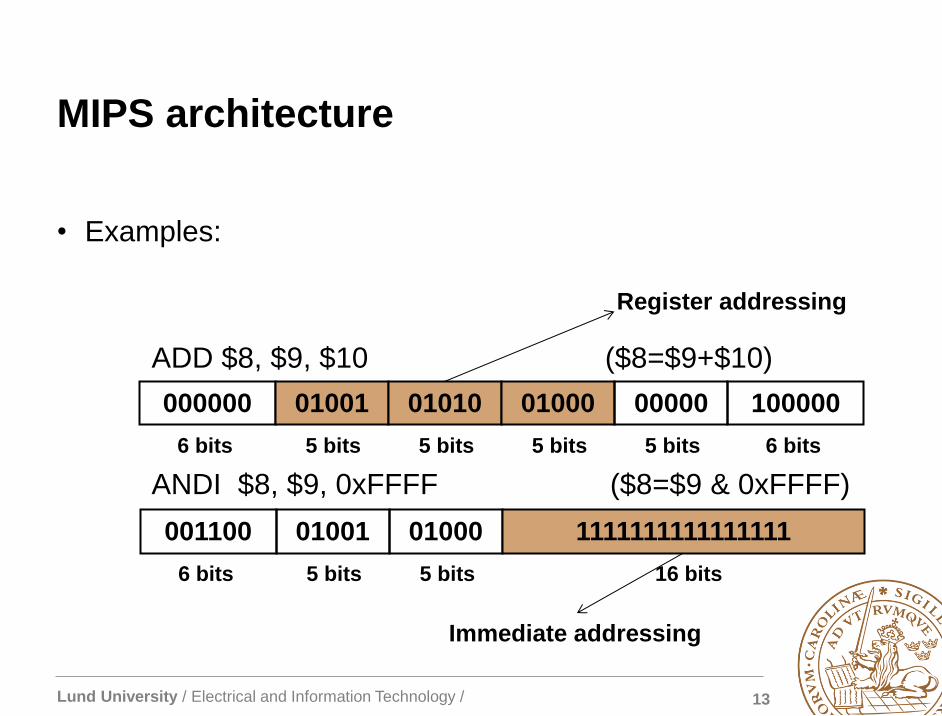
MIPS architecture
• Examples:
ADD $8, $9, $10 ($8=$9+$10)
ANDI $8, $9, 0xFFFF ($8=$9 & 0xFFFF)
000000 01001 01010 01000 00000 100000
6 bits 6 bits 5 bits 5 bits 5 bits 5 bits
001100 01001 01000 1111111111111111
6 bits 5 bits 5 bits 16 bits
Register addressing
Immediate addressing

Lund University / Electrical and Information Technology / 14
MIPS architecture
• Example: Displacement addressing
LW $8, 4($9) ($8=mm($9+4))
100011 01001 01000 0000000000000100
+
$7
$8 15862
$9 16
$10
16 ????
20 15862
24 ????
28 ????
16
4
20
registers
memory

Lund University / Electrical and Information Technology / 15
Overview
• Background
• MIPS architecture
• Writing an assembly program for a MIPS architecture
• Writing an assembly program using MipsIT toolset

Lund University / Electrical and Information Technology / 16
Assembly programming
• Assembly instructions (mnemonic) for each machine
instruction
ADD $8, $9, $10 == 0x12A4020
• Pseudoinstructions (supported by assembler)
– Translated into a sequence of machine instructions
LW $8, data == LI $9, 0x85000
LW $8, 0($9)

Lund University / Electrical and Information Technology / 17
Assembly programming
• Program structure
– Plain text file with data declaration and program code
– Data declarations
• Starts with assembly directive .data
• Var_name: storage_type value(s) *examples will be provided
– Program code
• Starts with assembly directive .text
• Contains instructions
• Definition of starting and ending point of the program
– Additional assembly directives might be used prior the data
declaration segment

Lund University / Electrical and Information Technology / 18
Assembly programming
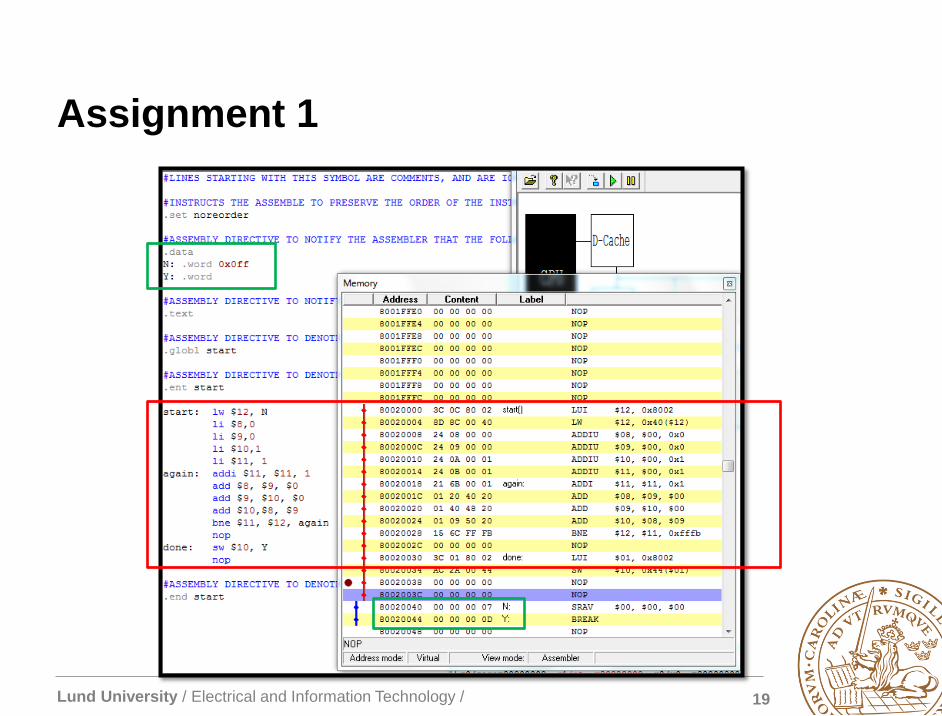
• ASSIGNMENT 1: Write an assembly program that
computes the N-th element in a Fibonacci sequence, and
stores the result in memory . Assume N>2
– Inputs: N (a memory location)
– Outputs: Y (a memory location)
• Example:
• Solution is given in Assignment1.pdf (course web-page)
0
1
0
1
21
F
F
FFF nnn
55 YN
Lund University / Electrical and Information Technology / 19
Assignment 1
Lund University / Electrical and Information Technology / 20
Assembly programming
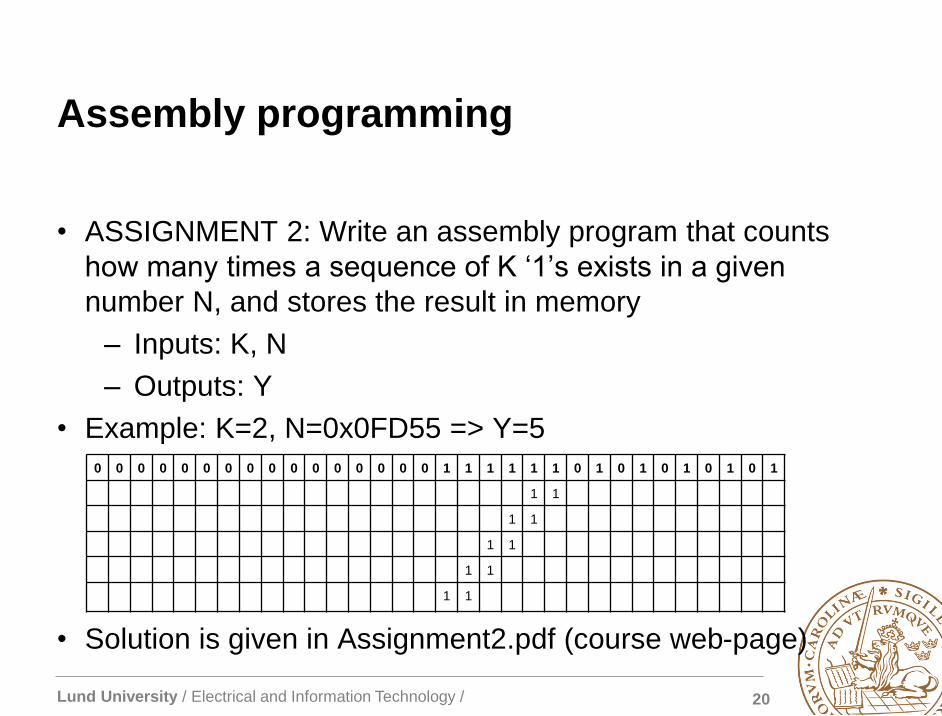
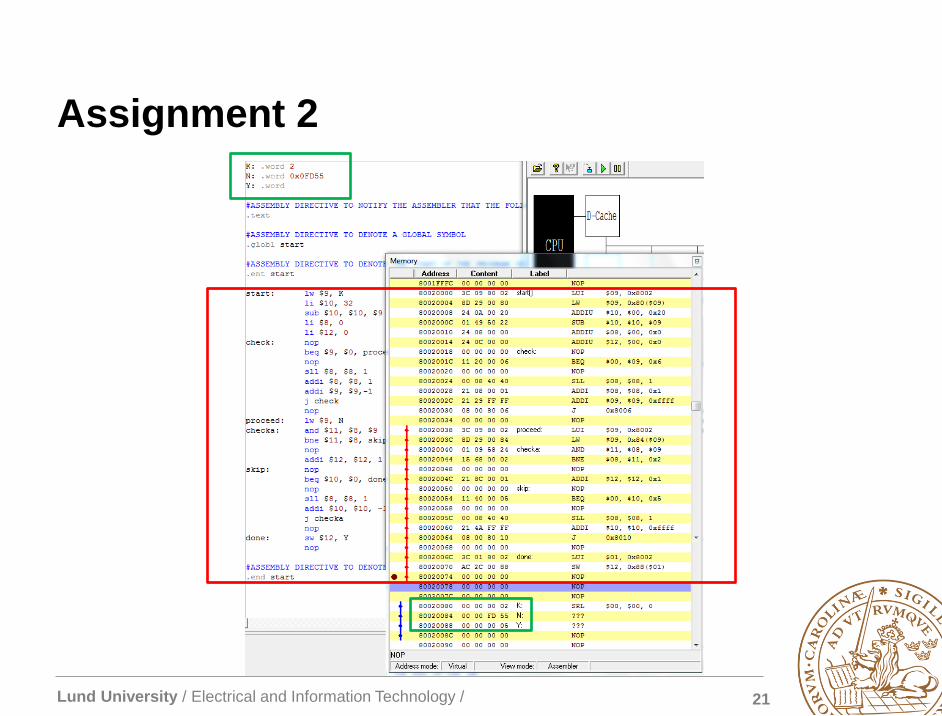
• ASSIGNMENT 2: Write an assembly program that counts
how many times a sequence of K ‘1’s exists in a given
number N, and stores the result in memory
– Inputs: K, N
– Outputs: Y
• Example: K=2, N=0x0FD55 => Y=5
• Solution is given in Assignment2.pdf (course web-page)
0 0 0 0 0 0 0 0 0 0 0 0 0 0 0 0 1 1 1 1 1 1 0 1 0 1 0 1 0 1 0 1
1 1
1 1
1 1
1 1
1 1
Lund University / Electrical and Information Technology / 21
Assignment 2

Lund University / Electrical and Information Technology / 22
Overview
• Background
• MIPS architecture
• Writing an assembly program for a MIPS architecture
• Writing an assembly program using MipsIT toolset

Lund University / Electrical and Information Technology / 23
Assembly programming using MipsIt toolset
• Open MipsIt.exe
Lund University / Electrical and Information Technology / 24
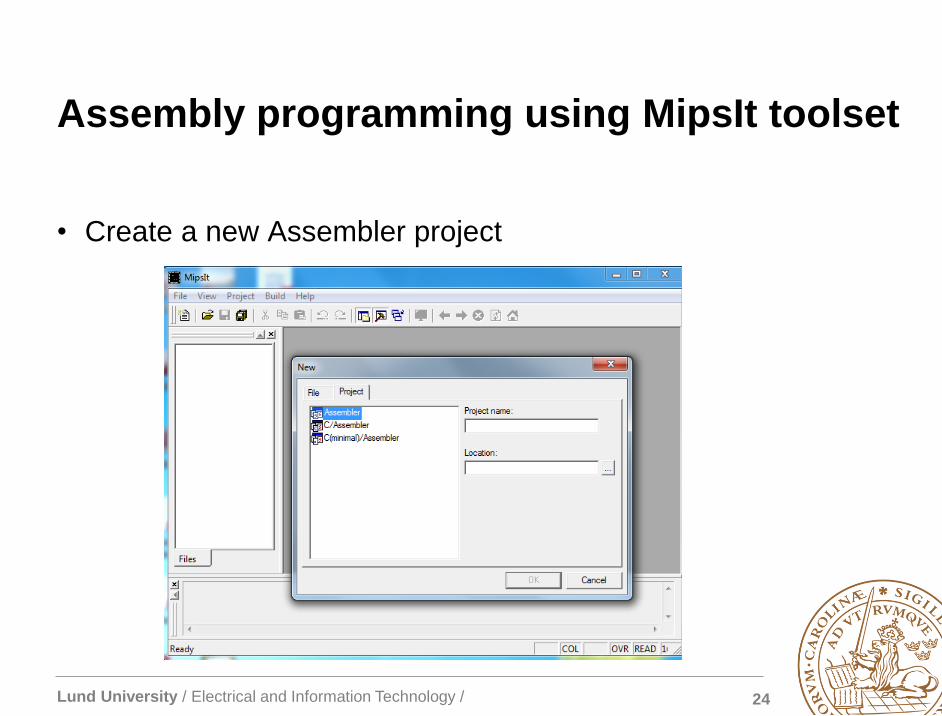
Assembly programming using MipsIt toolset
• Create a new Assembler project
Lund University / Electrical and Information Technology / 25
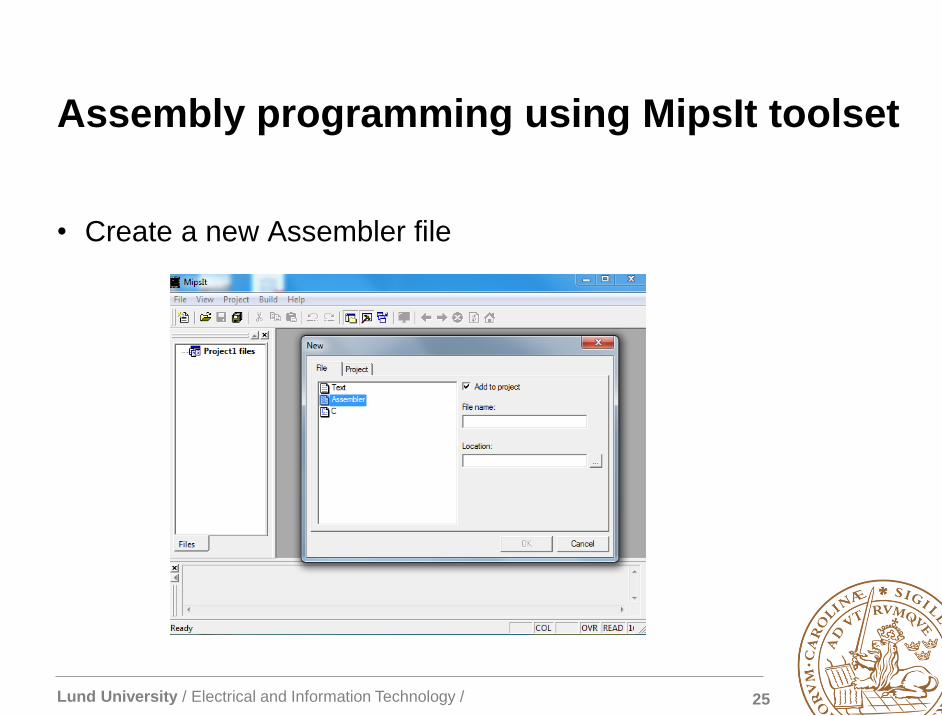
Assembly programming using MipsIt toolset
• Create a new Assembler file

Lund University / Electrical and Information Technology / 26
Assembly programming using MipsIt toolset
• Write the assembly program

Lund University / Electrical and Information Technology / 27
Assembly programming using MipsIt toolset
• Compile the assembly program
Lund University / Electrical and Information Technology / 28
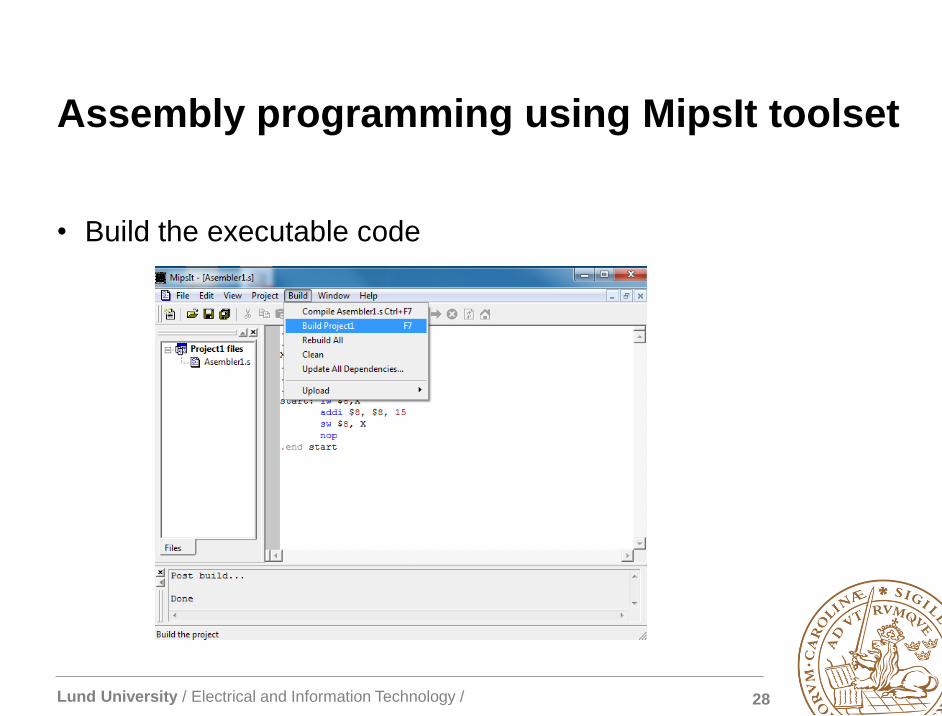
Assembly programming using MipsIt toolset
• Build the executable code

Lund University / Electrical and Information Technology / 29
Assembly programming using MipsIt toolset
• Open Mips.exe
Lund University / Electrical and Information Technology / 30
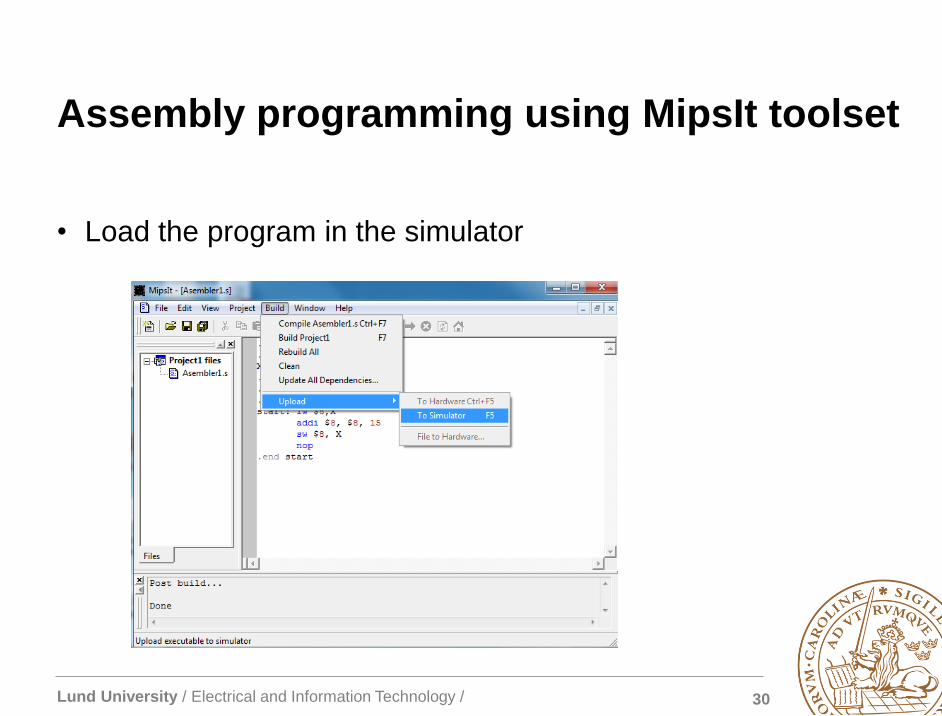
Assembly programming using MipsIt toolset
• Load the program in the simulator

Lund University / Electrical and Information Technology / 31
Assembly programming using MipsIt toolset
Click to see and change the
values of the registers
Click to see and change the values at
different memory locations
Lund University / Electrical and Information Technology / 32
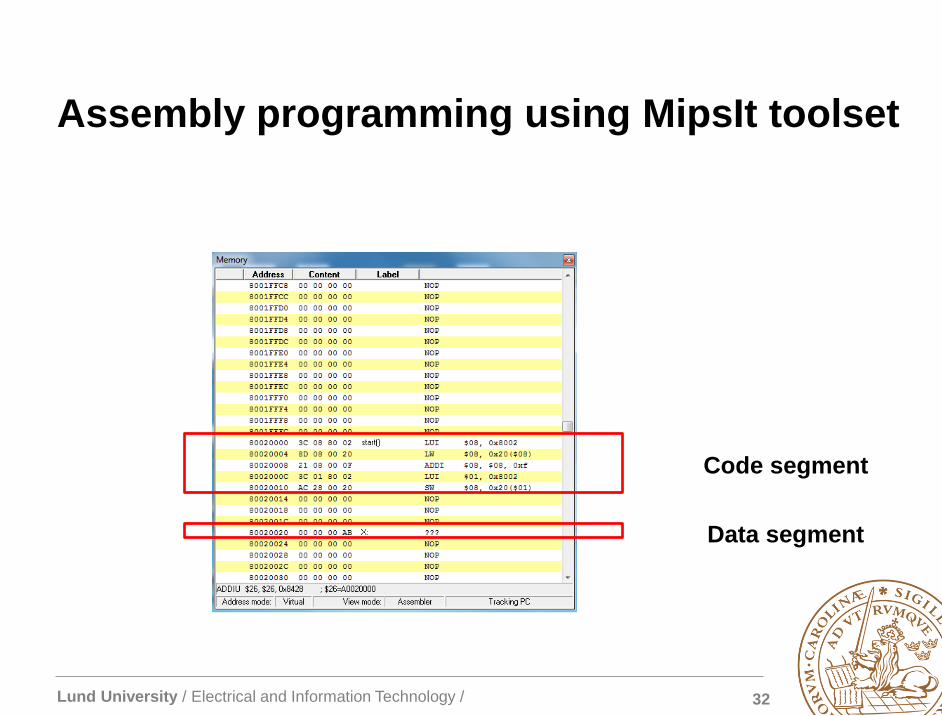
Assembly programming using MipsIt toolset
Code segment
Data segment
Lund University / Electrical and Information Technology / 33
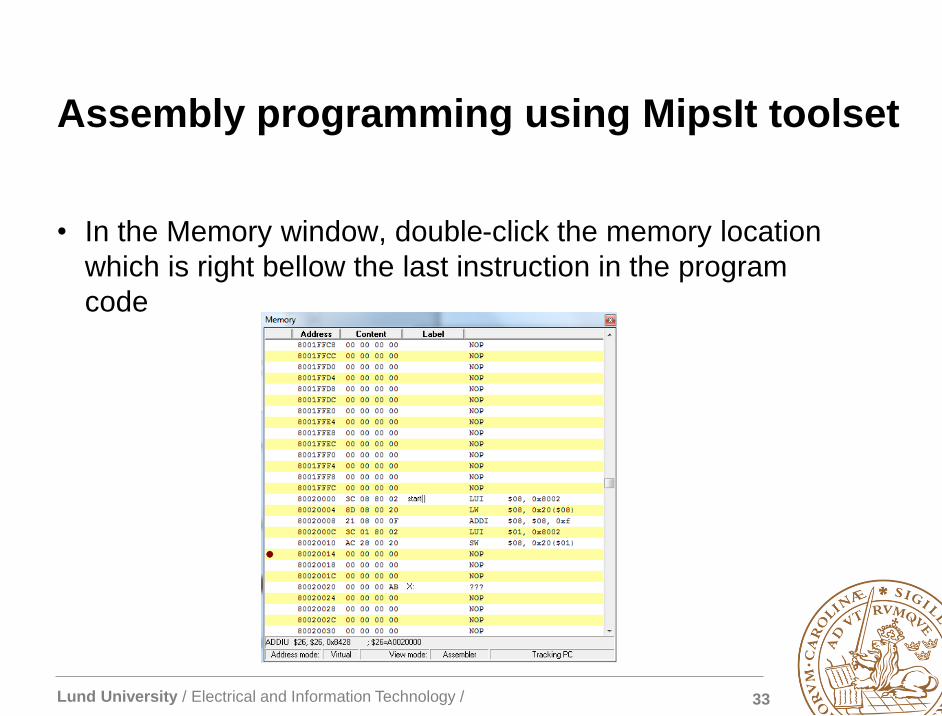
Assembly programming using MipsIt toolset
• In the Memory window, double-click the memory location
which is right bellow the last instruction in the program
code
Lund University / Electrical and Information Technology / 34
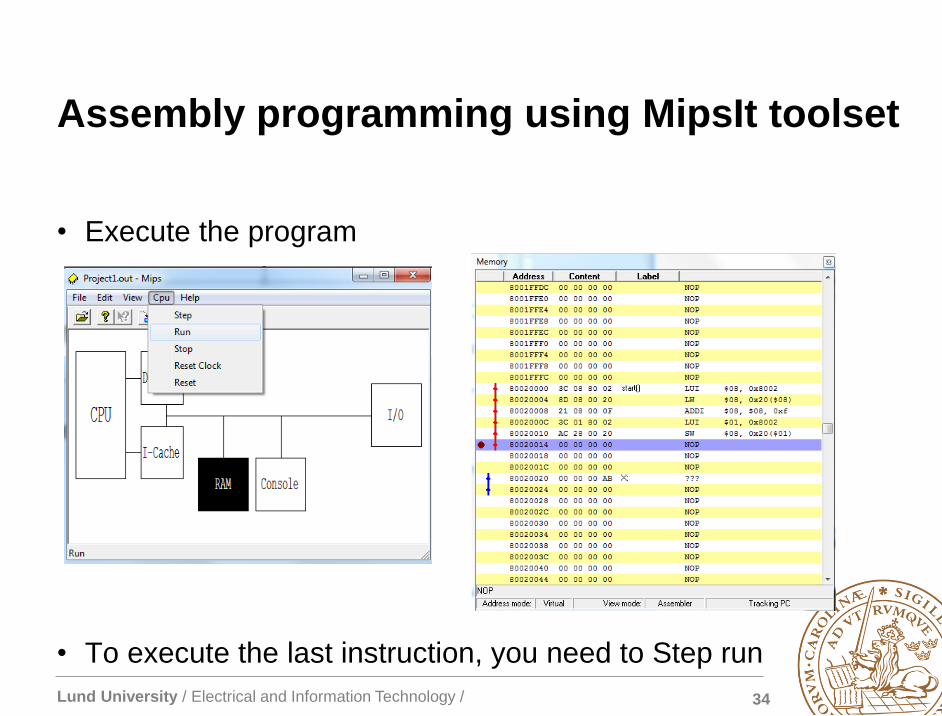
Assembly programming using MipsIt toolset
• Execute the program
• To execute the last instruction, you need to Step run

Lund University / Electrical and Information Technology / 35
Assembly programming using MipsIt toolset
• For a better understanding on how the execution flows use
the Step option
• By stepping, you get to see how the code is executed
instruction after instruction

Lund University / Electrical and Information Technology / 36