lab guide - college for creative...
TRANSCRIPT

1
STUD
ENT
LAB GUIDE

2
CCS Campus Safety Ford campus: (313) 664-7444 Taubman Center: (313) 664-1444(If using a campus phone, simply dial the last four digits of any campus phone number.)
Web links CCS Home: www.collegeforcreativestudies.edu Blackboard access: bb.collegeforcreativestudies.edu CCS Email: mail.collegeforcreativestudies.edu (or click the link on the Blackboard website)
Help Desk (for CCS lab computer problems) Link: helpdesk.collegeforcreativestudies.edu (or click the link on the Blackboard website) Call: (313) 664-7818
Imaging Center (Taubman Center, room 631) (313) 664-1507 Monday-Thursday: 8:00am-10:00pm Friday: 8:00am-3:00pm
Audio-Visual Checkout/Media Center (Ford campus, room W109) (313) 664-7647 Monday-Thursday: 8:00am-10:15pm Friday: 8:00am-5:00pm
24-hour Computer labs Room C201 (Ford campus) Room 630 (Taubman Center)

3
Table of Contents
Rules --------------------------------------------------------------------------- 4Student Responsibilities --------------------------------------------------- 4General Information --------------------------------------------------------- 5Getting Started in Mac OS X ------------------------------------------------ 6 Basic OS X ------------------------------------------------------------ 6 Savingyourfiles------------------------------------------------------ 6 Saving to your network home space ------------------------------ 7 Saving to your own storage media ------------------------------ 8 Lab printing ------------------------------------------------------------ 8 Logging Out ------------------------------------------------------------ 8Getting Started in Windows ------------------------------------------------ 9 Savingyourfiles------------------------------------------------------ 10 Saving to your network home storage --------------------------- 10 Saving to your own media ------------------------------------------ 11 Lab printing ------------------------------------------------------------ 11 Logging Out ------------------------------------------------------------ 11Changing your login password ------------------------------------------------ 12Using the wireless network ------------------------------------------------- 12 Obtaining the wireless password ------------------------------------ 12 Wireless setup for a Mac laptop -------------------------------------- 13 Wireless setup for a Windows laptop --------------------------------- 13 Wireless connection issues -------------------------------------------- 13Getting Started in Blackboard ---------------------------------------------- 14Getting Started in WebAdvisor --------------------------------------------- 15Getting Started with CCS Student Email ------------------------------------ 16Rendering at CCS ------------------------------------------------------------- 17Troubleshooting --------------------------------------------------------------- 18 Accessing the Help Desk ---------------------------------------------- 20
4
Rules
• Have your student ID badge at all times.
• Absolutely no food or drinks in the labs.
• Deletingfilesfromcomputersortheshareddrivethatdonotbelongtoyouisstrictlyprohibited. Students who do so may be subject to disciplinary action.
• Maintain overall cleanliness.
• Treat Academic Technologies proctors and lab equipment with respect. Any failure to do so will result in a loss of lab privileges.
• Any detrimental use of lab computer equipment will not be tolerated.
o Noillegal/pirated/pornographicfilesorsoftware,orprogramsthatdownloadsuchmaterial
o Pilfering lab hardware/software
o Willfully damaging equipment, jamming or ripping out connections
• Pay attention to signs and heed announcements as they are posted.
Student Responsibilities
• Questions about learning how to use various software applications to complete your course work should be directed to your instructors.
• Youaresolelyresponsibleforbackingupyourownfiles.CCSisnotresponsibleforanylostwork.AnyfilesleftonlabcomputersarepubliclyaccessibletoallCCSstudentsandstaff.Also note:
o Files may be deleted at the discretion of the Academic Technologies department from the local computer and the network shared drive due to illegal, corruptive, or otherwise detrimental activity.
o Files may be deleted from network or other drives (except your home drive) when disk space gets low. Signs will be posted notifying students when this will take place.
o The contents of the File Transfer folder will be deleted every Friday at 5:30 am. Backup yourfilesbeforethen.
o The contents of your Home Folder will be completely deleted at the end of the academic year in May, following the close of classes. Notices will be posted and anemailreminderswillbesenttoyourCCSemailwiththespecificdate.Besuretobackupyourfilesbeforethedeletiondate.

5
General Information
Computer LabsEach campus has a 24-hour lab with Mac and PC computers, printers, and scanners. On the Ford campus, room C201 is the 24-hour lab. At the Taubman Center, room 630 is the 24-hour lab.
ItemsfoundinthelabswillbeturnedovertotheCampusSecurityOfficelocatedoneachcampus.The Academic Technologies Department is not responsible for lost items.
Login informationEvery student is provided with a username and password for email, Blackboard, and computer and network drive access for most labs on-campus. Your username and password should have been provided with your admissions information.
Ifyouloseyourlogininformation,gototheAcademicTechnologiesofficeinroomW002locatedinthe WBFII building or in room 616 at the Taubman Center. Be sure to have your student ID with you.
Lab ProctorsLab proctors are on duty during class hours. If a proctor is not doing rounds, he/she may be found in the Ford campus or Taubman Center 24-hour lab. They enforce lab policies and keep the labs clean. Lab proctors are not personal tutors; they are able to troubleshoot general issues and can help students submit tickets to the Help Desk when additional help is needed.
Imaging CenterThe Imaging Center offers a variety of print services to the CCS community. It is located on the 6th flooroftheTaubmanCenterinroom631,anditshoursareMonday-Thursday,8:00am-10:00pm,andFriday, 8:00am-3:00pm. For more information, click the “Imaging Center” link within the “Campus Offices”pageonBlackboard.
Help DeskThe Help Desk is an online feature where you may submit tickets detailing technology problems in the CCS labs. To submit a ticket go to the CCS Blackboard website (bb.collegeforcreativestudies.edu) and click on the Help Desk link.
It is imperative that you create a ticket via Help Desk whenever there is a technology problem in the CCS labs. Once a ticket has been created, it will be forwarded to a technical staff member for resolution.Youwillbenotifiedbyemailoncetheproblemhasbeenresolved.
Details on how to create a ticket via the Help Desk can be found in the “Accessing the Help Desk” section of this booklet on page 20.
AVCThe Audio-Visual Center provides equipment rental services and support for the Audio-Visual editing suites, the sound recording/editing suites, and the Production Studio. Reservations can be made through the AVC. The center is located in room W109 on the Ford campus. Its hours are 8:00am-10:15pm Monday through Thursday and 8:00am-5pm on Fridays.

6
Getting started in Mac OS X
When you begin to use one of the Macintosh computers, you should see a login screen. Log in by clicking on the default Student account. Except for specialized labs, no password is necessary.
Basic OS XOnce you’ve logged in, note the various parts of the screen, which should be similar to the above interface.
The Dock is a pane that pops up on the bottom of the screen, displaying shortcuts to internet browsers such as Firefox, Safari, and utility applications such as System Preferences. Click the Applications folder to quickly access the majority of the computer’s installed programs.
The applications available on each computer vary from lab to lab, so check which programs are installed before settling on a machine.
Saving your filesItisimperativethatyousaveyourfilesonaregularbasis.Always make sure that your work is backed up to: •yournetworkhomestorage •yourownstoragemedia
Totemporarilystoreyourfilesontothecomputeritself,dragthemto the Documents folder, whose shortcut is in the Dock, OR into the ThawSpace drive on the desktop.
Please note that any files saved outside of these areas on the computer will be deleted upon logout OR reboot! Due to security software, all personal settings are regularly reset upon logout or reboot,andallfilesstoredoutside of the ThawSpace drive will be deleted.
7
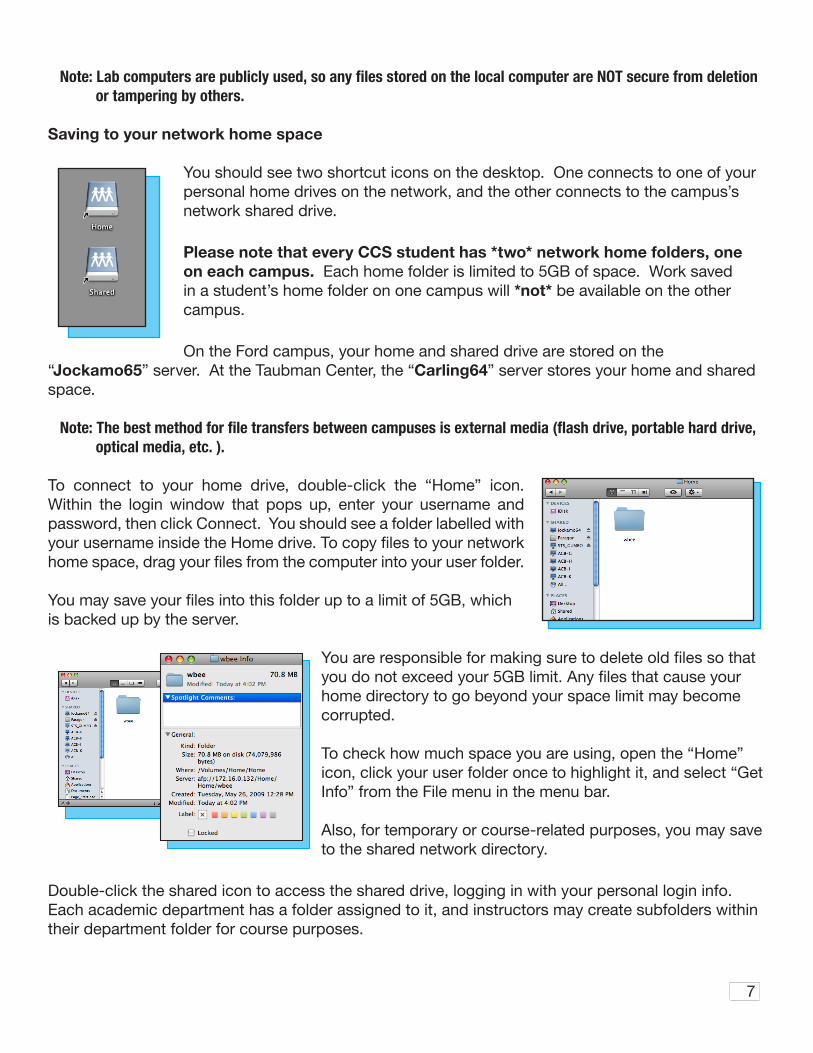
Note: Lab computers are publicly used, so any files stored on the local computer are NOT secure from deletion or tampering by others.
Saving to your network home space
You should see two shortcut icons on the desktop. One connects to one of your personal home drives on the network, and the other connects to the campus’s network shared drive.
Please note that every CCS student has *two* network home folders, one on each campus. Each home folder is limited to 5GB of space. Work saved in a student’s home folder on one campus will *not* be available on the other campus.
On the Ford campus, your home and shared drive are stored on the “Jockamo65” server. At the Taubman Center, the “Carling64” server stores your home and shared space.
Note: The best method for file transfers between campuses is external media (flash drive, portable hard drive, optical media, etc. ).
To connect to your home drive, double-click the “Home” icon. Within the login window that pops up, enter your username and password, then click Connect. You should see a folder labelled with yourusernameinsidetheHomedrive.Tocopyfilestoyournetworkhomespace,dragyourfilesfromthecomputerintoyouruserfolder.
Youmaysaveyourfilesintothisfolderuptoalimitof5GB,whichis backed up by the server.
Youareresponsibleformakingsuretodeleteoldfilessothatyoudonotexceedyour5GBlimit.Anyfilesthatcauseyourhome directory to go beyond your space limit may become corrupted.
To check how much space you are using, open the “Home” icon, click your user folder once to highlight it, and select “Get Info” from the File menu in the menu bar.
Also, for temporary or course-related purposes, you may save to the shared network directory.
Double-click the shared icon to access the shared drive, logging in with your personal login info. Each academic department has a folder assigned to it, and instructors may create subfolders within their department folder for course purposes.

8
Totemporarilybackupyourfilesontheshareddrive,savethem to the File Transfer folder.
Fromhere,youmaytransferyourfilestoanothercomputer by logging into another Mac and accessing the File Transfer folder there.
Copythefilestothelocalcomputerbydraggingthemfrom the File Transfer folder into the Documents folder, whose icon is located in the Dock.
Important: The File Transfer folder’s contents are deleted every Friday at 5:30am.
TheFileTransferfolderisforshort-termstorageonly,sobackupyourfilesregularlytoyourownmedia. In addition, your instructor may designate space on the shared drive to submit or retrieve course files,andwillinformyouofwherethisspaceislocated.
Saving to your own storage mediaTo save to your own media, presumably a USB/Firewire drive, power on your drive if it has an external power source, and plug the media in via the appropriate port.Adiskiconshouldappearonthedesktop.Dragyourfilesontothediskiconto save them to the drive.
Whenfinished,besuretodragthediskiconitselfintheTrashicontoejectthedrive properly. Failing to perform this step may result in corruption or loss of your data.
Lab printingCCS now uses print management software to regulate printing in most labs. The Papercut software will load at login, displaying a window in the top-right corner of the screen.
When printing from a lab computer to a lab printer, you will be prompted to log in and authenticate your print jobs. For more information, consult the “Using the Papercut system” pamphlet, located in the Ford campus kiosk (lower level) or in the Taubman Center 24-hour lab. Logging OutBesuretologoutonceyouarefinishedusingthecomputer.Failingtolog out may leave any network home or shared drives that you have logged into open for others! To do so, click the Apple menu located at the top-left corner of the screen, and select “Log Out”.
Note: Any files stored on the computer outside of the ThawSpace drive will be deleted upon logout or reboot! Save to your own media or home space.

9
Getting started in Windows
When you begin to use one of the Windows lab computers, you will need to login using your username and password. To log in, enter your personal user name and password and click ‘OK’ (or hit Enter). You should proceed to the desktop.
If you cannot log in,
•Checktoseethatyourcapslockkeyisoff.(Allcharactersshouldbelowercase.)•Makesurethattheloginscreensays“LogontoNovellNetwork”.Ifitsays“Logontothe
computer”, click the “Novell Logon” link instead, located in smaller letters shortly under the passwordfield.
•Makesurethat the computer’s ethernet cord is connected securely on both ends.•CometoroomW002intheWBFIIBuildingontheFordcampusorroom616,theAcademicTechnologiesoffice,attheTaubmanCentertoverifyyourlogininformation.BringyourCCSIDbadge.
To use one of the installed applications, either double-click its shortcut on the desktop or click the Start button, then Programs, to access the full list of available applications. Open the ‘My Computer’ icon on the desktop to access various drives, including network drives. Depending on the campus, the “H:” drive pertains to one of your home folders, and the “S:” drive pertains to the campus’s shared drive.
Each student has two home folders, one available for saving work on each campus. Each home folder is limited to 5GB of space. Work saved in a student’s home folder on one campus will not be available on the other campus.
On the Ford campus, your home and shared space are stored on the “Jockamo65” server. At the Taubman Center, your home space and shared space are stored on the “Carling64” server.
10
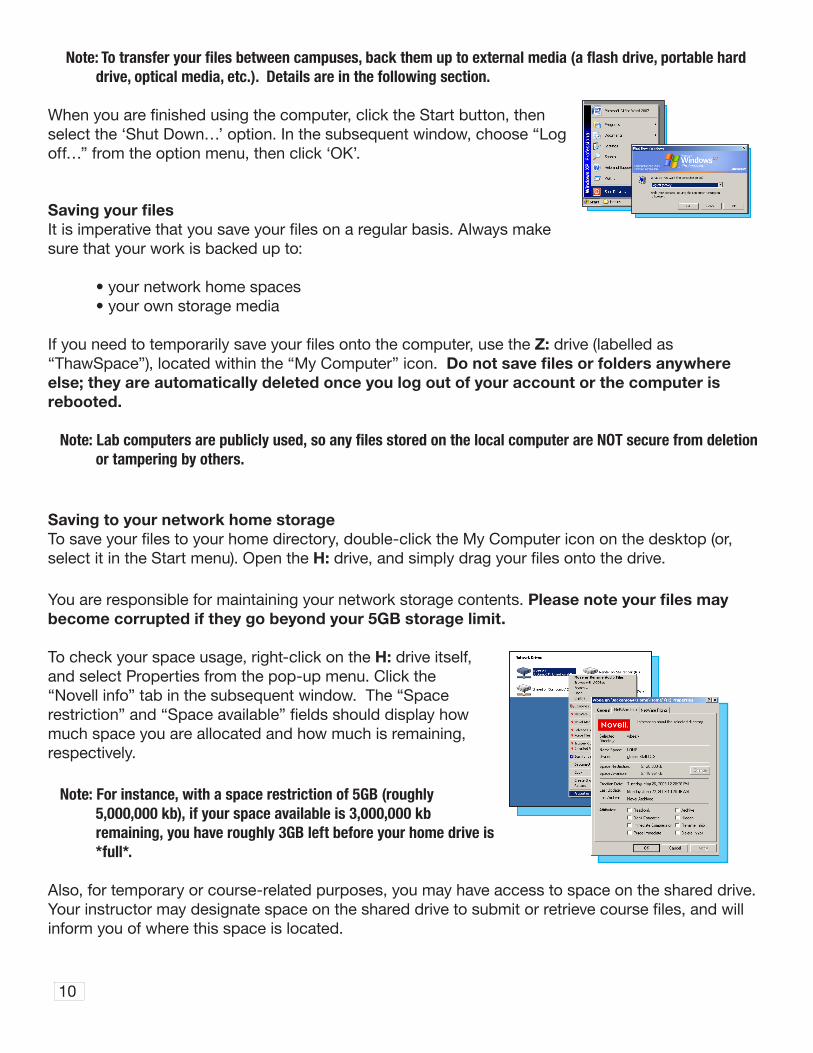
Note: To transfer your files between campuses, back them up to external media (a flash drive, portable hard drive, optical media, etc.). Details are in the following section.
Whenyouarefinishedusingthecomputer,clicktheStartbutton,thenselect the ‘Shut Down…’ option. In the subsequent window, choose “Log off…” from the option menu, then click ‘OK’.
Saving your filesItisimperativethatyousaveyourfilesonaregularbasis.Alwaysmakesure that your work is backed up to:
•yournetworkhomespaces •yourownstoragemedia
Ifyouneedtotemporarilysaveyourfilesontothecomputer,usetheZ: drive (labelled as “ThawSpace”), located within the “My Computer” icon. Do not save files or folders anywhere else; they are automatically deleted once you log out of your account or the computer is rebooted.
Note: Lab computers are publicly used, so any files stored on the local computer are NOT secure from deletion or tampering by others.
Saving to your network home storageTosaveyourfilestoyourhomedirectory,double-clicktheMyComputericononthedesktop(or,select it in the Start menu). Open the H:drive,andsimplydragyourfilesontothedrive.
You are responsible for maintaining your network storage contents. Please note your files may become corrupted if they go beyond your 5GB storage limit.
To check your space usage, right-click on the H: drive itself, and select Properties from the pop-up menu. Click the “Novell info” tab in the subsequent window. The “Space restriction”and“Spaceavailable”fieldsshoulddisplayhowmuch space you are allocated and how much is remaining, respectively.
Note: For instance, with a space restriction of 5GB (roughly 5,000,000 kb), if your space available is 3,000,000 kb remaining, you have roughly 3GB left before your home drive is *full*.
Also, for temporary or course-related purposes, you may have access to space on the shared drive. Yourinstructormaydesignatespaceontheshareddrivetosubmitorretrievecoursefiles,andwillinform you of where this space is located.

11
Totemporarilybackupfilesontheshareddrivefortransferringpurposes,savethemtotheFile Transfer folder within the shared (S:) drive.
Note: The File Transfer folder will be cleaned out every Friday at 5:30am! Back up your files to your home drive or own media before then.
Saving to your own media
USB flash drivesTherecommendedoptionforquicklytransferringyourdataistouseaUSBflashdrive. Plug your drive into an available USB port, and the drive icon should show up insidethe‘MyComputer’icon,onwhichyoumaycopyandbackupyourfiles.
Do not unplug the drive from the computer before ejecting it properly. Right-click on the drive icon and select ‘Eject’ to eject the drive. Now you may remove it from the machine.
External hard drivesRefertothecompany’sinstructionmanualandtechnicalsupportfirsttoformatyourexternal hard drive properly or to diagnose problems.
Powering on an external drive while it is connected to the machine may damage the connection port.Toavoidthis,firstplugthedriveintoanelectricaloutlet and turn it on; then connect it to the computer through an available USB or Firewire port.
The drive should appear as an icon within the “My Computer” window, on which you may copy and backupyourfiles.Again,do not unplug the drive from the computer before ejecting it properly. To eject it, right-click the drive icon and select Eject from the pop-up menu. Now you may turn it off and disconnect it from the machine.
Lab printingCCS now uses print management software to regulate printing in most labs. The Papercut software will load at login, displaying a window in the top-right corner of the screen.
When printing from a lab computer to a lab printer, you will be prompted to log in and authenticate your print jobs. For more information, consult the “Using the Papercut system” pamphlet, located in the Ford campus kiosk (lower level) or in the Taubman Center 24-hour lab.
Logging OutTo log out from the computer, click the Start button and select “Shut Down”. Within the subsequent pop-up window, select “Log out”, and hit OK.
Note: Any files stored on the computer *outside* of the ThawSpace drive will be deleted upon logout or reboot! Save to your own media or home space.

12
Changing your login password
To change your CCS login password, open a web browser and navigate to the CCS Blackboard page. Click the “Password Reset” button in the Quick Links section.
Alternatively, you may navigate to the web address: http://pwreset.collegeforcreativestudies.edu
Click the “Change Password” link. Type in your username and current password, then click Login. In the next window, type in your new password twice, then click the “Change Password” button.
This will change your password for the CCS network login, CCS email, and CCS Webadvisor systems.
Using the wireless network
If you have a laptop with wireless network capability, the College for Creative Studies offers wireless network ser vices on both CCS campuses. Any changes in accessing the wireless network will be noted in updated documents, which are available in the lobby of the lower level of the WBFII Building ontheFordcampusorattheAcademicTechnologiesofficelocatedattheTaubmanCenter.
The default network for the Ford campus is named “CCS Wireless”, which any wireless-enabled laptop should pick up automatically. It offers 128-bit WPA encryption. Please note that using an encrypted network does not guarantee privacy or security. If you plan on entering per sonal or sensitive data online, you are much more secure using a wired connection.
These encryption services require the use of a password, for authentication purposes.
Obtaining the wireless passwordTo connect to the CCS wireless network, you will need the wireless password. For security reasons, this key is only available on Blackboard, once you log in with your username and password.
Log on to the Blackboard website (bb.collegeforcreativestudies.edu). Navigate to the My CCS tab --> My Organizations module and click on All Users. Select Documents --> Technical Support.
Click on the “Read more” link for CCS Wireless. The password will be displayed on the page which opens.
Note: If there are any problems obtaining the wireless password from Blackboard, you can obtain the password from the Academic Technologies office. Come to room W002 in the WBF II building on the Ford campus or room 616, the Academic Technologies office, at the Taubman Center. Make sure you have your CCS ID badge.

13
Wireless setup for a Windows laptop
If your laptop has network capability through a wireless card, make sure that the card is turned on. There may be a physical switch on the card, or you can hold down the Fn (function) key and press F2, which toggles the wireless card on and off on certain models. Also ensure that the wireless card is not disabled through the operating system.
Right-click on the network icon in the system tray on the bottom-right corner. In the pop-up menu, select “Open Network and Sharing Center”, which should pop up in the next window. Click the “Connect to a network” link.
“CCS Wireless” should be an available option. Select it and enter the wireless password.
Wireless connection issues
If you receive a weak signal, you may need to move around to be in optimal range. You may also receive a weak signal if there are numerous people connecting in the same room at the same time, as they may be sharing the same wireless router.
If connectivity issues persist, contact the Help Desk by creating a ticket through Help Desk link on the CCS Blackboard site or call (313) 664-7818, detailing the lab room or on-campus area you were located in when attempting to connect to the wireless network.
Wireless setup for a Mac laptop
As above, click the AirPort symbol in the menu bar and select “Turn AirPort On”.
As it loads available networks, you should see an entry named “CCS Wireless”.
Select it, and type in the password in the following login box. Click the “Remember this network” checkbox to connect automatically next time. Click OK.
Your Mac should now be connected to the network. Alternatively, you may open the System Preferences and select “Network”, then double-click “AirPort” to set various wireless options, such as choosing which wireless networkstoconnecttofirstinyourpersonal“Preferrednetworks” list (under “Advanced” options).

Getting Started in Blackboard
The CCS Blackboard site is a web-based resource areawhereyoucanfindup-to-dateinformationonCCS events, policies, and current announcements.
Blackboardprovideslinkstocampusoffices,forms,and course sites for each class taught at CCS.
To access the CCS Blackboard site, open a web browser on any computer and navigate to the web address: bb.collegeforcreativestudies.edu
In the login section, enter your username and password, and click the Login button.
Once logged in, your display should be similar to the image on the right. (Note the “Quick Links” buttons along the left side, allowing you to connect to such resources as the Help Desk and Campus Email.)
Along the top of the page are an array of tabs through which you may access different resources. The “My CCS” tab is your main page, which is broken down into sections called modules.
Some modules are permanent, such as the “My Courses” module, which displays the courses you are enrolled in.
Note: If your “My Courses” tab does not display all your courses, do not worry! It simply means that the instructor has not yet activated the Blackboard section for student access.
Aside from the permanent modules, your “My CCS” page is largely customizable. You may add new modules, remove modules you don’t want, and rearrange modules using the “Contents” and “Layout” buttons, which are located near the top right corner.
Otherpages,like“CampusOffices”and“Calendar”,respectivelydisplaycontactandgeneralinformation about the campus’s academic and administrative departments, (i.e. Illustration, Library, Security, etc.) and information about upcoming functions, lectures, or other local events of interest.
When your instructor has activated the Blackboard aspect of a course in which you are enrolled, it

15
will appear in the “My Courses” module on your “My CCS” tab. When you click on the course link, you will be sent to the course site.
Depending on how the instructor has set up the site, the buttons along the left will provide resources such as Syllabus, Course Information, etc.
Any announcements that have been posted by the instructor are displayed to the right.
While there are numerous features in Blackboard that can be utilized, the course instructor may add or disable various functions depending on the purposes of the course.
Feel free to navigate Blackboard and become familiar with its options and resources. Use Blackboard habitually to access campus services and various academic resources electronically; you will save yourself some time!
Getting Started in WebAdvisor
WebAdvisor is a secure web interface that allows students and faculty to access information contained in the college’s administrative database. Students may search and register for classes, check grades, access transcript information and degree audits, or check and pay account balances.
Log in via the CCS Blackboard website, then click on the “Webadvisor” button under “Quick Links”. The Webadvisor page lists a series of links through which you can search for classes, check your grades, etc.
Click one of these links, and Webadvisor may prompt you to log in again, using the same username and password that you used for Blackboard. Click “Submit” to continue.
Note: You may need to explicitly click the “Log in” button if you are not prompted, or you will *not* be able to access additional Webadvisor options.
Once successfully logged in, you may click “Students menu” to access all of your available op tions.
The menu page categorizes your options as:•Registration(addingordropping
courses), •FinancialProfile(checkingandpaying
your account balance), and
•AcademicProfile(classschedules,transcript,degree-audit,andgrades)

16
MakesuretologoutofWebAdvisorwhenyouarefinished.WebAdvisorwillalsologyououtautomatically after 30 minutes of inactivity.
If you are not able to log on: •Checkthatyouareusingthesameusernameandpasswordthatyouusedto
login to Blackboard.
•MakesuretheCapsLockkeyisnoton,asusernamesandpasswordsarecase-sensitive.
If you receive a “You are not authorized to access the requested process” error: •Youshouldstillbeabletologinsuccessfully.Onceloggedin,clickthe“MainMenu”link.Alist
of roles should appear (Continuing Ed, Student, Faculty, Staff). Select the role that applies to you, and the appropriate menu of options will appear.
If you still have problems accessing Webadvisor:•Makesurecookiesareenabledintheinternetbrowseryouareusing.
•Checktomakesurethatyouareusingthelatestversionofyourinternetbrowser.Additionally,some browsers, such as the AOL browser, may not work with our Webadvisor setup. Recommended browsers include Firefox, Safari, and Internet Explorer.
•Makesurethatthetimeandtimezonesettingsonyourowncomputerarecorrect.
Getting Started with CCS Student Email
To access your CCS email account, navigate to the web address mail.collegeforcreativestudies.edu within any web browser, or click the “Campus Email” button in the “Quick Links” column on the CCS Blackboard.
You’ll be presented with the email login screen. Type in your username and password and hit the “Log in” button to be transferred to your inbox.
Any email messages you have will appear in your mailbox. To view a message, simply double-click on it and it will open within the viewing window.
For full information on using CCS email, visit the “Merit Mail” Organization listed under “My Organizations” when you have logged into Blackboard.Thereyouwillfindvarioustutorialson creating new messages, forwarding your email, or general account management.

17
Rendering at CCS
In-Class RenderingRendering can be done during the class you are registered for and only during times that the class meets. All renderings must be completed by the end of class or they will be cancelled. Any unapproved rendering in the labs will be cancelled by an Academic Technologies staff person. Only a staff person can cancel renders.
Out of Class RenderingsAll “out of class” renderings must go through the CCS RenderFarm. RenderFarm rendering is currently available for Maya and 3DMax, and is available to all students. It is the instructor’s responsibility to teach students the proper way to construct their work for the RenderFarm and how toproperlyfilloutrenderingforms.
To submit your work for rendering through the RenderFarm:
•Log on to the Blackboardwebsite.Clickthe“CampusOffices”tab,thenclick“Rendering”inthe“Quick Links” section along the left.
•Onthenextpage,youshouldseetwosetsofinstructionsonthemainpage(“Mayainstructions”,“3DMax instructions”) as well as two new online form links under the “Quick Links” section:
Maya Render Form3DMax Render Form
•First,readthroughtheMayaorthe3DMaxinstructionstoproperlysetupandsubmityourrenderfiles.
•Oncecompleted,clickeithertheMayaorthe3DMaxonlineformlink.Fillouttheformcompletely. Once you click Submit, your request will be emailed to the Renderfarm manager.
If your project has not been constructed correctly, the rendering will be stopped and we will notify you by either email or phone.
Yourrenderedfileswillbestoredinthe“RenderFarmPickup”folderontheRenderFarmvolumefor a maximum of 48 hours. You can pick up your completed project at any time during those 48 hours. After 48 hours, the Academic Technologies staff person will delete your file. It is the responsibilityofthestudenttoarrangeproperstorage,backupandpickupoffiles.
18
Troubleshooting
To report a computer problem, submit a Help Desk ticket via the Help Desk link on the CCS Blackboard site, or call the CCS Help Desk at (313) 664-7818 (or ext. 7818 for on-campus calls).
Note: See the “Accessing the Help Desk” section on page 20 of this booklet for more information.
The following are general solutions for typical computer problems that may occur in the CCS labs.
Software issues
If the computer you are using is freezing, running slowly, or otherwise behaving erratically, make sure, ifpossible,thatyousaveyourfilesorbackthemupto:
•yourownstoragemedia, •yournetworkhomespace,
Then, reboot the computer.
Note: Due to the security software that is running on most CCS lab computers, rebooting the computer will reset all application settings and erase all student files outside of the “ThawSpace” drive.
Afterreboot,iftheapplicationsoftwareyouareusinghasproblemsopeningorusingyourfile,butopensotherfileswithnoproblems,theremaybeissuesinyourfilethatneedtobefixed.Ifpossible,trycopyingthecontentintoanewdocument,andsavethenewfile.Ifeditingorrecreatingyourfiledoes not yield results, revert to a backup copy.
Iftheproblempersistsevenafterrebootandisnotduetoissueswithyourfiles,submitaticketthrough the Help Desk (see the end of this section) detailing the lab, computer name, and a description of the problem.
Mac fixesForce quit: On a Mac, if the application you are running freezes or stops
responding and you cannot quit the program normally, select “Force Quit…” from the Apple menu to terminate it (or press the Apple + Option + Esc keys simultaneously).
Afterwards,saveyourfilestoyourownmediaornetworkhomespace
and reboot the computer.
Windows fixesForce quit: If you cannot exit the program normally, press the Ctrl, Alt, and Del keys
simultaneously, then select “Start Task Manager”. Within the Windows Task Manager, click the Applications tab, and then select the program you wish to terminate. Click “End Task”.
Saveyourfilestoyourownmediaornetworkhomespaceandrebootthecomputer.
19
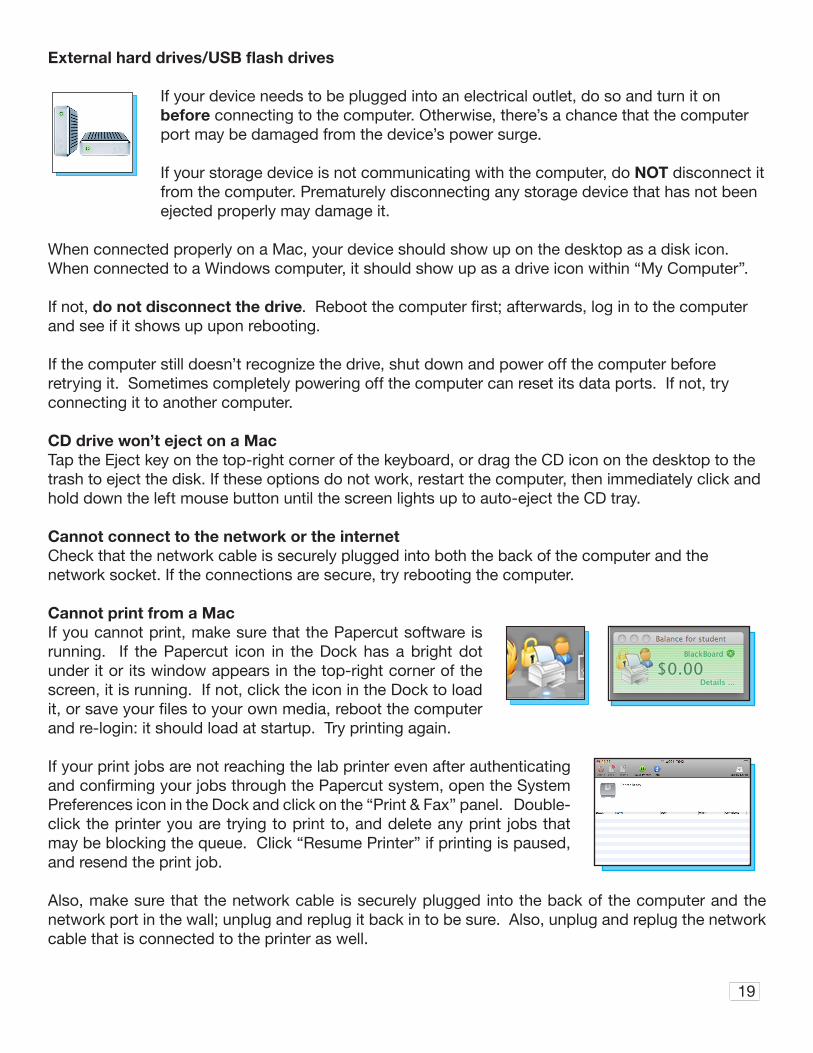
External hard drives/USB flash drives
If your device needs to be plugged into an electrical outlet, do so and turn it on before connecting to the computer. Otherwise, there’s a chance that the computer port may be damaged from the device’s power surge.
If your storage device is not communicating with the computer, do NOT disconnect it from the computer. Prematurely disconnecting any storage device that has not been ejected properly may damage it.
When connected properly on a Mac, your device should show up on the desktop as a disk icon. When connected to a Windows computer, it should show up as a drive icon within “My Com puter”.
If not, do not disconnect the drive.Rebootthecomputerfirst;afterwards,logintothecomputerand see if it shows up upon rebooting.
If the computer still doesn’t recognize the drive, shut down and power off the computer before retrying it. Sometimes completely powering off the computer can reset its data ports. If not, try connecting it to another computer.
CD drive won’t eject on a MacTap the Eject key on the top-right corner of the keyboard, or drag the CD icon on the desktop to the trash to eject the disk. If these options do not work, restart the computer, then immediately click and hold down the left mouse button until the screen lights up to auto-eject the CD tray.
Cannot connect to the network or the internetCheck that the network cable is securely plugged into both the back of the computer and the network socket. If the connections are secure, try rebooting the computer.
Cannot print from a MacIf you cannot print, make sure that the Papercut software is running. If the Papercut icon in the Dock has a bright dot under it or its window appears in the top-right corner of the screen, it is running. If not, click the icon in the Dock to load it,orsaveyourfilestoyourownmedia,rebootthecomputerand re-login: it should load at startup. Try printing again.
If your print jobs are not reaching the lab printer even after authenticating andconfirmingyourjobsthroughthePapercutsystem,opentheSystemPreferences icon in the Dock and click on the “Print & Fax” panel. Double-click the printer you are trying to print to, and delete any print jobs that may be blocking the queue. Click “Resume Printer” if printing is paused, and resend the print job.
Also, make sure that the network cable is securely plugged into the back of the computer and the network port in the wall; unplug and replug it back in to be sure. Also, unplug and replug the network cable that is connected to the printer as well.

20
If the printer is still not responding, cut off the printer for about thirty seconds and turn it back on before resending the print job. If the printer is out of paper or toner, or you are otherwise having problems with the Papercut system, create a Help Desk ticket detailing the issues.
Cannot print from a PCIf you cannot print, make sure that the Papercut software is running. If its window appears in the top-right corner of the screen, it is running. If not, reboot the computer and re-login: it should load at startup. Try printing again.
If your print jobs are not reaching the lab printer even after authenticatingandconfirmingyourjobsthroughthePapercutsystem,click the Start button and select Settings --> Printers. Double-click the lab printer icon and try deleting any jobs that are stuck in the queue.
Make sure that the network cable is securely plugged into the back of the computer and the network port in the wall; unplug and replug it back in to be sure. Also, unplug and replug the network cable that is connected to the printer as well.
If the printer is still not responding, cut off the printer for about thirty seconds and turn it back on before resending the print job. If the printer is out of paper or toner, or you are otherwise having problems with the Papercut system, create a Help Desk ticket detailing the issues.
Accessing the Help Desk
The Help Desk is an online feature where you may submit tickets detailing computer problems in the CCS labs. The web address is helpdesk.collegeforcreativestudies.edu, or simply click the Help Desk link on the CCS Blackboard website (bb.collegeforcreativestudies.edu).
The Help Desk home page displays a login box, where you may log in using your username and password.
Once logged in, you will be transferred to the HelpDeskinterface.Ifthisisyourfirsttimelogging in, you may be required to enter some basic contact information such as your name, phone number, and email address. Click the “Create Ticket” button, and a ticket will appear in a pop-up window. (Make sure to enable pop-up windows in the browser.)
21
Make sure to select the computer lab where the problem occurred and the type of problem, selecting the appropriate entries in the pop-down menus.
For instance, for a problem with a scanner in Mac lab W004, choose “Mac” in the Category menu and “Mac Scanner” in the Category Option menu.
PleasedescribethenatureoftheissuetothebestofyourabilityintheDescriptionfield,includingthe name of the computer as well (i.e. W004-A).
Finally, click Submit to create the ticket, and logout using the “Sign Out” link. Check your email for updates,asyoushouldreceiveconfirmationoncetheissuehasbeenresolved.

22
Notes:

23
Notes:

Here are some helpful tips:
• Save your files regularly to your own storage media or your network home drive.
• Any files saved *outside* of the ThawSpace drive on a lab computer will be DELETED upon logout or reboot!
• Reboot a computer before using it, especially if it is behaving erratically.
• The File Transfer folder will be emptied every Friday at 5:30am! Backup all files that pertain to you before then.
• Do not delete files from computers or the shared drive that do not belong to you. Students who do so may be subject to disciplinary action.
• Maintain your network home directory by cleaning it out regularly, especially when you’re near your 5GB storage limit.
• Do not run or edit your files directly *from* a network drive, CD, a USB flash drive, or any other external media. It may cause the computer to run slower or crash, and the file may become corrupted or deleted due to a crash.
• Copy your files to the ThawSpace drive on the computer and work on them, and re-save the files frequently back to your own storage media.
• Respect all technical equipment.
• Make any reservations early, whether you are:
o Checking out equipment,
o Reserving time slots in the Audio-Visual suites
o Rendering your files through the Renderfarm,
o Requesting services from the Imaging Center or Audio-Visual Center
• Submit a ticket via the Help Desk link found on Blackboard to report problems.