juniper junos 8.x / 9.x / 10 - center for internet security · juniper junos 8.x / 9.x / 10.x ......
TRANSCRIPT

Security Configuration Benchmark For
Version 1.0.1 November 11th, 2010
Juniper JUNOS 8.x / 9.x / 10.x
Copyright 2001-2010, The Center for Internet Security http://cisecurity.org

Background. CIS provides benchmarks, scoring tools, software, data, information, suggestions, ideas, and other services and materials from the CIS website or elsewhere (“Products”) as a public service to Internet users worldwide. Recommendations contained in the Products (“Recommendations”) result from a consensus-building process that involves many security experts and are generally generic in nature. The Recommendations are intended to provide helpful information to organizations attempting to evaluate or improve the security of their networks, systems and devices. Proper use of the Recommendations requires careful analysis and adaptation to specific user requirements. The Recommendations are not in any way intended to be a “quick fix” for anyone’s information security needs. No representations, warranties and covenants. CIS makes no representations, warranties or covenants whatsoever as to (i) the positive or negative effect of the Products or the Recommendations on the operation or the security of any particular network, computer system, network device, software, hardware, or any component of any of the foregoing or (ii) the accuracy, reliability, timeliness or completeness of any Product or Recommendation. CIS is providing the Products and the Recommendations “as is” and “as available” without representations, warranties or covenants of any kind. User agreements. By using the Products and/or the Recommendations, I and/or my organization (“we”) agree and acknowledge that: No network, system, device, hardware, software or component can be made fully secure; We are using the Products and the Recommendations solely at our own risk; We are not compensating CIS to assume any liabilities associated with our use of the Products or the Recommendations, even risks that result from CIS’s negligence or failure to perform; We have the sole responsibility to evaluate the risks and benefits of the Products and Recommendations to us and to adapt the Products and the Recommendations to our particular circumstances and requirements; Neither CIS, nor any CIS Party (defined below) has any responsibility to make any corrections, updates, upgrades or bug fixes or to notify us if it chooses at it sole option to do so; and Neither CIS nor any CIS Party has or will have any liability to us whatsoever (whether based in contract, tort, strict liability or otherwise) for any direct, indirect, incidental, consequential, or special damages (including without limitation loss of profits, loss of sales, loss of or damage to reputation, loss of customers, loss of software, data, information or emails, loss of privacy, loss of use of any computer or other equipment, business interruption, wasted management or other staff resources or claims of any kind against us from third parties) arising out of or in any way connected with our use of or our inability to use any of the Products or Recommendations (even if CIS has been advised of the possibility of such damages), including without limitation any liability associated with infringement of intellectual property, defects, bugs, errors, omissions, viruses, worms, backdoors, Trojan horses or other harmful items. Grant of limited rights. CIS hereby grants each user the following rights, but only so long as the user complies with all of the terms of these Agreed Terms of Use: Except to the extent that we may have received additional authorization pursuant to a written agreement with CIS, each user may download, install and use each of the Products on a single computer; Each user may print one or more copies of any Product or any component of a Product that is in a .txt, .pdf, .doc, .mcw, or .rtf format, provided that all such copies are printed in full and are kept intact, including without limitation the text of this Agreed Terms of Use in its entirety. Retention of intellectual property rights; limitations on distribution. The Products are protected by copyright and other intellectual property laws and by international treaties. We

3 | P a g e
acknowledge and agree that we are not acquiring title to any intellectual property rights in the Products and that full title and all ownership rights to the Products will remain the exclusive property of CIS or CIS Parties. CIS reserves all rights not expressly granted to users in the preceding section entitled “Grant of limited rights.” Subject to the paragraph entitled “Special Rules” (which includes a waiver, granted to some classes of CIS Members, of certain limitations in this paragraph), and except as we may have otherwise agreed in a written agreement with CIS, we agree that we will not (i) decompile, disassemble, reverse engineer, or otherwise attempt to derive the source code for any software Product that is not already in the form of source code; (ii) distribute, redistribute, encumber, sell, rent, lease, lend, sublicense, or otherwise transfer or exploit rights to any Product or any component of a Product; (iii) post any Product or any component of a Product on any website, bulletin board, ftp server, newsgroup, or other similar mechanism or device, without regard to whether such mechanism or device is internal or external, (iv) remove or alter trademark, logo, copyright or other proprietary notices, legends, symbols or labels in any Product or any component of a Product; (v) remove these Agreed Terms of Use from, or alter these Agreed Terms of Use as they appear in, any Product or any component of a Product; (vi) use any Product or any component of a Product with any derivative works based directly on a Product or any component of a Product; (vii) use any Product or any component of a Product with other products or applications that are directly and specifically dependent on such Product or any component for any part of their functionality, or (viii) represent or claim a particular level of compliance with a CIS Benchmark, scoring tool or other Product. We will not facilitate or otherwise aid other individuals or entities in any of the activities listed in this paragraph. We hereby agree to indemnify, defend and hold CIS and all of its officers, directors, members, contributors, employees, authors, developers, agents, affiliates, licensors, information and service providers, software suppliers, hardware suppliers, and all other persons who aided CIS in the creation, development or maintenance of the Products or Recommendations (“CIS Parties”) harmless from and against any and all liability, losses, costs and expenses (including attorneys' fees and court costs) incurred by CIS or any CIS Party in connection with any claim arising out of any violation by us of the preceding paragraph, including without limitation CIS’s right, at our expense, to assume the exclusive defense and control of any matter subject to this indemnification, and in such case, we agree to cooperate with CIS in its defense of such claim. We further agree that all CIS Parties are third-party beneficiaries of our undertakings in these Agreed Terms of Use. Special rules. CIS has created and will from time to time create special rules for its members and for other persons and organizations with which CIS has a written contractual relationship. Those special rules will override and supersede these Agreed Terms of Use with respect to the users who are covered by the special rules. CIS hereby grants each CIS Security Consulting or Software Vendor Member and each CIS Organizational User Member, but only so long as such Member remains in good standing with CIS and complies with all of the terms of these Agreed Terms of Use, the right to distribute the Products and Recommendations within such Member’s own organization, whether by manual or electronic means. Each such Member acknowledges and agrees that the foregoing grant is subject to the terms of such Member’s membership arrangement with CIS and may, therefore, be modified or terminated by CIS at any time. Choice of law; jurisdiction; venue. We acknowledge and agree that these Agreed Terms of Use will be governed by and construed in accordance with the laws of the State of Maryland, that any action at law or in equity arising out of or relating to these Agreed Terms of Use shall be filed only in the courts located in the State of Maryland, that we hereby consent and submit to the personal jurisdiction of such courts for the purposes of litigating any such action. If any of these Agreed Terms of Use shall be determined to be unlawful, void, or for any reason unenforceable, then such terms shall be deemed severable and shall not affect the validity and enforceability of any remaining provisions. We acknowledge and agree that we have read these Agreed Terms of Use in their entirety, understand them and agree to be bound by them in all respects.

4 | P a g e
Table of Contents Table of Contents ..........................................................................................................................................................4
Overview ...........................................................................................................................................................................9
Consensus Guidance ...............................................................................................................................................9
Intended Audience ..................................................................................................................................................9
Acknowledgements.............................................................................................................................................. 10
Typographic Conventions ................................................................................................................................. 10
Configuration Levels ........................................................................................................................................... 10
Level-I Benchmark settings/actions....................................................................................................... 10
Level-II Benchmark settings/actions ..................................................................................................... 10
Scoring Status ......................................................................................................................................................... 11
Scorable ................................................................................................................................................................ 11
Not Scorable ....................................................................................................................................................... 11
Using This Document .......................................................................................................................................... 11
Recommendations ..................................................................................................................................................... 12
1. General Recommendations ......................................................................................................................... 12
1.1 Require Current Software (Level 1, Not Scorable) ............................................................. 12
1.2 Require Physical Security (Level 1, Not Scorable) .............................................................. 13
1.3 Require Regular Remote Configuration Backup (Level 1, Not Scorable) ................ 13
1.4 Require Secure Configuration Backup Storage (Level 1, Not Scorable) ................... 14
1.5 Require Maximum RAM (Level 1, Not Scorable) ................................................................. 15
1.6 Require Log Monitoring (Level 1, Not Scorable) ................................................................. 16
2. Firewall ................................................................................................................................................................. 17
2.1 Require Inbound Filter to Routing Engine (Level 2, Not Scorable) ............................ 17
2.2 Require SSH Term in RE Firewall Filter (Level 2, Not Scorable) ................................. 19
2.3 Require SNMP Term in RE Firewall Filter (when SNMP is used) (Level 2, Not Scorable) .............................................................................................................................................................. 20
2.4 Forbid Internal Source from External Networks (Level 2, Not Scorable) ............... 22
2.5 Require Explicit Deny and Log in Firewall Filters (Level 2, Not Scorable) ............. 23
3. Interfaces <Interface Name> ...................................................................................................................... 24
3.1 Disable Unused Interfaces (Level 1, Not Scorable)............................................................. 24
3.2 Require Interface Description (Level 1, Scorable) .............................................................. 25
3.3 Forbid Proxy ARP (Level 2, Scorable) ....................................................................................... 26
3.4 Disable ICMP Redirect Messages on Untrusted Networks (Level 1, Not Scorable) 27
3.5 Require Loopback Address (Level 2, Scorable).................................................................... 28
3.6 Forbid Multiple Loopback Addresses (Level 2, Scorable) ............................................... 29
3.7 Require Inbound Firewall Filter on Loopback Interface (Level 2, Scorable) ......... 30
3.8 DLn – Dialer Interfaces ......................................................................................................................... 31
3.8.1 Require Caller ID if Incoming Map is Used (Level 1, Scorable) ................................ 31
3.8.2 Require CHAP Authentication if Incoming Map is Used (Level 1, Scorable) ..... 32
3.8.3 Forbid Dial in Access (Level 2, Scorable) ............................................................................ 34
3.9 Family Inet VRRP-Group (Interface Redundancy) .................................................................. 35
3.9.1 Require Authentication-Key If VRRP Is Used (Level 2, Scorable) ........................... 35
3.9.2 Require Authentication-Type MD5 If VRRP Is Used (Level 2, Scorable) ............. 36

5 | P a g e
4. Protocols .............................................................................................................................................................. 37
4.1 BGP ................................................................................................................................................................. 37
4.1.1 Require MD5 Peer Authentication (where BGP is used) (Level 2, Scorable) .... 38
4.1.2 Require IPSEC SA Neighbor Authentication (where BGP is used) (Level 2, Not Scorable) .............................................................................................................................................................. 39
4.1.3 Require GTSM / lowest Multihop (where eBGP is used) (Level 2, Scorable) ... 41
4.1.4 Require Bogon Filtering (where eBGP is used) (Level 2, Not Scorable).............. 43
4.1.5 Require Ingress Prefix Filtering (where eBGP is used) (Level 2, Not Scorable) 46
4.2 ISIS .................................................................................................................................................................. 47
4.2.1 Require MD5 Neighbor Authentication (where IS-IS is used) (Level 2, Scorable) .............................................................................................................................................................. 47
4.2.2 Forbid Authentication Checking Suppression (where IS-IS is used) (Level 2, Scorable) .............................................................................................................................................................. 49
4.2.3 Forbid Hello Authentication Checking Suppression (where IS-IS is used) (Level 2, Scorable) ......................................................................................................................................................... 50
4.2.4 Forbid PSNP Authentication Checking Suppression (where IS-IS is used) (Level 2, Scorable) ........................................................................................................................................... 51
4.2.5 Forbid CSNP Authentication Checking Suppression (where IS-IS is used) (Level 2, Scorable) ........................................................................................................................................... 52
4.3 OSPF ............................................................................................................................................................... 53
4.3.1 Require MD5 Neighbor Authentication (where OSPF is used) (Level 2, Scorable) .............................................................................................................................................................. 54
4.3.2 Require IPSEC SA Neighbor Authentication (where OSPF is used) (Level 2, Scorable) .............................................................................................................................................................. 55
4.4 OSPFv3 .......................................................................................................................................................... 57
4.4.1 Require IPSEC SA Neighbor Authentication (where OSPFv3 is used) (Level 2, Scorable) .............................................................................................................................................................. 57
4.5 RIP ................................................................................................................................................................... 58
4.5.1 Require MD5 Neighbor Authentication (where RIP is used) (Level 2, Scorable) 59
4.5.2 Require check-zero (where RIP is used) (Level 2, Scorable) .................................... 60
4.6 <Routing Protocol> ................................................................................................................................. 61
4.6.1 Require BFD Authentication (where BFD is used) (Level 2, Scorable) ................ 61
4.7 <Protocol> bfd-liveness-detection .................................................................................................. 63
4.7.1 Require BFD Authentication (where BFD is used) (Level 2, Scorable) ................ 63
4.7.2 Forbid BFD Loose Authentication (where BFD is used) (Level 2, Scorable) ..... 64
4.8 LDP ................................................................................................................................................................. 66
4.8.1 Require MD5 Peer Authentication (where LDP is used) (Level 2, Scorable) .... 66
4.9 MSDP.............................................................................................................................................................. 67
4.9.1 Require Peer Authentication (where MSDP is used) (Level 2, Scorable) ........... 67
4.10 Neighbor-discovery ........................................................................................................................... 69
4.10.1 Require Secure Neighbor Discovery (when IPv6 is used, JUNOS 9.3+) (Level 2, Scorable) ......................................................................................................................................................... 69
4.11 Router-discovery................................................................................................................................. 70
4.11.1 Forbid ICMP Router Discovery (Level 2, Scorable) ................................................... 71

6 | P a g e
4.12 RSVP .......................................................................................................................................................... 72
4.12.1 Require Peer Authentication (when RSVP is used) (Level 1, Scorable) .......... 72
5. SNMP ...................................................................................................................................................................... 73
5.1 Forbid Common SNMP Community Strings (Level 1, Scorable) .................................. 73
5.2 Forbid SNMPv1, v2 and ,v2c Write Access (Level 1, Scorable) ..................................... 74
5.3 Re quire Client List for SNMPv1 and v2 (Level 1, Scorable) .......................................... 75
5.4 Require “Default Restrict” in SNMP Client Lists (Level 1, Scorable) .......................... 77
5.5 Forbid SNMP Write Access (Level 2, Scorable) .................................................................... 78
5.6 Forbid SNMP if not used (Level 2, Not Scorable) ................................................................ 79
5.7 Require Privacy AES128 for SNMPv3 Access (Level 2, Scorable) ............................... 80
5.8 Require Authentication SHA for SNMPv3 Access (Level 2, Scorable) ....................... 81
5.9 Require Interface Restrictions for SNMP (Level 1, Scorable) ........................................ 82
6. System ................................................................................................................................................................... 83
6.1 Accounting .................................................................................................................................................. 83
6.1.1 Require Accounting Destination (Level 1, Scorable) .................................................... 83
6.1.2 Require Accounting of Logins & Configuration Changes (Level 1, Scorable) .... 85
6.1.3 Require Accounting of Interactive Commands (Level 2, Scorable)........................ 86
6.2 Archival ........................................................................................................................................................ 87
6.2.1 Require Archive on Commit (Level 2, Scorable) ............................................................. 87
6.2.2 Require Archive Site (Level 2, Scorable) ............................................................................. 88
6.2.3 Forbid Plain Text Archive Site (Level 2, Scorable) ......................................................... 89
6.3 Authentication-Order ............................................................................................................................ 90
6.3.1 Require External Authentication Order (Level 1, Scorable)...................................... 90
6.3.2 Forbid Local Password Authentication (Level 1, Scorable) ....................................... 92
6.4 Require Loopback Address as Default Source (Level 2, Scorable).............................. 93
6.5 Diag-Port-Authentication .................................................................................................................... 94
6.5.1 Require Diagnostic Port Authentication (Level 1, Scorable)..................................... 94
6.5.2 Require Complex Diagnostic Port Password (Level 1, Not Scorable) ................... 95
6.6 Internet-Options ...................................................................................................................................... 97
6.6.1 Require icmpv4-rate-limit (Level 2, Scorable)................................................................. 97
6.6.2 Require icmpv6-rate-limit (Level 2, Scorable)................................................................. 98
6.6.3 Require ignore ICMP source-quench (Level 2, Scorable) ........................................ 100
6.6.4 Require tcp-drop-synfin-set (Level 1, Scorable) .......................................................... 101
6.7 Login ........................................................................................................................................................... 102
6.7.1 Require Login Class for all Users Accounts (Level 1, Scorable) ............................ 102
6.7.2 Require Idle Timeout for All Login Classes (Level 1, Scorable) ............................ 103
6.7.3 Require Permissions All Login Classes (Level 1, Scorable) .................................... 104
6.7.4 Forbid Shell Access for All Login Classes (Level 1, Scorable) ................................ 105
6.7.5 Forbid Default Login Classes for all Users Accounts (Level 1, Scorable) ......... 106
6.7.6 Require login message (Level 1, Scorable) ..................................................................... 107
6.7.7 Require multiple character sets in password (Level 1, Scorable) ...................... 108
6.7.8 Require at least 4 set changes in passwords (Level 1, Scorable) ......................... 109
6.7.9 Require at least 8 characters for passwords (Level 1, Scorable) ......................... 110
6.7.10 Require SHA1 hashing of passwords (Level 1, Scorable) .................................... 112
6.7.11 Require SSH Key Based Authentication for User Accounts (Level 2, Scorable) 112

7 | P a g e
6.7.12 Retry Options ............................................................................................................................ 114
6.7.12.1 Require Max 3 Tries Before Disconnect (Level 1, Scorable) .............................. 114
6.7.12.2 Require Backoff Threshold Max 2 (Level 1, Scorable) .......................................... 115
6.7.12.3 Require Min Backoff Factor of 5 (Level 1, Scorable) ............................................. 116
6.7.12.4 Require Min Session Time of At Least 20 Seconds (Level 1, Scorable) ........ 117
6.8 NTP .............................................................................................................................................................. 118
6.8.1 Require External Time Sources (Level 1, Scorable) ................................................... 118
6.8.2 Require NTP Boot-Server (Level 2, Scorable) ............................................................... 119
6.8.3 Require NTP Version 4 (Level 1, Scorable) ..................................................................... 120
6.8.4 Require Encryption Keys for NTP (Level 2, Scorable)............................................... 121
6.8.5 Require Different Encryption Key for Each Server (Level 2, Scorable) ............ 123
6.9 Radius-server / Tacplus-server ..................................................................................................... 124
6.9.1 Require External Authentication Server (Level 1, Scorable) ................................. 125
6.9.2 Require Shared Secret for External Authentication Servers (Level 1, Scorable) 126
6.9.3 Require Different Shared Secret for each External Authentication Server (Level 1, Scorable) ........................................................................................................................................ 127
6.9.4 Require MS-CHAPv2 RADIUS Authentication (when used, JUNOS 9.2+) (Level 1, Scorable) ...................................................................................................................................................... 128
6.10 Root-Authentication ....................................................................................................................... 129
6.10.1 Require Root Password (Level 1, Scorable)............................................................... 130
6.10.2 Require Complex Root Password (Level 1, Not Scorable) .................................. 131
6.10.3 Require Unique Root Password (Level 1, Not Scorable) ..................................... 132
6.11 Services ................................................................................................................................................. 133
6.11.1 Forbid Telnet Service (Level 1, Scorable) ................................................................... 133
6.11.2 Forbid Reverse Telnet Service (Level 1, Scorable) ................................................. 134
6.11.3 Forbid FTP Service (Level 1, Scorable) ........................................................................ 135
6.11.4 Forbid Finger Service (Level 1, Scorable) ................................................................... 136
6.11.5 Forbid DHCP Service (Level 2, Scorable) .................................................................... 137
6.11.6 SSH ................................................................................................................................................. 138
6.11.6.1 Require SSH Service (Level 1, Scorable) ...................................................................... 138
6.11.6.2 Require SSH Version 2 (Level 1, Scorable) ................................................................. 139
6.11.6.3 Require SSH Connection Limit (Level 1, Scorable) ................................................. 140
6.11.6.4 Require SSH Rate Limit (Level 1, Scorable) ............................................................... 142
6.11.6.5 Forbid Remote Access to Root Account (Level 2, Scorable) .............................. 143
6.11.7 Web-Management (JWEB) ................................................................................................. 144
6.11.7.1 Forbid HTTP Access where JWEB Service is Installed (Level 1, Scorable) . 144
6.11.7.2 Require HTTPS Access where JWEB Service is Installed (Level 1, Scorable) 145
6.11.7.3 Require Idle Timeout for JWEB Service if Installed (Level 1, Scorable)....... 146
6.11.7.4 Require Session Limited for JWEB Service if Installed (Level 1, Scorable) 147
6.11.7.5 Require Interface Restrictions for JWEB Service if Installed (Level 2, Scorable) 148
6.11.8 XNM-* (JUNOScript) .............................................................................................................. 149
6.11.8.1 Forbid XNM-Clear-Text Service (Level 1, Scorable) .............................................. 149
6.11.8.2 Require Connection Limit when XNM-SSL is used (Level 2, Scorable)......... 150

8 | P a g e
6.11.8.3 Require Rate Limit when XNM-SSL is used (Level 2, Scorable) ....................... 151
6.11.8.4 Disable XNM-SSL if not used (Level 1, Not Scorable) ............................................ 152
6.12 Ports ....................................................................................................................................................... 153
6.12.1 Disable Auxiliary Port (Level 2, Scorable) .................................................................. 153
6.12.2 End Console Sessions on Disconnect (Level 1, Scorable) .................................... 154
6.12.3 Disable Console Port (Level 2, Scorable)..................................................................... 155
6.12.4 Require Insecure Option for Console Port (Level 2, Scorable) ......................... 156
6.13 PIC-Console-Authentication. ...................................................................................................... 157
6.13.1 Require Encrypted Password for PIC Console Ports (Level 1, Scorable) .... 158
6.13.2 Require Complex PIC Console Port Password (Level 1, Not Scorable) ........ 159
6.14 SYSLOG .................................................................................................................................................. 160
6.14.1 Require external SYSLOG server (Level 1, Scorable) ............................................ 160
6.14.2 Require external SYSLOG with all Facilities (Level 1, Scorable) ...................... 161
6.14.3 Require external SYSLOG with at least Informational Severity Level (Level 1, Scorable) ...................................................................................................................................................... 162
6.14.4 Require external SYSLOG with at least Informational Severity Level (Level 1, Scorable) ...................................................................................................................................................... 164
6.15 SYSLOG FILE ....................................................................................................................................... 165
6.15.1 Require local SYSLOG for All Firewall Events (Level 1, Scorable) .................. 165
6.15.2 Require local SYSLOG for All Authentication and Authorization Events (Level 1, Scorable) ........................................................................................................................................ 166
6.15.3 Require local SYSLOG for All Interactive Commands (Level 1, Scorable) ... 167
6.16 Miscellaneous System Settings .................................................................................................. 168
6.16.1 Forbid Autoinstallation (Level 1, Scorable) ............................................................... 168
6.16.2 Require Encrypted Configuration Files (Level 2, Scorable) ............................... 169
6.16.3 Ignore Multicast Echo Requests (Level 2, Scorable) .............................................. 170
6.16.4 Disable Ping Record Route Requests (Level 1, Scorable) .................................... 171
6.16.5 Disable Ping Timestamp Requests (Level 1, Scorable) ........................................ 172
6.16.6 Disable ICMP Redirect Messages Globally (Level 2, Scorable) ......................... 173
6.16.7 Require UTC Timezone (Level 2, Scorable) ............................................................... 174
6.16.8 Forbid Router Model in Hostname (Level 1, Scorable) ........................................ 174
Appendix A: References ....................................................................................................................................... 176
Appendix B: Change History .............................................................................................................................. 177

9 | P a g e
Overview This document, Security Configuration Benchmark for Juniper J, M, MX and T Series Routers, provides prescriptive guidance for establishing a secure configuration posture for Juniper J,M, MX, and T Series Routers versions JUNOS 8.x, 9.x, and 10.x. This guide was tested against J-Series and MX Series running 8.1R3, 9.2R1 and 10R2. This guide may also be relevant to other versions of JUNOS on these platforms, such as JUNOS Enhanced Service, and to other platforms running JUNOS such as EX series switches or SRX series Service Gateways; however these systems are not specifically addressed in this guide at the present time. This guide does not address other Juniper platforms such as ScreenOS Firewalls or Secure Access Instant Virtual Extranet’s (IVE’s). To obtain the latest version of this guide, please visit http://cisecurity.org. If you have questions, comments, or have identified ways to improve this guide, please write us at [email protected].
Consensus Guidance This guide was created using a consensus review process comprised of volunteer and contract subject matter experts. Consensus participants provide perspective from a diverse set of backgrounds including consulting, software development, audit and compliance, security research, operations, government, and legal. Each CIS benchmark undergoes two phases of consensus review. The first phase occurs during initial benchmark development. During this phase, subject matter experts convene to discuss, create, and test working drafts of the benchmark. This discussion occurs until consensus has been reached on benchmark recommendations. The second phase begins after the benchmark has been released to the public Internet. During this phase, all feedback provided by the Internet community is reviewed by the consensus team for incorporation in the CIS benchmark. If you are interested in participating in the consensus review process, please send us a note to [email protected].
Intended Audience This guide is intended for individuals and organizations responsible for the security of Juniper J, M, MX and T Series Routers running JUNOS. This guide primarily focuses on Enterprise users, but will also be relevant to Service Provider and other users of JUNOS.

10 | P a g e
Acknowledgements This benchmark exemplifies the great things a community of users, vendors, and subject matter experts can accomplish through consensus collaboration. The CIS community thanks the entire consensus team with special recognition to the following individuals who contributed greatly to the creation of this guide:
Authors Martin White, aUseful.com
Contributors and Reviewers Sergey Gordeychik, Positive Technologies Bill Shelton, Juniper Networks Andrew Weck, JNCIE, HIC Network Security Solutions, LLC
Typographic Conventions The following typographical conventions are used throughout this guide:
Convention Meaning Stylized Monospace font Used for blocks of code, command, and script examples.
Text should be interpreted exactly as presented. Monospace font Used for inline code, commands, or examples. Text should
be interpreted exactly as presented.
<italic font in brackets> Italic texts set in angle brackets denote a variable requiring substitution for a real value.
Italic font Used to denote the title of a book, article, or other publication.
Note Additional information or caveats
Configuration Levels This section defines the configuration levels that are associated with each benchmark recommendation. Configuration levels represent increasing levels of security assurance.
Level-I Benchmark settings/actions
Level-I Benchmark recommendations are intended to: be practical and prudent; provide a clear security benefit; and do not negatively inhibit the utility of the technology beyond acceptable means
Level-II Benchmark settings/actions
Level-II Benchmark recommendations exhibit one or more of the following characteristics: are intended for environments or use cases where security is paramount acts as defense in depth measure may negatively inhibit the utility or performance of the technology

11 | P a g e
Scoring Status This section defines the scoring statuses used within this document. The scoring status indicates whether compliance with the given recommendation is discernable in an automated manner.
Scorable
The platform’s compliance with the given recommendation can be determined via automated means.
Not Scorable
The platform’s compliance with the given recommendation cannot be determined via automated means.
Using This Document To aide experienced JUNOS administrators, this document is organized in line with the format of a standard JUNOS configuration file wherever possible. Only commands and hierarchies for which this Benchmark contains specific recommendations are included, so [edit System Locations Altitude] will not appear in this document. For those new to Juniper routers, JUNOS configuration format roughly groups relevant settings together in a hierarchical fashion, which should still make specific items easy to find. For instance, all settings for OSPF can be found under the [edit protocols] hierarchy ([edit] denoting the top of the hierarchy). To make the document easier to navigate, the brackets and edit part of the hierarchy are omitted in the index and section headings. Where commands are shown in this guide, operational mode commands are prefixed by user@host> while configuration mode commands are prefixed by user@host# and the current configuration hierarchy inline with what you would see on a real JUNOS router. Where the user must provide data for a command, the required information will be shown between < and > symbols. In the example below, the user will need to provide the RADIUS Servers IP Address and the Shared Secret configured for that server in the spaces indicated.
[edit system accounting destination]
user@host#set radius server <server ip> secret <shared secret>

12 | P a g e
Recommendations
1. General Recommendations This section provides general guidance on securing JUNOS Routers which does not apply to any particular hierarchy level or commands. These recommendations are not scorable and do not provide any Audit advice. This section is not intended to be a comprehensive source for none configuration related security considerations for JUNOS.
1.1 Require Current Software (Level 1, Not Scorable)
Description: The router should run current software.
Rationale: As with any complex software product Juniper engineers or independent security researchers occasionally uncover bugs and vulnerabilities in JUNOS which could potentially be exploited by an attacker to compromise your network. Administrators are urged to develop and follow a process to ensure they are aware of new vulnerabilities and have the ability to obtain and install appropriate patches and upgrades as required.
Remediation: Various commercial products are available on the market to automate vulnerability management and there are also a multitude of websites providing vulnerability information. At a minimum we would recommend that administrators regularly review:
J-Security Center Juniper Security Notices The SANS Internet Storm Center
And subscribe to the JTAC Security Bulletin, which can be accessed through the JTAC support portal.
Audit: N/A
Default Value: None.
References:
1. Payment Card Industry Data Security Standard (PCI DSS), Version 1.2, Requirement 6.1

13 | P a g e
2. Router Security Configuration Guide, Version 1.1b, Section 4.1.7 (page 57), National Security Agency (NSA)
1.2 Require Physical Security (Level 1, Not Scorable)
Description: The router should be physically secured.
Rationale: As with most information assets, it is vital that an attacker is prevented from gaining physical access to your Juniper JUNOS routers. With physical access an attacker may bypass firewalls by re-patching systems, power off your router or connect to Console ports. It is possible with almost all network equipment to reset the Root password if you have physical access.
Remediation: While preventing all physical access is nearly impossible in some deployment scenarios, such as for a Service Provider supplying Customer Premises Equipment (CPE), in most cases the following minimum steps should be considered:
The router should be deployed in a secure, locked room. Access logs should be maintained for the room, either electronically through use of
access cards or through a manual process for access to the key. Access to the room should be limited to only those personnel absolutely required. Use of CCTV to monitor sensitive areas and comms rooms. The room should ideally be equipped with Uninterruptable Power Supply (UPS) and
cooling facilities as well as be free from Electromagnetic Interference sources. Loss of power (either malicious or accidental) or cooling can result in a loss of service.
Audit: N/A
Default Value: None.
References:
1. Payment Card Industry Data Security Standard (PCI DSS), Version 1.2, Requirement 9
2. Router Security Configuration Guide, Version 1.1b, Section 3.1.1 (page 33), National Security Agency (NSA)
1.3 Require Regular Remote Configuration Backup (Level 1, Not Scorable)
Description: Regular backups should be made of the router.

14 | P a g e
Rationale Backups of a routers configuration may be necessary when recovering from physical hardware failure, administrative errors or a successful attack. Preserving the evidence of an attack may also be necessary for regulatory compliance, forensic investigation or prosecution of the attacker. By default, JUNOS routers save a local backup copy of your configuration every time you commit (save) a change. JUNOS maintains the 50 previous configuration files, 4 on the Routing Engines Flash drive and the remainder on the hard disk. This provides a useful method to recover from many types of fault or error, however an attacker will, potentially, be in a position to compromise these backups along with the active configuration, so it is vital that you also keep a remote configuration backup beyond the attackers reach.
Remediation: A discussion of all possible backup methods is beyond the scope of this Benchmark. Consider the Archival section of this Benchmark for one method of obtaining remote backups whenever your configuration is changed. Alternatively CVS tools such as RANCID provide an method to backup and configuration files from a central location as well as keeping track of changes over time. Also consider a method of maintaining offline copies of your backup data, such as tape storage. This provides a vital tool in Disaster Recovery and is also extremely helpful when recovering from a successful attack, as you can be certain that the attacker was unable to alter the offline version.
Audit: N/A
Default Value: None.
References:
1. Router Security Configuration Guide, Version 1.1b, Section 3.3.4 (page 45), National Security Agency (NSA)
1.4 Require Secure Configuration Backup Storage (Level 1, Not Scorable)
Description: Backups of router configuration should be secured.
Rationale:
15 | P a g e
If an attacker has access to your router configuration files they have gained a lot of sensitive information about your network topology, defenses, weaknesses, critical servers and possibly your VPN keys and login information.
Remediation: A discussion of securing your backup services is beyond the scope of this Benchmark, but at a minimum you should consider the following:
Never transfer configuration files using plain text protocols such as Telnet or FTP. Use SSH or SCP instead.
Restrict access to backups to the least number of administrative users possible. Store offline backups in a physically secure, fire resistant, air tight safe. Log access and changes to backups. Secure any server that stores backups using the appropriate Center for Internet
Security Benchmark. Disable all unused services on the backup server.
Audit: N/A
Default Value: None.
References:
1. Router Security Configuration Guide, Version 1.1b, Section 3.3.4 (page 45), National Security Agency (NSA)
1.5 Require Maximum RAM (Level 1, Not Scorable)
Description: The router should have the maximum RAM installed.
Rationale: Some Denial of Service attacks rely on exhausting the target routers memory resources by bombarding the router with bogus requests or traffic, when the router runs out of memory it will stop being able to service genuine requests and may be unable to perform critical tasks like maintaining route tables. Juniper routers are somewhat more resilient to this type of attack then some other systems due to the separation of the Control and Forwarding planes, but attacks against router services may still cause disruption.
Remediation: Installing the most RAM available for your system will both help to mitigate these attacks and boost performance of your routers. In most cases RAM upgrades are extremely cost effective way to increase router performance and survivability.

16 | P a g e
Audit: N/A
Default Value: None.
References:
1. Router Security Configuration Guide, Version 1.1b, Section 3.1.1 (page 34), National Security Agency (NSA)
1.6 Require Log Monitoring (Level 1, Not Scorable)
Description: Logs and events should be monitored.
Rationale: Even after you have applied all of the settings in this guide, there is no such thing as perfect security. All systems are potentially vulnerable, be it to undiscovered software bugs, social engineering or other risks. System logs, SNMP traps and any other information generated by your network devices should be monitored for changes and suspicious activity at least daily. Remember that your TACACS+ or RADIUS server may also produce logs detailing logins and what commands users issue. If your systems produce more logging then you can actively monitor, consider using a Security Information and Event Manager type system. SIEM software consolidates and analyzes log information from across your organization, detecting security incidents and providing detailed, joined up information to aide your incident response and investigation. Some popular SIEM systems include:
Juniper STRM Series RSA enVision Cisco CS-MARS OSSIM
Remediation: N/A
Audit: N/A
Default Value: None.
References:

17 | P a g e
1. Watch your Internet Routers!, Internet Storm Center Diary, SANS Institute
2. Payment Card Industry Data Security Standard (PCI DSS), Version 1.2, Requirement 10.6
2. Firewall JUNOS Routers provide Stateful Firewall functionality for IPv4, IPv6 and MPLS traffic. In some environments the router may be used to filter ingress or egress traffic for the network or the filters may be used to protect the router itself. Filters are applied inbound or outbound to an interface per unit and address family. When applied to a traffic interface the firewall inspects traffic traversing the router through that interface. When applied to the Loopback interface, the firewall inspects traffic to or from the Routing Engine, no matter which interface it was actually received on. Firewall Filters are configured under the [edit firewall] hierarchy.
2.1 Require Inbound Filter to Routing Engine (Level 2, Not Scorable)
Description: Traffic to the Routing Engine should be filtered.
Rationale: JUNOS routers can provide a wide range of services to the network and, as with any computer system, the more services that are offered and the more hosts to which they are available, the wider attack surface is offered to a potential attacker. To protect the router from attack a Firewall Filter should be applied to all inbound traffic to the Routing Engine which limits the hosts able to connect to the router and the services on which they are permitted to connect. Permitted traffic should be logged in most cases, although for some protocols this may produce excessive load on the router so the impact of logging should be considered before it is applied. If applied to the lo0 interface the filter will apply to all traffic sent to the Routing Engine. See Require Inbound Firewall Filter on Loopback Interface (Level 2, Not Scorable) for details of how to apply the filter. Where the router processes IPv6 traffic a filter will be required for family inet6 in addition to the family inet filter example shown below. NOTE : The Firewall Filter applies to ALL traffic sent to the Routing Engine, including traffic sent to the routers interface addresses. Ensure your firewall filter allows all of the Routing,

18 | P a g e
Management and other protocols which are required for normal operation prior to applying the filter.
Remediation: To create a firewall filter enter the following command from the[edit firewall] hierarchy.
[edit firewall]
user@host#edit family inet
[edit firewall family inet]
user@host#edit filter <filter name>
[edit firewall family inet filter <filter name>]
user@host#edit term <term name>
[edit firewall family inet filter <filter name> term <term name>]
user@host#set from <match conditions>
user@host#set then <action>
The following example filter allows SSH from 192.168.1.0/24 and OSPF from 10.0.0.0/8 while (implicitly) denying all other traffic:
firewall {
family inet {
filter ProtectRE {
term AllowOSPF {
from {
protocol ospf;
source-address 10.0.0.0/8;
}
then {
accept;
}
}
term AllowSSH {
from {
protocol tcp;
source-address 192.168.1.0/24;
destination-port ssh;
}
then {
accept;
log;
syslog;
}
}
}
}
}

19 | P a g e
Audit: Due to the range of options available as to Filter Name, Term Name and terms; it is not possible to score this recommendation. Firewall filters may be viewed by issuing the following command:
[edit]
user@host#show firewall
Default Value: No firewall filters are configured by default.
References:
1. Router Security Configuration Guide, Version 1.1b, Section 4.4.1 (page 55), National Security Agency (NSA)
2. Cisco IOS Benchmark Version 2.2, Requirement 1.1.2.7, Center for Internet Security
3. Firewall Filter Overview, JUNOS Software Policy Framework Configuration Guide, Juniper Networks
2.2 Require SSH Term in RE Firewall Filter (Level 2, Not Scorable)
Description: Routing Engine Firewall Filter should restrict SSH sources
Rationale: Firewall filters are built up of one or more terms, which are evaluated in order until either one is matched (at which point the terms then action is taken) or the final term has been evaluated, at which point the default action is to discard the packet. SSH is one of the main services for remote administration of the router and, as a result, presents a tempting target for attackers. To protect the router, you should only allow authorized management hosts, ideally on an internal network segment, to connect using SSH. Permitted SSH connections should be logged to the local routing engine and to SYSLOG, allowing a record of connections to be kept and potential attacks to be detected.
Remediation: To create a firewall filter term enter the following command from the[edit firewall family <family> filter <filter name>] hierarchy.
[edit firewall family inet filter <filter name>]
user@host#edit term <term name>

20 | P a g e
[edit firewall family inet filter <filter name> term <term name>]
user@host#set from source-address <authorized address or subnet>
user@host#set from source-address <authorized address or subnet 2>
user@host#set from protocol tcp
user@host#set from destination-port ssh
user@host#set then accept
user@host#set then syslog
user@host#set then log
Audit: Due to the range of options available as to Filter Name, Term Name and terms; it is not possible to score this recommendation. Firewall filters may be viewed by issuing the following command:
[edit]
user@host#show firewall
Default Value: No firewall filters are configured by default.
References:
1. Router Security Configuration Guide, Version 1.1b, Section 5.3.1 (page 227), National Security Agency (NSA)
2. Cisco IOS Benchmark Version 2.2, Requirement 1.1.2.7, Center for Internet Security
3. Firewall Filter Overview, JUNOS Software Policy Framework Configuration Guide, Juniper Networks
2.3 Require SNMP Term in RE Firewall Filter (when SNMP is used) (Level 2, Not Scorable)
Description: Routing Engine Firewall Filter should restrict SNMP sources
Rationale: Firewall filters are built up of one or more terms, which are evaluated in order until either one is matched (at which point the terms then action is taken) or the final term has been evaluated, at which point the default action is to discard the packet. SNMP provides detailed information about the router and may allow changes to the routers configuration, making SNMP a prime target for an attacker. To protect the router, you should only allow authorized management hosts, ideally on an internal network segment, to connect using SNMP.

21 | P a g e
Permitted SNMP connections should be logged to the local routing engine and to SYSLOG, allowing a record of connections to be kept and potential attacks to be detected.
Remediation: To create a firewall filter term enter the following command from the[edit firewall family <family> filter <filter name>] hierarchy.
[edit firewall family inet filter <filter name>]
user@host#edit term <term name>
[edit firewall family inet filter <filter name> term <term name>]
user@host#set from source-address <authorized address or subnet>
user@host#set from source-address <authorized address or subnet 2>
user@host#set from protocol udp
user@host#set from destination-port snmp
user@host#set then accept
user@host#set then syslog
user@host#set then log
Audit: Due to the range of options available as to Filter Name, Term Name and terms; it is not possible to score this recommendation. Firewall filters may be viewed by issuing the following command:
[edit]
user@host#show firewall
Default Value: No firewall filters are configured by default.
References:
1. Router Security Configuration Guide, Version 1.1b, Section 4.5.3 (page 151), National Security Agency (NSA)
2. Cisco IOS Benchmark Version 2.2, Requirement 1.1.5.5 and 1.1.5.6, Center for Internet Security
3. Firewall Filter Overview, JUNOS Software Policy Framework Configuration Guide, Juniper Networks

22 | P a g e
2.4 Forbid Internal Source from External Networks (Level 2, Not Scorable)
Description: Deny traffic with an internal source address from external source.
Rationale: An attacker may attempt to bypass security controls and Intrusion Detection Systems (IDS) by using the source address of a trusted (generally internal) host, a technique known as spoofing. Packets arriving on external networks should never have a source address from your internal network ranges, especially where the internal networks use RFC1918 private address space or invalid addresses. Any traffic with an internal source arriving on an external interface is defacto an attack and should be blocked. A Firewall Filter should be applied to all external network interfaces and include a term to deny internal address ranges. The denied method is used to block the packet silently, with no message sent back to the source. This traffic should also be logged to the local routing engine and SYSLOG, allowing attacks to be detected and record kept.
Remediation: To create a firewall filter term enter the following command from the[edit firewall family <family> filter <filter name>] hierarchy.
[edit firewall family inet filter <filter name>]
user@host#edit term <term name>
[edit firewall family inet filter <filter name> term <term name>]
user@host#set from source-address 127.0.0.0/8
user@host#set from source-address 10.0.0.0/8
user@host#set from source-address 0.0.0.0/32
user@host#set from source-address 172.16.0.0/12
user@host#set from source-address 192.168.0.0/16
user@host#set from source-address 192.0.2.0/24
user@host#set from source-address 169.254.0.0/16
user@host#set from source-address 224.0.0.0/8
user@host#set from source-address 255.255.255.255/32
user@host#set from source-address <other internal addresses>
user@host#set then discard
user@host#set then syslog
user@host#set then log
NOTE – At least one further term must be included in this firewall filter to allow legitimate traffic.

23 | P a g e
Audit: Due to the range of options available as to Filter Name, Term Name and terms; it is not possible to score this recommendation. Firewall filters may be viewed by issuing the following command:
[edit]
user@host#show firewall
Default Value: No firewall filters are configured by default.
References:
1. Cisco IOS Benchmark Version 2.2, Requirement 2.3.1.1, Center for Internet Security
2. Firewall Filter Overview, JUNOS Software Policy Framework Configuration Guide, Juniper Networks
2.5 Require Explicit Deny and Log in Firewall Filters (Level 2, Not Scorable)
Description: Filters should include a final Deny and Log term.
Rationale: Firewall filters are built up of one or more terms, which are evaluated in order until either one is matched (at which point the terms then action is taken) or the final term has been evaluated, at which point the default action is to discard the packet. It is important to log packets which are denied by the firewall filter, these may indicate an attempted attack or could suggest a problem in the network or with the firewall filter itself. A term should be added to the end of the each firewall filter which logs the packet header information and blocks the packet. The discard method is used to block the packet silently, with no message sent back to the source, denying the attacker information and limiting resource usage on the router.
Remediation: To create a firewall filter term enter the following command from the[edit firewall family <family> filter <filter name>] hierarchy.
[edit firewall family inet filter <filter name>]
user@host#set term <term name> then discard
user@host#set term <term name> then syslog
user@host#set term <term name> then log

24 | P a g e
Audit: Due to the range of options available as to Filter Name, Term Name and terms; it is not possible to score this recommendation. Firewall filters may be viewed by issuing the following command:
[edit]
user@host#show firewall
Default Value: No firewall filters are configured by default.
References:
1. Cisco IOS Benchmark Version 2.2, Requirement 1.1.2.7, Center for Internet Security
2. Firewall Filter Overview, JUNOS Software Policy Framework Configuration Guide, Juniper Networks
3. Interfaces <Interface Name> This section provides guidance on the secure configuration of Interface specific parameters and options which are contained under the [edit interfaces <interface name>] hierarchy.
3.1 Disable Unused Interfaces (Level 1, Not Scorable)
Description: Unused interfaces should be explicitly disabled.
Rationale: JUNOS routers can be installed with tens or even hundreds of physical interfaces of different types. To ensure that unused interfaces are not connected to networks, either accidently or by a malicious user seeking to bypass security measures, all unused interfaces should be explicitly disabled.
Remediation: To disable an interface enter the following command from the[edit interfaces <interface name>] hierarchy.
[edit interfaces <interface name>]
user@host#set disable

25 | P a g e
Audit: From the command prompt, execute the following command:
[edit]
user@host#show interfaces <interface name>
The following output should be returned
<interface name> {
disable;
}
Please note that other configuration items related to the interface may also appear between the curly braces.
Default Value: Installed physical interfaces are enabled by default on most platforms.
References: None.
3.2 Require Interface Description (Level 1, Scorable)
Description: All interfaces should have a description.
Rationale: JUNOS routers can be installed with tens or even hundreds of physical and logical interfaces of different types. To allow effective planning, troubleshooting and to avoid confusion & mistakes which may compromise your networks security, all interface units should have a description configured.
Remediation: To configure an interface description enter the following command from the[edit interfaces <interface name> unit <unit number>] hierarchy.
[edit interfaces <interface name> unit <unit number>]
user@host#set description <description>

26 | P a g e
Audit: From the command prompt, execute the following command:
[edit]
user@host#show interfaces | match “description” | count
The returned value should be a positive integer equal to the number of configured interface units.
Default Value: Descriptions are not set by default.
References: None.
3.3 Forbid Proxy ARP (Level 2, Scorable)
Description: Do not use Proxy ARP.
Rationale: Address Resolution Protocol (ARP) provides resolution between IP and MAC Addresses (or other Network and Link Layer addresses on none IP networks) within a Layer 2 network. Proxy ARP is a service where a device connected to one network (in this case the JUNOS router) answers ARP Requests which are addressed to a host on another network, replying with its own MAC Address and forwarding the traffic on to the intended host. Sometimes used for extending broadcast domains across WAN links, in most cases Proxy ARP on enterprise networks is used to enable communication for hosts with mis-configured subnet masks, a situation which should no longer be a common problem. Proxy ARP effectively breaks the LAN Security Perimeter, extending a network across multiple Layer 2 segments. Using Proxy ARP can also allow other security controls such as PVLAN to be bypassed.
Remediation: To disable Proxy ARP enter the following command from the[edit interfaces <interface name> unit <unit number>] hierarchy:
[edit interfaces <interface name> unit <unit number>]
user@host#delete proxy-arp

27 | P a g e
Audit: From the command prompt, execute the following command:
[edit]
user@host#show interfaces | match “proxy-arp” | count
The returned value should return 0 or null.
Default Value: Proxy ARP is disabled by default on most JUNOS routers.
References:
1. Router Security Configuration Guide, Version 1.1b, Section 4.4.2 (page 75), National Security Agency (NSA)
2. Cisco IOS Benchmark Version 2.2, Requirement 2.3.3.2, Center for Internet Security
3.4 Disable ICMP Redirect Messages on Untrusted Networks (Level 1, Not Scorable)
Description: The Routing Engine should not send ICMP Redirect Messages.
Rationale: ICMP Redirect Messages provide a method for a router to communicate routing information with a host and is intended for use when a router receives packets to forward to a destination to which the host should have a direct route. An attacker may abuse this feature to obtain topology information about a target network and potentially identify weaknesses for later exploitation. To prevent this abuse, ICMP Redirect message generation should be disabled on any interfaces connected to untrusted networks such as the Internet. NOTE – Ensure that your hosts are not reliant on ICMP Redirect messages for routing before disabling this feature.
Remediation: To disable ICMP Redirect message generation on an untrusted network interface, issue the following command from the[edit interfaces] hierarchy;
[edit interfaces]
user@host#set <interface name> unit <unit number> family <address
family> no-redirects

28 | P a g e
Audit: From the command prompt, execute the following command:
[edit]
user@host#show interfaces | match “no-redirects” | count
The above command should return an integer value equal to the number of untrusted interfaces on the device. Because this is a subjective value, this recommendation is not scorable.
Default Value: By default the ICMP Redirect messages are generated.
References:
1. Configuring the JUNOS Software to Disable Protocol Redirect Messages on the Router , JUNOS 9.5 System Basics Configuration Guide, Juniper Networks
3.5 Require Loopback Address (Level 2, Scorable)
Description: Configure a Loopback address.
Rationale: When a router needs to initiate connections to remote hosts, for example for SYSLOG or NTP, it will use the nearest interface for the packets source address. This can cause issues due to the possible variation in source, potentially causing packets to be denied by intervening firewalls or handled incorrectly by the receiving host. To prevent these problems the router should be configured with a Loopback interface and any services should be bound to this address.
Remediation: To create a loopback interface enter the following command from the[edit interfaces] hierarchy:
[edit interfaces]
user@host#set lo0 unit 0 family inet address <ip address>
Audit: From the command prompt, execute the following command:

29 | P a g e
[edit]
user@host#show interfaces lo0
The following should be returned:
unit 0 {
family inet {
address <ip address>;
}
}
Additional configuration items for the Loopback interface may also be present between the curly braces.
Default Value: No Loopback Address is configured by default.
References:
1. Router Security Configuration Guide, Version 1.1b, Section 4.1.4 (page 58), National Security Agency (NSA)
2. Cisco IOS Benchmark Version 2.2, Requirement 2.2.1.4, Center for Internet Security
3.6 Forbid Multiple Loopback Addresses (Level 2, Scorable)
Description: Configure only one Loopback address.
Rationale: Multiple Loopback addresses create potential for abuse, mis-configuration and confusion. Alternative Loopback addresses should be configured with caution and, where they must be used, should be clearly documented.
Remediation: To remove an additional loopback interface enter the following command from the[edit interfaces] hierarchy:
[edit interfaces]
user@host#delete lo<Loopback Interface Number>

30 | P a g e
Audit: From the command prompt, execute the following command:
[edit]
user@host#show interfaces | match “lo[0-9]” | count
A value of 1 should be returned.
Default Value: No Loopback Address is configured by default.
References:
1. Router Security Configuration Guide, Version 1.1b, Section 4.1.4 (page 58), National Security Agency (NSA)
2. Cisco IOS Benchmark Version 2.2, Requirement 2.2.1.5, Center for Internet Security
3.7 Require Inbound Firewall Filter on Loopback Interface (Level 2, Scorable)
Description: A Firewall Filter should be applied to lo0.
Rationale: JUNOS routers can provide a wide range of services to the network and, as with any computer system, the more services that are offered and the more hosts they are available to, the wider attack surface is offered to a potential attacker. To protect the router from attack a Firewall Filter should be applied to all inbound traffic to the Routing Engine which limits the hosts able to connect to the router and the services on which they are permitted to connect. If applied to the lo0 interface the filter will apply to all traffic sent to the Routing Engine rather than to traffic traversing the router. Where IPv6 traffic is also handled by the router a firewall filter will also need to be applied for family inet 6. See the Firewall section for details of how to configure Firewall Filters. NOTE : The Firewall Filter applies to ALL traffic sent to the Routing Engine, including traffic sent to the routers interface addresses. Ensure your firewall filter allows all of the Routing, Management and other protocols which are required for normal operation prior to applying the filter.
Remediation: To apply a firewall filter to the loopback interface enter the following command from the[edit interfaces] hierarchy:

31 | P a g e
[edit interfaces]
user@host#set lo0 unit 0 family inet filter input <filter name>
Audit: From the command prompt, execute the following command:
[edit]
user@host#show interfaces lo0 unit 0 family <address family> filter
input
The name of the configured firewall filter should be returned.
Default Value: No firewall filters are configured by default.
References:
1. Router Security Configuration Guide, Version 1.1b, Section 4.4.1 (page 55), National Security Agency (NSA)
2. Cisco IOS Benchmark Version 2.2, Requirement 1.1.2.7, Center for Internet Security
3.8 DLn – Dialer Interfaces Dialer interfaces are used to access modem connections on Juniper routers. These settings are accessed under the [edit interfaces dln] hierarchy (where n is the interface number).
3.8.1 Require Caller ID if Incoming Map is Used (Level 1, Scorable)
Description: Caller restrictions MUST be used when Incoming calls are permitted.
Rationale: Some JUNOS routers support the use of a dial in modem connection for Telnet/SSH administration of the router from a remote connection over the telephone network. This can provide a useful out of band management channel, allowing access to a customer router at a remote site when the primary circuit has failed for example, but also creates a new route for attack, allowing a malicious user to bypass firewalls and other defenses.

32 | P a g e
Even when the phone number for the modem is kept secret, attackers may still discover it through war dialing, possibly narrowing targets by researching the number ranges used by your organization. To limit the scope for such an attack, the dialer interface should be configured to check the incoming Caller ID for connection attempts, only allowing the connection to proceed when the caller is on a pre-configured list of approved numbers.
Remediation: If you have configured a dialer interface to accept incoming calls, you should restrict the allowable Caller ID by entering the following command under the [edit interfaces dln unit 0 dialer-options] hierarchy (where n is the dialer interface number);
[edit interfaces dln unit 0 dialer-options]
user@host#set incoming-map caller <Approved CallerID Number>
Up to 15 caller numbers may be configured on a dialer interface, repeat the command above for each number you wish to add.
Audit: From the command prompt, execute the following command:
[edit]
user@host#show interfaces | match “incoming-map” | count
If an interface is set to accept incoming calls and use Caller ID this should be a positive integer. A value of 0 does may indicate that Caller ID is not used or may simply indicate that incoming calls are not configured at all.
Default Value: None.
References:
1. Setting Up USB Modems for Remote Management, JUNOS 9.5 Security Configuration Guide, Juniper Networks
3.8.2 Require CHAP Authentication if Incoming Map is Used (Level 1, Scorable)
Description: CHAP Authentication MUST be used when Incoming calls are permitted.
Rationale: Some JUNOS routers support the use of a dial in modem connection for Telnet/SSH administration of the router from a remote connection over the telephone network.

33 | P a g e
This can provide a useful out of band management channel, allowing access to a customer router at a remote site when the primary circuit has failed for example, but also creates a new route for attack, allowing a malicious user to bypass firewalls and other defenses. Even when the phone number for the modem is kept secret, attackers may still discover it through war dialing, possibly narrowing targets by researching the number ranges used by your organization. To limit the scope for such an attack, the dialer interface should be configured to use Challenge Handshake Authentication Protocol (CHAP) before allowing calls to connect. Using CHAP, a username and password can be configured for each user that needs to connect to the router via the modem. The password should not be the same as that used by to login to the routers CLI itself.
Remediation: If you have configured a dialer interface to accept incoming calls, you should configure CHAPS authentication using the following commands from the indicated hierarchy (where n is the interface number);
[edit access]
user@host#set profile <profile name> client <username> chap-secret
<password>
user@host#top
user@host#edit interface dln unit 0
[edit interfaces dln unit 0]
user@host#set ppp-options chap access-profile <profile name>
Repeat the first command for each user that is required.
Audit: From the command prompt, execute the following command:
[edit]
user@host#show interfaces | find “chap” | match “access-profile” |
count
If an interface is set to accept incoming calls and use CHAP Authentication this should be a positive integer. A value of 0 does may indicate that CHAP is not used or may simply indicate that incoming calls are not configured at all.
Default Value: None.

34 | P a g e
References:
1. Setting Up USB Modems for Remote Management, JUNOS 9.5 Security Configuration Guide, Juniper Networks
3.8.3 Forbid Dial in Access (Level 2, Scorable)
Description: Dial in access should not be used on sensitive routers.
Rationale: Some JUNOS routers support the use of a dial in modem connection for Telnet/SSH administration of the router from a remote connection over the telephone network. This can provide a useful out of band management channel, allowing access to a customer router at a remote site when the primary circuit has failed for example, but also creates a new route for attack, allowing a malicious user to bypass firewalls and other defenses. Even when the phone number for the modem is kept secret, attackers may still discover it through war dialing, possibly narrowing targets by researching the number ranges used by your organization. For sensitive routers, such as those in a PCI DSS Cardholder Data Environment, the protective measures available for dial in access are insufficient and no dial in access should be used. If not required for other services the modem should be physically removed from the router.
Remediation: If you have configured a dialer interface to accept incoming calls, you should disable it using the following commands from the [edit interfaces] hierarchy (where n indicates the interface number);
[edit interfaces]
user@host#delete interface dln
Audit: From the command prompt, execute the following command:
[edit]
user@host# show interfaces | match “incoming-map” | count
The above command should return 0 or an error.
Default Value: None.

35 | P a g e
References:
1. Setting Up USB Modems for Remote Management, JUNOS 9.5 Security Configuration Guide, Juniper Networks
2. Payment Card Industry Data Security Standard (PCI DSS), Version 1.2, Requirement 8.3
3.9 Family Inet VRRP-Group (Interface Redundancy) Virtual Router Redundancy Protocol (VRRP) allows administrators to create Virtual IP Addresses (VIPs) for an interface. The VIP is shared between two routers, with only one handling traffic while other acts as a backup. VRRP settings are accessed under the [edit interfaces <interface name> unit <unit number> family inet vrrp-group] hierarchy.
3.9.1 Require Authentication-Key If VRRP Is Used (Level 2, Scorable)
Description: VRRP should always use authentication.
Rationale: VRRP provides resilience for a routers interfaces, allowing another router to act as backup in the event of a partial or complete failure of the primary router and increasing the availability network resources as well as resilience to DoS attack. Routers configured to share a Virtual IP Address using VRRP communicate their status to their peer on a regular basis using a multicast packet, allowing a Master for the VIP to be elected. It is the Master that deals with packets destined for the VIP address. If no authentication is used an attacker could potentially disrupt the VRRP Master Election process, causing neither router to handle packets destined for the VIP and resulting a DoS.
Remediation: If you have configured VRRP on one or more interfaces you should configure authentication using the following commands from the [edit interfaces <interface name> unit <unit number> family inet address <ip address>] hierarchy;
[edit interfaces <interface name> unit <unit number> family inet
address <ip address>]
user@host#set vrrp-group <group number> authentication-key <key>
Audit: From the command prompt, execute the following command:
[edit interfaces]

36 | P a g e
user@host#show | find “vrrp-group” | match “authentication-key” | count
The above command should return an integer equal to the number of VRRP Groups configured.
Default Value: VRRP is not configured by default.
References:
1. Configuring VRRP Authentication (IPv4 Only), JUNOS 9.5 High Availability Configuration Guide, Juniper Networks
3.9.2 Require Authentication-Type MD5 If VRRP Is Used (Level 2, Scorable)
Description: VRRP should always use MD5 authentication.
Rationale: VRRP provides resilience for a routers interfaces, allowing another router to act as backup in the event of a partial or complete failure of the primary router and increasing the availability network resources as well as resilience to DoS attack. Routers configured to share a Virtual IP Address using VRRP communicate their status to their peer on a regular basis using a multicast packet, allowing a Master for the VIP to be elected. It is the Master that deals with packets destined for the VIP address. If no authentication is used an attacker could potentially disrupt the VRRP Master Election process, causing neither router to handle packets destined for the VIP and resulting a DoS. VRRP supports simple authentication and MD5. Simple authentication transmits the password in plain text so should not be used. MD5 authentication uses a Keyed-Hash Authentication Message Code (HMAC), a techniques which uses a key combined with a cryptographic hash algorithm to verify the authenticity and integrity of the received packet.
Remediation: If you have configured VRRP on one or more interfaces you should configure authentication using MD5-HMAC with the following commands from the [edit interfaces <interface name> unit <unit number> family inet address <ip address>] hierarchy;
[edit interfaces <interface name> unit <unit number> family inet
address <ip address>]
user@host#set vrrp-group <group number> authentication-type md5
Audit: From the command prompt, execute the following command:

37 | P a g e
user@host>show vrrp detail | match “Authentication type: md5” | count
The above command should return a positive integer equal to the number of VRRP groups configured.
Default Value: None.
References:
1. Configuring VRRP Authentication (IPv4 Only), JUNOS 9.5 High Availability Configuration Guide, Juniper Networks
4. Protocols A wide range of protocols are configured at this hierarchy, including Routing protocols, MPLS and PIM. Routing protocols in particular, are a fundamental part of what makes a router tick. JUNOS supports a wide range of routing protocols, the parameters for which are contained under the [edit protocols] hierarchy. Because JUNOS allows the creation of Logical Routers and multiple Routing Instances on some platforms, routing may also be configured at other hierarchies. For instance IS-IS may be configured at the [edit protocols isis] level, the [edit logical-routers <logical router name> protocols isis], [edit logical-routers <logical router name> routing-instances <routing instance name> protocols isis] and the [edit routing-instances <routing instance name> protocols isis].
These latter hierarchies are essentially copies of the [edit protocols isis] configuration options. Any recommendations that apply to the protocol at this level, equally apply the protocol when it is configured at other levels.
4.1 BGP Border Gateway Protocol (BGP) is the core routing protocol of the Internet and is also commonly used on the internal core networks of larger Enterprises and Service Providers. Exterior Gateway Routing Protocols in general and BGP in particular are complex systems; it is beyond the scope of this benchmark to give even an overview of how BGP operates on Juniper routers.

38 | P a g e
With this in mind all recommendations in this section are at Level 2 and should only be applied by experienced network engineers, however it is recommended that all administrators running BGP in their network be familiar with these recommendations. BGP parameters for JUNOS routers are configured under the [edit protocols bgp] hierarchy.
4.1.1 Require MD5 Peer Authentication (where BGP is used) (Level 2, Scorable)
Description: BGP Peers should be authenticated.
Rationale: Where it is deployed, BGP routing is vital for normal operation of an organizations network infrastructure. Correct route information is required for routers to correctly direct traffic through the network. An attacker posing as one of the target routers BGP neighbors may inject incorrect information into the route table resulting in DOS attack or loss of confidential data through a Man in the Middle attack. On Juniper routers (as well as routers from other manufacturers such as Cisco or Brocade) it is possible to authenticate neighbors using an MD5 digest of elements of the TCP segment, creating a signature which can be verified without ever needing to transmit the password. This method is described in RFC 2385. NOTE – Ensure that Neighbor Authentication is configured with the same details on both neighbors which may require co-ordination with your external peers. Failure to do so will prevent route updates from being accepted.
Remediation: If you have deployed BGP in your network you should authenticate all neighbors. Authentication can be configured at the Global, Group or Neighbor level, with more specific settings overriding less specific. For eBGP a different MD5 password should be configured for each neighbor or peer. For iBGP neighbors the same key may be used globally or different keys may be used by group or neighbor as appropriate to your infrastructure. To configure BGP Authentication at the globally enter the following command at the [edit protocols bgp] hierarchy:
[edit protocols bgp]
user@host#set authentication-key <md5 key>

39 | P a g e
To configure BGP Authentication at the group level enter the following command at the [edit protocols bgp] hierarchy:
[edit protocols bgp]
user@host#set group <group name> authentication-key <md5 key>
Finally, to configure BGP Authentication at the neighbor level enter the following command at the [edit protocols bgp group <group name>] hierarchy:
[edit protocols bgp group <group name>]
user@host#set neighbor <neighbor IP> authentication-key <md5 key>
Remember that more specific settings override less specific settings, so a key set at the neighbor level will be used even if keys are also set at the group and global levels.
Audit: Enter the following command from operational mode:
user@host>show bgp neighbor | match “Authentication key is configured”
| count
The above command should return a positive integer equal to the number of configured BGP Neighbors.
Default Value: No BGP routing is configured by default..
References:
1. Cisco IOS Benchmark Version 2.2, Requirement 2.3.2.1, Center for Internet Security
2. Router Security Configuration Guide, Version 1.1b, Section 4.4.5 (page 123), National Security Agency (NSA)
4.1.2 Require IPSEC SA Neighbor Authentication (where BGP is used) (Level 2, Not Scorable)
Description: BGP Neighbors should be authenticated.
Rationale:

40 | P a g e
Where it is deployed, BGP routing is vital for normal operation of an organizations network infrastructure. Correct route information is required for routers to correctly direct traffic through the network. An attacker posing as one of the target routers BGP neighbors may inject incorrect information into the route table resulting in DoS attack or loss of confidential data through a Man in the Middle attack. As well as MD5 hash based authentication, JUNOS routers can also authenticate BGP neighbors using IPSEC Security Associations. This allows more robust authentication mechanisms to be used and is recommended as an alternative to MD5 HMAC in high security environments. Although M, T and MX series devices normally require a Services PIC or DPC installed to use IPSEC tunnels, no additional hardware is required for IPSEC SA based authentication of BGP neighbors. As with MD5 HMAC, IPSEC SA based Authentication can be configured Globally, at the Group Level or at the Neighbor Level, with more specific settings overriding less specific settings. Because IPSEC SA Authentication is intended for use in high security environments, it is recommended that different parameters are configured for each neighbor, particularly where eBGP is used. NOTE: Security Associations must be configured correctly on all neighbors reached through interfaces where IPSEC based authentication is configured for BGP to continue to function.
Remediation: To setup IPSEC SA based authentication, first configure a Security Association at the [edit security ipsec] hierarchy;
[edit security ipsec]
edit security-association <SA name>
set description <description>
set mode transport
set manual direction bidirectional
set manual protocol ah
set manual authentication algorithm <authentication method>
set manual authentication key <key>
The SA must be bi-directional and must be configured with the same parameters on all neighbors reachable on the intended interface. To configure IPSEC SA based authentication globally for BGP, issue the following command from the [edit protocols bgp] hierarchy;

41 | P a g e
[edit protocols bgp]
user@host#set ipsec-sa <SA name>
To configure IPSEC SA based authentication for a group, issue the following command from the [edit protocols bgp group <group name>] hierarchy;
[edit protocols bgp group <group name>]
user@host#set ipsec-sa <SA name>
To configure IPSEC SA based authentication for a neighbor, issue the following command from the [edit protocols bgp group <group name> neighbor <neighbor ip address>] hierarchy;
[edit protocols bgp group <group name> neighbor <neighbor ip address>]
user@host#set ipsec-sa <SA name>
Audit: Due to the range of options for configuring IPSEC SA based Authentication with BGP, this recommendation is not scorable.
Default Value: No BGP routing is configured by default.
References:
1. Applying IPSEC Security Association, JUNOS Software Routing Configuration Guide, Juniper Networks
4.1.3 Require GTSM / lowest Multihop (where eBGP is used) (Level 2, Scorable)
Description: GTSM should be used with BGP.
Rationale: Where it is deployed, External BGP routing is vital for normal operation of an organizations network infrastructure. Correct route information is required for routers to correctly direct traffic destined for external networks. An attacker may attempt to exhaust the routers CPU and memory resources by flooding a target router with fake routing updates, resulting in a DoS condition. Potentially an attack may also inject fake routing information into the route table.

42 | P a g e
General TTL Security Mechanism (GTSM) is defined in RFC5082 and takes advantage of the fact that routers normally peer with adjacent neighbors, i.e. with routers only 1 hop away. GTSM uses the Time to Live (TTL) field of routing update packets to determine whether or not the packet originated from an adjacent router, denying those which do not. Juniper routers effectively implement GTSM by default. Administrators can use the multihop command hierarchy to increase the maximum acceptable TTL for route updates, allowing updates from none adjacent peers. When peering with adjacent routers then multihop should not be configured, using the default to effectively configure GTSM with a TTL limit of 254 (or 1 hop). If your network requires peering with routers more than 1 hop away (none adjacent peers), multihop should be configured on a per peer or per group basis with the minimum possible value so as to limit the distance, in terms of networks, from which an attack can be launched.
Remediation: If you have deployed multihop in your network but do not have any peers more then 1 hop away, disable multihop with the following command from the [edit protocols bgp], [edit protocols bgp group <group name>] or [edit protocols bgp group <group name> neighbor <neighbor address>] depending at which level you have configured multihop;
[edit protocols bgp]
user@host#delete multihop
To change the number of hops distance from which a route update can originate, enter the following command from the[edit protocols bgp group <group name>] to apply multihop to a group or [edit protocols bgp group <group name> neighbor <neighbor address>] to apply multihop to a single neighbor;
[edit protocols bgp group <group name>]
user@host#set multihop ttl <number of hops>
Remember that, in both cases, more specific settings override less specific ones. So if multihop is set to 5 at the neighbor level, but the default of 1 at the global level, the neighbor level setting will apply for communications with that peer.
Audit: Enter the following command from operational mode:

43 | P a g e
[edit]
user@host#show protocols bgp | match “multihop” | count
The above command should return an integer indicating the number of occasions that multihop is defined. In most cases, where adjacent peers are used, the returned value should be 0 (or 1 if peering with the Team Cymru Bogon Route Server).
Default Value: A TTL of 1 is used by default on eBGP sessions and a default TTL of 64 is used for iBGP.
References:
1. Router Security Configuration Guide, Version 1.1b, Section 4.4.5 (page 123), National Security Agency (NSA)
4.1.4 Require Bogon Filtering (where eBGP is used) (Level 2, Not Scorable)
Description: Bogon prefixes should be filtered when using eBGP.
Rationale: Bogon Networks are those IP Address blocks which should never appear on the Internet. Examples include loopback addresses, RFC1918 private addresses and IP blocks which have not yet been assigned by the IANA (Internet Assigned Numbers Authority) to one of the RIRs (Regional Internet Registries). If traffic arrives at your network edge from a Bogon network, the traffic is almost certainly malicious and should be filtered. Studies have shown instances where as much as 60% of DoS attack traffic is being sourced from Bogon or Martian (a subset which includes RFC1918 and RFC3330 networks) addresses. As a rule Bogon traffic should also be filtered from leaving the network as it may be malicious or represent a possible information leak. Either way, return traffic would not get back. Bogon information can be obtained from a number of sources such as:
IANA - Obtain the current IPv4 assignments list, anything that is shown as Unallocated or Reserved is a Bogon.
Team Cymru provides, what is effectively, the definitive Bogon list in a range of formats and through a BGP Route Server project.
RIPE NCC also provides lists of Unallocated, Martian and combined Bogon space. An important point to remember about Bogon filtering is that the addresses that make up Bogon space change. Unallocated addresses get allocated, reserved networks may be re-

44 | P a g e
purposed, etc. If you keep your Bogon filters static, you may accidently block valid traffic from these addresses. Ensure you have a procedure to keep your Bogon lists up to date!
Remediation: JUNOS offers a variety of options for filtering Bogons and Martians, which is why this item is not scorable. Some of the more common options are discussed below. 1 – The Martian Table Most Martian space (but not all, else you would not be able to use your router on private networks) is blocked using the Martian Routing Table, which is discussed elsewhere in this Benchmark and configured under the [edit routing-options martians] hierarchy. Route updates for prefixes in this special table are ignored, so adding Bogons here will prevent them being learned through any routing protocol. 2 – Ingress Prefix Filtering Ingress Filtering should be used on eBGP sessions to prevent your own prefixes being advertised back to your network or, in the case of ISP networks, customer networks advertising prefixes other than those allocated to them. The other filtering types are covered previously. Prefix lists are configured under the [edit policy-options] hierarchy, but are discussed here as they are applied under the [edit protocols bgp <group name>] hierarchy. First configure a policy:
[edit policy-options]
user@host#edit policy-statement <policy name> term <term name>
[edit policy-options policy-statement <policy name> <term name>]
user@host#set from route-filter <network>/<mask> <exact | orlonger |
prefix-length-range <start>-<end>> reject
The last stage should be repeated for each prefix required, but is as several options are shown a couple of examples are given below:
[edit policy-options <policy name> <term name>]
user@host#set from route-filter 0.0.0.0/0 exact reject
user@host#set from route-filter 10.0.0.0/8 orlonger reject
user@host#set from route-filter 0.0.0.0/0 prefix-length-range /29-/32
reject
The first line in the example rejects a default route advertised to the router and only that route. The second line will filter any route from the 10.0.0.0/8 range, for instance 10.1.1.0/24 or 10.2.0.0/16. The final line is a little more complex, this will reject any route

45 | P a g e
with a mask length of /29, /30, /31 or /32 (generally eBGP routes should be summarized into larger prefixes than this). Having defined a policy, we need to apply it. As with most other BGP configuration options, you can apply the policy at Global, Group or Neighbor levels as suites your needs. In this example we will apply the policy to a group containing all our eBGP peers:
[edit protocols bgp group <group name>]
user@host#set import <policy name/s>
3 – Peering with a Bogon Route Server As far as I am aware, the idea of using a BGP Peering session to a Route Server for updates on Bogon networks was hatched by Team Cymru and they offer a free, public Bogon Route Server, which you can peer with to keep you Bogon list up to date. The theory works equally well by peering to a route server of your own, allowing a greater degree of control over your Bogon list updates for your organization if desired. First a static route is created and configured to discard traffic. An address that is reserved for Test or Example networks is used, you may need to allow this /32 prefix in the Martian Table:
[edit routing-options]
user@host#set static route 192.0.2.1/32 discard no-readvertise retain
An import policy should be set to match prefixes from the route servers AS and the Community (if used) for Bogon updates, setting the next hop to 192.0.2.1 and accepting the route.
[edit policy-options]
user@host#edit policy-statement <policy name> term <term name>
[edit policy-options policy-statement <policy name> term <term name>]
user@host#set from protocol bgp as-path <peer AS> community <community>
user@host#set then next-hop 192.0.2.1
Finally the BGP Peering and Group is configured with the import policy above and not to export. In addition security options covered in other recommendations should be used:
[edit protocols bgp <group name>]
user@host#set type external description “bogon route servers”

46 | P a g e
user@host#set import <policy name>
user@host#set peer-as <AS of Route Server>
user@host#set neighbor <neighbors IP>
user@host#set local-address <local IP to use for peering>
Audit: Not scorable or auditable.
Default Value: Most Martians are filtered by default, most Bogons are not.
References:
1. Router Security Configuration Guide, Version 1.1b, Section 4.4.5 (page 123), National Security Agency (NSA)
2. The Bogon Reference, Team Cymru
3. IPv4 Address Space Registry, Internet Assigned Numbers Authority (IANA)
4.1.5 Require Ingress Prefix Filtering (where eBGP is used) (Level 2, Not Scorable)
Description: Filter prefixes advertised to the router through eBGP.
Rationale: In addition to filtering Bogon and Maritan routes JUNOS routers peering with eBGP neighbors should also apply Ingress Filtering to prevent the router processing bad updates sent from the neighbor router, either maliciously or by accident. At a minimum prefix filters should deny any prefix which belong to your own AS. Depending on your type of deployment you may also wish to block prefixes which are more specific than those issues by RIR’s or limit ISP customers to advertising those prefixes which you have assigned to them.
Remediation: From the [edit policy-options] hierarchy, define a new policy by issuing the following commands:
[edit policy-options]
user@host#edit policy-statement <policy name> term <term name>
[edit policy-options policy-statement <policy name> term <term name>]
user@host# set from route-filter <network>/<mask> <exact | orlonger |
prefix-length-range <start>-<end>> reject

47 | P a g e
Now apply the policy, either globally, to a group or to an individual peer as required by your environment.
[edit protocols bgp <group name>]
user@host#set import <policy name>
Audit: Because a policy may be applied at one or more different levels depending on the requirements of a specific organization, it is not possible to score this recommendation.
Default Value: No Ingress Filtering is applies by default.
References:
1. Router Security Configuration Guide, Version 1.1b, Section 4.4.5 (page 123), National Security Agency (NSA)
4.2 ISIS Intermediate System to Intermediate System (IS-IS) is a Link State Interior Gateway Routing Protocol similar in operation to OSPF. It is less popular on Enterprise networks than on Service Provider networks where it scales more effectively than. IS-IS is a complex protocol, with many configuration options which may have effects which are not immediately obvious. With this in mind all recommendations in this section are at Level 2 and should only be applied by experienced network engineers, however it is recommended that all administrators with IS-IS in their network be familiar with these recommendations.
IS-IS parameters for JUNOS routers are configured under the [edit protocols isis] hierarchy.
4.2.1 Require MD5 Neighbor Authentication (where IS-IS is used) (Level 2, Scorable)
Description: ISIS Neighbors should be authenticated.
Rationale: Where it is deployed, IS-IS routing is vital for normal operation of an organizations network infrastructure. Correct route information is required for routers to correctly direct traffic through the network.

48 | P a g e
An attacker posing as one of the target routers IS-IS neighbors may inject incorrect information into the route table resulting in DoS attack or loss of confidential data through a Man in the Middle attack. On Juniper routers (as well as routers from other manufacturers such as Cisco or Brocade) it is possible to authenticate neighbors using an MD5 digest of elements in PDU combined with a sequence number to protect against Replay attacks. Authentication is configured for each IS-IS Level. NOTE – Ensure that Neighbor Authentication is configured with the same details on all routers in the IS-IS Area at the given level. Failure to do so will prevent route updates from being accepted.
Remediation: If you have deployed IS-IS in your network you should use MD5 authentication for all neighbors. To configure authentication, first configure the authentication type at the [edit protocols isis level <level>] hierarchy:
[edit protocols isis level <level>]
user@host#set authentication-type md5
user@host#set authentication-key <key>
Audit: Enter the following command from the [edit protocols isis level <level>] hierarchy:
[edit protocols isis level <level>]
user@host#show | match “authentication-“ | except “-auth” | count
The above command should return ‘2’ when both required statements are configured.
Default Value: No IS-IS routing is configured by default.
References:
1. Router Security Configuration Guide, Version 1.1b, Section 4.4.3 (page 113), National Security Agency (NSA)
2. Configuring IS-IS Authentication, JUNOS Software Routing Protocols Configuration Guide, Juniper Networks

49 | P a g e
4.2.2 Forbid Authentication Checking Suppression (where IS-IS is used) (Level 2, Scorable)
Description: ISIS Neighbors should be authenticated.
Rationale: Where it is deployed, IS-IS routing is vital for normal operation of an organizations network infrastructure. Correct route information is required for routers to correctly direct traffic through the network. An attacker posing as one of the target routers IS-IS neighbors may inject incorrect information into the route table resulting in DoS attack or loss of confidential data through a Man in the Middle attack. On JUNOS routers it is possible to suppress some authentication features to aide integration with other vendors IS-IS implementations. One of these interoperability features allows you to configure the router to generate authenticated packets, but not check the authentication of received packets. This leaves the router as vulnerable as it would be with no authentication enabled at all and should not be used.
Remediation: If you have deployed IS-IS in your network and have disabled authentication checking, re-enable it by issuing the following command from the [edit protocols isis] hierarchy:
[edit protocols isis]
user@host#delete no-authentication-check
Audit: Enter the following command from the [edit protocols isis] hierarchy:
[edit protocols isis]
user@host#show | match “no-authentication-check“ | count
The above command should return null or 0.
Default Value: No IS-IS routing is configured by default.
References:

50 | P a g e
1. Configuring IS-IS Authentication, JUNOS Software Routing Protocols Configuration Guide, Juniper Networks
4.2.3 Forbid Hello Authentication Checking Suppression (where IS-IS is used) (Level 2, Scorable)
Description: ISIS Neighbors should be authenticated.
Rationale: Where it is deployed, IS-IS routing is vital for normal operation of an organizations network infrastructure. Correct route information is required for routers to correctly direct traffic through the network. An attacker posing as one of the target routers IS-IS neighbors may inject incorrect information into the route table resulting in DoS attack or loss of confidential data through a Man in the Middle attack. On JUNOS routers it is possible to suppress some authentication features to aide integration with other vendors IS-IS implementations. One of these interoperability features allows you to configure the router to ignore authentication for Hello messages from other routers. This potentially leaves the router open to attack through Hello messages to the same extent as it would be were authentication configured at all. NOTE – Ensure that all routers with which the JUNOS router must communicate with through IS-IS support authentication of Hello messages prior to re-enabling it.
Remediation: If you have deployed IS-IS in your network and have disabled hello authentication checking, re-enable it by issuing the following command from the [edit protocols isis level <level>] hierarchy:
[edit protocols isis level <level>]
user@host#delete no-hello-authentication
Audit: Enter the following command from the [edit protocols isis level <level>] hierarchy:
[edit protocols isis level <level>]

51 | P a g e
user@host#show | match “no-hello-authentication “ | count
The above command should return null or 0.
Default Value: No IS-IS routing is configured by default. Hello Authentication is not suppressed by default when IS-IS is configured.
References:
1. Configuring IS-IS Authentication, JUNOS Software Routing Protocols Configuration Guide, Juniper Networks
4.2.4 Forbid PSNP Authentication Checking Suppression (where IS-IS is used) (Level 2, Scorable)
Description: ISIS Neighbors should be authenticated.
Rationale: Where it is deployed, IS-IS routing is vital for normal operation of an organizations network infrastructure. Correct route information is required for routers to correctly direct traffic through the network. An attacker posing as one of the target routers IS-IS neighbors may inject incorrect information into the route table resulting in DoS attack or loss of confidential data through a Man in the Middle attack. On JUNOS routers it is possible to suppress some authentication features to aide integration with other vendors IS-IS implementations. One of these interoperability features allows you to configure the router to ignore authentication for Partial Sequence Number PDU (PSNP) messages from other routers. This potentially leaves the router open to attack through PSNP messages to the same extent as it would be were authentication configured at all. NOTE – Ensure that all routers with which the JUNOS router must communicate with through IS-IS support authentication of PSNP messages prior to re-enabling it.
Remediation: If you have deployed IS-IS in your network and have disabled PSNP authentication checking, re-enable it by issuing the following command from the [edit protocols isis level <level>] hierarchy:

52 | P a g e
[edit protocols isis level <level>]
user@host#delete no-psnp-authentication
Audit: Enter the following command from the [edit protocols isis level <level>] hierarchy:
[edit protocols isis level <level>]
user@host#show | match “no-psnp-authentication “ | count
The above command should return null or 0.
Default Value: No IS-IS routing is configured by default. PSNP Authentication is not suppressed by default when IS-IS is configured.
References:
1. Configuring IS-IS Authentication, JUNOS Software Routing Protocols Configuration Guide, Juniper Networks
4.2.5 Forbid CSNP Authentication Checking Suppression (where IS-IS is used) (Level 2, Scorable)
Description: ISIS Neighbors should be authenticated.
Rationale: Where it is deployed, IS-IS routing is vital for normal operation of an organizations network infrastructure. Correct route information is required for routers to correctly direct traffic through the network. An attacker posing as one of the target routers IS-IS neighbors may inject incorrect information into the route table resulting in DoS attack or loss of confidential data through a Man in the Middle attack. On JUNOS routers it is possible to suppress some authentication features to aide integration with other vendors IS-IS implementations. One of these interoperability features allows you to configure the router to ignore authentication for Complete Sequence Number PDU (CSNP) messages from other routers.

53 | P a g e
This potentially leaves the router open to attack through CSNP messages to the same extent as it would be were authentication configured at all. NOTE – Ensure that all routers with which the JUNOS router must communicate with through IS-IS support authentication of CSNP messages prior to re-enabling it.
Remediation: If you have deployed IS-IS in your network and have disabled CSNP authentication checking, re-enable it by issuing the following command from the [edit protocols isis level <level>] hierarchy:
[edit protocols isis level <level>]
user@host#delete no-csnp-authentication
Audit: Enter the following command from the [edit protocols isis level <level>] hierarchy:
[edit protocols isis level <level>]
user@host#show | match “no-csnp-authentication “ | count
The above command should return null or 0.
Default Value: No IS-IS routing is configured by default. CSNP Authentication is not suppressed by default when IS-IS is configured.
References:
1. Configuring IS-IS Authentication, JUNOS Software Routing Protocols Configuration Guide, Juniper Networks
4.3 OSPF Open Shortest Path First (OSPF) is common Interior Gateway Routing Protocol widely deployed in Enterprise and Service Provider networks. OSPF is a complex protocol, with many configuration options which may have effects which are not immediately obvious.

54 | P a g e
With this in mind all recommendations in this section are at Level 2 and should only be applied by experienced network engineers, however it is recommended that all administrators with OSPF in their network be familiar with these recommendations.
OSPF parameters for JUNOS routers are configured under the [edit protocols ospf] hierarchy.
4.3.1 Require MD5 Neighbor Authentication (where OSPF is used) (Level 2, Scorable)
Description: OSPF Neighbors should be authenticated.
Rationale: Where it is deployed, OSPF routing is vital for normal operation of an organizations network infrastructure. Correct route information is required for routers to correctly direct traffic through the network. An attacker posing as one of the target routers OSPF neighbors may inject incorrect information into the route table resulting in DoS attack or loss of confidential data through a Man in the Middle attack. On Juniper routers (as well as routers from other manufacturers such as Cisco or Brocade) it is possible to authenticate neighbors using an MD5 digest of elements in the update combined with a sequence number to protect against Replay attacks. Authentication is configured on an area by area basis. NOTE – Ensure that Neighbor Authentication is configured with the same details on all routers in the OSPF Area. Failure to do so will prevent route updates from being accepted.
Remediation: To configure MD5 based authentication, first configure the authentication type at the [edit protocols ospf area <area number>] hierarchy (this step is not required on all versions of JUNOS):
[edit protocols ospf area <area number>]
user@host#set authentication-type md5
The key must then be configured for any interfaces in the area
[edit protocols ospf area <area number>]
user@host#set interface <interface number> authentication md5 <key
number> <key>

55 | P a g e
The <key number> parameter needs to be the same across all routers in the area and is there to provide a method for transitioning from old to new keys.
Audit: Enter the following command from operational mode:
user@host>show ospf interface detail | match “Auth type MD5” | count
The above command should return a positive integer equal to the number of interfaces on which OSPF is configured.
Default Value: No OSPF routing is configured by default.
References:
1. Cisco IOS Benchmark Version 2.2, Requirement 2.3.2.3, Center for Internet Security
2. Router Security Configuration Guide, Version 1.1b, Section 4.4.3 (page 106), National Security Agency (NSA)
4.3.2 Require IPSEC SA Neighbor Authentication (where OSPF is used) (Level 2, Scorable)
Description: OSPF Neighbors should be authenticated.
Rationale: Where it is deployed, OSPF routing is vital for normal operation of an organizations network infrastructure. Correct route information is required for routers to correctly direct traffic through the network. An attacker posing as one of the target routers OSPF neighbors may inject incorrect information into the route table resulting in DoS attack or loss of confidential data through a Man in the Middle attack. As well as MD5 hash based authentication, JUNOS routers can also authenticate OSPF neighbors using IPSEC Security Associations. This allows more robust authentication mechanisms to be used and is recommended as an alternative to MD5 HMAC in high security environments. Although M, T and MX series devices normally require a Services PIC or DPC installed to use IPSEC tunnels, no additional hardware is required for IPSEC SA based authentication of OSPF neighbors.

56 | P a g e
NOTE: Security Associations must be configured correctly on all neighbors reached through interfaces where IPSEC based authentication is configured for OSPF to continue to function.
Remediation: To setup IPSEC SA based authentication, first configure a Security Association at the [edit security ipsec] hierarchy;
[edit security ipsec]
edit security-association <SA name>
set description <description>
set mode transport
set manual direction bidirectional
set manual protocol ah
set manual authentication algorithm <authentication method>
set manual authentication key <key>
The SA must be bi-directional and must be configured with the same parameters on all neighbors reachable on the intended interface. Next configure IPSEC SA based authentication for one or more interfaces which OSPF will be run over from the [edit protocols ospf] hierarchy;
[edit protocols ospf area <area number>]
user@host#set interface <interface number> ipsec-sa <SA name>
Audit: Enter the following command from the [edit protocols ospf] hierarchy;
[edit protocols ospf]
user@host#show | match “ipsec-sa” | count
The above command should return a positive integer equal to the number of interfaces on which IPSEC SA based authentication is required..
Default Value: No OSPF routing is configured by default.
References:
2. Configuring Authentication for OSPFv2, JUNOS Software Routing Configuration Guide, Juniper Networks

57 | P a g e
4.4 OSPFv3 Open Shortest Path First (OSPF) Version 3 is an Interior Gateway Routing Protocol widely deployed in Enterprise and Service Provider networks which expands OSPF to support IPv6.. OSPF is a complex protocol, with many configuration options which may have effects which are not immediately obvious. With this in mind all recommendations in this section are at Level 2 and should only be applied by experienced network engineers, however it is recommended that all administrators with OSPF in their network be familiar with these recommendations.
OSPFv3 parameters for JUNOS routers are configured under the [edit protocols ospfv3] hierarchy.
4.4.1 Require IPSEC SA Neighbor Authentication (where OSPFv3 is used) (Level 2, Scorable)
Description: OSPF Neighbors should be authenticated.
Rationale: Where it is deployed, OSPFv3 routing is vital for normal operation of an organizations network infrastructure. Correct route information is required for routers to correctly direct traffic through the network. An attacker posing as one of the target routers OSPFv3 neighbors may inject incorrect information into the route table resulting in DoS attack or loss of confidential data through a Man in the Middle attack. OSPFv3 does not support MD5 HMAC based authentication, instead relying on IPSEC Security Associations to authenticate neighbors. This provides more robust authentication and the option to encrypt protocol traffic in transit. Although M, T and MX series devices normally require a Services PIC or DPC installed to use IPSEC tunnels, no additional hardware is required for IPSEC SA based authentication of OSPFv3 neighbors. NOTE: Security Associations must be configured correctly on all neighbors reached through interfaces where IPSEC based authentication is configured for OSPFv3 to continue to function.
Remediation: To setup IPSEC SA based authentication, first configure a Security Association at the [edit security ipsec] hierarchy;
[edit security ipsec]

58 | P a g e
edit security-association <SA name>
set description <description>
set mode transport
set manual direction bidirectional
set manual protocol <ah or esp>
set manual authentication algorithm <authentication method>
set manual authentication key <key>
The SA must be bi-directional and must be configured with the same parameters on all neighbors reachable on the intended interface. Next configure IPSEC SA based authentication for one or more interfaces which OSPF will be run over from the [edit protocols ospfv3] hierarchy;
[edit protocols ospfv3 area <area number>]
user@host#set interface <interface number> ipsec-sa <SA name>
Audit: Enter the following command from the [edit protocols ospf] hierarchy;
[edit protocols ospfv3]
user@host#show | match “ipsec-sa” | count
The above command should return a positive integer equal to the number of interfaces on which IPSEC SA based authentication is required..
Default Value: No OSPF routing is configured by default.
References:
1. Configuring Authentication for OSPFv3, JUNOS Software Routing Configuration Guide, Juniper Networks
4.5 RIP Routing Information Protocol is a distance vector protocol used for interior gateway routing on some networks. RIP is a complex protocol, with many configuration options which may have effects which are not immediately obvious.

59 | P a g e
With this in mind all recommendations in this section are at Level 2 and should only be applied by experienced network engineers, however it is recommended that all engineers who have RIP in their network be familiar with these recommendations.
RIP parameters for JUNOS routers are configured under the [edit protocols rip] hierarchy.
4.5.1 Require MD5 Neighbor Authentication (where RIP is used) (Level 2, Scorable)
Description: RIP Neighbors should be authenticated.
Rationale: Where it is deployed, RIP routing is vital for normal operation of an organizations network infrastructure. Correct route information is required for routers to correctly direct traffic through the network. An attacker posing as one of the target routers RIP neighbors may inject incorrect information into the route table resulting in DoS attack or loss of confidential data through a Man in the Middle attack. On Juniper routers (as well as routers from other manufacturers such as Cisco or Brocade) it is possible to authenticate neighbors using an MD5 digest of elements in the update. RIP Authentication is defined in RFC2082. NOTE – Ensure that Neighbor Authentication is configured with the same details on all routers in the AS. Failure to do so will prevent route updates from being accepted.
Remediation: If you have deployed RIP in your network you should use MD5 authentication for all neighbors. To configure authentication enter the following command from the [edit protocols rip] hierarchy:
[edit protocols rip]
user@host#set authentication-type md5
user@host#set authentication-key <key>
Audit: Enter the following command from the [edit protocols rip] hierarchy:

60 | P a g e
[edit protocols rip]
user@host#show | match “authentication-“ | count
The above command should return ‘2’ when both required statements are configured.
Default Value: No RIP routing is configured by default.
References:
1. Cisco IOS Benchmark Version 2.2, Requirement 2.3.2.4, Center for Internet Security
2. Router Security Configuration Guide, Version 1.1b, Section 4.4.3 (page 109), National Security Agency (NSA)
4.5.2 Require check-zero (where RIP is used) (Level 2, Scorable)
Description: Check that fields that the RFC requires must be 0 are 0.
Rationale: Where it is deployed, RIP routing is vital for normal operation of an organizations network infrastructure. Correct route information is required for routers to correctly direct traffic through the network. The RFCs relating to RIP define a number of reserved fields in the packet format for future use. Those fields not used in the protocol version used should be set to 0. If a packet is received with reserved fields set to a value other then 0 then it is breaking the RFC standards and may be an attempt to attack the router. In almost all network environments there is no reason for such a packet to exist, so JUNOS’s default behavior of ignoring them should be used.
Remediation: If you have deployed RIP in your network and disabled zero value checking of reserved fields, you should re-enable it by issuing the following command from the [edit protocols rip] hierarchy:
[edit protocols rip]
user@host#set check-zero
Audit: Enter the following command from the [edit protocols rip] hierarchy:

61 | P a g e
[edit protocols rip]
user@host#show | match “check-zero“ | count
The above command should return ‘1’ when checking is enabled.
Default Value: When RIP is used, check-zero is the default setting.
References:
1. Accepting Packets Whose Reserved Fields Are Nonzero, JUNOS Software Protocols Configuration Guide, Juniper Networks
4.6 <Routing Protocol> Some security settings are configured in exactly the same way across all supported routing protocols. These settings are found under the [edit protocols <routing protocol>] hierarchy where <routing protocol> is one of isis, bgp, ospf, static , rip, pim or another protocol with BFD support.
4.6.1 Require BFD Authentication (where BFD is used) (Level 2, Scorable)
Description: BFD Peers should be authenticated.
Rationale: Bidirectional Forwarding Detection (BFD) is a Forwarding Plane feature which allows more rapid detection of a failed neighbor then can be achieved through a routing protocols’ normal detection mechanisms, providing faster reconvergence. If no authentication was used an attacker may replay or spoof BFD messages to destabilize a network and/or prevent proper reconvergence resulting in a Denial of Service. Several authentication mechanisms are supported for BFD ranging from plain text password, which should not be used, to meticulously keyed SHA1. The latter provides the strongest hashing algorithm and best replay protection, with the sequence number being updated on each packet, and it is this mechanism that should be used in most cases. NOTE – If None Stop Routing (NSR) features are required; meticulously keyed SHA1 or MD5 should not be used as the BFD. Sessions using these algorithms may fail when switching to the Backup Routing Engine. NOTE - Both BFD peers must be configured with the same keys otherwise the BFD link may be declared down resulting in a reconvergence. Because it is not possible to configure both ends
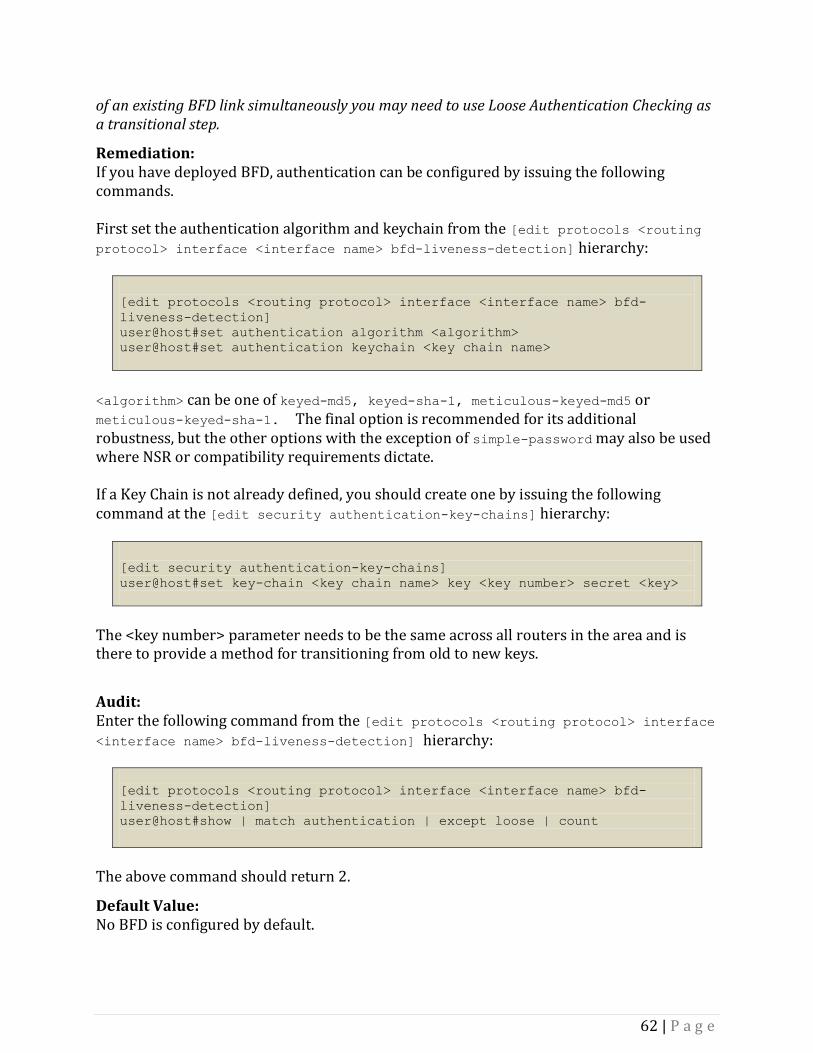
62 | P a g e
of an existing BFD link simultaneously you may need to use Loose Authentication Checking as a transitional step.
Remediation: If you have deployed BFD, authentication can be configured by issuing the following commands. First set the authentication algorithm and keychain from the [edit protocols <routing protocol> interface <interface name> bfd-liveness-detection] hierarchy:
[edit protocols <routing protocol> interface <interface name> bfd-
liveness-detection]
user@host#set authentication algorithm <algorithm>
user@host#set authentication keychain <key chain name>
<algorithm> can be one of keyed-md5, keyed-sha-1, meticulous-keyed-md5 or meticulous-keyed-sha-1. The final option is recommended for its additional robustness, but the other options with the exception of simple-password may also be used where NSR or compatibility requirements dictate. If a Key Chain is not already defined, you should create one by issuing the following command at the [edit security authentication-key-chains] hierarchy:
[edit security authentication-key-chains]
user@host#set key-chain <key chain name> key <key number> secret <key>
The <key number> parameter needs to be the same across all routers in the area and is there to provide a method for transitioning from old to new keys.
Audit: Enter the following command from the [edit protocols <routing protocol> interface <interface name> bfd-liveness-detection] hierarchy:
[edit protocols <routing protocol> interface <interface name> bfd-
liveness-detection]
user@host#show | match authentication | except loose | count
The above command should return 2.
Default Value: No BFD is configured by default.

63 | P a g e
References:
1. Overview of BFD Authentication for OSPF, JUNOS Software Routing Protocols Configuration Guide, Juniper Networks
4.7 <Protocol> bfd-liveness-detection Some security settings are configured in exactly the same way across all supported routing protocols. One of these is Bidirectional Forwarding Detection (BFD), which is configured under the [edit protocols <protocol> bfd-liveness-detection] hierarchy where < protocol> is one of isis, bgp, ospf, static , rip, pim or another protocol with BFD support.
4.7.1 Require BFD Authentication (where BFD is used) (Level 2, Scorable)
Description: BFD Peers should be authenticated.
Rationale: Bidirectional Forwarding Detection (BFD) is a Forwarding Plane feature which allows more rapid detection of a failed neighbor then can be achieved through a routing protocols’ normal detection mechanisms, providing faster reconvergence. If no authentication was used an attacker may replay or spoof BFD messages to destabilize a network and/or prevent proper reconvergence resulting in a Denial of Service. Several authentication mechanisms are supported for BFD ranging from plain text password, which should not be used, to meticulously keyed SHA1. The latter provides the strongest hashing algorithm and best replay protection, with the sequence number being updated on each packet, and it is this mechanism that should be used in most cases. NOTE – If None Stop Routing (NSR) features are required; meticulously keyed SHA1 or MD5 should not be used as the BFD. Sessions using these algorithms may fail when switching to the Backup Routing Engine. NOTE - Both BFD peers must be configured with the same keys otherwise the BFD link may be declared down resulting in a reconvergence. Because it is not possible to configure both ends of an existing BFD link simultaneously you may need to use Loose Authentication Checking as a transitional step.
Remediation: If you have deployed BFD, authentication can be configured by issuing the following commands. First set the authentication algorithm and keychain from the [edit protocols <protocol> interface <interface name> bfd-liveness-detection] hierarchy:

64 | P a g e
[edit protocols <protocol> interface <interface name> bfd-liveness-
detection]
user@host#set authentication algorithm <algorithm>
user@host#set authentication keychain <key chain name>
<algorithm> can be one of keyed-md5, keyed-sha-1, meticulous-keyed-md5 or meticulous-keyed-sha-1. The final option is recommended for its additional robustness, but the other options with the exception of simple-password may also be used where NSR or compatibility requirements dictate. If a Key Chain is not already defined, you should create one by issuing the following command at the [edit security authentication-key-chains] hierarchy:
[edit security authentication-key-chains]
user@host#set key-chain <key chain name> key <key number> secret <key>
The <key number> parameter needs to be the same across all routers in the area and is there to provide a method for transitioning from old to new keys.
Audit: Enter the following command from the [edit protocols <protocol> interface <interface name> bfd-liveness-detection] hierarchy:
[edit protocols <protocol> interface <interface name> bfd-liveness-
detection]
user@host#show | match authentication | except loose | count
The above command should return 2.
Default Value: No BFD is configured by default.
References:
1. Overview of BFD Authentication for OSPF, JUNOS Software Routing Protocols Configuration Guide, Juniper Networks
4.7.2 Forbid BFD Loose Authentication (where BFD is used) (Level 2, Scorable)
Description:

65 | P a g e
BFD Peers should be authenticated.
Rationale: Bidirectional Forwarding Detection (BFD) is a Forwarding Plane feature which allows more rapid detection of a failed neighbor then can be achieved through a routing protocols’ normal detection mechanisms, providing faster reconvergence. If no authentication was used an attacker may replay or spoof BFD messages to destabilize a network and/or prevent proper reconvergence resulting in a Denial of Service. Loose Authentication Checking is intended for use when transitioning from unauthenticated BFD to authenticated BFD implementations and should never be deployed long term in a production network. When Loose Authentication Checking is enabled, the router will produce authenticated BFD packets, but will not check the authentication of packets it receives from its peer. When enabled the router is effectively as unprotected as when authentication is not configured at all.
Remediation: If you have deployed BFD with loose authentication checking, it can be disabled by issuing the following command from the [edit protocols <protocol> interface <interface name> bfd-liveness-detection] hierarchy:
[edit protocols <protocol> interface <interface name> bfd-liveness-
detection]
user@host#delete authentication loose-check
Audit: Enter the following command from the [edit protocols <protocol> interface <interface name> bfd-liveness-detection] hierarchy:
[edit protocols <protocol> interface <interface name> bfd-liveness-
detection]
user@host#show | match “loose-check” | count
The above command should return null or 0.
Default Value: No BFD is configured by default.

66 | P a g e
References:
1. Overview of BFD Authentication for OSPF, JUNOS Software Routing Protocols Configuration Guide, Juniper Networks
4.8 LDP Label Distribution Protocol (LDP) is used in many Multi Protocol Label Switched (MPLS) networks to exchange Label information between Label Switch Router (LSR) peers and is defined in RFC5036. MPLS networks are complex, with many configuration options which may have effects which are not immediately obvious. With this in mind all recommendations in this section are at Level 2 and should only be applied by experienced network engineers, however it is recommended that all engineers who have MPLS in their network be familiar with these recommendations.
LDP parameters for JUNOS routers are configured under the [edit protocols ldp] hierarchy.
4.8.1 Require MD5 Peer Authentication (where LDP is used) (Level 2, Scorable)
Description: LDP peers should be authenticated.
Rationale: Where it is deployed, LDP is vital for normal operation of an MPLS network. LDP is used to determine Label mapping and populate the routers Forwarding Information Base (FIB). An attacker posing as one of the target routers LDP peers may attempt to inject incorrect label information or exploit a vulnerability in the routers LDP implementation to cause an information disclosure or denial of service. On Juniper routers (as well as routers from other manufacturers such as Cisco or Brocade) it is possible to authenticate peers on a session by session basis using an MD5 digest of elements in the update. NOTE – Ensure that Neighbor Authentication is configured with the same details on all peers. Failure to do so will prevent label updates from being accepted.
Remediation: If you have deployed LDP in your network you should use MD5 authentication for all neighbors.

67 | P a g e
To configure authentication enter the following command from the [edit protocols ldp] hierarchy:
[edit protocols ldp]
user@host#set session <remote end of LDP session> authentication-key
<key>
Audit: Enter the following command from the [edit protocols ldp] hierarchy:
[edit protocols ldp]
user@host#show | match “authentication-key“ | count
The above command should return an integer value equal to the number of LDP Sessions.
Default Value: LDP is not configured by default.
References:
1. Configuring Miscellaneous LDP Properties, Juniper Software MPLS Applications Configuration Guide, Juniper Networks
4.9 MSDP Multicast Source Discovery Protocol (MSDP) provides a method for linking multiple PIM-SM domains (Protocol Independent Multicast – Sparse Mode) and is defined in RFC3681. PIM-SM and MSDP are complex protocols, with many configuration options which may have effects which are not immediately obvious. With this in mind all recommendations in this section are at Level 2 and should only be applied by experienced network engineers, however it is recommended that all administrators with MSDP in their network be familiar with these recommendations.
MSDP parameters for JUNOS routers are configured under the [edit protocols msdp] hierarchy.
4.9.1 Require Peer Authentication (where MSDP is used) (Level 2, Scorable)
Description: MSDP Peers should be authenticated.

68 | P a g e
Rationale: When deployed MSDP it provides PIM-SM with information for routing Multicast traffic and is critical to operation of Multicast services on the network. If no authentication is used, an attacker may inject false information into the PIM-SM distribution tree, resulting in potential Denial of Service or Integrity compromise. MSDP packets can be authenticated using a Keyed Hash-based Message Authentication Code (HMAC) generated by hashing elements of the of the update packet combined with a shared secret using MD5. NOTE - Both MSDP peers must be configured with the same keys.
Remediation: If you have deployed MSDP, authentication can be configured by issuing the following command from the [edit protocols msdp] hierarchy:
[edit protocols msdp]
user@host#set peer <peer address> authentication-key <key>
Audit: Enter the following command from the [edit protocols msdp] hierarchy:
[edit protocols msdp]
user@host#show | match “authentication-key” | count
The above command should return an integer value equal to the number of configured MSDP Peers.
Default Value: No MSDP is configured by default.
References:
1. Configuring the MSDP Authentication Key, JUNOS Software Multicast Protocols Configuration Guide, Juniper Networks

69 | P a g e
4.10 Neighbor-discovery Neighbor Discovery Protocol (NDP), defined in RFC2461, is an important component of IPv6, effectively replacing the combined functions provided by ICMP Router Discovery (RDISC), Address Resolution Protocol (ARP) and ICMP Redirect in IPv4.
Neighbor Discovery Protocol parameters for JUNOS routers are configured under the [edit protocols neighbor-discovery] hierarchy.
4.10.1 Require Secure Neighbor Discovery (when IPv6 is used, JUNOS 9.3+) (Level 2, Scorable)
Description: NDP should be protected.
Rationale: One of the primary functions of NDP is to resolve Network Layer (IP) addresses to Link Layer (eg Ethernet) addresses, a function performed in IPv4 by ARP. An attacker who has access to the broadcast segment may abuse NDP or ARP to trick hosts into sending the attacker traffic destined for someone else, a technique known as ARP Poisoning. To protect against this and other attacks against NDP functions, Secure Network Discovery (SEND) should be deployed where preventing access to the broadcast segment may not be possible. Support for SEND was added to JUNOS in version 9.3. SEND utilizes public/private RSA key pairs to produce Cryptographically Generated Addresses (as defined in RFC3972), which ensures that the claimed source of an NDP message is the owner of the claimed address. NOTE: All nodes on the segment will need to be configured with SEND if the secure-messages-only option is selected, which is recommended unless only a small subset of devices require increased protection. Failure to configure SEND for all nodes may result in loss of connectivity.
Remediation: If you have deployed IPv6 you can configure SEND by issuing the following commands from the [edit protocols neighbor-discovery] hierarchy: If you have not already done so, you will need to generate or install an RSA key pair, to generate a new pair enter the following command:
user@host>request pki generate-key-pair <name> <ca-profile>

70 | P a g e
Next, set the security level to define how unsecure NDP messages should be handled. If only a subset of devices will be configured to use SEND, then use the default option. If all nodes on the segment require protection, which is recommended, use the secure-messages-only option:
[edit protocols neighbor-discovery]
user@host#set secure security-level secure-messages-only
Finally, specify the key pair and details you generated/installed earlier:
[edit protocols neighbor-discovery]
user@host#set secure cryptographic-address key-pair <name>
user@host#set secure cryptographic-address key-length <length>
For more details on configuring Public/Private Key Pairs in JUNOS please refer to: Generating a Public-Private Key Pair, JUNOS Software Security Configuration Guide, Juniper Networks
Audit: Enter the following command from the [edit protocols] hierarchy:
[edit]
user@host#show neighbor-discovery ssecure | match cryptographic-address
| count
The above command should return a value of 2.
Default Value: SEND is not configured by default.
References:
1. Secure Neighbor Discovery Configuration Guidelines, JUNOS Software Routing Protocol Configuration Guide, Juniper Networks
4.11 Router-discovery ICMP Router Discovery, defined in RFC1256, provides a method for hosts on a multicast or broadcast segment to discover routers attached to the network segment.

71 | P a g e
ICMP Router Discovery parameters for JUNOS routers are configured under the [edit protocols router-discovery] hierarchy.
4.11.1 Forbid ICMP Router Discovery (Level 2, Scorable)
Description: ICMP Router Discovery should not be used.
Rationale: ICMP Router Discovery provides details of routers attached to a broadcast or multicast segment in response to Router Solicitation messages from hosts or in the form of a period Router Advertisement. These messages may provide an attacker attached to the segment with a clearer picture of network environment and, as the feature is rarely used, should only be configured on networks where a specific requirement exists for its use.
Remediation: If you have configured ICMP Router Discovery and do not require it, you can disable it by issuing the following command from the [edit protocols router-discovery] hierarchy:
[edit protocols router-discovery]
user@host#set disable
Audit: Enter the following command from the [edit] hierarchy:
[edit]
user@host#show protocols router-discovery
The above command should return the following output:
disable;
Additional configuration items may be present between the inner curly braces, but will have no effect because the protocol is disabled.
Default Value: ICMP Router Discovery is disabled by default.

72 | P a g e
References: None.
4.12 RSVP Resource Reservation Protocol (RSVP) is commonly used in Quality of Service (QoS) and MLPS Traffic Engineering (through the RSVP-TE variation) solutions, in simple terms it allows node to ‘reserve’ bandwidth throughout the path that a session will take.
RSVP parameters for JUNOS routers are configured under the [edit protocols rsvp] hierarchy.
4.12.1 Require Peer Authentication (when RSVP is used) (Level 1, Scorable)
Description: RSVP Peers should be authenticated.
Rationale: RSVP messages may be abused by an attacker to interfere with QoS and Traffic Engineering services, resulting in poor performance or Denial of Service, or seek to attack the target router directly using weaknesses in the RSVP implementation. To protect against these types of attacks RSVP messages may be Authenticated using an MD5 hash of certain packet elements combined with a secret key (MD5 HMAC). RSVP Authentication is set on an interface by interface basis and should be configured for all interfaces where RSVP is used. NOTE: All RSVP neighbors reachable through each interface will need to be configured with the same key and authentication method for continued operation.
Remediation: If you have configured RSVP you can add authentication by issuing the following command from the [edit protocols rsvp] hierarchy:
[edit protocols rsvp]
user@host#set interface <interface name> authentication-key <key>
Audit: Enter the following command from the [edit] hierarchy:
[edit]
user@host#show protocols rsvp | match authentication-key | count

73 | P a g e
The above command should return an integer value equal to the number of interfaces for which RSVP is configured.
Default Value: RSVP is not configured by default.
References:
1. Configuring RSVP Interfaces, JUNOS Software MPLS Applications Configuration Guide, Juniper Networks
5. SNMP Simple Network Management Protocol (SNMP) provides a standards based interface to manage and monitor network devices. This section provides guidance on the secure configuration of SNMP parameters which are contained under the [edit snmp] hierarchy.
5.1 Forbid Common SNMP Community Strings (Level 1, Scorable)
Description: Do not use common / default community strings.
Rationale: SNMP can be used to read, and sometime write, sensitive information about your router and network environment. When using SNMP Version 2C (SNMPv2c) a community string is used to identify and, to a limited degree, authenticate Management Stations. If an attacker knows or guesses the community string that is used they may be able gain access to the SNMP interface as if they were a valid administrator. To reduce the risk of an attacker guessing your community strings you should not use the following well known, common strings which are used as defaults on many brands of router:
“Public” “Private” “Admin” “Monitor” “Security”
Remediation: If you have deployed SNMPv2c on your router using one of these strings, rename the community using the following command under the[edit snmp] hierarchy;

74 | P a g e
[edit snmp]
user@host#rename community <old community> to community <new community>
Audit: From the command prompt, execute the following command:
[edit]
user@host#show snmp | match community | match
“public|private|admin|monitor|security” | count
The above command should return 0 or an error.
Default Value: No SNMP communities are set by default on most platforms.
References:
1. Cisco IOS Benchmark Version 2.2, Requirement 1.1.5.1-2, Center for Internet Security
2. Router Security Configuration Guide, Version 1.1b, Section 4.2.1 (page 77), National Security Agency (NSA)
3. Payment Card Industry Data Security Standard (PCI DSS), Version 1.2, Requirement 8.4 and 8.5.13
5.2 Forbid SNMPv1, v2 and ,v2c Write Access (Level 1, Scorable)
Description: Do not allow Read-Write SNMP access for versions below SNMPv3.
Rationale: SNMP can be used to read and write configuration information from a router using your Network Management Systems; however the inherently insecure design of the older SNMP V1, V2 and V2C standards, which do not use encryption to protect community strings, make their use for setting configuration an open invitation to an attacker. While, by default, a JUNOS router configured for SNMP Write access provides access only to Ping or Traceroute from the router, these still provide a potential source of information about your network or avenue for further attack so should not be permitted. Additional SNMP Management Information Base (MIB) view might be configured which, were Write access permitted, would allow an attacker to disable interfaces, change routing configuration or change anything else that you might do from the command line.

75 | P a g e
Remediation: If you have deployed SNMP below Version 3 on your router with Read-Write access, delete the associated community using the following command under the [edit snmp] hierarchy;
[edit snmp]
user@host#delete community <community>
Alternatively you can set the communities authorization level with the following command from the [edit snmp <community>] hierarchy;
[edit snmp <community>]
user@host#set authorization read-only
Audit: From the command prompt, execute the following command:
[edit]
user@host#show snmp | match “authorization read-write” | count
The above command should return 0 or an error.
Default Value: No SNMP communities are set by default on most platforms.
References:
1. Cisco IOS Benchmark Version 2.2, Requirement 1.1.5.4, Center for Internet Security
2. Router Security Configuration Guide, Version 1.1b, Section 4.2.1 (page 77), National Security Agency (NSA)
3. Payment Card Industry Data Security Standard (PCI DSS), Version 1.2, Requirement 8.4 and 8.5.13
5.3 Re quire Client List for SNMPv1 and v2 (Level 1, Scorable)
Description: Limit clients to access SNMP.
Rationale:

76 | P a g e
Even when limited to read only access, SNMP can provide an attacker with a wealth of information about your router and network topology. To limit the potential for attacks against your routers SNMP service you should limit the IP addresses that are permitted to connect using a client-list.
Remediation: To configure a client list issue the following command under the [edit snmp] hierarchy;
[edit snmp]
user@host#edit client-list <client list name>
[edit snmp client-list <client list name>]
user@host#set default restrict
user@host#set <ip address>
user@host#set <ip address> restrict #optionally add exceptions
user@host#up 1
[edit snmp]
user@host#edit community <community name>
[edit snmp community <community name>]
user@host#set client-list-name <client list name>
The first set command is covered in detail in the next recommendation, but is not covered under all versions of JUNOS. Additional IP Addresses may be permitted by repeating the second set command, while IP’s that you want to deny from an allowed range using the restrict option as shown in the 3rd (optional) set command.
Several client lists may be configured and the same client list may be used by several communities. Note - Client-lists may also be defined directly under the [edit snmp community <community name> clients] hierarchy for use within the specified community with the same effect, but for ease of management and audit, the first method is preferred.
Audit: From the command prompt, execute the following command:
[edit]
user@host#show snmp | match “client-list-name” | count

77 | P a g e
The above command should return a positive integer equal to the number of communities configured on the router.
Default Value: No SNMP communities are set by default on most platforms.
References:
1. Cisco IOS Benchmark Version 2.2, Requirement 1.1.5.6, Center for Internet Security
2. Configuring the SNMP Community String, JUNOS Software Management Configuration Guide, Juniper Networks
5.4 Require “Default Restrict” in SNMP Client Lists (Level 1, Scorable)
Description: Limit clients to access SNMP.
Rationale: Even when limited to read only access, SNMP can provide an attacker with a wealth of information about your router and network topology. To limit the potential for attacks against your routers SNMP service your client lists should be configured to deny any source address which is not explicitly allowed by being added to the list. Note – Not all versions of JUNOS support this command.
Remediation: To configure a client list issue the following command under the [edit snmp client-list <client list name>] hierarchy;
[edit snmp client-list <client list name>]
user@host#set default restrict
Note - Client-lists may also be defined directly under the [edit snmp community <community name> clients] hierarchy for use within the specified community with the same effect, but for ease of management and audit, the first method is preferred.
Audit: From the command prompt, execute the following command:
[edit]
user@host#show snmp | match “default restrict” | count

78 | P a g e
The above command should return a positive integer equal to the number of communities configured on the router.
Default Value: No SNMP communities are set by default on most platforms.
References:
1. Cisco IOS Benchmark Version 2.2, Requirement 1.1.5.6, Center for Internet Security
2. Configuring the SNMP Community String, JUNOS Software Management Configuration Guide, Juniper Networks
5.5 Forbid SNMP Write Access (Level 2, Scorable)
Description: Do not allow Read-Write SNMP access.
Rationale: SNMP can be used to read and write configuration information from a router using your Network Management Systems; however the inherently insecure design of the older SNMP V1, V2 and V2C standards, which do not use encryption to protect community strings, make their use for setting configuration an open invitation to an attacker. Even the more recent SNMPv3, which introduces encryption, authentication and message integrity checking, does not provide support for centralized authentication, account lockout or other basic security measures applied to other methods to access the router. This leaves the router vulnerable to brute force attack. The use of UDP as the transport mechanism in SNMP also makes spoofing the source of an SNMP request far simpler, easing brute force or flooding attacks.
Remediation: If you have deployed SNMP below Version 3 on your router with Read-Write access, delete the associated community using the following command under the [edit snmp] hierarchy;
[edit snmp]
user@host#delete community <community>
If you have deployed SNMP Version 3 on your router with Write access, delete the associated community using the following command under the[edit snmp v3 vacm access] hierarchy;
[edit snmp v3 vacm access]
user@host#delete group <group name> default-context-prefix security-

79 | P a g e
model <security model> security-level <security level> write-view
Complete the sections in <> with the details configured for your group/s. This command will leave any read or notify views for the group in place. If only a write-view is configured, the group can be deleted instead.
Audit: From the command prompt, execute the following command:
[edit]
user@host#show snmp | match “read-write|write-view” | count
The above command should return 0 or an error.
Default Value: No SNMP communities are set by default on most platforms.
References:
1. Cisco IOS Benchmark Version 2.2, Requirement 1.1.5.4, Center for Internet Security
2. Router Security Configuration Guide, Version 1.1b, Section 4.2.1 (page 77), National Security Agency (NSA)
3. Payment Card Industry Data Security Standard (PCI DSS), Version 1.2, Requirement 8.5.13
5.6 Forbid SNMP if not used (Level 2, Not Scorable)
Description: Do not allow SNMP access if you do not use it to manage the router.
Rationale: SNMP can be used to read and write configuration information from a router using your Network Management Systems; however the inherently insecure design of the older SNMP V1, V2 and V2C standards, which do not use encryption to protect community strings, make their use for setting configuration an open invitation to an attacker. Even the more recent SNMPv3, which introduces encryption, authentication and message integrity checking, does not provide support for centralized authentication, account lockout or other basic security measures applied to other methods to access the router. This leaves the router vulnerable to brute force attack. If you do not use SNMP to manage your router, you should disable SNMP to ensure it cannot be abused by an attacker.
Remediation:

80 | P a g e
To disable all SNMP processing on the router issue the following command under the [edit] (top) hierarchy;
[edit]
user@host#delete snmp
Audit: From the command prompt, execute the following command:
[edit]
user@host#show snmp
The above command should return no output or an error. Because it is not possible to determine whether SNMP is intended to be in use, this item is Not Scorable.
Default Value: No SNMP is configured by default on most platforms.
References:
1. Router Security Configuration Guide, Version 1.1b, Section 4.2.1 (page 77), National Security Agency (NSA)
5.7 Require Privacy AES128 for SNMPv3 Access (Level 2, Scorable)
Description: Do not allow plaintext SNMPv3 access.
Rationale: SNMPv3 provides much improved security over previous versions by offering options for Authentication and Encryption of messages. When configuring a user for SNMPv3 you have the option of using a range of encryption schemes, or no encryption at all, to protect messages in transit. The strongest scheme available is AES128 and this should be configured on all sensitive routers. AES Encryption is not available in some export versions of JUNOS. If you are using an export version of JUNOS, 3DES or DES encryption should be used instead.
Remediation:

81 | P a g e
For each SNMPv3 user created on your router add privacy options by issuing the following command from the[edit snmp v3 usm local-engine] hierarchy;
[edit snmp v3 usm local-engine]
user@host#set user <username> privacy-aes128 privacy-password
<password>
Audit: From the command prompt, execute the following command:
[edit]
user@host#show snmp v3 usm local-engine | match “privacy-aes128” |
count
The above command should return a positive integer equal to the number of configured users.
Default Value: No SNMP communities are set by default on most platforms.
References:
1. Creating SNMPv3 Users, JUNOS Software Network Management Configuration Guide, Juniper Networks
5.8 Require Authentication SHA for SNMPv3 Access (Level 2, Scorable)
Description: Do not allow unauthenticated SNMPv3 access.
Rationale: SNMPv3 provides much improved security over previous versions by offering options for Authentication and Encryption of messages. Authentication in SNMPv3 is performed using Keyed-Hash Message Authentication Code or HMAC. This technique uses a cryptographic hash function in combination with a secret key to authenticate and ensure the integrity of a given message. JUNOS supports the MD5 and SHA1 hash functions for use in SNMPv3 authentication. MD5 is an older protocol which has shown significant vulnerability in recent years, so the more recent and more trusted SHA1 should be used. SHA1 is not available in some export versions of JUNOS. If you are using an export version of JUNOS, MD5 hashing should be used instead.

82 | P a g e
Remediation: For each SNMPv3 user created on your router add privacy options by issuing the following command from the[edit snmp v3 usm local-engine] hierarchy;
[edit snmp v3 usm local-engine]
user@host#set user <username> authentication-sha <password>
Audit: From the command prompt, execute the following command:
[edit]
user@host#show snmp v3 usm local-engine | match “authentication-sha” |
count
The above command should return a positive integer equal to the number of configured users.
Default Value: No SNMP communities are set by default on most platforms.
References:
1. Creating SNMPv3 Users, JUNOS Software Network Management Configuration Guide, Juniper Networks
5.9 Require Interface Restrictions for SNMP (Level 1, Scorable)
Description: SNMP should only be configured on required interfaces.
Rationale: By default the SNMP service will listen for incoming connections on all interfaces which have an IP Address configured, exposing SNMP to users on all networks through which the router is reachable. In most cases the router should only be manageable over some of its interfaces; in particular a router providing connectivity to un-trusted networks such as the Internet should only be manageable from trusted sources.
Remediation:

83 | P a g e
To restrict SNMP to required interfaces issue the following command from the[edit snmp] hierarchy;
[edit snmp]
user@host#set interface <interface or interface list>
Audit: From the command prompt, execute the following command:
[edit]
user@host#show snmp interfaces
The configured Interface or Interfaces should be returned.
Default Value: By default SNMP, when configured, is accessible over all configured interfaces.
References:
1. Configuring the Interfaces on Which SNMP Request Can Be Accepted, JUNOS Software Management Configuration Guide, Juniper Networks
6. System This section provides guidance on the secure configuration of system wide parameters which are contained under the [edit system] hierarchy.
6.1 Accounting Accounting services provide mechanisms to keep a centralized record of what a router and its users are doing and when. Keeping records of accounting information separate to the router is vital to allow administrators to spot when an attack may have occurred and to reconstruct what happened in the aftermath of an attack. On Juniper routers, accounting services are configured under [edit system accounting].
6.1.1 Require Accounting Destination (Level 1, Scorable)
Description: At least one Accounting Destination must be configured to either TACACS+ or RADIUS.
Rationale:

84 | P a g e
RADIUS and TACACS+ are centralized Authentication, Authorization and Accounting (AAA) services. Both protocols provide services to receive and record information about what users and processes on a router are doing. At least one accounting RADIUS or TACACS+ server should be configured to record accounting data for the router. Generally more then one server is used to ensure resilience of this vital service.
Remediation: Configure one or more RADIUS or TACACS+ servers as Accounting Destinations use the following commands under the[edit system accounting destination] hierarchy; For RADIUS
[edit system accounting destination]
user@host#set radius server <server ip> secret <shared secret>
For TACACS+
[edit system accounting destination]
user@host#set tacplus server <server ip> secret <shared secret>
Audit: From the command prompt, execute the following command:
[edit]
user@host#show system accounting destination | match “server” | count
The above command should return an integer value greater than or equal to 1.
Default Value: None.
References:
1. Router Security Configuration Guide, Version 1.1b, Page 166, National Security Agency (NSA)
2. Payment Card Industry Data Security Standard (PCI DSS), Version 1.2, Requirement 10.2

85 | P a g e
6.1.2 Require Accounting of Logins & Configuration Changes (Level 1, Scorable)
Description: At minimum Login and Configuration Change Accounting Events must be sent to either TACACS+ or RADIUS.
Rationale: To protect any asset, including a Juniper router, you have to have a record of who logged in or attempted to login as well as who made changes to the configuration and when. JUNOS can log these events to RADIUS and/or TACACS+ servers to allow reliable, centralized records to be kept for all of the devices in your network.
Remediation: Configure Accounting of Logins and Configuration Changes by entering the following commands under the[edit system accounting] hierarchy;
[edit system accounting]
user@host#set events [change-log login]
Audit: From the command prompt, execute the following command:
[edit]
user@host#show system accounting
The above command should return the output below:
accounting {
events [change-log login];
}
Additional configuration items for Accounting may be present between the curly braces.
Default Value: None.
References:
1. Router Security Configuration Guide, Version 1.1b, Page 166, National Security Agency (NSA)

86 | P a g e
2. Payment Card Industry Data Security Standard (PCI DSS), Version 1.2, Requirement 10.2
6.1.3 Require Accounting of Interactive Commands (Level 2, Scorable)
Description: Interactive Command Accounting Events must be sent to either TACACS+ or RADIUS.
Rationale: To protect any asset, including a Juniper router, you have to have a record of who logged in or attempted to login as well as who made changes to the configuration and when. For additional security you should also keep records of all commands issued, who issued them and when. This is not possible in all deployments due to the additional load, network traffic and storage requirements. For most scenarios the high resource use is outweighed by the benefits that the command history provides, particularly in responding to an incident. JUNOS can log these events to RADIUS and/or TACACS+ servers to allow reliable, centralized records to be kept for all of the devices in your network.
Remediation: Configure Accounting of Logins and Configuration Changes by entering the following commands under the[edit system accounting] hierarchy;
[edit system accounting]
user@host#set events [change-log interactive-commands login]
The interactive-commands should be selected at a minimum, although in many cases you may also wish to add change-log and login accounting.
Audit: From the command prompt, execute the following command:
[edit]
user@host#show system accounting
The above command should return the output below:
accounting {
events interactive-commands;
}

87 | P a g e
Additional configuration items for Accounting may be present on the same line.
Default Value: None.
References:
1. Router Security Configuration Guide, Version 1.1b, Page 166, National Security Agency (NSA)
2. Payment Card Industry Data Security Standard (PCI DSS), Version 1.2, Requirement 10.2
6.2 Archival JUNOS can be configured to send a backup of its configuration using the options set under the [edit system archival] hierarchy.
6.2.1 Require Archive on Commit (Level 2, Scorable)
Description: The routers configuration should be archived whenever changes are committed.
Rationale: Before changes made to a JUNOS router are applied they must be committed. Archiving the configuration to an external server on every commit creates a complete history of all changes allowing an effective ‘post mortem’ to be carried out following any breach and aiding recovery to security and other incidents. The archive can also be used to alert administrators of unauthorized changes and identify what was changed by utilizing hashes or diff in scripts or systems like Tripwire.
Remediation: To enable Archival on commit issue the following commands from the[edit system] hierarchy;
[edit system]
user@host#set archival configuration transfer-on-commit
Audit: From the command prompt, execute the following command:
[edit]
user@host#show system archival
The above command should yield the following output:

88 | P a g e
configuration {
transfer-on-commit
}
Additional configuration items for the Archival service may be present between the curly braces.
Default Value: Archival is not configured by default.
References:
2. Archival, JUNOS 9.2 System Basic Configuration Guide, Juniper Networks
6.2.2 Require Archive Site (Level 2, Scorable)
Description: The routers configuration should be archived to at least one Archive Site.
Rationale: Archiving the configuration to an external server creates a history of changes allowing an effective ‘post mortem’ to be carried out following any breach and aiding recovery to security and other incidents. The archive can also be used to alert administrators of unauthorized changes and identify what was changed by utilizing hashes or diff in scripts or systems like Tripwire. At least one Secure Copy (SCP) Archive Site should be configured on the router.
Remediation: To enable Archival on commit issue the following commands from the[edit system] hierarchy;
[edit system]
user@host#set archival configuration archive-site <SCP URL> password
<password>
Audit: From the command prompt, execute the following command:
[edit]
user@host#show system archival configuration archive-sites | match
“scp://” | count

89 | P a g e
The command above should return a positive integer equal to or greater than 1.
Default Value: Archival is not configured by default.
References:
1. Archival, JUNOS 9.2 System Basic Configuration Guide, Juniper Networks
6.2.3 Forbid Plain Text Archive Site (Level 2, Scorable)
Description: The routers configuration MUST NOT be sent in plain text to the Archive Site.
Rationale: JUNOS routers can use a range of protocols for copying configuration files to Archive Sites including FTP, TFTP, NFS and SCP. Of these, only Secure Copy (SCP) provides encryption for the data in transit. Using FTP, FTP or NFS transfer files in plain text, allowing an attacker to copy the file from the network exposing sensitive data and possibly authentication information for both the router and the Archive Site.
Remediation: Archival is not configured by default. If plain text Archive Sites have been configured, they can be removed by issuing the following command from the[edit system] hierarchy;
[edit system]
user@host#delete archival configuration archive-site <URL>
Audit: From the command prompt, execute the following command:
[edit] ***NEEDS DEVELOPMENT!
user@host#show system archival configuration archive-sites | match
“ftp://|file://|tftp://” | count
The command above should return 0 or an error.
Default Value: Archival is not configured by default.
References:
1. Archival, JUNOS 9.2 System Basic Configuration Guide, Juniper Networks

90 | P a g e
6.3 Authentication-Order Each user of a Juniper router must have a unique username and password which allows them to be identified for Authorization and Accounting purposes. Centralized Authentication services such as RADIUS and TACACS+ provide essential mechanisms to protect network devices. Most critically, centralized Authentication provides network administrators with the ability to manage user accounts in a single place to affect all of the routers in their network. This is vital in situations where, for example, an employee leaves the organization or a user account is compromised by an attacker. Juniper routers support multiple Authentication protocols, the order in which these are used is configured under [edit system authentication-order].
6.3.1 Require External Authentication Order (Level 1, Scorable)
Description: At least one external Authentication method should be specified.
Rationale: RADIUS and TACACS+ are centralized Authentication, Authorization and Accounting (AAA) services. Both protocols provide services to Authenticate users on routers, switches and other systems. Juniper routers support both RADIUS and TACACS+ Authentication. JUNOS will use each of the configured protocols in order set under [edit system authentication-order] until the password is accepted or the end of the list is reached.
It is vital to understand the impact of this behavior and its relation to security. If the order is set as RADIUS then TACACS+, the router will attempt to authenticate a user’s credentials first using the RADIUS server. If the RADIUS server cannot be reach or the login is denied the router will attempt to authenticate against TACACS+. RADIUS or TACACS+ servers for Authentication are configured separately under the [edit system radius-server] or [edit system tacplus-server] hierarchies respectively.
Remediation: Configure at least one external Authentication method using the following commands under the [edit system] hierarchy; For RADIUS
[edit system]
user@host#set authentication-order radius

91 | P a g e
For TACACS+
[edit system]
user@host#set authentication-order tacplus
For RADIUS then TACACS+
[edit system]
user@host#set authentication-order [radius, tacplus]
For TACACS+ then RADIUS
[edit system]
user@host#set authentication-order [tacplus, radius]
Audit: From the command prompt, execute the following command:
[edit]
user@host#show system authentication-order | match “radius|tacplus” |
count
The above command should return an integer value of 1.
Default Value: By default all Juniper routers use local password authentication with accounts set under the [edit system login user] hierarchy.
References:
1. Configuring the Authentication Order, JUNOS 9.3 System Basics Configuration Guide, Juniper Networks
2. Payment Card Industry Data Security Standard (PCI DSS), Version 1.2, Requirement 8

92 | P a g e
6.3.2 Forbid Local Password Authentication (Level 1, Scorable)
Description: Authentication using locally configured usernames and passwords should not be configured in the authentication-order statement.
Rationale: Juniper routers support local user accounts in addition to RADIUS and TACACS+ Authentication. JUNOS will use each of the configured protocols in order set under [edit system authentication-order] until the password is accepted or the end of the list is reached.
It is vital to understand the impact of this behavior and its relation to security. If the order is set as RADIUS then local password, the router will attempt to authenticate a user’s credentials first using the RADIUS server. If the RADIUS server cannot be reach or the login is denied the router will attempt to authenticate against the user accounts configured in the [edit system login user] hierarchy. Because local user accounts cannot be centrally audited and controlled they present a far greater risk when, for example, and account is compromised or an employee leaves the organization. My removing local authentication from the authentication-order you prevent these accounts being used when RADIUS or TACACS+ reject an authentication attempt, however local accounts remain usable on occasions where all other authentication services cannot be contacts, ensuring that access to the router is maintained.
Remediation: Remove local user authentication from the authentication order by issuing the following command from the [edit system] hierarchy;
[edit system]
user@host#delete authentication-order password
This command will leave other authentication methods (RADIUS or TACACS+) that are already configured under the authentication-order statement.
Audit: From the command prompt, execute the following command:
[edit]
user@host#show system authentication-order | match “password” | count
The above command should return zero or an error.

93 | P a g e
Default Value: By default all Juniper routers use local password authentication with accounts set under the [edit system login user] hierarchy.
References:
1. Configuring the Authentication Order, JUNOS 9.3 System Basics Configuration Guide, Juniper Networks
2. Payment Card Industry Data Security Standard (PCI DSS), Version 1.2, Requirement 8
6.4 Require Loopback Address as Default Source (Level 2, Scorable)
Description: The Loopback interface should be used as the default source address.
Rationale: To ensure a consistent source address for traffic from the router, the Loopback address should be configured as the default source address for traffic generated by the Routing Engine. When configured, packets for NTP, SNMP Traps, SSH, SYSLOG and other protocols initiated by the router will all use the Loopback address for the packets source unless explicitly configured to use a different address at the protocols more specific hierarchy.
Remediation: To set the default source address to the loopback interface enter the following command from the[edit system] hierarchy:
[edit system]
user@host#set default-address-selection
Audit: From the command prompt, execute the following command:
[edit]
user@host#show system | match “default-address-selection” | count
A value of 1 should be returned.
Default Value: No Loopback Address is configured by default.
References:

94 | P a g e
1. Router Security Configuration Guide, Version 1.1b, Section 4.1.4 (page 58), National Security Agency (NSA)
2. Cisco IOS Benchmark Version 2.2, Requirement 2.2.1.x, Center for Internet Security
6.5 Diag-Port-Authentication Many control boards used in Juniper routers provide a Diagnostic Port, intended for use by Juniper engineers or when working with JTAC to resolve problems. Juniper routers allow authentication to be configured for these diagnostic ports under the [edit system diag-port-authentication] hierarchy.
6.5.1 Require Diagnostic Port Authentication (Level 1, Scorable)
Description: An encrypted password should be set for access to the routers diagnostic ports.
Rationale: Most Juniper routers contain Diagnostic Ports on one or more of the control boards installed in the system, such as FEB (Forwarding Engine Board) in M5 or M10 routers or SSB (System Switching Board) in M20 routers. These ports allow access to a range of diagnostic functions and could provide an attacker with physical access to the system a route to bypass other controls in order to compromise the router. Because of this risk, it is possible to set a password for all Diagnostic Ports installed in the system. As with other similar items, the password is stored by JUNOS as a hash (in this case MD5) in the configuration file. Should a system not contain any diagnostic ports, this item of configuration is ignored by the router.
Remediation: Configure a password for the diagnostic ports using one of the following commands under the [edit system] hierarchy; To enter a new password in plain text :
[edit system]
user@host#set diag-port-authentication plain-text-password
You will be prompted to enter the new password, which JUNOS will then hash with MD5 before placing the command in the candidate configuration.

95 | P a g e
To enter an existing password hash which you have taken from an existing configuration file, type the following :
[edit system]
user@host#set diag-port-authentication encrypted-password “<MD5 Hash>”
Audit: From the command prompt, execute the following commands:
[edit]
user@host#show system diag-port-authentication
The above command should return the following output:
diag-port-authentication encrypted-password "<MD5 Hash>";
Default Value: By default no password is configured for diagnostic ports.
References:
1. Configuring the Password on the Diagnostics Port, JUNOS 9.3 System Basics Configuration Guide, Juniper Networks
2. Router Security Configuration Guide, Version 1.1b, Page 62, National Security Agency (NSA)
3. Payment Card Industry Data Security Standard (PCI DSS), Version 1.2, Requirement 8.5.10 and 8.5.11
6.5.2 Require Complex Diagnostic Port Password (Level 1, Not Scorable)
Description: A complex password must be used for the routers Diagnostic Port/s
Rationale: Due to the sensitivity of the routers Diagnostic Port/s a complex password should be employed to help prevent attackers employing ‘brute force’ or ‘dictionary’ attacks to gain access through these ports.

96 | P a g e
Passwords are stored, automatically by JUNOS, as a MD5 hash in the configuration under the [edit system diag-port-authentication] hierarchy. A complex password should be employed which meets or exceeds the following requirements; - Does not contain Dictionary words, names, dates, phone numbers or addresses. - Is at least 8 characters in length. - Contains at least one each of upper & lower case letters, numbers and special characters. - Avoids more then 4 digits or same case letters in a row.
Remediation: Configure a password for the diagnostic ports using one of the following commands under the [edit system] hierarchy; To enter a new password in plain text :
[edit system]
user@host#set diag-port-authentication plain-text-password
You will be prompted to enter the new password, which JUNOS will then hash with MD5 before placing the command in the candidate configuration. To enter an existing password hash which you have taken from an existing configuration file, type the following :
[edit system]
user@host#set diag-port-authentication encrypted-password “<MD5 Hash>”
Audit: Because Diagnostic Port passwords are automatically stored by JUNOS as a MD5 hash, which will always be 128bits long, it is not possible to confirm from the command line the complexity and length of the password used therefore this is not a scorable item.
Default Value: None.
References:
1. Configuring the Password on the Diagnostics Port, JUNOS 9.3 System Basics Configuration Guide, Juniper Networks
2. Router Security Configuration Guide, Version 1.1b, Page 62, National Security Agency (NSA)

97 | P a g e
3. Payment Card Industry Data Security Standard (PCI DSS), Version 1.2, Requirement 8.5.10 and 8.5.11
6.6 Internet-Options JUNOS allows administrators to configure a variety of IP options, affecting the way the router behaves in relation to things like ICMP requests, Path MTU Discovery and IP Packet Flags. These items are configured under the [system internet-options] hierarchy.
6.6.1 Require icmpv4-rate-limit (Level 2, Scorable)
Description: It is possible to limit the amount of ICMPv4 traffic that the Routing Engine will handle.
Rationale: Many Denial of Service attacks against routers will attempt to overwhelm the target’s processing, memory or bandwidth by barraging the router with malicious ICMP traffic. Many administrators simply block all ICMP traffic; however this can cause many problems such as the inability of hosts to perform Path MTU Discovery and preventing debugging through common tools such as Ping (ICMP Echo). Loss of these important ICMP functions can adversely affect the reliability or functionality of the network. By limiting the rate at which ICMP traffic can be sent or received by the Routing Engine, it is possible to limit the impact of many DoS attacks without losing the important functionality that ICMP provides to the network. The limits are set using two parameters. The first, packet-rate, defines the number of ICMPv4 (of any type) packets allowed per second. The second parameter, bucket-size, defines the number of seconds over which the first metric is applied before starting the process again, having emptied the bucket. By default, once configured, the rate limit will allow 1000 packets per second with a bucket-size of 5 seconds. This should be sufficient on most platforms to prevent serious DoS attacks, whilst being high enough not to interfere with normal operation. The administrator should set the limits based on the normal level of ICMPv4 traffic that is handled by the router. Failure to do this could cause the router to become unreliable in some cases. This requirement deals only with ICMPv4 traffic to or from the Routing Engine and has no effect on ICMPv4 traffic traversing the router.
Remediation:

98 | P a g e
ICMPv4 Rate Limiting can be configured by issuing the following commands from the [edit system] hierarchy.
[edit system]
user@host#set internet-options icmpv4-rate-limit
To alter the packet-rate and bucket-size use the commands below (with your own values) :
[edit system]
user@host#set internet-options icmpv4-rate-limit bucket-size 20
user@host#set internet-options icmpv4-rate-limit packet-limit 200
Audit: From the command prompt, execute the following commands:
[edit]
user@host#show system internet-options icmpv4-rate-limit | count
The above command should return an integer value greater than or equal to 1.
Default Value: By default icmpv4-rate-limit is not configured. Once configured the bucket-size defaults to 5 seconds and the packet-limit defaults to 1000 packets per second.
References:
1. icmpv4-rate-limit, JUNOS 9.3 System Basics Configuration Guide, Juniper Networks
6.6.2 Require icmpv6-rate-limit (Level 2, Scorable)
Description: It is possible to limit the amount of ICMPv6 traffic that the Routing Engine will handle.
Rationale: Many Denial of Service attacks against routers will attempt to overwhelm the target’s processing, memory or bandwidth by barraging the router with malicious ICMP traffic. Many administrators simply block all ICMP traffic; however this can cause many problems such as the inability of hosts to perform Path MTU Discovery and preventing debugging

99 | P a g e
through common tools such as Ping (ICMP Echo). Loss of these important ICMP functions can adversely affect the reliability or functionality of the network. By limiting the rate at which ICMP traffic can be sent or received by the Routing Engine, it is possible to limit the impact of many DoS attacks without losing the important functionality that ICMP provides to the network. Rate limiting for IPv6 ICMP traffic should be applied, even if IPv6 packet processing is not currently configured on any router interfaces at present due to the risk of adding IPv6 processing at a later date, whether intentional or otherwise. The limits are set using two parameters. The first, packet-rate, defines the number of ICMPv6 (of any type) packets allowed per second. The second parameter, bucket-size, defines the number of seconds over which the first metric is applied before starting the process again, having emptied the bucket. By default, once configured, the rate limit will allow 1000 packets per second with a bucket-size of 5 seconds. This should be sufficient on most platforms to prevent serious DoS attacks, whilst being high enough not to interfere with normal operation. The administrator should set the limits based on the normal level of ICMPv6 traffic that is handled by the router. Failure to do this could cause the router to become unreliable in some cases. This requirement deals only with ICMPv6 traffic to or from the Routing Engine and has no effect on ICMPv6 traffic traversing the router.
Remediation: ICMPv6 Rate Limiting can be configured by issuing the following commands from the [edit system] hierarchy.
[edit system]
user@host#set internet-options icmpv6-rate-limit
To alter the packet-rate and bucket-size use the commands below (with your own values) :
[edit system]
user@host#set internet-options icmpv6-rate-limit bucket-size 20
user@host#set internet-options icmpv6-rate-limit packet-limit 200
Audit: From the command prompt, execute the following commands:
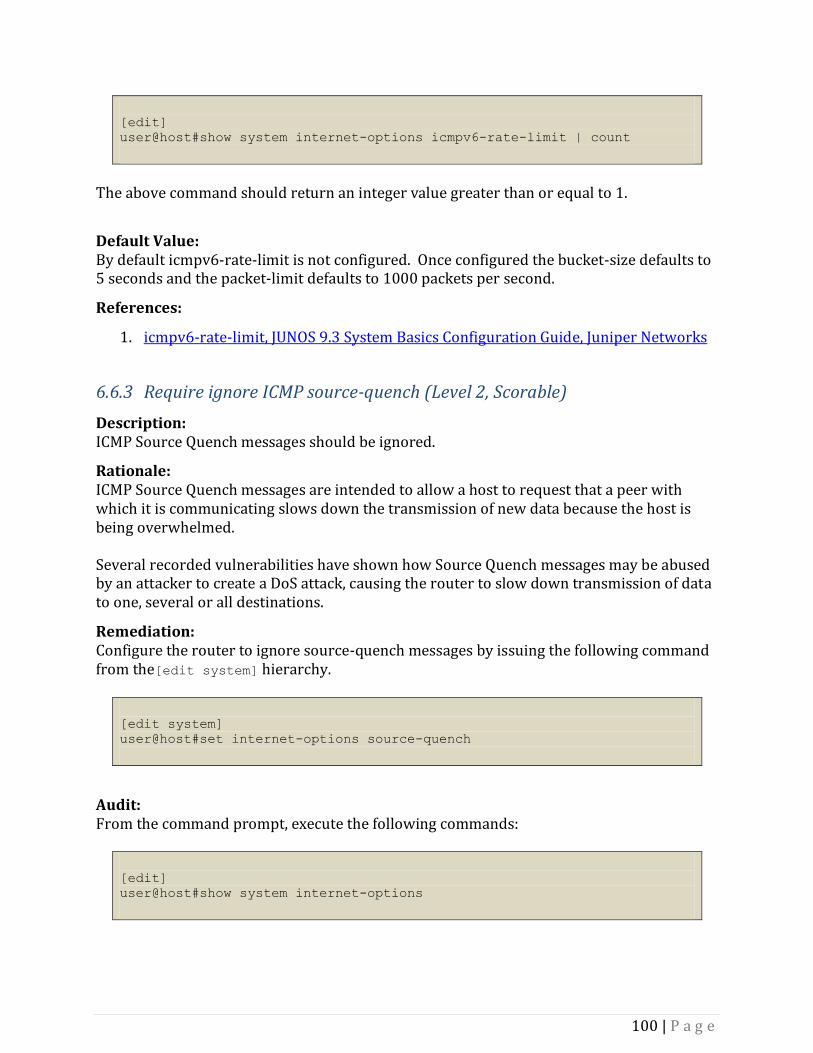
100 | P a g e
[edit]
user@host#show system internet-options icmpv6-rate-limit | count
The above command should return an integer value greater than or equal to 1.
Default Value: By default icmpv6-rate-limit is not configured. Once configured the bucket-size defaults to 5 seconds and the packet-limit defaults to 1000 packets per second.
References:
1. icmpv6-rate-limit, JUNOS 9.3 System Basics Configuration Guide, Juniper Networks
6.6.3 Require ignore ICMP source-quench (Level 2, Scorable)
Description: ICMP Source Quench messages should be ignored.
Rationale: ICMP Source Quench messages are intended to allow a host to request that a peer with which it is communicating slows down the transmission of new data because the host is being overwhelmed. Several recorded vulnerabilities have shown how Source Quench messages may be abused by an attacker to create a DoS attack, causing the router to slow down transmission of data to one, several or all destinations.
Remediation: Configure the router to ignore source-quench messages by issuing the following command from the[edit system] hierarchy.
[edit system]
user@host#set internet-options source-quench
Audit: From the command prompt, execute the following commands:
[edit]
user@host#show system internet-options

101 | P a g e
This should return the following output :
internet-options {
source-quench;
}
Other configuration items may be included in the output between the curly braces.
Default Value: By default the router does not ignore ICMP Source Quench messages.
References:
1. Configuring Source Quench, JUNOS 9.3 System Basics Configuration Guide, Juniper Networks
2. http://www.kb.cert.org/vuls/id/222750
6.6.4 Require tcp-drop-synfin-set (Level 1, Scorable)
Description: TCP packets which have both the SYN and FIN flags set should be dropped.
Rationale: TCP packets that have both SYN and FIN flags set are sometimes used by attackers to bypass Intrusion Detection Systems and Firewalls or to directly attack hosts on the target network. If patches are up-to-date then most systems are no longer vulnerable to this technique; however, there is no valid reason for a packet to contain both SYN and FIN flags, so such traffic is almost certainly malicious or the result of an error and should not be processed.
Remediation: Configure the router to drop TCP packets containing both SYN and FIN flags by issuing the following command from the[edit system] hierarchy.
[edit system]
user@host#set internet-options tcp-drop-synfin-set
Audit: From the command prompt, execute the following commands:

102 | P a g e
[edit]
user@host#show system internet-options
This should return the following output :
internet-options {
tcp-drop-synfin-set;
}
Other configuration items may be included in the output between the curly braces.
Default Value: By default the router does not ignore ICMP Source Quench messages.
References:
1. Configuring the Router to Drop Packets with the SYN and FIN Bits Set, JUNOS 9.3 System Basics Configuration Guide, Juniper Networks
2. http://www.kb.cert.org/vuls/id/464113
6.7 Login A variety of options can be set to control the login process and users on a JUNOS router under the [edit system login] hierarchy.
6.7.1 Require Login Class for all Users Accounts (Level 1, Scorable)
Description: All user accounts must have a class set.
Rationale: Controlling the level of access which users are granted when logging into a router, helps protect against both malicious attacks and accidental misconfiguration of the router by less experienced staff. Configuring user permissions on a user by user basis can quickly become unwieldy and difficult to manage, potentially leading to mistakes with a serious impact on the routers security. Instead, permissions should be assigned to classes to which individual users are linked in order to grant the appropriate level of access that corresponds with their job role.

103 | P a g e
Remediation: Configure a class for a user account using the following command under the [edit system login] hierarchy:
[edit system login]
user@host#set user <username> class <class name>
Audit: From the command prompt, execute the following commands:
[edit]
user@host#show system login | match “class .*;” | count
The above command should return a positive integer equal to the number of configured users.
Default Value: By default all users are, in effect, members of the super-user class.
References:
1. JUNOS Login Classes Overview, JUNOS 9.5 System Basics Configuration Guide, Juniper Networks
2. Payment Card Industry Data Security Standard (PCI DSS), Version 1.2, Requirement 7.1.
6.7.2 Require Idle Timeout for All Login Classes (Level 1, Scorable)
Description: All login classes should have an idle timeout defined.
Rationale: Controlling the level of access which users are granted when logging into a router, helps protect against both malicious attacks and accidental misconfiguration of the router by less experienced staff. Login classes should be defined to grant permissions to user accounts, both local and remote, allowing permissions to be managed in a similar manner to User Groups on a Microsoft Windows system. All login classes should have an Idle Timeout of no more than 15 minutes configured, so that unused sessions are automatically logged out after this time, limiting the scope for abuse of unattended sessions.

104 | P a g e
Remediation: Configure the Idle Timeout for a class using the following command under the [edit system login] hierarchy:
[edit system login]
user@host#set class <class name> idle-timeout <timeout in minutes>
Audit: From the command prompt, execute the following commands:
[edit]
user@host#show system login | match “idle-timeout [0-9]|idle-timeout
1[0-5]” | count
The above command should return a positive integer equal to the number of configured classes.
Default Value: No idle timeout is defined by default.
References:
1. JUNOS Login Classes Overview, JUNOS 9.5 System Basics Configuration Guide, Juniper Networks
2. Payment Card Industry Data Security Standard (PCI DSS), Version 1.2, Requirement 8.5.15.
6.7.3 Require Permissions All Login Classes (Level 1, Scorable)
Description: All login classes should have permissions defined.
Rationale: Controlling the level of access which users are granted when logging into a router, helps protect against both malicious attacks and accidental misconfiguration of the router by less experienced staff. Login classes should be defined to grant permissions to user accounts, both local and remote, allowing permissions to be managed in a similar manner to User Groups on a Microsoft Windows system. All login classes should have one more permissions defined which will be applied to all users, local and remote, linked to the class.

105 | P a g e
Remediation: Configure the Permissions for a class using the following command under the [edit system login] hierarchy:
[edit system login]
user@host#set class <class name> permissions <permission or list of
permissions>
Audit: From the command prompt, execute the following commands:
[edit]
user@host#show system login | match “permissions” | count
The above command should return a positive integer equal to the number of configured classes.
Default Value: No permissions are defined by default.
References:
1. JUNOS Login Classes Overview, JUNOS 9.5 System Basics Configuration Guide, Juniper Networks
2. Payment Card Industry Data Security Standard (PCI DSS), Version 1.2, Requirement 7.1.1.
6.7.4 Forbid Shell Access for All Login Classes (Level 1, Scorable)
Description: All login classes should deny Shell access.
Rationale: JUNOS runs on top of a heavily modified BSD Unix based operating system and users with certain permission sets will be able to start a Shell to interact with this underlying system directly. Once within a Unix Shell a user may execute scripts or applications and perform changes outside of the normal Authentication, Authorization and Accounting (AAA) mechanisms which protect the router when a user performs commands in JUNOS. To ensure all interaction with the router will need to be performed through JUNOS, all login classes should have access to the shell explicitly denied.
Remediation:

106 | P a g e
Deny Shell access for a class using the following command under the [edit system login] hierarchy:
[edit system login]
user@host#set class <class name> deny-commands “start shell”
You may also wish to deny other commands or groups of commands by using a list or Regular Expression as the deny-commands value, ensure that start shell is still included.
Audit: From the command prompt, execute the following commands:
[edit]
user@host#show system login | match “deny-commands.*start shell.*” |
count
The above command should return a positive integer equal to the number of configured classes.
Default Value: Shell access is not restricted by default.
References:
1. JUNOS Login Classes Overview, JUNOS 9.5 System Basics Configuration Guide, Juniper Networks
6.7.5 Forbid Default Login Classes for all Users Accounts (Level 1, Scorable)
Description: All user accounts must have a class set.
Rationale: JUNOS routers ship with 4 login classes pre-defined these are:
super-user
read-only
operator
unauthorized
These classes provide basic configuration to allow organizations to get a router up and running, but do not provide fine grained control or the additional security options specified by previous recommendations in this section, so should not be used to grant permissions to user accounts.
Remediation:
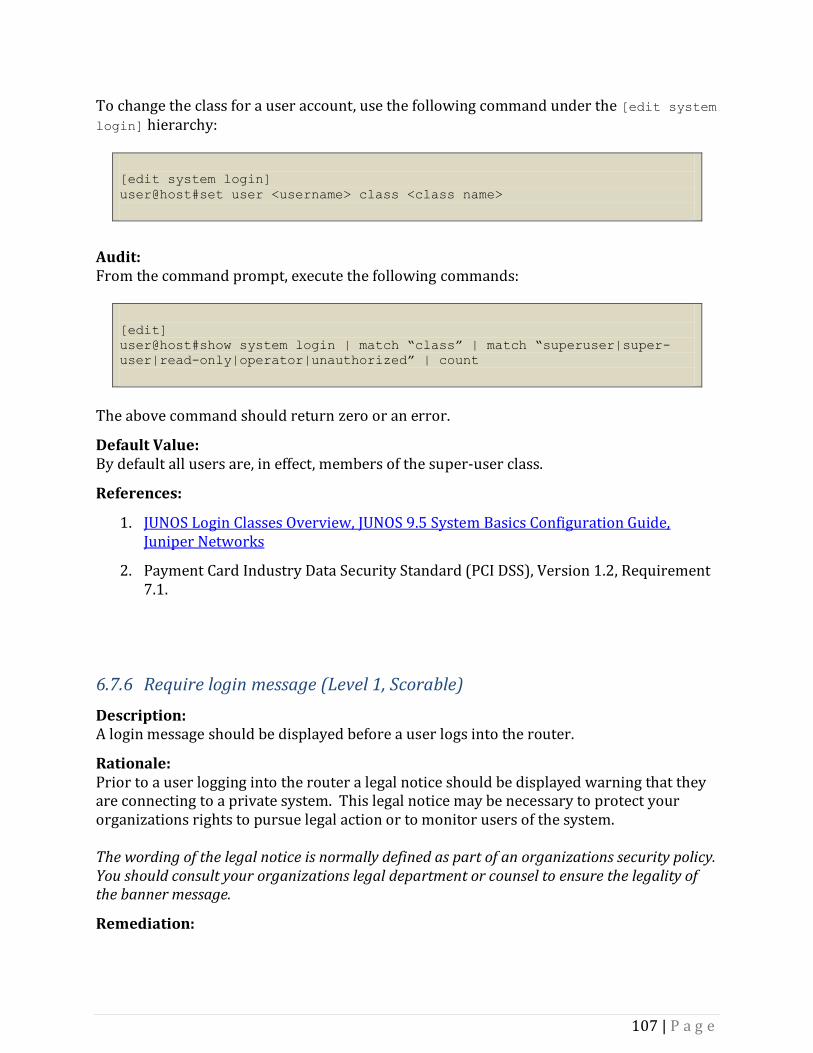
107 | P a g e
To change the class for a user account, use the following command under the [edit system login] hierarchy:
[edit system login]
user@host#set user <username> class <class name>
Audit: From the command prompt, execute the following commands:
[edit]
user@host#show system login | match “class” | match “superuser|super-
user|read-only|operator|unauthorized” | count
The above command should return zero or an error.
Default Value: By default all users are, in effect, members of the super-user class.
References:
1. JUNOS Login Classes Overview, JUNOS 9.5 System Basics Configuration Guide, Juniper Networks
2. Payment Card Industry Data Security Standard (PCI DSS), Version 1.2, Requirement 7.1.
6.7.6 Require login message (Level 1, Scorable)
Description: A login message should be displayed before a user logs into the router.
Rationale: Prior to a user logging into the router a legal notice should be displayed warning that they are connecting to a private system. This legal notice may be necessary to protect your organizations rights to pursue legal action or to monitor users of the system. The wording of the legal notice is normally defined as part of an organizations security policy. You should consult your organizations legal department or counsel to ensure the legality of the banner message.
Remediation:

108 | P a g e
Configure a login message using the following command under the [edit system] hierarchy:
[edit system]
user@host#set login message “<LEGAL NOTICE>”
Audit: From the command prompt, execute the following commands:
[edit]
user@host#show system login message
The above command should return the following output:
message “<LEGAL NOTICE>”;
Default Value: By default no login message is set.
References:
1. Configuring a System Login Message, JUNOS 9.3 System Basics Configuration Guide, Juniper Networks
2. Router Security Configuration Guide, Version 1.1b, Page 171, National Security Agency (NSA)
6.7.7 Require multiple character sets in password (Level 1, Scorable)
Description: Passwords for local user accounts must be configured to require character set changes.
Rationale: Weak passwords on local user accounts present a serious threat to the security of the router, allowing malicious users access through simple dictionary or brute force attacks. Fortunately JUNOS provides a mechanism for enforcing complexity requirements when new passwords are initially set in plain-text.

109 | P a g e
Secure passwords should contain characters from number of different character sets (Upper case letters, Lower case letters, Numbers, Punctuation and Special Characters) and JUNOS should be configured to force users passwords to meet this requirement.
Remediation: Configure a password character set changes using the following command under the [edit system] hierarchy:
[edit system]
user@host#set login password change-type character-set
Audit: From the command prompt, execute the following commands:
[edit]
user@host#show system login password change-type
The above command should return the following output:
change-type character-sets;
Default Value: For routers running JUNOS the default is change-type is character-set. For routers running JUNOS FIPS the default is set-transitions.
References:
1. Router Security Configuration Guide, Version 1.1b, Page 62, National Security Agency (NSA)
2. Payment Card Industry Data Security Standard (PCI DSS), Version 1.2, Requirement 8.5.
6.7.8 Require at least 4 set changes in passwords (Level 1, Scorable)
Description: Passwords for local user accounts must be configured to require at least 4 character set changes.
Rationale: Weak passwords on local user accounts present a serious threat to the security of the router, allowing malicious users access through simple dictionary or brute force attacks.

110 | P a g e
Fortunately JUNOS provides a mechanism for enforcing complexity requirements when new passwords are initially set in plain-text. Secure passwords should contain characters from at least 4 different character sets (Upper case letters, Lower case letters, Numbers, Punctuation and Special Characters) and JUNOS should be configured to force users passwords to meet this requirement.
Remediation: Configure the minimum character set changes using the following command under the [edit system] hierarchy:
[edit system]
user@host#set login passwords minimum-changes 4
Audit: From the command prompt, execute the following commands:
[edit]
user@host#show system login passwords minimum-changes
The above command should return the following output:
login password minimum-changes 4;
A value greater than 4 is also acceptable.
Default Value: For routers running JUNOS the default is minimum changes is 1. For routers running JUNOS FIPS the default is 3.
References:
1. Router Security Configuration Guide, Version 1.1b, Page 62, National Security Agency (NSA)
2. Payment Card Industry Data Security Standard (PCI DSS), Version 1.2, Requirement 8.5.
6.7.9 Require at least 8 characters for passwords (Level 1, Scorable)
Description:

111 | P a g e
Passwords for local user accounts must be configured to require at least 8 characters.
Rationale: Weak passwords on local user accounts present a serious threat to the security of the router, allowing malicious users access through simple dictionary or brute force attacks. Fortunately JUNOS provides a mechanism for enforcing complexity requirements when new passwords are initially set in plain-text. Secure passwords should be required to contain at least 8 characters.
Remediation: Configure the minimum characters for passwords using the following command under the [edit system] hierarchy:
[edit system]
user@host#set login passwords minimum-length 8
Audit: From the command prompt, execute the following commands:
[edit]
user@host#show system login password minimum-length
The above command should return the following output:
minimum-length 8;
A value greater than 8 is also acceptable.
Default Value: For routers running JUNOS the default minimum-length is 6. For routers running JUNOS FIPS the default is 10.
References:
1. Router Security Configuration Guide, Version 1.1b, Page 62, National Security Agency (NSA)
2. Payment Card Industry Data Security Standard (PCI DSS), Version 1.2, Requirement 8.5.

112 | P a g e
6.7.10 Require SHA1 hashing of passwords (Level 1, Scorable)
Description: Passwords should not be stored in the configuration file in plain-text.
Rationale: Passwords for locally configured users are stored in the routers configuration file. By applying a hashing algorithm to the password before storing it, it is possible to limit an attacker’s ability to gain passwords from configuration backups or to escalate privileges when using a different account through the CLI.
Remediation: Configure password hashing using the following command under the [edit system] hierarchy:
[edit system]
user@host#set login password format sha1
Audit: From the command prompt, execute the following commands:
[edit]
user@host#show system login password format
The above command should return the following output:
login password format sha1;
Default Value: For routers running JUNOS the default format is MD5. For routers running JUNOS FIPS the default is SHA1.
References: None
6.7.11 Require SSH Key Based Authentication for User Accounts (Level 2, Scorable)
Description: SSH Key Based Authentication should be used.

113 | P a g e
Rationale: Password based authentication of SSH management sessions is commonly targeted by attackers with Brute Force attacks, where random passwords are attempted until access is granted. JUNOS routers provide the facility to authenticate SSH sessions using Public Key Encryption, utilizing either the Digital Signature Algorithm (DSA) or Rivest Shamir Adleman (RSA) algorithms. When a user connects to the router they are sent a challenge, which they send back to the router signed using their private key. This signature is validated using the user’s public key which is stored on the router.
Remediation: To configure SSH key based authentication using a key file issue the following command under the [edit system] hierarchy:
[edit system]
user@host#set login user <username> load-key-file <filename>
To configure SSH key based authentication using a DSA based authentication using a locally configured key issue the following command under the [edit system] hierarchy:
[edit system]
user@host#set login user <username> ssh-dsa <key>
To configure SSH key based authentication using a DSA based authentication using a key retrieved from a key server issue the following command under the [edit system] hierarchy:
[edit system]
user@host#set login user <username> ssh-dsa from <hostname>
To configure SSH key based authentication using a RSA based authentication using a locally configured key issue the following command under the [edit system] hierarchy:
[edit system]
user@host#set login user <username> ssh-rsa <key>

114 | P a g e
To configure SSH key based authentication using a RSA based authentication using a key retrieved from a key server issue the following command under the [edit system] hierarchy:
[edit system]
user@host#set login user <username> ssh-rsa from <hostname>
Audit: From the command prompt, execute the following commands:
[edit]
user@host#show system login | match “(ssh-.sa)|(load-key-file)” | count
The above command should return a positive integer value equal to the number of configured users.
Default Value: SSH is not configured by default.
References:
None.
6.7.12 Retry Options
Options that dictate how the router treats failed remote login attempts are configured under the [edit system login retry-options] hierarchy.
6.7.12.1 Require Max 3 Tries Before Disconnect (Level 1, Scorable)
Description: A maximum of 3 failed login attempts should be allowed before the session is disconnected.
Rationale: Remote administration protocols like Telnet and SSH are commonly targeted by Brute Force or Dictionary attacks where a malicious user attempts to guess a valid username/password combination in order to gain control of the router. To slow down the rate at which an attacker can attempt to guess passwords, sessions should be disconnected after no more than 3 failed login attempts (a lower value can be used if preferred).
Remediation:

115 | P a g e
Configure the number of tried before disconnect using the following command under the [edit system] hierarchy:
[edit system]
user@host#set login retry-options tries-before-disconnect <number of
tries>
Audit: From the command prompt, execute the following commands:
[edit]
user@host#show system login retry-options tries-before-disconnect
The above command should return an integer value equal to or less than 3.
Default Value: For most JUNOS version the default is to disconnect after 10 failed login attempts.
References:
1. Router Security Configuration Guide, Version 1.1b, Page 229, National Security Agency (NSA)
2. Configuring Password Retry Limits for Telnet and SSH Access, JUNOS 9.5 Security
Configuration Guide, Juniper Network
6.7.12.2 Require Backoff Threshold Max 2 (Level 1, Scorable)
Description: A maximum of 2 failed login should trigger a backoff.
Rationale: Remote administration protocols like Telnet and SSH are commonly targeted by Brute Force or Dictionary attacks where a malicious user attempts to guess a valid username/password combination in order to gain control of the router. To slow down the rate at which an attacker can attempt to guess passwords Juniper routers can initiate a backoff timer when a user login fails more times than a configured threshold. Once initiated the backoff will not allow a further login attempt by the user for a configured (see next recommendation) period of time called the backoff factor. After the next failed login attempt further logins will not be allowed for the 2x the backoff factor, then 3x and so on.

116 | P a g e
Remediation: Configure the backoff threshold using the following command under the [edit system] hierarchy:
[edit system]
user@host#set login retry-options backoff-threshold <threshold>
Audit: From the command prompt, execute the following commands:
[edit]
user@host#show system login retry-options backoff-threshold
The above command should return an integer value equal to or less than 2.
Default Value: For most JUNOS version the default is to backoff after 2 failed login attempts.
References: 1. Configuring Password Retry Limits for Telnet and SSH Access, JUNOS 9.5 Security
Configuration Guide, Juniper Network
6.7.12.3 Require Min Backoff Factor of 5 (Level 1, Scorable)
Description: A minimum of 5 seconds should be used for the backoff factor.
Rationale: Remote administration protocols like Telnet and SSH are commonly targeted by Brute Force or Dictionary attacks where a malicious user attempts to guess a valid username/password combination in order to gain control of the router. To slow down the rate at which an attacker can attempt to guess passwords Juniper routers can initiate a backoff timer when a user login fails more times than a configured threshold. Once initiated the backoff will not allow a further login attempt by the user for a configured (see next recommendation) period of time called the backoff factor. After the next failed login attempt further logins will not be allowed for the 2x the backoff factor, then 3x and so on.
Remediation:

117 | P a g e
Configure the backoff threshold using the following command under the [edit system] hierarchy:
[edit system]
user@host#set login retry-options backoff-factor <number of seconds>
Audit: From the command prompt, execute the following commands:
[edit]
user@host#show system login retry-options backoff-factor
The above command should return an integer value equal to or greater than 5.
Default Value: For most JUNOS version the default is to backoff factor of 5 seconds.
References: 1. Configuring Password Retry Limits for Telnet and SSH Access, JUNOS 9.5 Security
Configuration Guide, Juniper Network
6.7.12.4 Require Min Session Time of At Least 20 Seconds (Level 1, Scorable)
Description: A Minimum Session Time should be set to at least 20 seconds.
Rationale: Remote administration protocols like Telnet and SSH are commonly targeted by Brute Force or Dictionary attacks where a malicious user attempts to guess a valid username/password combination in order to gain control of the router. To slow down the rate at which an attacker can attempt to guess passwords Juniper routers can enforce a minimum session time, preventing an attacker from attempting to circumvent the backoff timer through using multiple sessions.
Remediation: Configure the Minimum Session Time using the following command under the [edit system] hierarchy:
[edit system]
user@host#set login retry-options minimum-time <number of seconds>

118 | P a g e
Audit: From the command prompt, execute the following commands:
[edit]
user@host#show system login retry-options minimum-time
The above command should return an integer value equal to or greater than 20.
Default Value: For most JUNOS version the default is a Minimum Session Time of 20 seconds.
References: 1. Configuring Password Retry Limits for Telnet and SSH Access, JUNOS 9.5 Security
Configuration Guide, Juniper Network
6.8 NTP Network Time Protocol allows administrators to set the system time on all of their compatible systems from a single source, ensuring a consistent time stamp for logging and authentication protocols. NTP is an internet standard, defined in RFC1305. Juniper Routers can be configured to use NTP under the [edit system ntp] hierarchy.
6.8.1 Require External Time Sources (Level 1, Scorable)
Description: At least two external NTP Server should be configured for the router.
Rationale: Keeping time settings consistent across a network is vital if log data is to be meaningful and usable in understanding faults and security incidents. Consistent time settings are also vital to the operation of some network protocols and services such as IPSec and 802.1x which maybe critical to many networks. To ensure that the time on your JUNOS router is consistent with other devices in your network, at least two (and preferably at least three) NTP Server/s external to the router should be configured. Although NTP provides for a Peer to Peer type implementation, where individual time servers are not specified and methods such as broadcast and multicast are utilized to synchronize time between hosts, in almost all real world cases a Server / Client model should be used for network devices, even if multicast or broadcast methods are used for other types of hosts.

119 | P a g e
Using specified time sources allows you to better secure, monitor and manage your NTP implementation , simplifying debugging and allowing tighter control of NTP traffic. Having multiple NTP servers ensures fault tolerance and also protects against mis-configured or compromised servers causing radical time changes, something an attacker may want to achieve to cover their tracks or conduct replay attacks.
Remediation: Configure at least one External NTP Server using the following commands under the [edit system] hierarchy;
[edit system]
user@host#set ntp server <Servers IP> key <key ID> version 4
*Only the set ntp server <server IP> is directly covered by requirement
1.6.1, the key and version are covered in subsequent requirements, but are
included here for a complete view of the command.
Audit: From the command prompt, execute the following commands:
[edit]
user@host#show system ntp | match server | except boot-server | count
The above command should return an integer value greater than or equal to 2 if sufficient NTP servers are explicitly configured.
Default Value: By default Juniper routers do not have NTP servers configured.
References:
1. NTP Server, JUNOS 9.3 System Basics Configuration Guide, Juniper Networks
2. Payment Card Industry Data Security Standard (PCI DSS), Version 1.2, Requirement 8
3. NTP Security, GIAC Practical Repository, GSEC Ver 1.4 Option 1, Matt Willman
6.8.2 Require NTP Boot-Server (Level 2, Scorable)
Description: At least one server should be configured for the router to update its time on boot.
Rationale:

120 | P a g e
When the router boots or when a new Routing Engine is installed its time may have drifted or be set beyond the maximum amount where periodic updates can return it to the correct time, resulting in the correct time never being set. To prevent this situation; a Boot Server should be set from which the router will obtain its time as it loads. Because the ntpdate utility, which contacts the Boot Server, runs prior to many of the other core demons, such as rpd, the Boot Server should be reachable from the routers management interface (fxp0 on most routers) without any Routing Protocol learned routes or Tunnels being available.
Remediation: Keys are configured on a key ring and identified by an ID number. To add a key enter the llowing command from the [edit system] hierarchy;
[edit system]
user@host#set ntp boot-server <Server IP>
Audit: From the command prompt, execute the following commands:
[edit]
user@host#show system ntp | match boot-server | count
The above command should return an integer value of 1.
Default Value: By default Juniper routers do not have encryption for NTP configured.
References:
1. NTP Server, JUNOS 9.3 System Basics Configuration Guide, Juniper Networks
2. Payment Card Industry Data Security Standard (PCI DSS), Version 1.2, Requirement 8
3. NTP Security, GIAC Practical Repository, GSEC Ver 1.4 Option 1, Matt Willman
6.8.3 Require NTP Version 4 (Level 1, Scorable)
Description: Version 4 of the NTP protocol should be utilized.
Rationale:

121 | P a g e
NTP is one of the oldest Internet Standard protocols and has been around for at least 24 years. As with most protocols, during its life time, NTP has received numerous revisions and updates to ensure it remains reliable and secure to use in modern networks. The current reference version of NTP is Version 4. Although not yet formalized by the IETF in an RFC, Version 4 adds significant enhancements to the protocols security and is widely accepted as the defacto standard for secure implementation and should be used for all network devices.
Remediation: Configure each External NTP Server to use NTP Version 4 using the following commands under the [edit system] hierarchy;
[edit system]
user@host#set ntp server <Servers IP> key <key ID> version 4
*Only the set version 4 is directly covered by requirement 1.6.2, the key and
server are covered in related requirements, but are included here for a
complete view of the command.
Audit: From the command prompt, execute the following commands:
[edit]
user@host#show system ntp | match server | match “version 4” | count
The above command should return an integer value greater then or equal to 1 if any NTP servers are explicitly configured to use Version 4. This value should be the same as the total number of servers configured as tested under Req 1.6.1
Default Value: By default all Juniper routers use NTP Version 4 when a server is explicitly configured.
References:
1. Configuring RADIUS Authentication, JUNOS 9.3 System Basics Configuration Guide, Juniper Networks
2. Payment Card Industry Data Security Standard (PCI DSS), Version 1.2, Requirement 8
6.8.4 Require Encryption Keys for NTP (Level 2, Scorable)
Description: Encryption keys should be set for NTP Servers

122 | P a g e
Rationale: Having established the need for NTP, it is essential to ensure that the routers time is not manipulated by an attacker as this could allow DoS to services relying on accurate time as well as replay attacks and other malicious activity. NTP Version 3 allows for encryption keys to be set to allow systems to verify the identity of NTP servers and to protect communications between them from being altered. This functionality has been further enhanced in NTP 4 with PKI being supported on some platforms (but not JUNOS at present). JUNOS currently only supports use of an MD5 key, which is used to verify NTP packets by comparing the routers results to the hash provided by the server. This process confirms both that the server is authentic and that the NTP data has not been modified in transit. Please note that NTP data itself is still sent in clear text on the network, however the data is not sensitive, the cryptographic protection is used simply to ensure identity and reliability as described above.
Remediation: Keys are configured on a key ring and identified by an ID number. To add a key enter the following command from the [edit system] hierarchy;
[edit system]
user@host#set ntp authentication-key <Key ID> type md5 value <Key>
Set the keys for all configured NTP servers using the following commands under the [edit system] hierarchy, this sets the key that the router will use to encrypt and decrypt traffic for this server;
[edit system]
user@host#set ntp server <Servers IP> key <key ID> version 4
*Only the key <key ID> is directly covered by requirement 1.6.3, the server
and version are covered in subsequent requirements, but are included here for
a complete view of the command.
Finally configure the key as trusted so that the router will accept NTP traffic encrypted using it. This mechanism provides an easy method to retire keys in the event of compromise. Enter following command from the [edit system] hierarchy;
[edit system]
user@host#set ntp trusted-key <key ID>

123 | P a g e
Audit: From the command prompt, execute the following commands:
[edit]
user@host#show system ntp | match server | match key | count
The above command should return an integer value greater then or equal to 1 if any NTP servers are configured with encryption keys. This value should be the same as the total number of servers configured as tested in Requirement 6.8.1. Note – Although the ntp trust-key is not audited under this requirement, all keys that you intend to use must be trusted or incoming NTP packets will be rejected.
Default Value: By default Juniper routers do not have encryption for NTP configured.
References:
1. NTP Server, JUNOS 9.3 System Basics Configuration Guide, Juniper Networks
2. Payment Card Industry Data Security Standard (PCI DSS), Version 1.2, Requirement 8
3. NTP Security, GIAC Practical Repository, GSEC Ver 1.4 Option 1, Matt Willman
6.8.5 Require Different Encryption Key for Each Server (Level 2, Scorable)
Description: Different encryption keys should be set for each NTP Server
Rationale: As discussed in the previous requirement, MD5 keys should be set to allow the router to verify the Servers identity and that data has not been altered in transit. To prevent the compromise of a single server or key undermining your NTP infrastructure, different MD5 keys should be used for each server configured.
Remediation: Keys are configured on a key ring and identified by an ID number. To add a key enter the following command from the [edit system] hierarchy;
[edit system]
user@host#set ntp authentication-key <Key ID> type md5 value <Key>

124 | P a g e
Set the keys for all configured NTP servers using the following commands under the [edit system] hierarchy;
[edit system]
user@host#set ntp server <Servers IP> key <key ID> version 4
*Only the key <key ID> is directly covered by requirement 1.6.4, the server
and version are covered in related requirements, but are included here for a
complete view of the command.
Audit: From the command prompt, execute the following commands:
[edit]
user@host#show system ntp | match authentication-key | count
The above command should return an integer value representing the number of keys configured. This value should be equal to or greater than the total number of servers configured as tested in Req1.6.1.
Default Value: By default Juniper routers do not have encryption for NTP configured.
References:
1. NTP Server, JUNOS 9.3 System Basics Configuration Guide, Juniper Networks
2. Payment Card Industry Data Security Standard (PCI DSS), Version 1.2, Requirement 8
3. NTP Security, GIAC Practical Repository, GSEC Ver 1.4 Option 1, Matt Willman
6.9 Radius-server / Tacplus-server Each user of a Juniper router must have a unique username and password which allows them to be identified for Authorization and Accounting purposes. Centralized Authentication services such as RADIUS and TACACS+ provide essential mechanisms to protect network devices. It is essential that a Juniper router be configured with at least one TACACS+ or RADIUS server.
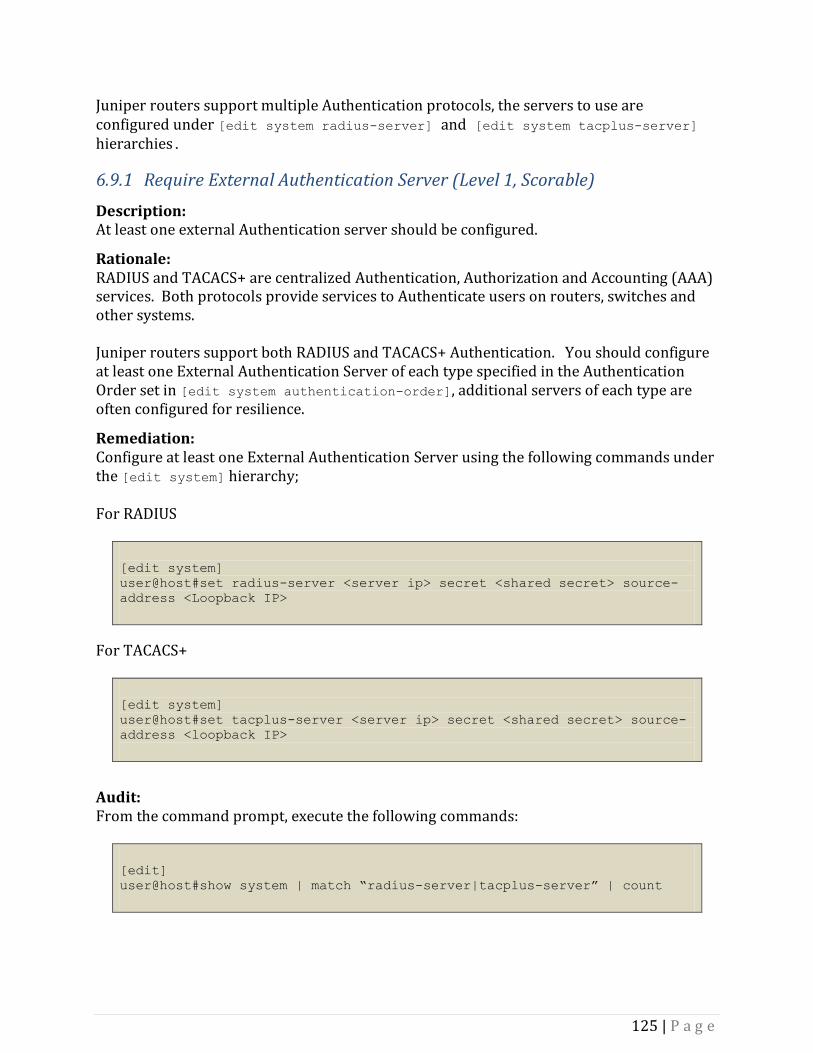
125 | P a g e
Juniper routers support multiple Authentication protocols, the servers to use are configured under [edit system radius-server] and [edit system tacplus-server] hierarchies.
6.9.1 Require External Authentication Server (Level 1, Scorable)
Description: At least one external Authentication server should be configured.
Rationale: RADIUS and TACACS+ are centralized Authentication, Authorization and Accounting (AAA) services. Both protocols provide services to Authenticate users on routers, switches and other systems. Juniper routers support both RADIUS and TACACS+ Authentication. You should configure at least one External Authentication Server of each type specified in the Authentication Order set in [edit system authentication-order], additional servers of each type are often configured for resilience.
Remediation: Configure at least one External Authentication Server using the following commands under the [edit system] hierarchy; For RADIUS
[edit system]
user@host#set radius-server <server ip> secret <shared secret> source-
address <Loopback IP>
For TACACS+
[edit system]
user@host#set tacplus-server <server ip> secret <shared secret> source-
address <loopback IP>
Audit: From the command prompt, execute the following commands:
[edit]
user@host#show system | match “radius-server|tacplus-server” | count

126 | P a g e
The above command should return an integer value equal to or greater then 1 if any servers of either type are configured.
Default Value: By default all Juniper routers use local password authentication with accounts set under the [edit system login user] hierarchy and do not have any External Authentication Servers configured.
References:
1. Configuring RADIUS Authentication, JUNOS 9.3 System Basics Configuration Guide, Juniper Networks
2. Payment Card Industry Data Security Standard (PCI DSS), Version 1.2, Requirement 8
6.9.2 Require Shared Secret for External Authentication Servers (Level 1, Scorable)
Description: External Authentication servers should be configured with a Shared Secret.
Rationale: RADIUS and TACACS+ are centralized Authentication, Authorization and Accounting (AAA) services. Both protocols provide services to Authenticate users on routers, switches and other systems. Because these servers are being trusted to authenticate your administrative users, it is vital to ensure the identity of the RADIUS or TACACS+ server. Both protocols use a Shared Secret to authenticate the server.
Remediation: Configure a Shared Secret for all External Authentication Server using the following commands under the [edit system] hierarchy; For RADIUS Servers:
[edit system]
user@host#set radius-server <server ip> secret <shared secret> source-
address <Loopback IP>
For TACACS+ Servers:
[edit system]
user@host#set tacplus-server <server ip> secret <shared secret> source-
address <loopback IP>

127 | P a g e
Audit: From the command prompt, execute the following commands:
[edit]
user@host#show system | display set | match “radius-server|tacplus-
server” | match “secret” | count
The above command should return an integer value for each Radius or TACACS+ server configured with a Shared Secret. This value should be the same as the number of Radius or TACACS+ servers.
Default Value: By default all Juniper routers use local password authentication with accounts set under the [edit system login user] hierarchy and do not have any External Authentication Servers configured.
References:
1. Configuring RADIUS Authentication, JUNOS 9.3 System Basics Configuration Guide, Juniper Networks
2. Payment Card Industry Data Security Standard (PCI DSS), Version 1.2, Requirement 8
6.9.3 Require Different Shared Secret for each External Authentication Server (Level 1, Scorable)
Description: External Authentication servers should be configured with a Shared Secret.
Rationale: RADIUS and TACACS+ are centralized Authentication, Authorization and Accounting (AAA) services. Both protocols provide services to Authenticate users on routers, switches and other systems. Because these servers are being trusted to authenticate your administrative users, it is vital to ensure the identity of the RADIUS or TACACS+ server. With both protocols this is achieved by using a Shared Secret.
Remediation: Configure a Shared Secret for all External Authentication Server using the following commands under the [edit system] hierarchy; For RADIUS

128 | P a g e
[edit system]
user@host#set radius-server <server ip> secret <shared secret> source-
address <Loopback IP>
For TACACS+
[edit system]
user@host#set tacplus-server <server ip> secret <shared secret> source-
address <loopback IP>
Audit: From the command prompt, execute the following commands:
[edit]
user@host#show system | display set | match “radius-server|tacplus-
server” | match “secret”
The above command should return one line for each tacacs+ or radius server configured; each should have a different Secret string shown.
Default Value: By default all Juniper routers use local password authentication with accounts set under the [edit system login user] hierarchy and do not have any External Authentication Servers configured.
References:
1. Configuring RADIUS Authentication, JUNOS 9.3 System Basics Configuration Guide, Juniper Networks
2. Payment Card Industry Data Security Standard (PCI DSS), Version 1.2, Requirement 8
6.9.4 Require MS-CHAPv2 RADIUS Authentication (when used, JUNOS 9.2+) (Level 1, Scorable)
Description: MS-CHAPv2 should be used for RADIUS authentication (where available).
Rationale: RADIUS is a centralized Authentication, Authorization and Accounting (AAA) protocol providing services to authenticate users on routers, switches and other systems.

129 | P a g e
From JUNOS 9.2 it is possible to configure MS-CHAPv2 globally for use with all RADIUS servers, providing stronger mutual authentication between the router and the server and additional features which allow users to change their password when it is expired, reset or configured to change at next login. NOTE – MS-CHAPv2 must be supported and configured on all RADIUS servers which the router uses for authentication.
Remediation: Configure a MS-CHAPv2 Authentication using the following commands under the [edit system] hierarchy;
[edit system]
user@host#set radius-options password-protocol mschap-v2
Audit: From the command prompt, execute the following commands:
[edit]
user@host#show system radius-options
The above command should return: password-protocol mschap-v2;
Default Value: By default all Juniper routers use local password authentication with accounts set under the [edit system login user] hierarchy and do not have any External Authentication Servers configured.
References:
1. Configuring RADIUS Authentication, JUNOS 9.3 System Basics Configuration Guide, Juniper Networks
6.10 Root-Authentication The Root account provides full access to the Juniper router and to the underlying BSD OS. An attacker gaining access to this user account would gain complete control of the platform.

130 | P a g e
6.10.1 Require Root Password (Level 1, Scorable)
Description: A Root Password should be set for the system. Passwords are stored, automatically by JUNOS, as a SHA1 hash in the configuration under the [edit system root-authentication] hierarchy.
Rationale: Access to the Root user account should be restricted by setting a strong password which is encrypted in the configuration file to prevent it being revealed from backups or other sources.
Remediation: Users will generally be prompted to set the Root password during initial setup of the router, however, a password may be set from the CLI using either of the two methods below from the [edit system] hierarchy; To enter a new Root Password in plain text type:
[edit system]
user@host#set root-authentication plain-text-password
You will be prompted to enter the new Password twice and, if the Passwords match, JUNOS will add a SHA1 hash of the Password to the configuration. If you already have a SHA1 hash of your Root Password (from an existing router configuration, for example), enter the following command:
[edit system]
user@host#set root-authentication encrypted-password “<SHA1 hash>”
If JWEB is installed on your router, the Root Password may also be changed through the Configuration > Quick Configuration > Setup page.
Audit: From the command prompt, execute the following command:
[edit]
user@host#show system root-authentication
The above command should yield the following output;

131 | P a g e
encrypted-password "<encrypted password>";
Default Value: None.
References: None.
6.10.2 Require Complex Root Password (Level 1, Not Scorable)
Description: A Complex Root Password should be set for the system.
Rationale: Due to the importance of the Root user account a complex password should be employed to help prevent attackers employing ‘brute force’ or ‘dictionary’ attacks to gain full control of the router. Passwords are stored, automatically by JUNOS, as a SHA1 hash in the configuration under the [edit system root-authentication] hierarchy. A complex password should be employed which meets or exceeds the following requirements; - Does not contain Dictionary words, names, dates, phone numbers or addresses. - Is at least 8 characters in length. - Contains at least one each of upper & lower case letters, numbers and special characters. - Avoids more then 4 digits or same case letters in a row.
Remediation: Users will generally be prompted to set the Root password during initial setup of the router, however, a password may be set from the CLI using either of the two methods below from the [edit system] hierarchy; To enter a new Root Password in plain text type:
[edit system]
user@host#set root-authentication plain-text-password
You will be prompted to enter the new Password twice and, if the Passwords match, JUNOS will add a SHA1 hash of the Password to the configuration. If you already have a SHA1 hash of your Root Password (from an existing router configuration, for example), enter the following command:

132 | P a g e
[edit system]
user@host#set root-authentication encrypted-password “<SHA1 hash>”
If JWEB is installed on your router, the Root Password may also be changed through the Configuration > Quick Configuration > Setup page.
Audit: Because all Root Passwords are automatically stored by JUNOS as a SHA1 hash, which will always be 160bits long, it is not possible to confirm from the command line the complexity and length of the password used therefore this is not a scorable item.
Default Value: None.
References:
1. Router Security Configuration Guide, Version 1.1b, Page 62, National Security Agency (NSA)
2. Payment Card Industry Data Security Standard (PCI DSS), Version 1.2, Requirement 8.5.10 and 8.5.11
6.10.3 Require Unique Root Password (Level 1, Not Scorable)
Description: The Root Password should be unique on the system.
Rationale: Due to the rights associated with the Root user account it must be protected at all costs to prevent malicious users taking ownership of the router. Using the same or similar password for the Root User as is used, for example, to access the routers Console or Diagnostic ports presents a number of risks. A user who is authorized to know one of these lesser passwords could abuse this knowledge to login as Root, effectively performing a Vertical Escalation of Privileges attack. Further risks are presented by the lower level hashing algorithm used to protect other system passwords. Most of these utilize MD5, a demonstrably less secure protocol then SHA1 which used for the Root password. Theoretically an attacker could exploit the weaker hashing used on these lesser system passwords to recover the Root password, although this would still be difficult. Finally, the Root password should not be reused on other systems, including other routers, and should be stored securely. If the Root Password was the same across all of the routers and other systems in your network, the compromise of one host could result in the compromise of all hosts.
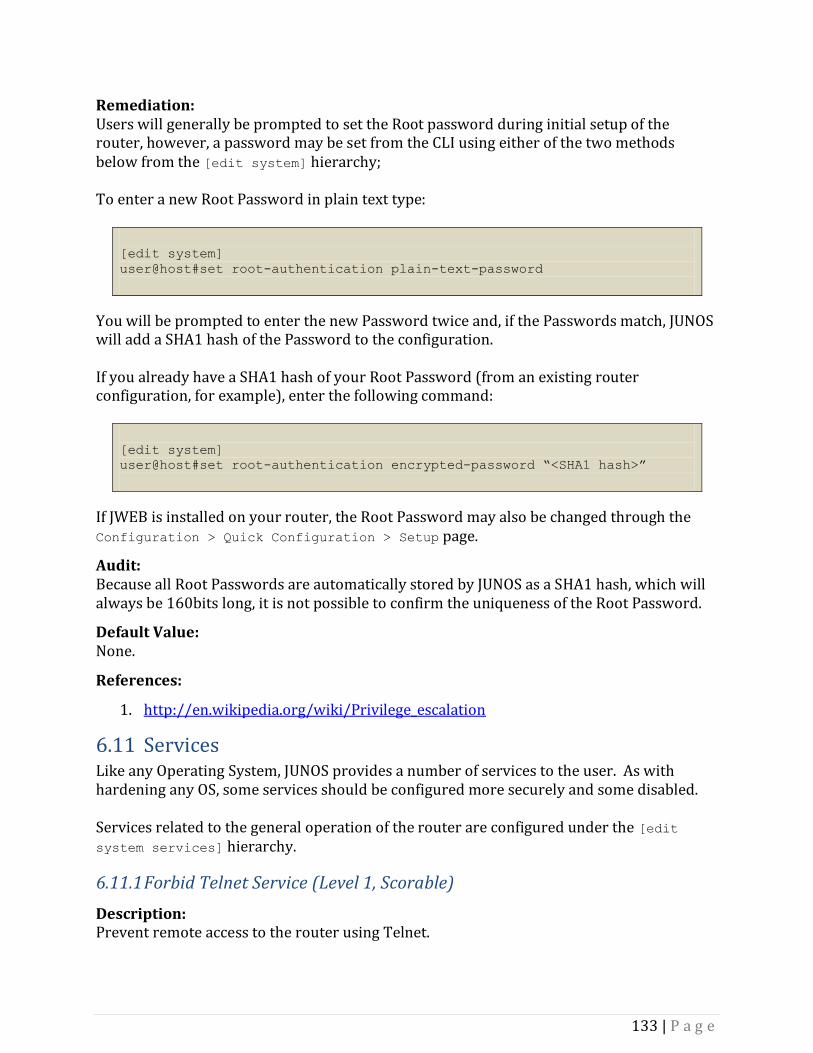
133 | P a g e
Remediation: Users will generally be prompted to set the Root password during initial setup of the router, however, a password may be set from the CLI using either of the two methods below from the [edit system] hierarchy; To enter a new Root Password in plain text type:
[edit system]
user@host#set root-authentication plain-text-password
You will be prompted to enter the new Password twice and, if the Passwords match, JUNOS will add a SHA1 hash of the Password to the configuration. If you already have a SHA1 hash of your Root Password (from an existing router configuration, for example), enter the following command:
[edit system]
user@host#set root-authentication encrypted-password “<SHA1 hash>”
If JWEB is installed on your router, the Root Password may also be changed through the Configuration > Quick Configuration > Setup page.
Audit: Because all Root Passwords are automatically stored by JUNOS as a SHA1 hash, which will always be 160bits long, it is not possible to confirm the uniqueness of the Root Password.
Default Value: None.
References:
1. http://en.wikipedia.org/wiki/Privilege_escalation
6.11 Services Like any Operating System, JUNOS provides a number of services to the user. As with hardening any OS, some services should be configured more securely and some disabled. Services related to the general operation of the router are configured under the [edit system services] hierarchy.
6.11.1 Forbid Telnet Service (Level 1, Scorable)
Description: Prevent remote access to the router using Telnet.

134 | P a g e
Rationale: Telnet is a remote management protocol that allows users to connect to the command line of the router. Because Telnet does transmits all data (including passwords) in clear text over the network and provides no assurance of the identity of the hosts involved, it can allow an attacker to gain sensitive configuration, password and other data and is also vulnerable to session hijacking and injection attacks.
Remediation: To disable Telnet access issue the following command from the[edit system] hierarchy;
[edit system]
user@host#delete services telnet
Audit: From the command prompt, execute the following command:
[edit]
user@host#show system services | match telnet
The above command should yield no output or an error.
Default Value: Depends on platform, Telnet is enabled on J-Series and disabled on almost all others.
References:
1. Payment Card Industry Data Security Standard (PCI DSS), Version 1.2, Requirement 2.3 and 8.4
6.11.2 Forbid Reverse Telnet Service (Level 1, Scorable)
Description: Reverse Telnet services MUST not be used.
Rationale: Telnet is a remote management protocol that allows users to connect to the command line of the router. Because Telnet transmits all data (including passwords) in clear text over the network and provides no assurance of the identity of the hosts involved, it can allow an attacker to gain sensitive configuration, password and other data and is also vulnerable to session hijacking and injection attacks.

135 | P a g e
Reverse Telnet is a service that can be configured on a Juniper router, allowing a user to connect via the routers auxiliary port to the console of another device by establishing a Telnet session, on port 2900/TCP by default, to the router. Because Telnet is used as the underlying protocol, Reverse Telnet is subject to the same risks.
Remediation: To disable Reverse Telnet access issue the following command from the[edit system] hierarchy;
[edit system]
user@host#delete services reverse telnet
Audit: From the command prompt, execute the following command:
[edit]
user@host#show system services | match “reverse telnet”
The above command should yield no output or an error.
Default Value: Reverse Telnet is disabled by default.
References:
1. Payment Card Industry Data Security Standard (PCI DSS), Version 1.2, Requirement 2.3 and 8.4
6.11.3 Forbid FTP Service (Level 1, Scorable)
Description: FTP should be disabled.
Rationale: File Transfer Protocol (FTP) can be used for loading and exporting configuration from a Juniper router, which can run an FTP Server Service to support these functions. FTP transfers data in plaintext and should be avoided, with the Secure Copy functions of SSH used instead. In addition, the FTP service allows files to be read from and written to the routers file system, presenting a risk if misused.

136 | P a g e
Remediation: To disable the FTP service, issue the following command from the[edit system] hierarchy;
[edit system]
user@host#delete services ftp
Audit: From the command prompt, execute the following command:
[edit]
user@host#show system services | match ftp
The above command should yield no output or an error.
Default Value: FTP is enabled on most platforms by default.
References:
1. Payment Card Industry Data Security Standard (PCI DSS), Version 1.2, Requirement 2.2.2
6.11.4 Forbid Finger Service (Level 1, Scorable)
Description: The Finger service should be disabled.
Rationale: Finger is a simple TCP service dating back to the early 1970’s that provides information on users logged into a system to other users on the network. While this was a useful feature in the early days of the Internet, providing information about a router to unauthenticated users is not quite so desirable in todays Internet and presents a serious threat to the security of your router. The finger deamon itself has suffered from numerous vulnerabilities across many platforms and, as with any unneeded service, should be disabled for this reason also.
Remediation: The Finger service is not enabled by default, however if it has been configured on your router it can by disabled by issuing the following command from the[edit system] hierarchy;

137 | P a g e
[edit system]
user@host#delete services finger
Audit: From the command prompt, execute the following command:
[edit]
user@host#show system services | match finger
The above command should yield no output or an error.
Default Value: Finger is disabled on most versions of JUNOS by default. The service cannot be used on FIPS versions of JUNOS.
References:
1. Payment Card Industry Data Security Standard (PCI DSS), Version 1.2, Requirement 2.2.2
6.11.5 Forbid DHCP Service (Level 2, Scorable)
Description: The routers DHCP server should be disabled when not required.
Rationale: When hardening any computer system for security, it is important to disable or uninstall any application that is not required. The same rule applies to routers and other network devices. JUNOS routers are able to operate as a Dynamic Host Configuration Protocol (DHCP) server, providing IP Address and other information to client systems on connected networks. Typically this functionality will only be deployed in very small installations, where a single router provides a small number of hosts with Internet or WAN access and provides and no local servers are available. If you are not using the router as a DHCP server, the service should be explicitly disabled.
Remediation: The DHCP Server service is not enabled by default, however if it has been configured on your router it can by disabled by issuing the following command from the[edit system] hierarchy; On J-Series routers :
[edit system]

138 | P a g e
user@host#delete services dhcp
On other router platforms :
[edit system]
user@host#delete services dhcp-localserver
Audit: From the command prompt, execute the following command:
[edit]
user@host#show system services | match dhcp
The above command should yield no output or an error.
Default Value: The DHCP Server is enabled by default on J-Series router platforms to allow easy configuration. The DHCP-Local-Server is not normally configured by default on other platforms.
References:
1. Payment Card Industry Data Security Standard (PCI DSS), Version 1.2, Requirement 2.2.2
2. DHCP Overview, JUNOS 9.2 System Basics Configuration Guide, Juniper Networks
6.11.6 SSH
Options for the Secure Shell (SSH) service are set under [edit system services ssh] hierarchy.
6.11.6.1 Require SSH Service (Level 1, Scorable)
Description: SSH should be utilized for remote console sessions to Juniper routers.
Rationale: SSH provides administrators with a remote console session on the router in a similar fashion to Telnet. Unlike Telnet, SSH encrypts all data as it transits the network and ensures the identity of the remote host.

139 | P a g e
Because of this extra protection, all remote console sessions should use SSH.
Remediation: To enable SSH access issue the following command from the[edit system] hierarchy;
[edit system]
user@host#set services ssh
Audit: From the command prompt, execute the following command:
[edit]
user@host#show system services | match ssh
The above command should yield the following output:
ssh;
Additional configuration items for the SSH service may be present between the curly braces.
Default Value: For most platforms SSH access is enabled by default.
References:
1. Payment Card Industry Data Security Standard (PCI DSS), Version 1.2, Requirement 2.3 and 8.4
2. Configuring SSH Service for Remote Access to the Router, JUNOS Software System Basics Guide, Juniper Networks
6.11.6.2 Require SSH Version 2 (Level 1, Scorable)
Description: Remote console connections should only use SSH Version 2.
Rationale: SSH Version 1 has been subject to a number of serious vulnerabilities and is no longer considered to be a secure protocol, resulting in the adoption of SSH Version 2 as an Internet Standard in 2006.

140 | P a g e
Juniper routers support both versions, but due to the weakness of SSH Version 1 only the later standard should be used.
Remediation: To restrict SSH to Version 2 only, issue the following command from the[edit system] hierarchy;
[edit system]
user@host#set services ssh protocol-version v2
Audit: From the command prompt, execute the following command:
[edit]
user@host#show system services ssh
The above command should yield the following output (along with any other options set for the SSH service);
ssh {
protocol-version v2
}
Additional configuration items for the SSH service may be present between the curly braces.
Default Value: Version 2 should be the default on all current platforms.
References:
1. Router Security Configuration Guide, Version 1.1b, Page 222, National Security Agency (NSA)
2. Configuring SSH Service for Remote Access to the Router, JUNOS Software System Basics Guide, Juniper Networks
6.11.6.3 Require SSH Connection Limit (Level 1, Scorable)
Description: SSH connections should be limited.
Rationale:

141 | P a g e
SSH is a common management protocol, so is often targeted by attackers trying to gain access to routers or execute Denial of Service (DoS) attacks. To limit the effectiveness of DoS and Brute Force attacks targeting the router using the SSH service the maximum number of concurrent connections should be limited. Any sessions attempted once this limit is reached will be rejected by the router. A maximum limit of 10 concurrent sessions is recommended for most environments.
Remediation: To restrict concurrent SSH connections, issue the following command from the [edit system] hierarchy;
[edit system]
user@host#set services ssh connection-limit <limit>
Audit: From the command prompt, execute the following command:
[edit]
user@host#show system services ssh
The above command should yield the following output (along with any other options set for the SSH service);
ssh {
connection-limit <limit>;
}
Additional configuration items for the SSH service may be present between the curly braces.
Default Value: Up to 75 concurrent sessions are accepted by default on most current platforms.
References:
1. Router Security Configuration Guide, Version 1.1b, Page 222, National Security Agency (NSA)
2. Configuring SSH Service for Remote Access to the Router, JUNOS Software System Basics Guide, Juniper Networks

142 | P a g e
6.11.6.4 Require SSH Rate Limit (Level 1, Scorable)
Description: SSH connections should be limited.
Rationale: SSH is a common management protocol, so is often targeted by attackers trying to gain access to routers or execute Denial of Service (DoS) attacks. To limit the effectiveness of DoS and Brute Force attacks targeting the router using the SSH service, rate limiting should be used to restrict the maximum number of new connections per second. Any sessions attempted once this limit is reached will be rejected by the router. A maximum limit 4 new sessions per second is recommended for most environments.
Remediation: To restrict concurrent SSH connections, issue the following command from the [edit system] hierarchy;
[edit system]
user@host#set services ssh rate-limit <limit>
Audit: From the command prompt, execute the following command:
[edit]
user@host#show system services ssh
The above command should yield the following output (along with any other options set for the SSH service);
ssh {
rate-limit <limit>;
}
Additional configuration items for the SSH service may be present between the curly braces.
Default Value: Up to 150 new sessions per second are accepted by default on most current platforms.
References:

143 | P a g e
1. Router Security Configuration Guide, Version 1.1b, Page 222, National Security Agency (NSA)
2. Configuring SSH Service for Remote Access to the Router, JUNOS Software System Basics Guide, Juniper Networks
6.11.6.5 Forbid Remote Access to Root Account (Level 2, Scorable)
Description: Prevent remote access to the Root user account on the router.
Rationale: During normal operation, remote access to the Root user should not be required in almost all scenarios. Because the Root user account has full access to the router and underlying BSD OS it is an extremely valuable target for attackers and must be protected from remote exploitation. By disabling remote access to the Root user account we ensure that physical access to the routers console port is required in order to gain this level of access. Root access only needs to be disabled for SSH connections, as it is never allowed over a Telnet session.
Remediation: To disable remote access to the Root account issue the following command from the[edit system] hierarchy;
[edit system]
user@host#set services ssh root-login deny
Audit: From the command prompt, execute the following command:
[edit]
user@host#show system services ssh
The above command should yield the following output (along with any other options set for the SSH service);
ssh {
root-login deny;
}

144 | P a g e
Additional configuration items for the SSH service may be present between the curly braces.
Default Value: root-login allow; (which is implied and may or may not be explicitly stated in the configuration).
References:
1. Configuring the Root Login, JUNOS 9.2 System Basics Configuration Guide, Juniper Networks
6.11.7 Web-Management (JWEB)
Juniper routers may have the JWEB management service installed to allow users to monitor and configure the router without an advanced knowledge of the command line. Options for JWEB are set under [edit system services web-management] hierarchy.
6.11.7.1 Forbid HTTP Access where JWEB Service is Installed (Level 1, Scorable)
Description: Prevent remote access to the router using HTTP.
Rationale: JWEB can be accessed through HTTP or HTTPS. HTTP transmits all data (including passwords) in clear text over the network and provides no assurance of the identity of the hosts involved, it should not be used to manage a Juniper router.
Remediation: To disable HTTP access issue the following command from the[edit system] hierarchy;
[edit system]
user@host#delete services web-management http
Audit: From the command prompt, execute the following command:
[edit]
user@host#show system services web-management | match “http;”

145 | P a g e
The above command should yield no output or an error.
Default Value: Depends on platform, JWEB is installed on J-Series by default and optional on all other platforms. For J-Series routers HTTP access is enabled by default.
References:
1. Payment Card Industry Data Security Standard (PCI DSS), Version 1.2, Requirement 2.3 and 8.4
6.11.7.2 Require HTTPS Access where JWEB Service is Installed (Level 1, Scorable)
Description: When JWEB is installed it should be accessed through HTTPS.
Rationale: JWEB can be accessed through HTTP or HTTPS. HTTPS uses SSL to encrypt all data as it transit the network and uses certificates to ensure that identity of the router. Because of this added security over HTTP, HTTPS should be utilized for any router where JWEB is installed.
Remediation: To enable HTTPS access issue the following command from the[edit system] hierarchy;
[edit system]
user@host#set services web-management https local-certificate
<certificate name>
If you have not already done so you will need to acquire and install an X.509 certificate before you can use it in the command above. Please refer to the Secure Web Access Overview, JUNOS 9.5 Security Configuration Guide, Juniper Networks.
Audit: From the command prompt, execute the following command:
[edit]
user@host#show system services web-management
The above command should yield the following output:

146 | P a g e
https {
local-certificate <certificate name>;
}
Additional configuration items for the HTTPS service may be present between the curly braces.
Default Value: Depends on platform, JWEB is installed on J-Series by default and optional on all other platforms. For J-Series routers HTTP access is enabled by default.
References:
1. Payment Card Industry Data Security Standard (PCI DSS), Version 1.2, Requirement 2.3 and 8.4
6.11.7.3 Require Idle Timeout for JWEB Service if Installed (Level 1, Scorable)
Description: When JWEB is installed and used, idle sessions should be timed out after 15 minutes.
Rationale: If JWEB management sessions are left unattended it may be possible for an attacker to use the session to take control of the router. To prevent this, or at least limit the scope of such an attack, and idle timeout should be set to end sessions where no activity has occurred for a defined period of time. The Payment Card Industry Data Security Standard (PCI DSS) recommends that administrative sessions should be timed out if left idle for 15 minutes.
Remediation: To enable Idle Timeouts for Jweb issue the following command from the[edit system] hierarchy;
[edit system]
user@host#set services web-management session idle-timeout <Time in
Minutes>
Audit: From the command prompt, execute the following command:

147 | P a g e
[edit]
user@host#show system services web-management session idle-timeout
An integer value should be returned which represents the configured time in minutes. For PCI DSS compliance this value should be 15 or less.
Default Value: Depends on platform, JWEB is installed on J-Series by default and optional on all other platforms. No idle timeout is set by default.
References:
1. Payment Card Industry Data Security Standard (PCI DSS), Version 1.2, Requirement 8.5.15
6.11.7.4 Require Session Limited for JWEB Service if Installed (Level 1, Scorable)
Description: When JWEB is installed and used no more than 5 concurrent sessions should be permitted.
Rationale: If JWEB is installed and used on the router it is possible that an attacker could attempt to exhaust the routers resources by opening a large number of JWEB sessions or that an authorized user could do so accidently. To prevent this the maximum number of concurrent JWEB sessions should be set at 5 or less.
Remediation: To enable Session limits for Jweb issue the following command from the[edit system] hierarchy;
[edit system]
user@host#set services web-management session session-limit 5
Audit: From the command prompt, execute the following command:
[edit]
user@host#show system services web-management session session-limit

148 | P a g e
An integer value should be returned which represents the configured session limit. The value should be less than or equal to 5.
Default Value: Depends on platform, JWEB is installed on J-Series by default and optional on all other platforms. No session limit is set by default.
References:
1. JWeb User Guide, Version 9.2, Page 13, Juniper Networks
6.11.7.5 Require Interface Restrictions for JWEB Service if Installed (Level 2, Scorable)
Description: When JWEB is installed the interfaces on which it may be contacted should be limited.
Rationale: By default, when installed, the JWEB service will listen for incoming connections on all interfaces which have an IP Address configured, exposing JWEB to users on all networks through which the router is reachable. In most cases the router should only be manageable over some of its interfaces; in particular a router providing connectivity to un-trusted networks such as the Internet should only be manageable from trusted sources.
Remediation: To apply JWEB Interface restrictions issue the following command from the[edit system] hierarchy;
[edit system services web-management https]
user@host#set interface <interface or interface list>
Audit: From the command prompt, execute the following command:
[edit]
user@host#show system services web-management https interfaces
The configured Interface or Interfaces should be returned.
Default Value:

149 | P a g e
Depends on platform, JWEB is installed on J-Series by default and optional on all other platforms. By default JWEB listens on all interfaces when installed, dependant on platform and version.
References:
1. JWeb User Guide, Version 9.2, Page 11, Juniper Networks
6.11.8 XNM-* (JUNOScript)
JUNOScript is a XML based Network Management (which is why it is configured under the rather confusing XNM moniker) interface for JUNOS routers allowing custom applications to be created to configure, manage and monitor Juniper routers and forming the basis of some of Junipers’ management products such as JUNOScope. Options for JUNOScope are configured under the [edit system services xnm-plain-text] and [edit system services xnm-ssl] hierarchies.
6.11.8.1 Forbid XNM-Clear-Text Service (Level 1, Scorable)
Description: The routers XNM-Clear-Text service MUST be disabled.
Rationale: JUNOScript can access the router using a variety of transport modes including Clear-Text, Telnet, SSH and SSL. When Plain-Text is used the JUNOScript client connects to the router on port 3221/TCP. As the name suggests Authentication information, commands and router configuration are all transported across the network in Clear (unencrypted) Text form, making it trivial for an attacker to steal login credentials, learn configuration or hijack the session to execute their own commands.
Remediation: The XNM-Clear-Text service is not enabled by default, however if it has been configured on your router it can by disabled by issuing the following command from the[edit system] hierarchy;
[edit system]
user@host#delete services xnm-clear-text
Audit: From the command prompt, execute the following command:

150 | P a g e
[edit]
user@host#show system services | match xnm-clear-text
The above command should yield no output or an error.
Default Value: The XNM-Clear-Text Service is disabled by default and cannot be enabled on JUNOS FIPS releases.
References:
1. Payment Card Industry Data Security Standard (PCI DSS), Version 1.2, Requirement 2.3 and 8.4
2. Supported Access Protocols, JUNOS 9.2 JUNOSecipt API Guide, Juniper Networks
6.11.8.2 Require Connection Limit when XNM-SSL is used (Level 2, Scorable)
Description: If the XNM-SSL service is configured, connection limits must be explicitly set.
Rationale: JUNOScript can be configured to use SSL transport to prevent the exposure of sensitive data and authentication details on the network. If configured the XNM-SSL service will provide services on port 3220/TCP. An attacker may attempt to open a large number of sessions to the XNM-SSL service to exhaust the routers resources or an authorized user may do so accidently, especially given that the service is designed to allow a scripting interface to JUNOS. To limit the impact of any such incident, the number of concurrent connections to the XNM-SSL service should explicitly limited. A relatively low value of 10 is recommended, but may not be appropriate for all environments so it is left to the administrator’s discretion.
Remediation: The XNM-SSL service can be enabled and configured by issuing the following command from the[edit system] hierarchy;
[edit system]
user@host#set services xnm-ssl connection-limit <limit>
Audit: From the command prompt, execute the following command:

151 | P a g e
[edit]
user@host#show system services xnm-ssl connection-limit
The above command should return a positive integer.
Default Value: The XNM-SSL Service is disabled by default. When it is first configured the default Connection Limit is 75.
References:
1. Configuring SSL Service for JUNOScript Client Applications, JUNOS 9.3 System Basics Configuration Guide, Juniper Networks
6.11.8.3 Require Rate Limit when XNM-SSL is used (Level 2, Scorable)
Description: If the XNM-SSL service is configured, the Rate Limit must be explicitly set.
Rationale: JUNOScript can be configured to use SSL transport to prevent the exposure of sensitive data and authentication details on the network. If configured the XNM-SSL service will provide services on port 3220/TCP. An attacker may attempt to open a large number of sessions to the XNM-SSL service to exhaust the routers resources or an authorized user may do so accidently, especially given that the service is designed to allow a scripting interface to JUNOS. To limit the impact of any such incident, the rate at which new connections to the XNM-SSL service should explicitly limited. Rate Limits are set in terms of the number of connection attempts per minute. Established connections do not count towards this count. A relatively low value of 60 (the equivalent of one attempt per second, sustained over a minute) is recommended, but may not be appropriate for all environments so it is left to the administrator’s discretion.
Remediation: The XNM-SSL service can be enabled and configured by issuing the following command from the[edit system] hierarchy;
[edit system]
user@host#set services xnm-ssl rate-limit <limit>

152 | P a g e
Audit: From the command prompt, execute the following command:
[edit]
user@host#show system services xnm-ssl rate-limit
The above command should return a positive integer.
Default Value: The XNM-SSL Service is disabled by default. When it is first configured the default Rate Limit is 150 connection attempts per second.
References:
1. Configuring SSL Service for JUNOScript Client Applications, JUNOS 9.3 System Basics Configuration Guide, Juniper Networks
6.11.8.4 Disable XNM-SSL if not used (Level 1, Not Scorable)
Description: If it is not used, the XNM-SSL service should be explicitly disabled.
Rationale: If JUNOScript or other XNM based API access is not required in your environment, the XNM-SSL service should be explicitly disabled to prevent abuse.
Remediation: The XNM-SSL service can disabled by issuing the following command from the[edit system] hierarchy;
[edit system]
user@host#delete services xnm-ssl
Audit: From the command prompt, execute the following command:
[edit]
user@host#show system services | match xnm-ssl
The above command should return no output or an error. Because it is not possible to determine if the use of XNM-SSL is intentional, this recommendation is Not Scorable.

153 | P a g e
Default Value: The XNM-SSL Service is disabled by default.
References:
1. Configuring SSL Service for JUNOScript Client Applications, JUNOS 9.3 System Basics Configuration Guide, Juniper Networks
6.12 Ports Juniper routers have two special ports that are used to connect directly to the routing system. These ports are configured under the [edit system services] hierarchy.
6.12.1 Disable Auxiliary Port (Level 2, Scorable)
Description: The routers Auxiliary Port should be disabled.
Rationale: The Auxiliary Port on a Juniper router is used to connect Modems and other devices to allow remote administration of the router when other connectivity is not possible. Connections to the Auxiliary Port are treated in a very similar fashion to local Console Port connections. Although this is a useful function, in most enterprise settings the Auxiliary Port is not utilized at all and so should be shutdown to prevent potential abuse. Only apply this configuration if you are certain that you do not require the Auxiliary Port for your routers.
Remediation: To disable the Auxiliary Port issue the following command from the[edit system] hierarchy;
[edit system]
user@host#set ports auxiliary disable
Audit: From the command prompt, execute the following command:
[edit]
user@host#show system ports
The above command should yield the following output;

154 | P a g e
auxiliary disable;
Additional configuration items for ports may be present between the outer curly braces.
Default Value: The Auxiliary port is enabled by default on most platforms.
References:
1. Router Security Configuration Guide, Version 1.1b, Page 55, National Security Agency (NSA)
6.12.2 End Console Sessions on Disconnect (Level 1, Scorable)
Description: Console sessions should be logged out as soon as the console cable is unplugged from the routers console port.
Rationale: Administrators often use the routers console port to configure the router when they have physical access to the device. When the administrator unplugs from the console port their session may be left logged in, allowing the next person who connects to the console port to access the router with the privileges and audit trail of the original administrator. To prevent this, the router should be configured to log out console port sessions as soon as the cable is unplugged.
Remediation: To log console sessions out when the console cable is unplugged, issue the following command from the[edit system] hierarchy;
[edit system]
user@host#set ports console log-out-on-disconnect
Audit: From the command prompt, execute the following command:
[edit]
user@host#show system ports

155 | P a g e
The above command should yield the following output;
console log-out-on-disconnect;
Additional configuration items for ports may be present between the outer curly braces.
Default Value: By default, console sessions continue after the console cable is unplugged.
References:
1. Router Security Configuration Guide, Version 1.1b, Page 58, National Security Agency (NSA)
6.12.3 Disable Console Port (Level 2, Scorable)
Description: The routers console port should be disabled.
Rationale: Administrators often use the routers console port to configure the router when they have physical access to the device. In high security environments or deployments where the physical security of the router is minimal, such as CPE (Customer Premises Equipment) or branch office installations, disabling the console port will increase the difficulty of accessing the router for an attacker with physical access. Connecting to the console will not allow access to the CLI without restarting the router, an event which will show up in your monitoring and audit logs. Only apply this configuration if you are certain that you do not require the Console Port for your routers.
Remediation: To disable the routers console port, issue the following command from the[edit system] hierarchy;
[edit system]
user@host#set ports console disabled
Audit: From the command prompt, execute the following command:

156 | P a g e
[edit]
user@host#show system ports
The above command should yield the following output;
console {
disabled;
}
Additional configuration items for ports may be present between the outer curly braces.
Default Value: By default, console sessions continue after the console cable is unplugged.
References:
1. Router Security Configuration Guide, Version 1.1b, Page 58, National Security Agency (NSA)
6.12.4 Require Insecure Option for Console Port (Level 2, Scorable)
Description: The routers console port should be set as Insecure.
Rationale: Administrators often use the routers console port to configure the router when they have physical access to the device. In high security environments or deployments where the physical security of the router is minimal, such as CPE (Customer Premises Equipment) or branch office installations, it is important to prevent both customers and intruders from resetting the routers password. Normally if an attacker is able to connect a console cable and then restart the router, it is possible to reset the root password in order to gain full control. To prevent this, the routers Console Port should be set as Insecure. This setting, which persists after restart, can be used to prevent password recovery using the console port, providing greatly increased security. Note – Setting the Console Port as Insecure will make Root password recovery impossible. If you lose your Root password you may not be able to regain access to your router.
Remediation: To set the routers console port as Insecure, issue the following command from the[edit system] hierarchy;

157 | P a g e
[edit system]
user@host#set ports console insecure
Audit: From the command prompt, execute the following command:
[edit]
user@host#show system ports
The above command should yield the following output;
console {
insecure;
}
Additional configuration items for ports may be present between the outer curly braces.
Default Value: By default Root password recovery is possible from the console.
References:
1. Router Security Configuration Guide, Version 1.1b, Page 58, National Security Agency (NSA)
2. Recovering the Root Password, JUNOS Software System Basics Configuration Guide, Juniper Networks
6.13 PIC-Console-Authentication. Most Juniper routers contain Physical Interface Cards (PICs) which provide the physical ports and associated hardware. Most PICs contain a console port, which an attacker may attempt to use to gain access to the router. Security for the PIC Console Ports is configured under the [edit system pic-console-authentication] hierarchy.

158 | P a g e
6.13.1 Require Encrypted Password for PIC Console Ports (Level 1, Scorable)
Description: The router should have an encrypted password set for PIC Console Ports
Rationale: The routers Physical Interface Cards (PICs) may contain additional Console ports which can be used to access the router locally. These are extremely useful when trying to recover downed routers, but may be misused by attackers as not all users are aware of the ports existence and, so, may not have secured them adequately. JUNOS allows an administrator to set an encrypted password for these ports in much the same way as other console ports on the router.
Remediation: Configure a password for the PIC Console Ports using one of the following commands under the [edit system] hierarchy; To enter a new password in plain text:
[edit system]
user@host#set pic-console-authentication plain-text-password
You will be prompted to enter the new password, which JUNOS will then hash with MD5 before placing the command in the candidate configuration. To enter an existing password hash which you have taken from an existing configuration file, type the following:
[edit system]
user@host#set pic-console-authentication encrypted-password “<MD5
Hash>”
Audit: From the command prompt, execute the following command:
[edit]
user@host#show system pic-console-authentication
The above command should yield the following output;
encrypted-password <MD5 Hash>;

159 | P a g e
Default Value: By default JUNOS does not require any authentication to access the PIC Console Ports.
References
1. Configuring Console Access to PICs, JUNOS 9.3 System Basics Configuration Guide, Juniper Networks
2. Router Security Configuration Guide, Version 1.1b, Page 62, National Security Agency (NSA)
3. Payment Card Industry Data Security Standard (PCI DSS), Version 1.2, Requirement 8.5.10 and 8.5.11
6.13.2 Require Complex PIC Console Port Password (Level 1, Not Scorable)
Description: A complex password must be used for the PIC Console Port/s.
Rationale: Due to the sensitivity of the routers PIC Console Port/s a complex password should be employed to help prevent attackers employing ‘brute force’ or ‘dictionary’ attacks to gain access through these ports. Passwords are stored, automatically by JUNOS, as a MD5 hash in the configuration under the [edit system pic-console-authentication] hierarchy. A complex password should be employed which meets or exceeds the following requirements; - Does not contain Dictionary words, names, dates, phone numbers or addresses. - Is at least 8 characters in length. - Contains at least one each of upper & lower case letters, numbers and special characters. - Avoids more then 4 digits or same case letters in a row.
Remediation: Configure a password for the PIC Console Ports using one of the following commands under the [edit system] hierarchy; To enter a new password in plain text:
[edit system]
user@host#set pic-console-authentication plain-text-password

160 | P a g e
You will be prompted to enter the new password, which JUNOS will then hash with MD5 before placing the command in the candidate configuration. To enter an existing password hash which you have taken from an existing configuration file, type the following:
[edit system]
user@host#set pic-console-authentication encrypted-password “<MD5
Hash>”
Audit: Because PIC Console Port passwords are automatically stored by JUNOS as a MD5 hash, which will always be 128bits long, it is not possible to confirm from the command line the complexity and length of the password used therefore this is not a scorable item.
Default Value: None.
References:
1. Configuring the Password on the Diagnostics Port, JUNOS 9.3 System Basics Configuration Guide, Juniper Networks
2. Router Security Configuration Guide, Version 1.1b, Page 62, National Security Agency (NSA)
3. Payment Card Industry Data Security Standard (PCI DSS), Version 1.2, Requirement 8.5.10 and 8.5.11
6.14 SYSLOG SYSLOG is a standard protocol for forwarding and handling log information in an IP Network. Options for system logging and the SYSLOG service are configured under the [edit system syslog] hierarchy.
6.14.1 Require external SYSLOG server (Level 1, Scorable)
Description: Logging data must be sent to at least one external SYSLOG server.
Rationale: Log information from a router can be vital to detecting an attack against the router or to analysis of faults or attacks after the fact. Because of this, one of the first tasks an attacker will attempt to accomplish after gaining access to a router is to alter or delete logs to cover their tracks.

161 | P a g e
To prevent an attacker or a fault denying you access to log data, it is vital to send it to at least one external server using the SYSLOG protocol.
Remediation: SYSLOG data is recorded locally by default, you can configure external SYSLOG servers by issuing the following command from the[edit system] hierarchy;
[edit system]
user@host#set syslog host <SYSLOG_SERVER> <FACILITY> <SEVERITY>
Details of Facility and Severity are given in the next two sections. In most cases the explicit-priority options should be set so that Priority data (the facility and severity of a message) is sent to the server, this is the default on most routers and may be required for compatibility with many SYSLOG servers.
Audit: From the command prompt, execute the following command:
[edit]
user@host#show system syslog | match “host” | count
The above command should return an Integer value equal to or greater than 1.
Default Value: SYSLOG information is not sent to remote hosts by default, but is kept locally.
References: 1. Router Security Configuration Guide, Version 1.1b, Page 130, National Security
Agency (NSA) 2. Payment Card Industry Data Security Standard (PCI DSS), Version 1.2, Requirement
10
6.14.2 Require external SYSLOG with all Facilities (Level 1, Scorable)
Description: Logging data must be sent to at least one external SYSLOG server from all SYSLOG Facilities.
Rationale: SYSLOG entries are generated by a range of sources on a JUNOS router, such as Daemon for events from system processes or PFE for events encountered by the Packet Forwarding Engine. These sources are referred to as Facilities and, in order to ensure that you are
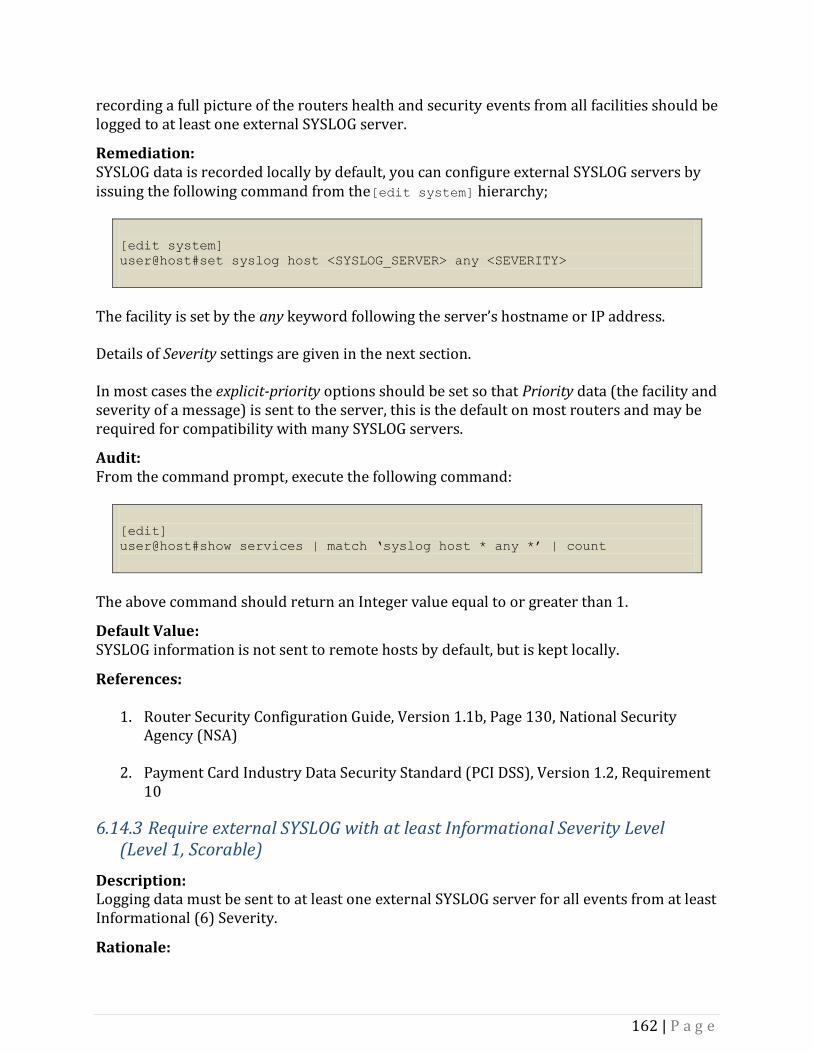
162 | P a g e
recording a full picture of the routers health and security events from all facilities should be logged to at least one external SYSLOG server.
Remediation: SYSLOG data is recorded locally by default, you can configure external SYSLOG servers by issuing the following command from the[edit system] hierarchy;
[edit system]
user@host#set syslog host <SYSLOG_SERVER> any <SEVERITY>
The facility is set by the any keyword following the server’s hostname or IP address. Details of Severity settings are given in the next section. In most cases the explicit-priority options should be set so that Priority data (the facility and severity of a message) is sent to the server, this is the default on most routers and may be required for compatibility with many SYSLOG servers.
Audit: From the command prompt, execute the following command:
[edit]
user@host#show services | match „syslog host * any *‟ | count
The above command should return an Integer value equal to or greater than 1.
Default Value: SYSLOG information is not sent to remote hosts by default, but is kept locally.
References:
1. Router Security Configuration Guide, Version 1.1b, Page 130, National Security Agency (NSA)
2. Payment Card Industry Data Security Standard (PCI DSS), Version 1.2, Requirement
10
6.14.3 Require external SYSLOG with at least Informational Severity Level (Level 1, Scorable)
Description: Logging data must be sent to at least one external SYSLOG server for all events from at least Informational (6) Severity.
Rationale:

163 | P a g e
SYSLOG entries are logged with an associated Severity Level indicating how serious the event is. There are eight possible levels, which are as follows:
0 – Emergency 1 – Alert 2 – Critical 3 – Error 4 – Warning 5 – Notice 6 – Informational 7 – Debug
To ensure that critical information is not missed Syslog Severity should be set to Informational (6) or Debug (7).
Remediation: SYSLOG data is recorded locally by default, you can configure external SYSLOG servers by issuing the following command from the[edit system] hierarchy;
[edit system]
user@host#set syslog host <SYSLOG_SERVER> <FACILITY> 6
The facility is set by the any keyword following the server’s hostname or IP address (see previous requirements). In most cases the explicit-priority options should be set so that Priority data (the facility and severity of a message) is sent to the server; this is the default on most routers and may be required for compatibility with many SYSLOG servers.
Audit: From the command prompt, execute the following command:
[edit]
user@host#show system | match „syslog host * 6 *‟ | count
The above command should return an Integer value equal to or greater than 1.
Default Value: SYSLOG information is not sent to remote hosts by default, but is kept locally.
References: 1. Router Security Configuration Guide, Version 1.1b, Page 130, National Security
Agency (NSA)
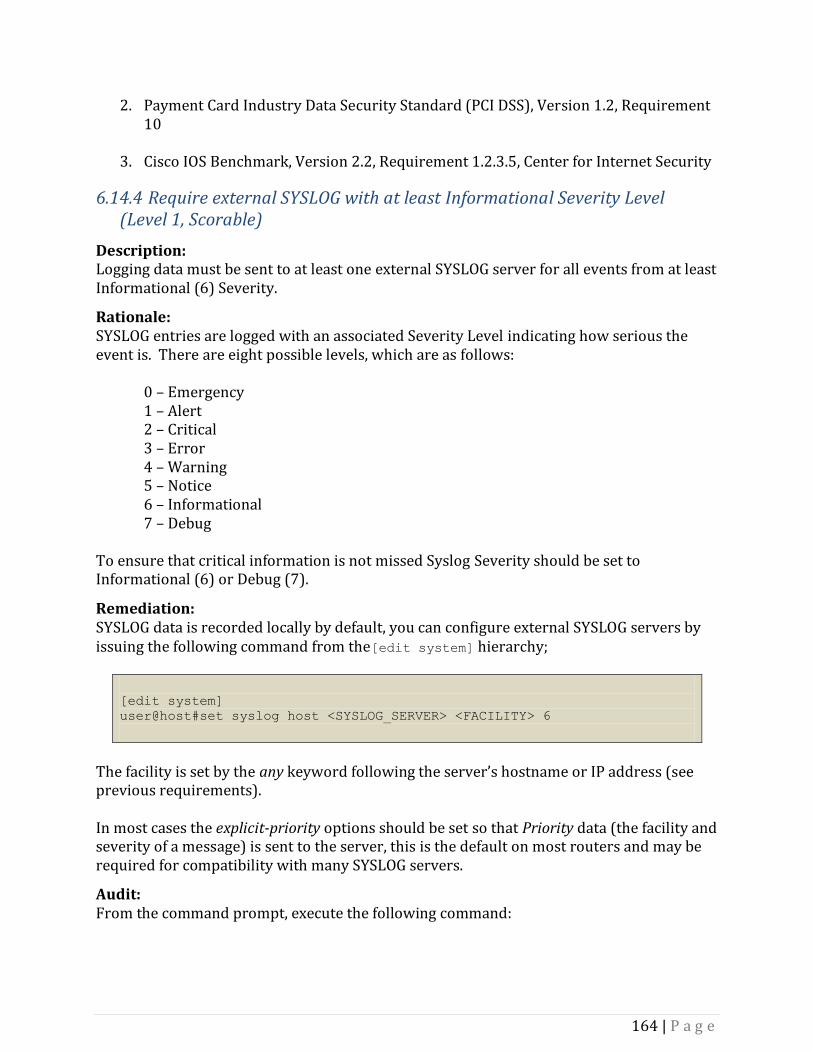
164 | P a g e
2. Payment Card Industry Data Security Standard (PCI DSS), Version 1.2, Requirement 10
3. Cisco IOS Benchmark, Version 2.2, Requirement 1.2.3.5, Center for Internet Security
6.14.4 Require external SYSLOG with at least Informational Severity Level (Level 1, Scorable)
Description: Logging data must be sent to at least one external SYSLOG server for all events from at least Informational (6) Severity.
Rationale: SYSLOG entries are logged with an associated Severity Level indicating how serious the event is. There are eight possible levels, which are as follows:
0 – Emergency 1 – Alert 2 – Critical 3 – Error 4 – Warning 5 – Notice 6 – Informational 7 – Debug
To ensure that critical information is not missed Syslog Severity should be set to Informational (6) or Debug (7).
Remediation: SYSLOG data is recorded locally by default, you can configure external SYSLOG servers by issuing the following command from the[edit system] hierarchy;
[edit system]
user@host#set syslog host <SYSLOG_SERVER> <FACILITY> 6
The facility is set by the any keyword following the server’s hostname or IP address (see previous requirements). In most cases the explicit-priority options should be set so that Priority data (the facility and severity of a message) is sent to the server, this is the default on most routers and may be required for compatibility with many SYSLOG servers.
Audit: From the command prompt, execute the following command:

165 | P a g e
[edit]
user@host#show system | match „syslog host * 6|7 *‟ | count
The above command should return an Integer value equal to or greater than 1.
Default Value: SYSLOG information is not sent to remote hosts by default, but is kept locally.
References: 1. Router Security Configuration Guide, Version 1.1b, Page 130, National Security
Agency (NSA) 2. Payment Card Industry Data Security Standard (PCI DSS), Version 1.2, Requirement
10
3. Cisco IOS Benchmark, Version 2.2, Requirement 1.2.3.5, Center for Internet Security
6.15 SYSLOG FILE In addition to logging to external systems, some event data should be maintained locally to the router. This allows a higher level of logging to be maintained then might be possible using remote servers and provides a local copy of recent logs in the event that the remote logging system becomes available. JUNOS allows specific event types to be saved to different files, aiding rapid investigation of incidents without over burdening the router; as JUNOS also manages the files to prevent them growing too large, archiving up to 10 (by default) compressed versions of each file when the size limit is reached.
6.15.1 Require local SYSLOG for All Firewall Events (Level 1, Scorable)
Description: Logging data for Firewall Events should be saved to a locally.
Rationale: The router’s built in Firewall can be the first line of defense, so the logging it produces can be vital in responding to a security incident as well as a useful tool for diagnosing faults relating to the Firewall. A local SYSLOG file should be configured to record all firewall related events.
Remediation:

166 | P a g e
To configure a local SYSLOG file for Firewall events, issue the following command from the [edit system syslog] hierarchy;
[edit system syslog]
user@host#set file <filename> firewall any
Audit: From the command prompt, execute the following command:
[edit system syslog]
user@host#show | find “file” | match “firewall any;” | count
The above command should return an Integer value equal to or greater than 1.
Default Value: SYSLOG for Firewall events is not sent to a separate file by default.
References: 1. Router Security Configuration Guide, Version 1.1b, Page 130, National Security
Agency (NSA)
6.15.2 Require local SYSLOG for All Authentication and Authorization Events (Level 1, Scorable)
Description: Logging data for Auth Events should be saved to a locally.
Rationale: Authentication and Authorization events are generated whenever a user logs in to the router or performs an action which requires Authorization, such as making a change. This information can provide a vital snapshot of activity on the router when responding to security incidents and faults. A local SYSLOG file should be configured to record all Authentication and Authorization related events, referred to just as Authorization when setting the SYSLOG facility.
Remediation: To configure a local SYSLOG file for Auth events, issue the following command from the [edit system syslog] hierarchy;
[edit system syslog]

167 | P a g e
user@host#set file <filename> authorization any
Audit: From the command prompt, execute the following command:
[edit system syslog]
user@host#show | find “file” | match “authorization any;” | count
The above command should return an Integer value equal to or greater than 1.
Default Value: SYSLOG for Firewall events is not sent to a separate file by default.
References: 1. Router Security Configuration Guide, Version 1.1b, Page 130, National Security
Agency (NSA)
6.15.3 Require local SYSLOG for All Interactive Commands (Level 1, Scorable)
Description: Logging data for Interactive Commands should be saved to a locally.
Rationale: When responding to a security incident or fault, a record of all of the commands issued on the router, either through the CLI or through management APIs such as JUNOScript or NETCONF, can provide vital clues. A local SYSLOG file should be configured to record all Interactive Commands issued on the router along with who issued them and when.
Remediation: To configure a local SYSLOG file for Interactive Commands, issue the following command from the [edit system syslog] hierarchy;
[edit system syslog]
user@host#set file <filename> interactive-commands any
Audit: From the command prompt, execute the following command:
[edit system syslog]
user@host#show find “file” | match “interactive-commands any;” | count

168 | P a g e
The above command should return an Integer value equal to or greater than 1.
Default Value: SYSLOG messages for interactive commands are not sent to a separate file by default.
References: 1. Router Security Configuration Guide, Version 1.1b, Page 130, National Security
Agency (NSA)
6.16 Miscellaneous System Settings This section contains leaf node settings or miscellaneous configuration items that are found directly under the [edit system] hierarchy.
6.16.1 Forbid Autoinstallation (Level 1, Scorable)
Description: Autoinstallation MUST be disabled.
Rationale: The Auto Installation feature on J-Series routers allows the router to download it’s configuration from an FTP, TFTP or HTTP server on boot, having obtained IP Addressing details via DHCP or BOOTP. Using Auto Installation may allow an attacker to change the routers configuration at boot (or after forcing a reboot through a DoS attack) by impersonating the DHCP, FTP, TFTP or HTTP servers or session hijacking. If successful the attacker would have gained complete control over the router. Because all of the protocols used by Auto Installation transfer data in plain text, it is trivial for an attacker to intercept the traffic and obtain a complete copy of the routers configuration, possibly containing authentication details to both the router and the server.
Remediation: To disable Auto Installation issue the following command from the[edit system] hierarchy;
[edit system]
user@host#delete autoinstallation
Audit: From the command prompt, execute the following command:
[edit]

169 | P a g e
user@host#show system | match autoinstallation
The above command should yield no output or an error.
Default Value: Only available on J-Series routers, the Autoinstallation service is disabled by default.
References:
1. Payment Card Industry Data Security Standard (PCI DSS), Version 1.2, Requirement 1.2.2, 2.3 and 8.4
2. Autoinstallation, JUNOS 9.5 System Basics Configuration Guide, Juniper Networks
3. Cisco IOS Benchmark Version 2.2, Requirement 1.2.2.6, Center for Internet Security
6.16.2 Require Encrypted Configuration Files (Level 2, Scorable)
Description: Configuration files should be encrypted.
Rationale: On many JUNOS router platforms the configuration files are stored on a removal flash file system. A malicious user with even momentary physical access to the router could readily remove the routers flash card, gaining access to the routers configuration which is likely to contain extremely sensitive details. Exposure to this type of attack increased in branch office or customer premises installations or where routers are transported post configuration. To prevent an attacker accessing the configuration files from flash, JUNOS routers offer a facility to encrypt the /config and /var/db/config directories using AES or DES algorithms. Note that export restrictions mean that AES is not available in all regions.
Remediation: To enable configuration file encryption, you must first set an encryption key by issuing the following commands from operational mode;
user@host>request system set-encryption-key
You will be prompted to enter and then verify the key. The preferred encryption algorithm may be specified or left as default. If AES is supported in your release the router will default to using AES, otherwise it will default to DES.
170 | P a g e
Once a key has been set the following command should be issued from the [edit system] hierarchy;
[edit system]
user@host#set encrypt-configuration-files
The encryption will not be carried out until the configuration is committed.
Audit: From the command prompt, execute the following command:
[edit]
user@host#show system | match encrypt-configuration-files | count
The above command return a 1.
Default Value: Configuration file encryption is disabled by default.
References:
1. Encrypting and Decrypting Configuration Files, JUNOS 9.5 Security Admin Guide, Juniper Networks
6.16.3 Ignore Multicast Echo Requests (Level 2, Scorable)
Description: The Routing Engine should ignore Echo Requests sent to Multicast addresses.
Rationale: Attacks may use multicast Echo Requests (pings) during recognizance of a network to obtain a list of routers and what services they may be offering. An example of this would be sending a ping to 224.0.0.18, hoping to discover routers in the network running VRRP. In most environments it is not necessary for the Routing Engine to respond to multicast Echo Requests to function correctly, however in some cases this will be required, only disable this functionality if you are certain you do not need it.
Remediation: To ignore multicast Echo Requests, issue the following command from the[edit system] hierarchy;

171 | P a g e
[edit system]
user@host#set no-multicast-echo
Audit: From the command prompt, execute the following command:
[edit]
user@host#show system | match “no-multicast-echo” | count
The above command should return an integer value of 1 if this item is configured.
Default Value: By default the Routing Engine responds to multicast Echo Requests for multicast groups it is a member of.
References:
1. Disabling the Response to Multicast Pings, JUNOS 9.3 System Basics Configuration Guide, Juniper Networks
6.16.4 Disable Ping Record Route Requests (Level 1, Scorable)
Description: The Routing Engine should ignore Echo Requests with the Record Route option set.
Rationale: When the Record Route option is set on an Echo Request (ping), the hosts processing the packet should record their interface addresses on the response packet as it traverses the network (upto 9 hops) allowing the host that made the request to see the path that the response takes through the network. Attackers may use Echo Requests with the Record Route option set during recognizance of a network to obtain details of the networks topology.
Remediation: To ignore Echo Requests with the Record Route option set, issue the following command from the[edit system] hierarchy;
[edit system]
user@host#set no-ping-record-route
Audit: From the command prompt, execute the following command:

172 | P a g e
[edit]
user@host#show system | match “no-ping-record-route” | count
The above command should return an integer value of 1 if this item is configured.
Default Value: By default the Routing Engine responds to Echo Requests with the Record Route option set, adding the receiving interfaces IP address to the header of the packet.
References:
1. no-ping-record-route, JUNOS 9.3 System Basics Configuration Guide, Juniper Networks
6.16.5 Disable Ping Timestamp Requests (Level 1, Scorable)
Description: The Routing Engine should ignore Echo Timestamp Requests.
Rationale: When the Timestamp Request option is set in a Echo Request (ping ) packet, a host generally responds with its current system time when the ping is received. Attackers may use Echo Requests with the Timestamp option set during recognizance of a network to obtain details of your routers configuration.
Remediation: To ignore Echo Requests with the Timestamp Request option set, issue the following command from the[edit system] hierarchy;
[edit system]
user@host#set no-ping-time-stamp
Audit: From the command prompt, execute the following command:
[edit]
user@host#show system | match “no-ping-time-stamp” | count
The above command should return an integer value of 1 if this item is configured.
Default Value:

173 | P a g e
By default the Routing Engine responds to Echo Requests with the Timestamp Request option set, including the current system time of the router.
References:
1. no-ping-time-stamp, JUNOS 9.3 System Basics Configuration Guide, Juniper Networks
6.16.6 Disable ICMP Redirect Messages Globally (Level 2, Scorable)
Description: The Routing Engine should not send ICMP Redirect Messages.
Rationale: ICMP Redirect Messages provide a method for a router to communicate routing information with a host and is intended for use when a router receives packets to forward to a destination to which the host should have a direct route. An attacker may abuse this feature to obtain topology information about a target network and potentially identify weaknesses for later exploitation. To prevent this abuse, ICMP Redirect message generation should be disabled, ideally globally. NOTE – Ensure that your hosts are not reliant on ICMP Redirect messages for routing before disabling this feature.
Remediation: To disable ICMP Redirect message generation globally, issue the following command from the[edit system] hierarchy;
[edit system]
user@host#set no-redirects
Audit: From the command prompt, execute the following command:
[edit]
user@host#show system | match “no-redirects” | count
The above command should return an integer value of 1 if this item is configured.
Default Value: By default the ICMP Redirect messages are generated.
References:

174 | P a g e
1. Configuring the JUNOS Software to Disable Protocol Redirect Messages on the Router , JUNOS 9.5 System Basics Configuration Guide, Juniper Networks
6.16.7 Require UTC Timezone (Level 2, Scorable)
Description: The router should use the UTC timezone.
Rationale: When a network comprises of hosts across multiple countries, the use of local time zones can make analysis of log events confusing and error prone. To prevent confusion Coordinated Universal Time (UTC) should be used for all routers to allow consistent logging timestamps. UTC can be considered equivalent to GMT for the purposes of setting time zones (it is actually GMT with added leap seconds defined by atomic clocks at the US Naval Observatory).
Remediation: To configure the time zone, issue the following command from the[edit system] hierarchy;
[edit system]
user@host#set time-zone GMT
Audit: From the command prompt, execute the following command:
[edit]
user@host#show system time-zone
The above command should return “GMT”.
Default Value: By default the time zone is not set.
References:
1. Router Security Configuration Guide, Version 1.1b, Page 174, National Security Agency (NSA)
6.16.8 Forbid Router Model in Hostname (Level 1, Scorable)
Description: The router model MUST not appear in the hostname.

175 | P a g e
Rationale: The first step in any attack is reconnaissance. An attacker will attempt to learn about the target network, its hosts and its routers. A key piece of information for an attacker is what type of device he/she is attacking. By using the routers Model number, type, manufacturer or software version as part of its hostname, we give an attacker this valuable piece of information with no effort or risk of exposure. This is particularly true where the hostname is used in DNS.
Remediation: To configure the hostname, issue the following command from the[edit system] hierarchy;
[edit system]
user@host#set host-name <hostname>
Audit: From the command prompt, execute the following command:
[edit]
user@host#show system host-name
The above command should return the hostname, which should not include the words “Juniper”, “JUNOS”, “JUN” or the model number of a Juniper Router (eg “J2320”).
Default Value: May vary with platform.
References: None.

176 | P a g e
Appendix A: References Resource Location Router Security Configuration Guide, National Security Agency (NSA)
http://www.nsa.gov/snac/routers/cisco_scg-1.1b.pdf
Payment Card Industry Data Security Standard (PCI DSS) Version 1.2
https://www.pcisecuritystandards.org/security_standards/pci_dss.shtml
JUNOS 9.3 System Basics Configuration Guide, Juniper Networks
http://www.juniper.net/techpubs/software/junos/junos93/swconfig-
system-basics/swconfig-system-basics-TOC.html
Complete JUNOS Configuration Statement Hierarchy, Juniper Networks
http://www.juniper.net/techpubs/software/junos/junos93/swref-
hierarchy/complete-junos-configuration-statement-hierarchy.html
US CERT Vulnerability Notes Database
http://www.kb.cert.org/vuls/
NTP Security, GIAC Practical Repository, GSEC Ver 1.4 Option 1, Matt Willman
http://www.giac.org/certified_professionals/practicals/gsec/2115.php
Wikipedia http://www.wikipedia.com/
JUNOS 9.2 JUNOScript API Guide, Juniper Networks
http://www.juniper.net/techpubs/software/junos/junos92/junoscript-
guide/junoscript-guide-TOC.html
JUNOS 9.5 Security Admin Guide http://www.juniper.net/techpubs/software/junos-security/junos-
security95/junos-security-admin-guide/junos-security-admin-guide-
TOC.html

177 | P a g e
Appendix B: Change History
Date Version Changes for this version
July 23rd, 2010 1.0.0 Public Release November 11
th, 2010 1.0.1 Fixed typo on page 16