junior - outdoor art explorer
TRANSCRIPT
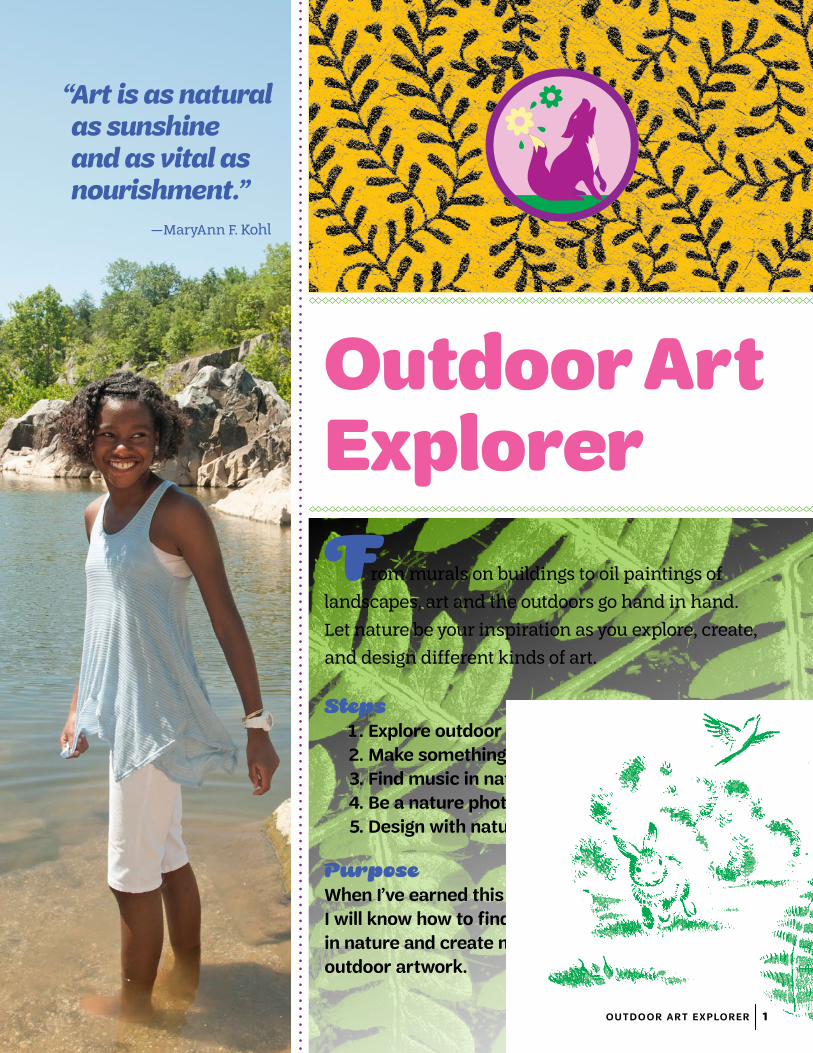
Outdoor Art Explorer
“Art is as natural as sunshine and as vital as nourishment.”
—MaryAnn F. Kohl
From murals on buildings to oil paintings of
landscapes, art and the outdoors go hand in hand.
Let nature be your inspiration as you explore, create,
and design different kinds of art.
Steps 1 . Explore outdoor art 2. Make something! 3. Find music in nature 4. Be a nature photographer 5. Design with nature
PurposeWhen I’ve earned this badge, I will know how to find the art in nature and create my own outdoor artwork.
OUTD O OR ART EXPLORER 1
Tips Before TakeoffStaying safe will make earning this badge more fun, so before
you step outside, check out this list:
▶ Don’t go alone. Make sure an adult you know joins you on
your outdoor adventure.
▶ Dress the part. Sunny out? Don’t forget the sunscreen!
Cold out? Zip up! Wear protective clothing—like a jacket, a
hat, and gloves. Hiking a trail? Wear hiking shoes.
▶ Pack for safety. Bring a backpack with a reusable bottle
of water. Optional: a first aid kit with bandages and
antibiotic cream, a whistle, a flashlight with batteries, and
a camera.
▶ Stay connected. Bring a cell phone in case you need to
contact someone for help. If you don’t have a phone, make
sure an adult with you does—and that the phone has good
reception.
▶ Be aware of your surroundings. Pay attention to where
you walk. Keep an eye out for signs, especially if you’re
hiking a trail that goes in different directions.
2
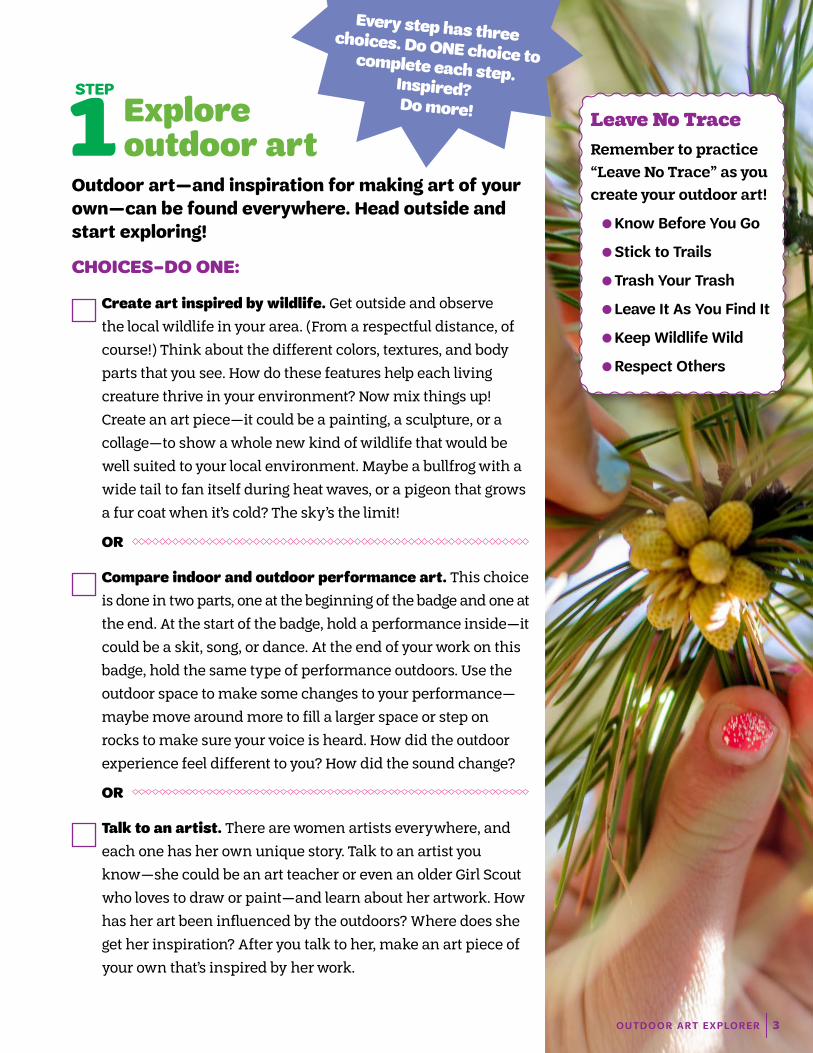
Explore outdoor art
Outdoor art—and inspiration for making art of your own—can be found everywhere. Head outside and start exploring!
CHOICES–DO ONE:
Create art inspired by wildlife. Get outside and observe
the local wildlife in your area. (From a respectful distance, of
course!) Think about the different colors, textures, and body
parts that you see. How do these features help each living
creature thrive in your environment? Now mix things up!
Create an art piece—it could be a painting, a sculpture, or a
collage—to show a whole new kind of wildlife that would be
well suited to your local environment. Maybe a bullfrog with a
wide tail to fan itself during heat waves, or a pigeon that grows
a fur coat when it’s cold? The sky’s the limit!
OR
Compare indoor and outdoor performance art. This choice
is done in two parts, one at the beginning of the badge and one at
the end. At the start of the badge, hold a performance inside—it
could be a skit, song, or dance. At the end of your work on this
badge, hold the same type of performance outdoors. Use the
outdoor space to make some changes to your performance—
maybe move around more to fill a larger space or step on
rocks to make sure your voice is heard. How did the outdoor
experience feel different to you? How did the sound change?
OR
Talk to an artist. There are women artists everywhere, and
each one has her own unique story. Talk to an artist you
know—she could be an art teacher or even an older Girl Scout
who loves to draw or paint—and learn about her artwork. How
has her art been influenced by the outdoors? Where does she
get her inspiration? After you talk to her, make an art piece of
your own that’s inspired by her work.
STEP
1
OUTD O OR ART EXPLORER 3
Every step has three choices. Do ONE choice to complete each step. Inspired? Do more! Leave No Trace
Remember to practice
“Leave No Trace” as you
create your outdoor art!
⚬Know Before You Go
⚬Stick to Trails
⚬Trash Your Trash
⚬Leave It As You Find It
⚬Keep Wildlife Wild
⚬Respect Others

4
Make something!
If you like getting crafty, now’s your chance! Let nature be your guide as you make an outdoor-themed project. You can keep it for yourself, or share as a gift for a friend or family member.
CHOICES–DO ONE:
Make something wearable. Buddy up and take a night walk
with an adult to a place where you can get a good look at the
sky. (It can be hard to see the night sky when you’re around a
lot of lights or tall buildings.) Then design a piece of clothing
that represents what you saw. You can do it in any way you
like, but you might try starting with a plain dark T-shirt and
making a “reverse tie dye” print (using bleach instead of dye)
or a “galaxy” shirt, which is made by dabbing fabric paint on
the shirt with sponges and then flicking white paint over it to
make “stars.” Check out the next spread for more details! If you
use bleach for your project, make sure to wear rubber gloves
and protective eyewear.
OR
Make something with wood.
Try your hand at woodworking
with sticks or branches you find on the
ground. (Be sure to check and make sure
that collecting wood from the ground is
allowed in your area.) Team up with an
adult and use a jackknife to whittle the
wood. Talk about knife safety first, of
course! Depending on the size and shape
of your wood, you could make a walking
stick or a sculpture—or sharpen the tips
to make stick pens. (Dip
them into blueberries or
raspberries mixed with
water for ink!)
STEP
2 ⚬Move at least an arm’s length away from anyone else before using a jackknife.
⚬Hold the handle securely with the whole hand.
⚬Always cut away from the body.
⚬Keep the jackknife closed when not in use.
⚬Do not walk around with an open jackknife.
⚬Keep the jackknife away from extreme cold or heat: Either will ruin the metal and plastic parts of the knife.
⚬Use the jackknife responsibly.
Gir
l Sco
ut
Ha
nd
boo
k, 1
953

OR
Make an impression. Using clay or salt dough, make an
outdoor-themed impression. You might collect leaves or shells,
or anything that’s unique to the area where you live. Press your
found objects into the clay or dough, then remove them and
return them to the place where they were found. If you’d like
to hang your impression when it’s finished, make a hole at the
top for string. (You may need to re-poke the hole a few times
as your impression dries to keep it from closing up.) Your
impression can be dried in the oven on low heat—ask an adult
for help—or outside in the sun on a hot day.
For More FUN: Make your own salt dough!
Materials:
⚬ 3 cups flour
⚬ 1 cup salt
⚬ 1 cup water (plus up to
1/2 cup extra water,
if needed)
⚬ Food coloring (optional)
⚬ Electric mixer
⚬ Drinking straws
(optional)
⚬ Parchment paper
or aluminum foil
Instructions:
1 Mix the flour and salt
together in a bowl.
2 Add 1 cup of water to the
flour mix. To make colored
dough, add 15 drops of food
coloring to the water before
mixing it into the dough.
3 Use the electric mixer to
mix the dough on medium
speed until a ball forms.
If the dough is dry, slowly
add water (1 tablespoon
at a time) until the dough
comes together.
4 Remove the dough;
knead it until smooth.
5 Form the dough into
disks and make your
impressions. If you want
to hang your finished
project, use a straw to
poke a hole at the top.
6 With adult help, preheat
the oven to 275 degrees.
7 Bake dough pieces on
a foil- or parchment paper-
lined cookie sheet for
2 hours. Cool completely
before handling.
Salt Dough
OUTD O OR ART EXPLORER 5

To make a galaxy shirt, put on some old clothes and head outside—it’s a messy process!
Talk to an adult about the best place to make and dry your shirt in order to keep the bleach
from getting on anything else.
Make a Galaxy Shirt
6
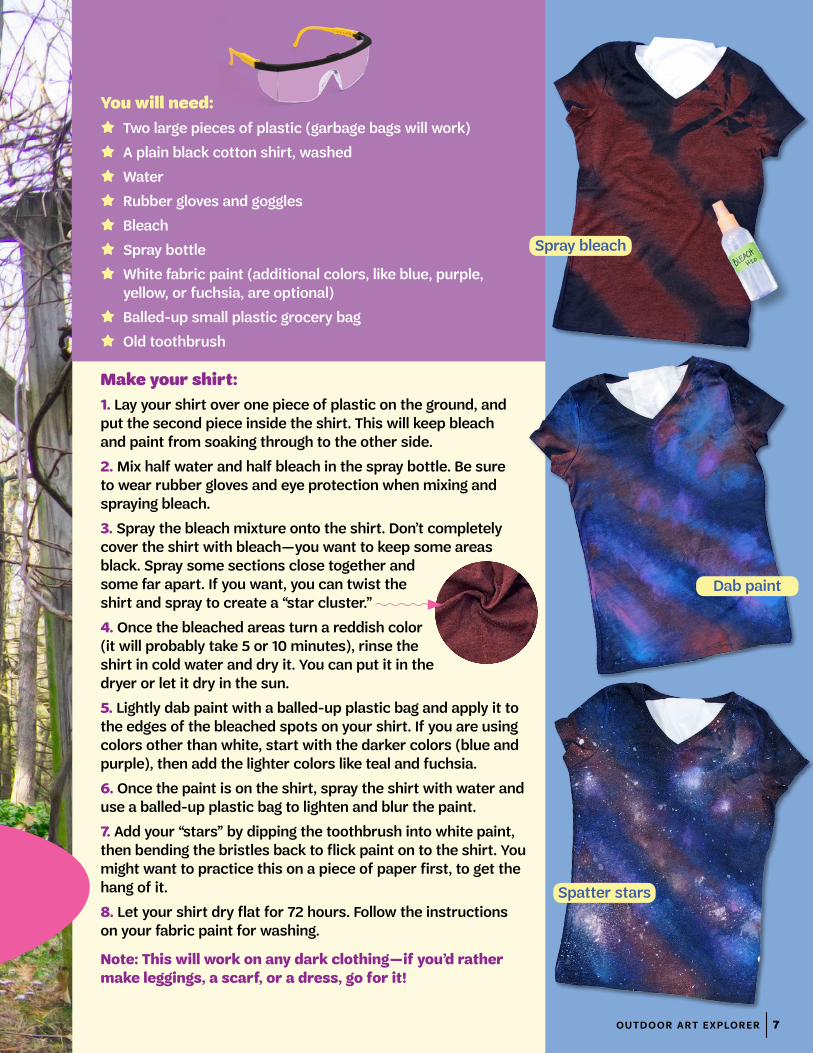
Make your shirt:
1. Lay your shirt over one piece of plastic on the ground, and put the second piece inside the shirt. This will keep bleach and paint from soaking through to the other side.
2. Mix half water and half bleach in the spray bottle. Be sure to wear rubber gloves and eye protection when mixing and spraying bleach.
3. Spray the bleach mixture onto the shirt. Don’t completely cover the shirt with bleach—you want to keep some areas black. Spray some sections close together and some far apart. If you want, you can twist the shirt and spray to create a “star cluster.”
4. Once the bleached areas turn a reddish color (it will probably take 5 or 10 minutes), rinse the shirt in cold water and dry it. You can put it in the dryer or let it dry in the sun.
5. Lightly dab paint with a balled-up plastic bag and apply it to the edges of the bleached spots on your shirt. If you are using colors other than white, start with the darker colors (blue and purple), then add the lighter colors like teal and fuchsia.
6. Once the paint is on the shirt, spray the shirt with water and use a balled-up plastic bag to lighten and blur the paint.
7. Add your “stars” by dipping the toothbrush into white paint, then bending the bristles back to flick paint on to the shirt. You might want to practice this on a piece of paper first, to get the hang of it.
8. Let your shirt dry flat for 72 hours. Follow the instructions on your fabric paint for washing.
Note: This will work on any dark clothing—if you’d rather make leggings, a scarf, or a dress, go for it!
You will need:
★ Two large pieces of plastic (garbage bags will work)
★ A plain black cotton shirt, washed
★ Water
★ Rubber gloves and goggles
★ Bleach
★ Spray bottle
★ White fabric paint (additional colors, like blue, purple, yellow, or fuchsia, are optional)
★ Balled-up small plastic grocery bag
★ Old toothbrush
OUTD O OR ART EXPLORER 7
Spray bleach
Dab paint
Spatter stars
Find music in nature
For as long as musicians have been making music, they’ve been finding inspiration in the outdoors. Combine music and the outdoors in this step.
CHOICES–DO ONE:
Sing outdoors. Girl Scouts have been singing songs outdoors
for more than 100 years. Learn a new song with your Girl Scout
friends and sing it in a round. It can be any song you want—
you can even try it with your favorite popular song. Some
songs will work better in rounds than others, so you might
need to go through a few to find one you like. Go on a walk
with some friends, and try playing follow the leader: Change
the speed of the song to match the leader’s walking pace.
For More FUN: Change the words of a popular song to make
it into a hiking song.
OR
Make rainy day music. The next time there’s a rainy day
where you live, take some time to really listen to it. How do the
sounds change as the rain gets heavier and lighter throughout
the day? If it’s a thunderstorm, how does it sound different
as the storm gets closer and farther away? Then try to re-
create the sounds of a rainstorm with music. If you play an
instrument or like to sing, you can do it on your own. If you
want to try it with a group, you might create a “human rain
storm.” See Rainy Day Music on this page for more details.
OR
Create “nature’s symphony.” Make music with items you
find in nature. You might shake a bag of rocks, wave swishy
branches, and blow grass whistles. Come up with your own
beat, or set up an outdoor speaker and play along with your
favorite songs! When you’re done making music, return the
items back to the places where they were found.
STEP
3Rainy Day Music
For this activity, a
group of people sit
in a circle, with one
person as the leader.
The leader starts
making sounds, and
one by one each
person follows the
lead of the person on
their right. If you’re
the leader, you might
start like this:
1 Rub your palms
together.
2 Snap your fingers.
3 Clap two fingers
on the palm of
your hand.
4 Clap your hands.
5 Slap your lap or
slap the floor.
6 After the sounds
get very loud,
repeat the activities
in reverse as the
“storm” dies down.
7 Then slowly stop,
until the room
is silent.
8
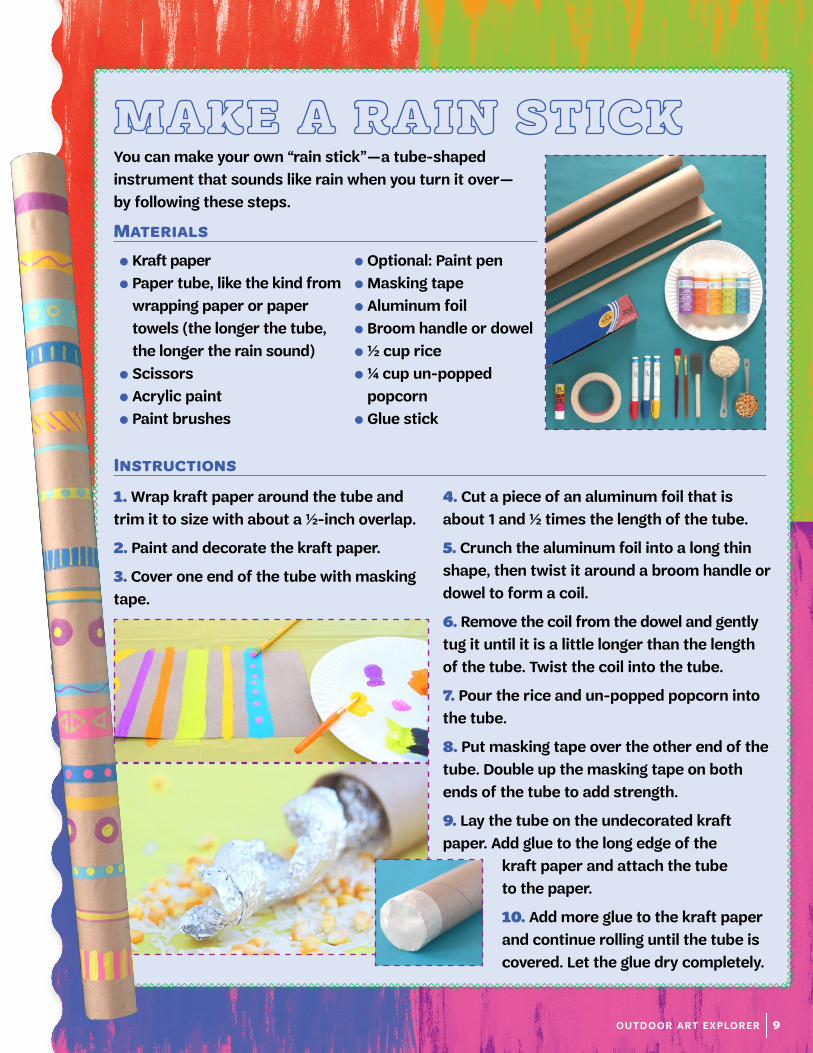
You can make your own “rain stick”—a tube-shaped
instrument that sounds like rain when you turn it over—
by following these steps.
Instructions
4. Cut a piece of an aluminum foil that is
about 1 and 1/2 times the length of the tube.
5. Crunch the aluminum foil into a long thin
shape, then twist it around a broom handle or
dowel to form a coil.
6. Remove the coil from the dowel and gently
tug it until it is a little longer than the length
of the tube. Twist the coil into the tube.
7. Pour the rice and un-popped popcorn into
the tube.
8. Put masking tape over the other end of the
tube. Double up the masking tape on both
ends of the tube to add strength.
9. Lay the tube on the undecorated kraft
paper. Add glue to the long edge of the
kraft paper and attach the tube
to the paper.
10. Add more glue to the kraft paper
and continue rolling until the tube is
covered. Let the glue dry completely.
Materials
⚬ Optional: Paint pen
⚬ Masking tape
⚬ Aluminum foil
⚬ Broom handle or dowel
⚬ 1/2 cup rice
⚬ 1/4 cup un-popped
popcorn
⚬ Glue stick
⚬ Kraft paper
⚬ Paper tube, like the kind from
wrapping paper or paper
towels (the longer the tube,
the longer the rain sound)
⚬ Scissors
⚬ Acrylic paint
⚬ Paint brushes
1. Wrap kraft paper around the tube and
trim it to size with about a 1/2-inch overlap.
2. Paint and decorate the kraft paper.
3. Cover one end of the tube with masking
tape.
OUTD O OR ART EXPLORER 9

STEP
4 Be a nature photographer
Photographers are artists who see the world through the lens of a camera. Head outside with a camera (a cell phone camera works, too—if you don’t have a cell phone, see if you can borrow one) and become a nature photographer!
CHOICES–DO ONE:
Play with light. Find an outdoor space that you love and
photograph it at three different times of day. How does the
light change the photo? What happens to the shadows? Which
photo is your favorite and why?
For More FUN: Photograph your space in three different
kinds of weather—maybe sunny, cloudy, and rainy or snowy.
OR
Explore structures. From chicken coops to skyscrapers,
human-made structures have to work together with nature.
In the Northeastern states and in the mountains of the
western United States, homes are built to handle heavy snow
on the roof; you’ll find homes designed for tornado safety in
the Midwest. Head outdoors to explore buildings and other
structures in your area. Take a picture of one structure that
you think works well with nature, and one that doesn’t. Get
together with your Girl Scout friends to compare your photos
and talk about what you found.
OR
Go big and small. Macro means big and micro means small.
Try taking macro and micro shots of outdoor objects by
zooming in and out with your camera. (Some cameras have
macro and micro settings, too.) Take a series of photos where
you get closer and closer in on an object until it’s difficult to tell
what it is. Share your photos with family or friends—see how
long it takes them to guess what’s shown in the pictures.
10
Berenice Abbott (1898–1991) photographed many different subjects over the course of her long career, but she is best-known for her black-and-white photos of New York City in the 1930s. She found art in all different aspects of the city, from the construction of Rockefeller Center to goods for sale in store windows. “Photography can never grow up if it imitates some other medium,” she said. “It has to walk alone; it has to be itself.”
10
Design with nature
From sculptures to gardens, outdoor art changes the appearance of the environment. Work together with nature to design a piece of outdoor art.
CHOICES–DO ONE:
Design outdoor art. Visit at least one piece of outdoor art in
your area. It could be anything from a statue to a mural on a
building wall. (If you’re not sure where to find any, public parks
are a good place to start.) How does the art change the look of
the area around it? Is it something you would have chosen for
that space? Sketch or paint a picture of the kind of outdoor art
you’d like to see in your community.
For More FUN: Visit the art with your Girl Scout friends, then
compare your drawings and paintings when you’re finished.
OR
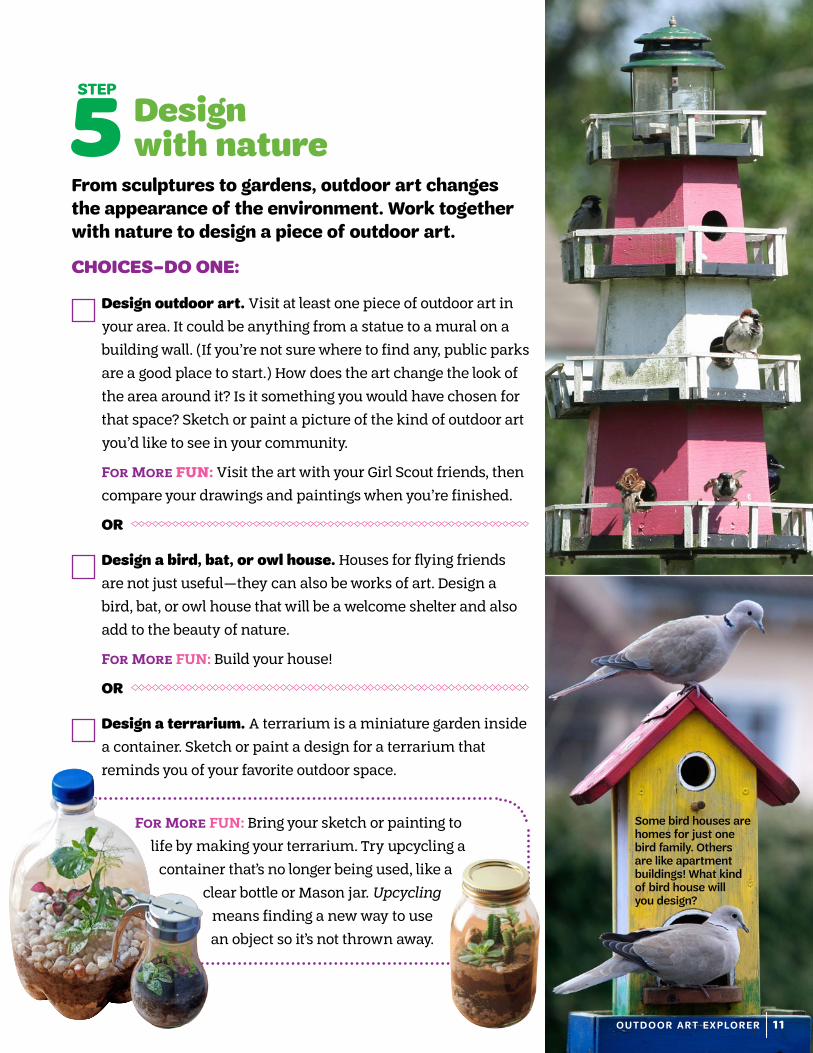
Design a bird, bat, or owl house. Houses for flying friends
are not just useful—they can also be works of art. Design a
bird, bat, or owl house that will be a welcome shelter and also
add to the beauty of nature.
For More FUN: Build your house!
OR
Design a terrarium. A terrarium is a miniature garden inside
a container. Sketch or paint a design for a terrarium that
reminds you of your favorite outdoor space.
STEP
5
For More FUN: Bring your sketch or painting to
life by making your terrarium. Try upcycling a
container that’s no longer being used, like a
clear bottle or Mason jar. Upcycling
means finding a new way to use
an object so it’s not thrown away.
Some bird houses are homes for just one bird family. Others are like apartment buildings! What kind of bird house will you design?
OUTD O OR ART EXPLORER 11

Going on a Journey? Do some badge work along the way. On the aMUSE Journey, you’ll talk to a woman you’d like to know
better and ask her about the different roles she plays in her
life. If you choose to talk to an artist in Step 1 of this badge, ask
her how she balances her different roles—maybe at her job, as
a sister, or in her friendships—with being an artist. Are there
women who have paved the way for her in any of these roles?
I’m inspired to:
Now that I’ve earned this badge, I can give service by:
• Creating a collage of nature photos for a senior or community center
• Performing outdoor music with a group of younger Girl Scouts
• Making an outdoor-themed gift to cheer up a sick friend or family member
©2016 Girl Scouts of the United States of America.
All rights reserved. No part of this publication may be reproduced, distributed, or transmitted in any form or by any means, including photocopying, recording, or by any other electronic or mechanical methods now known or hereinafter invented, without the prior written permission of Girl Scouts of the United States of America, except in the case of brief quotations embodied in critical reviews and certain other noncommercial uses permitted by copyright law. For permissions requests, write to Girl Scouts of the United States of America at the address below or visit the www.girlscouts.org website to access permission request forms.
First published in 2011 by Girl Scouts of the USA 420 Fifth Avenue, New York, NY 10018-2798 www.girlscouts.org
Printed in the United States
©Stock images courtesy of iStockphoto.com
Special thanks to our council and volunteer badge co-creation team:
Tracey Bunch and Susan Groff, Girl Scouts of Eastern PA
Deb King and Chrissy Turner, Girl Scouts of the Green and White Mountains
Lorena Kirschner, Girl Scouts of Northern NJ
Kristi Thunker and Megan Brink, Girl Scouts—Dakota Horizons
Scarlett Webb, Girl Scouts of Western NY
12