jj206 computer & design 1 chapter 14
DESCRIPTION
JJ206 Computer & Design 1TRANSCRIPT

Ch 14: Plotting
AutoCAD 2012and
AutoCAD LT 2012 Essentials
By Scott Onstott

Ch 14: Plotting
Adding AutoCAD Plotters• Use the PLOTTERMANAGER
command to open the specific folder on your hard drive where plotter configuration files are stored.
• Double click the Add-A-Plotter Wizard to configure a new plotter
• Double click any of the existing plotter configuration files (having the .pc3 file extension) to edit their configurations

Ch 14: Plotting
System Printers• All modern plot devices have drivers
written by the manufacturer that you must install within your operating system; these are called system printers in Windows
• The Mac version of AutoCAD does not use AutoCAD plotter drivers at all and simply uses the manufacturer’s printer driver
• When you create an AutoCAD plotter driver in Windows (using the Add-A-Plot Wizard) you must select System Printer

Ch 14: Plotting
AutoCAD Plotters• AutoCAD plotters are an
abstraction layer above system printers, which in turn are managed by the Windows operating system
• An AutoCAD plotter send print jobs to a system printer which interfaces with the device itself
• If you don’t see your plotter in the system printer list within the Add-A-Plotter Wizard you must first install its system printer

Ch 14: Plotting
Filtering Paper Sizes• The paper sizes that you see in the Page Setup
and Plot dialog boxes are managed by AutoCAD Plotter configuration files (.pc3)
• It is worthwhile filtering the number of paper sizes managed by your AutoCAD plotters down to the number of paper sizes you actually use
• Having a one-to-one correspondence between the paper sizes in your AutoCAD plotters and the paper sizes you actually use streamlines the plotting process

Ch 14: Plotting
Plot Style Tables• Use the STYLESMANAGER
command to open the specific folder where plot style tables are stored on your hard drive
• Double click the Add-A-Plot Style Table Wizard to create a new plot style table
• Double click any of the existing plot style tables (.ctb and .stb files) to edit its configuration

Ch 14: Plotting
Plot Style Table Types• Plot style tables control the appearance of
objects being sent to a plot device• Color-dependent plot style tables manage
objects by color exclusively• Named plot style tables manage objects by
layer or by object• Plot styles control the color, linetype,
lineweight, screening, end cap style, and fill style, and many others

Ch 14: Plotting
Named Plot Style Tables• Plot styles can be assigned on a layer
by layer basis when using named plot style tables
• You can convert a drawing from color-dependent to named plot style tables with the CONVERTPSTYLES command
• Named plot styles can also be assigned at the object level in the Properties palette (use the PROPERTIES command to access)
Ch 14: Plotting
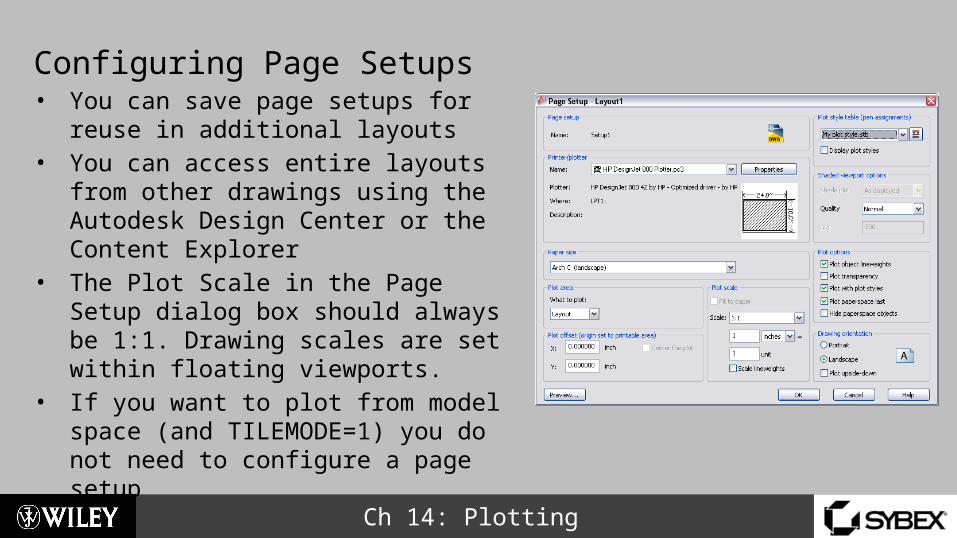
Configuring Page Setups• You can save page setups for reuse in
additional layouts• You can access entire layouts from other
drawings using the Autodesk Design Center or the Content Explorer
• The Plot Scale in the Page Setup dialog box should always be 1:1. Drawing scales are set within floating viewports.
• If you want to plot from model space (and TILEMODE=1) you do not need to configure a page setup

Ch 14: Plotting
Exporting Electronic “Plots”• You can export drawings to DWF,
DWFx, and PDF formats• DWF and DWFx formats can be
marked up in Autodesk Design Review
• The DWFx format is based on XML (extensible markup language)
• DXFx files can be viewed (but not marked up) in Microsoft Internet Explorer without needing to install a plug-in (it is built in)
• DWF/DWFx files are vector based