irt120h irt60h manual - 2016 - issue 1.0 - laney.co.uk · heartland of the uk - where the sound of...
TRANSCRIPT

IRT120HIRT60H


2
Dear Player,
Thank you very much for purchasing your new Laney product and becoming part of the worldwide Laney family. Each and every Laney unit is designed and built with the utmost attention to care and detail, so I trust yours will give you many years of enjoyment.
Laney products have a heritage which stretches back to 1967 when I first began building valve amplifiers in my parent’s garage.
Since then we have moved on from strength to strength developing an extensive range of guitar, bass, public address, multi instrument and keyboard amplification products along with a list of Laney endorsees that includes some of the world’s most famous and respected musicians.
At the same time we believe we have not lost sight of the reason Laney was founded in the first place - a dedication to building great sounding amplification for working musicians.
Warm Regards,
Lyndon Laney Chairman & Founder
3
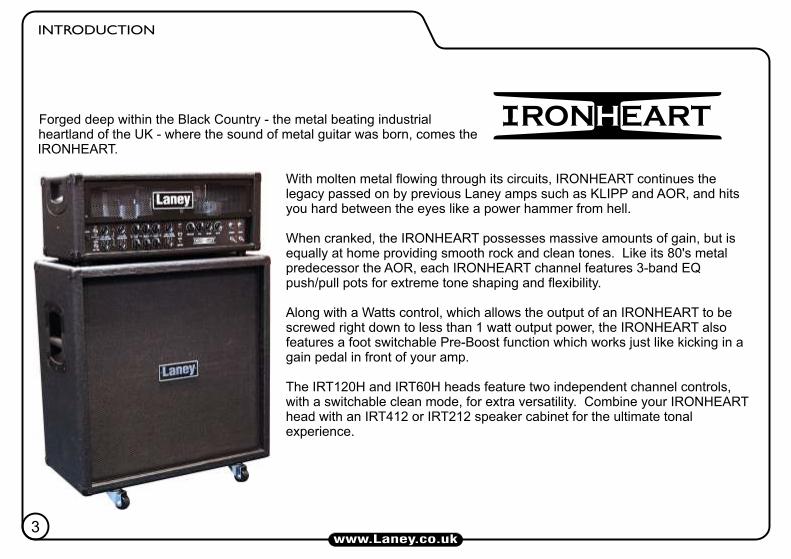
Forged deep within the Black Country - the metal beating industrial heartland of the UK - where the sound of metal guitar was born, comes the IRONHEART.
With molten metal flowing through its circuits, IRONHEART continues the legacy passed on by previous Laney amps such as KLIPP and AOR, and hits you hard between the eyes like a power hammer from hell.
When cranked, the IRONHEART possesses massive amounts of gain, but is equally at home providing smooth rock and clean tones. Like its 80's metal predecessor the AOR, each IRONHEART channel features 3-band EQ push/pull pots for extreme tone shaping and flexibility.
Along with a Watts control, which allows the output of an IRONHEART to be screwed right down to less than 1 watt output power, the IRONHEART also features a foot switchable Pre-Boost function which works just like kicking in a gain pedal in front of your amp.
The IRT120H and IRT60H heads feature two independent channel controls, with a switchable clean mode, for extra versatility. Combine your IRONHEART head with an IRT412 or IRT212 speaker cabinet for the ultimate tonal experience.

4
WARNING: When using electrical products, basic cautions should always be followed, including the following:1. Read these instructions. 2. Keep these instructions safe.3. Heed all warnings.4. Follow all instructions.5. Do not use this apparatus near water. 6. Clean only with a dry cloth.7. Do not block any of the ventilation openings. Install in accordance with manufacturer’s instructions. 8. Do not install near any heat sources such as radiators, heat registers, stoves or other apparatus (including amplifiers) that produce heat.9. An apparatus with Class I construction shall be connected to a mains socket outlet with a protective connection. Do not defeat the safety purpose of the polarized or grounding-type plug. A polarized plug has two blades with one wider than the other. A grounding type plug has two blades and a third grounding prong. The wide blade or third prong is provided for your safety. If the provided plug does not fit into your outlet, consult an electrician for replacement of the obsolete outlet. 10. Protect the power cord from being walked on or pinched, particularly at plugs, convenience receptacles, and the point they exit from the apparatus.11. Only use attachments/accessories provided by the manufacturer.12. Use only with a cart, stand, tripod, bracket, or table specified by the manufacturer, or sold with the apparatus. When a cart is used, use caution when moving the cart/apparatus combination to avoid injury from tip-over.13. The mains plug or appliance coupler is used as the disconnect device and shall remain readily operable. The user should allow easy access to any mains plug, mains coupler and mains switch used in conjunction with this unit thus making it readily operable. Unplug this apparatus during lightning storms or when unused for long periods of time.14. Refer all servicing to qualified service personnel. Servicing is required when the apparatus has been damaged in any way, such as when power-supply cord or plug is damaged, liquid has been spilled or objects have fallen into the apparatus, the apparatus has been exposed to rain or moisture, does not operate normally, or has been dropped.15. Never break off the ground pin. Connect only to a power supply of the type marked on the unit adjacent to the power supply cord.16. If this product is to be mounted in an equipment rack, rear support should be provided.17. Note for UK only: If the colours of the wires in the mains lead of this unit do not correspond with the terminals in your plug‚ proceed as follows: a) The wire that is coloured green and yellow must be connected to the terminal that is marked by the letter E‚ the earth symbol‚ coloured green or coloured green and yellow. b) The wire that is coloured blue must be connected to the terminal that is marked with the letter N or the colour black. c) The wire that is coloured brown must be connected to the terminal that is marked with the letter L or the colour red.18.This electrical apparatus should not be exposed to dripping or splashing and care should be taken not to place objects containing liquids, such as vases, upon the apparatus.19. Exposure to extremely high noise levels may cause a permanent hearing loss. Individuals vary considerably in susceptibility to noise-induced hearing loss, but nearly everyone will lose some hearing if exposed to sufficiently intense noise for a sufficient time. The U.S. Government’s Occupational Safety and Health Administration (OSHA) has specified the following permissible noise level exposures: According to OSHA, any exposure in excess of the above permissible limits could result in some hearing loss. Earplugs or protectors to the ear canals or over the ears must be worn when operating this amplification system in order to prevent a permanent hearing loss, if exposure is in excess of the limits as set forth above. To ensure against potentially dangerous exposure to high sound pressure levels, it is recommended that all persons exposed to equipment capable of producing high sound pressure levels such as this amplification system be protected by hearing protectors while this unit is in operation.

5

6
(Pull Deep) (Pull Shift) (Pull Shift)
FRONT PANEL CONTROLS
1. INPUT 1/4" mono jack socket. Connect your guitar here. Use only a good quality instrument cable.2. PRE-BOOST SWITCH Switches the input boost circuit on or off. The Pre-Boost circuit increases the input signal to the preamp tubes, just like placing a boost pedal in your signal path. This drives the preamp tubes harder, resulting in more distortion. This works on both channels.3. PRE-BOOST CONTROL Controls the level of boost applied to the guitar signal.4. PRE-BOOST LED This LED will illuminate when the Pre-Boost controls are activated.5. LEAD GAIN Controls the level of preamp gain on the Lead channel. Turning this control clockwise will add more distortion to your guitar signal, ranging from light overdrive, to full on metal. Use this in conjunction with Lead Volume (8) to achieve the correct volume and distortion level you require.6. LEAD EQ CONTROLS These are a traditional set of passive tone controls. Passive controls have the advantage of always sounding musical at any of their settings, due to their unique interactive nature. This gives the player a more natural set of tools to shape their ideal sound. Set these to midway (0) as a good starting point.7. LEAD EQ PULL SWITCHES Pulling on each of the EQ control knobs will shift the response of each control as follows:
!Bass: Deep - This extends the low-end frequency response, resulting in a fuller, heavier sound for lower notes.!Mid: Shift - This lowers the frequency range of the mid control to give a tighter sound.!Treble: Shift - This broadens the Treble control frequency response, to give a rounder sound to higher notes, especially when used with thin sounding pickups.
8. LEAD VOLUME Controls the Lead channel volume. Experiment with different combinations of the Gain and Volume controls to achieve different sounds. Reducing the Gain while increasing the Volume will result in a warm, open, overdriven sound as the power amp
is driven harder, while reducing the Volume and increasing the Gain will give a tighter, more modern sound with more distortion. Once set, try using your guitar's volume controls to interactively adjust tone and distortion levels.

FRONT PANEL CONTROLS
7
9. CHANNEL SWITCH Switches between the Lead and Clean/Rhythm channels.
10. CHANNEL LEDS Indicates which channel is currently selected by the Channel Switch (9).
11. CLEAN/RHYTHM SWITCH This switch activates the Clean mode on the Rhythm channel. When operated, the Clean Volume (12) control becomes active, while Rhythm Gain (14) and Rhythm Volume(17) are removed from the signal path. When using clean mode, the preamp gain is lowered, resulting in a cleaner tone.
12. CLEAN VOLUME Use this to control the volume of the amplifier when using clean mode. The amp can still be driven to overdrive with the control turned fully clockwise, and can be driven harder by using the Pre-Boost.
13. CLEAN LED This LED will illuminate when Clean mode is activated.
14. RHYTHM GAIN as Lead Gain (5)
15. CLEAN/RHYTHM EQ CONTROLS as Lead EQ Controls (6)
16. CLEAN/RHYTHM EQ PULL SWITCH as Lead EQ Pull Switch (7)
17. RHYTHM VOLUME as Lead Volume (8)
18. DYNAMICS This allows control over the response of the amplifier at lower frequencies. Turning this control clockwise gives a looser low end, while lower settings provide a tighter response. The optimum setting is dependant on the speaker cabinet used.
19. TONE This Tone control works in a similar fashion to the Tone control you probably have on your guitar except that it uniquely works at the other end of the amplification chain. This has the ability to not only control the overall top end response but also reduce upper harmonics on the output stage and preamplifier overdrive sounds. This will give you bright cutting sounds at high settings and smooth rounded sounds at lower settings. Midway (0) is a good starting point. Both the Tone and Dynamics controls depend greatly on the speaker cabinet connected to the amplifier.
20. REVERB Controls the level of the built in Laney-designed digital reverb.
21. WATTS The Watts control adjusts the signal level within the power amplifier, allowing it to be driven harder at lower volume levels. For full output power, running the power tubes at maximum levels, turn this control fully clockwise. To reduce output volume, turn this control to the left. This can be useful in practice environments, or when it is desirable to push the preamp hard but control the output level.
22. STANDBY SWITCH Disconnects the main HT voltage from the tubes but keeps the tubes warm so that they are ready to play instantly. Switch for short breaks when you don't want to wait for the tubes to warm up again. With the switch in the 1 (up) position, the amp is in play mode, while 0 (down) allows the amp to warm up.
23. STANDBY LAMP This will illuminate when the amplifier is in play mode.
24. POWER SWITCH Main power switch for the unit. Tube amplifiers take between 30 seconds to 2 minutes to warm up and be ready to play after switching on, this is normal. Use in conjunction with the standby switch to prolong tube life. To turn on, flip the switch to 1 (up).
25. POWER LAMP This will illuminate when the power switch is operated, indicating the presence of mains power within the amplifier.

8
REAR PANEL CONTROLS
1. MAINS INLET SOCKET Connect to your power source. Make sure the voltage indicated on the rear panel is correct for your country!
2. MAINS FUSE This drawer contains the main safety fuse for the unit. The fuse protects the amplifier from damage in the event of fault by disconnecting the mains power supply. USE ONLY THE CORRECT SIZE AND RATING SPECIFIED ON THE PANEL. If a fuse blows or fails and a replacement of the same size and rating is installed which in turn blows, the amplifier has suffered a malfunction and needs immediate service from a qualified technician. DO NOT TRY A FUSE OF HIGHER RATING - Using a fuse that is too large in current rating may cause serious, irreparable damage to the amplifier and presents a serious fire hazard. The mains fuse ratings are detailed in the Specifications section of this manual, as well as printed on the rear of the amplifier. There is a spare fuse located in the fuse drawer of the mains power inlet in the event of a failure.
3. HT FUSE This fuse disconnects the high voltage DC power to the tubes within the amplifier in the event of a fault. USE ONLY THE CORRECT SIZE AND RATING FUSE AS SPECIFIED ON THE PANEL. If a fuse blows or fails and a replacement of the same size and rating is installed which in turn blows, the amplifier has suffered a malfunction. At this point check the output tubes, and replace faulty ones if required. Should the tubes not be the problem, refer the amplifier to a qualified service technician. DO NOT TRY A FUSE OF HIGHER RATING - Using a fuse that is too large in current rating may cause serious, irreparable damage to the amplifier. Fuses are designed to protect, do not take chances.
SOURCE
N15039
HT FUSE
1*16 OHM1*8 OHM1*4 OHM
2*16 OHM2*8 OHM6L6EL34
SEND LEVELRETURN
SPEAKERSFX LOOPAUX IN D.I.
GROUND LINK
SERIAL NUMBER
MODEL IRT120H
REMOTE
BYPASS -10dB0dB INPUTAMP54
3
2
1
0 10
9
8
7
6
ONLIFT
SUPPLY VOLTAGE & FUSE RATING:
T5A L 250V
T2A L 250V
~120V~100V
~240V~220V/~230V
MAXIMUM POWER CONSUMPTION 50 WATTS 50/60Hz
CAUTION - RISK OF ELECTRIC SHOCK DO NOT OPENATTENTION - RISQUE DE DÉCHARGE ÉLECTRIQUE, NE S'OUVRE PAS
BIAST1A L
WARNING:USE ONLY ONE IMPEDANCE SELECTION AT A TIME(Refer to User Manual for connection details)
FOR USE WITH FS4-IRT ONLY
DESIGNED AND ENGINEERED IN THE UK BY LANEY
L Z B1 2 3 4

9
4. BIAS SWITCH This allows the use of either 6L6 or EL34 output tubes in your amplifier. Ensure that the switch is in the correct position for your output tubes, otherwise you may risk damaging your amplifier. The IRT120H is factory fitted with 4x matched 6L6 tubes, while the IRT60H features 2x matched 6L6 tubes. We recommend the use of matched sets of output tubes for optimum performance.5.AUXILIARY INPUT This input allows the connection of backing tracks etc. to be mixed in post the FX loop.6. FX LOOP
FX RETURN 1/4" mono jack socket for the connection of the output of an external FX unit. This can also be used as a slave in for the power amp. As the FX Loop is an insert type, this will mute the preamp signal.FX LOOP SWITCH Selects the FX Loop mode of operation:! Bypass - Removes the FX Loop from the signal path.! 0dBu - For connection of FX units with a 0dBu nominal output level.! -10dBu - For connection of FX units with a -10dBu nominal output level. As this is intended for devices with a lower output level, this switch increases the gain of the FX Loop by 10dB.FX SEND 1/4" mono jack socket for connection to the input of an external FX unit. This can also be used as a line out for connection to another power amp slave input or for recording.
7. REMOTE All IRONHEART amps are equipped with a 5 pin DIN socket for the connection of the supplied FS4-IRT foot-switch, allowing remote operation of the following functions: Channel, Clean, Reverb, and Boost.
8. DI. This output with dedicated level control provides a balanced direct feed for connection to an external device. Some examples include: house PA, recording setup, stage monitor system. In the unlikely event of ground hum when connecting to other equipment, simple dis-engadge the D.I ground link. The D.I signal is sourced from one of two places:
!INPUT: A buffered signal picked up from the input of the amplifier. The signal doesn’t include speaker emulation.!AMP: In this mode, the signal is sourced from the output of the amplifier and includes additional 4*12 speaker emulation.
9. SPEAKERS Five 1/4" mono jack sockets are provided for the connection of a variety of speaker cabinets. Mismatching your speaker impedance will reduce the performance of your amplifier, and in extreme cases may damage the unit.
Always operate this amplifier a load connected. If not serious irreparable damage may occur.
Only use one impedance selection at a time.
REAR PANEL CONTROLS

10
QUICK START SETTINGS
Set to preference
(Pull Deep) (Pull Shift) (Pull Shift)Clean
(Pull Deep) (Pull Shift) (Pull Shift)Rock
Rhythm
Lead
(Pull Deep) (Pull Shift)
(Pull Shift)(Pull Shift)
Metal
Rhythm
Lead
DetunedMetal
Rhythm
Lead

11
USER SETTINGS
(Pull Deep) (Pull Shift) (Pull Shift)
(Pull Deep) (Pull Shift) (Pull Shift)
(Pull Deep) (Pull Shift) (Pull Shift)
(Pull Deep) (Pull Shift) (Pull Shift)

12
SAMPLE SETUP
POWERED CAB / MONITOR
IRT-X
IRT412FS4-IRTMP3
FX UNIT
SOURCE
N15039
HT FUSE
1*16 OHM1*8 OHM1*4 OHM
2*16 OHM2*8 OHM6L6EL34
SEND LEVELRETURN
SPEAKERSFX LOOPAUX IN D.I.
GROUND LINK
SERIAL NUMBER
MODEL IRT120H
REMOTE
BYPASS -10dB0dB INPUTAMP54
3
2
1
0 10
9
8
7
6
ONLIFT
SUPPLY VOLTAGE & FUSE RATING:
T5A L 250V
T2A L 250V
~120V~100V
~240V~220V/~230V
MAXIMUM POWER CONSUMPTION 50 WATTS 50/60Hz
CAUTION - RISK OF ELECTRIC SHOCK DO NOT OPENATTENTION - RISQUE DE DÉCHARGE ÉLECTRIQUE, NE S'OUVRE PAS
BIAST1A L
WARNING:USE ONLY ONE IMPEDANCE SELECTION AT A TIME(Refer to User Manual for connection details)
FOR USE WITH FS4-IRT ONLY
DESIGNED AND ENGINEERED IN THE UK BY LANEY
L Z B1 2 3 4

13
IRT412
FS4-IRT
IRT412
SOURCE
N15039
HT FUSE
1*16 OHM1*8 OHM1*4 OHM
2*16 OHM2*8 OHM6L6EL34
SEND LEVELRETURN
SPEAKERSFX LOOPAUX IN D.I.
GROUND LINK
SERIAL NUMBER
MODEL IRT120H
REMOTE
BYPASS -10dB0dB INPUTAMP54
3
2
1
0 10
9
8
7
6
ONLIFT
SUPPLY VOLTAGE & FUSE RATING:
T5A L 250V
T2A L 250V
~120V~100V
~240V~220V/~230V
MAXIMUM POWER CONSUMPTION 50 WATTS 50/60Hz
CAUTION - RISK OF ELECTRIC SHOCK DO NOT OPENATTENTION - RISQUE DE DÉCHARGE ÉLECTRIQUE, NE S'OUVRE PAS
BIAST1A L
WARNING:USE ONLY ONE IMPEDANCE SELECTION AT A TIME(Refer to User Manual for connection details)
FOR USE WITH FS4-IRT ONLY
DESIGNED AND ENGINEERED IN THE UK BY LANEY
L Z B1 2 3 4
SAMPLE SETUP

14
TUBE AMP TIPS
Tube amplifiers generally sound much warmer/sweeter than solid state transistor amplifiers but they also need a little more respect due to the fragile glass tubes. The Ironheart heads use four 12AX7 preamp tubes, and two or four 6L6 output tubes (depending on the model) which should give you years of trouble free service, however like all tube amps; it is important to treat it with a certain amount of care. Use the following steps as a guide for how to take care of your amplifier:
! Take care when moving the amplifier. Tubes are fragile glass components, they can easily be damaged if thrown in and out of vans.! Make sure the impedance of your cabinets matches the setting on your amplifier. Improper impedance matching will result in reduced output power and compromised sound at best, and amplifier failure/shortened tube life at worst.! Allow the amplifier to warm up to room temperature before switching it on: the sudden thermal shock can crack a cold glass tube enclosure, plus any moisture is bad news around high voltage electronics.! After playing, allow the amplifier to cool down before moving. Hot tubes are more fragile than cool ones.! Always use good quality loudspeaker cables: instrument cables are not capable of handling the load requirements of the loudspeaker and can short out.
Replacing Tubes
A tubes life expectancy is based upon a number of factors which include operating temperature, how hard and how often it is played, vibration due to travel, etc. Tubes should be changed in your amplifier if you notice any deterioration in your amplifiers sound or performance. Otherwise, they need not be changed at any regular interval.
Typical problems with preamp tubes can be crackly noise, hiss, hum, and microphony. If they fail or exhibit reduced performance, preamp tubes can simply be swapped out with no further action required.
Typical output tube problems can include a blown HT fuse, sound lacking in punch, sound lacking extreme highs or low, and low level hum. The output tubes can be replaced singly if you replace them with the exact same type AND grade as factory fitted, otherwise they should be replaced as a matched quad set in the IRT120H, or a matched dual set in the IRT60H.
To change a tube, firstly switch off and unplug the amplifier from the mains supply. Wait for the tubes to cool down. Remove the rear protective grille held in place with four screws. Preamp tubes are protected with a screen can; to remove, push down and twist the can anti clockwise and then pull up. The tube can now be gently pulled out. Output tubes have a spring retainer which grips the base of the tube; push down on this with one hand, whilst gently rocking the tube with the other to remove. Take care when inserting the new tube in to make sure all pins are correctly aligned. If you have swapped the type of output tube (from 6L6 to EL34 for example) make sure that the bias switch on the rear panel is correctly set before powering on.
The user should not attempt to service this product. Please refer all servicing to qualified service personnel.

15
BLOCK DIAGRAM
INPUT
LEADGAIN
EXTERNALLOUDSPEAKER4-16 OHMS
FX RETURNLINE OUT FX SEND
16Ohms
BYPASS0 dBu-10dBu
REVERB
REVERBLEVEL
CLEAN/RHYTHM
RHYTHMGAIN
CLEAN/BOOST
CLEANVOLUME
CLEAN/RHYTHMEQ
BA
SS
MID
TR
EB
LE
DE
EP
MID
SH
IFT
TR
EB
LE
SH
IFT
LEADEQ
BA
SS
MID
TR
EB
LE
DE
EP
MID
SH
IFT
TR
EB
LE
SH
IFT
LEAD VOLUME
RHYTHM VOLUME
LEAD/RHYTHM
8Ohms/2x16Ohms
4Ohms/2x8Ohms
*IRT120H DI ONLY
Footswitch
Pre-Boost
Master section controls
Tone
Dyn
am
ics
Watts
D.I. OUT
D.I. LEVELGROUND LINK
D.I. SOURCED.I
AMP
EMULATION
16Ohms

16
SPECIFICATIONS

17
FCC Compliancy StatementThis device complies with Part 15 of the FCC rules.Operation is subject to the following two conditions:1) This device may not cause harmful interference2) This device must accept any interference received, that may cause undesired operation.
Warning: Changes or modification to the equipment not approved by Laney can void the user's authority to use the equipment.Note: This equipment has been tested and found to comply with the limits for Class B digital device, pursuant to Part 15 of the FCC Rules. These limits are designed to provide reasonable protection against harmful interference in a residential installation. This equipment generates, uses and can radiate radio frequency energy and if not installed and used in accordance with the instructions, may cause harmful interference to radio communications. However, there is no guarantee that interference will not occur in a particular installation. If this equipment does cause harmful interference to radio or television reception, which can be determined by turning the equipment off and on, the user is encouraged to try and correct the interference by one or more of the following measures.!Reorient or relocate the receiving antenna.!Increase the separation between the equipment and receiver.!Connect the equipment into an outlet on a circuit different from that to which the receiver is connected.!Consult the dealer or an experienced radio/TV technician for help
--------------------------------------------------------------------------------This product conforms to the requirements of the following European Regulations, Directives & Rules:CE Mark (93/68/EEC), Low Voltage 2006/95/EC, EMC (2004/108/EEC), RoHS (EU2002/95/EC), WEEE (EU2002/96/EC)
---------------------------------------------------------------------------------In order to reduce environmental damage, at the end of its useful life, this product must not be disposed of along with normal household waste to landfill sites. It must be taken to an approved recycling centre according to the recommendations of the WEEE (Waste Electrical and Electronic Equipment) directive applicable in your country.
---------------------------------------------------------------------------------Windows is a registered trademark of Microsoft Corporation in the United States and other countries.Mac, Mac OS & iPad are trademarks of Apple Inc., registered in the U.S. and other countries.Audacity is a trademark of Dominic MazzoniMixPad Audio Mixer is a trademark of NCH Software, IncPro Tools is a trademark registered in the United States by Avid Technology, Inc.Speakon is a trademark of Neutrik®AG.
---------------------------------------------------------------------------------
LEGAL


OPERATING INSTRUCTIONS - ISSUE 1.0
Please complete for future reference.
Model number:
Serial number:
Place of purchase:
Date of purchase: