investigator’s guide to national forensic laboratory services
TRANSCRIPT

A guide for investigators on how to collect, preserve and submit evidence to the RCMP’s National Forensic Laboratory Services
INVESTIGATOR’S GUIDE TO NATIONAL FORENSIC LABORATORY SERVICES

© 2017 HER MAJESTY THE QUEEN IN RIGHT OF CANADA as represented by the Royal Canadian Mounted Police.
Cat. No. PS64-139/2019E-PDFISBN 978-0-660-29378-3
Également disponible en français sous le titre Guide de l’enquêteur sur les services nationaux de laboratoire judiciaire
CONTENTSABOUT THIS GUIDE 1CONTACT INFORMATION 1Forensic Assessment Centre 1
National Anti-Counterfeiting Bureau 1
BASIC GUIDELINES AND TECHNIQUES 2Collection 2
Common tools and supplies for collecting evidence ...............................................................................................2
Handling exhibits ..................................................................................................................................................................4
Swabbing protocols for DNA ............................................................................................................................................5
Collecting comparison samples for DNA purposes ..................................................................................................7
Preservation and storage 8Drying and storing exhibits ...............................................................................................................................................8
Common containers .............................................................................................................................................................9
Packaging and shipping 11Sharp objects ..........................................................................................................................................................................11
Dangerous goods ..................................................................................................................................................................11
Proper closure .........................................................................................................................................................................12
Proper labelling ......................................................................................................................................................................12
BY EXHIBIT TYPE 13Biological (DNA) analysis 13
1. Adhesive tape (DNA) ......................................................................................................................................................13
2. Airbag (DNA) .....................................................................................................................................................................13
3. Bite marks (DNA) ..............................................................................................................................................................13
4. Blood (DNA) .......................................................................................................................................................................13
5. Bone/teeth (DNA) ............................................................................................................................................................14
6. Buccal / mouth (DNA) ....................................................................................................................................................15
7. Cartridges / casings / bullets (DNA) ..........................................................................................................................15
8. Cigarette butts (DNA) ....................................................................................................................................................15
9. Clothing / fabric (DNA) .................................................................................................................................................15
10. Condoms (DNA) .............................................................................................................................................................15
11. Drinking containers / straws (DNA) ........................................................................................................................16
12. Envelopes and stamps (DNA) ....................................................................................................................................16
13. Aborted fetus (DNA) .....................................................................................................................................................16
14. Fingernail (DNA).............................................................................................................................................................16
15. Firearms (DNA) ..............................................................................................................................................................17
16. Food (DNA) ......................................................................................................................................................................17

17. Fork / spoon (DNA) .....................................................................................................................................................17
18. Hair (DNA) ........................................................................................................................................................................18
19. Human remains (DNA) .................................................................................................................................................18
20. Knife (DNA) ......................................................................................................................................................................18
21. Semen (DNA) ..................................................................................................................................................................19
22. Skin cells (DNA) ..............................................................................................................................................................19
23. Tools / weapons (DNA) ................................................................................................................................................19
Counterfeit 201. Bank notes and negotiable instruments (counterfeit) .......................................................................................20
2. Coins (counterfeit) ...........................................................................................................................................................20
3. Payment cards (counterfeit) .........................................................................................................................................20
4. Travel and identification documents (counterfeit) ..............................................................................................20
5. Computers and it equipment (counterfeit) ............................................................................................................21
Firearms and toolmark identifcation 211. Ammunition, cartridges, bullets (firearms/toolmark) .........................................................................................21
2. Bone and cartilage (firearms/toolmark) .................................................................................................................22
3. Clothing (firearms/toolmark) .......................................................................................................................................22
4. Firearms (firearms/toolmark) .......................................................................................................................................22
5. Gunpowder / primer caps (firearms/toolmark) .....................................................................................................23
6. Obliterated serial number (firearms/toolmark) ....................................................................................................23
7. Tools (firearms/toolmark) ..............................................................................................................................................24
8. Toolmark impressions (firearms/toolmark) ...........................................................................................................24
9. Tires (firearms/toolmark) ..............................................................................................................................................24
10. Wires (firearms/toolmark) ..........................................................................................................................................24
Toxicology 241. Blood (toxicology) ...........................................................................................................................................................24
2. Food and beverages (toxicology) ..............................................................................................................................25
3. Liver (toxicology) ..............................................................................................................................................................25
4. Stomach contents (toxicology) ...................................................................................................................................25
5. Syringes, pipes, powders, drugs, or drug residue (toxicology)........................................................................25
6. Urine (toxicology) ............................................................................................................................................................26
7. Vitreous humour (toxicology) ......................................................................................................................................26
Trace analysis 261. Accelerants / ignitable liquids (trace analysis) ......................................................................................................26
2. Adhesive tape (trace analysis) .....................................................................................................................................27
3. Bank dye packs (trace analysis) ...................................................................................................................................27
4. Building products (trace analysis) ..............................................................................................................................27
5. Clothing (trace analysis) ................................................................................................................................................28
6. Dyes for fuel marking (trace analysis) .......................................................................................................................29
7. Explosive debris (post-blast trace analysis) ............................................................................................................29

8. Explosive devices (trace analysis) ...............................................................................................................................30
9. Explosive substances (trace analysis) .......................................................................................................................30
10. Fire debris / ignitable liquid residue (trace analysis) ........................................................................................31
11. Gunshot residue (trace analysis) ..............................................................................................................................31
12. Metals (trace analysis) ..................................................................................................................................................31
13. Paint (trace analysis) .....................................................................................................................................................32
14. Physical match (trace analysis) .................................................................................................................................32
15. Safe insulation (trace analysis) ..................................................................................................................................33
16. Tools (trace analysis) .....................................................................................................................................................33
17. Unknown liquid or powder (trace analysis) .........................................................................................................33
18. Vehicle parts (trace analysis) .....................................................................................................................................34
SUBMITTING EVIDENCE 35Contact the Forensic Assessment Centre 35
National Anti-Counterfeiting Bureau 35
POST FORENSIC ANALYSIS 36Return of exhibits and master files 36
Retention of exhibits by investigating agency 36
Disclosure 36
OTHER FORENSIC RESOURCES 37National DNA Data Bank of Canada ................................................................................................................................37
Forensic identification units ..............................................................................................................................................37
Technological crime units ..................................................................................................................................................37
Explosives disposal units ....................................................................................................................................................37
Firearms reference table .....................................................................................................................................................37
National Weapons Enforcement Support Team .........................................................................................................38
National Centre For Missing Persons And Unidentified Remains ........................................................................38
National Forensic Laboratory Services Investigator’s Guide1
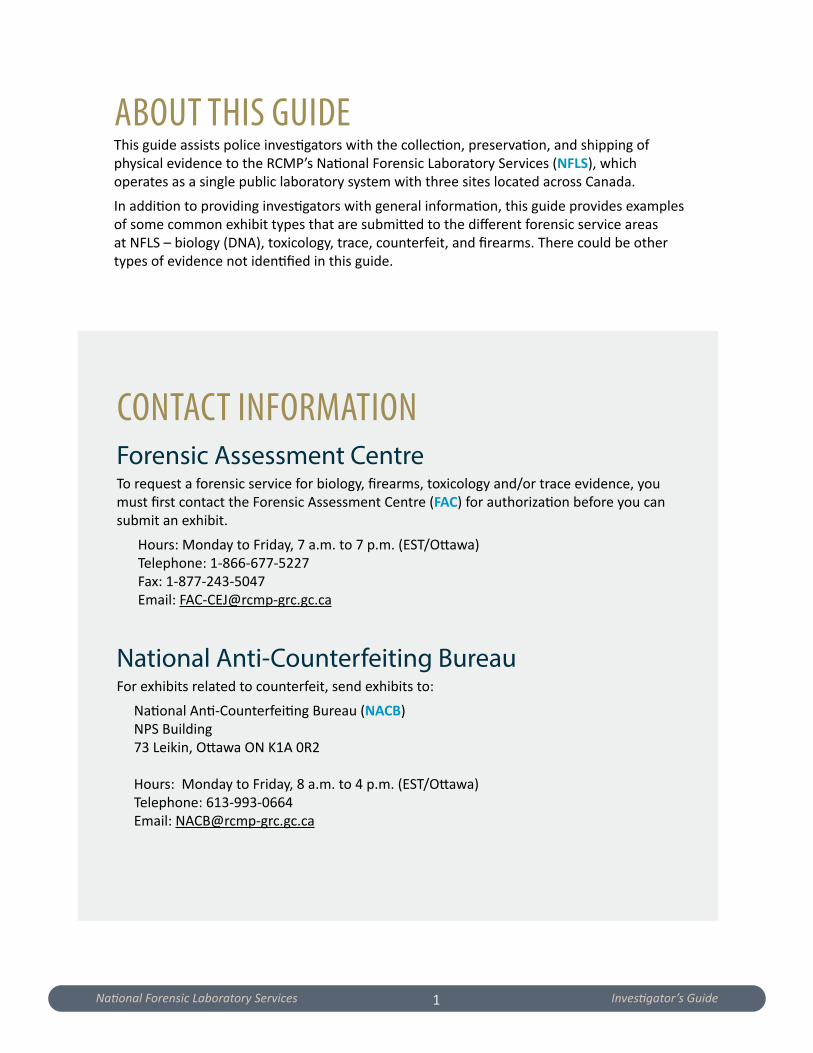
ABOUT THIS GUIDEThis guide assists police investigators with the collection, preservation, and shipping of physical evidence to the RCMP’s National Forensic Laboratory Services (NFLS), which operates as a single public laboratory system with three sites located across Canada.
In addition to providing investigators with general information, this guide provides examples of some common exhibit types that are submitted to the different forensic service areas at NFLS – biology (DNA), toxicology, trace, counterfeit, and firearms. There could be other types of evidence not identified in this guide.
CONTACT INFORMATIONForensic Assessment CentreTo request a forensic service for biology, firearms, toxicology and/or trace evidence, you must first contact the Forensic Assessment Centre (FAC) for authorization before you can submit an exhibit.
Hours: Monday to Friday, 7 a.m. to 7 p.m. (EST/Ottawa) Telephone: 1-866-677-5227Fax: 1-877-243-5047Email: [email protected]
National Anti-Counterfeiting BureauFor exhibits related to counterfeit, send exhibits to:
National Anti-Counterfeiting Bureau (NACB)NPS Building73 Leikin, Ottawa ON K1A 0R2
Hours: Monday to Friday, 8 a.m. to 4 p.m. (EST/Ottawa)Telephone: 613-993-0664Email: [email protected]

National Forensic Laboratory Services Investigator’s Guide2
BASIC GUIDELINES AND TECHNIQUESCollectionLocal forensic identification service units may be called upon to assist with the collection of evidence. They have the proper tools and their members have undergone specialized training to ensure evidence is collected properly and safely. The following are some general guides, tips and best practices that can be used by investigators should forensic identification members not be available to assist.
Common tools and supplies for collecting evidence
Always use gloves and a maskTool Generally used for Additional information
Disposable scalpels • cutting stains from larger exhibits
• scraping paint samples from vehi-cles (e.g. hit-and- run)
• if disposable tools are not available, rinse non- disposable tools between each use with alcohol or distilled water
Disposable tweezers and forceps
• collecting small items (hair, building product particles, cigarette butts, etc.)
• DO NOT use metal tools on ammunition components
Disposable lancet • collecting known DNA samples from individuals onto collection cards
• found in the RCMP’s DNA Warrant/ Consent Collection Kits (blue bags)
• commercially available or from medical practitioner
Sterile swabs • collecting biological samples (e.g. blood, saliva, skin cells)
• soaking up liquid such as gasoline at an arson scene
• it is preferable to use sterile, cotton swabs that are individually wrapped within a re-sealable paper or plastic sleeve
• when collecting non- biological evidence, a best practice is to also submit an unused “control” swab (preferably from the same lot)
Sexual Assault Evidence Kits (SAEKs)
• SAEKs are used to assist with the collection of evidence associated with sexual assaults – evidence is collected by trained health care professionals
• police can submit requests for forensic analy-sis regardless of whether it is part of a SAEK
• SAEKs are generally sealed by the health care practitioner when handed over to police
• ensure the health care professional that is collecting the evidence provides you with a list of all the samples/exhibits in the SAEK because you will need to list all items on Form C-414 when submitting for analysis (alternatively, you may break the seal to itemize the available exhibits)

National Forensic Laboratory Services Investigator’s Guide3
Forensic Blood Collection Kit
• used for toxicological analysis of blood (e.g. cases of impaired driving)
• contains two grey- stoppered vacuum tubes with a white powder that acts as preservative and anticoagulant
• the RCMP has a kit and it is also available commercially
DNA Warrant/ Consent Collection Kit (blue bag)
• used for collecting known DNA samples for comparison purposes
• there are three DNA Warrant/ Consent Collection Kits:
- Blood Sample - Buccal Sample - Hair Sample
• DNA Warrant/Consent Collection Kits are not to be used for submission of samples to the National DNA Data Bank
• blood samples are preferred for biology (DNA) analysis, followed by buccal (mouth swab) and then, hair.
• the RCMP’s DNA Warrant/Consent Collection Kits are available to all police agencies, however, other versions are available by alternate service providers (the RCMP kits are identifiable by the blue bag used)
Convicted Offender DNA Database Sample Collection Kit (clear bag)
• used to collect DNA samples from convicted offenders
• specifically designed for the collection of DNA samples from convicted offenders
• identifiable by the clear bag used
• these are the only kits that are accepted by the National DNA Data Bank (NDDB)
• to obtain these kits, contact the NDDB
Leak proof urine cup
• used for toxicological analysis of urine (e.g. impaired driving)
• commercially available or from medical practitioner
Gunshot Residue (GSR) Kit
• collecting GSR samples from per-sons suspected of recently discharg-ing a firearm
• collecting samples from objects suspected as having been exposed to a source of GSR, but cannot be easily submitted to the laboratory for analysis (e.g. a motor vehicle)
• contains instructions, a collection form, and two boxes each containing a pair of disposable gloves, a label to re-seal the box after use, and two sample vials (also known as stubs)
• obtain samples as soon as possible after the shooting
• DO NOT collect GSR samples if the exhibit has been authorized for GSR testing at NFLS
• complete the GSR Kit form at the time of sampling
• include the GSR Kit collection form with your submission request by either sending the original along with the GSR Kit or sending an electronic copy by email with Form C-414
• contact FAC to receive a GSR Kit

National Forensic Laboratory Services Investigator’s Guide4
FTA collection card or Whatman 31 ET filter paper
• collecting blood or buccal (mouth swab) samples from known individuals
• the FTA Collection Card is found in the RCMP’s DNA Warrant/Consent Collection Kit (blue bags)
• Whatman filter papers are commercially available
Hemastix test strips • allows you to screen for the presence of blood
• identifies if blood may be present, either human or animal
• the strip should not come into directw contact with the material that is being collected
• advise FAC if the Hemastix stip came in direct contact with an exhibit, stained surface or swab (so that FAC directs the exhibit to the appropriate area for DNA analysis)
Handling exhibits
� Personal safetyCrime scenes and handling exhibits can be dangerous. Minimize exposure to infectious disease, hazardous drugs, and reduce the risk of contaminating the evidence by always wearing gloves and a mask when handling exhibits, including when you are collecting, packaging or shipping evidence. When finished, remove gloves and wash thoroughly with soap and hot water. Eye protection and other personal protection is also advised.
� Avoid contaminating exhibitsKeep exhibits that need to be examined completely separate from each other, from different scenes, and from comparison samples. Wear gloves at all times, changing them frequently (e.g. between exhibits and different areas of a crime scene). Avoid excessive handling of exhibits. Use a clean tool for each exhibit being processed. Use disposable tools such as scalpels whenever possible. Alternatively, clean all scissors and forceps thoroughly with alcohol between uses. Always package exhibits separately in clean bags or containers that will not leak, break or open. If accidental contamination is suspected, please inform FAC at the time of your submission.
� FingerprintingFingerprinting is not a service provided by NFLS and is the responsibility of the investigator and agency. Your local forensic identification unit may provide this service or assist you in determining if the surface of the item is suitable for fingerprinting. Also, when conducting fingerprinting, avoid excessive handling of the exhibit, even while wearing gloves. Please note that if the exhibit requires both fingerprinting and other forensic services at NFLS, there is a recommended order and workflow. For example, fingerprinting and swabbing for DNA analysis are normally done prior to submitting firearm-related exhibits for firearm testing and examination. Contact FAC for further guidance.
� Large and small exhibitsFor larger exhibits with visible staining that cannot be submitted to NFLS (e.g. bed mattress, large carpet), the stains of interest may be cut out when required. Using a sterile disposable scalpel, carefully cut out the area of interest ensuring to leave a sufficient border around the stain. When collecting truly small particles, such as hair or paint chips, it is best to fold them in a piece of paper and seal in an envelope or plastic bag.
National Forensic Laboratory Services Investigator’s Guide5
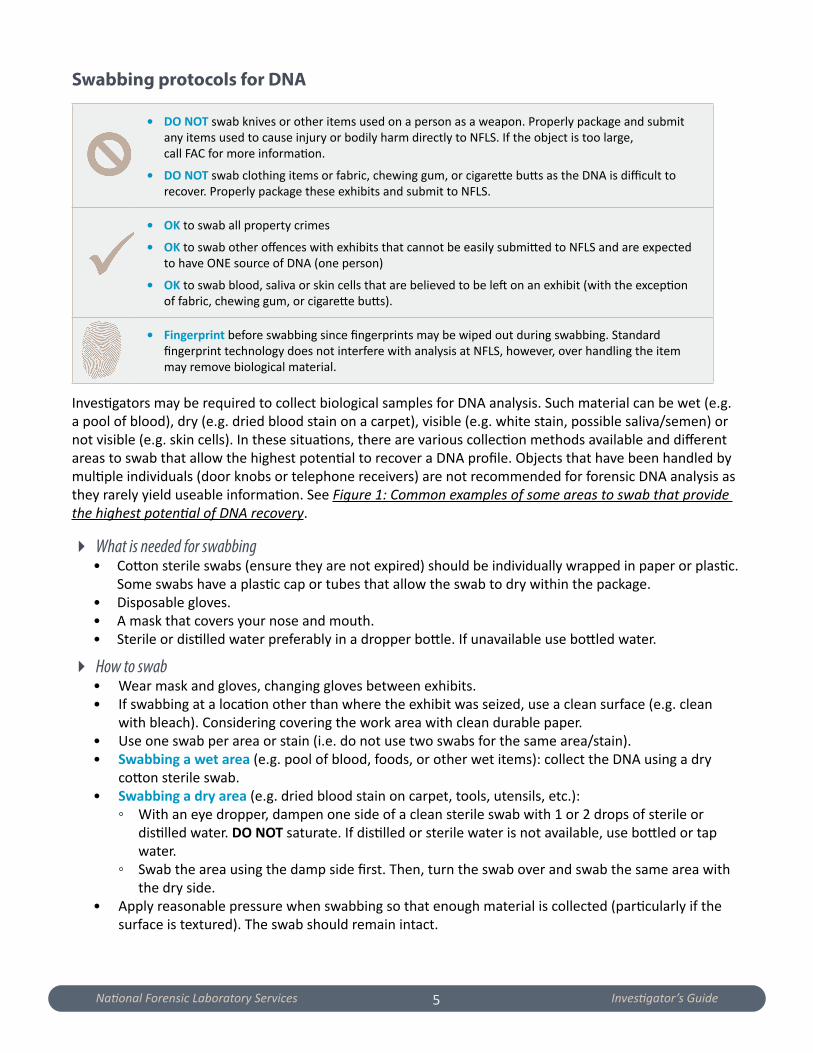
Swabbing protocols for DNA
• DO NOT swab knives or other items used on a person as a weapon. Properly package and submit any items used to cause injury or bodily harm directly to NFLS. If the object is too large, call FAC for more information.
• DO NOT swab clothing items or fabric, chewing gum, or cigarette butts as the DNA is difficult to recover. Properly package these exhibits and submit to NFLS.
• OK to swab all property crimes
• OK to swab other offences with exhibits that cannot be easily submitted to NFLS and are expected to have ONE source of DNA (one person)
• OK to swab blood, saliva or skin cells that are believed to be left on an exhibit (with the exception of fabric, chewing gum, or cigarette butts).
• Fingerprint before swabbing since fingerprints may be wiped out during swabbing. Standard fingerprint technology does not interfere with analysis at NFLS, however, over handling the item may remove biological material.
Investigators may be required to collect biological samples for DNA analysis. Such material can be wet (e.g. a pool of blood), dry (e.g. dried blood stain on a carpet), visible (e.g. white stain, possible saliva/semen) or not visible (e.g. skin cells). In these situations, there are various collection methods available and different areas to swab that allow the highest potential to recover a DNA profile. Objects that have been handled by multiple individuals (door knobs or telephone receivers) are not recommended for forensic DNA analysis as they rarely yield useable information. See Figure 1: Common examples of some areas to swab that provide the highest potential of DNA recovery.
� What is needed for swabbing• Cotton sterile swabs (ensure they are not expired) should be individually wrapped in paper or plastic. Some swabs have a plastic cap or tubes that allow the swab to dry within the package.• Disposable gloves.• A mask that covers your nose and mouth.• Sterile or distilled water preferably in a dropper bottle. If unavailable use bottled water.
� How to swab• Wear mask and gloves, changing gloves between exhibits.• If swabbing at a location other than where the exhibit was seized, use a clean surface (e.g. clean with bleach). Considering covering the work area with clean durable paper.• Use one swab per area or stain (i.e. do not use two swabs for the same area/stain).• Swabbing a wet area (e.g. pool of blood, foods, or other wet items): collect the DNA using a dry cotton sterile swab.• Swabbing a dry area (e.g. dried blood stain on carpet, tools, utensils, etc.):
◦ With an eye dropper, dampen one side of a clean sterile swab with 1 or 2 drops of sterile or distilled water. DO NOT saturate. If distilled or sterile water is not available, use bottled or tap water.◦ Swab the area using the damp side first. Then, turn the swab over and swab the same area with the dry side.
• Apply reasonable pressure when swabbing so that enough material is collected (particularly if the surface is textured). The swab should remain intact.
National Forensic Laboratory Services Investigator’s Guide6
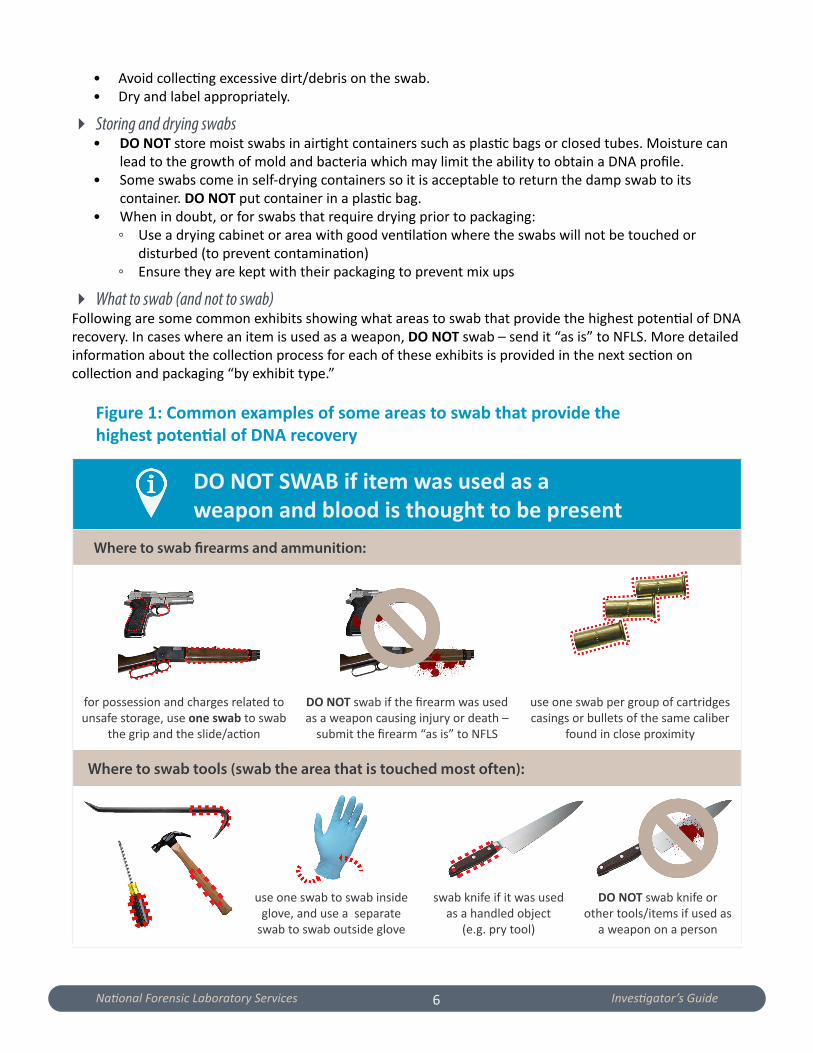
• Avoid collecting excessive dirt/debris on the swab.• Dry and label appropriately.
� Storing and drying swabs• DO NOT store moist swabs in airtight containers such as plastic bags or closed tubes. Moisture can lead to the growth of mold and bacteria which may limit the ability to obtain a DNA profile.• Some swabs come in self-drying containers so it is acceptable to return the damp swab to its container. DO NOT put container in a plastic bag.• When in doubt, or for swabs that require drying prior to packaging:
◦ Use a drying cabinet or area with good ventilation where the swabs will not be touched or disturbed (to prevent contamination)◦ Ensure they are kept with their packaging to prevent mix ups
� What to swab (and not to swab)Following are some common exhibits showing what areas to swab that provide the highest potential of DNA recovery. In cases where an item is used as a weapon, DO NOT swab – send it “as is” to NFLS. More detailed information about the collection process for each of these exhibits is provided in the next section on collection and packaging “by exhibit type.”
Figure 1: Common examples of some areas to swab that provide the highest potential of DNA recovery
DO NOT SWAB if item was used as a weapon and blood is thought to be present
Where to swab firearms and ammunition:
for possession and charges related to unsafe storage, use one swab to swab
the grip and the slide/action
DO NOT swab if the firearm was used as a weapon causing injury or death –
submit the firearm “as is” to NFLS
use one swab per group of cartridges casings or bullets of the same caliber
found in close proximity
Where to swab tools (swab the area that is touched most often):
use one swab to swab inside glove, and use a separate
swab to swab outside glove
swab knife if it was used as a handled object
(e.g. pry tool)
DO NOT swab knife or other tools/items if used as
a weapon on a person

National Forensic Laboratory Services Investigator’s Guide7
Swab anything large, e.g. floor wall, window glass, furniture (use one swab per stain).
Where to swab drinking containers, utensils and food (swab the area that may have saliva on it):
Collecting comparison samples for DNA purposesDNA analysis is based on a comparative process wherein a DNA profile that is obtained from an exhibit is compared to the DNA profile from a known person, from personal effects or discarded items. For all DNA samples submitted to NFLS for comparison, clearly indicate on Form C-414 whether a sample is from consent, from a warrant, or a discarded item. In all cases, always wear disposable gloves, even when collecting comparison samples.
� From known persons, in order of preference:1. Blood
◦ A blood sample can be collected using the RCMP’s Blood Sample Warrant/Consent Collection Kit (blue bags), or a blood sample kit offered by another service provider.◦ Use the FTA collection card in the collection kit or a Whatman 31 ET filter paper to collect the blood. The FTA collection card or Whatman 31 ET filter paper are preferred methods to collect blood samples, however, liquid blood is accepted in most cases.◦ The collection of liquid blood must be performed by a healthcare practitioner who collects the blood in a lavender vacutainer tube, which contains preservatives and anti-coagulants.◦ The collection of blood from a deceased person is done at autopsy.◦ See section on “Exhibit Types” for the collection of a blood sample for biological analysis.
2. Buccal (mouth swab)◦ A buccal sample can be collected using the RCMP’s Buccal Sample Warrant/Consent Collection
blood on glass blood on floor DO NOT swab fabric, textiles, or clothing
when swabbing food items, freeze the item first, if possible
National Forensic Laboratory Services Investigator’s Guide8
Kit (blue bags), or a buccal sample kit offered by another service provider.◦ See section on “Exhibit Types” for the collection of a buccal/mouth swab sample for biological analysis.
3. Hair◦ A hair sample can be collected using the RCMP’s Hair Sample Warrant/Consent Collection Kit (blue bags), or a hair sample kit offered by another service provider.◦ See section on “Exhibit Types” for the collection of hair samples for biological analysis.
If it is not possible to collect any of the above samples (e.g. individual is under surveillance), consider collecting and submitting personal effects or discarded samples for comparison purposes
� From personal effects and discarded itemsPersonal effects, such as a toothbrush, razor or hair brush, can be collected and submitted as compari-son samples. Personal items, usually from missing persons, are considered “quasi” knowns because it is not guaranteed that the object pertains solely to the user/owner of the item. As it relates to the personal effects of a known suspect, it is not possible to submit them as Comparison samples without consent or a court-ordered warrant.
Discarded items, such as gum, a cigarette butt or a drinking container, can be collected and submitted as Comparison samples, however, the act of discarding must be viewed by police. For example, the cigarette butt has to be seen by police as discarded by the suspect in order to be used as a comparison sample. Ensure that discarded sample is packaged, sealed and labelled separately and that the origin of the sample is clearly marked.
� From a collection card using a dry stain• Use a FTA collection card or Whatman 31 ET filter paper and a disposable lancet to collect enough blood from a finger prick.• Gently squeeze the finger, causing the blood to drop on to the card, approximately the size of a quarter.• Allow the blood stain to dry completely. DO NOT fan the card or apply artificial heat to speed up the drying process (allow to dry naturally).• Package, seal and label each known sample separately.• Ensure the origin of the sample is clearly marked.• Collection cards are stored at room temperature before and after sample application.
Preservation and storageThe following information will assist in preventing the deterioration, unauthorized handling, loss, contamination and unnecessary alteration of exhibits during storage and prior to submitting exhibits to NFLS.
Drying and storing exhibitsEnsure exhibits are completely dry especially when using plastic bags (some exceptions are noted below). If a drying cabinet is not available, allow wet or moist exhibits to dry naturally in a clean low traffic area prior

National Forensic Laboratory Services Investigator’s Guide9
to packaging. DO NOT hand fan, use electric fans, hair dryers or other heat sources to speed up the drying process as air currents and excessive heat may cause some loss of evidential material. Fully dried exhibits can be stored at room temperature provided it is not excessively hot or humid. The best storage for most exhibits is generally a freezer. If unavailable, use a fridge. If there is no fridge, you can store at room tem-perature, however, ensure the item is fully dried.
Exceptions:
• DO NOT dry exhibits for arson investigations (e.g. fibre debris, suspect clothing). Arson exhibits should be packaged as soon as possible. See section on Fire Debris for more detailed information.• Liquid samples and human tissue (e.g. muscle, aborted fetus, and other moist exhibits) should be stored in a frozen state whenever possible. Refrigeration can be used if freezing is not an option. Submit the samples to NFLS as soon as possible.• Biological samples submitted for toxicological analysis should be refrigerated immediately and submitted as soon as possible to prevent the potential breakdown or loss of drugs (e.g., cocaine).
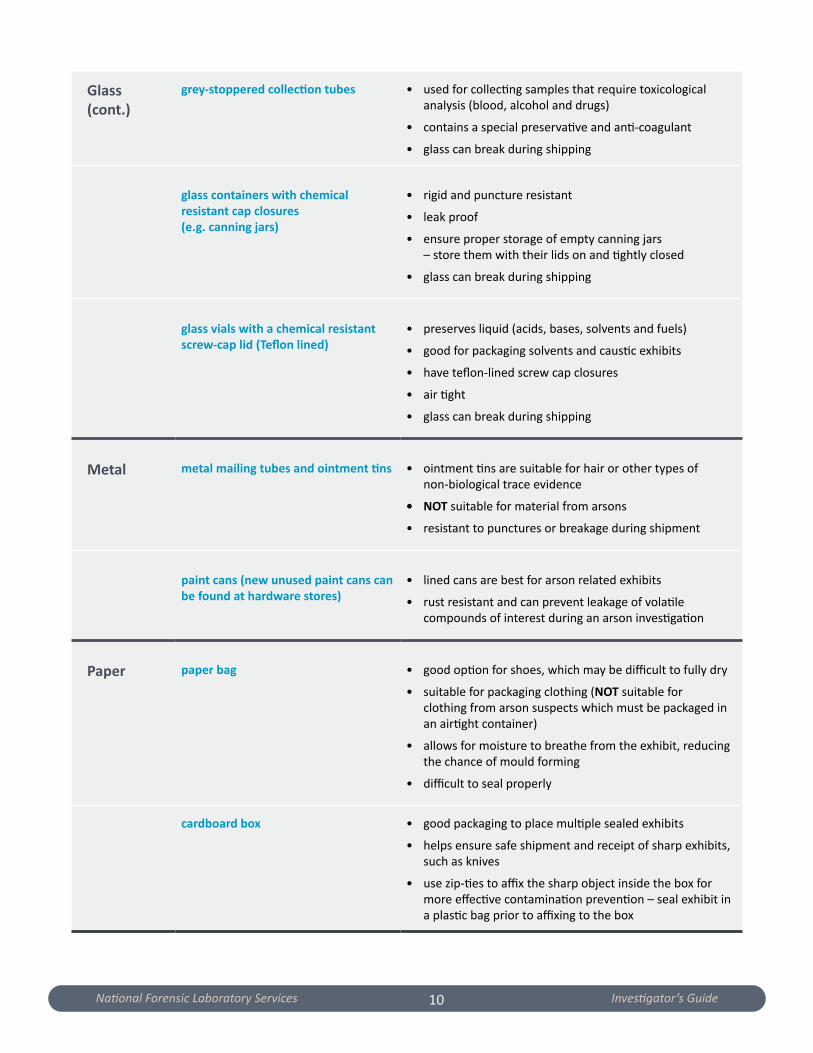
Common containers
Type Container style Notes
Plastic tamper-proof evidence bags • apply tamper proof seal as directed
• if any gaps are present after sealing, tape or heat-seals can be used
• already packaged exhibits (e.g. swab holders, exhibits in paper bags) can be put into tamper-proof evidence bags
plastic vials • suitable for collecting biological samples
• suitable for solid evidence such as building product mate-rials, paint chips, ammunition fragments, etc.
• ensure lids are put on tightly – consider using tape to seal the lid in place
• not recommended for some solvents (e.g. gasoline) as it can dissolve the plastic
• liquid samples (urine, melted snow) may leak depending on the lid type
Nylon special bags for packaging fire debris • 100% nylon
• air tight (must be properly sealed)
• easy to puncture
• commercially available
Glass lavender vacutainer tubes • healthcare professionals, pathologists, coroners and other qualified medical professionals use these tubes to collect blood for DNA (please note dry stain collection is preferred to liquid blood sample)
• contains an anti-coagulant
• glass can break during shipping
National Forensic Laboratory Services Investigator’s Guide10
Glass (cont.)
grey-stoppered collection tubes • used for collecting samples that require toxicological analysis (blood, alcohol and drugs)
• contains a special preservative and anti-coagulant
• glass can break during shipping
glass containers with chemical resistant cap closures (e.g. canning jars)
• rigid and puncture resistant
• leak proof
• ensure proper storage of empty canning jars – store them with their lids on and tightly closed
• glass can break during shipping
glass vials with a chemical resistant screw-cap lid (Teflon lined)
• preserves liquid (acids, bases, solvents and fuels)
• good for packaging solvents and caustic exhibits
• have teflon-lined screw cap closures
• air tight
• glass can break during shipping
Metal metal mailing tubes and ointment tins • ointment tins are suitable for hair or other types of non-biological trace evidence
• NOT suitable for material from arsons
• resistant to punctures or breakage during shipment
paint cans (new unused paint cans can be found at hardware stores)
• lined cans are best for arson related exhibits
• rust resistant and can prevent leakage of volatile compounds of interest during an arson investigation
Paper paper bag • good option for shoes, which may be difficult to fully dry
• suitable for packaging clothing (NOT suitable for clothing from arson suspects which must be packaged in an airtight container)
• allows for moisture to breathe from the exhibit, reducing the chance of mould forming
• difficult to seal properly
cardboard box • good packaging to place multiple sealed exhibits
• helps ensure safe shipment and receipt of sharp exhibits, such as knives
• use zip-ties to affix the sharp object inside the box for more effective contamination prevention – seal exhibit in a plastic bag prior to affixing to the box

National Forensic Laboratory Services Investigator’s Guide11
Packaging and shippingProper packaging and delivery of exhibits to NFLS is critical. Improperly packaged exhibits can be a health hazard, may cause the exhibit to become contaminated or could even destroy the evidence. Improperly packaged exhibits might not be suitable for analysis and will be sent back to you by NFLS without further processing. Before submitting the exhibits, discuss packaging requirements with your local forensic identification services and/or FAC.
Sharp objectsObjects such as knives, syringes, glass must be packaged properly to ensure the object/exhibit doesn’t puncture through packaging. For glass and other breakable items, ensure there is plenty of protective material used when packaging. Knives should be packaged in a knife box, or protected, secured and tied down in a box.
Dangerous goodsFollow Transport Canada’s Transportation of Dangerous Goods Regulations: improper transportation of dangerous goods is an offence. For more information, contact FAC prior to shipping exhibits.
� Ammunition• Firearms and unfired ammunition must be shipped separately.• For shipping of ammunition in amounts of less than 25 kgs., follow the Transportation of Dangerous Goods Regulations. For this weight category, the shipping package must have a “1.4S” Transportation of Dangerous Goods (TDG) label attached to it and the shipping company/courier must be notified in writing (e.g. notation on the way bill) that the package contains a substance that is classified as “1.4S” for TDG purposes.• Ammunition must be packed in a strong container that is securely closed to prevent opening during transit. Cartridges must be properly cushioned and protected from accidental discharge.
� Explosives• Contact FAC to obtain an explosive transport container. It is the only approved shipping container for non-initiated explosive samples. There are instructions provided with the explosive transport containers, including Teflon vials.
� Firearms• Ensure the firearm is unloaded and safe for handling before shipping. A visible securing device should be used through the action (e.g. zap-strap, trigger lock). Depending on the type of firearm, additional legal requirements must be met. For more information see the Storage, Display and Transportation of Firearms and Other Weapons by Business Regulations.• DO NOT place labels or tags over identifying marks or over areas that affect the operation of the firearm component. You can mark the container or affix a tag to the item, as required.• Firearms must be registered to the investigating agency prior to shipping. A Public Agency Identification Number (PAIN) must be obtained and can be found on the RCMP public website, under the Canadian Firearms Program.• Firearms with broken stocks must be packaged properly to ensure the object/exhibit doesn’t puncture through packaging. Ensure there is plenty of protective material used when packaging.• The container should not bear any markings on the exterior to indicate that it contains a firearm.• Firearms and unfired ammunition must be shipped separately.

National Forensic Laboratory Services Investigator’s Guide12
� Gun powder and primer caps• Refer to Explosives.
� Ignitable liquids• An Ignitable Liquid Transport Container (ILTC) is recommended to safely transport ignitable liquids. These containers are equipped with an inner protective metal can and lid, absorbent material, exhibit bags and sample vials along with instructions.• Larger police agencies have their own ILTC. Other agencies should contact FAC to request an ILTC and provide the number of samples of suspected ignitable liquids you wish to submit for analysis.• For more information, follow Transport Canada’s Transportation of Dangerous Goods Regulations: improper transportation is an offence.
� Infectious substances• An infectious substance is a micro-organism that is known or reasonably believed to cause disease in humans or animals. The infectious substance might be contained in blood, tissue, organs, body fluids, vaccines or cultures.• In shipping infectious substances, follow Transport Canada’s Transportation of Dangerous Goods Regulations. In particular, refer to Shipping Infectious Substances.
� Toxicological exhibits• Label the exhibit container in a way that allows it to be uniquely identified (e.g. name of source, date, investigator information).• Package according to Transportation of Dangerous Good Regulations.• Place the exhibit container into a sealable plastic bag with absorbent packing material. Place this bag into another container strong enough to withstand transportation (e.g. a box).• Ensure sufficient packing material is present to impede the movement of the exhibit container with out/within the outer container.
Proper closureInspect each layer of packaging to ensure they are properly closed and that at least one of the layers for each exhibit is sealed. Following are some examples of what constitutes a “sealed package”:
• evidence bag• heat-sealed plastic bags• vials or jars, sealed with tape• plastic or paper bags folded and sealed with sufficient tape
Proper labellingDelays can be caused due to the improper identification/labelling of exhibits. To ensure your submission is processed promptly, please ensure that exhibit identifier listed on Form C-414 (Request for Forensic Laboratory Analysis) matches exactly to the exhibit identifier used on the actual exhibit. These identifiers should also match exactly to information found on each layer of packaging.

National Forensic Laboratory Services Investigator’s Guide13
BY EXHIBIT TYPEBiological (DNA) analysis
1. Adhesive tape (DNA)
Fingerprinting on any adhesive tape-related exhibits must be done prior to submitting for DNA analysis. Contact your local forensic identification unit for fingerprinting services. Advise the person who is fingerprinting that DNA analysis will also be done and advise NFLS that the exhibit was first sent for fingerprinting.
• DO NOT swab – submit as is.• Submit the tape for DNA analysis without removing it from the taped object, if possible.• If removal from taped object is necessary, handle ends of tape as little as possible to allow for
possible DNA sampling. Place adhesive-side down onto a new document protector.• If cutting the tape is necessary to remove it from the object/person, mark the cut ends with
permanent marker.• Do not separate or straighten pieces.• Package in tamper-proof evidence bags or rigid plastic or metal containers.• Do not package in paper or cardboard containers.
2. Airbag (DNA) • For cases involving injury of an individual, other than the driver, or in
cases of death:◦ DO NOT swab. The entire airbag should be packaged and submitted to NFLS “as is” (without swabbing).
• For crimes against property (e.g. stolen vehicles) or cases of impaired driving:◦ If blood is visible, swab the blood stain only.◦ If no blood is visible, divide the airbag into halves and swab each half separately (one swab per half). Swab from the centre outwards, to about 2/3 of the distance to the outside.
3. Bite marks (DNA)• When attempting to recover saliva or biological traces from a bite mark, use one swab over the bite
mark. See swabbing protocols for dry area.• Only one swab is needed.
4. Blood (DNA)A. Blood collected by healthcare professional◦ Blood from a deceased person is collected at autopsy by the pathologist/medical examiner or designated assistant. Consider asking for a buccal (from mouth) swab or pulled hair sample as back up. Deep muscle tissue, bone and/or teeth can also be considered.◦ Blood from a suspect or victim/complainant is collected by a healthcare practitioner (e.g. at hospital).

National Forensic Laboratory Services Investigator’s Guide14
◦ Blood samples should be refrigerated and submitted to NFLS as soon as possible.◦ Ensure all vials are properly sealed and labeled.◦ Note: A dry stain is preferred. Request that the healthcare professional create a dry stain using a FTA collection card or Whatman 31 ET filter paper.
B. Blood collected by investigator
All necessary information and instructions for blood, buccal or hair samples are contained in the RCMP’s DNA Warrant/Consent Collection Kits (blue bags). If a sample is being collected from a convicted offender, use the Convicted Offender DNA Database Sample Collection Kit (clear bag).
◦ From a person by consent- Use a FTA card or Whatman 31 ET filter paper and a disposable lancet to collect the blood.- Allow the blood stain to dry completely.- Package, seal and label each known sample separately.- Ensure the origin of the sample is clearly marked.
◦ From a person by warrant- DNA warrant legislation (sections 487.04 and 487.05 of the Criminal Code) (Form 5.02) allows for samples to be taken from suspects or accused individuals without their consent.- NFLS recommends using the RCMP’s Blood Sample Warrant/Consent Collection Kit (blue bag), which has been prepared specifically for DNA warrant or consent sample collection.
◦ From a convicted offender- Please refer to the National DNA Data Bank of Canada for more information.
◦ From items at the crime scene
Direct contact between Hemastix test strips and a biological stain may negatively affect certain DNA analysis procedures. Advise FAC if the Hemastix strip has come in direct contact with an exhibit, stained surface or swab so that the exhibit is directed to the appropriate areas for DNA analysis.
- Blood stains on fabric or absorbent material (e.g. carpet, clothing):-- If possible, submit the entire item. Consult with FAC for large items.-- Allow to completely dry naturally.-- Package, seal and label each item separately.
- Blood stains on other surfaces (e.g. walls):-- If the item is large, cut out a portion, dry naturally, seal, label and submit. A swab can also be taken (see swabbing protocols). When swabbing suspected bloodstains, try to concentrate the stain onto the swab tip. Avoid swabbing excess background material (dirt, debris, paint, etc.) from the material being swabbed. Use one swab per stain.-- Avoid scraping dry blood into envelopes. Dry blood may become airborne.
- Liquid blood stains:-- Use a dry swab. Do not over saturate. See swabbing protocols for dry area.
5. Bone/teeth (DNA)• Bone/teeth need to be pulverized prior to submission.• Contact FAC for more information.

National Forensic Laboratory Services Investigator’s Guide15
6. Buccal / mouth (DNA)• After blood, the next preferred comparison sample is a buccal (mouth swab).
See section on Comparison samples from known sources.• When possible, known samples should be collected using the RCMP’s Buccal Sample Warrant/
Consent Collection Kit (blue bag), which has been prepared specifically for DNA warrant or consent sample collection.
• Swabbing the mouth allows for the collection of epithelial cells from the lining of the mouth.• Have the individual rinse his/her mouth with water twice before collecting the sample in order to
remove excess saliva.• Use one dry sterile swab to thoroughly rub the inside of the cheeks, tongue and gums using an up
and down motion.• Allow time for the swab to dry completely.• Package, seal and label each known sample separately.• Ensure the origin of the sample is clearly marked.
7. Cartridges / casings / bullets (DNA)• Spent cartridges should be swabbed together when thought to
have originated from the same firearm (i.e. those of the same caliber found in close proximity).
8. Cigarette butts (DNA) • Use clean forceps or gloves to collect the cigarette• butt, if possible.• If the cigarette butt is wet or damp, allow to dry completely.• DO NOT swab. Submit “as is”.• Package, seal and label each item separately.
9. Clothing / fabric (DNA) • DO NOT swab as the DNA is difficult to recover.
Submit the item “as is” to NFLS.• Allow time for stains to dry completely. Applying artificial
heat (e.g. blow dryer) may damage the biological sample. Not allowing the item to dry fully or properly can cause bacteria to form, leading to the degradation of the biological sample. Handle each article of clothing separately.
• If the item is large (carpet, bed sheet), consult with FAC.• Package, seal and label each article of clothing separately in paper bags.
10. Condoms (DNA)• If intact, place a knot at open end to seal contents and submit to the laboratory as soon as possible.• If broken or ripped, allow the condom to dry as much as possible and package, seal and label sepa-
rately in a paper bag before submitting to the laboratory.• Keep the intact or broken condom frozen, if possible.
Swab multiple casings from the same group with a single swab
DO NOT swab cigarette butts
DO NOT swab fabrics

National Forensic Laboratory Services Investigator’s Guide16
11. Drinking containers / straws (DNA)• Skin cells can be located on drinking containers such as coffee
cups, pop cans, milk/juice cartons, coffee lids and/or straws.• Swab the area where skin cells are thought to be present as
this provides the highest potential of DNA recovery (see diagram). Use one swab. See swabbing protocols.
12. Envelopes and stamps (DNA)• Whenever possible, submit the entire envelope to NFLS.• Ensure that the envelope is dry before packaging.• In cases where the envelope requires both fingerprinting and forensic DNA analysis, have the exhibit
fingerprinted prior to its submission to NFLS. Advise FAC.• If handwriting analysis will be taking place (via private examiner), this may need to be done prior to
fingerprinting. Ensure the examiner takes all necessary contamination prevention precautions.• If the exhibit is required for other document examination, please specify this on Form C-414.
13. Aborted fetus (DNA)• When the abortion of the fetus has just occurred, the products of conception should be sent to NFLS
as soon as possible.• Refrigerate and ship immediately.• DO NOT freeze products of conception unless the sample was already frozen at the time of the sei-
zure. If already frozen, it should be kept frozen (avoid freeze-thaw-freeze).• Package on ice and send to NFLS as soon as possible using expedited transport• It is preferable not to place in formalin/formaldehyde or any other preservative.
14. Fingernail (DNA)
Material from under the fingernail should be collected when the victim / complainant indicates that he/she scratched the assailant. Samples are collected from each hand separately.
Swabbing fingernails is preferred, however, clippings are acceptable depending on the case.
A. Swabbing fingernails◦ Place two separate sheets of paper on a working surface where the swabbing will take place.◦ Use one swab per hand.◦ Moisten one side of a sterile swab with saline water (if not available, use distilled water or tap water).◦ Place the victim/complainant’s right hand over one of the pieces of paper and swab the area under each of the fingernails using the damp side of the swab. Turn the swab and go over the same areas with the dry side.◦ Place the swab in its packaging, ensuring that it is properly closed and labelled right hand.◦ Carefully fold the piece of paper to enclose any debris.◦ Place the swab and folded paper in an envelope or container marked right hand.◦ Repeat for left hand.

National Forensic Laboratory Services Investigator’s Guide17
B. Clipping fingernails◦ Place two separate sheets of paper on a working surface where the clipping will take place.◦ Place the victim/complainant’s right hand over one of the pieces of paper and clip the nails as close as possible to the fingertip using clean scissors or clippers.◦ Fold the piece of paper with the clippings and place in a clean container.◦ Label the container right hand.◦ Repeat for left hand.
15. Firearms (DNA)
• DO NOT swab the firearm if its discharge caused injury or death – properly package and submit the firearm to NFLS for swabbing.
• If the firearm is a handled object, it is acceptable to swab. The general rule is to use one swab on different areas of the same firearm. ◦ for possession and charges related to unsafe storage, use one swab to swab the grip and slide/action◦ for possession and charges related to unsafe storage involving more than one firearm, NFLS will accept up to 4 swabs per investigation (one per firearm)
• All cartridges found from within the magazine may be swabbed using one swab.• See Packaging and shipping of dangerous goods.
16. Food (DNA)• Food may be considered for biological (DNA) analysis. • When swabbing food items, freeze the item first, if possible.• Swab the area where the food item was bitten
(see swabbing protocols).• When in doubt, contact FAC.
17. Fork / spoon (DNA) • Skin cells can be located on items such as utensils used for food.• Swab the area where skin cells are thought to be present as this
provides the highest potential of DNA recovery (see diagram). Use one swab. See swabbing protocols.
DO NOT swab a firearm if its discharge caused injury or death.
Use one swab per firearm. One swab can be used on different areas of the same firearm.

National Forensic Laboratory Services Investigator’s Guide18
18. Hair (DNA)A. From known source◦ After Blood and Buccal (mouth swab), hair is the next preferred comparison sample. See section on Comparison samples from known sources.◦ When possible, known samples should be collected using the RCMP’s Hair Sample Warrant / Consent Collection Kit (blue bag), which has been prepared specifically for DNA warrant or consent sample collection.◦ Collect approximately 6-8 pulled scalp hairs with root sheaths. DO NOT cut hair.◦ Place the hair in a folded sheet of paper and place in another appropriate container (envelope or plastic bag).◦ Package, seal and label each known sample separately.◦ Ensure the origin of the sample is clearly marked.B. From unknown source◦ In the event a hair or hairs are found at a crime scene, there may be an opportunity to submit these as exhibits for DNA analysis.◦ Place the hair in a folded sheet of paper and place in another appropriate container (envelope or plastic bag).◦ Package, seal and label each sample separately.◦ Ensure the origin of the sample is clearly marked.
19. Human remains (DNA)• If decomposition is minimal, routine comparison samples should be taken at autopsy.
Consult with the coroner.• If decomposition is extensive, have the following samples taken at autopsy:
◦ A sample of deep muscle tissue (about an inch cube) – DO NOT put tissue in formalin or any preservative◦ Sample of bone including the marrow (about 3 to 4 inches long), preferably from a long bone or from a rib◦ A few teeth, preferably molars
• Freeze sample(s) as soon as possible and keep frozen until submitted to NFLS.• Note on bone and/or teeth samples: Bone samples must be pulverized before sending to NFLS.
Contact FAC to obtain a list of service providers that offer bone pulverization services.
20. Knife (DNA)
• DO NOT swab the knife if it has been used on a person as a weapon – properly package and submit the knife to NFLS for swabbing. See Packaging and shipping of sharp objects.
• If the knife is a handled object (e.g. used as a pry tool), the handle should be swabbed. When swabbing the handle, swab both sides using one swab.
DO NOT swab if used on a person as a weapon causing injury or death.
Package “as is” and submit to NFLS.
Swab if knife has been handled(e.g. used as a pry took).

National Forensic Laboratory Services Investigator’s Guide19
21. Semen (DNA)A. Semen from a victim/complainant (DNA)◦ The healthcare practitioner will use a Sexual Assault Evidence Kit (SAEK) or equivalent to collect the samples required from the victim or complainant.◦ SAEKs are generally sealed when handed over to police. Ensure the health care professional that is collecting the evidence provides you with a list of all the samples/exhibits in the SAEK because you will need to list all items on the request Form C-414 when submitting for analysis. Alternatively, you may break the seal in order to itemize the available exhibits.B. Semen from items at a crime scene (DNA)◦ Semen stains can be found on the surface of objects or items (e.g. bedding, carpet).◦ When dealing with an object that can be seized (e.g. clothing, bedding) and semen is thought to be present, DO NOT swab. Submit to NFLS as is.◦ When dealing with an object that cannot be seized (e.g. wall, floor) and semen is thought to be present, swab the area and submit to NFLS. DO NOT swab fabric surfaces. Cuttings from areas of interest can be taken from fabric surfaces.◦ See swabbing protocols.
22. Skin cells (DNA)
DO NOT swab fabric.
DO NOT swab cigarette butts.
DO NOT swab chewing gum.
DO NOT swab if possible blood present.
• DO NOT swab fabric, cigarette butts, chewing gum as the DNA is difficult to recover. Package and submit “as is” to NFLS.
• DO NOT swab if there is possible blood present and submit “as is” to NFLS.
• Some common types of items where skin cells may exist include Break and Enter tools, jewelry, and cell phones.
• Swab the item where it is handled most.• Use one swab.
23. Tools / weapons (DNA)
• DO NOT swab a tool or weapon that has been used on a person to cause injury or death – properly package and submit the tool or weapon to NFLS for swabbing.
• If the tool or weapon is a handled object (and not used on a person), the handle
DO NOT swab tools or weapons that have been used on a person to cause
injury or death
Swab handled objects to determine if biological evidence exists. Use one moist swab per stain.
Swab both sides of textured area as a single swab.

National Forensic Laboratory Services Investigator’s Guide20
should be swabbed separately.• Carefully package the ends of tools to prevent loss of foreign material.• Use plastic bags or styrofoam cups over the ends to prevent further damage to the tool and to retain
any foreign material.• Send tools in a tightly-packed box to prevent movement.• See Packaging and shipping of dangerous goods.
Counterfeit
1. Bank notes and negotiable instruments (counterfeit)• Under Section 462 of the Criminal Code, the National Anti-Counterfeiting Bureau (NACB) has been
delegated authority to be the central repository and point of disposition of all counterfeit money, counterfeit cheques and other negotiable instruments.
• All suspect counterfeit bank notes (Canadian, US and foreign currency) must be submitted to the NACB for examination and destruction.
• Before conducting a printing plant search, investigators are encouraged to contact the NACB to discuss the case and establish a list of items to seize.
• All counterfeit exhibits are submitted directly to the NACB.
2. Coins (counterfeit)• Submit all suspect counterfeit Canadian circulation coins to the National Anti-Counterfeiting Bureau
(NACB) for examination.• The NACB DOES NOT accept:
◦ US coins◦ Foreign coins◦ Numismatic coins
• All counterfeit exhibits are submitted directly to the NACB.
3. Payment cards (counterfeit)• Submit all suspect counterfeit and/or payment cards to the National Anti-Counterfeiting Bureau
(NACB).• Forensic specialists may choose to examine a sampling of exhibits in large case submissions.• Investigators should consult with counterfeit examiners at the NACB before sending seized
equipment to the laboratory, including embossing machines encoders and tipping machines.• DO NOT activate, adjust or alter equipment.• Place payment cards and related printing materials in separate document protectors or plastic or
paper envelopes.• All counterfeit exhibits are submitted directly to the NACB.
4. Travel and identification documents (counterfeit)• Suspect travel and identification documents include government issued identification such as
passports, immigrations forms, citizenship cards, driver’s licenses, health cards and social insurance cards.
• All counterfeit exhibits are submitted directly to the National Anti-Counterfeiting Bureau.
National Forensic Laboratory Services Investigator’s Guide21
5. Computers and it equipment (counterfeit)
Computers and equipment should go to your technological crime unit.
• DO NOT move, unplug or alter the equipment.• DO NOT allow the suspect (or other user) access to the computer.• Ask the user to provide you with usernames and passwords, but do not attempt to login.• Contact your local technological crime unit for assistance.• When seizing, collect all wires, cables and related items.• Modern printers may store electronic data relevant to an investigation. To prevent the possible loss
of evidence, contact your local technological crime unit for assistance.• Check if the printer has a ribbon. Used ribbon can be submitted to determine if impressions of the
questioned text can be found.• If the printer has interchangeable type elements, collect them all.• All counterfeit exhibits are submitted directly to the National Anti-Counterfeiting Bureau.• Comparison Sample: Obtain samples of correspondence from files which were produced by the
same equipment on or about the date of the questioned document, if possible. Label and place samples in paper envelopes.
Firearms and toolmark identifcation
1. Ammunition, cartridges, bullets (firearms/toolmark)
• If no blood is thought to be present on ammunition components, consider having a forensic identification specialist swab them. If blood is thought to be present, it is preferable to submit the relevant ammunition component to NFLS for swabbing.
• Contact your local forensic identification unit to arrange for the fingerprinting of cartridge cases, cartridges and firearms prior to submitting to NFLS.
A. Unfired ammunition (firearms/toolmark)◦ Any cartridge found in the chamber of a firearm should be itemized/packaged as a separate exhibit.◦ Once removed from a magazine, unfired ammunition MUST be itemized/packaged as a separate exhibit. DO NOT attempt to load back into the magazine.◦ Unfired ammunition MUST be packaged/shipped separately from firearms.◦ For shipping of ammunition, you must follow Transport Canada’s Transportation of Dangerous Goods Regulations. Improper transportation of dangerous goods is an offence.B. Fired ammunition (firearms/toolmark)◦ Includes the submission of cartridge cases, shotshells, shot pellets, shotshell wads, etc.◦ All ammunition components must be itemized/packaged as separate exhibits.◦ DO NOT use metal tools to remove bullets from bodies or objects (i.e. walls).◦ Bullets, shot pellets, shotshell wads, etc. removed from bodies should be rinsed with water and dried before packaging.◦ It is not necessary to remove ALL the shot pellets from a body. A representative sample will be sufficient for examination at NFLS.
National Forensic Laboratory Services Investigator’s Guide22
◦ For shipping, wrap in tissue or some type of padding to prevent excessive movement◦ Indicate “biohazard” on Form C-414 if there is biological material present on the item.◦ Note: Bullets or bullet fragments can often be located by X-rays. X-rays should be taken of a body or exhibit as projectile fragments may remain in the body even when both entrance and exit wounds have been identified. Most medical or veterinary facilities have X-ray equipment which can be used for locating projectiles in small objects. This would prevent the loss of forensically significant evidence and allow for the removal of small fragments with minimum damage.
2. Bone and cartilage (firearms/toolmark)• Wounds on bone and cartilage may be examined to determine if the tool being submitted was used
to inflict the damage.• The medical examiner or pathologist will excise the bone or cartilage containing the wound.
◦ To preserve toolmarks on cartilage and bone, tissue samples are submerged in a (0.9%) saline solution.
• Refrigerate or freeze and send to NFLS as soon as possible.• Comparison Sample: Collect associated items for comparison purposes, such as suspect tools.
3. Clothing (firearms/toolmark)• Firearms analysis on articles of clothing can be submitted for impact damage assessment and range
determination.• When clothing is submitted for range determination it must be accompanied by photographs of the
associated wounds and an autopsy report (if available at the time of submission).• Avoid excessive handling of the clothing to ensure residue is not lost or transferred to other parts of
the item.• Collect only the outer layer of clothing that has possibly been penetrated by the projectile(s) or were
in close proximity to the bullet path.• Protect the area near the bullet hole and other areas suspected of bearing firearms discharge resi-
due from contamination or contact with other parts of the clothing.• Package each item of clothing separately to prevent a transfer of residue.• Allow wet or moist clothing to dry naturally before packaging. Not allowing items to dry fully or
properly can cause bacteria to form. Do not use a blow dryer.• Use paper bags to package clothing to prevent mould.• Indicate “biohazard” on Form C-414 for the exhibit if there is biological material present on the item.
4. Firearms (firearms/toolmark)
• Fingerprinting or swabbing for DNA on any firearms related exhibits must be done prior to submitting to the firearms section.
• The Integrated Ballistics Identification System (IBIS) database can cross-reference firearms with fired ammunition components. Only CBSA firearms seizures can be directly submitted to the IBIS Section. You must first obtain authorization by FAC to submit fired ammunition components to IBIS.
• Unload and affix proper identification tags to the trigger guard of the firearm.• DO NOT use adhesive labels, especially if the firearm is to be fingerprinted. These can
remove the fingerprints.

National Forensic Laboratory Services Investigator’s Guide23
• DO NOT handle or manipulate the firearm in any way that would affect testing at NFLS. This includes, but is not limited to:◦ test firing (for legal classification and functionality)◦ disassembly◦ trigger pull◦ shock discharge◦ serial number restoration
• NFLS will not conduct testing that has already been attempted by another laboratory or law enforcement agency.
• Contact FAC if the firearm was recovered from water or if the exhibit is excessively soiled. Exposure to air will initiate the corrosion process so it is preferable to keep the firearm submerged or covered in the medium (e.g. water, mud, soil) from which it was discovered and shipped to NFLS in that state. If that is not possible, the firearm can be cleaned as follows:◦ Rinse with boiling water to flush off foreign material◦ Allow to dry naturally◦ Apply lubricant to metallic surfaces to protect against corrosion◦ DO NOT use pull-throughs, brushes or other cleaning devices to clean the barrel or other metallic parts of the firearm
• Prior to shipping:◦ Firearms must be registered to the investigating agency. Get a Public Agency Identification Number (PAIN), which can be found on the RCMP public website.◦ Ensure the firearm is unloaded and safe for handling before shipping. A visible securing device should be used through the action (e.g. zap-strap, triggerlock).◦ If a firearm and magazines are seized together, these should be itemized/packaged as one exhibit.◦ If there is biological material present on the item, indicate “biohazard” on Form C-414.◦ Ensure that firearms are transported in accordance with all federal and provincial regulations and adhere to the shipping policies of the courier company that is being used.
5. Gunpowder / primer caps (firearms/toolmark)• Keep gunpowder in its manufacturer’s container, when possible.• Avoid contact with flame, excessive moisture, etc.• For shipping bulk gunpowder, primer caps or other dangerous goods, please refer to
Transport Canada’s Transportation of Dangerous Goods Regulations. Improper transportation of dangerous goods is an offence.
• An explosive transport container is the only approved shipping container for non-initiated explosive samples.
• For an explosive transport container or for more information about transporting dangerous goods or other items, please contact FAC prior to shipping exhibits.
6. Obliterated serial number (firearms/toolmark)• NFLS does not conduct serial number restoration if one has been previously attempted using chemi-
cal (acid) etching or heat recovery techniques.• If the item is difficult to transport, contact FAC to determine if a firearm specialists is available to
attend the scene and conduct the restoration on site.

National Forensic Laboratory Services Investigator’s Guide24
7. Tools (firearms/toolmark)• Includes knives, bolt cutters, screwdrivers, pliers, saws, etc.• DO NOT try to fit or place the tool in the toolmark. Keep tools isolated from the toolmarks that you
suspect to be linked.• Carefully package the ends of tools to prevent loss of foreign material.• Use plastic bags or styrofoam cups taped over the ends to prevent further damage to the tool and to
retain any foreign material.• Send tools in a tightly-packed box to prevent movement.• Comparison Sample: Collect associated items for comparison purposes.
8. Toolmark impressions (firearms/toolmark)• DO NOT try to fit or place the tool in the toolmark. Keep tools isolated from the toolmarks that you
suspect to be linked.• Protect toolmarks from damage• If possible, the object bearing the toolmark should be submitted.• If the toolmark cannot be removed, contact FAC for advice on making casts of the toolmark.• If the toolmark cannot be removed and casts of the toolmark are not possible, remove
portions of the exhibit containing the toolmarks. Clearly mark the toolmarks generated during the removal process.
• Comparison Sample: Collect associated items for comparison purposes, such as tools.
9. Tires (firearms/toolmark)• It is not necessary to submit the entire tire.• Cut an area around the puncture or slash.• Comparison Sample: Collect associated items for comparison purposes, such as the item used to
puncture the tire.
10. Wires (firearms/toolmark)• Wires can be submitted and submitted to NFLS for analysis.• Using some masking tape, identify the end that you cut - there is no need to mark or identify the
suspicious end.• DO NOT cover the suspect end with tape.• Cover the suspicious end with loose protective packing.• Comparison Sample: Collect associated items for comparison purposes.
Toxicology
1. Blood (toxicology)• Blood samples from a deceased will always be collected by a pathologist/medical examiner or
designated assistant. Ensure the blood is obtained from an intact vessel (e.g. femoral vein). Pooled samples such as cavity fluid, pericardial fluid or chest blood should be avoided. Trauma to and/or decomposition of the body may require the submission of additional samples (e.g. heart blood, liver, vitreous humour, stomach contents).
• Blood samples from a suspect or victim will always be collected by a healthcare practitioner (e.g. at hospital).

National Forensic Laboratory Services Investigator’s Guide25
• Advise the healthcare practitioner that the blood is being collected for toxicological analysis.• Where possible, a Forensic Blood Collection Kit should be used. If unavailable, collect blood using
two 10 mL grey-stoppered vacuum tubes.• Grey-stoppered vacuum tubes contain anti-coagulants and preservatives. After the tube is sealed
and labeled, invert the grey-stoppered vacuum tubes gently several times to mix contents.• Samples taken at hospital (including serum/plasma) may be seized by warrant and submitted to NFLS
for testing.• Blood samples should be refrigerated and submitted to NFLS as soon as possible as some drugs can
break down during storage.• Ensure all vials are properly sealed and labeled.• Note on blood being submitted for drug-facilitated sexual assault:
◦ For alcohol analysis, blood samples collected more than 24 hours after the incident will not be accepted.◦ For drug analysis, blood samples collected more than 72 hours after the incident will not be accepted.
2. Food and beverages (toxicology)• Food and beverage samples may be submitted for testing for alcohol, drugs or poisons.• Collect in a leak proof container, seal and label.• Store refrigerated and submit to the laboratory as soon as possible. Some drugs may break down
during storage.• Comparison Sample: Submit a known comparison sample, where possible (for example, a sealed
bottle of the same brand of wine).
3. Liver (toxicology)• Approximately 25 grams of liver tissue should be placed in a leak-proof container, sealed and labeled
by the pathologist or coroner.• Do not use a fixative or submerge the liver in any liquid.• Refrigerate the sample and submit to NFLS as soon as possible as some drugs can break down during
storage.
4. Stomach contents (toxicology)• A sample of stomach contents should be placed in a leak-proof container by the pathologist or
coroner.• Refrigerate the sample and submit to NFLS as soon as possible as some drugs can break down during
storage.
5. Syringes, pipes, powders, drugs, or drug residue (toxicology)• Analysis to identify a controlled substance (e.g. as obtained from drug seizures) is not conducted at
NFLS. Please contact Health Canada’s Drug Analysis Service.• Drug paraphernalia can include syringes, pipes, powders, tablets/capsules, or other residues.
These can be found at the scene and can be collected and submitted for analysis.• For sharp objects (e.g. syringes, pipes) package each item in a rigid puncture- resistant container,
seal and label.• For powders, tablets or capsules, place in a plastic or glass vial, seal and label.• All drug paraphernalia should be treated as biohazardous and labeled as such.• Liquids should be collected in a leak-proof container.

National Forensic Laboratory Services Investigator’s Guide26
6. Urine (toxicology)• Urine samples should be collected in a leak proof urine collection cup. Ensure cups are sealed, closed
tightly and labeled.• Urine samples can also be collected in 10 mL grey-stoppered vacuum tubes, sealed and labeled.• Fill urine containers only ¾ full to avoid leakage during transport.• If using a Doxtech™ Urine Specimen Collection Kit, disregard instructions that ask you to place the
label inside the container. The label should be affixed outside the container.• For alcohol analysis, urine samples collected more than 24 hours after the incident will not
be accepted.• For drug analysis, urine samples collected more than 72 hours after the incident will not be
accepted.• Samples must be refrigerated and sent to NFLS as soon as possible as some drugs can break down
during storage.
7. Vitreous humour (toxicology)• Vitreous humour refers to the transparent jellylike tissue filling the eyeball behind the lens.• The medical examiner will collect the vitreous in a 10 mL grey-stoppered vacuum tube.• Ensure the contents are sealed and labelled.• Refrigerate the sample and submit to NFLS as soon as possible.
Trace analysis
1. Accelerants / ignitable liquids (trace analysis)• The information in this section is only for samples of liquids that are suspected to be ignitable
liquids. For information about testing other materials for the presence of ignitable liquid residue (e.g. fire debris, clothing, empty containers, etc.) See Section 10, fire debris (trace analysis).
• Send ignitable liquids to the NFLS using shipping containers that comply with Transport Canada – see Transport of Dangerous Goods Regulations.
• For small amounts of liquid found in a container (e.g. jerrycan or solvent bottle), transfer the liquid to a new glass vial with a chemical resistant screw-cap lid (Teflon- lined).
• For large amounts of liquid, transfer 5 - 10 mL into a new glass vial with a chemical resistant screw-cap lid (Teflon-lined).
• For empty containers suspected of containing an accelerant (e.g. empty jerrycan or bottle), package in an approved air-tight container in the same manner as for fire debris. See Section 10, Fire debris (trace analysis).
• If a swab (e.g. gauze pad) is used to soak up a liquid at a fire scene, package the swab in a new metal paint can, or glass canning jar as described in Section 10, fire debris (trace analysis). An unused swab should also be packaged separately and submitted as a control sample
• Package and ship suspected ignitable liquids separately from any samples of fire debris or clothing that are to be examined for ignitable liquid residue.
• DO NOT store samples of suspected ignitable liquids in a conventional refrigerator or freezer. Vapor leakage could produce an explosion set off by the compressor motor.
• Comparison samples: All liquid samples must be packaged separately from any clothing or fire debris samples that may also be submitted.

National Forensic Laboratory Services Investigator’s Guide27
2. Adhesive tape (trace analysis)
Fingerprinting on any adhesive tape related exhibits must be done prior to submitting for trace analysis. Contact your local forensic identification unit for fingerprinting services. Advise the person who is fingerprinting that trace analysis will also be done and advise NFLS that the exhibit was first sent for fingerprinting.
• Tape from a crime scene may be compared to a roll of tape associated with the suspect or to pieces of tape from other scenes.
• Submit the tape for analysis without removing it from the taped object, if possible.• If removal from taped object is necessary, handle ends of tape as little as possible to allow for
possible physical matching. Place adhesive-side down onto a new document protector.• If cutting the tape is necessary in order to remove it from the object/person, mark the cut ends with
permanent marker.• Do not separate or straighten pieces.• Package in tamper-proof evidence bags or rigid plastic or metal containers.• Do not package in paper or cardboard containers.• Comparison samples: In tamper-proof evidence bags, submit all partial rolls and pieces of tape that
are similar in size, colour and texture. Do not mark or handle ends.
3. Bank dye packs (trace analysis)
Exploding bank dye packs are used by some banks to identify bank robbers. Disguised as a pack of bank notes, the pack is passed to a bank robber by the bank teller. Using a transmitter, the pack detects when the robber has left the bank and then it will emit a large cloud of red smoke and dye which will stain the bank notes, the robber’s clothing, etc.
• Use extreme caution when handling these dye packs to prevent contamination.• To avoid contamination, dye samples from suspects and those from the scene should be collected
by different investigators.• Samples from the scene should be double-bagged in tamper-proof exhibit bags and submitted
separately from samples from suspects.• Large surfaces such as the interior of vehicles can be swabbed using a gauze or cotton-tipped
applicator that is wet with rubbing alcohol (isopropanol), methanol or acetone. If none of these solvents are available, then water may be used.
• Allow time for swabs to dry completely before packaging.• Ensure that dye packs are made safe (i.e. no unexploded secondary packs, etc.) before moving
exhibits or obtaining swabs.
4. Building products (trace analysis)• Fragments of building products, such as drywall, caulking, or tar may be found on clothing, tools, and
vehicles, etc.• Collect a comparison sample from the scene.• DO NOT attempt to remove particles from clothing or tools – submit these items “as is”.• Collect particles from larger objects, such as vehicles, and submit in leak-proof containers, such as
plastic vials with tightly sealed lids or metal tins.• Comparison samples: Comparison samples should be collected from the damaged area(s) of the
building. Package separately in leak-proof containers. Mark container as comparison sample.
National Forensic Laboratory Services Investigator’s Guide28
5. Clothing (trace analysis)A. Clothing with paint or other foreign particles (trace analysis)◦ Wear a protection suit to prevent contamination – change suits for each suspect.◦ Ensure the floor where the individual will undress is clean.◦ Have each individual stand on a double stack of paper (at least two sheets) when removing clothing.◦ Handle each item of clothing separately – take care to prevent any transfer of material between exhibits.◦ Take care not to shake off any trace evidence adhering loosely to the garment.◦ Ensure that fallen particles are captured on pieces of paper placed underneath the exhibits.◦ If clothing is wet or moist, allow time for it to dry completely before packaging. Air-dry wet clothing from different individuals in separate rooms. DO NOT air-dry if the clothing is from an arson suspect and is to be tested for the presence of an accelerant.◦ Package, seal and label each article of dry clothing separately in tamper-proof evidence bags or new, brown-paper evidence bags.◦ Describe the location of any observed stains of interest on the accompanying Form C-414. DO NOT place any marks directly onto the clothing.◦ Also submit the upper sheet of paper where the individual was standing. Carefully fold the paper to retain loose debris. Package and label it in a separate sealed tamper-proof evidence bag or new, brown paper evidence bag. Discard the bottom sheet of paper that was in contact with the floor.◦ If articles of clothing have been packaged together (e.g. when removed at hospital), leave them all together – do not repackage separately.◦ If space is not available, wet exhibits may be packaged in tamper-proof evidence bags and submitted immediately to NFLS. Indicate on Form C-414 that the clothing is wet.◦ Clothing exhibits may also be frozen prior to submission.B. Clothing from arson investigation (suspected ignitable liquid residue)◦ Immediately place clothing in large wide-mouth (2 L) canning jars or large (1-10 gallon) clean metal cans (new paint cans can be found at a local hardware store), or in a nylon bag. DO NOT package the clothing in paper bags, as these do not provide an air-tight seal which is required for fire debris analysis.◦ If using nylon evidence bags, secure with an air-tight heat-seal. Rolling down the top of the bag at least six times and then securing with packing tape will also provide an air tight seal.◦ DO NOT air-dry if the clothing will be tested for the presence of ignitable liquids (e.g. solvents, fuels, or other volatiles). If the clothing is wet, seal it in a plastic bag (air tight seal) and freeze to prevent microbial action that will consume the ignitable liquids and retard mould growth.◦ Freeze the clothing prior to submission, if possible.◦ Note: Paper bags and ordinary plastic bags are not suitable for exhibits that are to be examined for the presence of accelerants.C. Clothing with pepper spray/tear gas◦ Allow clothing time to dry completely. ◦ Package, seal and label each article of clothing separately in tamper-proof evidence bags or unused brown-paper evidence bags.D. Clothing for gunshot residue analysis◦ See Gunshot Residue (trace analysis).

National Forensic Laboratory Services Investigator’s Guide29
6. Dyes for fuel marking (trace analysis)
Fuel marking dyes are available for marking gasoline or diesel storage tanks and can assist in identifying the theft of fuel from these bulk storage tanks. The dye is not visible and will not harm internal combustion engines.
• To obtain the dye, contact FAC with the following information:◦ Type of fuel◦ Volume of fuel to mark◦ Number of times the volume is to be marked◦ The location of the fuel tank
• After the fuel has been stolen, the investigator can seize a sample of fuel and:◦ test it in the field for an immediate result (there is a procedure to make the dye visible)◦ and/or send a sample to the lab for testing
• Collect three samples, 250 mL each, of:◦ The suspect fuel from the marked storage tank◦ Any claimed source of the suspect fuel
• For more information, see Accelerants / ignitable liquids (trace analysis).
7. Explosive debris (post-blast trace analysis)
• If swabs have been collected, at least two clean (unused) swabs must also be submitted for analysis as control samples.
• Be alert for damaged metal fragments, tape fragments, pieces of wire, shredded explosive wrappers (paper or plastic), clock mechanism parts, fuse, and/or battery parts – collect these and package each separately.
• Contact your nearest Explosive Disposal Unit (EDU) so that the scene can be searched for secondary explosives and/or hazardous devices (chemical, biological, radiological and nuclear).The scene must be declared safe before entry or exhibit collection.
• Have your local forensic identification services and the EDU locate the seat of the blast and collect debris and/or swabs from this location.
• Following the instructions of the EDU or forensic IDENT, search outward from the seat of the blast in a systematic pattern and collect debris showing signs of explosive or heat damage. Large objects or surfaces too big to collect are swabbed for residue.
• Certain items can be sent to NFLS for both explosives and DNA examination, in particular fragments that a suspect may have handled (e.g. container fragments, tape, device concealment packaging, switches or string). Such items should be packaged to preserve the priority evidence. If DNA is the priority, the exhibit should be packaged in a paper bag first, then inserted inside a sealed air-tight container.
• When possible, place debris in air-tight containers (e.g. canning jars, nylon evidence bags and lined metal cans).
• If any non-initiated explosive material is visible, remove from the debris and send it separately. Refer to Section 9, explosive substance (trace analysis).
• Comparison samples: Certain samples or items seized from two separate scenes may be suitable for comparison and must always be packaged separately. ◦ Any debris or samples or items collected from a post-blast crime scene must

National Forensic Laboratory Services Investigator’s Guide30
always be packaged separately.◦ Any samples or items collected from suspect or residences must be packaged and kept separate from post-blast scene debris and samples.◦ Non-initiated explosives from a scene or seized elsewhere (suspect or residence) can be sent in the same Explosive Transport Container (ETC). ◦ Contact FAC to ask a specialist to triage and identify what samples or items can be compared or not, where they should be sent, and for what type(s) of examinations (physical match, explosive analysis, etc).
8. Explosive devices (trace analysis)• DO NOT touch.• Contact the nearest Explosives Disposal Unit (EDU) to render the device safe. Live devices will not be
received / examined by NFLS. • Once the device is rendered safe, device components (e.g. power sources, timing units, wires,
blasting cap, tape) should collected and seized as post-blast evidence. Device components may be examined by local EDU.
• Place device components in air-tight containers such as canning jars, lined metal cans or nylon evidence bags. Submit to NFLS for explosives analysis. Refer to Section 7, explosive debris (post-blast trace analysis).
• If a non-initiated explosive substance is found and analysis is required, refer to Section 7, explosive debris (post-blast trace analysis).
9. Explosive substances (trace analysis)• Contact the nearest Explosives Disposal Unit (EDU) for assistance in determining the stability of the
suspected explosive substance.• The explosives transport container (ETC) is the only approved shipping container for non-initiated
explosive samples. • When sending non-initiated explosives to NFLS using the following procedure:
◦ Contact FAC to obtain a ETC. ◦ Following the instructions that come with the ETC, use the vials provided and package the explosive in 1-2 teaspoon quantities per vial. ◦ Suspected peroxide explosives must be diluted or slurried with 1:10 with isopropyl alcohol (rubbing alcohol).◦ Complete the documentation exactly as indicated in the instructions provided with the ETC and ship to NFLS by courier.◦ Note: If you are uncertain of the stability or hazards associated with an unknown substance, contact the FAC and request a specialist to advise you on safe handling and desensitization procedures before touching the substance.◦ Comparison samples: Refer to Section 7, explosive debris (post-blast trace analysis).

National Forensic Laboratory Services Investigator’s Guide31
10. Fire debris / ignitable liquid residue (trace analysis)
The information in this section is only for materials suspected to contain ignitable liquid residue (e.g. fire debris, clothing, empty containers). For information about testing samples suspected to be ignitable liquids, see Section 1, Accelerants/ignitable liquids (trace analysis).
• Place fire debris in clean, lined metal cans or in wide-mouth canning jars or in nylon bags. Unlined metal cans are also suitable but they are prone to rusting and run the risk of not being airtight upon arrival at NFLS. The can or jar must be unused, direct from supplier with lid on. If submitting debris in the canning jar, ensure the rubber seal on the lid of the jar is not inverted.
• DO NOT re-use other types of jars, such as pickle or jam jars.• Large exhibits that cannot be reduced to fit into canning jars or paint cans may be packaged in nylon
bags or other special bags sold for packaging fire debris.• Cut up large pieces of debris and fill container one-half to two-thirds, leaving at least 3 to 5 cm of
space at the top of the can or jar free of debris.• DO NOT dry exhibits before packaging.• Properly packaged exhibits may be stored in an explosion-proof refrigerator or freezer prior to
submission.• Package and ship separately from suspected ignitable liquids.• If a swab (e.g. gauze pad) is used to soak up a liquid at a fire scene, package the swab in a new metal
paint can, or glass canning jar as described above. An unused swab should also be packaged separately and sent in as a control sample.
11. Gunshot residue (trace analysis)• Only use an approved Gunshot Residue (GSR) sample collection kit sent to you by NFLS.• Follow all the instructions that come with the GSR Kits.• Collect samples from the hands and face of a suspect as soon as possible using an approved GSR
sampling kit.• Do not collect GSR samples if the exhibit has been authorized for GSR testing at NFLS. • When collecting articles of clothing from suspects, submit outermost layer of clothing only. Ensure
that each item is packaged separately in paper bags.• NFLS WILL NOT accept the following exhibits:
◦ GSR samples from the face and/or hands of suspected shooters more than twelve hours (>12 hrs) after the shooting incident◦ GSR samples taken anywhere from a shooting victim◦ Articles of clothing from shooting victims
• Contact FAC to request additional GSR Kits.
12. Metals (trace analysis)• Request an elemental analysis to determine sample composition and possible sources (e.g. metal
filings, metal fragments from fire and explosion scenes).• Submit suspect samples in tamper-proof exhibit bags.• For metallurgical examinations (e.g. metal fatigue), contact FAC to provide a potential list of
metallurgists.• Comparison samples: Submit comparison samples in tamper-proof exhibit bags.

National Forensic Laboratory Services Investigator’s Guide32
13. Paint (trace analysis)
During an investigation, you may come across paint in three different forms:
vehicle paint – NFLS can provide make/model and year information from paint left at a crime scene such as a break and enter (where a car smashed through a door, gate, wall, etc.) or a hit and run scene from vehicle parts left at the scene, or on a pedestrian’s clothing, bicycle etc.
architectural paint – NFLS can conduct comparisons of: 1) paint transferred to an object (e.g. door, window) from a painted tool; and 2) paint transferred to a tool from an object on which the tool was used.
spray paints – NFLS can compare spray paint on a vandalized wall or vehicle (e.g. graffiti epitaphs at homicide scenes) to a spray paint can seized from the suspect.
• If foreign paint is present on an object, submit the entire object to NFLS. If it is not practical to submit the entire object, DO NOT attempt to separate the foreign paint from the surface of the object. Instead, cut out a portion of the object around the foreign paint and submit to NFLS. If the object is too large to submit or the object cannot be cut, remove the foreign paint and include any underlying paint layers as one sample.
• Remove each paint sample with a new, disposable scalpel, being careful to obtain all layers of paint present.
• Submit scalpel with the sample.• Package each sample in a piece of folded paper, a leak-proof metal canister, or a plastic vial.
Place inside a sealed canister, plastic evidence bag or envelope.• Submit parts of the damaged material if possible, especially if smearing is present
(e.g. bumper extensions, parts of door frames).• Submit entire articles of clothing when paint smears are suspected.• DO NOT use adhesive tape to lift paint or to store a sample of the paint.• Submit liquid paint samples in paint tins or place on a glass slide, dry and submit.• Liquid samples (e.g. aerosol paint canisters) must be shipped in accordance with the
Transportation of Dangerous Goods Act.• For instructions related to the packaging of tools, see Section 16, tools (trace analysis).• Comparison samples: Take separate paint samples from all damaged areas of vehicles, buildings
(e.g. door frame), fences, posts, safes, etc. Use a new scalpel for each sample and package each sample separately, as described above, taking care to avoid contamination between samples. Include the VIN, make, model and year of each vehicle sampled and the location of each sample.
14. Physical match (trace analysis)
A physical match between two objects can provide conclusive links between a suspect and a crime scene. For example, motor vehicle parts left at a hit and run scene may be physically matched back to a suspect’s vehicle; or, a piece of tape recovered from a victim of a home invasion may be physically matched back to a roll of tape in the suspect’s possession.
• NFLS may provide assistance in the physical matching of a variety of materials, including adhesive tapes, plastic parts, large paint chips, glass containers, or metal foil.
• Carefully package broken material in leak-proof containers in such a way that protects the edges.

National Forensic Laboratory Services Investigator’s Guide33
• There are specific instructions for packaging adhesive tape seized from a crime scene. Refer to Adhesive Tape.
• Comparison samples: Include rolls of tape, plastic parts, paint chips, glass containers, metal foil, or other materials believed to be the source of the questioned item(s). Package separately from questioned samples and ensure that edges of the item(s) are protected from further damage. Refer to Adhesive Tape for instructions on correct packaging.
15. Safe insulation (trace analysis)
Safe insulation is a light, easily fractured mortar-like material used by safe manufacturers. Often safes are broken into by cutting into the wall of the safe. Cutting through the wall of safe will release the safe insulation causing particles to be dispersed on the suspect’s clothing, tools, vehicle, and/or residence. Many of the particles of safe insulation will be microscopic and so the suspect may not even be aware that they are present.
• Package materials containing suspected samples of safe insulation – such as clothing, footwear, vehicle, floor mats, and tools – in tamper-proof evidence bags or new, brown-paper evidence bags.
• For suspected safe insulation material found on larger objects, such as vehicle interiors, truck beds, or truck liners, manually recover as much material as possible and package in tamper-proof evidence bags or new, brown-paper evidence bags.
• Refer to clothing and tools for packaging instructions.• Comparison samples: Collect samples of safe insulation from each damaged area of the safe.
Package in leak-proof vials or tins, and seal in tamper-proof evidence bags. Keep separate from clothing and tools. Include information about make, model, year and serial number of the safe on Form C-414.
16. Tools (trace analysis)
Tools may be used to pry or cut an object at a crime scene, including screwdrivers, pry bars, pliers, bolt cutters, knives, and saws. Paint may be transferred from a door, window, safe, etc. to a tool, and/or paint from a tool may be transferred to the object being pried or cut open.
• Carefully package the ends of tools to prevent loss of foreign material.
• Use plastic bags or styrofoam cups taped over the ends to prevent further damage to the tool and to retain any foreign material.
• Send tools in a tightly-packed box to prevent movement.• For sharp objects, see packaging for sharp objects.• Comparison sample: collect associated items for comparison purposes.
17. Unknown liquid or powder (trace analysis)• Contact FAC for instructions on how to process suspected CBRN materials.• Submit in glass vials or bottles with Teflon-lined screw cap closures
(wide-mouth sample containers can be purchased).• Submit the entire sample unless it exceeds 250 grams (about 1 cup) of solid material or 500 mL
(about 2 cups) of unknown liquid.

National Forensic Laboratory Services Investigator’s Guide34
• If only a small amount of powder is available, for example, powder mailed in an envelope, do not attempt to remove the powder from the envelope. Package entire envelope and its contents in a leak proof plastic evidence container or bag.
• USE glass containers to store possible CBRN materials.• DO NOT use metal cans, plastic vials or plastic bags to sample possible CBRN materials.• Decontaminate the outside of the sample container after filling and before packaging for submission
by wiping it with a towel moistened with water or rubbing alcohol.• Seal all samples in a tamper-proof evidence bag.
18. Vehicle parts (trace analysis)
Caution: If airbags did not deploy during the collision, they are still armed and could deploy when you lean into the car, causing injury or death.
• If a physical match is to be attempted from parts left at a scene to a suspect vehicle, protect the broken ends of molding, aerials, lens, trim, etc. Refer to Physical Match.
• It may be possible to identify the make/model and year of a motor vehicle from a painted part left at the scene. Refer to section on Paint for packaging requirements.
National Forensic Laboratory Services Investigator’s Guide35
SUBMITTING EVIDENCENote on fingerprints: Almost all exhibits, including firearms or ammunition, could have fingerprints. Fingerprints should be processed before the exhibit is sent to the RCMP’s National Forensic Laboratory Services (NFLS). If a fingerprint examination is needed, consult with your local forensic identification unit before submitting exhibits. Some possible exceptions include exhibits where trace evidence could be lost with fingerprinting.
Contact the Forensic Assessment CentreAll requests for service to NFLS must go through the Forensic Assessment Centre (FAC) for authorization prior to the submission of exhibits. The only exception is for counterfeit submissions, which go directly to the NFLS National Anti-Counterfeiting Bureau.
Following is a general outline of the submission process:
1. Complete service request Form C-414, Request for Forensic Laboratory Analysis. It can be found by RCMP members on RCMP Forms or contact NFLS. Other checksheets or forms may be required depending on the investigation.
2. Send the completed Form C-414 and other applicable checksheets or forms to FAC by email (preferred) [email protected] or by fax 1-877-243-5047.
3. A FAC representative will contact you to authorize the service request or discuss the file. This may include discussion about exhibit selection and prioritization of exhibits.
National Anti-Counterfeiting BureauSubmit suspected counterfeit bank notes, negotiable instruments, travel and identity documents and payment cards directly to the National Anti-Counterfeit Bureau (NACB). Depending if the evidence is required in court will determine what form to complete.
� When evidence is required for court:• Complete service request Form C-414, Request for Forensic Laboratory Analysis. Provide details of
the occurrence and a clear indication that the analysis is required for court purposes. Specify date of court proceedings, if known.
• To avoid interfering with the forensic examination, do not place any markings on the exhibits (e.g. never write ‘counterfeit’ or ‘fake’ on any exhibit).
• If fingerprint analysis is needed, submit exhibits to the NACB first and indicate special handling is required. (Note: all fingerprinting must be done at your location).
• Please ensure that you include your email address.• Seal exhibits in an exhibit bag and mark with initials and date.• Forward your exhibits along with a copy of Form C-414 to the NACB.• Results for all banknote submissions include: a laboratory report; a Certificate of Examiner of
Counterfeits and/or an affidavit; and a Notice of Intention to Produce Certificate and/or an affidavit.
� When no criminal charges are anticipated:• When no criminal charges are anticipated and there are no suspects identified at time of submission,
exhibits will be processed as a “non-court” submission.• Complete Form 3774 (contact [email protected] for the form) and provide details of the
occurrence.

National Forensic Laboratory Services Investigator’s Guide36
• Forward your exhibits along with a copy of Form 3774 to the NACB.• Note: All non-court submissions are retained at the NACB for a minimum period of 6 months after
which they are destroyed. If a suspect is identified during the retention period, please notify the NACB and notes will be treated as evidence for court.
To submit NACB exhibits, by courier, registered mail or priority post:
National Anti-Counterfeiting BureauNPS Building73 Leikin, Ottawa ON K1A 0R2
POST FORENSIC ANALYSISReturn of exhibits and master filesAll master files, reports, documentation and exhibits examined by NFLS belong to the submitting agency. NFLS returns all exhibits to the agency, including all NFLS generated sub-samples (e.g. DNA extracts, swabs). Exceptions include:
• exhibits consumed in analysis and uninitiated explosives. • ammunition components are retained in archive for possible future comparison to cases linked via
CIBIN matches (if ammunition components are required for court purposes, it is your responsibility to contact the NFLS FAC to initiate exhibit return.
• the National Anti-Counterfeting Bureau (NACB) assumes responsibility for destroying all counterfeit notes (when the notes are no longer needed or are not required for court).
Retention of exhibits by investigating agencyNFLS does not retain exhibit material, master files, reports and related documentation beyond two years. Once exhibits are returned to the investigating agency, NFLS will have limited information available to conduct future analysis.
It is the agency’s responsibility to ensure retention of exhibit material, master files and related documents according to its policies. If further forensic examination is required, it is the responsibility of the lead investigating agency to submit and/or re-submit exhibits and related documentation for further analysis.
DisclosureDisclosure of NFLS documents prior to the return of the exhibit to the submitting agency can be requested by contacting the Forensic Assessment Centre (FAC). In consultation with the Crown Attorney, complete the Request for Disclosure form.
NFLS requires 30 days’ notice in order to provide documents. Please use the latest request form.
National Forensic Laboratory Services Investigator’s Guide37
OTHER FORENSIC RESOURCESThis guide pertains exclusively to National Forensic Laboratory Services (NFLS), however, investigators should be acquainted with other local points of reference and forensic services that are available to them. Following are some additional resources to consider:
National DNA Data Bank of CanadaThe National DNA Data Bank (NDDB) stores DNA profiles recovered from crime scenes and from convicted offenders. When investigators submit biological (DNA) evidence to NFLS, the DNA profiles developed from the crime scenes are uploaded and compared within the NDDB.
Convicted offender biological samples are collected and submitted directly to the NDDB. To ensure the integrity of the NDDB, the DNA Identification Regulations stipulate that the NDDB can only accept a biological sample that has been collected with a Convicted Offender DNA Database Sample Collection Kit (clear bag). For more information, contact the NDDB.
For a list of DNA designated offences or for other NDDB forms, including Form 5.01 – Information to Obtain a Warrant to Take Bodily Substances for Forensic DNA Analysis, visit the NDDB website.
� NDDB, DNA collection kits• To request an NDDB sample collection kit, please contact the NDDB.• NDDB DNA collection kits are available for blood, buccal or hair samples.• The use of any other collection kit will cause the sample to be rejected.• RCMP Detachments may also contact Divisional Stores directly.
Forensic identification unitsForensic identification is an area that provides essential support to criminal investigations, including bloodstain pattern analysis, crime scene examination for physical evidence such as fingerprints, and footwear or tire impressions. Specialists in these units can attend crime scenes or can be called upon to provide advice on the collection and packaging of evidence. Refer to your local point of contact.
Technological crime unitsTechnological crime units assist investigators with forensic analysis on various pieces of equipment such as computers, smart phones, tablets or other sophisticated technical products. Refer to your local point of contact.
Explosives disposal unitsExplosive disposal units provide expertise in relation to the handling of explosives and the investigation of post blast scenes. They can assist in the examination and rendering ‘safe’ of suspicious packages and improvised explosive devices including the disposal of military ordinance and ammunition. Many units are responsible for first response to CBRN-E (Chemical, Biological, Radiological, Nuclear, Explosives) events. Refer to your local point of contact.
Firearms reference tableThe Firearms Reference Table (FRT) is produced by the Canadian Firearms Program and incorporates both text and images, which aids investigators in the identification of firearms. For assistance, contact the Canadian Firearms Program.

National Forensic Laboratory Services Investigator’s Guide38
National Weapons Enforcement Support TeamThe National Weapons Enforcement Support Team (NWEST) offers personnel and resource support to law enforcement agencies across the country on all aspects of firearms investigations and prosecutions. Refer to your local/regional point of contact.
National Centre For Missing Persons And Unidentified RemainsNational Centre For Missing Persons And Unidentified Remains (NCMPUR) assists law enforcement agencies, coroners and medical examiners by providing information sharing through a national database and public website as well as training, investigational advice and case analyses.