introduction and basic navigation training guide
TRANSCRIPT

Introduction and Basic Navigation Training Guide Date Created: 7/14/2021 Date Updated: 1/28/2022

Page | 2
Table of Contents Installation .............................................................................................................................................................................. 3
User Settings ........................................................................................................................................................................... 4
Show Project Details ........................................................................................................................................................... 5
Signature Setup ................................................................................................................................................................... 5
Basic Navigation ...................................................................................................................................................................... 6
CAMP Hierarchy ...................................................................................................................................................................... 7
Project Navigation ................................................................................................................................................................... 8
In-App Navigation ................................................................................................................................................................... 8
Access Videos and Documentation ....................................................................................................................................... 10
Page | 3
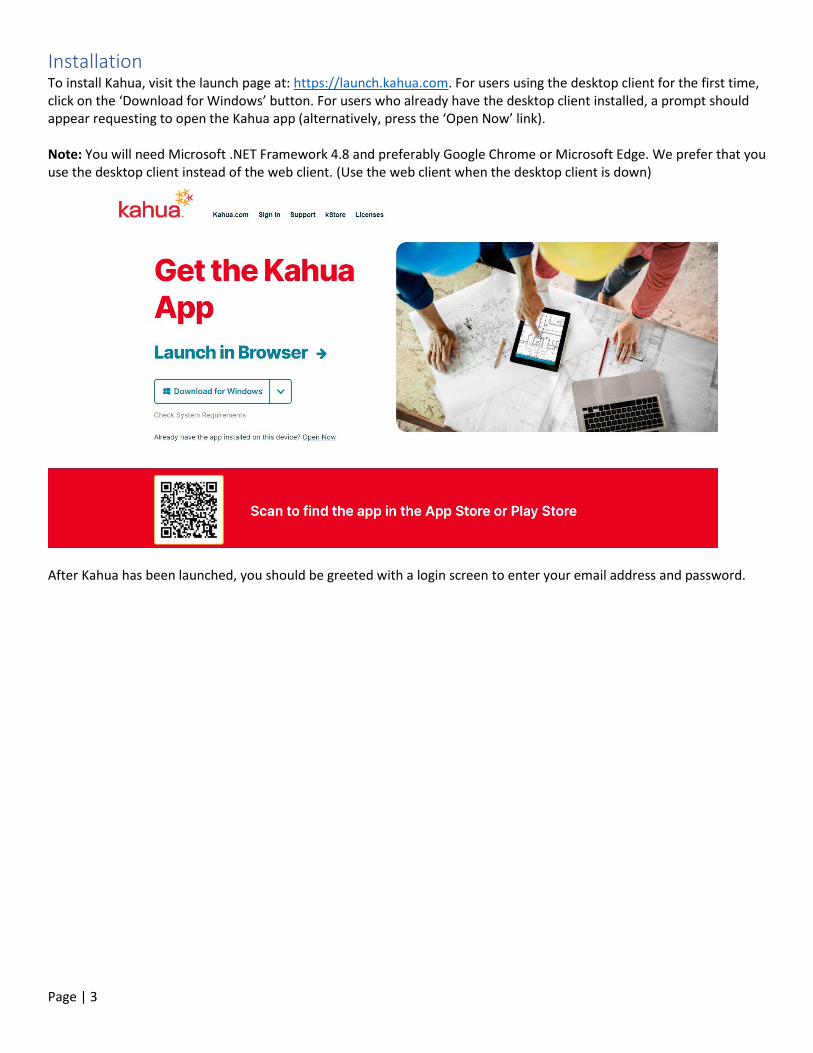
Installation To install Kahua, visit the launch page at: https://launch.kahua.com. For users using the desktop client for the first time, click on the ‘Download for Windows’ button. For users who already have the desktop client installed, a prompt should appear requesting to open the Kahua app (alternatively, press the ‘Open Now’ link). Note: You will need Microsoft .NET Framework 4.8 and preferably Google Chrome or Microsoft Edge. We prefer that you use the desktop client instead of the web client. (Use the web client when the desktop client is down)
After Kahua has been launched, you should be greeted with a login screen to enter your email address and password.

Page | 4
User Settings To access your settings, click the profile icon in the upper-right corner of your screen (or if you have set a picture, select your profile image) and select My Settings from the drop-down menu.
There are five tabs with available settings:
General – Application settings such as notification preferences, user time zone and language preferences, display of the project number in partition navigation, and display of account details in the window can be adjusted.
Profiles – Allows users to update their personal metadata. Fill out the Details section completely, especially if you are part of an approval workflow. Fill out other information, including uploading a photo, as needed by the organization. Note: The associated email address can only be changed by contacting [email protected].
Password – A user can change their account password at any time, adhering to minimum requirements that can be set by your Domain Administrator. Kahua’s default requirements are that the password must contain at least: eight characters total, one lowercase character, one number, one uppercase character, and cannot be the same as the username.
Signature – Upload a signature image and set how a signature block appears. Check for corporate standards on the signature block. In this section, the user assigns a PIN used whenever a signature is requested by the system. This signature may be utilized in response to approval tasks or creating certain communications.
Local Files – Enables users to sync select folders or files to their local drive for easy access and edit in the native application; Kahua designates and creates a path (on the local drive, in the user’s folder) upon enablement.

Page | 5
Show Project Details
In the General tab, two options need to be enabled.
1. Show project number – Toggles the display of the project number next to the name of the project 2. Show Account Details in Window – Toggles the display of your account name and company name next to your
profile icon.
Signature Setup
Page | 6
Within Kahua, some applications will require you to sign using a PIN code for approvals. In order to use this functionality, you must set up your signature from the Signature tab.
1. Type in your 4-digit PIN and confirm it 2. The ‘Add Image’ button allows an image of a signature to be uploaded
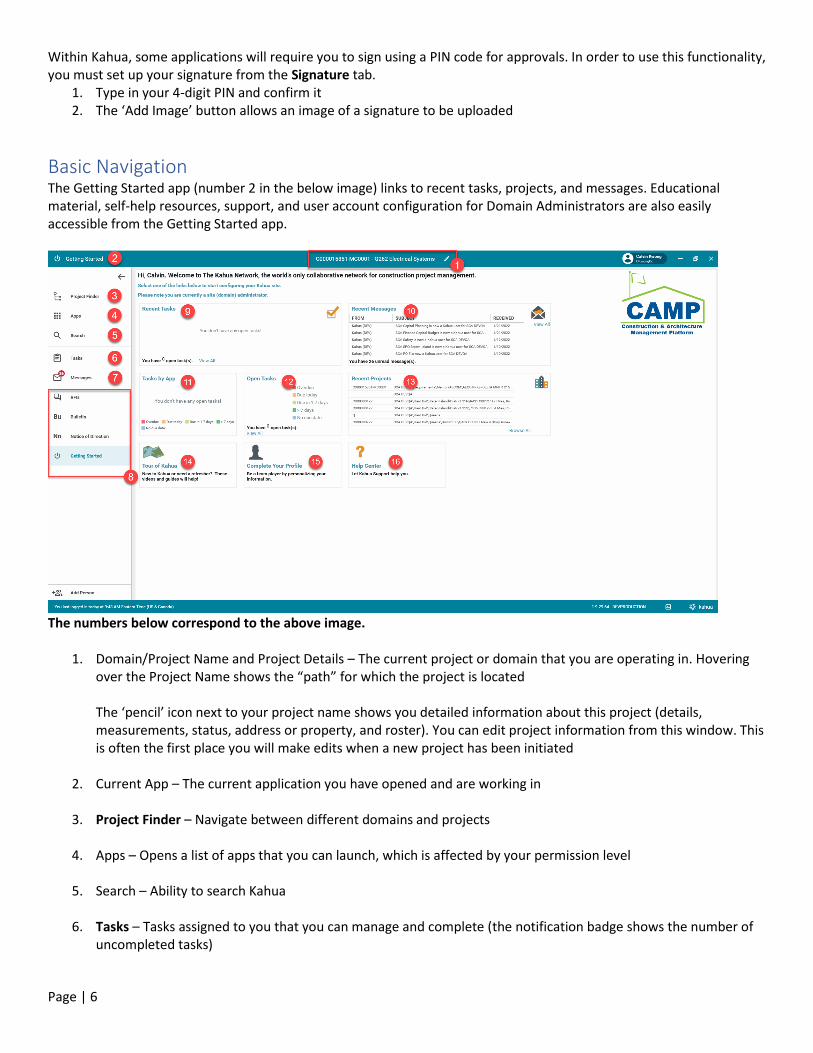
Basic Navigation The Getting Started app (number 2 in the below image) links to recent tasks, projects, and messages. Educational material, self-help resources, support, and user account configuration for Domain Administrators are also easily accessible from the Getting Started app.
The numbers below correspond to the above image.
1. Domain/Project Name and Project Details – The current project or domain that you are operating in. Hovering over the Project Name shows the “path” for which the project is located The ‘pencil’ icon next to your project name shows you detailed information about this project (details, measurements, status, address or property, and roster). You can edit project information from this window. This is often the first place you will make edits when a new project has been initiated
2. Current App – The current application you have opened and are working in
3. Project Finder – Navigate between different domains and projects
4. Apps – Opens a list of apps that you can launch, which is affected by your permission level
5. Search – Ability to search Kahua
6. Tasks – Tasks assigned to you that you can manage and complete (the notification badge shows the number of uncompleted tasks)

Page | 7
7. Messages – Messages sent to you (the notification badge shows the number of unread messages)
8. Open Applications Bar – Any open applications you may be using while in Kahua show below the Messages app; apps can be closed by right-clicking on the app and selecting ‘Close’. The app you currently have open will be highlighted in blue
9. Recent Tasks – Your most recently assigned tasks
10. Recent Messages – Your most recently received messages
11. Tasks by App – Analytical data concerning your outstanding tasks, organized by the app the task is in, as well as the due date
12. Open Tasks – Analytical data concerning your outstanding tasks, showing how many you have and how many days you have left to complete them
13. Recent Projects – Your most recently accessed projects and quick links to them
14. Tour of Kahua – Contains a list of video topics on how to use Kahua
15. Complete your Profile – Opens your account settings. You can also access this in the upper right corner by clicking on your profile and selecting ‘My Settings’
16. Help Center – Opens a new browser window for Kahua Support’s website
CAMP Hierarchy
The overall platform container is called a Domain. Partitions form a hierarchical structure within the Domain. The two main Partitions are Requirements Contracts and Hard Bid. Requirements Contracts have Mentor, JOC, and Emergency Partitions (including sidewalk bridges and security). Within each of these are Program Partitions and their associated Subproject Partitions. The Companies partitions serve as a layer to set permissions for the Programs Partitions. Hard Bid has Borough Partitions: Bronx, Brooklyn, Manhattan, Queens, Staten Island, and Multi-Boro. Within the Borough Partitions, there are District Partitions. Finally, District Partitions contain Project Partition(s).
Page | 8
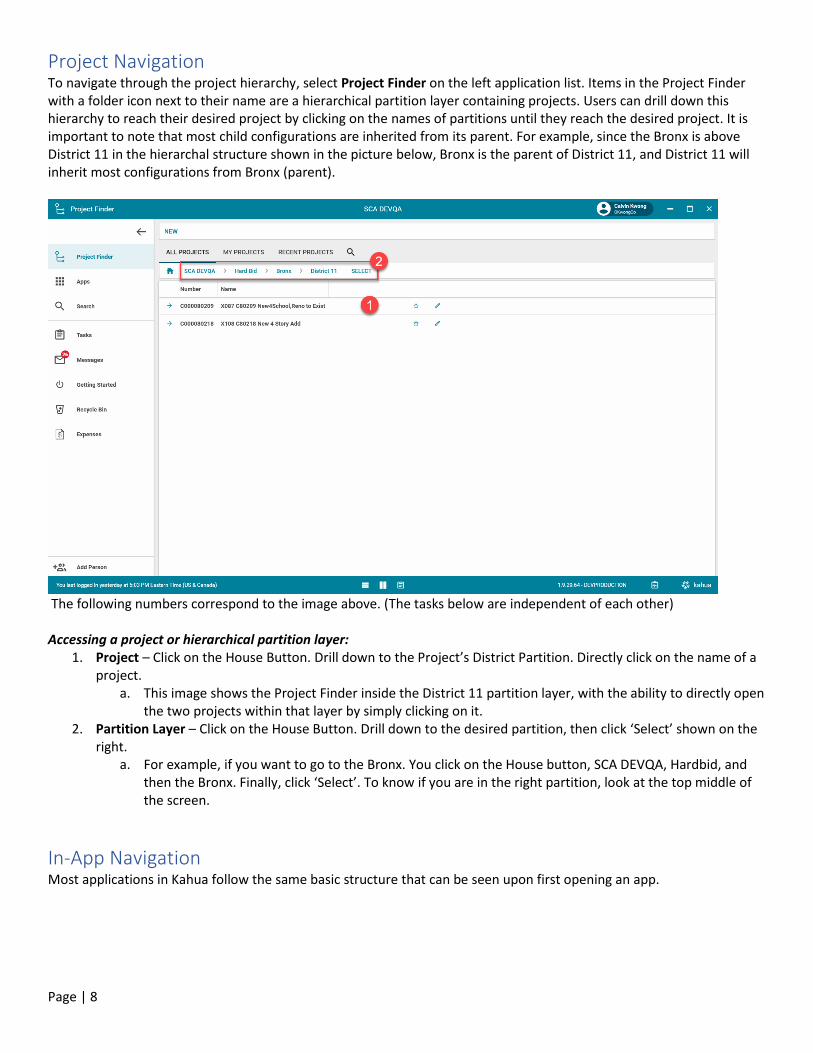
Project Navigation To navigate through the project hierarchy, select Project Finder on the left application list. Items in the Project Finder with a folder icon next to their name are a hierarchical partition layer containing projects. Users can drill down this hierarchy to reach their desired project by clicking on the names of partitions until they reach the desired project. It is important to note that most child configurations are inherited from its parent. For example, since the Bronx is above District 11 in the hierarchal structure shown in the picture below, Bronx is the parent of District 11, and District 11 will inherit most configurations from Bronx (parent).
The following numbers correspond to the image above. (The tasks below are independent of each other) Accessing a project or hierarchical partition layer:
1. Project – Click on the House Button. Drill down to the Project’s District Partition. Directly click on the name of a project.
a. This image shows the Project Finder inside the District 11 partition layer, with the ability to directly open the two projects within that layer by simply clicking on it.
2. Partition Layer – Click on the House Button. Drill down to the desired partition, then click ‘Select’ shown on the right.
a. For example, if you want to go to the Bronx. You click on the House button, SCA DEVQA, Hardbid, and then the Bronx. Finally, click ‘Select’. To know if you are in the right partition, look at the top middle of the screen.
In-App Navigation Most applications in Kahua follow the same basic structure that can be seen upon first opening an app.

Page | 9
The following numbers correspond to the image above. (The tasks below are independent of each other)
1. Log View – This displays a list of all the data records belonging to a particular application. 2. New – Used to create a new data record depending on the user’s permissions
In order to view the details of an individual record, users can click on the record in the Log View. When a record is selected, the left half of the screen will continue displaying the list of records, while the right half will display the details of the selected record. This is similar to Microsoft Outlook – you have to click on the record to modify it. After you click on the record, the record will turn from white (image above) to light blue (image below).
Page | 10
The following numbers correspond to the image above. (The tasks below are independent of each other) 1. Click on the desired record, and a details view will appear on the right half of the screen. The selected record will
be highlighted in blue. 2. When the details of a record are opened, users may have the ability to make modifications, view generated
PDFs, or delete records. Users can perform these actions by clicking on the appropriate button above the details of the record.
3. Buttons necessary for the application’s workflow process will appear at the bottom of the details view. This includes buttons that allow users to lock or submit records for approval.
4. For ease of use, users can toggle between views by clicking on the appropriate buttons at the bottom of the client.
a. The first button shows only the Log View b. The second button shows both the Log View and the record details c. The third button shows a full-screen view of the record details
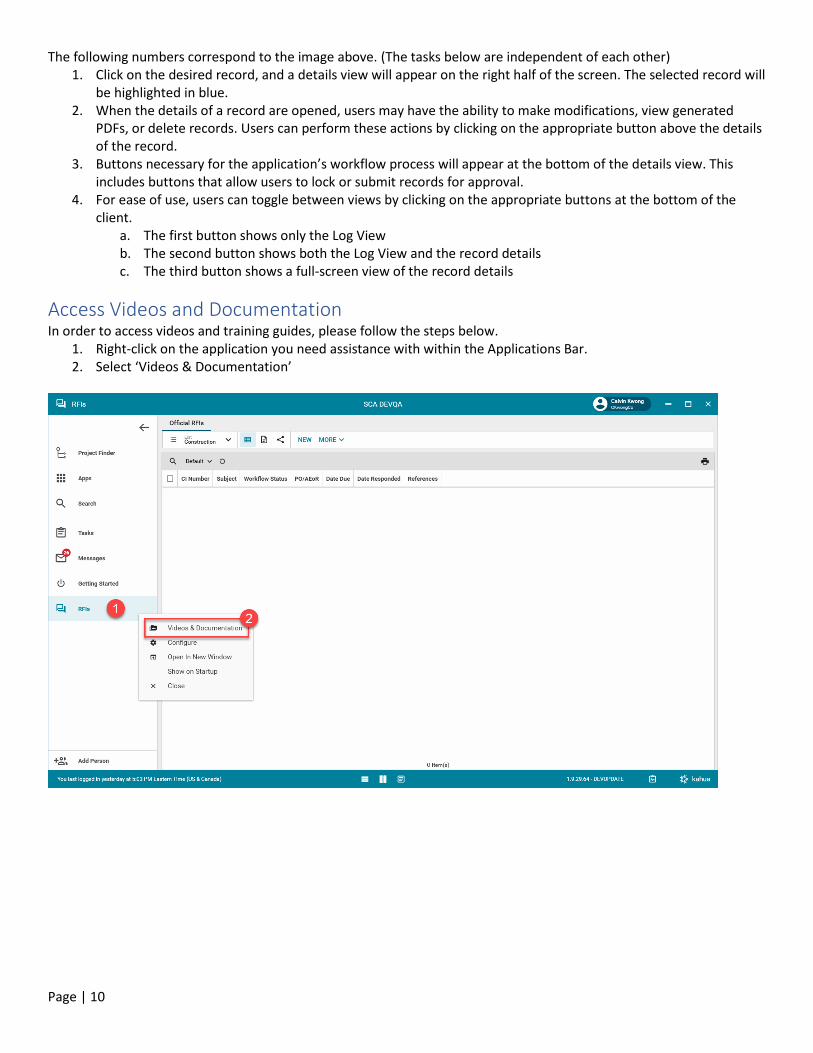
Access Videos and Documentation In order to access videos and training guides, please follow the steps below.
1. Right-click on the application you need assistance with within the Applications Bar. 2. Select ‘Videos & Documentation’