integrating firemonkey into existing vcl, c# and c++ ... · applications and also with c#. we will...
TRANSCRIPT

Americas Headquarters
EMEA Headquarters
Asia-Pacific Headquarters
100 California Street, 12th Floor San Francisco, California 94111
York House 18 York Road Maidenhead, Berkshire SL6 1SF, United Kingdom
L7. 313 La Trobe Street Melbourne VIC 3000 Australia
INTEGRATING FIREMONKEY INTO YOUR EXISTING VCL, C# AND C++ APPLICATIONS
Developing and using Win/Mac Libraries
Stephen Ball, Technical Sales Consultant
Embarcadero Technologies
April 2012

Developing and Using Win/Mac Libraries
Embarcadero Technologies, Inc. - 1 -
Table of Contents Introduction - - 2 - - What is a Shared Library? - - 2 - -
Part 1 – Our First Multi-Platform Shared Library - - 3 - - Creating a shared library with Delphi - - 3 - - Using the shared library from an application - - 7 - - Getting up and running on the Mac - - 11 - -
Part 2 – Consuming FireMonkey via a Shared Library. - - 16 - - Creating a FireMonkey Library - - 16 - - Consuming the “FireMonkey” library (Lazy loading) - - 23 - - Writing a VCL client for a FireMonkey Library - - 26 - - Writing a FireMonkey Client to use a Library that uses FireMonkey - - 28 - -
Part 3 – Integrating with C++ - - 31 - - Part 4 - Integrating with C# - - 33 - - Summary - - 38 - - Useful Links - - 38 - -
Source - - 38 - - Videos - - 38 - - Embarcadero URL’s - - 38 - -

Developing and Using Win/Mac Libraries
Embarcadero Technologies, Inc. - 2 -
INTRODUCTION In this paper we will look at what is required to create a shared library with RAD Studio that can be used across multiple platforms, specifically with Windows and Mac OS X. We will look at using the new library in Delphi FireMonkey™ & VCL applications and also with C#. We will cover using the shared library for containing business logic that is shared across applications using examples. The first will be a simple library with no visual elements. The second will use FireMonkey forms within the library and illustrate the differences this causes due to GDI+. Finally we also look at what is required to call the second example from a C# application. The techniques used in this paper are relevant and applicable for developers using C++Builder to write visual (using FireMonkey) and non-visual code.
WHAT IS A SHARED LIBRARY? Before we start lets explore what a Library is: Some really good reading is available from Wikipedia on the subject. http://en.wikipedia.org/wiki/Shared_library#Shared_libraries In short; a shared library is a file that is designed to be used by multiple executable files. Shared Libraries typically contain methods (functions and procedures) that are exposed so they can be called by different applications. Shared libraries are typically loaded/bound for use by applications either immediately at run time (as the application is loading) or late (just at the point they are required). By loading as the application starts it will typically be faster to use the library, as when you need it, it is already loaded. Late loading however will make it possible to deploy applications with only the required libraries and handle what happens when a library is missing at run time. Dynamic-link library (DLL) is Microsoft’s implementation of the shared library concept. On windows shared libraries typically have .dll as an extension. Dylib is the Mac OS X equivalent and has the naming convention of libxxx.dylib (xxx being the descriptive part of the file name) There are also some other great articles on edn.embarcadero.com looking at using DLL’s – For Interoperability with PHP, which is outside the scope of this paper, see: http://edn.embarcadero.com/article/39531 .

Developing and Using Win/Mac Libraries
Embarcadero Technologies, Inc. - 3 -
PART 1 – OUR FIRST MULTI-PLATFORM SHARED
LIBRARY CREATING A SHARED LIBRARY WITH DELPHI If you are moving to RAD Studio XE2 from an earlier version then this next section should feel very familiar. We will start by looking at creating a shared library with some non-visual code. The language used here is Delphi. From the File > New > Other…. menu option
Select Dynamic Link Library
You will then be presented with a new library

Developing and Using Win/Mac Libraries
Embarcadero Technologies, Inc. - 4 -
We can now use this base template to create the methods we want to expose and make available to multiple applications. For the purpose of this document we will start by creating a quote generator that will work on Windows and Mac OS X. Before we go any further, save the project as “MyXPlatformLib”. To save the project choose File > Save Project As… (see tip below) TIP: It is recommended practice that you make a folder for each project you create and save the project into it otherwise it will be saved into C:\Users\UserName.EMBARCADERO\Documents\RAD Studio\Projects along with everything else ever saved. For the purpose of demonstrating, we will have our quote generator return a ShortString made up of the date time and the classic first application quote of “Hello World!!” appended. Using a ShortString will limit the library for easy use with other Delphi and C++Builder applications, but will make it easy for the initial demo without the need to manage memory passed between the application and the library. (This will be covered later in the paper) This is also covered in the commented notes (in green) in the code when a new library is created, as you can see above in the IDE screen shot.

Developing and Using Win/Mac Libraries
Embarcadero Technologies, Inc. - 5 -
uses System.SysUtils, System.Classes; function GetQuoteOfTheDay: ShortString; stdcall; export; begin Result := FormatDateTime('DD-MMM-YYYY HH:NN:SS ',Now)+'Hello World!!'; end; {$R *.res} exports GetQuoteOfTheDay; begin end.
With the function written (see above), it is worth noting there are two key steps to making it available. Firstly declaring the calling convention for connecting to it. To start we will use stdcall. This is done by adding stdcall; export; at the end of the function. Alternatives to stdcall will come later in the paper) Finally we have to add the exports list to declare the function as exported. If you need to provide a different name for the exported call you can do that using the exports section. This may be useful if you are exporting two overloaded methods as you will need a unique name to identify each one. e.g. exports GetQuoteOfTheDay name 'GetQuote'; Now that we have the code completed for our library, it is time to compile our native versions for our target platforms. RAD Studio XE2 introduced the ability to compile libraries for multiple Target Platforms. Target platforms are found for each project in the Project Manager. Win32 bit is the default platform, however you can add additional platforms by right clicking and selecting Add Platform. Add to the target platforms (using the drop down list shown) OS X and Win 64.

Developing and Using Win/Mac Libraries
Embarcadero Technologies, Inc. - 6 -
Your Project Group should now look something like this Now that you have your target platforms, you can double click on the target platform that you want to build for, and choose Build or Compile from the Project menu option. Short cut keys are also available.
To Compile press Ctrl+F9. To Build choose Shift +F9
Compiling the DLL may yield the following warning about potential data loss. This is due to the result of the FormatDateTime function being a String rather than a ShortString: For more on the warning see this URL. http://docwiki.embarcadero.com/RADStudio/en/W1058_Implicit_string_cast_with_potential_data_loss_from_%27%25s%27_to_%27%25s%27_(Delphi) This warning can be removed in this instance by typecasting the result as a ShortString e.g. function GetQuoteOfTheDay: ShortString; stdcall; export; begin Result := ShortString(FormatDateTime('DD-MMM-YYYY HH:NN:SS ',Now)+'Hello World!!'); end;
Once built, go to the project folder using explorer and you will see that there are 3 separate folders created. OSX32, Win32 and Win64
This folder structure denotes the different platforms that you have built for and the files required for each platform are created and placed into these output folders. Each folder internally has either a Debug and/or Release folder depending on the type of Build configuration used.
Developing and Using Win/Mac Libraries
Embarcadero Technologies, Inc. - 7 -
Inspecting the content of the folders you will notice that the files that are output have slightly different names between Windows and Mac. (dll vs. dylib extensions).
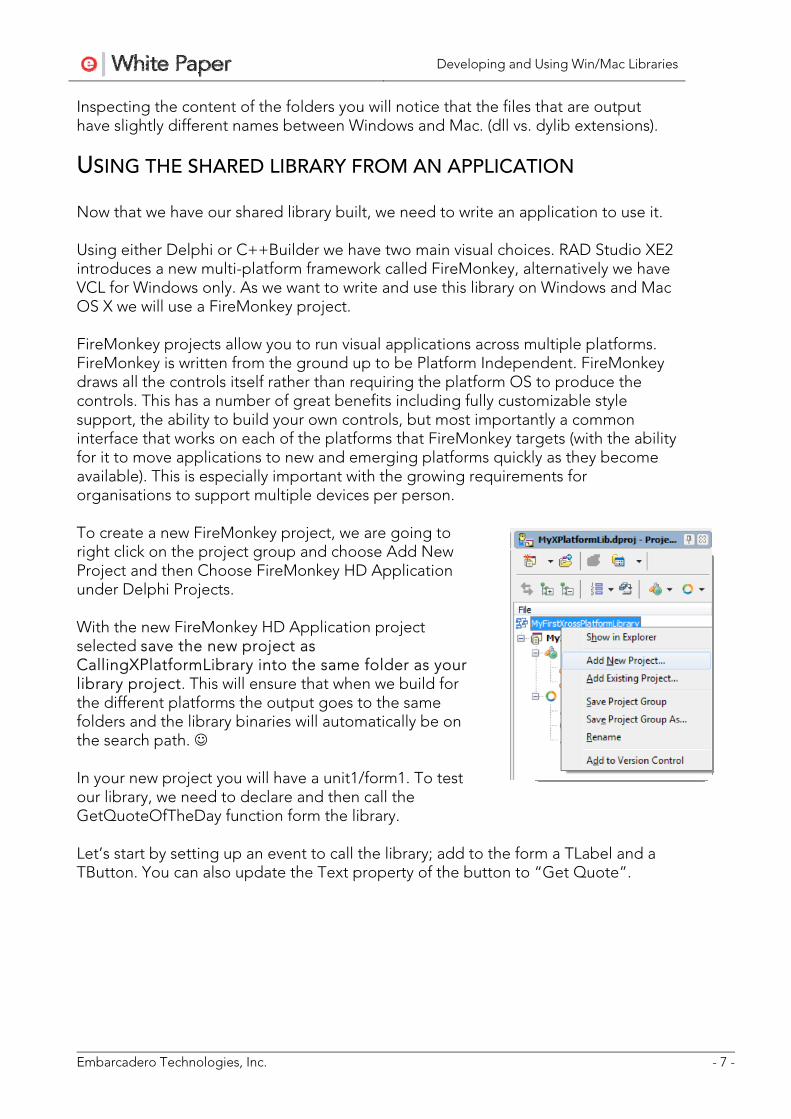
USING THE SHARED LIBRARY FROM AN APPLICATION Now that we have our shared library built, we need to write an application to use it. Using either Delphi or C++Builder we have two main visual choices. RAD Studio XE2 introduces a new multi-platform framework called FireMonkey, alternatively we have VCL for Windows only. As we want to write and use this library on Windows and Mac OS X we will use a FireMonkey project. FireMonkey projects allow you to run visual applications across multiple platforms. FireMonkey is written from the ground up to be Platform Independent. FireMonkey draws all the controls itself rather than requiring the platform OS to produce the controls. This has a number of great benefits including fully customizable style support, the ability to build your own controls, but most importantly a common interface that works on each of the platforms that FireMonkey targets (with the ability for it to move applications to new and emerging platforms quickly as they become available). This is especially important with the growing requirements for organisations to support multiple devices per person. To create a new FireMonkey project, we are going to right click on the project group and choose Add New Project and then Choose FireMonkey HD Application under Delphi Projects. With the new FireMonkey HD Application project selected save the new project as CallingXPlatformLibrary into the same folder as your library project. This will ensure that when we build for the different platforms the output goes to the same folders and the library binaries will automatically be on the search path. ☺ In your new project you will have a unit1/form1. To test our library, we need to declare and then call the GetQuoteOfTheDay function form the library. Let’s start by setting up an event to call the library; add to the form a TLabel and a TButton. You can also update the Text property of the button to “Get Quote”.

Developing and Using Win/Mac Libraries
Embarcadero Technologies, Inc. - 8 -
For those who know the VCL (Visual Component Library) well, you will notice that the text on the button is now a Text property, rather than Caption. – Personally I think this is a great thing as it enables me to work with RTTI in a much more generic way when working with controls having the Text property standardized. We can now double click on the button to create an empty event from where we can call GetQuoteOfTheDay; first, we need to declare the external method. Because Windows and Mac OSX conventions produce different library file names, we need to register the function in a way that will work for both platforms. If we wish to register multiple functions then it would make sense to have a constant that we use to define the library name and then the list of functions like below.
This type of function definition is called Implicit importing. The major draw back of implicit definitions is that it requires the library to be present when the application starts, otherwise the application cannot load. From RAD Studio 2010 onwards, the keyword delayed was added to allow applications to start without the library as they will only be loaded when required. This converts the method definition to behave like an Explicitly defined declaration. Unfortunately, the delayed keyword is not compatible with Mac versions. If you wish to delay load the library on Windows you can add in an $IFDEF using the platform specific definition for MSWINDOWS to ensure it compiles for Windows and Mac.

Developing and Using Win/Mac Libraries
Embarcadero Technologies, Inc. - 9 -
Now we have the function defined to use. Double click on the button to return to the OnClick event. Add to the event the following code to set the Label1.Text property to be the returned value of the call to the external function.
procedure TForm1.Button1Click(Sender: TObject); begin Label1.Text := GetQuoteOfTheDay; end;
Your code should now look something like the following…. unit Unit1; interface uses System.SysUtils, System.Types, System.UITypes, System.Classes, System.Variants, FMX.Types, FMX.Controls, FMX.Forms; type TForm1 = class(TForm) Button1: TButton; Label1: TLabel; procedure Button1Click(Sender: TObject); private { Private declarations } public { Public declarations } end; const {$IFDEF MSWINDOWS} libraryname = 'MyXPlatformLib.dll'; {$ENDIF} {$IFDEF MACOS} libraryname = 'libMyXPlatformLib.dylib'; {$ENDIF} function GetQuoteOfTheDay: ShortString; stdcall external libraryname {$IFDEF MSWINDOWS} delayed {$ENDIF}; var Form1: TForm1; implementation
{$R *.fmx} procedure TForm1.Button1Click(Sender: TObject); begin Label1.Text := GetQuoteOfTheDay; end; end.

Developing and Using Win/Mac Libraries
Embarcadero Technologies, Inc. - 10 -
Now we have completed our client application, it is time to run on Windows to check the code is working, before we deploy to Mac. Select each project in turn (you can see if a project is selected as the project name is bold). Select the target platform for Win32 and compile the project. Once both are compiled, select the FireMonkey project (we saved earlier as CallingXPlatformLibrary.exe) and Run. (F9) As you click on the button now you will see the quote returned from the library showing on the label.

Developing and Using Win/Mac Libraries
Embarcadero Technologies, Inc. - 11 -
GETTING UP AND RUNNING ON THE MAC Now we have the Windows version running its time to look at running this application on the Mac. This is a relatively simple process, but the first time we do this we need to setup and configure Platform Assist Server (PAServer). PAServer is a multi-platform application that runs on Windows or on Mac to allow us to remotely deploy and debug applications. PAServer client can be installed on multiple machines with profiles added as Target Platforms into Delphi to enable you to connect and deploy quickly and easily. PAServer also has the ability for you to debug from your IDE with the application running on the remote machine (exceptionally helpful). For now, we are going to deploy out our application to the Mac. First step is to ensure PAServer is running on the Mac. The installer for PAServer can be found after you install in C:\Program Files (x86)\Embarcadero\RAD Studio\9.0\PAServer For deploying to a remote windows machine install using Setup_paserver.exe For deploying to a remote Mac machine, then copy the contents of the setup_paserver.zip file to the Mac. Once installed we need to launch PAServer. The quickest way to do this is run the search feature in the top right corner of the Mac screen

Developing and Using Win/Mac Libraries
Embarcadero Technologies, Inc. - 12 -
As the PAServer starts you will be asked for a password.
Enter a session password that you want to use for connection to this machine. NOTE: This does not have to be the same as the machine password. This is for connecting to PAServer only.
Having entered the password your PAServer should now be up and running.

Developing and Using Win/Mac Libraries
Embarcadero Technologies, Inc. - 13 -
If for any reason you need to close the PAServer type in the letter Q to quit and press enter. This will shut down the PAServer socket connection allowing you to close it safely. The next step to deploying onto the PAServer on the Mac is to ensure we know the Name / IP Address of the machine.
You can get this from the System Preferences > Network screen.

Developing and Using Win/Mac Libraries
Embarcadero Technologies, Inc. - 14 -
With the IP Address we can then tell the profile for the Mac where to point. To do this, we need to edit the Target Platform to contain this information. Right Click on your Mac Target platform and choose Edit Profile. Edit the Host Name to contain the IP Address (or the machine name) and update the Password to match the password entered in PAServer and choose “Test Connection”
You should now see a connection-succeeded message. We are almost ready to run our application and see it working on the Mac!
Developing and Using Win/Mac Libraries
Embarcadero Technologies, Inc. - 15 -
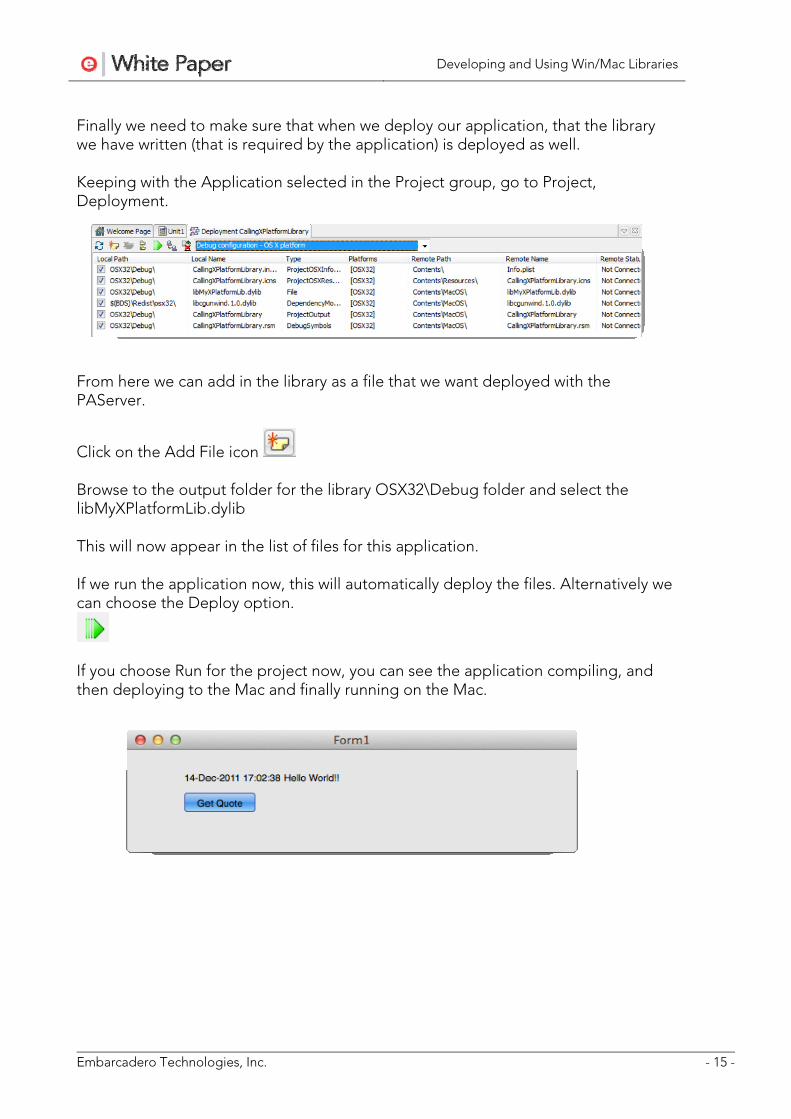
Finally we need to make sure that when we deploy our application, that the library we have written (that is required by the application) is deployed as well. Keeping with the Application selected in the Project group, go to Project, Deployment.
From here we can add in the library as a file that we want deployed with the PAServer.
Click on the Add File icon Browse to the output folder for the library OSX32\Debug folder and select the libMyXPlatformLib.dylib This will now appear in the list of files for this application. If we run the application now, this will automatically deploy the files. Alternatively we can choose the Deploy option.
If you choose Run for the project now, you can see the application compiling, and then deploying to the Mac and finally running on the Mac.

Developing and Using Win/Mac Libraries
Embarcadero Technologies, Inc. - 16 -
PART 2 – CONSUMING FIREMONKEY VIA A
SHARED LIBRARY. CREATING A FIREMONKEY LIBRARY Firstly, congratulations! You now know how to use PAServer and have successfully written your first multi-platform library and run it on Windows and Mac using the same code base!! ☺ In this section we are going to move on to building a more complicated library that will work across languages more easily and we will also use this library from both a VCL and FireMonkey client. This example will then be used with C# in the final section of this paper. To start, we are going to take a current FireMonkey project that has a form in it for selecting an image. This form has an exposed class function that you pass in a folder path and it returns back the image you select from that folder.
The code under this form is below unit formImages; interface uses System.SysUtils, System.Types, System.UITypes, System.Classes, System.Variants, FMX.Types, FMX.Controls, FMX.Forms, FMX.Dialogs, FMX.Layers3D, FMX.Types3D, FMX.Effects, FMX.Objects, FMX.Layouts, FMX.Ani, System.IOUtils, FMX.Filter.Effects; type TfrmImages = class(TForm)
Developing and Using Win/Mac Libraries
Embarcadero Technologies, Inc. - 17 -
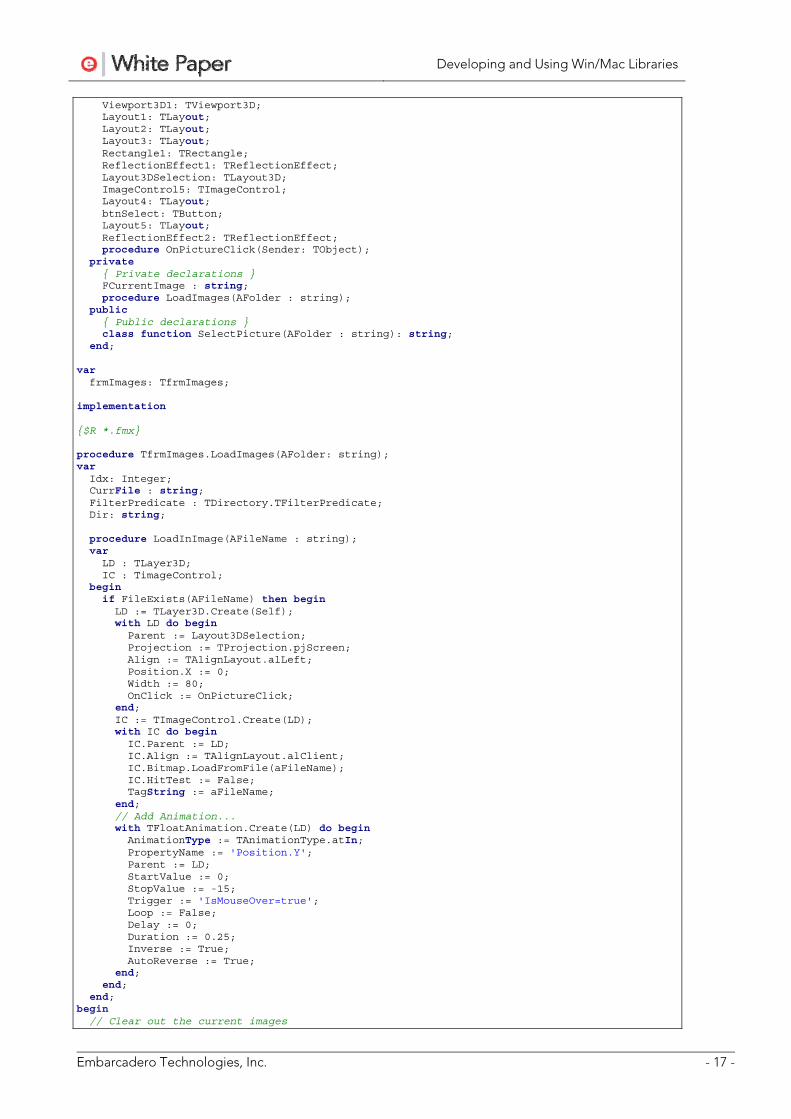
Viewport3D1: TViewport3D; Layout1: TLayout; Layout2: TLayout; Layout3: TLayout; Rectangle1: TRectangle; ReflectionEffect1: TReflectionEffect; Layout3DSelection: TLayout3D; ImageControl5: TImageControl; Layout4: TLayout; btnSelect: TButton; Layout5: TLayout; ReflectionEffect2: TReflectionEffect; procedure OnPictureClick(Sender: TObject); private { Private declarations } FCurrentImage : string; procedure LoadImages(AFolder : string); public { Public declarations } class function SelectPicture(AFolder : string): string; end; var frmImages: TfrmImages; implementation {$R *.fmx} procedure TfrmImages.LoadImages(AFolder: string); var Idx: Integer; CurrFile : string; FilterPredicate : TDirectory.TFilterPredicate; Dir: string; procedure LoadInImage(AFileName : string); var LD : TLayer3D; IC : TimageControl; begin if FileExists(AFileName) then begin LD := TLayer3D.Create(Self); with LD do begin Parent := Layout3DSelection; Projection := TProjection.pjScreen; Align := TAlignLayout.alLeft; Position.X := 0; Width := 80; OnClick := OnPictureClick; end; IC := TImageControl.Create(LD); with IC do begin IC.Parent := LD; IC.Align := TAlignLayout.alClient; IC.Bitmap.LoadFromFile(aFileName); IC.HitTest := False; TagString := aFileName; end; // Add Animation... with TFloatAnimation.Create(LD) do begin AnimationType := TAnimationType.atIn; PropertyName := 'Position.Y'; Parent := LD; StartValue := 0; StopValue := -15; Trigger := 'IsMouseOver=true'; Loop := False; Delay := 0; Duration := 0.25; Inverse := True; AutoReverse := True; end; end; end; begin // Clear out the current images

Developing and Using Win/Mac Libraries
Embarcadero Technologies, Inc. - 18 -
for Idx := Pred(Layout3DSelection.ChildrenCount) downto 0 do Layout3DSelection.Children[Idx].Free; // Find Each Image Dir := Trim(AFolder); FilterPredicate := function(const Path: string; const SearchRec: TSearchRec): Boolean begin Result := (TPath.MatchesPattern(SearchRec.Name, '*.*', False)); // and if Result then // Check if it is a image file begin Result := Pos(LowerCase(ExtractFileExt(SearchRec.Name)), DefaultBitmapCodecClass.GetFileTypes) > 0; end; end; // Load that image in. for CurrFile in TDirectory.GetFiles(Dir, FilterPredicate) do LoadInImage(CurrFile); Application.ProcessMessages; end; procedure TfrmImages.OnPictureClick(Sender: TObject); var MS: TMemoryStream; Idx: Integer; begin MS := TMemoryStream.Create; try for Idx := 0 to Pred(TFMXObject(Sender).ChildrenCount) do begin if TFMXObject(Sender).Children[Idx] is TImageControl then begin (TFMXObject(Sender).Children[Idx] as TImageControl).Bitmap.SaveToStream(MS); MS.Position := 0; ImageControl5.Bitmap.LoadFromStream(MS); FCurrentImage := string((TFMXObject(Sender).Children[Idx]).TagString); end; end; finally MS.Free; end; end; class function TfrmImages.SelectPicture(AFolder: string): string; var frm: TfrmImages; begin try frm := TfrmImages.Create(Application); try frm.LoadImages(AFolder); if (frm.ShowModal = mrOK) and (frm.FCurrentImage > '') then Result := frm.FCurrentImage else Result := 'None Selected'; finally frm.Free; end; except on e:Exception do begin Result := 'ERROR: '+e.Message; end; end; end; end.
The above code exposes the ability to load up a directory of images and create a layer for each image with a mouse over animation to perform a really nice bounce effect as the mouse moves over the images. The code for the fmx (the form file that contains the layout) is as follows

Developing and Using Win/Mac Libraries
Embarcadero Technologies, Inc. - 19 -
object frmImages: TfrmImages Left = 0 Top = 0 Caption = 'Image Selection Viewer [cdecl]' ClientHeight = 404 ClientWidth = 671 Visible = False StyleLookup = 'backgroundstyle' object ImageControl5: TImageControl Align = alClient Position.Point = '(0,137)' Width = 671.000000000000000000 Height = 228.000000000000000000 TabOrder = 0 end object Rectangle1: TRectangle Align = alTop Width = 671.000000000000000000 Height = 81.000000000000000000 Fill.Color = claBlack object Layout1: TLayout Align = alTop Width = 671.000000000000000000 Height = 81.000000000000000000 Margins.Rect = '(5,5,5,5)' object Layout2: TLayout Align = alLeft Position.Point = '(5,5)' Width = 17.000000000000000000 Height = 71.000000000000000000 end object Layout3: TLayout Align = alRight Position.Point = '(649,5)' Width = 17.000000000000000000 Height = 71.000000000000000000 end object Viewport3D1: TViewport3D Align = alClient Position.Point = '(22,5)' Width = 627.000000000000000000 Height = 71.000000000000000000 object Layout3DSelection: TLayout3D Position.Point = '(313.5,35.5,0)' Width = 627.000000000000000000 Height = 71.000000000000000000 Depth = 0.009999999776482582 Opacity = 1.000000000000000000 Projection = pjScreen Align = alClient Quanternion = '(0,0,0,1)' end end end object ReflectionEffect1: TReflectionEffect Opacity = 0.500000000000000000 Offset = 0 Length = 0.500000000000000000 end end object Layout4: TLayout Align = alTop Position.Point = '(0,81)' Width = 671.000000000000000000 Height = 56.000000000000000000 HitTest = True end object Layout5: TLayout Align = alBottom Position.Point = '(0,365)' Width = 671.000000000000000000 Height = 39.000000000000000000 object btnSelect: TButton Position.Point = '(576,7)' Width = 80.000000000000000000 Height = 22.000000000000000000

Developing and Using Win/Mac Libraries
Embarcadero Technologies, Inc. - 20 -
TabOrder = 0 ModalResult = 1 Text = 'Select' object ReflectionEffect2: TReflectionEffect Opacity = 0.500000000000000000 Offset = 0 Length = 0.500000000000000000 end end end end
Taking this Image Selector form we are going to wrap it up into a library that we can use on Windows and Mac and also make available for other languages and development tools to interact with. First step is to add the form to a new library project. Using the same options as the simple library previously described, create a new library and save the project as “SelectImage”. Next, add to the project targets so you have 32-bit Windows, 64-bit Windows and OSX32 and also add the image selector form. Now we have all elements we need in the project, its time to follow a similar process to before and make this functionality available externally when calling the library. Rather than using StdCall we are going to use another declaration type cdecl. StdlCall and cdecl calling conventions are only there for compatibility with Win32 processes as they are ignored completely by the Win64 compiler as there is only one calling conversion for 64 bit versions; however for 32 and 64 bit code compatibility, keep them there. To expose the class function on the form, we need to wrap it into a function that is exported. To achieve this, we will write a function called SelectPicture. This will accept the folder path (sent in via PChar) and return the file path of the image selected.

Developing and Using Win/Mac Libraries
Embarcadero Technologies, Inc. - 21 -
As we are using PChar, we need to do a little more work that using ShortString. We first need to allocate the memory for the PChar and then we can fill it with the result. Finally, we need a way to free the memory once its been used. To achieve this we will have another method called DisposePicture for disposing of the result string.
Finally we need to export the functions from the library.
As we are writing this library for multi-platform use we currently have to prefix the function name as it is exported on the Mac with a _ (underscore) Hence we have the Prefix which is defined as below to make it compile with the correct name for the right platforms. Also, to make the library work on multiple platforms, the exports section for any methods exposed must be in the same unit of code that methods are declared in. With all this written your source unit should look something like this…

Developing and Using Win/Mac Libraries
Embarcadero Technologies, Inc. - 22 -
library SelectImage; { Important note about DLL memory management: ShareMem must be the first unit in your library's USES clause AND your project's (select Project-View Source) USES clause if your DLL exports any procedures or functions that pass strings as parameters or function results. This applies to all strings passed to and from your DLL--even those that are nested in records and classes. ShareMem is the interface unit to the BORLNDMM.DLL shared memory manager, which must be deployed along with your DLL. To avoid using BORLNDMM.DLL, pass string information using PChar or ShortString parameters. } uses System.SysUtils, System.Classes, formImages in 'formImages.pas' {frmImages}; const // MAC Headers need a _ at the front of the name {$IFDEF MACOS} Prefix = '_'; {$ELSE} Prefix = ''; {$ENDIF} {$R *.res} function SelectPicture(AFolder : PChar): PChar; cdecl; var ResultStr : string; Temp: PWideChar; begin ResultStr := ''; try ResultStr := TfrmImages.SelectPicture(AFolder); finally Result := StrAlloc(Length(ResultStr)); Temp := Addr(ResultStr[1]); StrCopy(Result,Temp); end; end; procedure DisposePicture(SelectPictureResult : PChar); cdecl; begin StrDispose(SelectPictureResult); end; exports SelectPicture name Prefix+'SelectPicture', DisposePicture name Prefix+'DisposePicture'; begin end.
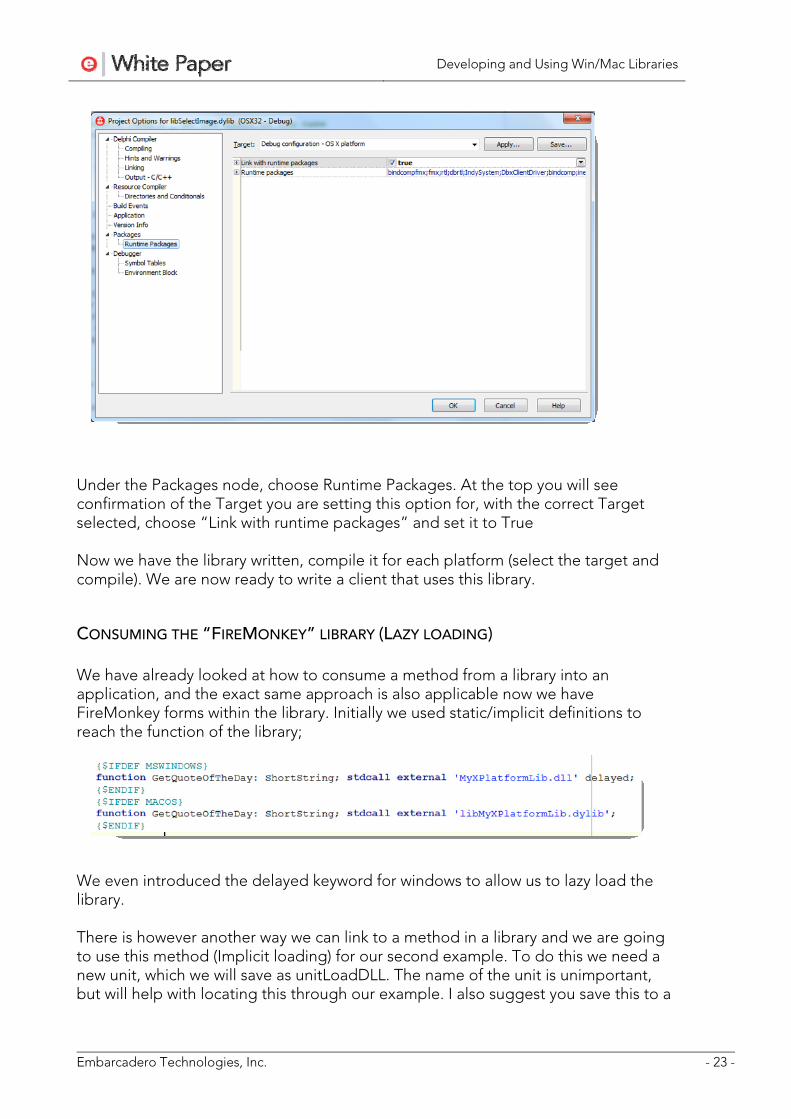
Now we have library code written, there is one more thing we need to do to the library to make it easily accessible for use on the Mac (due to the FireMonkey elements being compiled into this version) that is to enable runtime packages. To enable run time packages on the Mac version only (it is not required for the windows version), first select OSX32 as the target and choose Project > Options from the main menu.
Developing and Using Win/Mac Libraries
Embarcadero Technologies, Inc. - 23 -
Under the Packages node, choose Runtime Packages. At the top you will see confirmation of the Target you are setting this option for, with the correct Target selected, choose “Link with runtime packages” and set it to True Now we have the library written, compile it for each platform (select the target and compile). We are now ready to write a client that uses this library.
CONSUMING THE “FIREMONKEY” LIBRARY (LAZY LOADING) We have already looked at how to consume a method from a library into an application, and the exact same approach is also applicable now we have FireMonkey forms within the library. Initially we used static/implicit definitions to reach the function of the library;
We even introduced the delayed keyword for windows to allow us to lazy load the library. There is however another way we can link to a method in a library and we are going to use this method (Implicit loading) for our second example. To do this we need a new unit, which we will save as unitLoadDLL. The name of the unit is unimportant, but will help with locating this through our example. I also suggest you save this to a

Developing and Using Win/Mac Libraries
Embarcadero Technologies, Inc. - 24 -
common folder as we will use this in a few projects from here and that will provide a good point for common code to be identified. To create the new unit, choose File > New > Unit - Delphi
To manually link to the library we need to follow a few simple steps.
1. Define the function / procedure signature as a type
2. Declare local variables of the types defined. It is also useful to have a global
variable for the Handle to the Library to check if the library has been loaded.
Then at run time have code that
3. Load the Library and get a Handle to the library. 4. Maps the local procedure variables to the loaded library.
Now we know the steps required, we can add this functionality to an application. The following example has four steps, and encapsulates the loading in an easy-to-call function, enabling run time checking to see if the library has loaded.
Developing and Using Win/Mac Libraries
Embarcadero Technologies, Inc. - 25 -
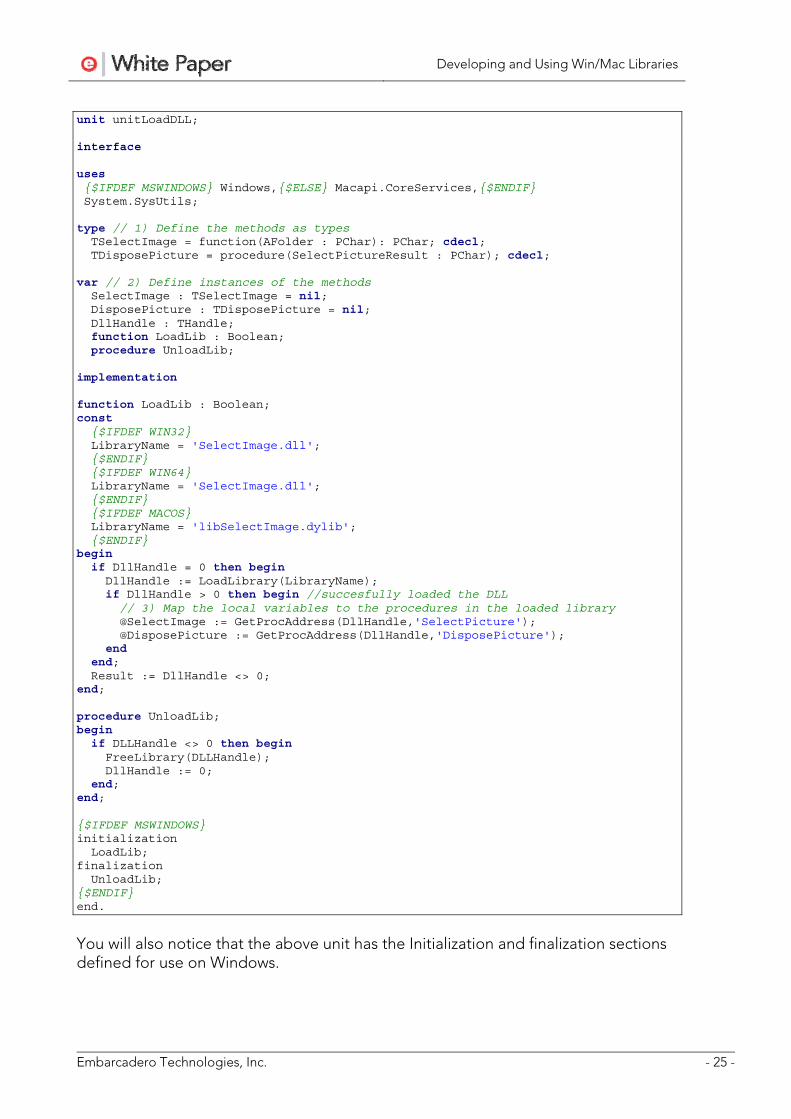
unit unitLoadDLL; interface uses {$IFDEF MSWINDOWS} Windows,{$ELSE} Macapi.CoreServices,{$ENDIF} System.SysUtils; type // 1) Define the methods as types TSelectImage = function(AFolder : PChar): PChar; cdecl; TDisposePicture = procedure(SelectPictureResult : PChar); cdecl; var // 2) Define instances of the methods SelectImage : TSelectImage = nil; DisposePicture : TDisposePicture = nil; DllHandle : THandle; function LoadLib : Boolean; procedure UnloadLib; implementation function LoadLib : Boolean; const {$IFDEF WIN32} LibraryName = 'SelectImage.dll'; {$ENDIF} {$IFDEF WIN64} LibraryName = 'SelectImage.dll'; {$ENDIF} {$IFDEF MACOS} LibraryName = 'libSelectImage.dylib'; {$ENDIF} begin if DllHandle = 0 then begin DllHandle := LoadLibrary(LibraryName); if DllHandle > 0 then begin //succesfully loaded the DLL // 3) Map the local variables to the procedures in the loaded library @SelectImage := GetProcAddress(DllHandle,'SelectPicture'); @DisposePicture := GetProcAddress(DllHandle,'DisposePicture'); end end; Result := DllHandle <> 0; end; procedure UnloadLib; begin if DLLHandle <> 0 then begin FreeLibrary(DLLHandle); DllHandle := 0; end; end; {$IFDEF MSWINDOWS} initialization LoadLib; finalization UnloadLib; {$ENDIF} end.
You will also notice that the above unit has the Initialization and finalization sections defined for use on Windows.

Developing and Using Win/Mac Libraries
Embarcadero Technologies, Inc. - 26 -
This allows the program to automatically call the functions to handle the loading and freeing on the library. These can equally be called from within the code at any point, and we will look at doing exactly that with the FireMonkey version. Now we have the ability written to link to the library, let us look at consuming it into multiple projects, starting with a VCL application.
WRITING A VCL CLIENT FOR A FIREMONKEY LIBRARY If we have current applications that we want to expand with FireMonkey or we want to keep smaller (binary sized) windows only applications, then we may want to use the FireMonkey images selector just written in a VCL application. The first example looks at doing just this. We will then use this same library with a FireMonkey client to enable a Windows and Mac version, then finally call the library from a C# client application. Start by adding to the current project group a new VCL application. We are going to design a similar app to the first example, with a button and a Label. The only difference this time being that we will use an OpenPictureDialog to select a file from a folder, and then pass in the folder location to show all images.
Add to the form the OnClick event as defined in the code below (to do this double click on the button) along with the uses to the unitLoadDLL that references the Library functions. Finally, we need to initialize GDI+ as this is not loaded automatically by a VCL application. This is the job of the calling application.
For more on GDI+ visit http://msdn.microsoft.com/en-us/library/ms534077(v=vs.85).aspx GDI+ is automatically available in a FireMonkey application as FireMonkey is designed from the ground up to call this code. To initialize GDI+ with VCL you just need to add Winapi.GFIPOBJ to the uses clauses. As we have already have a simple version running, let’s quickly jump to the code for the second example in this paper.

Developing and Using Win/Mac Libraries
Embarcadero Technologies, Inc. - 27 -
unit Unit1; interface uses Winapi.Windows, Winapi.Messages, System.SysUtils, System.Variants, System.Classes, Vcl.Graphics, Vcl.Controls, Vcl.Forms, Vcl.Dialogs, Vcl.StdCtrls, Winapi.GDIPOBJ, Vcl.ExtDlgs; type TForm1 = class(TForm) Button1: TButton; lblImage: TLabel; OpenPictureDialog1: TOpenPictureDialog; procedure Button1Click(Sender: TObject); private { Private declarations } public { Public declarations } end; var Form1: TForm1; implementation {$R *.dfm} uses unitLoadDLL; procedure TForm1.Button1Click(Sender: TObject); var pWorkInput, pReturn : PChar; ResultStr : string; begin if not OpenPictureDialog1.Execute then Exit; if DllHandle > 0 then begin ResultStr := ExtractFilePath(OpenPictureDialog1.FileName); pWorkInput := Addr(ResultStr[1]); // Need to manage the memory of pReturn as its managed by the DLL pReturn := SelectImage(pWorkInput); try lblImage.Caption := pReturn; finally // Tell the DLL its Pointer is done with! DisposePicture(pReturn); end; end else MessageDlg('DLL Not loaded',mtInformation,[mbOK],0); end; end.
Immediately you will see that this code is very similar to the initial version we wrote for passing a string around. This time there are additional values for managing the PChar’s but other than that, we check the library has loaded and call the method. The check to DllHandle > 0 could equally be replaced with LoadLib to achieve the same result. On running the application you should be able to click on the button and see the following.

Developing and Using Win/Mac Libraries
Embarcadero Technologies, Inc. - 28 -
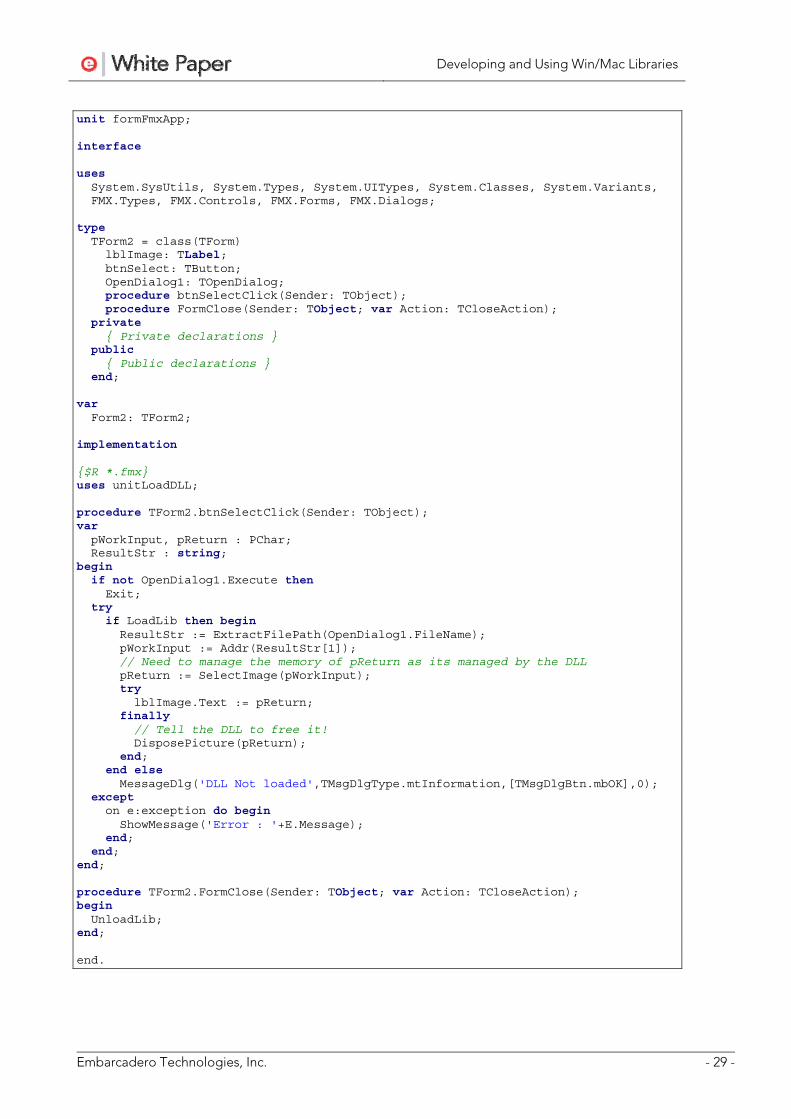
WRITING A FIREMONKEY CLIENT TO USE A LIBRARY THAT USES FIREMONKEY With the VCL application written, we can share our non-visual code with a new FireMonkey application. In fact, we will almost make a duplicate application. Just like with the VCL example application we can use the same common controls like TButton, TLabel, but this time we will use a TOpenDialog as these isn’t a TOpenPictureDialog within FireMonkey; the same effect as an OpenPictureDialog can easily be achieved by setting the OpenDialog filter property. As you can see from the code below the FireMonkey application is almost identical to the VCL example. The only difference is the choice of where to “unload” the library. On the FireMonkey project we have chosen to impalement the FormClose to release the library. Note: Due to the platform; the initialization on Mac must not call the LoadLibrary until the main application form is initialized, hence the function encapsulated this call. This seems to be similar to start up routines for ISAPI libraries and their load sequences being slightly different to typical windows debug versions of the same applications.
Developing and Using Win/Mac Libraries
Embarcadero Technologies, Inc. - 29 -
unit formFmxApp; interface uses System.SysUtils, System.Types, System.UITypes, System.Classes, System.Variants, FMX.Types, FMX.Controls, FMX.Forms, FMX.Dialogs; type TForm2 = class(TForm) lblImage: TLabel; btnSelect: TButton; OpenDialog1: TOpenDialog; procedure btnSelectClick(Sender: TObject); procedure FormClose(Sender: TObject; var Action: TCloseAction); private { Private declarations } public { Public declarations } end; var Form2: TForm2; implementation {$R *.fmx} uses unitLoadDLL; procedure TForm2.btnSelectClick(Sender: TObject); var pWorkInput, pReturn : PChar; ResultStr : string; begin if not OpenDialog1.Execute then Exit; try if LoadLib then begin ResultStr := ExtractFilePath(OpenDialog1.FileName); pWorkInput := Addr(ResultStr[1]); // Need to manage the memory of pReturn as its managed by the DLL pReturn := SelectImage(pWorkInput); try lblImage.Text := pReturn; finally // Tell the DLL to free it! DisposePicture(pReturn); end; end else MessageDlg('DLL Not loaded',TMsgDlgType.mtInformation,[TMsgDlgBtn.mbOK],0); except on e:exception do begin ShowMessage('Error : '+E.Message); end; end; end; procedure TForm2.FormClose(Sender: TObject; var Action: TCloseAction); begin UnloadLib; end; end.
Developing and Using Win/Mac Libraries
Embarcadero Technologies, Inc. - 30 -
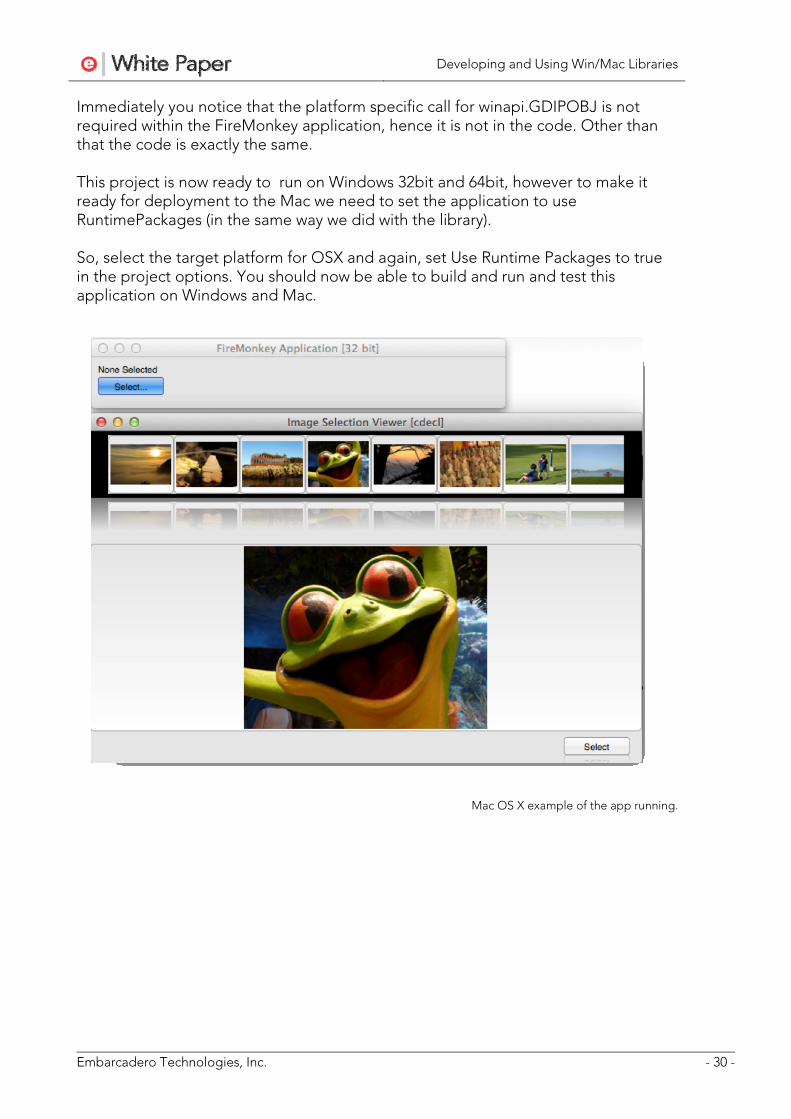
Immediately you notice that the platform specific call for winapi.GDIPOBJ is not required within the FireMonkey application, hence it is not in the code. Other than that the code is exactly the same. This project is now ready to run on Windows 32bit and 64bit, however to make it ready for deployment to the Mac we need to set the application to use RuntimePackages (in the same way we did with the library). So, select the target platform for OSX and again, set Use Runtime Packages to true in the project options. You should now be able to build and run and test this application on Windows and Mac.
Mac OS X example of the app running.

Developing and Using Win/Mac Libraries
Embarcadero Technologies, Inc. - 31 -
PART 3 – INTEGRATING WITH C++ Although the primary language used so far in this paper has been Delphi, multi-platform applications can also be written using the C++ language with C++Builder from Embarcadero as this also includes the ability to compile for multiple platforms. Following on from earlier where we got Delphi VCL applications working with FireMonkey, in this section we will quickly see how using the same techniques you can improve a C++Builder VCL application by integrating it with a FireMonkey library. Even though we could recreate the Library from the previous example with C++Builder and FireMonkey, we will use the same library, but this time with a VCL C++Builder application. Even though we only have Delphi application in our project group, there are no restrictions on adding in a C++Builder application to the same project group. Following the same steps as before, add a new C++ VCL Forms Application to our project group by right clicking on the project group and choose “Add New Project” -> “C++Builder Projects” -> “VCL Forms Application”
Add to the form in exactly the same way the label, button and OpenPictureDialog, remembering to rename the label to lblImage.

Developing and Using Win/Mac Libraries
Embarcadero Technologies, Inc. - 32 -
Now we have our basic shell recreated, the next steps are to add in the code for loading the library and calling the methods exposed in the library. To save writing and testing code to recreate the functionality we have already working, we are going to quickly explore a feature of C++Builder that allows use of Delphi code in a C++Builder application. This is achieved by “Making” a header file for the Delphi unit so we can bring it into the scope of the C++Builder application. To use the unitLoadDLL.pas file created previously, we first need to make sure (due to the file paths for the libraries being hard coded in our example) that we save the project to the same directory level as the previous demos so the pathing to locate the library is still correct at run time. Save the project (call it something like GetImageFromFMDLLCpp) into a new folder in the same directory level that the Delphi VCL and FireMonkey examples were created into.
Now we have the project saved at the right location to locate the libraries, its time to generate a C++ header for linking to the Delphi unit; this is quite straightforward. First, add the unit (unitLoadDLL.pas) to the project. Secondly, right click on the project and choose “Make”.
Having run the Make option, a new hpp file will be made for the unitLoadDLL.pas file and will be created at the same location as the .pas file. This header file can be added to the includes section of the cpp unit. #include "unitLoadDLL.hpp"
To use FireMonkey via a library in a C++ application the same rules apply; you need to initialize the GDI+ from the calling application; (remember its already initialized if you use FireMonkey Application instead) to do this just add the following include to the cpp unit. This is again done using the Winapi.GDIPOBJ. #include "Winapi.GDIPOBJ.hpp"
Now all we need to do is add in the OnClick event for the button push and we have our project working. Once these steps are followed your code should look something like the following and produce the same results as the Delphi VCL example earlier. //------------------------------------------------------------------------ #include <vcl.h> #pragma hdrstop #include "Unit3.h" #include "unitLoadDLL.hpp" #include "Winapi.GDIPOBJ.hpp"

Developing and Using Win/Mac Libraries
Embarcadero Technologies, Inc. - 33 -
//------------------------------------------------------------------------ #pragma package(smart_init) #pragma resource "*.dfm" TForm3 *Form3; //------------------------------------------------------------------------ __fastcall TForm3::TForm3(TComponent* Owner) : Vcl::Forms::TForm(Owner) { } //------------------------------------------------------------------------ void __fastcall TForm3::Button1Click(TObject *Sender) { PChar pWorkInput, pReturn; String ResultStr; if (! OpenPictureDialog1->Execute()) { return; } if (LoadLib) { ResultStr = ExtractFilePath(OpenPictureDialog1->FileName); pWorkInput = ResultStr.c_str(); // Need to manage the memory of pReturn as its managed by the DLL pReturn = SelectImage(pWorkInput); try { lblImage->Caption = pReturn; } __finally { // Tell the DLL its Pointer is done with! DisposePicture(pReturn); } } } //------------------------------------------------------------------------- void __fastcall TForm3::FormClose(TObject *Sender, TCloseAction &Action) { UnloadLib; } //-------------------------------------------------------------------------
PART 4 - INTEGRATING WITH C# FireMonkey gives some excellent capabilities for Stunning HD and 3D applications, and the great news is that its not only Delphi and C++Builder applications that can benefit from FireMonkey. Using the techniques learned in this paper, you now have a library that is capable of being shared with many other developer tools such as C# or Visual C++ applications as well!

Developing and Using Win/Mac Libraries
Embarcadero Technologies, Inc. - 34 -
The following code was written using Visual Studio 2010 professional and will use C# Using Visual Studio, choose File > New > Project. Let’s select a Visual C# - Windows Forms Application.
Save this project to a folder called CSharpApp in your FireMonkey Library parent folder. Within the project you will have a new, blank form. We are going to see how similar C# is to the Delphi language. Now we need to add the C# equivalent of the same 3 controls as the previous demo. Using the simply add to the Tool Box locate and add the following
• label • button • openFileDialog
Update the button text property to be “Get File” and the label text to show <> for no data.

Developing and Using Win/Mac Libraries
Embarcadero Technologies, Inc. - 35 -
We should now have a form that looks something live the image shown below:
Before we can use the Library we need to write some code that allows us to use the library. To do this we can easily create a class that will manage the interface to the library. This will then give a simple way to call the library within the C# code. Firstly we need to add the following uses at the top of the form to access the ability to call DllImport. using System.Runtime.InteropServices; // DLLImport Secondly we need to write a class – The following is out class called FMLibrarayLoader which we can reference later from main code. public class FMLibraryloader { } To this class we need to add the external methods, followed by their return type and then their parameters. (as like any other C# method. public class FMLibraryloader { public static extern IntPtr SelectPicture(String AFolders); public static extern void DisposePicture(IntPtr SelectPictureResult); } Finally, we need to add to the methods where they come from. This is done by adding the [attributes] for the Dll Import with the location, CharSet and Calling Convention. public class FMLibraryloader { [DllImport(@"..\..\..\..\..\DLL\Win32\Debug\SelectImage.dll", CharSet =

Developing and Using Win/Mac Libraries
Embarcadero Technologies, Inc. - 36 -
CharSet.Unicode, CallingConvention = CallingConvention.Cdecl)] public static extern IntPtr SelectPicture(String AFolders); [DllImport(@"..\..\..\..\..\DLL\Win32\Debug\SelectImage.dll", CharSet = CharSet.Unicode, CallingConvention = CallingConvention.Cdecl)] public static extern void DisposePicture(IntPtr SelectPictureResult); } Now we have the helper class in place, we can write the code to call the methods. On the form, double click on the button to get the C# version of an OnClick event and enter the following code private void button1_Click(object sender, EventArgs e) { openFileDialog1.Filter = "JPEG Images|*.jpg|GIF Images|*.gif|BITMAPS|*.bmp"; if (openFileDialog1.ShowDialog() == DialogResult.OK) { // Get a folder to show images from. String fFolder = Path.GetDirectoryName(openFileDialog1.FileName); // Create the output variable. IntPtr pOut; // Get the PChar(string) from the DLL for the selected file. pOut = FMLibraryloader.SelectPicture(fFolder); // Show the contents of the String Pointer lblSelected.Text = Marshal.PtrToStringAuto(pOut); // Release the memory for the string from the DLL FMLibraryloader.DisposePicture(pOut); } } As Path is in System.IO we need to add the following to the using section as well. using System.IO; Once you have carefully checked your path for the DLL matches that in the DLLImport attributes, you are ready to run your applications.

Developing and Using Win/Mac Libraries
Embarcadero Technologies, Inc. - 37 -
The Form1.cs file should now read as follows: This code will allow the end user to select an image, and then pass the folder to the library for it to show the FireMonkey form and return the result. using System; using System.Collections.Generic; using System.ComponentModel; using System.Data; using System.Drawing;// Loads GDI+ using System.Linq; using System.Text; using System.Windows.Forms; using System.Runtime.InteropServices; // DLLImport using System.IO; namespace CSharpToFireMonkeyDLL { public partial class Form1 : Form { public Form1() { InitializeComponent(); } private void button1_Click(object sender, EventArgs e) { openFileDialog1.Filter = "JPEG Images|*.jpg|GIF Images|*.gif|BITMAPS|*.bmp"; if (openFileDialog1.ShowDialog() == DialogResult.OK) { // Get a folder to show images from. String fFolder = Path.GetDirectoryName(openFileDialog1.FileName); // Create the output variable. IntPtr pOut; // Get the PChar(string) from the DLL for the selected file. pOut = FMLibraryloader.SelectPicture(fFolder); // Show the contents of the String Pointer lblSelected.Text = Marshal.PtrToStringAuto(pOut); // Release the memory for the string from the DLL FMLibraryloader.DisposePicture(pOut); } } } public class FMLibraryloader { [DllImport(@"..\..\..\..\..\DLL\Win32\Debug\SelectImage.dll", CharSet = CharSet.Unicode, CallingConvention = CallingConvention.Cdecl)] public static extern IntPtr SelectPicture(String AFolders); [DllImport(@"..\..\..\..\..\DLL\Win32\Debug\SelectImage.dll", CharSet = CharSet.Unicode, CallingConvention = CallingConvention.Cdecl)] public static extern void DisposePicture(IntPtr SelectPictureResult); } }

Developing and Using Win/Mac Libraries
Embarcadero Technologies, Inc. - 38 -
SUMMARY FireMonkey is amazingly powerful and is easily shared with other applications and developers through the techniques we have covered. In this paper, we have seen how to encapsulate non-visual and visual business logic into libraries. We have then taken these libraries and used them in VCL applications, C# applications and also in using Delphi (or we could use C++Builder) with FireMonkey have simply compiled the applications to be Win/Mac applications that target both platforms. Overall we have seen that FireMonkey provides a great framework for enhancing the development we are doing today whilst leveraging the powerful access to the CPU and GPU that FireMonkey provides. For more about FireMonkey and RAD Studio please follow the links below.
USEFUL LINKS SOURCE
Full code available for download from http://cc.embarcadero.com/item/28615
VIDEOS VCL to FireMonkey http://blogs.embarcadero.com/stephenball/2011/11/01/vcl-to-firemonkey-video/
Using the Power of FireMonkey to enhance C# http://blogs.embarcadero.com/stephenball/2011/11/01/using-firemonkey-to-enhance-c-sharp/
EMBARCADERO URL’S FireMonkey http://www.embarcadero.com/products/firemonkey http://embt.co/firemonkey-info RAD Studio http://www.embarcadero.com/products/rad-studio Delphi http://www.embarcadero.com/products/delphi C++Builder http://www.embarcadero.com/products/cbuilder

Embarcadero Technologies, Inc. is the leading provider of software tools that empower application developers and data management professionals to design, build, and run applications and databases more efficiently in heterogeneous IT environments. Over 90 of the Fortune 100 and an active community of more than three million users worldwide rely on Embarcadero’s award-winning products to optimize costs, streamline compliance, and accelerate development and innovation. Founded in 1993, Embarcadero is headquartered in San Francisco with offices located around the world. Embarcadero is online at www.embarcadero.com.