int ac19 training series vol 1
DESCRIPTION
INT AC19 Training Series Vol 1TRANSCRIPT
ARCHICAD Training SeriesVolume 1 - The ARCHICAD BIM Concept
NHS Office Complex, Los Angeles, California, USArchitect: PAAstudio, US
Credits
2ARCHICAD Training Series Vol. 1
Visit the GRAPHISOFT website at www.graphisoft.com for local distributor and product availability information.
ARCHICAD Training Series Vol. 1The ARCHICAD BIM Concept
(International English Metric/Imperial Version)Copyright © 2015 by GRAPHISOFT, all rights reserved. Reproduction, paraphrasing or translation
without express prior written permission is strictly prohibited.
TrademarksArchiCAD® is a registered trademark of GRAPHISOFT.
All other trademarks are the property of their respective holders.
CreditsCourtesy of GRAPHISOFT

Contents
ARCHICAD Training Series Vol. 13
CONTENTS
Introduction _______________________________________________4
The ARCHICAD Interface _____________________________________6
Navigation in ARCHICAD __________________________________ 12Navigate the Floor Plan_________________________________________ 12Navigate the 3D Model _________________________________________ 14
The Virtual Building™ Concept _____________________________ 18
The Documentation Workflow ______________________________ 27
The Publishing Workflow __________________________________ 32Creating Virtual Layouts ________________________________________ 32Sharing the Project ____________________________________________ 33

Introduction
IntroductionWelcome to the ARCHICAD Training Series! This Guide is part of the ARCHICAD Training Series, which currently includes the following materials:• Vol. 1 - The ARCHICAD BIM Concept• Vol. 2 - Conceptual Design in ARCHICAD• Vol. 3 - Intermediate ARCHICAD• Vol. 4 - Advanced ARCHICAD• Vol. 5 - Using Teamwork
You are now reading Vol. 1 - The ARCHICAD BIM Concept a comprehensive hands-on training to familiarize you with the modeling and documentation concepts of ARCHICAD. This guide is meant for new ARCHICAD users, prospects, as well as students and teachers using it as part of the BIM Curriculum Exercises.
Contents of the training material
• PDF guide – an e-book including detailed explanation of every step with screenshots• ARCHICAD project files - preset training files to help your learning processNarrated movie clips are available on the YouTube channel for GRAPHISOFT ARCHICAD (www.youtube.com/user/Archicad) providing step-by-step instructions for each step of the training guide. The ARCHICAD YouTube channel can also be accessed via the ARCHICAD Help menu by entering the title of this training guide into the search field.
How to use this training material?
• Install the required ARCHICAD version• Follow the instructions in this PDF guideYou must have ARCHICAD 19 installed on your computer to use this guide. The e-book was made with the INT (English) and US (Imperial) version of ARCHICAD, therefore we recommend using the same version for practicing.
ARCHICAD Training Series Vol. 14

Introduction
How to get ARCHICAD?
If you do not have ARCHICAD yet, please visit http://www.graphisoft.com/downloads/ to obtain a FREE installer:• If you are a student, a teacher or a representative of a school, download a fully functional
version of ARCHICAD and claim for an education license from myarchicad.com.• If you are a professional architect, download a fully functional version of ARCHICAD and claim
for a 30-day trial license from myarchicad.com. Projects saved with this version can be automatically upgraded to full versions when purchasing a commercial license.
Please contact your local distributor for purchasing commercial ARCHICAD licenses at www.graphisoft.com/info/where_to_buy.
We hope you will find this training useful and wish you success with your future ARCHICAD projects!
Good luck,The GRAPHISOFT Team
ARCHICAD Training Series Vol. 15

The ARCHICAD Interface
The ARCHICAD InterfaceTo start exploring ARCHICAD we will open an example file first. Let’s start ARCHICAD by clicking on the application icon. First we encounter a dialog box in which we can choose between creating a new project or opening an existing one.We’ll do the latter, so click on the Open a Project radio button. In the second section of the dialog box we select Browse for a Solo Project. Choose Standard Profile 19 for the Work Environment and click on Browse.
In the browser dialog box, we locate and open the NHS Office 19_metric.pla or NHS Office 19_imperial.pla project file (depending on the system of units of your location) from the extracted training project folder.
ARCHICAD Training Series Vol. 16

The ARCHICAD Interface
If you are running ARCHICAD 19 Student version, a message appears warning you that you have to convert the project into Education format.
Click the Convert to Education button. Since we are opening a so-called archive project that contains all the external elements used in creating the project, we are asked how we wish to handle these elements. For the time being we ignore this and keep all the project elements in the archive file so without changing the radio buttons simply click Open.
ARCHICAD Training Series Vol. 17
The ARCHICAD Interface
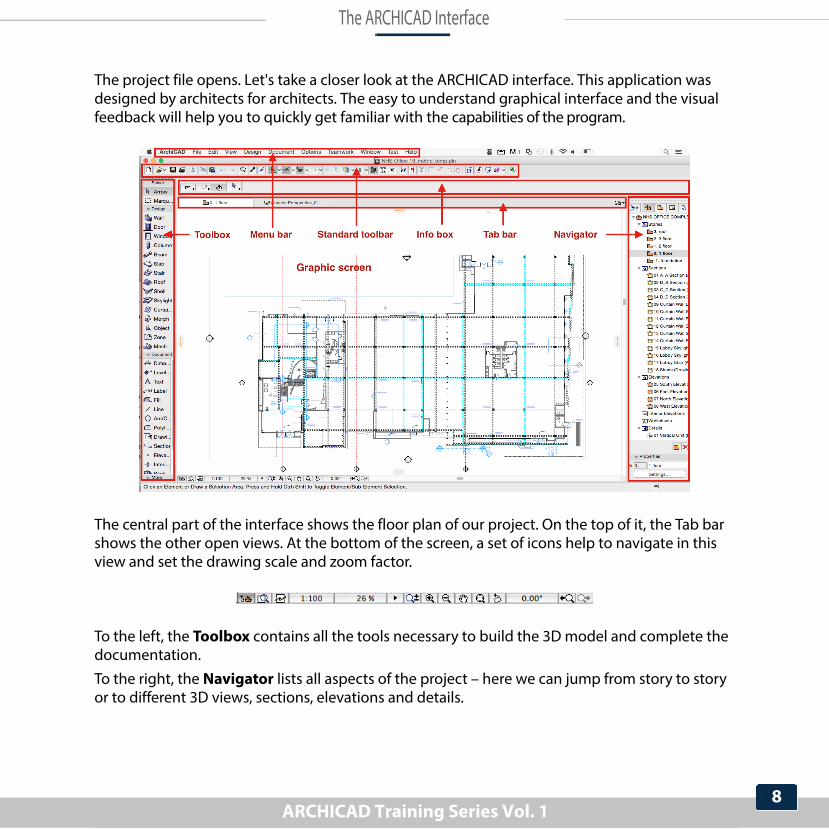
The project file opens. Let's take a closer look at the ARCHICAD interface. This application was designed by architects for architects. The easy to understand graphical interface and the visual feedback will help you to quickly get familiar with the capabilities of the program.
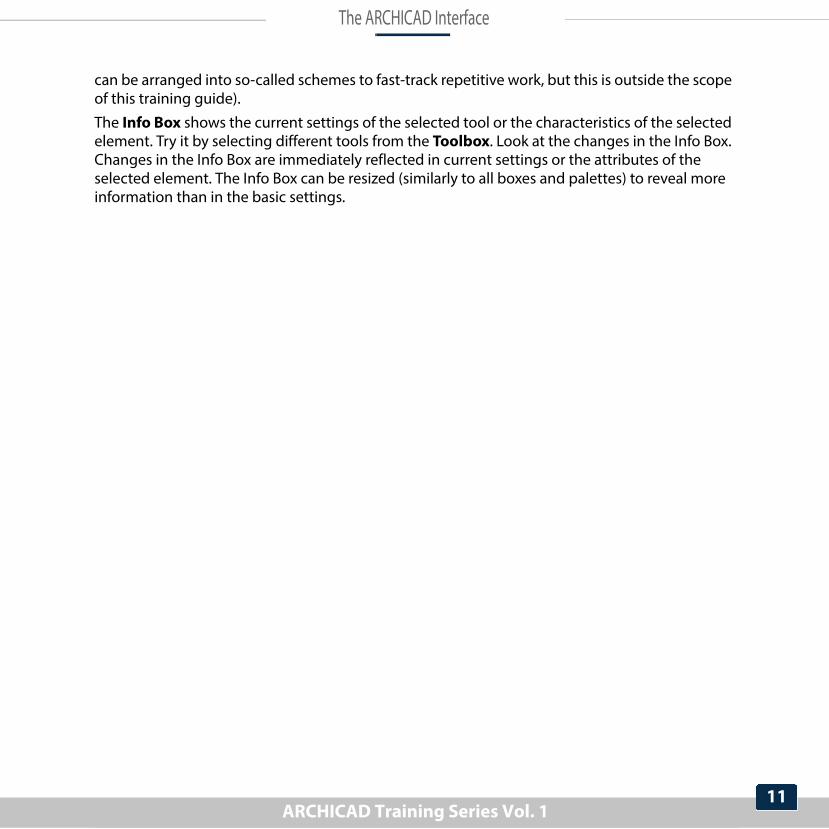
The central part of the interface shows the floor plan of our project. On the top of it, the Tab bar shows the other open views. At the bottom of the screen, a set of icons help to navigate in this view and set the drawing scale and zoom factor.
To the left, the Toolbox contains all the tools necessary to build the 3D model and complete the documentation.To the right, the Navigator lists all aspects of the project – here we can jump from story to story or to different 3D views, sections, elevations and details.
ARCHICAD Training Series Vol. 18

The ARCHICAD Interface
At the very top, the Menubar lists all the available commands, logically grouped. Commands for File operations, Editing and Viewing functions can be selected from the corresponding menus.
ARCHICAD Training Series Vol. 19

The ARCHICAD Interface
Since Design and Documentation are separate processes in architectural practice, tools and commands supporting these processes are also located in separate menus. Commands in the Options menu regulate basic settings and the work environment.
The Teamwork menu supports collaborative work, and the Window menu sets the visibility of the toolbars and palettes.
The Standard Toolbar contains some of the commands and functions available from the menus. It can be found right below the Menubar and can be fully customized. (The whole user interface
ARCHICAD Training Series Vol. 110
The ARCHICAD Interface
can be arranged into so-called schemes to fast-track repetitive work, but this is outside the scope of this training guide).The Info Box shows the current settings of the selected tool or the characteristics of the selected element. Try it by selecting different tools from the Toolbox. Look at the changes in the Info Box. Changes in the Info Box are immediately reflected in current settings or the attributes of the selected element. The Info Box can be resized (similarly to all boxes and palettes) to reveal more information than in the basic settings.
ARCHICAD Training Series Vol. 111

Navigation in ARCHICAD
Navigation in ARCHICAD
Navigate the Floor PlanLet’s take a closer look at the floor plan. From the icons at the bottom of the floor plan, let’s select the Increase Zoom icon.
The cursor changes to a magnifying glass. Let’s click two corners of a rectangle around the upper right entrance area of the building.
ARCHICAD Training Series Vol. 112

Navigation in ARCHICAD
After the second click, you will see the zoomed-in view of the floor plan in the main window.
Try the other icons for Panning, Reducing Zoom, Fitting in Window the contents of the floor plan or switching between Previous and Next Views.There is an even faster way to navigate in all views. With the cursor in the main window, press the mouse scroll button to pan around the floor plan in real-time. Remember to keep the scroll button pressed.Rolling the scroll button away from you will zoom in and rolling it towards you will zoom out in real-time. In these cases the cursor position will act as the center point of the projection.This technique will let you move from one location of the floor plan to another very quickly.
ARCHICAD Training Series Vol. 113

Navigation in ARCHICAD
Navigate the 3D ModelIn ARCHICAD, every building element is instantly represented in 3D as well. Naturally this sample project includes not only the 2D documentation but the entire 3D building model. You can use the Tab bar pull down menu or the Navigator elements to navigate between projected and 3D views of an ARCHICAD model. In this example, we will use the Navigator’s views in the Project Map. So what does our sample project look like in 3D?The 3D model can be shown in an axonometric or a perspective view. We’ll try an axonometric view first. Go to the 3D views section in the Project Map of the Navigator and double-click on Generic Axonometry.
ARCHICAD Training Series Vol. 114

Navigation in ARCHICAD
As a result you will see something like this:
Within the 3D view, the real-time navigational tools (zooming and panning) function exactly as on the floor plan. Use the scroll button of the mouse to move from one part of the model to the other.Stay in a view where the building more or less fills the main window. There are two fundamentally different ways of navigating in a model: Orbit and Walk. Let’s see how they work. From the bottom Toolbar select the Orbit icon.
The cursor changes to a little orbit sign. Click and keep the left mouse button pressed and move the mouse around to view the building from all sides.While in Orbit mode, real-time zoom and pan can still be used. Try them both to explore the whole model. To quit Orbit mode, press ESC.
ARCHICAD Training Series Vol. 115

Navigation in ARCHICAD
There is an even more exciting way of getting around the building. In order to see this, let’s double-click Generic Perspective from the 3D section of the Navigator. The result is something like this:
In this view orbit, real-time zoom and pan work as we have seen already. The only difference is that here they affect the camera position rather than the projected image. Let’s try and move around a little.For a different way of exploration, let’s get into ‘first-person shooter’ mode by selecting the Explore icon at the bottom toolbar.
ARCHICAD Training Series Vol. 116

Navigation in ARCHICAD
The appearing dialog box explains the controls, which are very similar to FPS computer games.
After getting familiar with the controls, click 3D Explore to start the fly-through inside the building and navigate around.Walls will not stop you in this ‘game’ but to get the hang of it try using the doors.To quit the Explore mode, just click into the 3D view.
ARCHICAD Training Series Vol. 117
The Virtual Building™ Concept
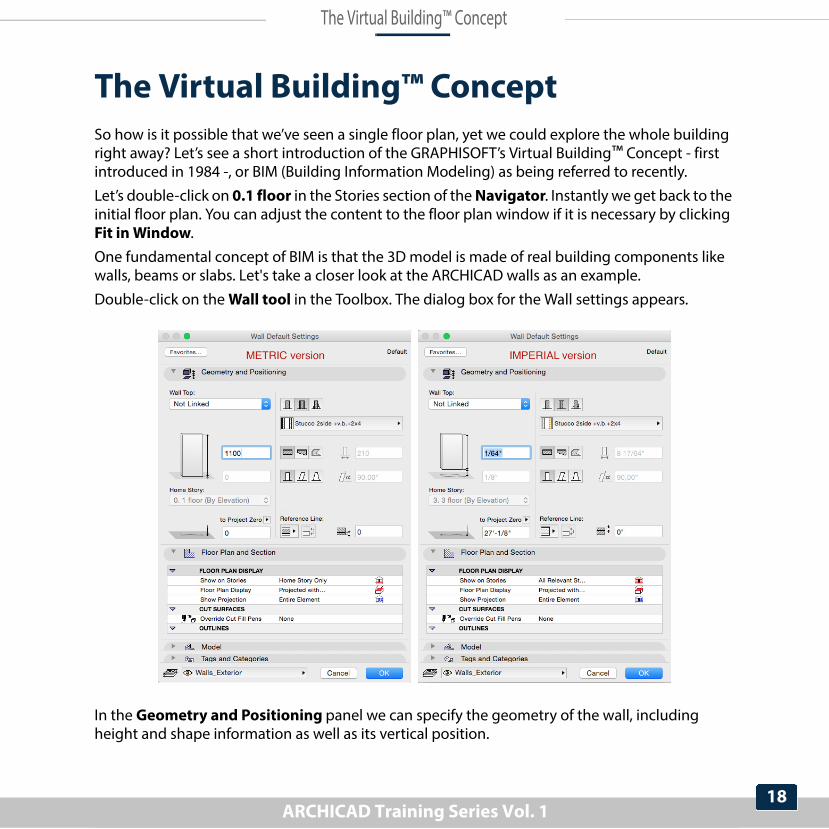
The Virtual Building™ ConceptSo how is it possible that we’ve seen a single floor plan, yet we could explore the whole building right away? Let’s see a short introduction of the GRAPHISOFT’s Virtual Building™ Concept - first introduced in 1984 -, or BIM (Building Information Modeling) as being referred to recently.Let’s double-click on 0.1 floor in the Stories section of the Navigator. Instantly we get back to the initial floor plan. You can adjust the content to the floor plan window if it is necessary by clicking Fit in Window.One fundamental concept of BIM is that the 3D model is made of real building components like walls, beams or slabs. Let's take a closer look at the ARCHICAD walls as an example.Double-click on the Wall tool in the Toolbox. The dialog box for the Wall settings appears.
In the Geometry and Positioning panel we can specify the geometry of the wall, including height and shape information as well as its vertical position.
ARCHICAD Training Series Vol. 118
The Virtual Building™ Concept
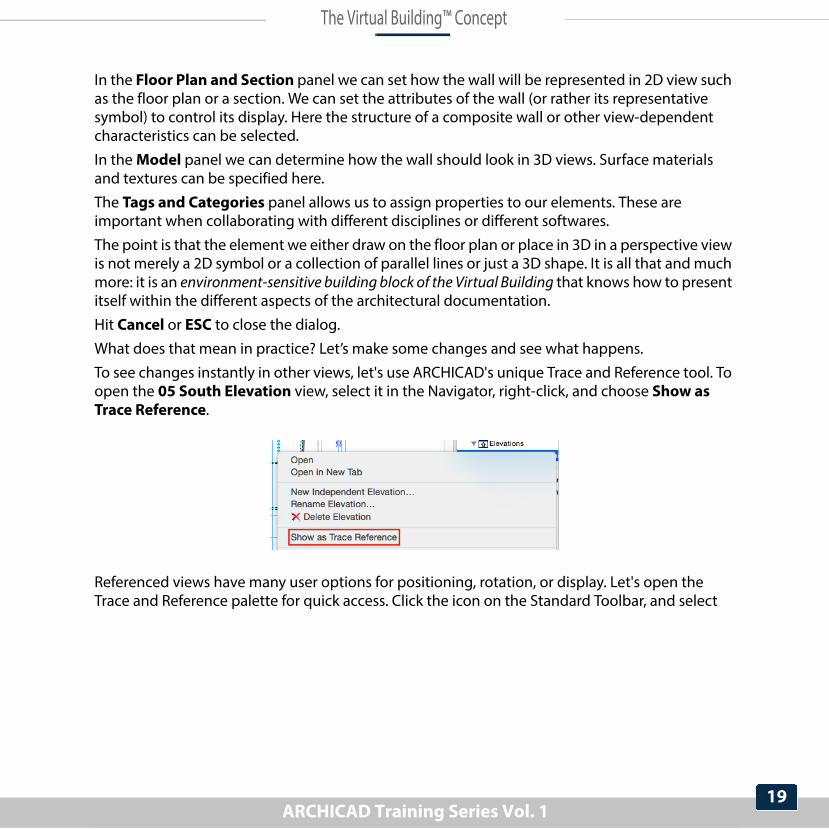
In the Floor Plan and Section panel we can set how the wall will be represented in 2D view such as the floor plan or a section. We can set the attributes of the wall (or rather its representative symbol) to control its display. Here the structure of a composite wall or other view-dependent characteristics can be selected.In the Model panel we can determine how the wall should look in 3D views. Surface materials and textures can be specified here.The Tags and Categories panel allows us to assign properties to our elements. These are important when collaborating with different disciplines or different softwares.The point is that the element we either draw on the floor plan or place in 3D in a perspective view is not merely a 2D symbol or a collection of parallel lines or just a 3D shape. It is all that and much more: it is an environment-sensitive building block of the Virtual Building that knows how to present itself within the different aspects of the architectural documentation.Hit Cancel or ESC to close the dialog.What does that mean in practice? Let’s make some changes and see what happens. To see changes instantly in other views, let's use ARCHICAD's unique Trace and Reference tool. To open the 05 South Elevation view, select it in the Navigator, right-click, and choose Show as Trace Reference.
Referenced views have many user options for positioning, rotation, or display. Let's open the Trace and Reference palette for quick access. Click the icon on the Standard Toolbar, and select
ARCHICAD Training Series Vol. 119

The Virtual Building™ Concept
Trace and Reference. Position the appearing palette to the upper-left corner of the graphic screen. Use the Drag Reference command to drag the elevation view below the floor plan.
Re-color the reference to its original by clicking the Reference's color icon.
Zoom in so you can see the reference south side of the building. Select the wall next to the entrance, and open its settings.
ARCHICAD Training Series Vol. 120
The Virtual Building™ Concept
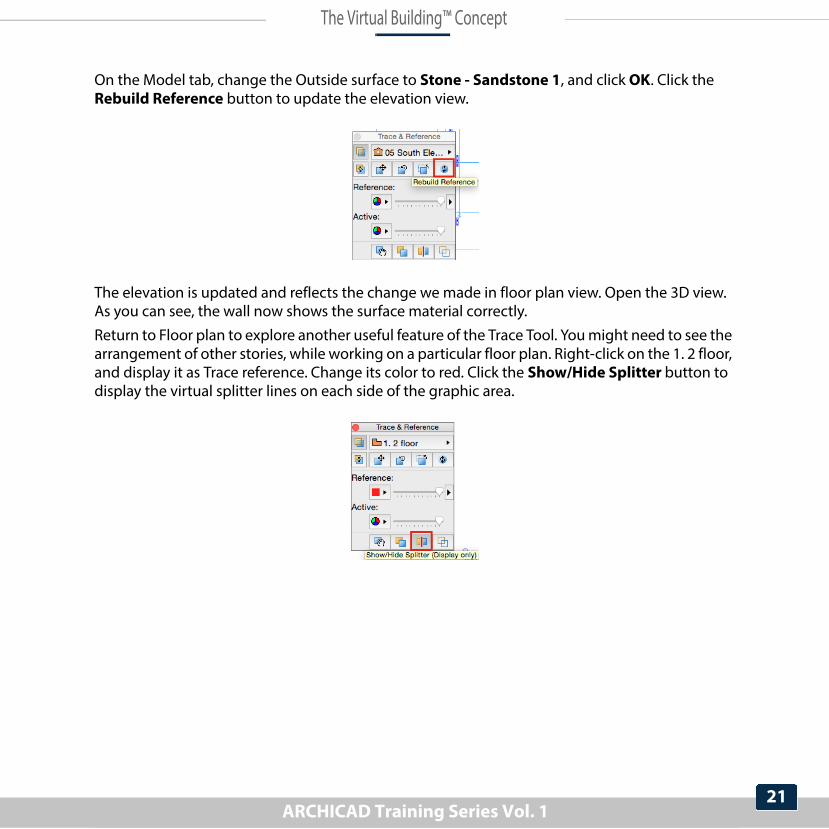
On the Model tab, change the Outside surface to Stone - Sandstone 1, and click OK. Click the Rebuild Reference button to update the elevation view.
The elevation is updated and reflects the change we made in floor plan view. Open the 3D view. As you can see, the wall now shows the surface material correctly.Return to Floor plan to explore another useful feature of the Trace Tool. You might need to see the arrangement of other stories, while working on a particular floor plan. Right-click on the 1. 2 floor, and display it as Trace reference. Change its color to red. Click the Show/Hide Splitter button to display the virtual splitter lines on each side of the graphic area.
ARCHICAD Training Series Vol. 121

The Virtual Building™ Concept
Drag any of these to hide the content of the active view, and make the content of the trace visible.
Close the Trace and Reference palette, and turn it off by clicking its icon on the Standard toolbar.
ARCHICAD Training Series Vol. 122

The Virtual Building™ Concept
One of the major advantages of the BIM concept is that non graphical-information, such as quantities, element inventories and schedules can be automatically extracted from the 3D model. Let’s check whether all aspects of the BIM model are covered: double-click Wall List in the Element Schedules section of the Navigator.
ARCHICAD Training Series Vol. 123
The Virtual Building™ Concept
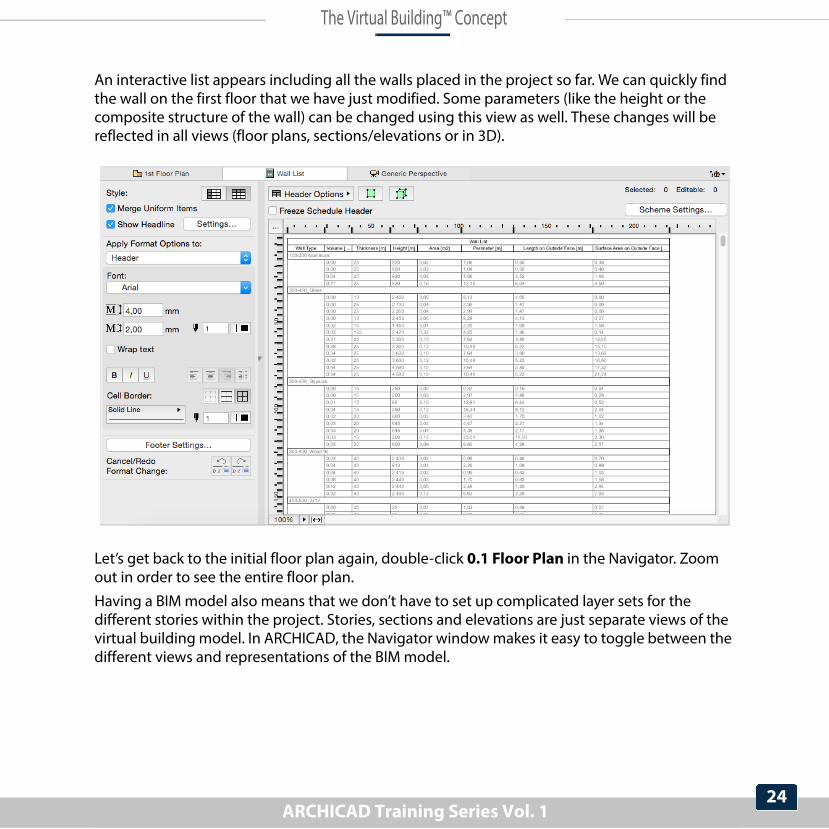
An interactive list appears including all the walls placed in the project so far. We can quickly find the wall on the first floor that we have just modified. Some parameters (like the height or the composite structure of the wall) can be changed using this view as well. These changes will be reflected in all views (floor plans, sections/elevations or in 3D).
Let’s get back to the initial floor plan again, double-click 0.1 Floor Plan in the Navigator. Zoom out in order to see the entire floor plan.Having a BIM model also means that we don’t have to set up complicated layer sets for the different stories within the project. Stories, sections and elevations are just separate views of the virtual building model. In ARCHICAD, the Navigator window makes it easy to toggle between the different views and representations of the BIM model.
ARCHICAD Training Series Vol. 124

The Virtual Building™ Concept
Double-click on the different stories (2 Floor, 3 Floor, etc. in the Stories section) and on the different sections below Sections, Elevations or Details.
ARCHICAD Training Series Vol. 125

The Virtual Building™ Concept
All these views are merely derivatives of the BIM model. Any number of them can be generated and they are all linked together, so if anything changes in one view, the changes are also reflected in all other views throughout the entire project. This is a huge advantage compared to the traditional 2D drawing based documentation method where coordination of the drawings had to be done manually. It is not only more productive but also more reliable as it reduces the risk of coordination issues to the minimum.
ARCHICAD Training Series Vol. 126
The Documentation Workflow
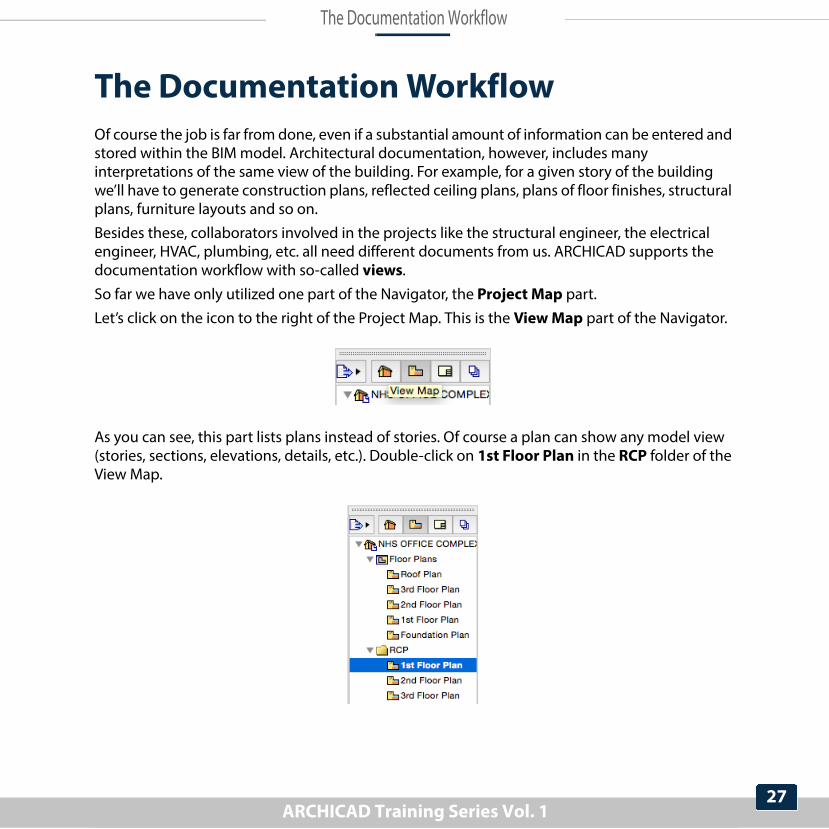
The Documentation WorkflowOf course the job is far from done, even if a substantial amount of information can be entered and stored within the BIM model. Architectural documentation, however, includes many interpretations of the same view of the building. For example, for a given story of the building we’ll have to generate construction plans, reflected ceiling plans, plans of floor finishes, structural plans, furniture layouts and so on.Besides these, collaborators involved in the projects like the structural engineer, the electrical engineer, HVAC, plumbing, etc. all need different documents from us. ARCHICAD supports the documentation workflow with so-called views.So far we have only utilized one part of the Navigator, the Project Map part.Let’s click on the icon to the right of the Project Map. This is the View Map part of the Navigator.
As you can see, this part lists plans instead of stories. Of course a plan can show any model view (stories, sections, elevations, details, etc.). Double-click on 1st Floor Plan in the RCP folder of the View Map.
ARCHICAD Training Series Vol. 127
The Documentation Workflow
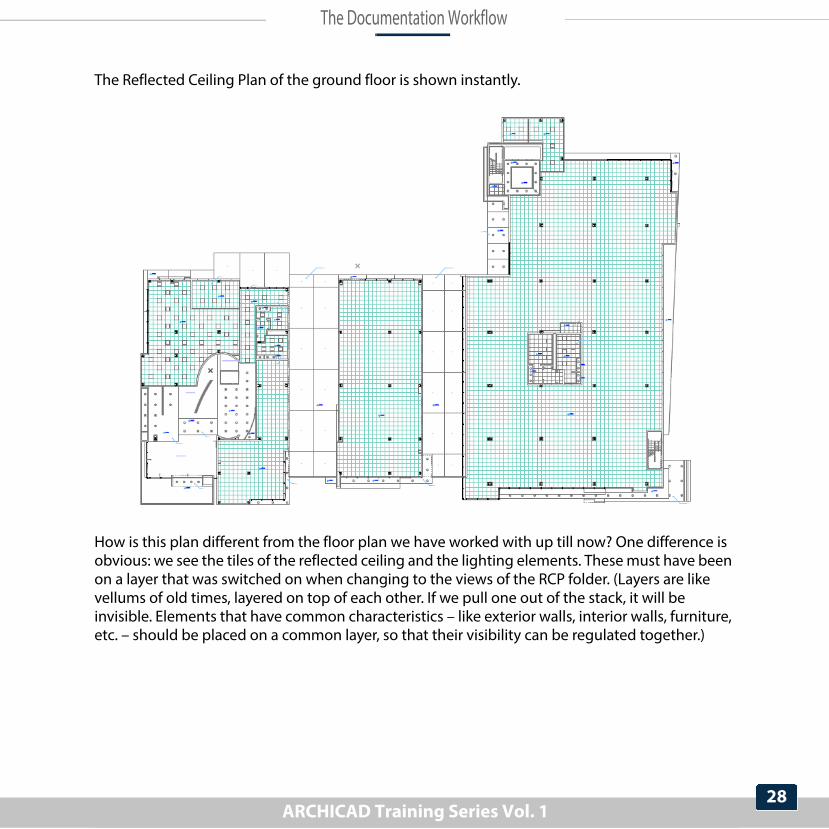
The Reflected Ceiling Plan of the ground floor is shown instantly.
How is this plan different from the floor plan we have worked with up till now? One difference is obvious: we see the tiles of the reflected ceiling and the lighting elements. These must have been on a layer that was switched on when changing to the views of the RCP folder. (Layers are like vellums of old times, layered on top of each other. If we pull one out of the stack, it will be invisible. Elements that have common characteristics – like exterior walls, interior walls, furniture, etc. – should be placed on a common layer, so that their visibility can be regulated together.)
ARCHICAD Training Series Vol. 128

The Documentation Workflow
The other significant difference is only visible if we zoom in to the interior of the building. Doors are shown with their openings only (as is usual on a reflected ceiling plan).
There are six differentiating factors for a view.
• Layer Combination determines which layers are switched on or off for that particular view. Here, layer combinations were set up and named in advance. The one that is used here is named ‘Reflected Ceiling Plan’.
• The other factor is the Scale of the drawing. For instance, plans that are submitted to the municipality for approval have a smaller scale than construction documentation. In ARCHICAD, objects like doors, windows or other custom elements are scale–sensitive, that is, their 2D representation depends on the current scale of the drawing.
• The third factor is the Structure Display. This function allows us to display construction elements in various ways depending how we define the components of elements. We can choose one of these options:- Entire Model- Without Finishes- Core Only- Core of Load-Bearing Elements Only
ARCHICAD Training Series Vol. 129

The Documentation Workflow
• The fourth factor is the Pen Set. We can define different line weights to the different colors.• The following factor is the so-called Model View Options Combination. These settings
control the behavior of ARCHICAD elements beyond merely toggling visibility on and off. These combinations were also set up and named in advance. The one for reflected ceiling plans can be viewed when selecting Document/Set Model View/Model View Options from the menu.
• The last factor is the Renovation Filter. We can provide visual feedback on the status of each element at a particular stage of a renovation project.
ARCHICAD Training Series Vol. 130

The Documentation Workflow
A view is defined by these factors, plus the current zoom and the dimensions. Clicking Settings... in the Properties panel below the Navigator provides access to all these settings.In the Quick Options part just below it, you can change these settings for the current project representation. In order to activate the Quick Options palette click on the Window/Palettes/Quick Options command.
Click on any of the buttons and see what changes occur on the floor plan when the settings are changed.
ARCHICAD Training Series Vol. 131
The Publishing Workflow
The Publishing Workflow
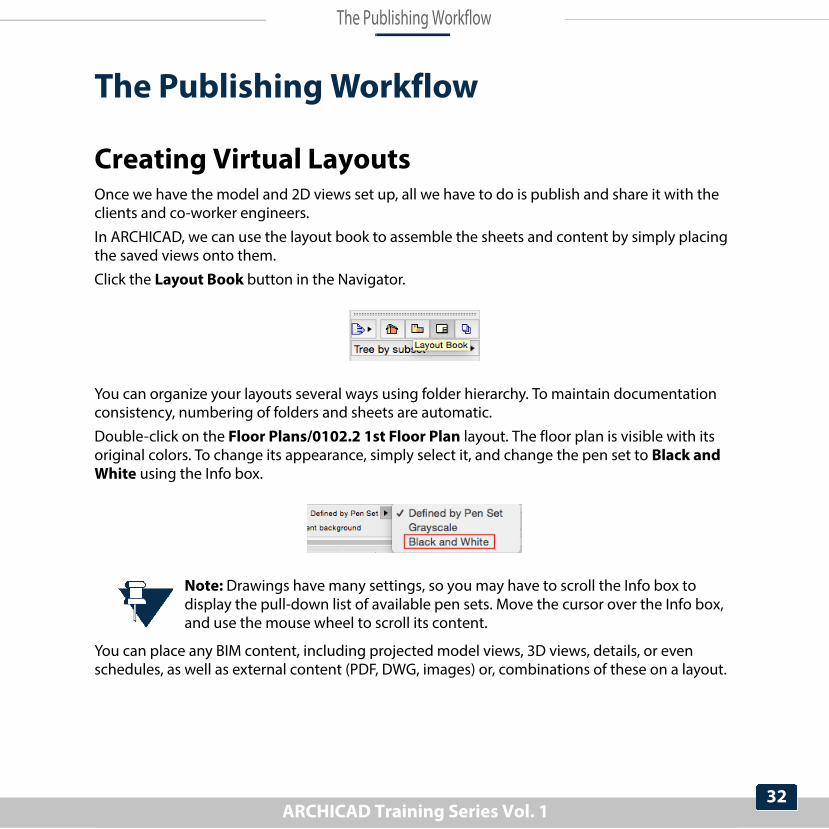
Creating Virtual LayoutsOnce we have the model and 2D views set up, all we have to do is publish and share it with the clients and co-worker engineers.In ARCHICAD, we can use the layout book to assemble the sheets and content by simply placing the saved views onto them.Click the Layout Book button in the Navigator.
You can organize your layouts several ways using folder hierarchy. To maintain documentation consistency, numbering of folders and sheets are automatic. Double-click on the Floor Plans/0102.2 1st Floor Plan layout. The floor plan is visible with its original colors. To change its appearance, simply select it, and change the pen set to Black and White using the Info box.
Note: Drawings have many settings, so you may have to scroll the Info box to display the pull-down list of available pen sets. Move the cursor over the Info box, and use the mouse wheel to scroll its content.
You can place any BIM content, including projected model views, 3D views, details, or even schedules, as well as external content (PDF, DWG, images) or, combinations of these on a layout.
ARCHICAD Training Series Vol. 132

The Publishing Workflow
You can set master layouts with constant layout content, like size, drawing arrangement, frames, title blocks, legends, notes, and automatic text information (e.g. project info, drawing data, layout data). Zoom to the right side of a layout to see the red marked master elements.
Sharing the ProjectIf the layouts are ready, you can publish them in several file formats. Now, let's see the most common ones: PDF, DWG, IFC and BIMx.Click the Publisher Sets button in the Navigator.
The available publisher sets are visible in the list. You can create as many sets as you want in a project.
ARCHICAD Training Series Vol. 133
The Publishing Workflow
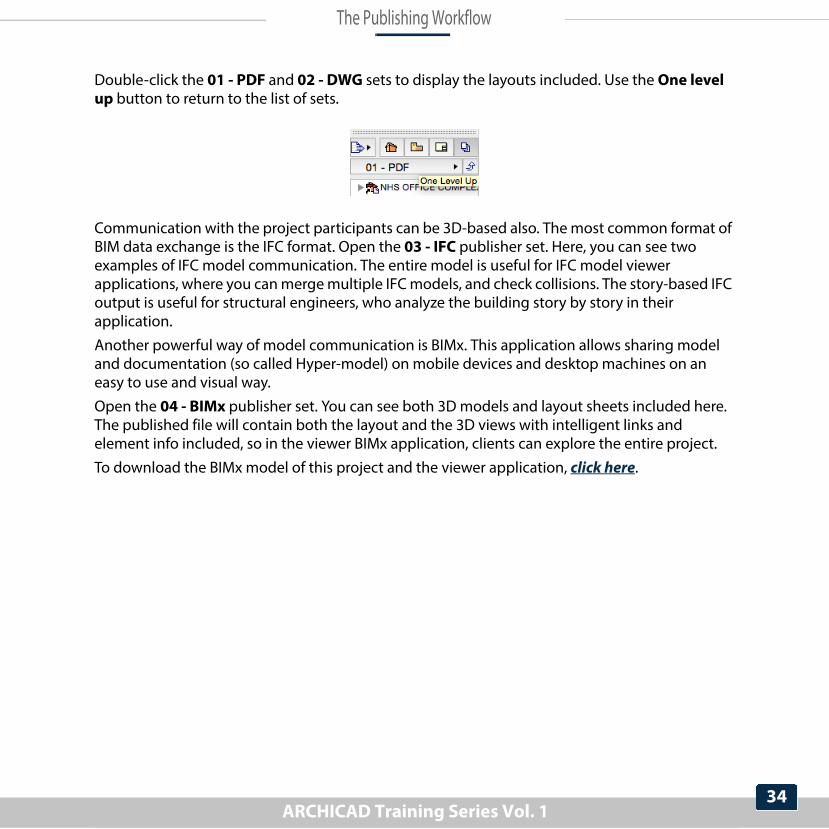
Double-click the 01 - PDF and 02 - DWG sets to display the layouts included. Use the One level up button to return to the list of sets.
Communication with the project participants can be 3D-based also. The most common format of BIM data exchange is the IFC format. Open the 03 - IFC publisher set. Here, you can see two examples of IFC model communication. The entire model is useful for IFC model viewer applications, where you can merge multiple IFC models, and check collisions. The story-based IFC output is useful for structural engineers, who analyze the building story by story in their application.Another powerful way of model communication is BIMx. This application allows sharing model and documentation (so called Hyper-model) on mobile devices and desktop machines on an easy to use and visual way.Open the 04 - BIMx publisher set. You can see both 3D models and layout sheets included here. The published file will contain both the layout and the 3D views with intelligent links and element info included, so in the viewer BIMx application, clients can explore the entire project.To download the BIMx model of this project and the viewer application, click here.
ARCHICAD Training Series Vol. 134

The Publishing Workflow
Congratulations! You have successfully completed this Training Guide! We hope that now you understand the fundamental concept of BIM workflow in ARCHICAD. Please check the other volumes of this training series for more details about the design workflow.Should you have any questions regarding ARCHICAD or other GRAPHISOFT products, please visit Graphisoft Help Center, our online knowledge base: www.graphisoft.com/learning/training_materials.Please feel free to contact GRAPHISOFT and its worldwide partners with further questions at www.graphisoft.com. We look forward to seeing you in the ARCHICAD user community.
The GRAPHISOFT Team
ARCHICAD Training Series Vol. 135