instructions for assembling the sweet sorter. (ss/05-06) for assembling the sweet sorter. ... side...
TRANSCRIPT

Instructions for Assembling the Sweet Sorter. (SS/05-06) 1
You will need the following tools/equipment.
· Soldering iron, solder, safety goggles. · Small cross-head screwdriver, small pliers/spanners. · Wire cutters/strippers.
Before you start.
Check that you have all the parts listed below. (Diagrams not to scale) All the acrylic pieces have a protective covering that must be removed before attempting to assemble any pieces. The colour sensor needs assembling using the separate instructions included. The sorter is designed to sort flat, round sweets. Smarties™ and M&M’s™ have been used as the default sweets. Different components/settings are required for each, and these are noted within the instructions.
Servo Arm. Sorting Plate. Top Plate. Container Plate. Mid Plate. Sweet Tube.
Side leg supports. Rear leg supports. Upper & Middle Tube supports. Base plates.
Servo & servo horn. Colour sensor kit.
Grey spacer (x 7) 3x6 mm threaded post. (x8)
Components included in this kit.
7 - 4 mm flat washers. 7 - 4 mm locking washers. 7 - 4 mm nuts. 20 - 3 mm flat washers. 4 - 3 mm locking washers. 6 - 3 mm nuts.
You should also find: 5 - 4x40 mm Pan-head screws. 2 - 4x40 mm Countersunk screws. 10 - 3x6 mm Pan-head screws. 4 - N0.2x3/16 Self tapping screws. 2 - Velcro™ Loop pads. The above components are in addition to those found in the sensor kit.

The sorting plate needs to be placed onto the top plate before the countersunk screws can be added. These screws hold the Sorting plate in place. Each of the 7 screws should be fitted with a grey spacer, as the screws are passed through the chassis.
2 Attaching the servo to the top plate.
1.
Attaching the legs to the top plate.
2.
Keep the top plate upside down and slot the side and rear legs into place. Note: each leg will only fit into its correct slot. If it does not fit properly it is in the wrong slot. Lower the middle plate over the legs as shown, then turn over to attach the screws and spacers.
3 mm nut, locking washer and flat washers. 3x6 mm post.
Spacing washers.
3x6 mm panhead screws.
Take 4 of the 3x6 mm threaded posts, screw them onto the top plate, then use washers to set the height of the servo for Smarties™ or M&M’s™.
Securing the chassis with screws & spacers.
3.
4x40 mm pan-head screw.
4x40 mm countersunk screws.
4x40 mm pan-head screw.
Grey spacer.
4 mm nut, flat and locking washers.
For Smarties™ use 3 washers between each post & servo. For M&M’s™ use just one washer.

3
a
Assembling the tube holder.
4.
Two base plates have been supplied; one with a 14 mm Ø centre hole, the second with a 16 mm Ø centre. If sorting Smarties™ use the 16 mm plate, for M&M’s™ use the 14 mm plate. Each plate needs 2 strips of Velcro™ loops as shown, this holds the sweets in place ready for the arm to select them. Cut two strips from the Velcro™ supplied.
Base plate shown upside-down.
Upper tube support.
Middle tube support.
30 mm support taken from the sensor kit.
3 mm washers used here to set for thickness of sweet. Use 3 washers if sorting Smarties™. Use 5 washers if sorting M&M’s™.
Base plate.
3x6 mm pan-head screws.
3x6 mm posts.
Completing the colour sensor.
5.
3x12 mm posts from sensor kit.
3 mm nuts & washers.
3x6 mm threaded posts.
3x30 mm threaded posts from sensor kit.
Fitting the colour sensor, tube holder and sorting arm.
6.
Use 3x6 mm pan-head screws for both sensor and tube holder. Holes in middle plate to allow screwdriver to pass through.
No.2x3/16 self tapping screws used to secure sorting arm onto servo horn. Note: Do not over tighten screws as only a short length of screw protrudes into the horn.
The position of the servo horn will need to be adjusted to give a full sweep of the sorting arm. Point should be able to sweep beyond the ‘reject’ hole. Point should be able to come back as far as the 1st sensor support.
a
b
b
Sweet tube should drop down through the upper & middle supports and rest on the base plate.
Assemble the PICAXE-08M servo driver and colour sensor boards according to the instructions provided in the colour sensor kit and then add the threaded posts as shown here.
Output 2
Connect cable to output 2 on colour sensor module.

For further information on other products in our range, contact:
KHResources Ltd. www.khresources.co.uk
P.O. Box. 161 email: [email protected]
Stockport Cheshire SK12 1WE
PICAXE™ name used with permission of : Revolution Education Ltd. www.picaxe.co.uk PICAXE™ programming/editing software available free from the above website.
REPRODUCED WITH PERMISSION FROM THE
BRITISH BATTERY MANUFACTURERS
ASSOCIATION.
Take care to fit your batteries correctly, observing the plus and minus marks on the battery and appliance.
NEVERALWAYS
Store unused batteries in theirpackaging and away from metalobjects which may cause a short-circuit.
Remove dead batteries fromequipment and all batteries fromequipment you know you are not
Never dispose of batteries in fire asthis may cause them to explode.Please put dead batteries in withthe normal household waste.
NEVER
Never attempt to recharge ordinarybatteries, either in a charger or byapplying heat to them. There arespecial rechargeable batterieswhich are marked as such.
Supervise children if they arereplacing batteries themselves inorder to ensure these guidelinesare followed.
Make sure battery compartmentsare secure.
ALWAYS
ALWAYS ALWAYS
going to use for a long time.
ALWAYS
Replace the whole set of batteries atone time, taking care not to mix oldand new batteries or batteries ofdifferent types.
ALWAYS
We respect all the Trademarks used within this document and do not intend to infer that this product is in any way endorsed by the Trademark owners.
4 Setting up and programming the sweet sorter.
The sensor can be powered from the 4xAA battery holder supplied, or from a 6 volt power supply (not supplied). The power needs to be on when downloading/connecting to a PC. A basic program for the sweet sorter can be down loaded from www.picaxe.co.uk, or found on the colour sensor data sheet. Within your program it is important to set the positions of each coloured drop-hole together with the sweet tube position and the sensor position. Some rough positions are given but these will need amending to suit the servo and the position of the servo horn.
The two white LED’s should be positioned to give a single ‘oval’ area of
light on top of the sweet to be read, if you have a ‘figure of 8’ shape you will not reflect enough light back up to the sensor. Both Smarties™ and M&M’s™ reflect different amounts of light, so two programs will have to be set up to work with each type of sweet. When loading the sweets into the tube, ensure that they are sat on top of each other and not side by side. If not they will jam as they get to the base plate. On starting up the sorting arm should rotate around until under the sweet tube as shown, allowing one sweet to drop. After a short pause it should vibrate to ensure the sweet has actually dropped, then move the sweet under the sensor and back off slightly. The LED’s will flash, the sensor reads the colour of the sweet and then the sorting arm should rotate around to the correct colour position. The arm will now return, pushing the sweet into its chosen pot. CAUTION: Keep fingers away from the arm as it sweeps around, to avoid injury.

'AXE112 Colour module using PICAXE-08M 'Sorts coloured Smarties(TM) into correct position bin ' This file is saved within the samples folder of the Programming Editor ' software as file <MOD020 Sweet Sorter.bas> ' ******************************************** ' Servo Position Constants ' Predefined servo positions - will require editing for your setup! ' These positions need to be found by experimentation symbol pos_tube = 22 ' tube position symbol pos_scan = 55 ' scan position symbol pos_red = 90 ' red bin symbol pos_green = 136 ' green bin symbol pos_blue = 167 ' blue bin symbol pos_yellow = 117 ' yellow bin symbol pos_reject = 193 ' reject bin ' ******************************************** ' PICAXE-08M input/output pins symbol LED = 0 ' Colour sensor white LEDs (output 0) symbol S2 = 1 ' Colour sensor select S2 (output 1) symbol ser = 2 ' Servo (output 2) symbol CSI = 3 ' Colour sensor pulse (input 3) symbol S3 = 4 ' Colour sensor select S3 (output 4) ' ******************************************** ' Variables symbol counter = b0 ' Counters for loops symbol counter2 = b1 symbol start_pos = b2 ' Servo start position symbol end_pos = b3 ' Servo end position symbol red_value = w4 ' Colour sensor red content symbol blue_value = w5 ' Colour sensor blue content symbol green_value = w6 ' Colour sensor green content ' Remember w4-w6 uses b8-b13! ' ******************************************** 'initialise LED and move servo to tbe tube position init: low LED ' make LED pin an output start_pos = pos_tube ' set start position servo ser, pos_tube ' move servo pause 300 ' delay for servo to move
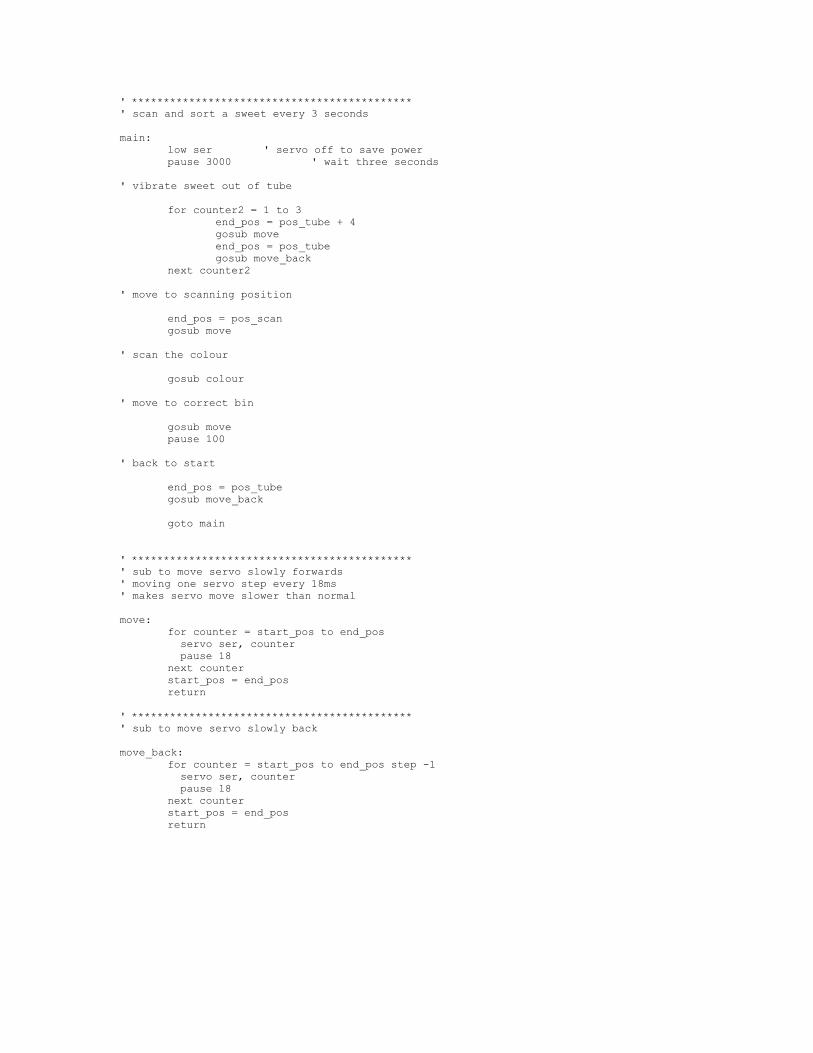
' ******************************************** ' scan and sort a sweet every 3 seconds main: low ser ' servo off to save power pause 3000 ' wait three seconds ' vibrate sweet out of tube for counter2 = 1 to 3 end_pos = pos_tube + 4 gosub move end_pos = pos_tube gosub move_back next counter2 ' move to scanning position end_pos = pos_scan gosub move ' scan the colour gosub colour ' move to correct bin gosub move pause 100 ' back to start end_pos = pos_tube gosub move_back goto main ' ******************************************** ' sub to move servo slowly forwards ' moving one servo step every 18ms ' makes servo move slower than normal move: for counter = start_pos to end_pos servo ser, counter pause 18 next counter start_pos = end_pos return ' ******************************************** ' sub to move servo slowly back move_back: for counter = start_pos to end_pos step -1 servo ser, counter pause 18 next counter start_pos = end_pos return

' ******************************************** ' sub to scan colours and then set the end position ' of the servo depending on which colour was identified colour: high LED ' LED on low S2 ' read red into w4 low S3 count 3, 50, red_value high S3 ' read blue into w5 count 3, 50, blue_value high S2 ' read green into w6 count 3, 50, green_value low LED ' LED off debug ' optional display variables on computer screen ' (NB: use 'word' Display Mode on debug screen) ' preload reject position end_pos = pos_reject ' By experimentation it was found that the values for ' w4, w5, and w6 need to be between these values for ' varying colour tolerances on the (Smartie TM) sweets ' red _value blue_value green_value ' blue 0<w4<50 250<w5<450 100<w6<200 ' green 0<w4<100 100<w5<250 180<w6<300 ' red 50<w4<200 0<w5<100 20<w6<80 ' yellow 150<w4<280 150<w5<200 180<w6<380 symbol blue_r_min = 0 symbol blue_r_max = 50 symbol blue_b_min = 250 symbol blue_b_max = 450 symbol blue_g_min = 100 symbol blue_g_max = 200 symbol green_r_min = 0 symbol green_r_max = 100 symbol green_b_min = 100 symbol green_b_max = 250 symbol green_g_min = 180 symbol green_g_max = 300 symbol red_r_min = 50 symbol red_r_max = 200 symbol red_b_min = 0 symbol red_b_max = 100 symbol red_g_min = 20 symbol red_g_max = 80 symbol yellow_r_min = 150 symbol yellow_r_max = 280 symbol yellow_b_min = 150 symbol yellow_b_max = 200 symbol yellow_g_min = 180 symbol yellow_g_max = 380

' now identify correct colour using these values ' at this point can be any colour if blue_value > red_b_min and blue_value < red_b_max then test_red
'only can be red if blue_value > blue_b_min and blue_value < blue_b_max then test_blue 'only can be blue 'now either green yellow or reject if red_value > yellow_r_min and red_value < yellow_r_max then test_yellow
'only can be yellow if red_value > green_r_min and red_value < green_r_max then test_green 'only can be green ' only reject left so return is_reject: return ' blue test_blue: if red_value < blue_r_min or red_value > blue_r_max then is_reject if green_value < blue_g_min or green_value > blue_g_max then is_reject 'if blue_value < blue_b_min or blue_value > blue_b_max then is_reject end_pos = pos_blue return ' red test_red: if red_value < red_r_min or red_value > red_r_max then is_reject if green_value < red_g_min or green_value > red_g_max then is_reject 'if blue_value < red_b_min or blue_value > red_b_max then is_reject end_pos = pos_red return ' green test_green: 'if red_value < green_r_min or red_value > green_r_max then is_reject if green_value < green_g_min or green_value > green_g_max then is_reject if blue_value < green_b_min or blue_value > green_b_max then is_reject end_pos = pos_green return ' yellow test_yellow: 'if red_value < yellow_r_min or red_value > yellow_r_max then is_reject if green_value < yellow_g_min or green_value > yellow_g_max then is_reject if blue_value < yellow_b_min or blue_value > yellow_b_max then is_reject end_pos = pos_yellow return