instruction manual
DESCRIPTION
I wrote this training and trouble-shooting manual for Software Audio Workshop, for use by technicians using computer-augmented sound tracks during "Legends in Concert" shows in Las Vegas and cruise ship venues.TRANSCRIPT
1
Documentation of SAW Operation for
Legends in Concert
Susan Mallgrave, Technical Writer
2
Documentation of SAW Operation for
Legends in Concert
Legends in Concert uses a computer-based program called Software Audio
Workshop (SAW) to run audio and video elements of the show:
announcements
click tracks for synchronization with live band
music and sound effects tracks
background vocal tracks
video for media presentation
synchronization of lighting console, if using SMPTE
(timecode standards to label frames of video)
This manual will cover three main areas of SAW operations that every Legends in
Concert Sound Tech must become familiar with:
Part 1 covers: Pre-show setup
Part 2 covers: Basic operating procedures of SAW
Part 3 covers: Trouble-shooting techniques

3
Part 1: Pre-show setup
A. Setting up hardware:
1. connect SAW computer CPU with monitor, keyboard,
and mouse
2. connect computer’s dual video card S-video port to video
switcher
3. connect fire-wire or light-pipe cable from Hammerfall
card in CPU to IO
Back of RME IO Shuttle all cables in
Shuttle with PC to TV PC to TV Y cable hook-up
4. connect all AC power cables
5. check with video tech to make sure video is turned on
4
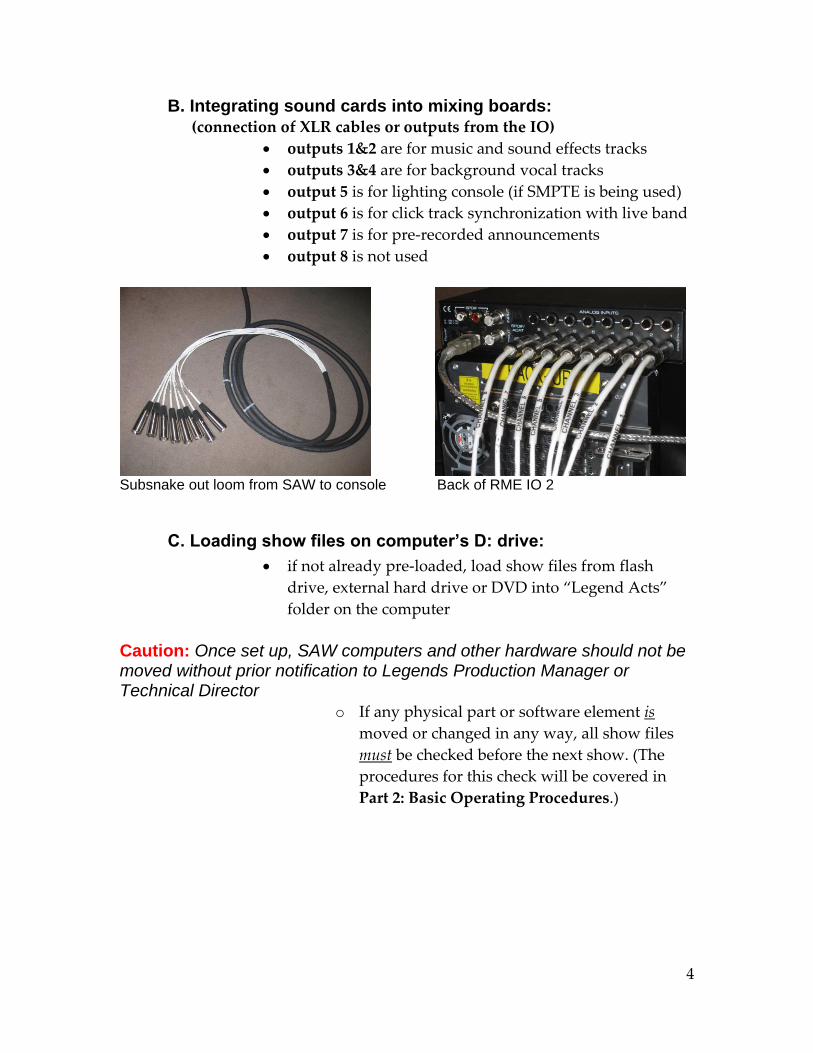
B. Integrating sound cards into mixing boards:
(connection of XLR cables or outputs from the IO)
outputs 1&2 are for music and sound effects tracks
outputs 3&4 are for background vocal tracks
output 5 is for lighting console (if SMPTE is being used)
output 6 is for click track synchronization with live band
output 7 is for pre-recorded announcements
output 8 is not used
Subsnake out loom from SAW to console Back of RME IO 2
C. Loading show files on computer’s D: drive:
if not already pre-loaded, load show files from flash
drive, external hard drive or DVD into “Legend Acts”
folder on the computer
Caution: Once set up, SAW computers and other hardware should not be moved without prior notification to Legends Production Manager or Technical Director
o If any physical part or software element is
moved or changed in any way, all show files
must be checked before the next show. (The
procedures for this check will be covered in
Part 2: Basic Operating Procedures.)
5
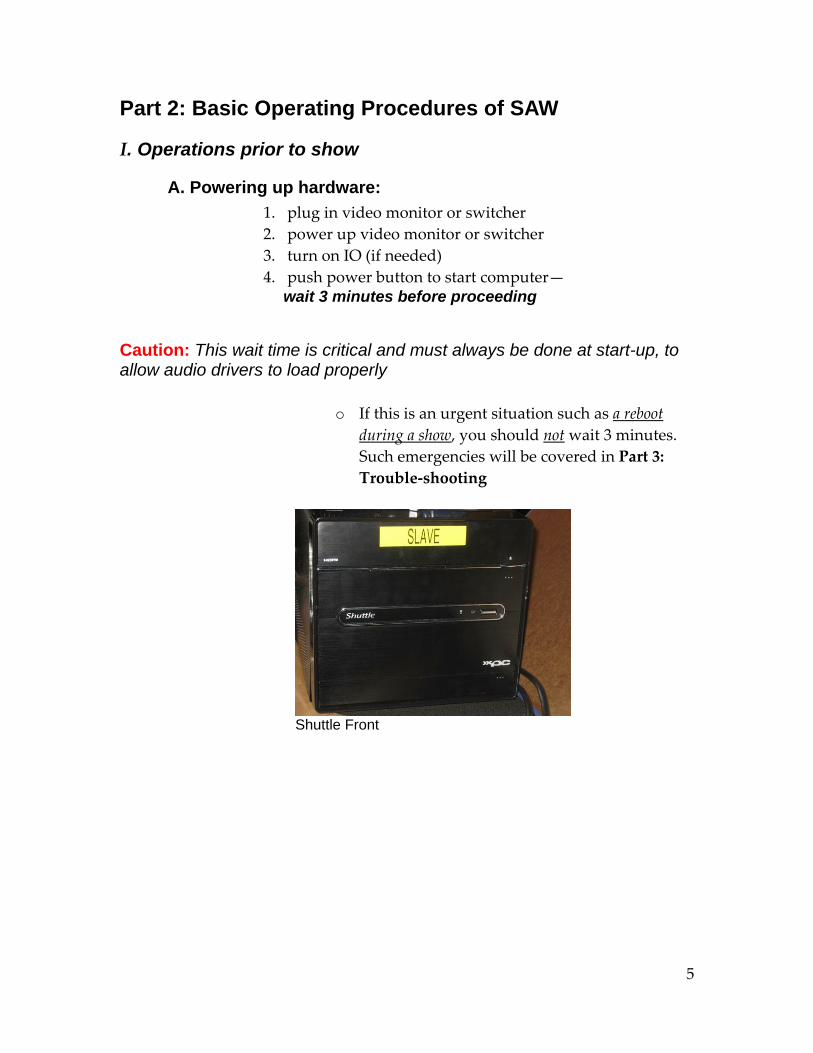
Part 2: Basic Operating Procedures of SAW
I. Operations prior to show
A. Powering up hardware:
1. plug in video monitor or switcher
2. power up video monitor or switcher
3. turn on IO (if needed)
4. push power button to start computer— wait 3 minutes before proceeding
Caution: This wait time is critical and must always be done at start-up, to allow audio drivers to load properly
o If this is an urgent situation such as a reboot
during a show, you should not wait 3 minutes.
Such emergencies will be covered in Part 3:
Trouble-shooting
Shuttle Front
6
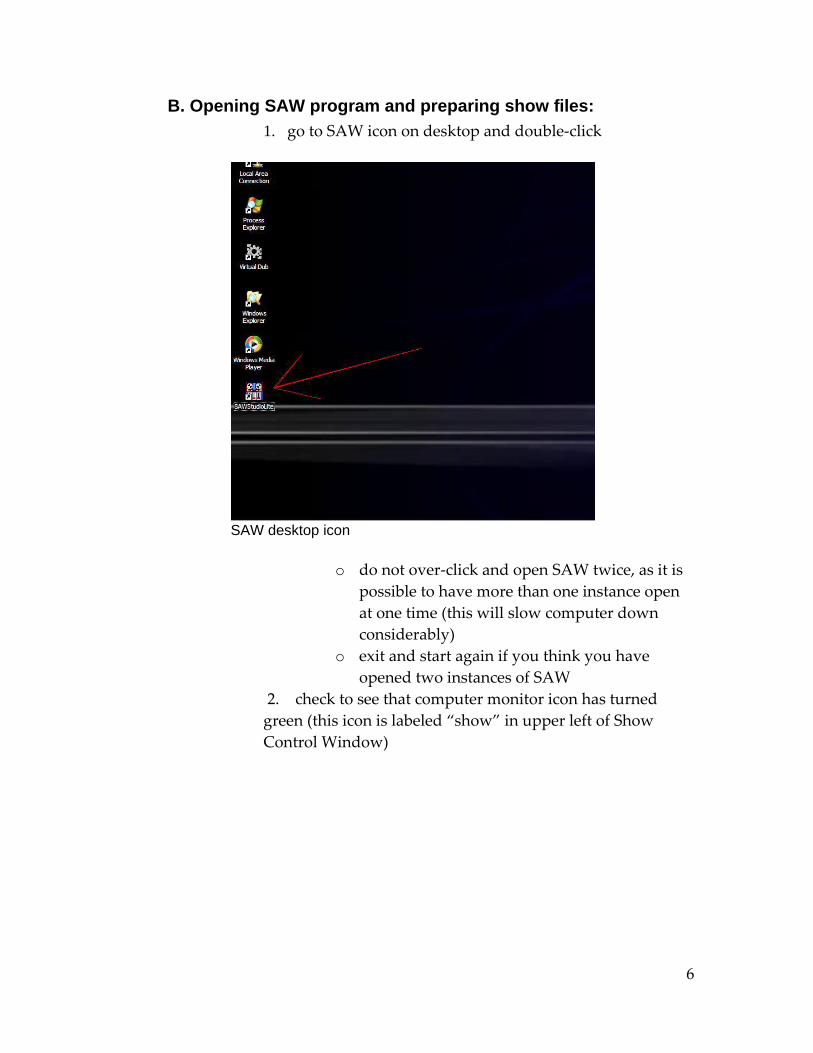
B. Opening SAW program and preparing show files:
1. go to SAW icon on desktop and double-click
SAW desktop icon
o do not over-click and open SAW twice, as it is
possible to have more than one instance open
at one time (this will slow computer down
considerably)
o exit and start again if you think you have
opened two instances of SAW
2. check to see that computer monitor icon has turned
green (this icon is labeled “show” in upper left of Show
Control Window)

7
C. Preparing show files:
1. Go to Show Control Window
Show Control Window
2. Click on blue triangle icon to open show control files
Show Control Dialogue
3. scroll to find: D/Legends Acts/Venue Show Control
Files/File Name/Show File
(Venue Show = look for name of your venue)
4. double-click appropriate show (show is already
sequenced when sent to property)
5. perform redundant back-up by using same startup and
loading procedures with second computer
8
Caution: Do not skip step #5 above—you may have to use the back-up during the show!
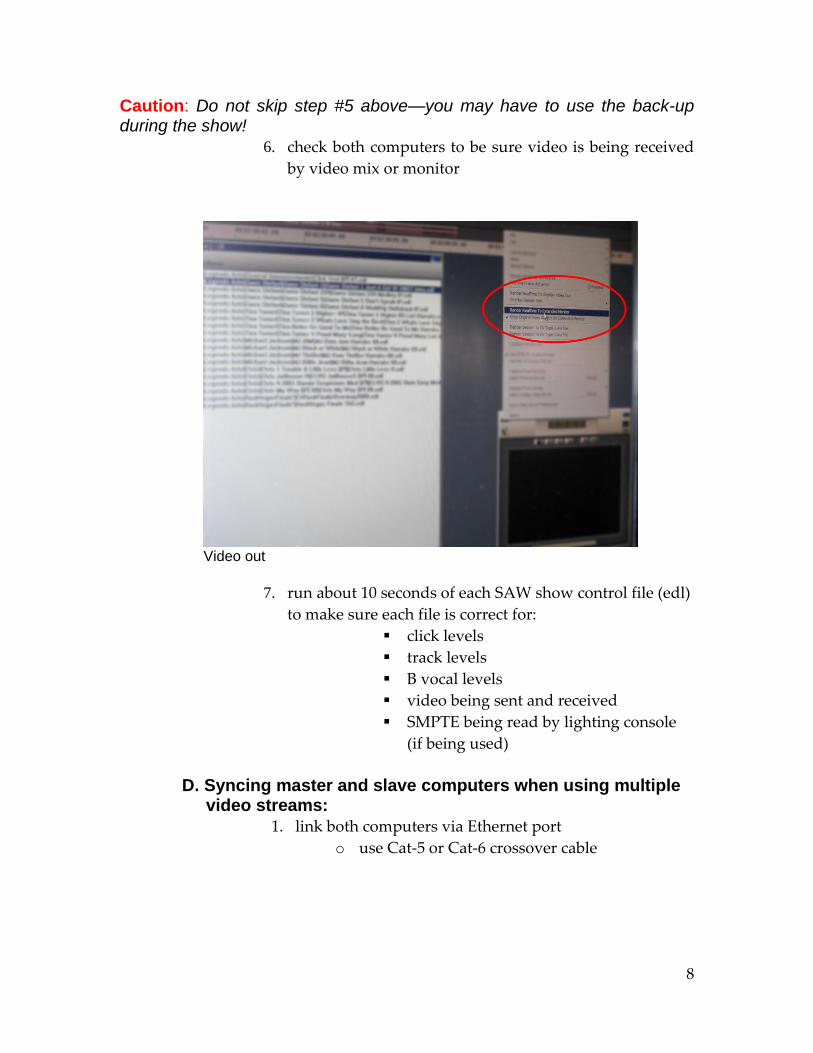
6. check both computers to be sure video is being received
by video mix or monitor
Video out
7. run about 10 seconds of each SAW show control file (edl)
to make sure each file is correct for:
click levels
track levels
B vocal levels
video being sent and received
SMPTE being read by lighting console
(if being used)
D. Syncing master and slave computers when using multiple video streams:
1. link both computers via Ethernet port
o use Cat-5 or Cat-6 crossover cable

9
Shuttle all cables in
2. go to master computer
3. go to menu at top of screen
4. click on “option”
5. choose “activate TCPIP Master Mode”
SYNC screen
6. check upper right corner of screen for “hostmaster”
o should see red “X” indicating no connection
7. go to slave (backup) computer
8. go to menu at top of screen
9. click on “option”
10. choose “activate TCPIP Slave Mode”
10
11. check upper right corner of screen for “slave computer”
o should see no red “X” if connection good
II. Operations during the show
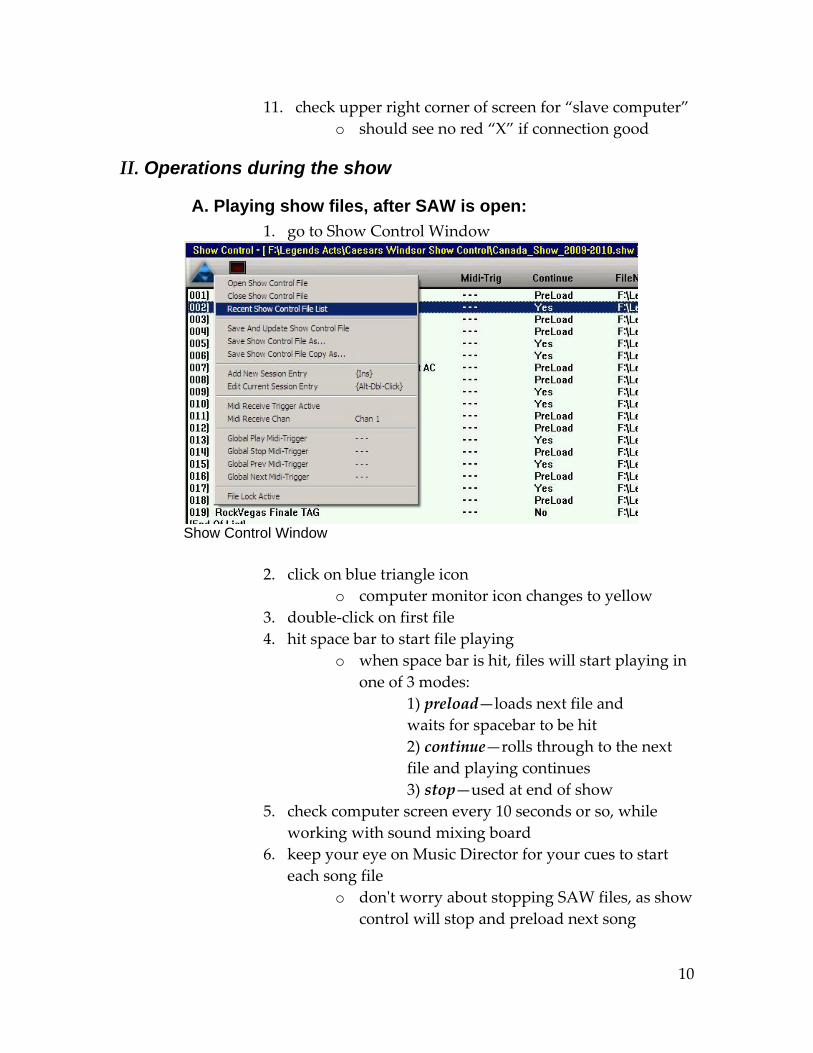
A. Playing show files, after SAW is open:
1. go to Show Control Window
Show Control Window
2. click on blue triangle icon
o computer monitor icon changes to yellow
3. double-click on first file
4. hit space bar to start file playing
o when space bar is hit, files will start playing in
one of 3 modes:
1) preload—loads next file and
waits for spacebar to be hit
2) continue—rolls through to the next
file and playing continues
3) stop—used at end of show
5. check computer screen every 10 seconds or so, while
working with sound mixing board
6. keep your eye on Music Director for your cues to start
each song file
o don't worry about stopping SAW files, as show
control will stop and preload next song

11
o worry only about starting show and starting
files for next act
o at end of show, program stops automatically
B. Making a new copy of a file before making any edits:
click on file in Show Control Window
choose “save show control file as”
name new file
double-click on D/Legends Acts/Venue Show Control
Files/File Name/Show File
Caution: the following emergency edits may be necessary for the show—before making any changes, first make a new copy as noted above in “B”
C. Skipping over performer in list:
1. use arrow keys to arrow up or down
2. skip over performer who will not perform
3. double-click on next performer to pre-load file
D. Moving files into different order:
1. hold down “ctrl” key
2. select file
3. move file with up and down arrows
E. Moving extra files out of the way:
1. select artist file
2. hold down “ctrl” key
3. move file(s) to bottom of list
F. Changing file mode from roll-through to pre-load:
1. hold down “alt” key
2. double-click on file
3. choose “preload” from window that appears
Caution: Roll-through changes must always be reviewed with Musical Director before show!
G. Saving above changes when desirable:
1. double-click on triangle icon in Show Control Window
2. choose “save and update show control file”

12
Part 3: Trouble-shooting
I. Cautions to help prevent the need for trouble-shooting
A. Using good practices:
1. follow instructions carefully
2. follow instructions in exact order given
3. follow loading times to the minute—
o allow a full 3 minutes for drivers to load after
starting SAW program
4. test each SAW file before show—
o run about 10 seconds of each SAW show
control file to make sure each file is correct for:
click levels
track levels
B vocal levels
video being sent and received
SMPTE being read by lighting console
(if being used)
5. look at screen every time space bar is hit during show
o wait for numbers to appear in upper-left corner
of SAW, before rushing to your mixer work
6. click on “okay,” if computer screen error message
offers “okay”—
o try clicking on “okay,” sometimes SAW will
lead you back to where you need to be
o SAW error messages are not crashes, they are
issues that need to be addressed
B. Avoiding danger zones:
1. add no programs to computer—
o these can interfere with SAW operation
2. make no edits to show one hour before performance

13
II. Solutions to common problems during show
A. Moving files accidentally in the Multi-track Sessions Window:
Multi-track Session Window
1. click on “file” if you think you’ve bumped a show file
2. click on “exit”—“update current” box appears
3. click on “NO”
4. go to desktop
5. click on SAW icon
6. go to Show Control Window
7. click on blue triangle icon to open show control file
o scroll to find: D/Legends Acts/Venue Show
Control Files/File Name/Show File
(Venue Show = look for name of your venue)
8. double-click appropriate show
B. Hitting the space bar twice, instead of once:
1. click on space bar again—simple!
o if space bar is hit 2x, file has been started and
then stopped
o clicking again will re-start file

14
C. Leaving the Show Control Window unintentionally:
(playing from Multi-track Sessions Window instead of song file
in the Show Control Window):
1. double-click into Show Control Window
2. double-click song file you want for next song up (at time
of next cue)
o single-click will choose a song, but double-
click preloads it, saving time
o computer icon in upper left corner of show
control window will be lit up in green if
you are actually in Show Control Window
Caution: The best thing to do is to keep the mouse clicked in Show Control Window and pay attention to this view at all times!
D. Getting knocked out of SAW program:
1. click in blue triangle icon, to reset show window files quickly
2. click on show file (edl) at top ( most recent file)
E. Clicking on space bar and file does not play:
1. write down exactly what is written in any dialogue box
2. click “okay” in dialogue box—if file still does not play . . .
3. click on the “X” in upper right corner—if file still does not
play . . .
4. press “ctrl” “alt” “delete” keys, all at the same time
5. click on “task manager” in response box
6. click on “end task”
7. click on SAW icon on desktop (only click once)
8. go to Show Control Window
9. double-click next file in the show control list to preload
10. watch for cue from Musical Director
F. Crashing of SAW during show that uses slave or backup:
1. disconnect network cable
2. press “ctrl” “alt” “delete” keys, all at the same time (if
secondary computer has also locked up)
3. click on “task manager”

15
4. click on “SAW”
5. click on “end task”
6. go to desktop
7. click on SAW icon (only click once)
8. go to Show Control Window
9. select and open show control file—
o D/Legends Acts/Venue Show Control Files/File
Name/Show File