institute for comparative genomics laboratory … · web viewthe sackler institute for comparative...
TRANSCRIPT
The Sackler Institute for Comparative Genomics and Center for Conservation Genetics
Laboratory Manual
Summer 2013 Edition
Compiled for the curators, students and researchers of theAmerican Museum of Natural History’s Sackler Institute of Comparative Genomics.
This is an internal document for internal use only.

SICG Laboratory Procedures
Table of Contents1 Introduction 32 Orientation and Operational Procedures 4
2.1 Ordering Supplies 42.2 Shipping/Receiving 42.3 Computer Setup 52.4 Lab Access and Keys 52.5 Lab Meetings 62.6 Facilities 62.7 Cleanliness 6
3 Safety 83.1 Lab Safety Rules 83.2 Emergency Evacuation Procedure 83.3 Hazardous Materials Disposal Procedure 83.4 Chemical Inventory 93.5 Emergency Phone Tree 9
4 Tissue Importation, Accession and Storage 114.1 Ambrose Monell Cryo Collection (AMCC) 114.2 Working Tissue Storage 114.3 Supplemental Material 11
5 DNA extraction and storage 125.1 Procedures for Lab 3 – a PCR Product Free Area 125.2 Modern Material 145.3 Ancient DNA (aDNA) and Degraded Material 155.4 More Information on DNA Extraction 15
6 PCR Procedure 166.1 PCR Procedure 16
7 Gel Electrophoresis 177.1 Gel Electrophoresis 177.2 PCR and Gel Troubleshooting 18
8 PCR Clean-up 208.1 Ampure PCR Clean-up Procedure (by Hand) 208.2 Ampure Clean-up Using the Robot 208.3 ExoSAP Cleanup 21
9 Sequencing Reactions 229.1 Cycle Sequencing Reagents and Reaction 229.2 Things to Consider 24
10 Sequencing Reaction Clean-up 2310.1 Reagents and Supplies 2610.2 CleanSEQ Clean-up by Hand 2610.3 CleanSEQ Clean-up using the BioMek Robot 2710.4 Alcohol Precipitation General Overview 2710.5 Alcohol Precipitation Materials and Procedure 2810.6 Things to Consider 28
11 Microsatellite Reactions and Analysis 2911.1 Materials 2911.2 Reaction 29
1
SICG Laboratory Procedures11.3 Preparing Analysis Plates for the ABI3730xl 3011.4 Analyzing Raw Microsatellite Data 3111.5 Things to Consider 32
12 Cloning Procedure 3312.1 Setup of Cloning Reaction Mixture 3312.2 Transformation of Competent E. coli Cells 3312.3 Plating the Cells 3412.4 Setting up the Reference Plate 3412.5 Setting up the Reference Plate Colony PCR 34
AppendicesAppendix A : Specialized DNA Extraction Protocols 36Appendix B : Genomics Laboratory Safety Rules 40Appendix C : SICG Laboratory Check Out List 41Appendix D : SICG Laboratory Notebook Guidelines 42Appendix E : SICG Quick Lab Reference and Guide 45
2
SICG Laboratory Procedures
1. Introduction
The purpose of this lab manual is to provide a relatively comprehensive guide to performing lab work at the SICG. We hope the information enclosed will also provide a reference for students in varying degrees of their research. It should be particularly useful as an introduction to lab work and should accompany an initial training period with an experienced lab member. An attempt has been made to cover each of the most essential steps in depth, although this lab guide should not be solely relied on, but instead used in conjunction with training from your assigned SICG lab mentor. Several students and researchers have contributed specific protocols; they are included in the appendix. Additional relevant information on ordering, general management issues and protocols, as well lab upkeep are also included when available and appropriate.
3
SICG Laboratory Procedures
2. Orientation and Operational Procedures
2.0 General Overview The SICG is a very open research environment. With that said, there exists an immense opportunity for individual success and high individual productivity, but also a huge possibility of total group chaos. Thus far the lab has maintained the former via inter-personnel communication and punctuated reciprocal altruism. There are only a few permanent staff members at the SICG laboratory; therefore, maintenance and upkeep are a group effort. The students and researchers that are most successful are those that learn the system quickly, adhere to it adamantly, remain upfront about difficulties and trouble-shooting and fuel learning and data collection with self-motivation.
The SICG has several centers of communication that need to be highlighted upfront. The main center of communication is the Program Manager. At any time please feel free to approach or email the manager with questions about procedural and general activities. Unfortunately, the Program Manager has limited time, and for this reason we’ve set-up other platforms for communication. The SICG blog is a wonderful resource for sharing information and coordination. Located on the world wide web at http://SICGblog.blogspot.com/, the blog features discussion posts, links and calendars for scheduling sequencing plates, lab meetings and the conference room. You must be invited to the blog in order to post. Please contact the Program Manager for an invite. Login ID and Passwords for the sequencing calendar are “abi3730.” Lab meetings are another very important means of communication. See section 2.5 for this.
2.1: Ordering SuppliesPlease send an email requesting supplies to the Program Manager and c.c. your supervisor. Include in the text of the email the name of the item, the catalogue number and vendor, the desired quantity, the price per item and the grant/fund from which you wish to order the item this applies – see the example below.
---------------------------------------------From: Michael Levandowsky <[email protected]>Subject: new topo kitDate: August 6, 2010 11:08:33 AM EDTTo: Ellen Trimarco <[email protected]>, Rob DeSalle <[email protected]>
Hi Ellen,
Would it be possible to order the following?
Catalog no. Description List Price CompanyK4510-20 TOPO TA Cloning Kit with pCR2.1-TOPO vector 464.00 Invitrogen Telephone Number 800-955 6288Website: www.invitrogen.com
Thank you,Mike___________________________If there is a large list of items – feel free to create a spreadsheet with the specifics listed out. Most importantly remember to include all the relevant information: description, catalog #,
4
SICG Laboratory Proceduresvender, price, quantity, and applicable grant or PI. PLEASE DISCUSS ALL MAJOR PURCHASES WITH YOU MAJOR ADVISOR BEFORE SENDING THE ORDER TO THE MANAGER.
Ordering Primers Send regular unlabeled primer orders in a four-column excel sheet. The first column should include your name, the second should include the name of the primer, the third column should include the sequence (all caps), and the fourth column should include the date. Please don’t put 5’ or 3’ anywhere. Don’t put references and don’t use funny characters (!@*}{).
For labeled primers please refer to vender website (Applied Biosystems or Integrated DNA Technologies) for formatting labeled primers. Include the amount needed in picomoles. Warn Mohammad and Ellen via email when you plan on ordering labeled primers.
Expect unlabeled primers to arrive in 1-2 weeks and labeled primers to arrive in 4-5 weeks. Once the primers are here, we will email you.
2.2: Shipping/Receiving Shipping from the museum is fairly straightforward. Regular sized and business sized envelopes can be sent USPS by placing envelopes in the locker outside Invertebrate Zoology Office on the 5th floor; no postage required for museum business. Alternatively you can take these items to the mailroom on the lower level. Larger items should be taken to the mailroom directly. Specialty carriers (i.e. UPS and FedEx) can be used via the shipping department. Simply take the package to the shipping department during regular shipping hours with the packing slip complete and attached. The shipping department is near the loading dock on the lower level. FexEd Priority pick-ups require scheduling a pick-up. The last pick up for large items is around 3:30pm at the shipping department. FedEx envelopes should be taken to the first floor security desk no matter the time of day. Final pick-up is at 11PM. Boxes, slips, envelopes can be found in the IZ shipping room or from the Program Manager. Shippers should clearly mark perishables – and include all required documentation for customs. A CITES approval and/or U.S. Fish and Wildlife 3-177 form may be needed when exporting wildlife samples. You must speak with Dr. George Amato ([email protected]) before making arrangements to import any biological material to the AMNH.
When shipping any blood, chemicals, or biological specimens please see the Program Manager for further instructions or packing that may be needed- if these items are incorrectly shipped the AMNH could face a large fine.
Receiving items is also fairly simple. Most boxed items come from the shipping department directly to the laboratory. FedEx envelopes require pick-up from shipping. Shipping usually calls the Program Manager for pick-up. Regular mail is usually delivered to Invertebrate Zoology. Be sure that the address on the package clearly states the name of the recipient and the department. Frozen items should have the lab name and the name of the Program Manager on the label. Shippers should clearly mark perishables.
For shipping department questions call Greg or Michelle at x4148.
2.3: Computer SetupAMNH Network Connection
5
SICG Laboratory ProceduresAn AMNH connection is required to access the internal websites at the museum as well as use ethernet in the museum without IT shutting your connection down. You can request access on the internal IT website (http://it.internal.amnh.org/network/connection-request-form.html).Alternatively, email the Program Manager with your: MAC ethernet/hardware address, room/floor/section number, extension and jack number and they will activate for you.
E-mail/FTP/Wi-Fi/SSH/VPNTalk to the SICG Director. The online Account Request Form (http://it.internal.amnh.org/forms ) is now available only to authorized approvers.
AMNH VPNPlease use VPN (http://museum.internal.amnh.org/it/ras/vpn.html) when accessing the AMNH Geneious and Sequencher licenses remotely.
SoftwareFor the installation of software, please see the Lab Manager.
Which Computers Can I Use?If you bring your own computer to the museum, you will need a Property Pass- it’s like a badge but for you computer. Please see the Program Manager to obtain one. There are also computers for general use in the DeSalle Office Area Intern Office in Section 12.
2.4: Lab Access and KeysLab access requires an active badge, Lab Safety Training, a signed Check Out Lab Sheet (See Appendix C) and a completed Safety Form (See Appendix B). All ID’s must be returned to security before final departure upon discontinuing work the lab. Also, upon departure, a Check Out Lab Sheet must be completed and signed by your mentor and yourself (see Program Manager for your signed and filed sheet).
Key requests can be made through Joanna or the Program Manager. All keys must be returned to the Program Manager or IZ department office upon discontinuing work the lab.
2.5: Lab MeetingsSection 20 lab meetings are regularly- make sure you are on the Genomics listserve to receive notifications of meeting times. All members are required to attend. It you must be absent, please notify the Program Manager in advance. Agenda items for the lab meetings should be sent to the Program Managers in advance. All concerns, questions, suggestions, etc. can also be brought up at any given lab meeting- it is a great opportunity to put all efforts together to solve issues and address concerns. Please contact the Program Manager if you would like to present any recent findings or publications at the lab meeting, this is a wonderful platform to do so, whether rehearsing for a meeting or just letting the lab know what you’re up to. Individual curators also have regular lab meetings. Coordinate with your supervising curator for days.
2.6: FacilitiesIf you should ever notice any NON-EMERGENCY with the general facilities of the lab problem (i.e. the toilet is running, the air conditioning is too hot/too cold) – first call the Program Manager. If you are unable to reach the Program Manager and the situation needs to be rectified quickly call the FIXIT line at x5363 to place a service call.
2.7: Cleanliness6
SICG Laboratory ProceduresIt is vitally important that everyone help to keep the lab clean; this is for both practicality and safety. Common areas should be left CLEANER after use than when you found then. If there is ever a need for additional custodial help – please see the Program Manager. Specialized cleaning supplies can also be requested from the Program Manager. DO NOT LEAVE LABWARE IN THE SINKS. Fortunately we can now recycle plastics (No. 1, 2 and 5) and other material that have been used in the lab; please see the AMNH Green Practices website for directions.
http://museum.internal.amnh.org/green_practices
7

SICG Laboratory Procedures
3. Safety
3.0: General Overview:Safety is of the utmost concern. Most of the reagents we deal with are not harmful, but ALL chemicals and samples should be treated with respect and care. Below is a VITALLY important set of information that all lab members need to be cognizant of while working in the lab. The first set of rules are not all encompassing, they merely form a framework of understanding. One should apply common sense when approaching all lab work. Review the evacuation route and know where the safety equipment is in the lab BEFORE starting your work. There is a ‘right-to-know’ station in the entry to the lab that has MSDS sheets for most of the chemicals in the lab. There are fire extinguishers in the hall near the East and West exits of the lab. There are emergency showers near the restrooms and in Lab 2 near the hall door. Emergency call boxes are located under these showers – don’t hesitate to use them if there is an emergency.
See the AMNH Laboratory Safety Manual online: http://museum.internal.amnh.org/ehs/laboratory_safety_manual/table_of_contents.html
All MSDS sheets for all AMNH materials are posted by section online:https://msdsmanagement.msdsonline.com/ViewerSite/MSDSSearch.aspx
3.1: Lab Safety Rules (See Appendix B)
3.2: Emergency Evacuation ProcedureFire Evacuation- The Program Manager is your emergency evacuation coordinator. In case of emergency you should meet her near Laboratory 3. Once the lab is cleared of personnel, the group will proceed down the emergency stairs near the Conference Room. Exit on the fifth floor and go down the main stairs to the first floor; then exit onto Central Park West. It is important that you stay with the group, or if unable to go with the group, that you meet the group on Central Park West after proceeding out the nearest exit of the museum. Fire wardens will be wearing orange vests so you can spot them easily.
Level 1 Emergency – A Level 1 emergency includes terrorist, sniper, or other violent persons presenting emergency situations within the museum. The evacuation and safety procedures for a Level 1 are very different from fire safety procedures.
If you should become aware of a Level 1 emergency, and can leave the Museum quickly and safely, use the nearest available exit, use the emergency fire stairs, warn others of danger as you are leaving, do not go to the employee fire evacuation areas, get at least one block away from the Museum, and do not return until police have announced the Museum is safe for re-entry.
If staying in your current location appears safer, get behind a locked door, dial 911, stay out of sight, get behind solid objects, turn off the lights, stay quiet, place cell phones on quiet mode, and remain in secured area until public address announcement indicates the emergency has ended.
3.3: Hazardous Materials Disposal ProcedureBroken glass should be handled very carefully and placed in the broken glass boxes.
8
SICG Laboratory Procedures
Sharps should be handled with care and used sharps (such as razors and Pasteur pipettes ) should be placed in the plastic sharps containers.
All hazardous waste must be labeled with the following three items: 1) the words “hazardous waste,” 2) the chemical name or proprietary name, and 3) the hazard (flammable, toxic, reactive or corrosive). The waste should then be stored in the Satellite Accumulation Area- fume hood in Lab 2- until proper disposal can be planned. DO NOT PLACE ANYTHING IN THE SATILLITE ACCUMULATION AREA WITHOUT A HAZARDOUS WASTE LABEL!!
All potentially infectious materials (tissues, packaging, blood, associated consumables, etc.), as well as cloning material (E. coli plates) and potentially harmful bacterial, need to be disposed of properly. Place the items into an autoclavable bag and have the Program Manager, technician or senior lab member help you operate the autoclave. Once autoclaved, place in the biohazard waste container.
All animal tissues, especially mammal and some herbivore and bird tissues, need to be treated as biohazard waste. You should seek instruction from the appropriate governmental agency (i.e., APHIS, USFWS, Department of Agriculture) before attempting to dispose of them. Most can just be placed in a biohazard bag and sealed for incineration. Do not place regular trash in the biohazard- it is extremely costly to dispose of.
Kala Harinarayanan, Director of Environmental Health and Safety at AMNH, should be contacted in the case of environmental, safety or health questions. Her office number is (212) 769-5226. She can also be reached via security at x5222 if you ask for ‘safety 1’ in case of emergency.
3.4: Chemical InventoryA chemical inventory is performed annually. If you need to know what chemicals are in the lab, where chemicals are stored, or the potential dangers of a particular chemical, see the Program Manager. You can also find chemicals from all labs on the MSDS online system and potentially borrow them from other labs by contacting the lab at which they reside.
3.5: Emergency Phone TreeEmergency Numbers:Security x2222Safety Department (Kala) x5226
Non-Emergency Security Issues: Security x5222
Non-Emergency Immediate-Need QuestionsName AMNH Extension Cell Phone
Primary Contact Ellen Trimarco 5584 646-660-5437Secondary Contact Mohammad Faiz 5690 646-724-3486Third Contacts Julie Feinstein 5663
Location of Fire Extinguishers/Safety Showers/Eye Wash StationsThese locations should remain free from obstruction –don’t put anything directly in front of these stations.
9
SICG Laboratory Procedures
- Fire extinguishers are located outside the core and outside the conference room.- Safety showers: one near the glass wall in Lab 2 and one near the restrooms in the hall.- Eyewash stations are near the sinks in Labs 1, 2, and 3. Again, do not obstruct.
10
SICG Laboratory Procedures
4. Tissue Importation, Accession and Storage
4.0: General OverviewObviously tissue importation is not something we can afford to take lightly. Illegal importation is one of the quickest ways to have our doors shut completely, lose our museum blanket permits or lose your job. The museum has a well-defined and proven means of importing and accessioning specimens/samples and should be adhered-to with the utmost precision. At the point where you are even considering important, you will need to discuss this process with Dr. George Amato ([email protected]) as well as review the Office of the Registrar’s guide to importation: http://museum.internal.amnh.org/registrar/documents/AMNH_PERMITS_SESSION_PPP_Intranet_Version.pdf
4.1: Ambrose Monell Cryo Collection (AMCC) Frozen Tissue Accessioning All specimens and tissues involved in active data collection, need to be accessioned in the AMCC with all of their CITES and USFWS documentation. Please familiarize yourself with the policies and procedures section of the AMCC website (http://research.amnh.org/amcc/coll_pol.html#acq) and the registrars’ accession website (http://museum.internal.amnh.org/registrar/).
Questions about these policies should be directed to Dr. George Amato ([email protected]). The collection manager, Julie Feinstein, at 212-769-5663, can provide more information concerning accessioning at the AMCC.
4.2: Working Tissue StorageFreezers in the section 20 lab are FOR WORKING TISSUES ONLY. As a part of project completion, all archival material should be accessioned into the AMCC (if not already there) and removed from the section 20 freezers. Unlabeled boxes/tubes/samples etc., will be discarded without questions asked.
4.3: Supplemental MaterialUSFWS form 3-177 http://museum.internal.amnh.org/registrar/documents/wild.pdf
11

SICG Laboratory Procedures
5. DNA Extraction and Storage
5.0: General OverviewDNA isolation refers to the process of extraction DNA from a cell in a relatively pure form. It involves separating DNA from other cellular components, such as proteins, RNA, and lipids. DNA is isolated by placing cells in a tube containing a special cocktail of enzymes and buffers, and mechanically or chemically breaking them open. This causes the cell to release its contents into the cocktail. Enzymes are used to chew up the proteins and other undesired cellular components. At this point, certain salts in the cocktail pull the DNA out of solution in long strands that form a mucous-like glob within the solution. The DNA is then isolated by spinning the tube in a centrifuge. During the spin the DNA collects at the filer in a spin column; the solution travels through the filter to the collection tube and is poured off, and the DNA is resuspended in a second solution called an elution or suspension buffer. The end product is a concentrated solution of thousands of copies of the DNA.
At the SICG, most DNA isolation happens in Laboratory 3. Isolating our extractions to Lab 3 where PCR product is prohibited creates a control and secure environment for DNA – caution should be used when extracting DNA in labs 1 and 2 to avoid incorporating post-PCR product into extractions.
5.1: Procedures for Lab 3 – a PCR Product Free AreaWE STRONGLY RECOMMEND THAT ALL EXTRACTIONS AND PCR SET-UP TAKE PLACE IN LAB 3.
Contamination can occur from several sources including: previous amplification and purification of plasmid clones, repeated isolation of genomic nucleic acids, and previously amplified molecules (“amplicons”). It is the latter that is the primary source of PCR contamination - aerosoled PCR products from the post-PCR phase (after you have amplified the DNA in the PCR machine). This is especially a problem when you are working on repeated analysis of selected templates, different individuals of the same species or closely related species, or degraded DNA (template from scat, museum specimens, bone, etc.). Often contamination of these sources cannot be observed and can call results into question.
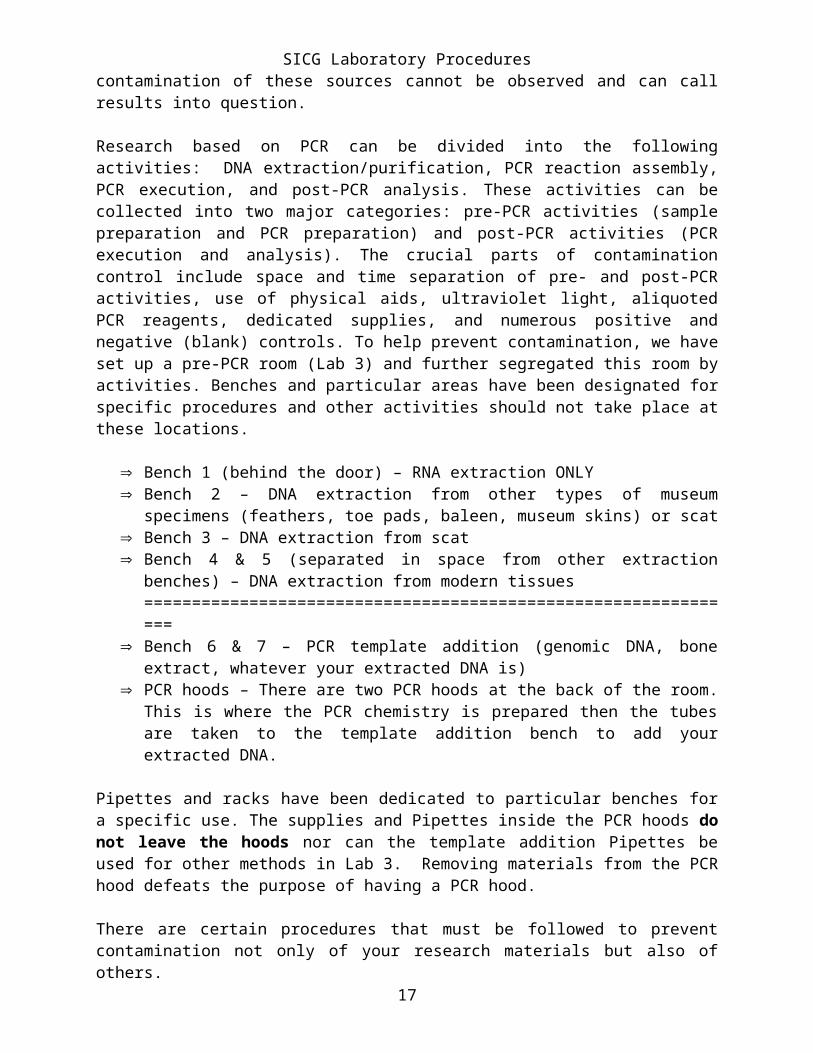
Research based on PCR can be divided into the following activities: DNA extraction/purification, PCR reaction assembly, PCR execution, and post-PCR analysis. These activities can be collected into two major categories: pre-PCR activities (sample preparation and PCR preparation) and post-PCR activities (PCR execution and analysis). The crucial parts of contamination control include space and time separation of pre- and post-PCR activities, use of physical aids, ultraviolet light, aliquoted PCR reagents, dedicated supplies, and numerous positive and negative (blank) controls. To help prevent contamination, we have set up a pre-PCR room (Lab 3) and further segregated this room by activities. Benches and particular areas have been designated for specific procedures and other activities should not take place at these locations.
Bench 1 (behind the door) – RNA extraction ONLY Bench 2 – DNA extraction from other types of museum specimens (feathers, toe pads,
baleen, museum skins) or scat Bench 3 – DNA extraction from scat
12

SICG Laboratory Procedures Bench 4 & 5 (separated in space from other extraction benches) – DNA extraction from
modern tissues ===============================================================
Bench 6 & 7 – PCR template addition (genomic DNA, bone extract, whatever your extracted DNA is)
PCR hoods – There are two PCR hoods at the back of the room. This is where the PCR chemistry is prepared then the tubes are taken to the template addition bench to add your extracted DNA.
Pipettes and racks have been dedicated to particular benches for a specific use. The supplies and Pipettes inside the PCR hoods do not leave the hoods nor can the template addition Pipettes be used for other methods in Lab 3. Removing materials from the PCR hood defeats the purpose of having a PCR hood.
There are certain procedures that must be followed to prevent contamination not only of your research materials but also of others.
* Do not wear gloves entering Lab 3! This is one of the fastest ways to introduce PCR products and contaminate someone’s research. Always put on a new pair of gloves when you enter Lab 3 (even if you were in the other lab only briefly).
* When you enter Lab 3 you have the option of putting on a lab coat dedicated for this room (rack by template addition bench). Do not wear a lab coat worn in the other labs into Lab 3.
* Samples housed in the other labs cannot be brought into Lab 3. [Note: In the initial set-up of Lab 3 we wiped down sample boxes and tubes with DNAaway/bleach as we brought them into Lab 3 for permanent storage. Now that the initial set-up period is over, we can no longer transfer materials or samples from the other labs, as this could introduce the PCR products that we are trying to avoid.]
* Supplies, equipment and reagents cannot be brought into Lab 3 from the other labs. All supplies must flow in one direction; therefore they must come from the supply closet or a newly received reagent order.
* After assembling your PCR reaction and adding DNA template you should seal your plate – or close the lid to the tubes - and carry them into the other lab for cycling without a rack. It is very important that you DO NOT TAKE RACKS from Lab 3 to Lab 2 or visa versa. You may use empty tip boxes accumulated by the PCR hoods to transfer your PCR. Once used in this way, please recycle these plastic boxes and DO NOT return them to Lab 3.
* If you are sub-sectioning samples (scat, tissue or whatever) that are housed outside the molecular lab, the sub-sectioning needs to be done in Lab 3 and then your sectioned working sample needs to be maintained in Lab 3.
* Use Pipettes and racks designated for their specified use and bench/area.
* Use barrier/filtered tips when setting up PCR reactions and for the addition of template to avoid contamination of Pipettes. [This also includes addition of amplified DNA in the hood in Lab 1].
13
SICG Laboratory Procedures* In the freezer are three “ice boxes” that you can use to keep tubes cold. If you absolutely must have ice in Lab 3, there are dedicated ice buckets for Lab 3. These buckets cannot be brought into any of the other labs; bring the ice scoop to the bucket in the hallway outside of Lab 1 and transfer ice to the bucket through the door.
* Make sure to turn the UV light on when you are finished using the hood. [UV will only eliminate DNA from the outer surface of an object – it will not penetrate the surface of any liquid, the wall of a tube, or the cover of a box/container.]
* Always use DNAaway on the Pipettes and racks at the template addition benches and the extraction benches at the start and finish of your work. You may also UV tip boxes (make sure to take off lid and turn it inside facing out) and tube racks each time you begin work.
* AMPLIFIED DNA MUST NEVER BE BROUGHT INTO LAB 3!! If you need to use amplified DNA as your template, prepare your master-mix in Lab 3 PCR hoods then take the tubes with master-mix into Lab 1. There is a hood dedicated to the addition of amplified DNA at the front of Lab 1.
* ONLY USE THE DOOR LEADING TO LAB 3 (next to the PCR hoods) IN CASE OF AN EMERGENCY!!! If you open this door, you can contaminate the room with amplified DNA. (Remember that there are PCR machines and gel rigs right next to this door – each time you open a PCR tube it aerosols amplified DNA into the air).
* Carboys for de-ionized water and buckets for the Biomek robot cannot enter Lab 3. To fill with DI water from Lab 3, use the lab cart to bring the input bucket as far as the external door, fill a cylinder with DI water (from the Zenon wall unit) and bring it to the door. Transfer water into the input bucket sitting outside Lab 3. Empty the output bucket in the custodian closet drain.
Please be considerate of the research of others, as you want them to be considerate of yours. No one wants contamination or to have his or her results questioned because of this issue.
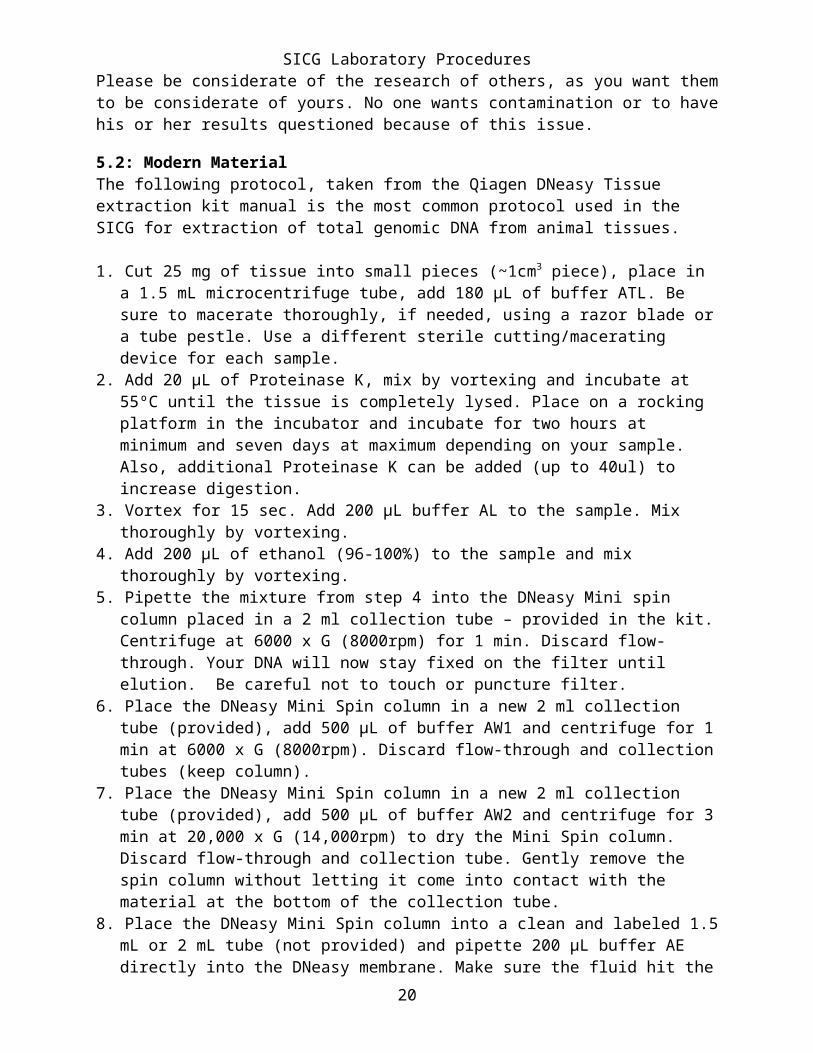
5.2: Modern MaterialThe following protocol, taken from the Qiagen DNeasy Tissue extraction kit manual is the most common protocol used in the SICG for extraction of total genomic DNA from animal tissues.
1. Cut 25 mg of tissue into small pieces (~1cm3 piece), place in a 1.5 mL microcentrifuge tube, add 180 μL of buffer ATL. Be sure to macerate thoroughly, if needed, using a razor blade or a tube pestle. Use a different sterile cutting/macerating device for each sample.
2. Add 20 μL of Proteinase K, mix by vortexing and incubate at 55ºC until the tissue is completely lysed. Place on a rocking platform in the incubator and incubate for two hours at minimum and seven days at maximum depending on your sample. Also, additional Proteinase K can be added (up to 40ul) to increase digestion.
3. Vortex for 15 sec. Add 200 μL buffer AL to the sample. Mix thoroughly by vortexing.4. Add 200 μL of ethanol (96-100%) to the sample and mix thoroughly by vortexing.5. Pipette the mixture from step 4 into the DNeasy Mini spin column placed in a 2 ml collection
tube – provided in the kit. Centrifuge at 6000 x G (8000rpm) for 1 min. Discard flow-through. Your DNA will now stay fixed on the filter until elution. Be careful not to touch or puncture filter.
14

SICG Laboratory Procedures6. Place the DNeasy Mini Spin column in a new 2 ml collection tube (provided), add 500 μL of
buffer AW1 and centrifuge for 1 min at 6000 x G (8000rpm). Discard flow-through and collection tubes (keep column).
7. Place the DNeasy Mini Spin column in a new 2 ml collection tube (provided), add 500 μL of buffer AW2 and centrifuge for 3 min at 20,000 x G (14,000rpm) to dry the Mini Spin column. Discard flow-through and collection tube. Gently remove the spin column without letting it come into contact with the material at the bottom of the collection tube.
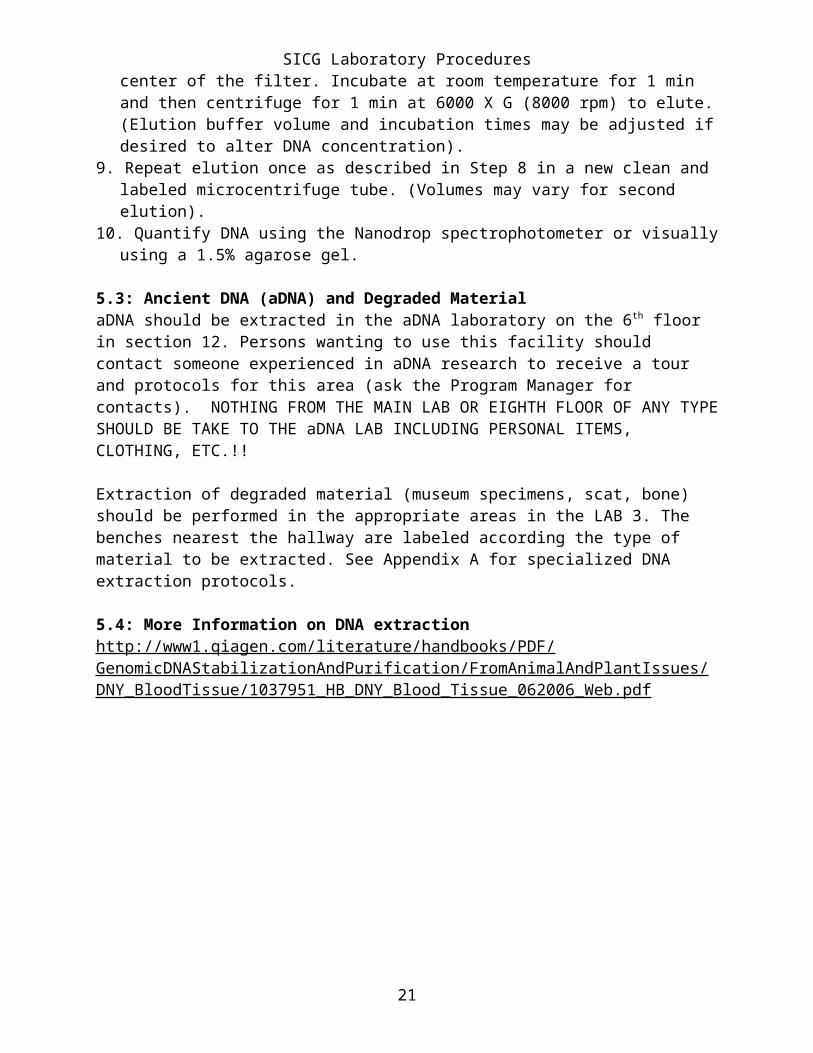
8. Place the DNeasy Mini Spin column into a clean and labeled 1.5 mL or 2 mL tube (not provided) and pipette 200 μL buffer AE directly into the DNeasy membrane. Make sure the fluid hit the center of the filter. Incubate at room temperature for 1 min and then centrifuge for 1 min at 6000 X G (8000 rpm) to elute. (Elution buffer volume and incubation times may be adjusted if desired to alter DNA concentration).
9. Repeat elution once as described in Step 8 in a new clean and labeled microcentrifuge tube. (Volumes may vary for second elution).
10. Quantify DNA using the Nanodrop spectrophotometer or visually using a 1.5% agarose gel.
5.3: Ancient DNA (aDNA) and Degraded Material aDNA should be extracted in the aDNA laboratory on the 6th floor in section 12. Persons wanting to use this facility should contact someone experienced in aDNA research to receive a tour and protocols for this area (ask the Program Manager for contacts). NOTHING FROM THE MAIN LAB OR EIGHTH FLOOR OF ANY TYPE SHOULD BE TAKE TO THE aDNA LAB INCLUDING PERSONAL ITEMS, CLOTHING, ETC.!!
Extraction of degraded material (museum specimens, scat, bone) should be performed in the appropriate areas in the LAB 3. The benches nearest the hallway are labeled according the type of material to be extracted. See Appendix A for specialized DNA extraction protocols.
5.4: More Information on DNA extractionhttp://www1.qiagen.com/literature/handbooks/PDF/GenomicDNAStabilizationAndPurification/FromAnimalAndPlantIssues/DNY_BloodTissue/1037951_HB_DNY_Blood_Tissue_062006_Web.pdf
15
SICG Laboratory Procedures
6. PCR Procedure
6.0: General Overview PCR, or Polymerase Chain Reaction, is a technique used to produce millions of copies of specific genes or gene segments of interest. For Sanger Sequencing, we do not need to know the sequence of an entire genome. Instead, we use PCR to amplify small sections of the genome, which can easily be compared among samples.
PCR occurs inside a thermocycler- a machine that raises and lowers the temperature of your sample. There are three steps involved in any PCR. First, you must denature your sample DNA into two separate strands. This is accomplished by heating the sample until the hydrogen bonds between strands break. The second step is the annealing step. In this step, primers, or small DNA sequences that complement a short segment of DNA flanking the gene region of interest, will bind to your DNA. The final step is the elongation step, where Taq polymerase adds free nucleotides to the 3’ end of each primer, complementing the template strand. These three steps are repeated multiple times yielding millions of copies of the gene of interest.
6.1: PCR ProcedureThere are many different recipes for PCR, but each of them includes: Taq, 8 μM dNTPs, buffer, magnesium, primers, and your sample. This recipe is a good place to start. You will most likely optimize your PCR recipe (chemistry) as well as the PCR program (time and temperature) in order to amplify your product successfully depending on your primers and template. *Note: the Fisher brand Taq buffer that we use in the SICG already contains magnesium.
BASIC PCR RECIPE (Combine in hood in Lab 3; on ice is optional, using a plastic basin)15 μL water2.5 μL buffer2.5 μL dNTPs1.5 μL BSA1.0 μL 10µM Primer 11.0 μL 10µM Primer 20.2 μL Taq
At the template addition bench in Lab 3, add 1.0 μL of your template DNA. DO NOT REMOVE TRAYS OR RACKS FROM THE HOODS!
Spin down the tubes and place on thermocycler in Lab 1 or 2. Do not remove plastic tube HOLDERS or PLATE RACKS from Lab 3.
Diluting PrimersYou will want to start with a 100µM stock for most applications or a 1:100 dilution (100 µM) from your dried concentrated primer. Multiply your nMoles amount by ten to resuspend (i.e. for 23.80 nMoles, add 238.00ul of water). To make a 10µM primer dilution, you will need a 1:10 dilution from this stock (i.e. 180µl water and 20µl of 100µM primer). Depending on your recipe and needs, use the formula volume x concentration = volume x concentration to create your aliquots. Try to create volumes that minimize freeze-thaw since freeze-thaw will break down the DNA in the primer over time.
16
SICG Laboratory Procedures7. Gel Electrophoresis
7.0: Introduction to Gel Electrophoresis
Gel electrophoresis is a technique used to separate DNA, RNA or proteins of different weights through a solid gel medium using electricity. At SICG, we mostly perform DNA agarose gel electrophoresis.
The idea is that larger fragments of DNA will travel slower through the gel medium than smaller fragments. In other words, the electrical current traveling through the gel works to separate fragments of different sizes. “Electrophoresis” refers to this process- it is the electromotive force (EMF) that pushes molecules through the agarose gel. A loading dye is added along with the PCR template so the viewer can see the progression of their DNA as it runs down the gel and determine when it is properly separated out according to colored bands from loading dye. SYBR safe is added to the gel after it cools and works by binding to the DNA and fluorescing under UV light, producing an image of your DNA “bands.” A ladder is also commonly added which is just a reference made up of known DNA fragment sizes that serve as a comparison to calculate exact sizes of your DNA in number of base pairs.
The type of gel used will be determined by your target fragment size and composition. A common gel used at SICG is a standard 1.5% agarose gel but others used here include low melting agarose (for gel extractions) and altered concentrations (i.e. 2-2.5% agarose gel for sexing). Several recipes/times/voltages are listed below with applications noted (see section 7.2)
7.1: Gel Electrophoresis
There are gel stations in Labs 1 and 2 according to advisors. Each of the stations contains gel rigs, pipettes and gel combs. ALWAYS use gloves when working in the gel areas including when using the gel imaging computer. SYBR safe hasn’t been proven to be entirely safe. Always clean up after yourself (close tip lids, throw trash away, rinse glassware and cylinders).
General Directions for Pouring a Gel:
1.5% Agarose Gel:To prepare 200mL, mix:3.0 g Agarose200mL 1X TAEUsing a microwave, heat and stir until fully dissolved and just short of boiling. You will have a cleared solution, like water.Let the melted agarose cool a little bit- either under running cold water or on a rotator, being sure to minimize the introduction of small bubbles since they will interfere with your gel. Meanwhile, prepare the mold, making sure that the ends are sealed. Check that the rig is even using a level and adjust gel screw feet accordingly.Add 12uL of SYBRsafe and mix the solution very well.Pour the melted agarose into the mold, place the combs and let it sit on level surface until completely solidified.Remove the combs.
17
SICG Laboratory ProceduresScale the recipe above for the following gel sizes: small (50mL), medium (100mL), and large (200mL).
Loading the gel:
Pipette 1uL of loading dye on a parafilm base, making little spots.Pipette up and down 4uL of PCR product in the spots and load into the wells.
115V – 30 min or more This is an average, so occasionally check your gel to avoid losing bands that have run off the gel.
7.2: PCR and Gel Troubleshooting
Problem: No bands.
If you don’t see any bands in your PCR, the concentration of your template DNA might be too high or too low. Try your PCR again with different dilutions of your DNA.
Alternatively, you may have used the wrong annealing temperature. A good starting place for optimizing a PCR is to perform a temperature gradient. Each well of your PCR will have a different annealing temperature, allowing you to chose the one that works best.
Problem: Smears, rather than bands.
If your PCR yields smears rather than bands, it is a sign that your primer has bound non-specifically. Try raising your annealing temperature. The higher the temperature, the more specifically your primers will bind.
Problem: Multiple bands.
If you have multiple bands, the first thing to do is to make sure you have not contaminated the PCR with some unwanted DNA. Always include a control reaction, with no template DNA added. Are there bands in your control well? If so, this is a sure sign that you have contamination.
If your control is clean, then the multiple bands are the result of non-specific binding of your primers. Try raising the annealing temperature. Alternatively, try a touch-down reaction. Begin with a high annealing temperature, and drop down to a lower one after a few (e.g. 8) cycles. You can also perform a gel extraction on the particular band you want if necessary. Speak to the lab personnel for more specifics on this.
Problem: Primer Dimer.
Primer dimer is a small band of DNA that can be visualized at the 15 – 30bp range on a gel (usually far below your product). Primer dimer is an indication that your primers are binding to each other instead of your product and could signify a few things. In all cases, primer dimer will only occur if the primers can bind well together. You can minimize the chance your primers will bind when designing primers using software that predicts this. In some cases, this is unavoidable and you only have one option for your primer based on phylogeny. You can reduce primer dimer, granted you also have product, by increasing the annealing temperature of your PCR or
18

SICG Laboratory Procedureslowering the concentration of your primer (or reversely increasing the concentration of your DNA). If you have low concentrations of limited DNA from your original extraction, primer dimer may be unavoidable. Use Ampure to cleanup versus exosap in this occasion (see Section 8.3).
19
SICG Laboratory Procedures
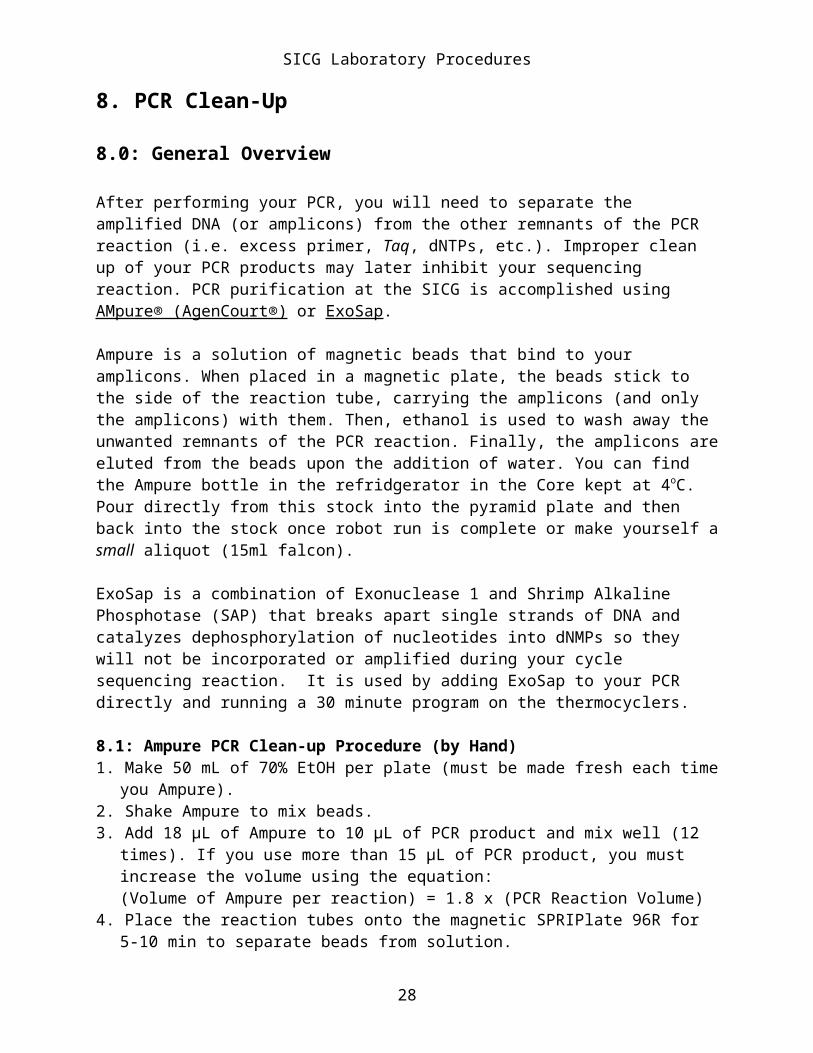
8. PCR Clean-Up
8.0: General Overview
After performing your PCR, you will need to separate the amplified DNA (or amplicons) from the other remnants of the PCR reaction (i.e. excess primer, Taq, dNTPs, etc.). Improper clean up of your PCR products may later inhibit your sequencing reaction. PCR purification at the SICG is accomplished using AMpure® (AgenCourt®) or ExoSap.
Ampure is a solution of magnetic beads that bind to your amplicons. When placed in a magnetic plate, the beads stick to the side of the reaction tube, carrying the amplicons (and only the amplicons) with them. Then, ethanol is used to wash away the unwanted remnants of the PCR reaction. Finally, the amplicons are eluted from the beads upon the addition of water. You can find the Ampure bottle in the refridgerator in the Core kept at 4oC. Pour directly from this stock into the pyramid plate and then back into the stock once robot run is complete or make yourself a small aliquot (15ml falcon).
ExoSap is a combination of Exonuclease 1 and Shrimp Alkaline Phosphotase (SAP) that breaks apart single strands of DNA and catalyzes dephosphorylation of nucleotides into dNMPs so they will not be incorporated or amplified during your cycle sequencing reaction. It is used by adding ExoSap to your PCR directly and running a 30 minute program on the thermocyclers.
8.1: Ampure PCR Clean-up Procedure (by Hand)1. Make 50 mL of 70% EtOH per plate (must be made fresh each time you Ampure).2. Shake Ampure to mix beads.3. Add 18 μL of Ampure to 10 μL of PCR product and mix well (12 times). If you use more than
15 μL of PCR product, you must increase the volume using the equation:(Volume of Ampure per reaction) = 1.8 x (PCR Reaction Volume)
4. Place the reaction tubes onto the magnetic SPRIPlate 96R for 5-10 min to separate beads from solution.
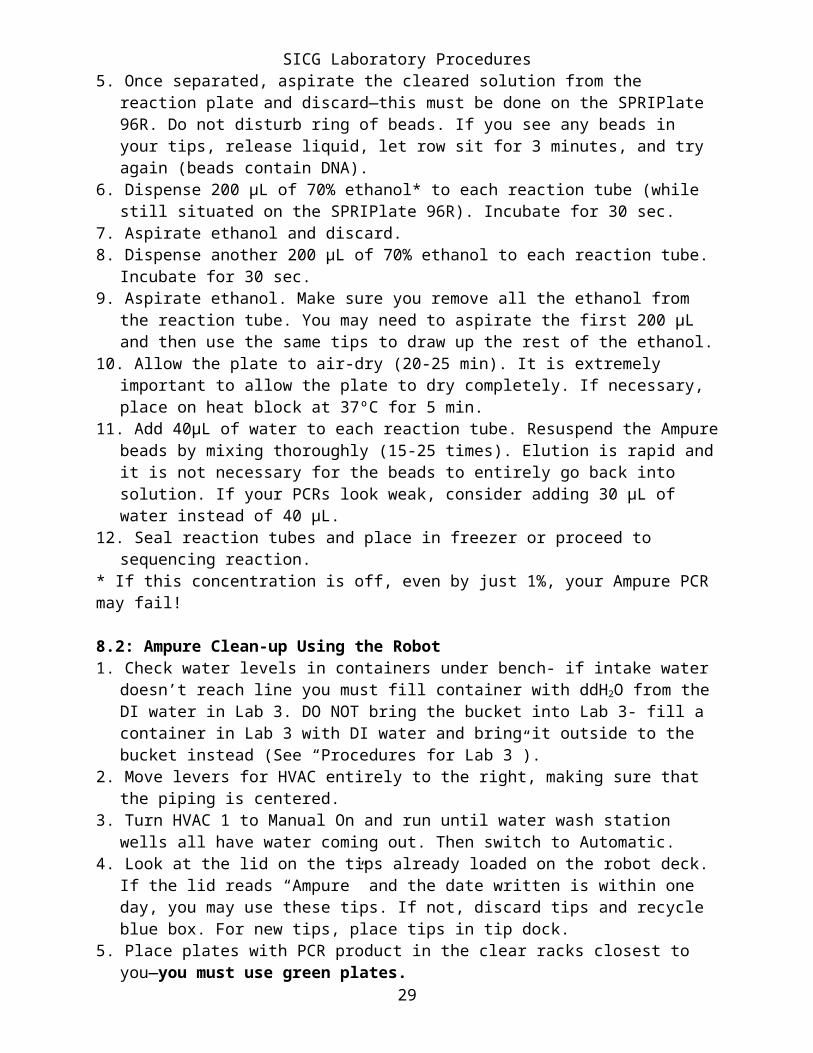
5. Once separated, aspirate the cleared solution from the reaction plate and discard—this must be done on the SPRIPlate 96R. Do not disturb ring of beads. If you see any beads in your tips, release liquid, let row sit for 3 minutes, and try again (beads contain DNA).
6. Dispense 200 μL of 70% ethanol* to each reaction tube (while still situated on the SPRIPlate 96R). Incubate for 30 sec.
7. Aspirate ethanol and discard.8. Dispense another 200 μL of 70% ethanol to each reaction tube. Incubate for 30 sec.9. Aspirate ethanol. Make sure you remove all the ethanol from the reaction tube. You may need
to aspirate the first 200 μL and then use the same tips to draw up the rest of the ethanol.10. Allow the plate to air-dry (20-25 min). It is extremely important to allow the plate to dry
completely. If necessary, place on heat block at 37ºC for 5 min.11. Add 40μL of water to each reaction tube. Resuspend the Ampure beads by mixing
thoroughly (15-25 times). Elution is rapid and it is not necessary for the beads to entirely go back into solution. If your PCRs look weak, consider adding 30 μL of water instead of 40 μL.
12. Seal reaction tubes and place in freezer or proceed to sequencing reaction. * If this concentration is off, even by just 1%, your Ampure PCR may fail!
8.2: Ampure Clean-up Using the Robot20
SICG Laboratory Procedures1. Check water levels in containers under bench- if intake water doesn’t reach line you must fill
container with ddH2O from the DI water in Lab 3. DO NOT bring the bucket into Lab 3- fill a container in Lab 3 with DI water and bring it outside to the bucket instead (See “Procedures for Lab 3”).
2. Move levers for HVAC entirely to the right, making sure that the piping is centered.3. Turn HVAC 1 to Manual On and run until water wash station wells all have water coming out.
Then switch to Automatic.4. Look at the lid on the tips already loaded on the robot deck. If the lid reads “Ampure” and the
date written is within one day, you may use these tips. If not, discard tips and recycle blue box. For new tips, place tips in tip dock.
5. Place plates with PCR product in the clear racks closest to you—you must use green plates.6. Add elution buffer (molecular grade water), fresh 70% ethanol, and Ampure to respective
pyramid plates—you must use one 50ml tube of ethanol for EACH plate.7. Program Computer
a. Go to Project, open project, and choose Ampure.b. Go to File, Open, and select the Choose this Method option.c. Press green arrow.d. Press Ignore for SILAS error.e. When options box appears, select number of plates and volume of samples. f. Make sure grip with tips loaded is selected, despite the warning box that comes up.g. A plan of the robot will appear: make sure your setup matches what it shows on the
screen. This will be your last chance to change anything or cancel run.h. Be aware of the light curtain- if you cross the light curtain boundary indicated on the
robot, you will pause the run. Depending on where you are in the method when it is paused, you may receive and error. Ask for assistance from the Program Manager if this happens.
8. Once Robot has finished running, pour excess Ampure back into your container and return to 4oC.
9. Rinse out all boats with distilled water into the white bucket next to the robot, dry off using Kimwipes and replace on robot.
10. Cover tips with lid and write “Ampure” if using a new tips and the date. Do not reuse tips for more than one day (they get clogged and your samples will not elute properly).
Switch HVAC to Manual Off and move both levers ALL the way to the left – do NOT leave pointing upwards or the tubing will get compressed and water will not be able to travel through.
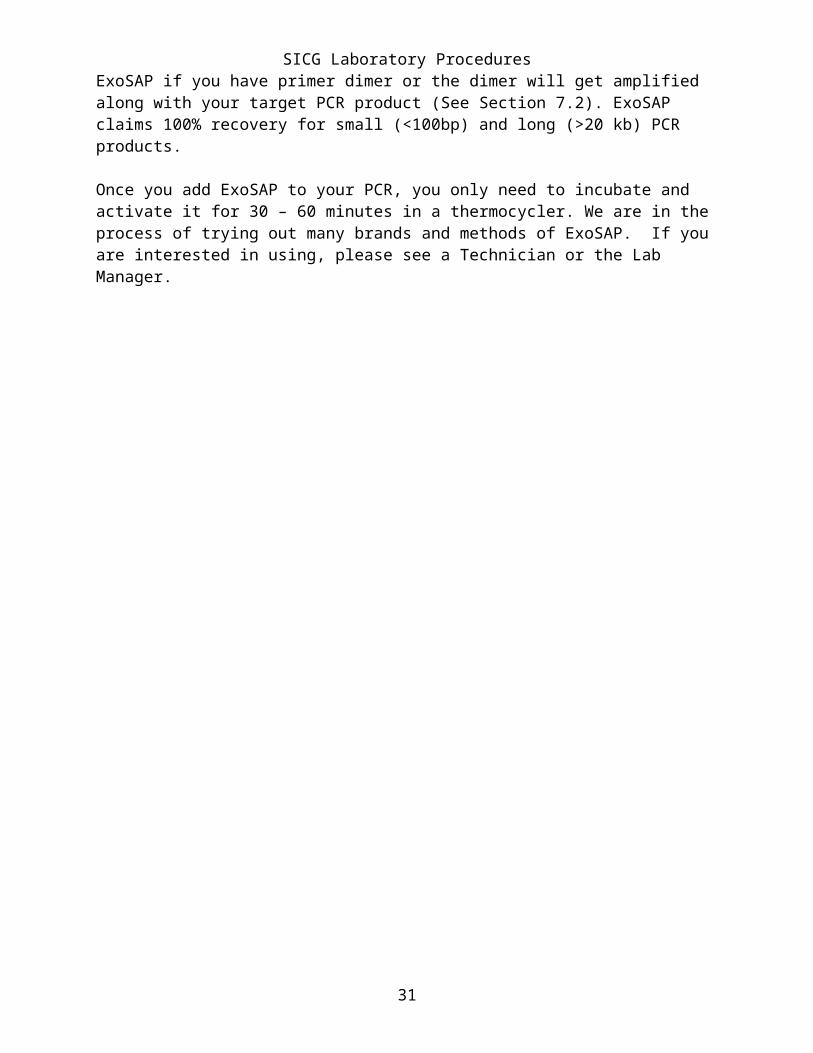
8.3: ExoSAP CleanupExoSAP is a mixture of two hydrolytic enzymes: Exonuclease I and Shrimp Alkaline Phosphotase (SAP). Basically, ExoSAP removes dNTPs, primers and all single stranded DNA. First, the exonuclease breaks apart single strands of DNA and then the SAP catalyzes the dephosphorylation of nucleotides in to dNMPs. Any material that is broken down will not be amplified during the second round of PCR (cycle sequencing), meaning only your target double stranded DNA PCR product will be amplified. Do not use ExoSAP if you have primer dimer or the dimer will get amplified along with your target PCR product (See Section 7.2). ExoSAP claims 100% recovery for small (<100bp) and long (>20 kb) PCR products.
Once you add ExoSAP to your PCR, you only need to incubate and activate it for 30 – 60 minutes in a thermocycler. We are in the process of trying out many brands and methods of ExoSAP. If you are interested in using, please see a Technician or the Lab Manager.
21
SICG Laboratory Procedures
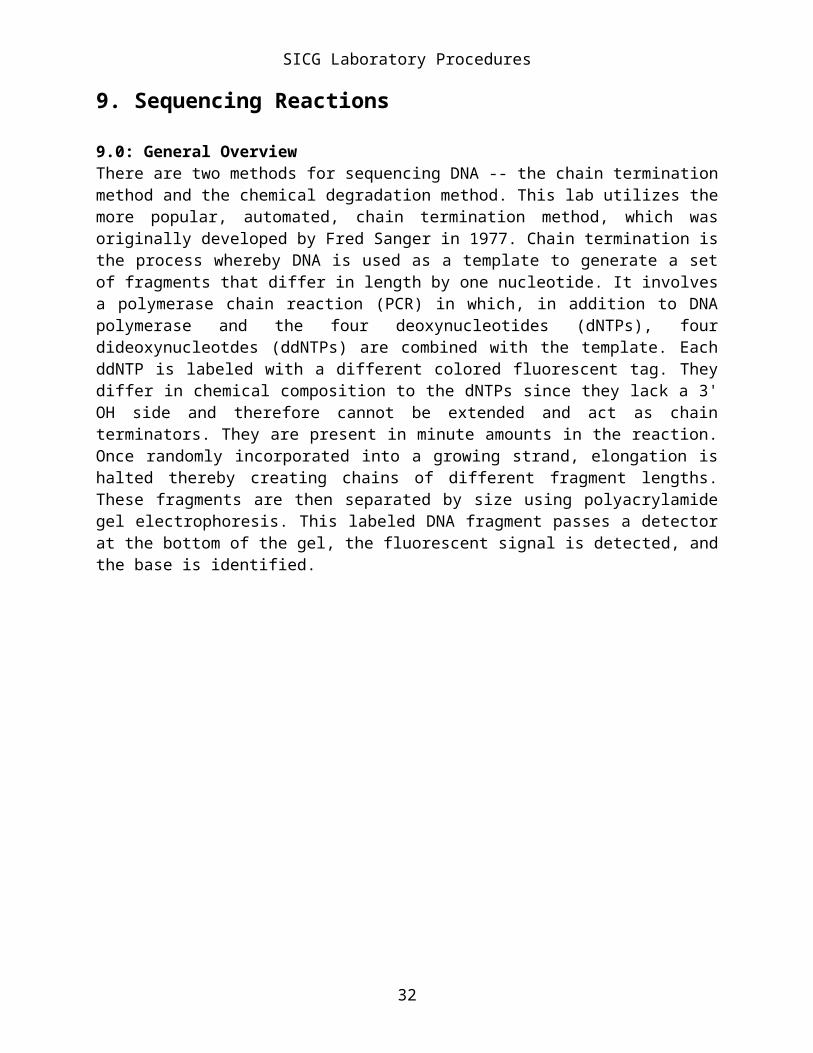
9. Sequencing Reactions
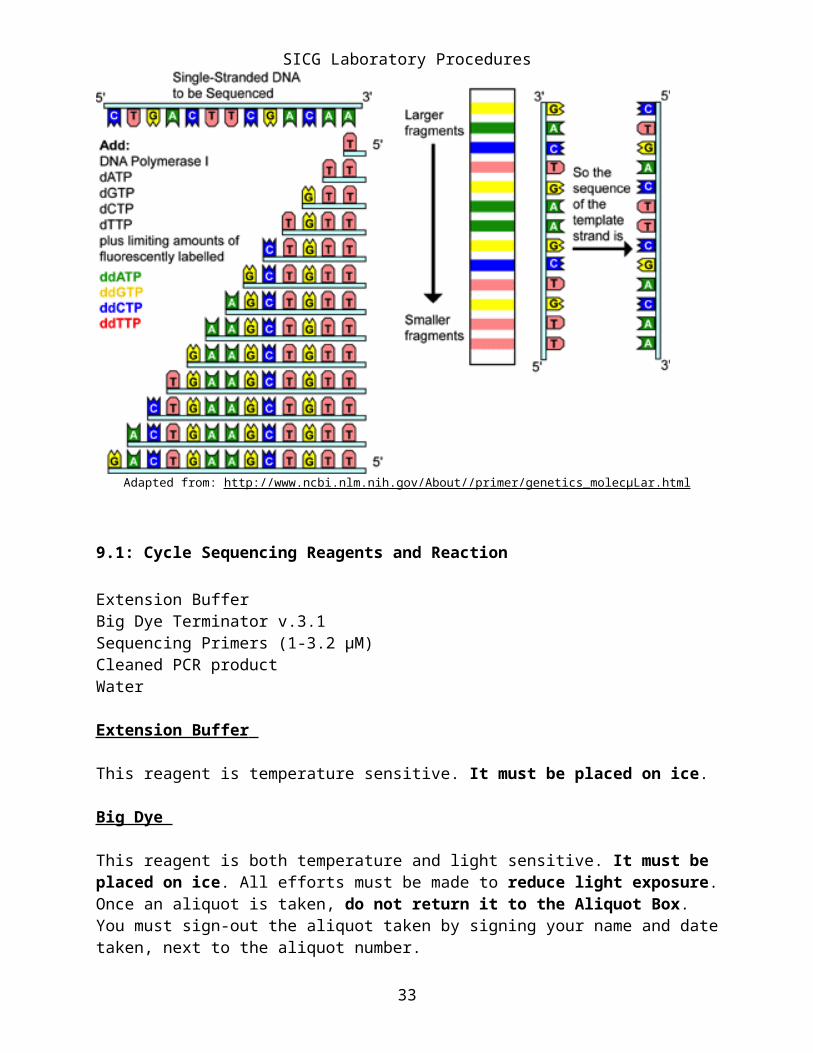
9.0: General OverviewThere are two methods for sequencing DNA -- the chain termination method and the chemical degradation method. This lab utilizes the more popular, automated, chain termination method, which was originally developed by Fred Sanger in 1977. Chain termination is the process whereby DNA is used as a template to generate a set of fragments that differ in length by one nucleotide. It involves a polymerase chain reaction (PCR) in which, in addition to DNA polymerase and the four deoxynucleotides (dNTPs), four dideoxynucleotdes (ddNTPs) are combined with the template. Each ddNTP is labeled with a different colored fluorescent tag. They differ in chemical composition to the dNTPs since they lack a 3' OH side and therefore cannot be extended and act as chain terminators. They are present in minute amounts in the reaction. Once randomly incorporated into a growing strand, elongation is halted thereby creating chains of different fragment lengths. These fragments are then separated by size using polyacrylamide gel electrophoresis. This labeled DNA fragment passes a detector at the bottom of the gel, the fluorescent signal is detected, and the base is identified.
Adapted from: http://www.ncbi.nlm.nih.gov/About//primer/genetics_molecμLar.html
9.1: Cycle Sequencing Reagents and Reaction
Extension BufferBig Dye Terminator v.3.1 Sequencing Primers (1-3.2 µM)
22
SICG Laboratory ProceduresCleaned PCR productWater
Extension Buffer
This reagent is temperature sensitive. It must be placed on ice.
Big Dye
This reagent is both temperature and light sensitive. It must be placed on ice. All efforts must be made to reduce light exposure. Once an aliquot is taken, do not return it to the Aliquot Box. You must sign-out the aliquot taken by signing your name and date taken, next to the aliquot number. Sequencing Primers (1µM - 3.2µM)
If a 10µM primer dilution is used for your PCR set-up, then you should make a 1:10 dilution of your 10µM stock, resulting in a 1 µM for sequencing stock (or alternatively 1:3 dilution of this stock for 3.2 µM primers). Depending on your recipe and needs, use the formula volume x concentration = volume x concentration to create your aliquots.
CYCLE SEQUENCING Using *Half the Recommended Amount of Big Dye (for a 10µl reaction)
Big Dye Buffer 1µl3.2x Primer 1µlWater 5µlBig Dye 0.5µlCleaned PCR Product 2.5µl
General Ranges to Experiment With for Optimizing:Cleaned PCR product 1-5µl Extension Buffer 0.75-1µl *Big Dye 0.5-1µlPrimers (1µM -3.2µM) 1µlWater up to 10µl
* Using less Big Dye saves significant costs when sequencing so please optimize your reaction volumes. Typically .5µl Big Dye can be used for fragments under 2,000 bp but you may need to optimize and experiment with your particular target sequence.
Preparation for Reaction
Cycle sequencing should be done in green (if you are going to clean on robot or by hand) or white-skirted plates (if you are going to clean by hand) and sealed with a heat seal to avoid evaporation. The heat sealer is located in the Core- use a pierceable seal for sequencing preparation. If only a few samples need to be cycle sequenced, a PCR strip tube can be used. The product can later be transferred to a skirted plate. If cleaning of the cycle sequenced product will
23

SICG Laboratory Proceduresbe done on the Biomek® FXP robot, plan ahead and ensure that the green-skirted plate is used. Only green plate can be used on the Robot.
Making the Master Mix 1. Obtain ice bucket and place all reagents on ice.2. Multiply the volume of each reagent (except the cleaned PCR product) by the number of
samples plus 10% to allow for pipetting errors. 3. Create a master mix by combing your water, extension buffer, primer (only one primer used
for each reaction) and Big Dye in a clean tube. NB: always add Big Dye last4. Mix well.5. Aliquot the appropriate volume in the plate or tubes (volume of reaction minus volume of
cleaned product). NB: addition of the master mix to plate should be done on ice6. Add your cleaned PCR products. NB: addition should be done on ice7. Briefly centrifuge plate/tubes down.8. Seal plate with rubber mat/seal tube tightly.9. Put in thermocycler. CYCLCE SEQUENCING THERMOCYCLER PROFILE
This is a shortened version from A. R. Platt et. al. 2007. Make necessary revisions as per recommendations of advisor.
96ºC 60 sec
96ºC 10 s50ºC 5 s 15 cycles 60ºC 1:15 s
96ºC 10 s50ºC 5 s 5 cycles 60ºC 1:30 s
96ºC 10 s50ºC 5 s 5 cycles 60ºC 2:00 s
Hold at 4ºC
Storage of plate/tubes
Plates can be stored overnight in the 4°C fridge. Long-term storage is not recommended. The sooner the cycle sequenced product is cleaned, the better your results. Ensure that plates/tubes are sealed and wrapped in foil (otherwise BigDye will degrade).
9.2: Things to Consider
• Check to make sure that the appropriate amount of template is added. Too little or too much could interfere with sequencing. In general, higher DNA quantities give higher signal intensities.
24
SICG Laboratory ProceduresThe amount of PCR product to use in sequencing also depends on the length and purity of the PCR product. You may want to use less elution for your product during the clean up to obtain higher concentrated product.
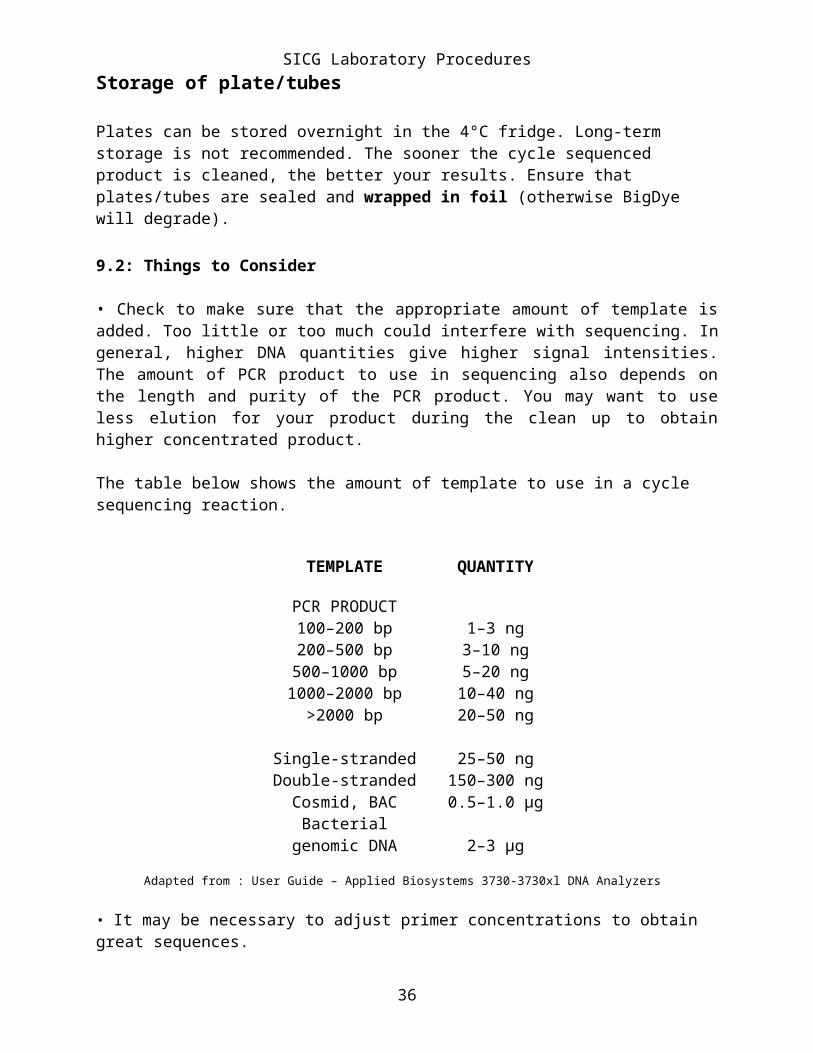
The table below shows the amount of template to use in a cycle sequencing reaction.
TEMPLATE QUANTITY
PCR PRODUCT100–200 bp 1–3 ng200–500 bp 3–10 ng500–1000 bp 5–20 ng1000–2000 bp 10–40 ng
>2000 bp 20–50 ng
Single-stranded 25–50 ngDouble-stranded 150–300 ngCosmid, BAC 0.5–1.0 µg
Bacterial genomic DNA 2–3 µg
Adapted from : User Guide – Applied Biosystems 3730-3730xl DNA Analyzers
• It may be necessary to adjust primer concentrations to obtain great sequences.
• There may be contaminants from your PCR such as excess PCR primers, dNTPs and DNA polymerase. Ensure that your PCR product is properly cleaned.
25

SICG Laboratory Procedures
10. Sequencing Reaction Clean-Up
10.0: CleanSEQ General Overview
The CleanSEQ Sequencing Reaction Clean-Up system utilizes Agencourt’s patented SPRITM paramagnetic bead technology and is very similar to the Ampure method (see “PCR Clean-Up”). The protocol can be performed directly in the thermal cycling plate. CleanSEQ contains magnetic particles in an optimized binding buffer to selectively capture sequencing extension products. Unincorporated dyes, nucleotides, salts and contaminants are removed using a simple washing procedure. The purification procedure is amenable to a variety of automation platforms since it requires no centrifugation or vacuum filtration. For fragment sizes under 200bp, considering using an ethanol precipitation method instead- sometimes these small fragments till get removed during the washing procedure if they do not bind properly to the magnetic beads. 10.1: CleanSEQ Reagents and Supplies
4-5ml of CleanSeq50ml of Ethanol at 85%*
(made fresh EVERY time from 100% Ethanol)50ml of Elution Buffer
Reagent grade water, 0.1mM EDTA (pH 8.0), 0.5mM EDTA (pH 8.0) or freshly deionized formamide
Reactions loaded onto an Eppendorf 96-well green plate half-skirted** TipsddH2O for tipwashSPRIPlate® magnetic plate* If this concentration is off, even by just 1%, your CleanSeq PCR may fail!** It has to be this plate – no exceptions – the plate will bend if it is too thin – or the robot will crash if the plate isn’t the right size.
10.2: CleanSEQ Clean-up by Hand1. Make 50ml of 85% EtOH per plate (must be fresh).2. Shake CleanSeq to mix beads.3. Add 10 μL of CleanSEQ to the reaction plate. This step should be performed before the plate
is placed on the SPRIplate. 10 μL of CleanSEQ is used regardless of the sequencing reaction volume.
4. Add 85% ethanol to the reaction plate according to the table below. Pipette the mix seven times, or seal and vortex the reaction plate for 30 seconds.
To determine the volume of ethanol needed for other sequencing reaction volumes use the equation provided below:
Volume of 85% Ethanol = 2.077 x (10 µL + Sample Volume)
5. Place the reaction tubes onto the SPRIPlate 96R for 3 minutes to separate beads from solution. 6. Aspirate cleared solution from the reaction plate and discard. If you see any beads in your
tips, release liquid, let row sit for 3 minutes, and try again (beads contain bound DNA).7. Dispense 100 μL of 85% ethanol to each well and incubate at room temperature for at least 30
seconds. Aspirate out the ethanol and discard. 8. Repeat step 7.9. Let the reaction plate air-dry for 10 minutes (or until all fluid is evaporated) at room
26
SICG Laboratory Procedurestemperature off the SPRIPlate 96R. The plate may then be sealed for storage at 4°C or -20°C or you may go on to the elution step for sequencing.
10. Add 40 μL of elution buffer and incubate the plate for 5 minutes at room temperature. For sequencing, the samples will have to be transferred away from the beads, using the SPRIPlate 96R, into a clean optical plate prior to loading. Place the plate back on the SPRIPlate 96R for 3 minutes. Then pick up your desired volume for sequencing (> 10ul) and transfer to a new optical plate. Heat seal.
10.3: CleanSEQ Clean-up using the BioMek Robot1. Check water levels in containers under bench. If intake water doesn’t reach line you must fill
container with ddH2O using the cart and empty other container into the custodial drain in the hallway using the pink key to open.
2. Move levers for HVAC entirely to the right, making sure that the piping is centered.Turn HVAC 1 to Manual On and run until water wash station wells all have water coming out. Then switch to Automatic.
3. Place tips in tip dock securely- wiggle the tip box to make sure it is flush with the dock.4. Add elution, ethanol and CleanSeq to respective pyramid plates. (NOTE* Ethanol
concentrations are different for Ampure and CleanSeq)5. Place your plates on the deck in their skirted plate holders.6. Run Beckman Program
a. Go to Project, open project, and choose CleanSeq.b. Go to File, Open, and select the Choose this Method option.c. Press green arrow.d. Press Ignore for SILAS error.e. When options box appears, select number of plates, volume of samples, whether or not
you want a transfer step at the end (you can select a volume for the robot to pick up and move to a new plate after elution of your Cycle Sequencing product).
f. Make sure grip with tips loaded is selected, despite the warning box that comes up.g. A ‘deck layout’ of the robot will appear: make sure your setup matches what it shows on
the screen. This is your last chance to change anything or cancel the program run so check carefully.
7. Once Robot has finished running, pour excess CleanSeq back into your container and return to the fridge.
8. Rinse out all boats with distilled water into the white bucket next to the robot, dry off using Kimwipes and replace on robot.
9. Write the date and “clean seq” on the tip box lid and cover. Do not use tips more than a day old since they get clogged and will not elute your sample properly.
10. Switch HVAC to Manual Off and move both levers ALL the way to the left- failure to do so will cause the tubing to compress inwards until water flow is not possible and tubing needs replacing.
For more information:https://www.beckmancoulter.com/wsrportal/bibliography?docname=Protocol%20000411v001.pdf
10.4: Alcohol Precipitation General Overview Cleaning of cycle sequence product using alcohol precipitation is one of the original and tried and true methods for cleaning cycle sequence reactions. The procedure is much the same as any precipitation in theory and practice: all the heavy particles pellet in the bottom of the tube during intense centrifugation while lighter products remain in solution and are decanted. This is
27
SICG Laboratory Procedurescertainly less expensive, less robust and less controlled than other procedures available, but it has been the reliable (and cheap) stand-by, and proven its worth for many decades.
10.5: Alcohol Precipitation Materials and Procedure70% Ethanol in a basinPlate with cycle sequencing product and balancing plateTipsMulti-channel PipettesCentrifugeInjection solution
You must use a plate (not tubes) for this procedure.
1. Add 100ul of 70% ethanol to each well containing cycle-seq product. Seal plate.2. Centrifuge plate at 4000rpm and 12C for > 45 minutes.3. Remove plate seal, cover with 3 folded, large Kimwipes, turn upside-down, and centrifuge at
500 rpm for 1 minute. Clean any ethanol from inside centrifuge.4. Let plate sit uncovered for ~20 minutes.5. Add 10-25ul injection solution per well, cover, and briefly centrifuge to bring solution to
bottom of wells. Gently vortex (i.e., swirl).
10.6: Things to Consider- If not running samples on the ABI3730xl immediately, cover samples with aluminum foil and freeze. The samples are more stable dry – don’t rehydrate unless you are going to analyze them right away. Also, BigDye is very light sensitive; therefore, wrapping in foil is very important.
- Try to avoid unnecessary jarring or bumping of plate during this procedure, especially when inverted.
- Be prompt with transitions from spins, fragments will disperse, or un-pellet, if left too long (i.e. more than just a few minutes). This will affect your data quality.
28
SICG Laboratory Procedures 11. Microsatellite Reactions and Analysis
11.0: General OverviewMircosatellites (“microsats”) are polymorphic loci present in nuclear DNA. They consist of simple repeats of nucleotides such as CACACA and are typically non-coding. Most individuals have many microsatellites in their genome, each of which can be highly variable among different individuals of the same species. Because of this, they can be used to identify individuals and better understand the genetic structure of a population. The procedure below describes how to prepare your samples for the ABI3730xl sequencer after you have already amplified your locus of interest using a PCR with fluorescent labeled primers that have been developed specifically for your locus (or loci) of interest. Once in the sequencer, your samples undergo fragment analysis, which essentially counts the number of amplified fragments in each well of your plate by detecting the intensity of the fluorescence. These counts are then displayed as peaks using GeneMapper or Geneious, with the height of the peak representing the number of copies of the fragment. Ideally, only your loci of interest is amplified in the PCR, resulting in one (for homozygous) or two (for heterozygous) high peaks.
11.1: MaterialsPCR product made with fluorescent labeled primersFlimsy 96-well plateGreen or clear skirted 96-well plate for machinePipettes- singles and multi-channels TipsBoats for Liz and H2OFormamideLIZBucket with ice
11.2: ReactionBefore beginning to prepare your plate:
Run a gel to see if you need to dilute any of your samples. If you have light bands, you will dilute them 1:25. If you have dark bands, you will dilute them 1:100. (Dilution explained later)
To prep your area and materials:
UV all pipettes, boats, plates and tips. Wipe your bench down with ethanol and/or DNA away. Place a large Kimwipe or two over the area where you will be working. Examine your gel and decide which if any samples you will be diluting, and by how much –
make a note of the wells they are in. Get formamide out of freezer and begin to defrost. Fill bucket with ice. Last – get LIZ out of deli case and put in ice bucket.
Getting Started
1. Label your plate that you will run in the ABI machine.
29

SICG Laboratory Procedures2. Fill wells in the flimsy plate for the samples that need to be diluted with H2O (24 μL for 1:25,
99 μL for 1:100).3. Pipette 955 μL of formamide in boat for LIZ. Try to put it in the corner of the boat.4. Pipette 18μL of Liz into the formamide.5. Mix with a tip.6. Using a multi-channel pipette, put 9 μL of LIZ-formamide solution into each well of your
plate that you will run in the machine with a multi-channel pipette.7. Arrange your tips to correspond with the wells in row one that will need to be diluted.8. Take 1 μL of DNA from your PCR plate with those tips and then mix them well in the flimsy
plate with the water.9. Take 1 μL of the DNA-water mixture and put it in the first row of your plate you will run in
the machine. Pipette up and down five times.10. Take 1 μL of the remaining DNA from row one and put straight into plate you are running
into the machine and mix up and down five times with LIZ-Formamide solution.11. Repeat steps 7-10 for each row of your plate.
11.3: Preparing Analysis Plates for the ABI3730xlPreparing plate for the machine
1. Heat seal plate.2. Three min on heat to heat-shock.3. One minute on ice.4. Find another plate to balance your plate in the centrifuge.5. Weigh the plates to make sure they are of equal weight.6. Centrifuge at 1500 rpm for one minute.7. Put in grey plate holder for sequencer – make sure the corners line up.8. Put on white lid – make sure the corners line up.9. Put in machine – again, make sure the corners line up.10. Put on top of the pile of plates after you have entered your template into the ABI computer.
To enter plate into the computer
1. Pick out an appropriate template. You can find one in the folder “desktop items- will be deleted” or in the folder “templates.” Make sure it’s a template for genotyping and not for sequencing.
2. Copy and paste your template to desktop.3. Rename the file and highlight and copy the name.4. Open file.5. Paste name under “container name” and “Plate ID”.6. Make sure it’s Genemapper and the correct results group.7. Make sure it’s for heat sealing.8. Go to Foundation Data – NEVER CLOSE!!!!9. Click on “Plate Manager.”10. Click on “Import.”11. Find your plate on the Desktop section.12. Click “Open.”13. Go to “Run Scheduler.”14. Click on “Search A.”15. Copy plate name into search field.16. When your plate name comes up, click “Add.”
30
SICG Laboratory Procedures17. After physically loading your plate, make sure the machine is running. If it is not, click on
the green arrow.
11.4: Analyzing Raw Microsatellite Data1. Plug your USB flash drive into the computer next to the sequencer.2. Open “GM Data” and drag your file into your flash drive.3. Plug flash drive into a computer with GeneMapper.4. Drag your file into “My Documents.”5. Open GeneMapper. The username is GM and the password is on the sticky tab next to the
computer.6. Click on tube icon at the top which should say “Import new file” if you place your mouse
over it.7. All your files are in the program now. Label each file in the sample name column with the
sample name.8. Pick the correct size standard for your project. For example, if you used LIZ 500, choose
“GS500LIZ.” Highlight the rest of the column and click control D to fill the rest of the column.
9. Choose your correct analysis method. Fill in the whole column.10. Press control G and order your files by the file name.11. Choose the correct panel for each sample. Usually this is your primer number or name.12. Now that everything is labeled, press the green arrow at the top to ruin everything.13. After everything is run, check the size standard. You do this by highlighting every sample
and then clicking on the icon at the top that is three vertical red lines on a horizontal red line.14. The size standard window will come up. Go through each sample and make sure the markers
are where they should be.15. After checking the size standard, run everything again.16. If you want to change the range of the template size you are looking at, follow the next few
steps.a. Click on “panel manager”- button with little blue squares.b. Go to your folder on the left side and open it.c. Click on the folder for the primer you want.d. Change the range to your range of interest (in min size and max size windows).
17. If you want to add bins, follow these steps:a. Do steps 16a–16d.b. Click on the folder for the primer you want.c. Add the samples you want to use as references for your beams by clicking on the little
tube icon at the top.d. The sample will come up in folders in the bottom left window.e. Open the folder you want.f. Hold down control and select the samples you want.g. Click “Add to list”.h. Open the folder on the left again and highlight the folder that shows up when you open it.i. The screen to make bins should pop up.j. Click on the blue icon with red plus symbols on it to show all the project alleles.k. Right click where you want your bins.l. Add bins.m. Click “Apply”.
18. Now you are ready to analyze your samples.19. Click on the “Genotyping” tab.
31
SICG Laboratory Procedures20. Select the samples you want to look at and click on the icon at the top that has a vertical blue,
red, and green line.21. Analyze your samples.
11.5: Things to Consider: -Before you begin, be sure you know the repeat number of your sequence, for example, is it dinucleotide (CA)n, trinucleotide (CAG)n, etc.? This will help you to identify where your heterozygous peaks are on the template, as you will know how they must be spaced out.
-Do NOT forget to label your plate!
-Keep in mind that the fluorescent-labeled primers are light sensitive.
-If you have problems with your ladder when analyzing your samples, it may be because you did not mix it well enough with the Formamide.
-On this note, be sure to keep the Formamide and the LIZ on ice at all times.
-It is often recommended to sequence your microsatellites after you have identified them, in order to confirm that they are the sequences and the repeats you claim they are.
-Be careful not infer too much from microsatellite data. It is not proof of any genotype-phenotype connection. This is can be proved using other more complicated methods such as quantitative analysis.
32
SICG Laboratory Procedures12. Cloning Procedure
12.0: General OverviewThe procedure described here is based on the TOPO TA Cloning Kit. In particular it follows the protocol for chemically competent, rather than electrocompetent, E. coli.
If a PCR product comes from several different kinds of cells, it is often desirable to separate individual DNA types into separate clones. This is accomplished by inserting the DNA products into plasmid vectors, which are then put into bacterial cells, and separating the transformed bacterial cells to establish clonal colonies containing specific DNA products.
12.1: Setup of Cloning Reaction MixtureFresh PCR product 0.5 µl to 4 ulSalt solution (from the kit) 1 ulSterile DNA-free water bring total volume to 5 µlTOPO vector 1 ul
Final Volume 6 µl
1. Mix gently, incubate 5 minutes at room temperature. The reaction time can actually be from 30 sec to 30 minutes. For large PCR products (>1kb) or if a pool of PCR products is involved, longer time will yield more colonies.
2. Put the tubes containing the reaction on ice. If necessary the cloning reaction can be stored overnight at –20 C.
*After the reaction is finished, remaining PCR product and TOPO vector should be stored at –20 C.
12.2: Transformation of Competent E. coli Cells1. Thaw competent E. coli cells (from the -80 C freezer) on ice. This can take some time and can
be started before setting up the cloning reaction. 2. Warm vial of SOC medium to room temperature.3. Prepare LB (Luria Broth) agar plates (ideally should be prepared the day before and allowed
to “harden” overnight) from and invitrogen imMedia pouch containing Kanamycin (it also contains x-gal). Procedure for making the plates: a. Put contents of the pouch in a flask. Add 200 ml distilled water and swirl to dissolve. b. Microwave flask for ~ 3 minutes, taking out from time to time to swirl and keeping an eye on it to see that it doesn’t boil over. c. Let cool until the flask can be picked up with the hand (but don’t let it gel!) d. Pour into sterile petri dishes, ~15 ml/dish. Let the dishes sit until the agar gel is hardened (perhaps a half-hour or more). Then store inverted in the dark.
4. Add 2 µlof the cloning reaction mixture (above) to a vial of thawed E. coli. 5. Mix gently.6. Incubate on ice 5-30 minutes.7. Heat shock the cells 30 seconds at 42 C, without shaking. (Cells should be transferred directly
from ice to 42 C).8. Add 250 µl SOC medium (room temperature) per tube.
33
SICG Laboratory Procedures9. Cap the tubes, tape them to lie horizontally in a shaker incubator and shake at 220 rpm, 37 C,
for 1 hour.
12.3: Plating the Cells 1. Plates should be warmed at least 30 minutes in a 37 C incubator.2. Spread 50-100µl of transformed mixture on pre-warmed plates. (If you haven’t done spreading
before, consult with someone who has).3. Incubate plates inverted overnight at 37 C.4. Pick and re-plate white colonies on reference plates. These are the transformed cells. Dark
blue colonies are not transformed. Some light blue colonies may be transformed. (See following for more details of reference plating).
12.4: Setting up the Reference PlateRe-plating the transformed (white) colonies onto labeled plates allows you to increase the amount of sample you have and to keep track of your samples.
1. Draw a checkerboard pattern on the bottom of LB plates (see above). Label every other square with numbers – 1, 2, 3, etc. – in such a way that no numbered squares are directly next to each other (to minimize the possibility of reference colonies coming into contact and contaminating each other).
2. Warm plates to 37 C.3. To transfer white, and light–blue colonies from the original colony-filled plates to the
numbered squares in the reference plates, use either sterile (autoclaved) wooden toothpicks, or, more expensively, sterile pipette tips as follows: a. Gently touch a white (transformed) colony with sterile toothpick or pipette tip and pick up some of the cells. b. Transfer the cells to a square of the reference plate by gently swiping the toothpick or pipette tip on the agar surface.
4. When the numbered squares of a reference plate are all filled, the plate should be sealed using either tape or strips of parafilm (get someone to show you how to do this) and incubate them inverted overnight at 37 C. 5. Store the plates at 4 C to prevent further growth until colony PCR.
12.5: Setting up the Reference Plate Colony PCR We now have colonies with single DNA clones, and the next step is to extract the target DNA from the E. coli cells, using M13 primers.
1. Place cells from each reference colony in a separate well of a 96-well plate, using either sterile toothpicks or pipette tips.
2. Set up a PCR mix in each well as follows: (ul/25 ul) (ul/20 ul)Bacterial cellsdd water 17.00 14.0 10x PCR buffer 2.50 2.0f M13 primer (100 ng/ul) 1.25 1.0 r M13 “ ( “ “ “ ) 1.25 1.0Taq polymerase 0.15 0.1DNTP 2.50 2.0
34

SICG Laboratory Procedures3. Cover plate with silicone cover,4. Spin plate 500 rpm for 1 min.5. Use PCR protocol:
94 C 10 min 30 cycles: 94 C 1 min 55 C 1 min 72 C 1 min
72 C 10 min extension 4 C (“infinity”)
*An Alternative Method
Instead of making colonies on reference plates take cells from the white colonies- put them into wells containing 50 µl ddH2O, then heat the well plate in the PCR machine to 95 C for 5 minutes. This will lyse the cells and liberate the DNA. An aliquot of this can be substituted for the DI water in the PCR mix recipe above and processed as described. The remaining fluid (water and lysed cells) can be frozen for possible future use.
35
SICG Laboratory ProceduresAppendix A
SPECIALIZED DNA EXTRACTION PROTOCOLS
Fecal DNA Extraction Protocol by Cristina Pomilla
Extraction of genomic DNA from carnivore fecal samples (QIAamp DNA Stool Kit)
Materials needed:
QIAamp DNA Stool Kit, 100% Ethanol, Proteinase K, 2.0 ml sterile Eppendorf tubes, 1.5 ml sterile Eppendorf tubes, razor blades, forceps, sterile Petri dishes, large Kimwipes, different size barrier tips, Bunsen burner and a small beaker with ethanol to sterilize forceps.
DAY 1:
Repeat these steps 1 to 3 in duplicate for each sample.
1. Shave (thin slices) ~200mg (0.5 mL) of fecal material from the surface of the scat using a new razor blade, sterilized forceps, and a Petri dish.
2. Add to a 2 mL reaction tube with 1.2 ml of ASL Buffer*, vortex for 15 sec.
* Shake buffer before use, if precipitate has formed heat at 70ºC.
3. Incubate at 55-65ºC on a rotator for 24 hrs.
NOTE: If your sample is made mostly from hairs, put some in a Petri dish and add ~4 mL of ASL Buffer. Let them soak for few minutes, moving them around with a forceps to dissolve the solid material attached to them. Collect the liquid with some hair pieces and divide it into the 2ml tubes. Add 1.6 ml in each tube (you will have to use two tablets in the steps below).
DAY 2:
1. Centrifuge 2 min* at 14,000 rpm to pellet particles.
* or 3 min at 13,000 rpm.
2. Transfer supernatant to a fresh 2ml reaction tube with one InhibitEX tablet*, vortex 1 min or as necessary to dissolve the tablet. Incubate at room temperature for 5 min.
* At this point the supernatants from the sample duplicate tubes are joined together. Use one tube and one tablet for up to 1.6 ml of supernatant, if more use a second tube and add a proportional piece of tablet. Cut tablets with a new razor blade on a piece of parafilm, avoiding touching it.
3. Centrifuge 6 min* at 14,000 rpm to pellet tablet.
* or 8 min at 13,000 rpm. More spins and one intermediate transfer may be necessary to recover the max supernatant.
4. Transfer 600 µl supernatant to fresh 2 mL reaction tubes containing 25 µl of Proteinase K (20 mg/µL). Immediately add 600 µL of AL Buffer* and vortex for 15 sec.
36
SICG Laboratory Procedures* Shake buffer before use, if precipitate has formed heat at 70ºC.
* Multiplespins can be used if necessary.
* If more than 600µl, then use separate tubes with scaled AL Buffer (and all subsequent reagents).
5. Incubate at 70ºC for 15 min.
6. Add 600 µL of 100% Ethanol (or as much Ethanol as AL Buffer added in step 4), vortex.
7. Transfer 600 µL at a time to a spin column placed over a collection tube. Centrifuge at 14,000 rpm for 1 min and discard the filtrate after each transfer.
8. Transfer the spin column to a fresh collection tube. Add 500 µL of AW1 Buffer and centrifuge at 14,000 rpm for 1 min.
9. Transfer the spin column to a fresh collection tube. Add 500 µL of AW2 Buffer and centrifuge at 14,000 rpm for 2 min.
10. Transfer the spin column to a fresh collection tube, centrifuge again at 14,000 rpm for 2 min to dry the column.
11. Transfer the spin column to a fresh 1.5ml reaction tube. Add 70 µL of AE Buffer preheated at 70ºC.
12. Incubate at room temperature for 45min.
13. Centrifuge at 8,000 rpm for 3 min.
14. Place the column in another fresh 1.5 mL reaction tube and perform a second elution with 70 µL of preheated AE Buffer. Incubate 10 min at room temperature.
15. Centrifuge for 3 min at 8,000 rpm.
16. Combine both elutions and mix thoroughly to homogenize- then transfer 90µl to both the stock and the back-up DNA tubes.
NOTE: If your DNA has some yellow-brown coloration it is possible that you have carried some inhibitors. If your PCR does not work here is the solution.
Merge your stock and back up DNA and bring to 200 µL adding ASL buffer. Repeat the protocol from step 4 using 200 µL of Buffer AL, 15µl of Proteinase K, and 200 µL of Ethanol.
37
SICG Laboratory Procedures
Coral DNA Extraction ( Chelex ) by Craig J. Starger
What you need- Coral samples- Vials of 5% Chelex solution - Clippers- Tweezers- Ethanol (95-100%)- Lighter- Heat block set at 95ºC- Vortex- Centrifuge
Procedure1. Turn on the heat block to 95ºC2. Line up 8 tubes of Chelex and 8 coral sample vials.3. Label tubes of Chelex to correspond to coral sample ID. Write slowly and clearly.4. Sterilize tweezers and clippers with ethanol and lighter. Be careful!5. Open a coral sample vial and the tube of Chelex with the same number.6. Remove the coral sample with the tweezers.7. Hold the coral sample over the tube of Chelex and clip off a small piece allowing it to fall
into the tube. One polyp is enough.8. Close the Chelex tube that now contains the small piece of coral.9. Return the rest of the coral sample to its vial. Top off the ethanol in the vial if it is getting
low.10. Write a small letter “C” on the coral sample vial.11. Clean the clippers and tweezers with a Kimwipe.12. Repeat for steps 5 to 11 with all eight coral samples.13. Vortex each sample for 10 to 15 seconds.14. Centrifuge all samples at top speed for 30 seconds.15. Carefully remove samples from centrifuge without shaking.16. The heat block should be at 95ºC.17. If necessary, fill the holes in the heat block with ddH2O.18. Place Chelex samples in the heat block for at least 1 hour, no more than 3.19. After 1 hour, remove samples from hat block and turn it off.20. Press the cap down on each sample to make sure it is tight .21. Vortex each sample for 10 to 15 sec.22. Centrifuge all samples at top speed for 30 sec.23. Place samples in refrigerator overnight.24. Check the lab bench to make sure everything is away. 25. When pipetting template, pipette from the top of the vial, where the DNA is concentrated.
Template taken from the bottom will contain too much Chelex, inhibiting the PCR.
38
SICG Laboratory Procedures
DNA Extraction From Blood Spots By Bryan Falk, Mitch Eaton and Ellen Trimarco
1. Cut out a small piece from (i.e. a triangle of 5mm per side, depending on how dense the blood is) from a single spot with a sterile razor.
2. Add 20 μL of Proteinase K, mix by vortexing and incubate at 55ºC. Place on a rocking platform in the incubator and incubate for one to three hours or when the paper appears bleached and white.
3. Vortex for 15 sec. Add 200 μL buffer AL to the sample. Mix thoroughly by vortexing.4. Add 200 μL of ethanol (96-100%) to the sample and mix thoroughly by vortexing.5. Pipette the mixture from step 4 into the DNeasy Mini spin column placed in a 2 ml collection
tube – provided in the kit. Do not transfer the blood spot to the collection tube. Centrifuge at 6000 x G (8000rpm) for 1 min. Discard flow-through. Your DNA will now stay fixed on the filter until elution. Be careful not to touch or puncture filter.
6. Place the DNeasy Mini Spin column in a new 2 ml collection tube (provided), add 500 μL of buffer AW1 and centrifuge for 1 min at 6000 x G (8000rpm). Discard flow-through and collection tubes (keep column).
7. Place the DNeasy Mini Spin column in a new 2 ml collection tube (provided), add 500 μL of buffer AW2 and centrifuge for 3 min at 20,000 x G (14,000rpm) to dry the Mini Spin column. Discard flow-through and collection tube. Gently remove the spin column without letting it come into contact with the material at the bottom of the collection tube.
8. Place the DNeasy Mini Spin column into a clean and labeled 1.5 mL or 2 mL tube (not provided) and pipette 20 - 50 μL buffer AE directly into the DNeasy membrane. Make sure the fluid hit the center of the filter. Incubate at room temperature for 5 min and then centrifuge for 1 min at 6000 X G (8000 rpm) to elute. (Elution buffer volume and incubation times may be adjusted if desired to alter DNA concentration).
9. Repeat elution once as described in Step 8 in the same collection tube as used in step 8 to combine elutions.
10. Quantify DNA using the Nanodrop spectrophotometer or visually using a 1.5% agarose gel.
*Abbreviated Version1. Cut out a small piece from (i.e. a triangle of 5mm per side, depending on how dense the blood
is) from a single spot with a sterile razor.2. Digest according to the Qiagen Blood and Tissue Kit.3. Incubate for one to three hours or when the paper appears bleached and white.4. Continue with the Qiagen Blood and Tissue Kit, but when supernatant is transferred to a spin
column, do not transfer the blood spot.4. At the elution step, use two AE washes of 30 - 50 ul each, letting both of these sit about five
minutes before centrifuging. Both elutions go into the same collection tube.
39
SICG Laboratory ProceduresAppendix B
Genomic Lab, 8th FloorSafety Rules
1. No smoking, eating, drinking, chewing gum, sucking on candies or cough drops, etc. is allowed in the lab.
2. No cosmetics or lip balm are to be applied in the lab.3. No food or drinks are to be brought into or stored in the lab.4. Gloves must be worn when working with blood or body fluids, hazardous chemicals,
infectious or potentially infectious material, or U/V light.5. Disposable gloves are not to be worn outside of the lab. Do not touch door handles,
telephones, light switches, computer keyboards or mice with gloves unless there are clearly labeled exceptions.
6. Lab coats should be worn if working with hazardous chemicals or potentially infectious agents. Lab coats should not leave the laboratory.
7. Footwear should be fully enclosed and not permeable (e.g. cloth-topped shoes that liquids can seep through).
8. Long hair and loose clothing should be contained if working with open flames, hazardous chemicals, or potentially infectious agents.
9. Safety glasses must be worn if carrying out hazardous activities.10. Sharps must be disposed of in certified sharps containers. Broken glass must be
placed in broken glass boxes.11. Hazardous chemical or biological spills must be cleaned up immediately, using
special treatment if applicable.12. Corridors and exits must not be obstructed.13. Aerosol production must be minimized.14. Hands must be washed before leaving the laboratory.15. Know where the emergency exits and MSDS station are.16. Do not leave open flames unattended.17. A check out sheet regarding disposal of hazardous waste, tissue and chemicals,
etc., will be signed and completed prior to terminating your work within the SICG Lab (pick up from Lab Manager).
I have read these rules thoroughly and understand and agree to abide with all requirements herein. I understand violation of these requirements could make me ineligible for access to this laboratory, result in possible job termination, or result in possible prosecution under pertinent state and federal regulations. _______________________________ ________________________Signed Date
_______________________________ ––––––––––––––––––––––––Print name Supervisor’s initials
_______________________________ ________________________Contact email Contact phone
40
SICG Laboratory ProceduresAppendix C
41

SICG Laboratory ProceduresAppendix D
SICG LAB NOTEBOOK GUIDELINES
Lab notebooks serve a very vital purpose for scientists in that they contain all information necessary for
anyone to repeat a given experiment and they record all results and special conditions (i.e. notes, mishaps,
repeated experiments, equipment malfunctions, unexpected occurrences, etc.) They also serve as a place
to store protocols or lab related reference materials. Researchers that spread out results and protocols on
small pieces of paper and combine them are unlikely to be successful- a lab notebook provides a single
safe place for all information on a project in consecutive order.
How to maintain a laboratory notebook (from Purrington, C. B. Maintaining a laboratory notebook. Retrieved
2012-01-23 from http://colinpurrington.com/tips/academic/labnotebooks)
If your notebook is not already equipped with page numbers, add them.
Devote pages 1 and 2 to a Table of Contents (which you will fill in as time passes). Have 2 columns, one
for experiment name and one for page number where experiment 1 starts, etc. If you come back to your
notebook after 20 years, you will be able to quickly find the appropriate section of your notebook. This
Table of Contents is also crucial for others who might want to use the notebook to reconstruct your brilliant
activities.
Never, under any circumstance, should you remove a page. This directive is to prevent unscrupulous
researchers from “losing” data that might not have been favorable to their research objectives. If you rip out
some pages you thought were unnecessary or had unfavorable caricatures of your colleagues, others might
view the gaps, and your stories, as suspicious.
Some researchers insist on reserving the left-hand page for “cryptic notes to self, and quick calculations,”
and the right-hand page for “real” entries. Do not do this. This strategy undermines the more important goal
of keeping a notebook. If you have made “calculations and notes to self” without proper narrative
explanation and justification, you, too, will probably find the left-hand page unusable after several months
have elapsed.
If you make a mistake, draw a thin line through the word or number rather than obliterating the entry with a
blob of ink. In some cases you may decide, upon reflection, that your original entry was actually the correct
one, and you will be glad that you can still read it.
For the same reason, never use correction fluids (e.g., White Out) or strips of white laboratory tape.
Write legibly! If you ever use your laboratory notebook to reconstruct experimental details, you will be
miserable if you haven’t been reasonably neat. Your notebook does not have to be a work of art, but it
should be easily readable by another person of average intelligence.
Provide the full date whenever you make an entry. Always use the international standard format:
YYYY/MM/DD (e.g., 2011/12/25). If you grew up writing dates a different way, change your ways.
There’s a fad in some fields to “recopy” notes into a different notebook at the end of the day. I think doing
that is a profoundly stupid idea. Sure, you might have fresh insight when you’re recopying data and such,
but you’ll also introduce copying errors (yes, even you). If you really think recopying is going to help your
science, I suggest you record your “field” notes on one side of the notebook and then recopy and add
42
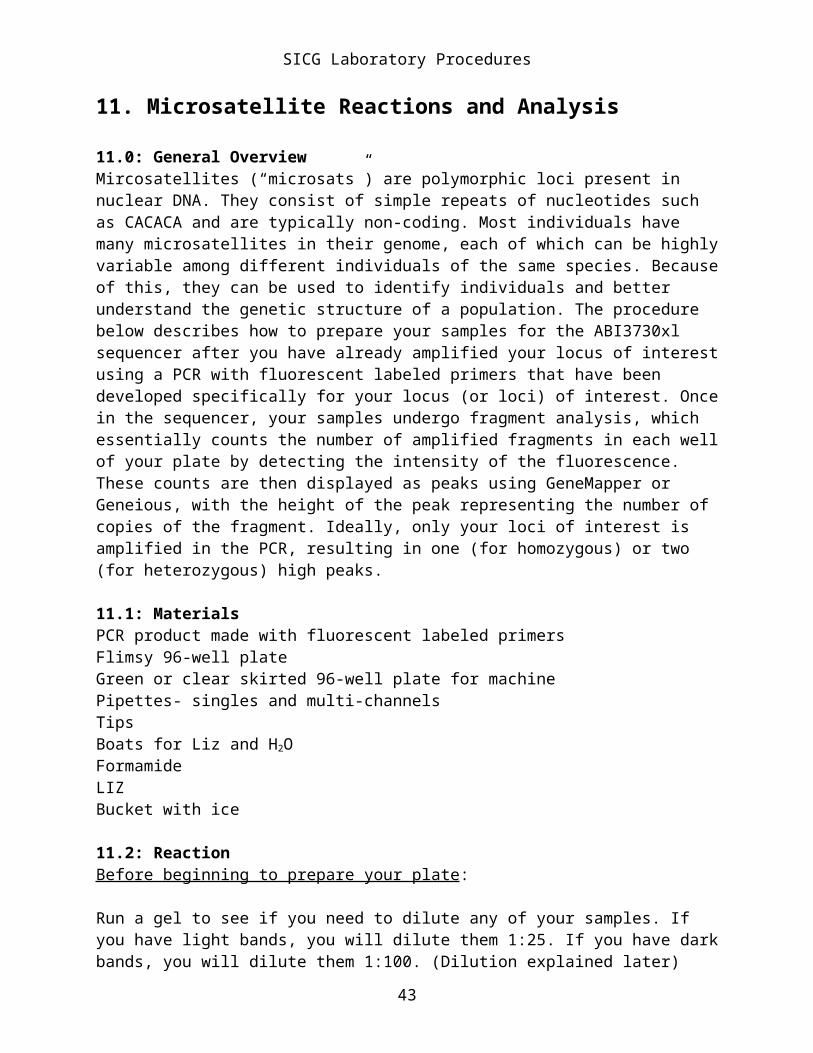
SICG Laboratory Proceduresinsights to the facing page. However, if you do fieldwork were it is likely that you’ll lose your notebook or
it will be stolen by roving bands of thugs with machetes, recopying into a secondary notebook might make
good sense.
How to maintain a laboratory notebook (from Sackler Institute Laboratories)
Label the spine of your lab notebook with your full name, beginning and ending date range for entries and
project.
If you attach a photograph of a gel, always record each well with a sample name or corresponding PCR
well with associated unique PCR name. This can be done manually or with PowerPoint.
For section 20 Labs: Keep a separate lab notebooks for Lab 3 than your notebook for Labs 1 and 2.
Alternatively, print out protocols for Lab 3 and then paste in to your lab notebook. Both of these strategies
will prevent contamination from Labs 1 or 2 from entering Lab 3.
Record all calculations and methods in a logical order and always include units. If you are beginning a
project make sure to include what type of taq you are using, write out PCR program temperatures and
times, and include any notes on optimization. Always include the names of any and all primers you use in
a reaction (not just forward and reverse). If a project has standardized methods, tape them or write them in
your lab notebook and then just reference them. For example, for a PCR from an established project you
might enter:
2012, January 23
PCR performed with five tuna DNA samples from extraction on 2011-05-20. Used Anna’s PCR program called “Tuna.”
15 μL water2.5 μL buffer2.5 μL dNTPs1.5 μL BSA1.0 μL 16ScpF (10uM)1.0 μL 16ScpR (10uM) 0.2 μL Promega Taq
What to write with (from Purrington, C. B. Maintaining a laboratory notebook. Retrieved 2012-01-23 from
http://colinpurrington.com/tips/academic/labnotebooks)
The following pens seemed to perform well under the conditions I used: Pentel Hybrid Gel Roller, Sakura
Gelly Roll (this company also makes Pigma Micron pens, which are great), Sanford Uni-Ball Gel RT,
Sanford Uni-Ball Vision, Sanford Uni-Gel RT, Zebra Sarasa (this writes this best, and comes in a pleasing
“blue/black” tint). I have a fondness for the Gelly Roll in part just because of the name.
Avoid the “Pilot G2″ line (they bled extensively in the organic solvents, and even bled when incubated with
warm water).
Do not use Sharpie (or equivalent) permanent markers for notebook entries: these markers were very good
at resisting water spills, but were removed by many solvents. More importantly, permanent markers tend to
bleed through to the underlying page, which makes for rather sloppy, illegible laboratory notebooks.
Sharpie ink also fades over time, especially when used on plastic (like microfuge tubes or plastic plant
stakes). I’m not sure whether the fade is sublimation or interaction with some wavelength of light.
43
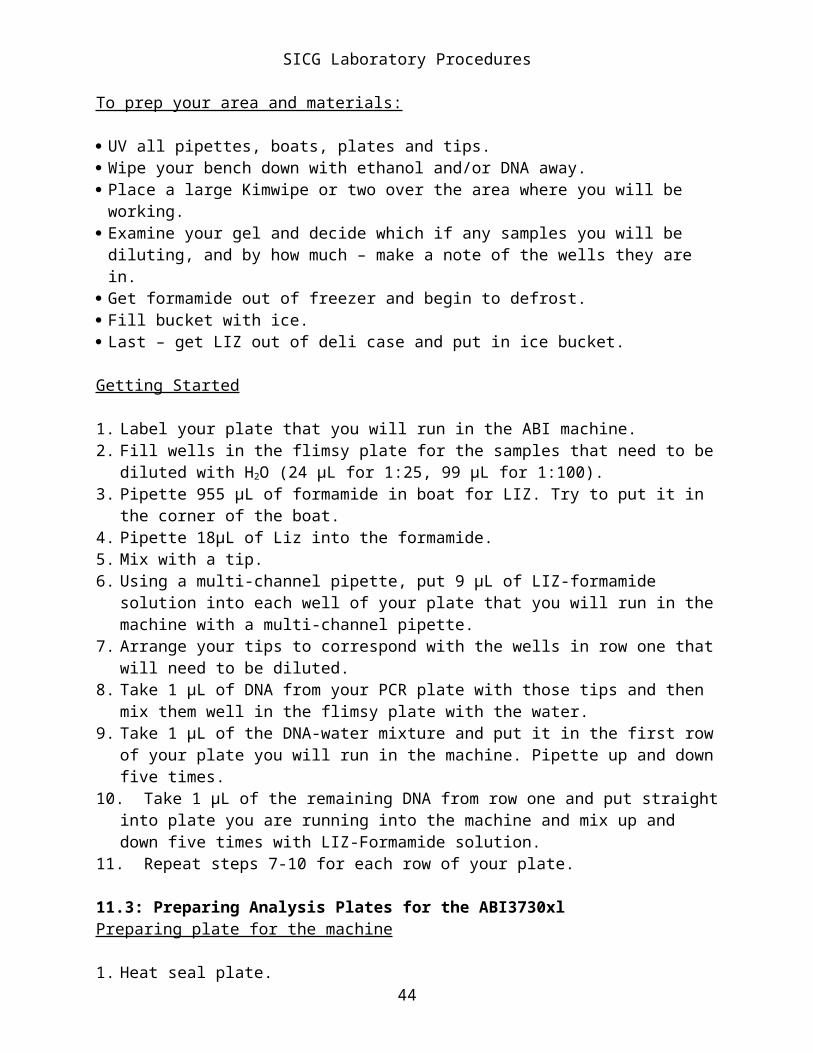
SICG Laboratory Procedures Do not use pencils. Although graphite is wonderfully resistant to many solvents, it is famously prone to
being erased, which can be terrible if you erase something that, in fact, was rather important. Also, if you
decide to patent a thought or protocol, you need to show the laboratory notebook to the patent office, and
they will laugh their heads off if you show up with a pencil-filled notebook.
44
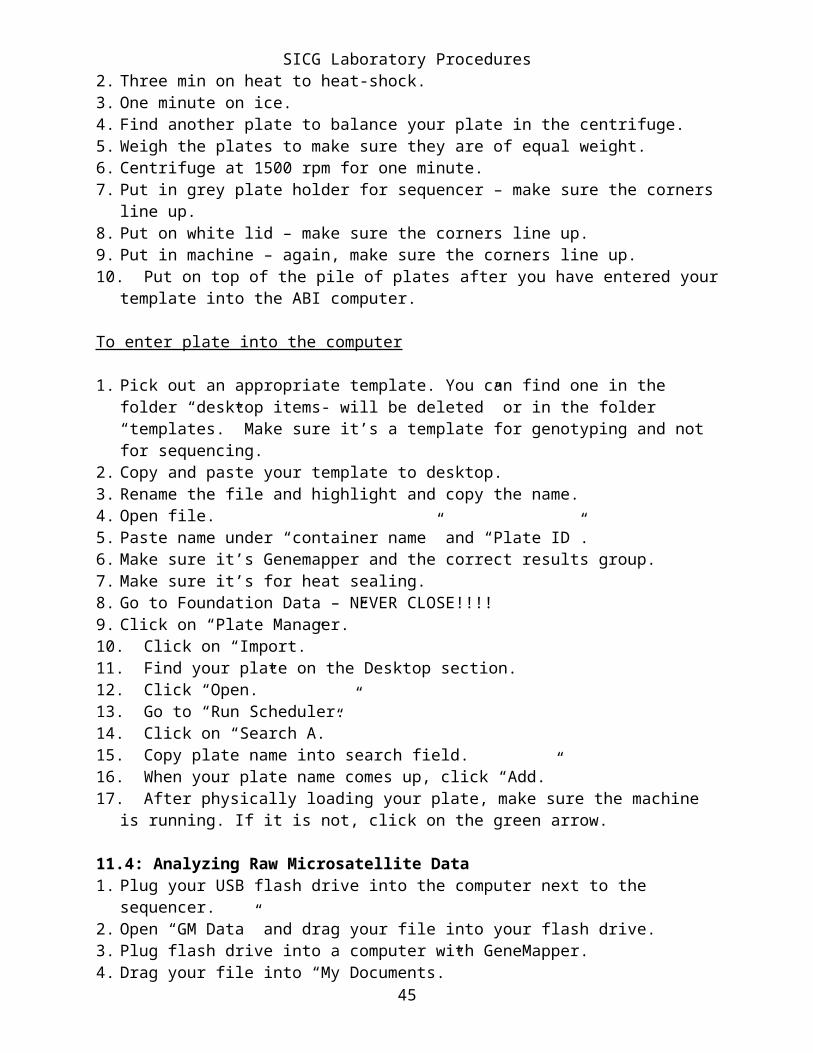
SICG Laboratory ProceduresAppendix E
SICG QUICK LAB REFERENCE AND GUIDEGeneral Lab Tips
Note the range indicated on pipettes (i.e. 0.1ul-10ul) and never dial outside of that range (ie. 11ul) or pipettes will become damaged!
Always pipette up and down (2-3x) or vortex DNA/primers and other aqueous solutions in order to get a homogenous sample, especially for small volumes like 1ul in a 500ul tube of solution.
When taking tips from a 96-tip rack, take in order across rows of 8 and down columns 0f 12 instead of randomly taking tips out of box (know as tip art). If you are working on a whole plate this not only will ensure if you’re interrupted you will know where you left off, but it will help those using the tips after you (for example in the gel area) to be able to multi-channel without fixing gaps.
Do not “borrow” materials from other people’s benches. All labs should be well stocked and if they are not, please see a technician.
If you are taking the third-to-last aliquot of anything (i.e. Big Dye, Taq, Extension Buffer) make sure you tell a technician so the aliquots can be replenished. Never take these reagents directly from the stock solution.
Do not throw trash in the biohazard- the biohazard disposal is very expensive and unnecessary trash adds to museum costs.
No USB drives in any computers until a virus scan has been completed each for the drive each time.
Gel Area Use filtered tips for tissue extraction, template addition or cloning- they are unnecessarily
costly for other processes.
Unplug gel rig voltage cords and turn power off when you are done running a gel. After taking gel out, return the gel rig cover to its place to reduce evaporation of TBE Buffer.
Wipe down UV imaging stand with kimwipe after use and always use gloves when touching anything in the gel making areas!! We treat SYBR “safe” as if it is unsafe – since it has not been proven otherwise.
Pouring a hot gel agarose solution over a plastic gel rig will cause it to warp over time. Instead be sure to cool under water or on rotator before pouring.
Don’t leave gel rig by gel imaging computer. Return all items in gel area to where their proper place.
Never pour agarose down drain- always strain!
Safety Do not leave flames unattended and extinguish off after use.
Do not chew gum in the lab.45
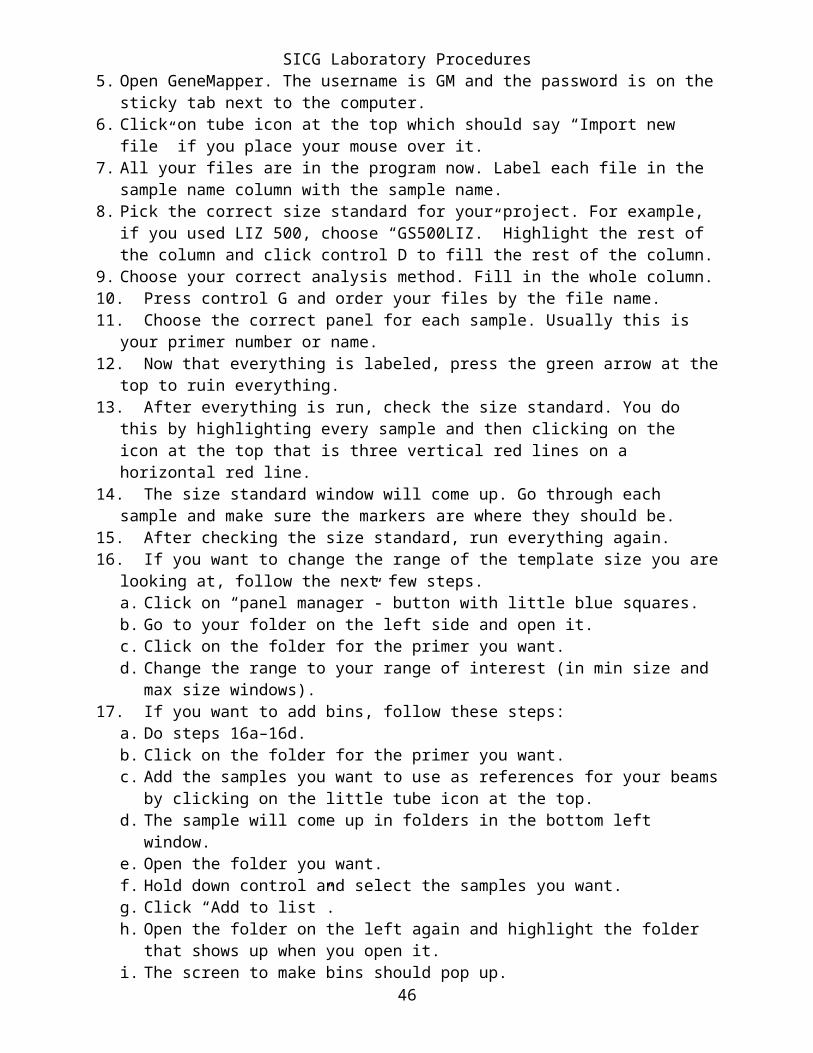
SICG Laboratory Procedures Always wear closed-toed shoes and shoes that cover tops of feet.
** And lastly, just ask if unsure about anything at all! Everyone you see in the lab is happy to help our newcomers.
46