installing ubuntu linux using a usb drive - alltid gode tilbud · pdf fileinstalling ubuntu...
TRANSCRIPT
Installing Ubuntu Linux using a USB drive
This detailed guide will show you how to install Ubuntu Linux on a PC by using a USB drive. You will need a
USB drive with at least 2GB capacity and a Windows PC to prepare it. Just follow these steps:
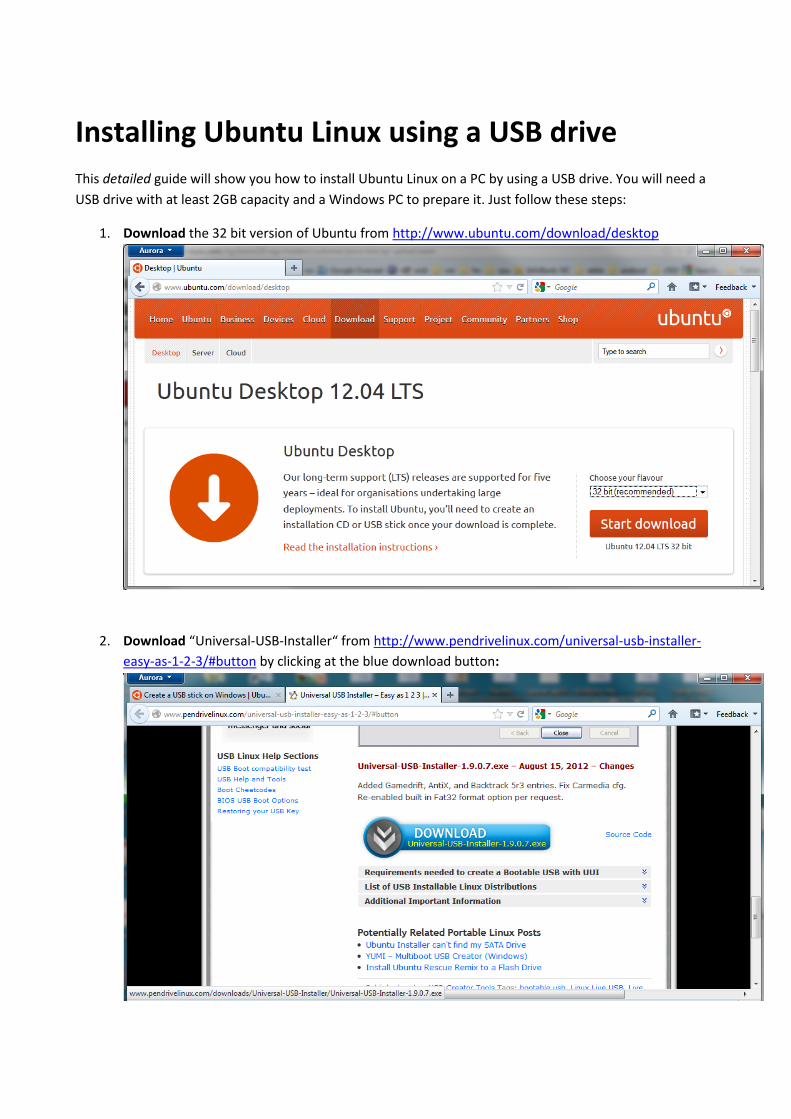
1. Download the 32 bit version of Ubuntu from http://www.ubuntu.com/download/desktop
2. Download “Universal-USB-Installer“ from http://www.pendrivelinux.com/universal-usb-installer-
easy-as-1-2-3/#button by clicking at the blue download button:
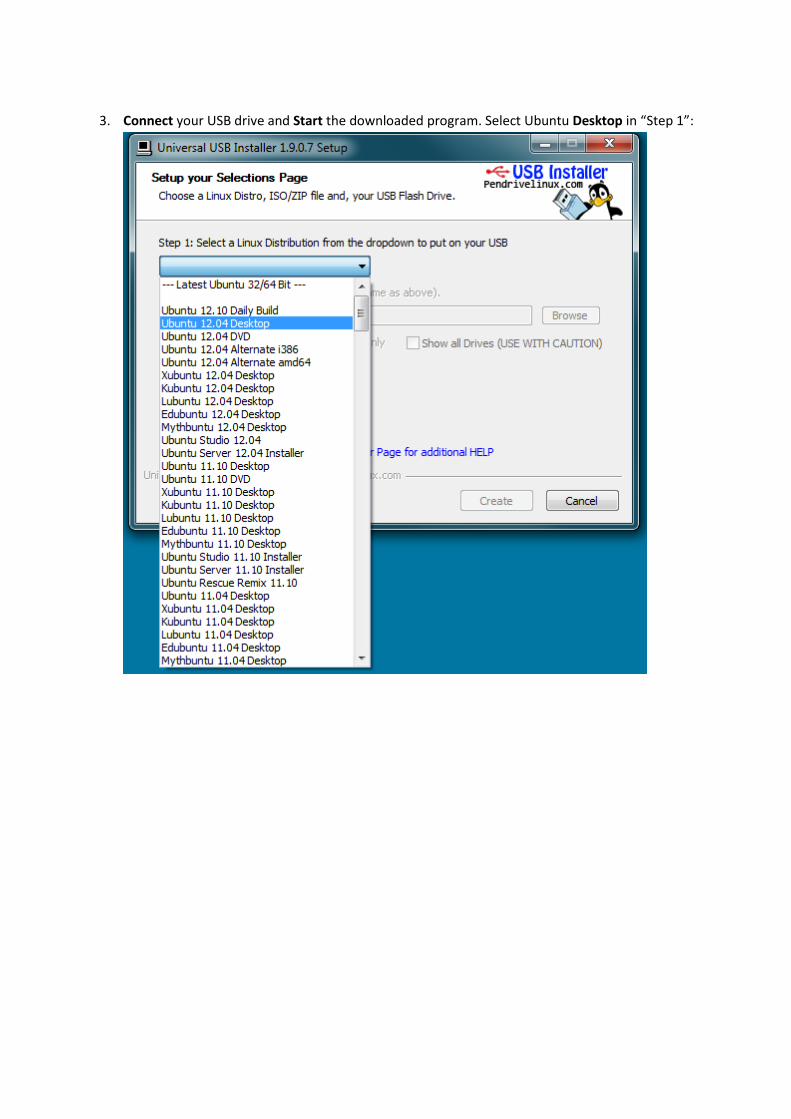
3. Connect your USB drive and Start the downloaded program. Select Ubuntu Desktop in “Step 1”:

4. Click Browse and select the downloaded Ubuntu-Linux in “Step 2”:

5. Select your USB drive in “step 3” and click “create”:
6. Read warning and make sure that you have selected the correct drive letter for the USB drive. If
you are sure to proceed, click “Yes”:
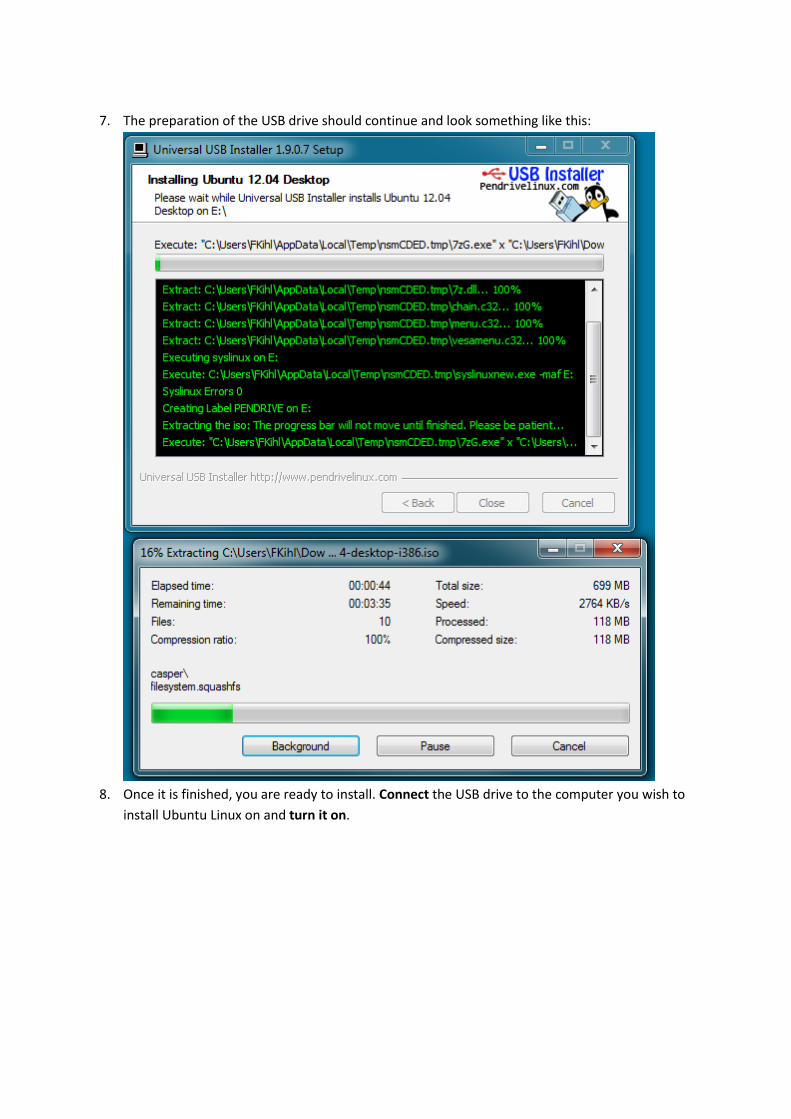
7. The preparation of the USB drive should continue and look something like this:
8. Once it is finished, you are ready to install. Connect the USB drive to the computer you wish to
install Ubuntu Linux on and turn it on.

9. Just seconds after powering on, you should see a welcome screen with a message to press F12 for
“Boot options” – Then please press F12. If you don’t see this F12 option, go to step 10. If you do
see the F12 option, and pressed F12 in time, you will see “Boot option menu” shown below after
less than a minute. This F12 has to be pressed within a few seconds, so you may need to power the
PC of and on again to retry a few times. Once the Boot options menu is shown, select USB HDD and
press enter. Go to step 11.
10. If you don’t see the F12 text, it has to be enabled. Turn off the computer, and power is back on.
Press F2 at the welcome screen. This will enter the system BIOS. Using the arrow keys to navigate,
enter to enable the “F12 Boot menu” (see below) and F10 to Save and Exit. This will reboot your PC
and at the welcome screen, you should press F12, as described in step 9.
11. The Ubuntu Linux installation should now start. You should see a welcome screen prompting you to
choose your language and giving you the option to install Ubuntu or try it from the CD. Follow the
instructions from the Ubuntu site: http://www.ubuntu.com/download/help/install-ubuntu-desktop

12. Some users have experienced issues with missing trackpad function, after Ubuntu is installed.
Follow below steps to fix the issue (connect a USB mouse to navigate)
a. From desktop open «Terminal» by using (Ctrl + Alt + T), and you will see the terminal
prompt as shown below:
b. In the terminal, type the following commands, each followed by ‘Enter’:
cd /etc/modprobe.d/
gksudo gedit options.conf
c. Enter your password to perform administrative tasks (same as your login password)
d. In the text editor, type the following line:
options psmouse proto=imps
e. Save the file and close it, using the menu, as shown below:
f. In the terminal, type the following commands, each followed by ‘Enter’:
sudo modprobe -r psmouse
sudo modprobe psmouse
g. Reboot the unit and if touchpad still doesn’t work, please press Fn + F7 to enable the
touchpad. Now the touchpad shuld be enabled and ready to use.
This guide is based on http://www.ubuntu.com/download/help/install-ubuntu-desktop and
http://www.ubuntu.com/download/help/create-a-usb-stick-on-windows.