installation guidelines - starnet® worldwide … · installation guidelines ... woven synthetic...
TRANSCRIPT
INSTALLATION guIdeLINeS
Starnet Healthcare Solutions
Starnet Healthcare Solutions
Table of Contents
hard surface
homogeneous inlaid 1
heterogeneous 6
luxury vinyl tile 10
vinyl composition tile and premium tile 14
rubber tile 17
rubber and vinyl wall base 21
carpet mannington infinity® and infinity® RE modular carpet tile 23
mannington integra hp re backing 26
rEvolve™ carpet tile 29
mannington latex backings – woven synthetic and ultrabac RE 32
Starnet and Mannington Commercial
A new kind of flooring alliance. Built to benefit today’s healthcare projects. Starnet and Mannington Commercial have teamed up to create the industry’s first coordinated, holistic approach to how healthcare products are designed, bundled, delivered, installed, maintained – and sustainably removed at the end of their useful life. More responsive, reliable and suited to meet today’s facility demands. •AportfolioofManningtoncoordinatingproductsdesignedforhealthcarespacesandtocoordinatewith other healthcare finishes being used today.
•Smoothtransitionsbetweendifferenttypesofflooringsurfaces,becausetheproductscomefromone manufacturer and are engineered to work together within a wide array of facilities and spaces. •Purchasing,bundlinganddeliverythroughStarnet.Sotherightproductsarriveattherighttime,tobe installed by the best in the business. •ComprehensivepackageofXpressoptionsforthosefasttrackprojects.Upto1000sqyds,1000sqft,or 1000 ln ft – style dependent, available to ship within 5 business days. •LowerTotalCostofOwnershipthroughouruseofpremiumperformanceproducttechnologiesandwith Starnet provided maintenance expertise. •Productssustainablymanufacturedtoexactingstandards,includingachievementofPlatinumandGold certification for environmentally preferable products. •SimpleendofliferemovalprovidedbyStarnetandrecyclingthroughMannington’sindustry-leading LOOP™ reclamation process.
Hard Surface Installation Procedures
Homogeneous Inlaid
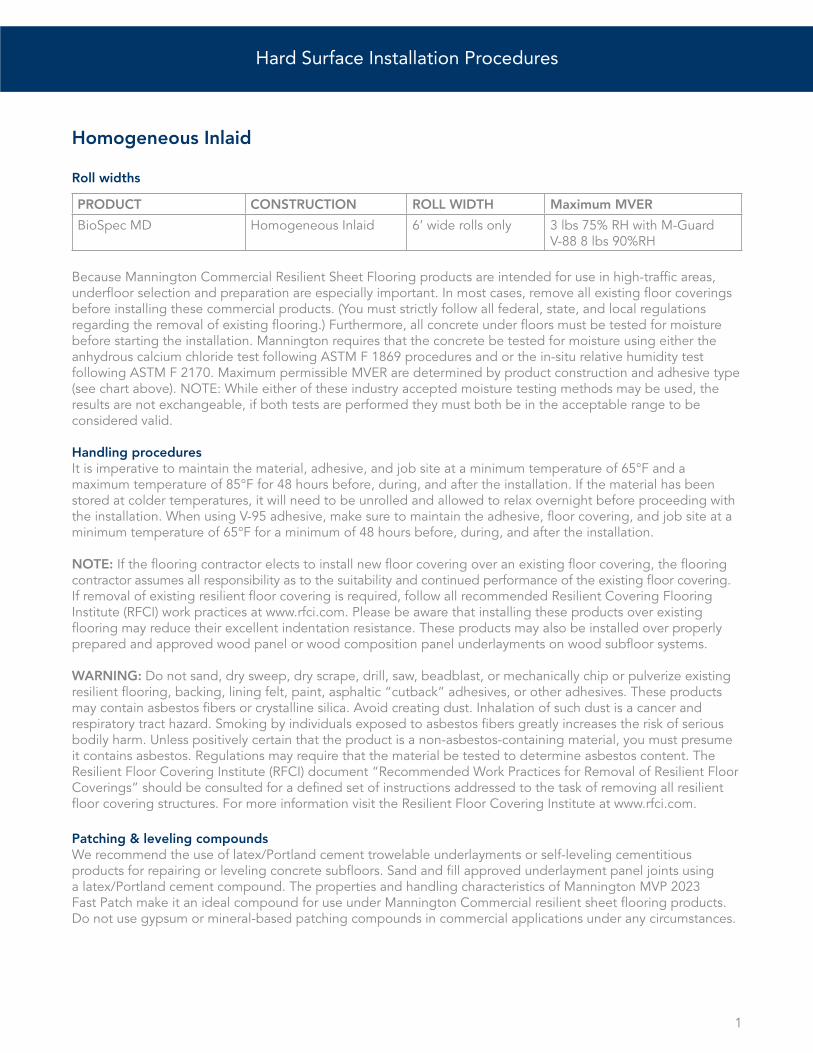
Roll widths
BecauseManningtonCommercialResilientSheetFlooringproductsareintendedforuseinhigh-trafficareas,underfloor selection and preparation are especially important. In most cases, remove all existing floor coverings before installing these commercial products. (You must strictly follow all federal, state, and local regulations regarding the removal of existing flooring.) Furthermore, all concrete under floors must be tested for moisture beforestartingtheinstallation.ManningtonrequiresthattheconcretebetestedformoistureusingeithertheanhydrouscalciumchloridetestfollowingASTMF1869proceduresandorthein-siturelativehumiditytestfollowingASTMF2170.MaximumpermissibleMVERaredeterminedbyproductconstructionandadhesivetype(seechartabove).NOTE:Whileeitheroftheseindustryacceptedmoisturetestingmethodsmaybeused,theresults are not exchangeable, if both tests are performed they must both be in the acceptable range to be considered valid.
Handling proceduresIt is imperative to maintain the material, adhesive, and job site at a minimum temperature of 65°F and a maximumtemperatureof85°Ffor48hoursbefore,during,andaftertheinstallation.Ifthematerialhasbeenstored at colder temperatures, it will need to be unrolled and allowed to relax overnight before proceeding with theinstallation.WhenusingV-95adhesive,makesuretomaintaintheadhesive,floorcovering,andjobsiteataminimumtemperatureof65°Fforaminimumof48hoursbefore,during,andaftertheinstallation.
NOTE: If the flooring contractor elects to install new floor covering over an existing floor covering, the flooring contractor assumes all responsibility as to the suitability and continued performance of the existing floor covering.Ifremovalofexistingresilientfloorcoveringisrequired,followallrecommendedResilientCoveringFlooringInstitute(RFCI)workpracticesatwww.rfci.com.Pleasebeawarethatinstallingtheseproductsoverexistingflooringmayreducetheirexcellentindentationresistance.Theseproductsmayalsobeinstalledoverproperlyprepared and approved wood panel or wood composition panel underlayments on wood subfloor systems.
WARNING: Do not sand, dry sweep, dry scrape, drill, saw, beadblast, or mechanically chip or pulverize existing resilientflooring,backing,liningfelt,paint,asphaltic“cutback”adhesives,orotheradhesives.Theseproductsmay contain asbestos fibers or crystalline silica. Avoid creating dust. Inhalation of such dust is a cancer and respiratory tract hazard. Smoking by individuals exposed to asbestos fibers greatly increases the risk of serious bodily harm.Unlesspositivelycertainthattheproductisanon-asbestos-containingmaterial,youmustpresumeitcontainsasbestos.Regulationsmayrequirethatthematerialbetestedtodetermineasbestoscontent.TheResilientFloorCoveringInstitute(RFCI)document“RecommendedWorkPracticesforRemovalofResilientFloorCoverings” should be consulted for a defined set of instructions addressed to the task of removing all resilient floor covering structures. For more information visit the Resilient Floor Covering Institute at www.rfci.com.
Patching & leveling compounds Werecommendtheuseoflatex/Portlandcementtrowelableunderlaymentsorself-levelingcementitiousproducts for repairing or leveling concrete subfloors. Sand and fill approved underlayment panel joints using alatex/Portlandcementcompound.ThepropertiesandhandlingcharacteristicsofManningtonMVP2023FastPatchmakeitanidealcompoundforuseunderManningtonCommercialresilientsheetflooringproducts.Do not use gypsumormineral-basedpatchingcompoundsincommercialapplicationsunderanycircumstances.
PRODUCT CONSTRUCTION ROLL WIDTH Maximum MVER
BioSpec MD Homogeneous Inlaid 6’ wide rolls only 3lbs75%RHwithM-GuardV-888lbs90%RH
1

Cutting & fittingManningtonCommercialinlaidproductsareflexibleandwillhandleeasilywhencuttingandfitting.Thisproductcharacteristicenablestheinstallertofitthematerialusingfreehandknifingtechniques. •Ifthejobsiteiscomplexandrequiresaprecisefit,usepattern-scribingtechniques. •Thematerialmayalsobefitusingdirectscribingtechniques. •Oncethematerialhasbeenfit,itisnecessarytotubeorlapbackhalfofthesheettoexposetheunderfloor for adhesive application. •Takecarewhenfoldingthematerialback.Alwaysfoldthematerialinawideradiustoavoidsharpkinksand creases, which may cause breaks in the product.
Applying adhesive •FullyadhereManningtonCommercialresilientsheetflooringtoanapprovedunderfloor. •Afteryouhavetrimmedthematerialtofittheroom,tubeorlapitbacktoexposetheunderfloor.Apply adhesive with the following recommended notched trowels. •Spreadadhesiveover100%oftheexposedsubfloor,leavingnogapsorpuddles. •Maintainuniformcoveragebykeepingthetrowelcleanandproperlynotched. •Inmostcasesitisadvisabletogivetheadhesivesufficientopentime.Opentimeallowsthemoisturetoflash offtheadhesive,permittingtheadhesivetodevelopmorebodyandimmediatetack.Opentimeisalways determined by subfloor porosity and atmospheric conditions. Be certain to provide ample open time on non-poroussubfloorsandatseamlines. •Aftertheadhesivehasbeguntotack-up,rollthesheetforwardintotheadhesivetoavoidtrappingair.Do notdroporflopthematerialintotheadhesive.Rollthefloorcoveringwithathree-section,100lb(orheavier) floor roller in both directions. •Afterthefirsthalfofthesheethasbeenadheredandrolled,foldbackthesecondhalfandrepeattheprocedure.
CAUTIONS: •Whenprovidingopentime,donotpermittheadhesiveto“skinover”ordry.Toomuchopentimewillresult in insufficient bonding. •BioSpecMDandLifeLinesIIshouldbeinstalledusingV-82adhesiveoverporoussubstrates.UseV-88or V-95adhesiveovernon-poroussubstrates. •ManningtonV-95adhesivehaslowinitialtack.Itmaybenecessarytoapplyweightstothefloorcovering, especiallyintheseamarea,untiltheadhesivesets.WhenusingV-95adhesive,rolltheadheredflooringwith a 100 lb (or heavier) roller within one hour after the flooring is installed. •Waitonetotwohoursandre-rolltheflooringagaintoensurefullcontacthasbeenachieved.Re-rollingthe material will also help remove any trapped air bubbles.
Seam cutting and seam sealing
PRODUCT METHOD TO USE
BioSpec MD Recess Scribing method
Recess scribing seams for inlaid constructionBioSpec MD •WhenseamingisrequiredwithBioSpecMD,positionthematerialsas“ReverseSheets.” •Cuttheselvageedgeofonesheetusingastraightedgeandautilityknifeoredgetrimmer.Trimoffabout 3/8”fromtheedge.Trimmingisnecessarysince6’rollsaretypicallystoredon-endcausingcompressionon oneedge.Ortherollsmightevenbedamagedduringtransport. •Positionthesheetsinsuchamannerthatthetopsheetwilloverlapthepreviouslystraightedgedsheetby approximately1/2”. •Foldbackthesheetstoexposetheunderfloorandapplytheappropriateadhesive.Placethetrimmedsheet into the adhesive while providing sufficient overlap of the second sheet; then lay in the second sheet. •Rolltheadheredareastowithin6”oftheseamlinewitha100lbthree-sectionfloorroller. •Adjusttherecessscriberbeforeactuallycuttingtheseambycuttingaslitinascrappieceofresilientflooring material.Insertthebuttonononeedgeoftheslit.Theneedleshouldjusttouchtheoppositesideoftheslit. Make sure to set the scriber to produce a net fit, neither gapped nor too full. •Usingarecess-scribingtool,insertthescriberagainstthestraightedgepieceofresilient.Usethebottomend of the tool, the guide, to follow the bottom sheet and lightly score the top sheet with the needle of the scribing tool. Keep the scribing tool perpendicular to the seam when scribing.
2

•Cuttheseamnetwithautilityknife(straightorhookblade).Cuttheseambyfollowingthescribedmark.A burr may be created on the seam in the needle of the scriber is set too deep or too much pressure is applied.
CAUTION:Ifthescriberispulledtootightlyagainstthebottomsheet,theseamwillbetoofulltohavethepotential to peak. •Afterscribingandcuttingtheseam,rolltheseamareawithahandseamrollertobringtheseamedgeslevel. Re-rolltheentireadheredareawiththe100lbfloorroller.Thoroughlycleantheseamareaandwipedry.
Recommended seaming methods-chemical or heat welded seams
PRODUCT CHEMICALLY WELDED HEAT WELDED
Biospec Md Recommended Recommended-preferredmethod
Chemical seam sealingBioSpec MD •Thoroughlycleantheseamofalladhesives,dirt,etc,beforesealingit. •Iftheseamsaretobechemicallywelded,useManningtonCommercialMCS42SeamSealer. •Wheninsertingtheapplicatortipintotheseamcut,itiscrucialthattheseamsealerbeappliedtothefull depth of the cut. •Wipeoffallsealerfromthesurfaceoftheseamwithacleanwhiteclothdampenedwithmineralspirits. •Becausetheseamsealershouldnotbeallowedtoremainonthesurfaceoftheflooringmorethan30or40 seconds, it is recommended 5 or 6 lineal feet of seam be sealed and then wiped clean. Be certain to overlap each application of seam sealer.
Heat weldingHeatweldingistheactoffusingresilientsheetstogetherwithaheatedthermalvinylweldrod.ThistechniqueissuitableforinstallingthefollowingManningtonCommercialresilientsheetflooringproducts:BioSpecMD.
NOTE: Heat welding is the preferred method of sealing seams for homogeneous products.
Weld rodsMannington’s weld rod is available on spools and is designed to fit the most popular heat welding guns. Manningtonoffersabroadrangeofsolidrodcolorstocoordinatewithallofourheat-weldableflooring.Camouflage weld rods are offered for BioSpec MD.
Heat welding recommendations •Toachievegoodsealingresults,knowledgeofproperheatweldingproceduresisimportant. •Arepeatedstop/startmethodwillproduceroughunevenseams,creatinganunpleasantappearance. •Temperaturesettingiscriticaltothesuccessofanyheatweldingapplication.Iftheweldinggunissettoohot or applied too slowly, the flooring is likely to burn, char, or craze the surface next to the weld rod. If welding gunisnothotenoughorappliedtooquickly,theweldmayhavepoorfusion.FollowallMannington temperaturerequirementstoachieveanevenseamwithgoodbondstrengthandintegrity. •Afterwaiting24hoursfortheadhesivetodry,useapower-groovingmachinetocutagroovetheentire length of the seam. Adjust the machine so the depth of the groove is about two thirds of the product’s thickness. Stop machine grooving several inches away from the wall. •Extendthegroovetothewallusingahand-groovingtool. •Priortoheatwelding,allowtheflooringadhesivetocompletelydry.Preheatweldinggunanddetermine proper temperature setting and router depth by practicing on scrap pieces of flooring. Make certain the speed nozzle is clean and free of obstructions. •Insertweldingrodintothespeednozzleallowingapproximately3”toextendout.Arrangeweldingrodin such a manner that it will not interfere with the application. Be careful when inserting the welding rod because the nozzle is extremely hot. •Pullthegunalongthelengthoftheseamtowardyourbodywhilemaintainingadownwardpressure.Keep thegunperpendiculartothefloor.Weldtheseamataconstant,evenspeed. •Stopandchangedirectionoftheweldwhenyouarenearthebackwall.Pullthegunoutofthegrooveand cut the weld rod. •Removetheurethanecoatingbeforeheatweldinginsidecornerbygroovingorsanding.Performedmetal corner caps may also be used.
3

•Allowweldedrodtocool,andthengroovetheinstalledrodwithahand-groovingtool.Groovingtherod makes it possible to achieve complete seam coverage when you start seaming from the opposite direction to finish the job. •Repositionyourselfandyourtoolsatthebackwallandcontinueweldingintothegroovedrodyoujustmade so there are no missed spots in the seam. It is important to achieve a smooth, continuous coverage of the rod into the seam. •Aftertheweldedrodshrinksandcoolsforapproximately30minutes,trimdowntheexcessbyusingthe followingtwosteps:Removeapproximatelytwothirdsoftheexposedweldedrod.Useaspatulatrimknife andtrimplatetotrimoffthetoplayer.Thereshouldbeabout1/32”excessweldrodprojectedabovethe surface of the resilient. •Thesecondstepistotrimtheweldedrodleveluntilitisflushwiththesurfaceoftheresilientsheet.Usean extremely sharp spatula knife without the trim place at a 5º to 10º angle to the floor surface. Keep the sharpened side down against the welded rod. Be careful not to cut or dig into the resilient surface. Inspect the finished seam carefully and remove any missed high spots with a spatula knife. If there are low spots, the seamweldmayrequirearodreapplication. •Oncetheentireareahasbeentrimmedandinspected,smoothoutseamwithoneofthetworecommended methods.Whenusingcamouflageweldrods,bothstepsarerequired. 1. GlazeCuringtheSeam:Applyheatfromtheweldingtoolbyremovingspeednozzleandusingthe same heat setting to direct a flow of heat from the gun along the length of the seam. 2. SeamSealingtheSeam:Tosmoothouttheseam,applyMCS42seamsealertotheweldedseamand leaveitonnolongerthan30to40seconds.Wipeallsealerfromthesurfaceoftheseamwithaclean white cloth dampened with mineral spirits. Do not wipe the seams of camouflage weld rods. Allow the sealer to be absorbed into the rod. Both of these two last steps reduce porosity of the trimmed rod and glaze the surface of the welded rod to produce a smooth, continuous appearance. •CoatthetrimmedweldrodwiththeQuantumGuardHPmarkertoprotecttherodfromsoil.
Finishing & maintenance •Protectallexposededgesoffloorcoveringwithtrimorrestrictivemoldings. •Removeallscrapsandtrashfromthejobsite. •Removealladhesivesmearsorresiduefromthesurfaceofthefloorcoveringwithacleanclothdampened with mineral spirits. •After24hoursofthecompletedinstallation,thoroughlycleanthefloor. •ManningtonCommercialresilientsheetflooringshouldreceivethreetofivecoatsofahigh-quality, cross-linked,acrylicfloorfinishbeforetheflooringisputinservice.ManningtonCommercialsheetproducts withtheQuantumGuardHPwearlayerdoesnotrequirepolish.Refertodelayedmaintenanceprocedures.
CAUTION:Donotwashtheflooruntil48hoursafterinstallation.After48hours,youmaydampmopthefloortoremove any residual surface dirt.
RepairsReplacing damaged areas •Ifpossible,thefloorcoveringrepairpieceshouldcomefromtheoriginalinstallation.Typically,consumers retain leftover pieces from the original installation. •Tapetherepairpieceoverthedamagedareaanddouble-cutusingasteelsquareasaguide. •Removethedamagedareaandscrapethesubfloorclean.Applyadhesiveonthebackoftherepairpiece and insert into the flooring. •Rolltherepairpiecewithahandseamroller. •UsetheappropriateManningtonseamsealertosealallcuts.
Flash coving resilient sheet productsAllManningtonresilientsheetgoodscanbeinstalledusingtheflashcovingmethod.Thisedgingtechnique,often preferred by hospitals and other health care facilities, is a process of extending the resilient flooring up the wall to create a wall base. Normally, the floor covering is extended up the wall to a height of 4” to 6”.
As with all resilient installations, proper preparation of the work area is critical to the success of the installation. Clean the underfloor carefully and make certain it is structurally sound.
4

Thejunctureofthefloorandwallalsoneedsspecialpreparationbeforebeginningacovedinstallation.Followthe instructions below to install the cove cap and the cove stick (cove fillet strip). •Measuredesiredheightforthecovecapsateachcornerandstrikeachalkline. •Attachaluminumorvinylcovecapsatthisheightusingflatheadnailswithahammerorbradpusher,oruse contact cement. •Alwaysmiterinsideandoutsidecornersinthecap.Whenmiteringtheoutsidecorners,filetheendsofthe capsmooth.Useaspeciallydesignedmitertoolwithinterchangeablediesetstomakecornersonthecove cap.Thistooleliminatessharpedgesattheoutsidecorners. •Covestickssupporttheresilientflooringasitisflashedupthewall,eliminatingthechanceofpuncturingthe resilient flooring. Firmly secure plastic or wood cove sticks where the floor meets the wall with adhesive or nails. •Usenonstainingnailsandsettheflushwiththestick.Thestickshouldhaveaminimumradiusof11/8”and be precisely mitered at all inside and outside corners. •Provideasmoothtransitioninthedoorcasingsandotherareaswherethecovingendsbycuttingbacktothe cove stick. •Tackthescribingfelttothewallwithbradtypenailsbeforebeginningtoscribeit.Useacombinationsquare, a small metal ruler, or a 1” piece of resilient to pattern scribe the felt. •Fitthescribingtoolupinsidethecovecapandscribethefeltbyslidingthetoolalongthecapasyoumark the felt with a pencil. •Scribeandcuttheoutsidecornersofthefeltusingautilityknifeandtheinsidecornersofthefelt,using dividers. •Afterscribingtheentireworkarea,positionthepatternsquarelyontheresilientsheetflooringandtranscribe the pattern with pencil dividers. Be careful when cutting the material on the inside and outside corners. •Dryfitthematerial.Insidecornersshouldfitsnug,butnotbeforcedintoposition.Makesuretoalways position the shorter side first and then the longer side. •Gentlypullmaterialawayfromthewall.Applytheappropriateadhesivetothefloor,wall,covecap,andcove stick. •Allowtheappropriateamountofopentime.Fitthematerialbackintoplace.Remembertoalwaysposition the shorter side first. •Rolltheflooringwiththeappropriatesizeroller(useahandrolleroncovedareas).Applytheappropriate seam sealer at all seams, following the recommended directions for the resilient floor being installed. •Themostdemandingaspectofacovedinstallationisformingtheoutsidecorners.Filloutsidecornerswitha “boot”typeplug,ratherthanaV-typeplug,ontheleastvisiblewall.Thepluggedcornerfillpieceshould extendbackatleastseveralinchesfromthecorner.Theseamofthefloorshouldbebelowthecovestick. Usinganunderscriber,scribethebackoftheplugatthecorner.Thiswillmarkthepatternofthecorneron the plug. •Cutalongthescribedlineata45°anglewithacurvedtrimknifeorautilitybladewhileholdingtheplug steadywithametalrulerandyourotherhand.Whencutting,leavethefaceofthepluglongerthantheback. •Checkthefillpieceforaccuratefit.Makeanyminoradjustmentstotheplugasnecessarytofillthespace correctly. Remove the fitted fill piece and apply the appropriate adhesive. Reposition the fill piece and apply seam sealer.
NOTE: If planning to heat weld the seams, be aware that only Mannington Commercial BioSpec MD products can be used. Remove the urethane coating before heat welding each inside corner by grooving or sanding. Preformedmetalcornercapsmayalsobeused.
5

Heterogeneous
General informationAllrecommendationsarebasedonthemostrecentavailableinformation.TheseinstallationspecificationsareforfullyadheredinstallationsofManningtonCommercialheterogeneousproducts,PrimusandVivendi. 1. Cutorderpiecesshouldberolledfaceoutonacoretotaketothejobsite.Otherwise,therollwillflattenor “oval,” making it difficult to get the floor covering to lay flat when unrolled. 2. Thefloorcovering,adhesive,androomtemperaturemustbekeptataminimumtemperatureof65°Fwitha maximumof90ºFforatleast48hoursbeforeandduring,and48hoursafterinstallation. 3. Allsubfloorpatchingonandbelowgrademustbedonewithanon-shrinking,water-resistantPortland cementpatchingcompoundsuchasManningtonMVP-2023. 4. NeverinstallManningtonsheetgoodsoverresidualasphalt-type(cutback)adhesive.Itcanbleedthrough thenewfloorcovering.Residualasphalt-typeadhesivemustberemovedorisolatedfromthefinished flooringbyprovidingamechanicalbarrier,suchasManningtonMVP-2023. 5. MustbefullyadheredusingManningtonV-82orMGuardV-88onporousornon-poroussubstrates.Use ManningtonCommercialhighperformanceV-95two-partepoxyadhesivesonnon-poroussubstratesor inareasthatrequirehighperformanceadhesives(i.e.underhospitalbeds,exceptionalhightrafficareas). 6. AllseamsmustbesealedbyeitherusingManningtonCommercialMLG-33chemicalseamsealerorheat welded with Mannington solid color weld rod.
Subfloor informationCareful and correct preparation of the subfloor is a major part of a satisfactory sheet floor covering installation.Roughness or unevenness of the subfloor will telegraph through the new floor covering, resulting in an unsightly surfaceandexcessivewearonhighspots.Propersubfloorselectionandpreparationareessentialforatrouble-freejob.
Wood subfloors1.GENERALWheninstallingPrimusorVivendisheetflooringproductsoverwoodpanelunderlayments,ManningtonCommercialM-GuardV-88adhesive(orequivalent)mustbeused.Allwoodfloorsmustbesuspendedatleast18”abovetheground.Adequatecross-ventilationmustbeprovidedandthegroundsurfaceofacrawlspacemustbecoveredwithasuitablevaporbarrier.Woodsubfloorsdirectlyonconcreteorinstalledoversleeperconstruction are not satisfactory for the installation of Mannington Resilient flooring products.
•Woodsubfloorsmustbecoveredwithaminimum¼”orheavierunderlaymentratedpaneltoassurea successful finished flooring installation.
2.UNDERLAYMENTMany times wood panel subfloors are damaged during the construction process or are not of underlayment grade.Thesepanelsmustbecoveredwithanapprovedunderlayment.Underlaymentpanelsareintendedtobeused to provide a smooth surface on which to adhere the finished floor covering. It must be understood that underlaymentpanelscannotcorrectstructuraldeficiencies.Particleboard,chipboard,constructiongradeplywood,anyhardboardandflakeboardarenotrecommendedasunderlayment.Allhaveinadequateuniformity,poor dimensional stability, and variable surface porosity. Mannington Resilient Floors will not accept responsibility for adhered installation over these subfloors. In all cases, the underlayment manufacturer or underlayment installer is responsible for all underlayment warranties.
3.UNDERLAYMENTREQUIREMENTSPanelsintendedtobeusedasunderlaymentshouldbespecificallydesignedforthispurpose.Thesepanelsshouldhaveaminimumthicknessof¼”.Anypanelsselectedasanunderlaymentmustmeetthefollowingcriteria: •Bedimensionallystable. •Haveasmooth,fullysandedfacesothegrainingortexturingwillnotshowthrough. •Beresistanttobothstaticandimpactindentation. •Befreeofanysurfacecomponentsthatmaycausestainingsuchasplasticfillers,markinginks,sealers,etc. •Beofuniformdensity,porosityandthickness. •Haveawrittenwarrantyforsuitabilityandperformancefromthepanelmanufacturerorhaveahistoryof proven performance. •Anyunevennessatjointsbetweenpanelsmustbesandedtoalevelsurface.Gapsbetweenpanels,hammer indentations,andallothersurfaceirregularitiesmustbepatchedwithManningtonMVP2023underlayment orequivalent.
6

Concrete subfloors 1. Concrete subfloors must be dry, smooth, and free from dust, solvent, paint, marker, wax, grease, oil, asphalt sealingcompoundsandotherextraneousmaterials.Thesurfacemustbehardanddense,andfreefrom powder or flaking. 2. New concrete slabs must be thoroughly dry (at least six weeks) and completely cured. Curing agents, surfacehardenersandotheradditivesmaycauseadhesivebondingfailure.Theseshouldberemovedby sanding or grinding. 3. Allconcreteslabsmustbecheckedformoisturebeforeinstallingmaterial.FollowASTMF-1869 recommendationsforperformingcalciumchloridetest.AlternateTestF-2170witharelativehumiditylevel of 75% maximum. 4. Mannington Commercial heterogeneous flooring products must never be installed where hydrostatic pressure or excessive moisture vapor emissions may exist. Moisture emission from subfloor cannot exceed 3lbs.per1,000sq.ft.per24hours.Manningtonwillnotassumeresponsibilityforfloorcoveringfailuredue tohydrostaticpressureormoisturevaporemissionthatexceedthelevelsstatedabove.Whenusing ManningtonCommercialM-GuardV-88themoisturelevelofconcretemustbenogreaterthan8lbs./1000 sq.ft./24hours(2.27kg/92.9m2/24hours)asdeterminedbyacalciumchloridetestaccordingtoASTM F-1869testmethodand/or90%RHasdeterminedbyASTMF-2170insiturelativehumiditytest.Ifboth testsareperformedtheRHtestisthequalifyingstandard.ThepHmustbebelow10. 5. Thefinalresponsibilityfordeterminingiftheconcreteisdryenoughforinstallationoftheflooringlieswith the floor covering installer. 6. Concrete floors with a radiant heating system are satisfactory, provided the temperature of the floor does not exceed 90°F at any point. 7. Holes,grooves,andotherdepressionsmustbefilledwithManningtonMVP–2023patchingandleveling compound(orequivalent)andtroweledsmoothandfeatheredevenwiththesurroundingsurface.
InstallationExisting resilient floor coverings Toachievemaximumproductperformance,Realities,PrimusandVivendishouldnotbeinstalledoverexistingresilient floor coverings. In the rare cases where removal of the existing resilient floor covering is not an option, theexistingflooringmustbecoveredwithManningtonMVP-2023orotherappropriateporousunderlayment.
NOTE: If the flooring contractor elects to install new floor covering over an existing floor covering, the flooringcontractor assumes all responsibility as to the suitability and continued performance of the existing floor covering.Ifremovalofexistingresilientfloorcoveringisrequired,followallrecommendedResilientCoveringFlooring Institute (RFCI) work practices at www.rfci.com.
NOTE:ConsultMannington’sCommercialInstallationGuideortheRecommendedWorkPracticesbrochurefrom the Resilient Floor Covering Institute for specific instructions on removal of old resilient floor covering. Visitwww.rfci.com
WARNING: Do not sand, dry sweep, dry scrape, drill, saw, beadblast, or mechanically chip or pulverize existing resilientflooring,backing,liningfelt,paint,asphaltic“cutback”adhesives,orotheradhesives.Theseproductsmay contain asbestos fibers or crystalline silica. Avoid creating dust. Inhalation of such dust is a cancer and respiratory tract hazard. Smoking by individuals exposed to asbestos fibers greatly increases the risk of serious bodilyharm.Unlesspositivelycertainthattheproductisanon-asbestos-containingmaterial,youmustpresumeitcontainsasbestos.Regulationsmayrequirethatthematerialbetestedtodetermineasbestoscontent.TheResilientFloorCoveringInstitute(RFCI)document“RecommendedWorkPracticesforRemovalofResilientFloor Coverings” should be consulted for a defined set of instructions addressed to the task of removing all resilient floor covering structures. For more information, visit the Resilient Floor Covering Institute at www.rfci.com.
Cutting and fitting •Itisimperativethatthematerial,adhesiveandjobsitebemaintainedataminimumtemperatureof65ºFora maximumof90ºF48hoursbefore,duringand48hoursafterinstallation. •Ifthematerialhasbeenstoredatcoldertemperatures,itwillbenecessarytounrollthematerialandallowit to relax over night before proceeding with the installation. •Ifthejobsiteiscomplexandrequiresaprecisefit,traditionalpatternscribingtechniquesshouldbeused. •Thematerialmayalsobefitusingdirectscribingtechniques.Oncethematerialhasbeenfit,itwillbe necessary to tube or lap half of the sheet back to expose the underfloor for adhesive application. •Careshouldbetakenwhenfoldingthematerialback.Alwaysfoldthematerialinawideradiustoavoid sharp kinks and creases, which may cause breaks in the product.
7

Adhesive applicationAfter the material has been trimmed to fit the room, it should be tubed or lapped back to expose the underfloor. •Onporoussubstrates,V-82adhesiveshouldbeappliedwitha1/16”wide,1/32”deepspaced1/32”apart notched trowel. •M-GuardV-88canbeusedonbothporousandnon-poroussubstrates.Overporoussubstratesapply with1/16”x1/32”x1/32”Unotchedtrowel.(1.6mmx0.8mmx0.8mm).Overnon-poroussubstratesuse a1/16”x1/32”x5/64”Unotchedtrowel(1.6mmx0.8mmx2mm). •V-95two-componentepoxyadhesivemustbeusedonallnon-poroussubstratesandinareasdemanding highperformance.Followalldirectionsonadhesivecontainer.V-95haslowinitialtack,itmaybenecessary toapplyweights,particularlyintheseamarea,untiladhesivesets.V-95shouldbeappliedwitha1/16”wide, 1/32”deep,spaced1/32”apartnotchedtrowelandthenrolledwitha3/8”nappaintroller. •Theadhesivemustbespreadover100%oftheexposedsubfloor,leavingnogapsorpuddles.Uniform coverage can be maintained by keeping the trowel clean and properly notched. •Aftertheadhesivehasbeenapplied,rollthesheetforwardintotheadhesivetoeliminatetrappingair. •Donotdroporflopthematerialintotheadhesive. •Rollthefloorcoveringwithathree-section100lb.orheavierfloorrollerinbothdirections. •Afterthefirsthalfofthesheethasbeenadheredandrolled,foldbackthesecondhalfandrepeatthe procedure. •WhenusingV-95,theflooringshouldberolledwitha100lb.floorrollerwithinonehouraftertheflooringis installed. •Wait1–2hoursthenre-rollagaintoinsurefullcontactandtoremoveanytrappedair.
CAUTION: Whenprovidingopentime,donotpermittheadhesiveto“skin”overordry.Toomuchopentimewill result in insufficient bonding.
SeamingPrimusandVivendiareavailablein6’,9’and12’widths.Chooseproductwidthtoeliminateunnecessaryseamsandminimizewaste.WhenseamingisrequiredwithManningtonCommercialheterogeneoussheetflooring,thematerials should be positioned Reverse Sheets for seaming.Theconstructionofheterogeneousflooringrequiresthattheseamsbecutusingthetracecuttingtechnique. •Theselvageedgeofonesheetshouldbestraight-edgedapproximately3/8”fromtheedge. •Positionthesheetsinsuchamannerthatthestraight-edgedtopsheetwilloverlaptheuntrimmedbottom sheet and maintain the pattern match. •Carefullytracealongtheedgeofthetopsheetwithautilityknifewithasharpbladeoracuttingtool designed for this purpose. •Removethetrimmedselvageedgeofthebottomsheet. •Oncetheseamsarecut,weighthesheetsandtubeorlapbackthesheetstoexposetheunderfloor. •ApplytheappropriateManningtonadhesiveusingthecorrectlynotchedtrowelover100%oftheexposed underfloor. •Afterprovidingsufficientopentimefortheadhesive,laythestraight-edgedsheetintotheadhesivefirstand then lay in the second sheet. •Rolltheadheredareastowithinabout6”oftheseamlinewitha100lb.three-sectionfloorroller. •Rolltheseamareawithahandseamrollertobringtheseamedgeslevel.Re-rolltheentireadheredarea with the 100 lb. floor roller. •Thoroughlycleantheseamareaandwipedry.
Heat welding heterogeneous flooring •Seamsmaybeheatweldedusingcoordinatingsolidcolorweldrod. •Waitatleast24hoursafterinitialinstallationtoallowtheadhesivetocurebeforegroovingtheflooring product to receive the heat weld rod. •Propertemperatureoftheheatweldingtooliscriticaltothesuccessofthisprocess.Heatweldingisalways dependentonspeedofapplicationandtemperature.Practiceonascrappieceofmaterialtodetermine optimum speed and temperature. •Aftertheweldrodhascooled,trimtheappliedweldrodintwosteps.Alwaysuseatrimplatewithasharpspatula trimknifeforthefirstpass.Trimweldrodflushwiththespatulaknife,beingcarefultonotgougethevinylsurface. •CoatthetrimmedweldrodwiththeQuantumGuardHPmarkertoprotecttherodfromsoil. •ManningtonCommercialHeatWeldRodiscolorcoordinatedforusewithPrimusandVivendi.Contrasting colors may be used if so desired.
8

Chemical seam sealing heterogeneous flooringSeams may be sealed using the chemical seam sealing method. •TheseamswillbesealedwithMLG-33andtheVST–96professionalapplicatortip. •Beforesealingtheseams,makecertainallseamsareclean,dryandfreeofadhesivecontamination. •FilltheVST-96applicatorbottleatleast2/3fullofsealer.Tightlyscrewontheapplicatortip. •Beforeusing,checktheflowthroughtheapplicatoronascrappieceofflooring. •Insertthefinintotheseamcutandlightlysqueezethebottletoapplyauniformbeadofsealer approximately1/8”wide,centeredontheseamcut.Itiscrucialthattheseamsealerpenetratesthefull thickness of the seam cut to insure a proper chemical bond. •Donotwipethesealerfromthesurfaceoftheflooring.
Flash covingAll Mannington Commercial sheet flooring can be integrally self or flash coved at the wall line. Flash coving is the procedureinwhichtheflooringmaterialiscontinuedupthewalltotheheightof4or6inches.Thiscovingtechniqueeliminatesthefloor-walljunctureandprovidesforeasymaintenance.
Whenflashcovingisrequired,followtheserecommendations: •Preparetheareabyinstallingacovefilletstripandacovecap(eitheraluminumorvinyl). •Thecapshouldbefirmlyattachedtothewallatthedesignatedheight.Outsidecornersinthecapshouldbe notchedandformedratherthanmitered.Thiseliminatesasharpedgeatthecorner. •Covefilletstripisavailableinbothplasticandwood.Thefilletstripshouldhaveaminimum11/8”radius. •Thecovestickshouldbepreciselymiteredatallinsideandoutsidecornersandfirmlysecuredintothefloor or the wall. •BestresultscanbeobtainedbypatternortemplatescribingManningtonCommercialSheetflooringwhen flashcovingisrequired.Traditionalpatternscribingtechniquesshouldbefollowed. •Insidecornersshouldbecutnet,withnofullnessorgaps.Outsidecornersmustbefilledusing“boot”plugs. Preformedmetalcornercapsmayalsobeused.
Finishing the job •Coverallexposededges. •Usewoodmoldingorvinylcovebasealongallwalls,cabinettoekicks,etc. •Usetransitionstripsindoorwaysorwherenewflooringjoinsanotherfloorcovering. •Caulkalongtubs,toiletbowls,etc. •Donotwashthefloorfor48hoursafterinstallation. •After48hours,dampmoptoremoveresidualsurfacedirt. •Followappropriatemaintenancescheduleforheterogeneousflooringproducts.
Cautions and miscellaneous •Donotplaceheavyitemsonnewlyinstalledfloorcoveringforatleast48hoursaftercompletionofthe installation.Heavyfurnitureshouldbeequippedwithsuitablenon-staining,wide-bearingcasters. •Furnitureshouldbemovedontothenewlyinstalledfloorusinganappliancehandtruckoverhardboardrunways. •Floorcoveringsubjectedtoexcessiveheatandlightexposureissubjecttothermaldegradation.Use appropriate precautions to minimize potential affects on the floor covering. •Oilorpetroleum-basedproductscanresultinsurfacestaining.Donottrackasphaltdrivewaysealeror automobile oil drips onto the vinyl floor covering. •Usenon-stainingwalk-offmatsatbuildingentrancestoremoveexcessdirtandgritfromfoottraffic—rubber can discolor vinyl floor covering.
9

Luxury vinyl tile
General informationTheseinstructionscoverallfullyadheredinstallationsofManningtonCommercialLVT;Nature’sPathsandNature’sPathsSelectluxuryvinylflooring.Nature’sPathsLockSolidutilizesaproprietarylockingsystemthatisinstalledasa“floating”flooranddoesnotrequireadhesive.Allrecommendationsarebasedonthemostrecentavailableinformation.Theinformationonthissheetprovidesgeneralguidelines.ForcompletedetailsconsultMannington’sProfessionalInstallationHandbookorvisitourwebsiteatmanningtoncommercial.com.Allinstructions and recommendations must be followed for a satisfactory installation. 1. Thefloorcovering,adhesive,androomtemperaturemustbekeptataminimumtemperatureof65°For warmerforatleast48hoursbefore,during,and48hoursafterinstallation.Maximumtemperaturemustnot exceed 100º F. 2. InstallManningtonCommercialLVTonlyafterthejobsitehasbeencleanedandclearedofothertrade apparatus that may damage a finished tile installation. 3. Alwayscheckthecartonstoassurethepatternnumberiscorrect.Tominimizeshadevariation,mixand installtiles/planksfromseveraldifferentcartons. 4. Allsubfloor/underlaymentpatchingmustbedonewithanon-shrinkingwaterresistantPortlandcement patchingcompoundsuchasManningtonMVP-2023. 5. NeverinstallManningtonCommercialLVToverresidualasphalt-type(cutback)adhesive.Itcanbleed through the new floor covering 6. ManningtonCommercialLVTistobeadheredwithManningtonCommercialadhesives;Nature’sPathsand Nature’sPathsSelectshallbeadheredwithManningtonCommercialV-82,M-GuardV-88orV-95Adhesive. Subfloor informationCareful and correct preparation of the subfloor is a major part of a satisfactory resilient floor covering installation. Roughness or unevenness of the subfloor will telegraph through the new floor covering, resulting in an unsightly surfaceandexcessivewearonhighspots.Propersubfloorpreparationandsuitableunderlaymentinstallationareessentialforatrouble-freejob.
A. Wood subfloors1.GENERALAllwoodfloorsmustbesuspendedatleast18”abovetheground.Adequatecross-ventilationmustbeprovidedandthegroundsurfaceofacrawlspacemustbecoveredwithasuitablevaporbarrier.Woodsubfloorsdirectlyon concrete or installed over sleeper construction are not satisfactory for the installation of Mannington Resilient flooringproducts.Woodsubfloorsmustbecoveredwithaminimum¼”orheavierunderlaymentratedpaneltoassure a successful finished flooring installation.
2.UNDERLAYMENTMany times wood panel subfloors are damaged during the construction process or are not of underlayment grade.Thesepanelsmustbecoveredwithanapprovedunderlayment.Underlaymentpanelsareintendedtobeused to provide a smooth surface on which to adhere the finished floor covering. It must be understood that underlayment panels cannot correct structural deficiencies.
Particleboard,chipboard,constructiongradeplywood,anyhardboardandflakeboardarenotrecommendedasunderlaymentforfullyadheredinstallations.Allhaveinadequateuniformity,poordimensionalstability,andvariable surface porosity. Mannington Resilient Floors will not accept responsibility for adhered installation over thesesubfloors.Nature’sPathsLockSolidcanbeinstalledoverallwoodandwoodcompositionpanelsprovidedthattheyaresmooth,flat,structurallysoundandfreeofdeflection.Thisincludesplywood,particleboard,orientedstrandboard(OSB),flakeboardandwaferboard.Ifthesurfaceofthesubfloorisnotsmooth,a¼”underlayment should be installed over the subfloor.
In all cases, the underlayment manufacturer or underlayment installer is responsible for all underlayment warranties.
3.UNDERLAYMENTREQUIREMENTSPanelsintendedtobeusedasunderlaymentshouldbespecificallydesignedforthispurpose.Thesepanelsshouldhaveaminimumthicknessof¼”.Anypanelsselectedasanunderlaymentmustmeetthefollowingcriteria: •Bedimensionallystable
10

•Haveasmooth,fullysandedfacesothegrainingortexturingwillnotshowthrough •Beresistanttobothstaticandimpactindentation •Befreeofanysurfacecomponentsthatmaycausestainingsuchasplasticfillers,markinginks,sealers,etc. •Beofuniformdensity,porosityandthickness •Haveawrittenwarrantyforsuitabilityandperformancefromthepanelmanufacturerorhaveahistoryof proven performance
Anyunevennessatjointsbetweenpanelsmustbesandedtoalevelsurface.Gapsbetweenpanels,hammerindentations,andallothersurfaceirregularitiesmustbepatchedwithMannington2023orequivalent.
B. Concrete subfloors 1. Concrete subfloors must be dry, smooth, and free from dust, solvent, paint, wax, grease, oil, asphalt sealing compoundsandotherextraneousmaterials.Thesurfacemustbehardanddense,andfreefrompowderor flaking. 2. New concrete slabs must be thoroughly dry and completely cured (at least six weeks). Curing agents, surfacehardenersandotheradditivesmaycauseadhesivebondingfailure.Theseshouldberemovedby sanding or grinding. 3. All concrete slabs must be checked for moisture before installing material. Details for moisture testing can befoundintheManningtonProfessionalInstallationHandbook.AnhydrousCalciumChloridetests conductedaccordingtoASTMF1869and/orInSituRelativehumiditytestsasconductedaccordingto ASTMF2170arethemostcommonlyacceptedtestprocedures.
ManningtonCommercialV-82adhesiveshallbeusedforinstallationofManningtonCommercialLVTon poroussubstratesincludingconcretethatisdryperASTMF-18693lbsmaximumMVERorASTMF-2170 75%maximumrelativehumidity.ManningtonM-GuardV-88adhesiveisrecommendedforhighermoisture toleranceof8lbsmaximumMVERor90%relativehumidity.M-Guardadhesivewillnotcorrectpre-existing moistureproblemsinolderconcretesubfloors.ManningtonCommercialV-95adhesiveshallbeusedfor non-poroussubstratesorunderhospitalbeds,heavyrollingloadsorwherehighperformanceisneeded.
ItisrecommendednottoinstallNature’sPathsLockSolidoverconcreteslabswithahistoryofexcessive moistureorhydrostaticconditions.Concretesubfloorsthatexceed8lbsMVERasdeterminedwiththe CalciumChloridetest(ASTMF-1869)or95%RHasdeterminedbytheRelativeHumiditytest(ASTM F-2170)shouldbeconsideredexcessivewithregardstomoistureemissions.Excessivemoisturevapor emissions may contribute to an unhealthy indoor environment.
Mannington will not assume responsibility for floor covering failure due to hydrostatic pressure or moisture vaporemission.Thefinalresponsibilityfordeterminingiftheconcreteisdryenoughforinstallationofthe flooring lies with the floor covering installer
4. Holes, grooves, expansion joints and other depressions must be filled with Mannington 2023 patching and levelingcompound(orequivalent),andtrowelledsmoothandfeatheredevenwiththesurroundingsurface. 5. Concrete floors with a radiant heating system are satisfactory, provided the temperature of the concrete floor does not exceed 90°F at any point. Before installing the flooring, the heating system should be turned on to eliminate residual moisture.
C. Existing resilient floor coveringsTo achieve maximum product performance, fully adhered Mannington Commercial LVT should not be installed over existing resilient floor coverings. In the rare cases where removal of the existing resilient floor coveringisnotanoption,theexistingflooringmustbecoveredwithMANNINGTONMVP2023usedasanEmbossingLevelerorotherappropriateporousunderlayment.
Note:ConsultMannington’sProfessionalInstallationHandbookortheRecommendedWorkPracticesbrochurefrom the Resilient Floor Covering Institute for specific instructions on removal of old resilient floor covering. See RFCI website at RFCI.com
WARNING: Do not sand, dry scrape, bead blast or mechanically pulverize existing resilient flooring, backingorliningfelt.Theseproductsmaycontainasbestosfibersthatarenotreadilyidentifiable.Usingtheabovenon-recommendedproceduresonasbestos-containingmaterialcancreateasbestosdust.Theinhalationofasbestosdust may cause asbestos or other serious bodily harm. Smoking greatly increases the risk of serious bodily harm.
11

Nature’sPathsLockSolidcanbeinstalledovermostexistinghardsurfacefloorcoveringsprovidedthattheexisting floor surface is well bonded and can be made smooth.
Ceramic tile should be made smooth by applying a cementious overlay such as patching or leveling compound.Whentheremovaloftheexistingresilientfloorcoveringisnotanoption,theexistingflooringmustbecoveredwithMANNINGTONMVP-2023usedasanEmbossingLevelerorequivalent.Existingvinylfloorsshouldnotbeheavily cushioned and consist of one layer only.
InstallationA. Nature’s Paths Select TileAswithalltileformats,tilesshouldbe“balanced”intheworkarea.Tilesmaybelaidsquarelyintheworkareaorlaidoutdiagonallyintheworkarea.Ineithercase,theroommustbeaccuratelymeasuredtosquareofftheareaandtodeterminethecenterpointofthearea.Theworkareashouldbedividedintoquadrantsdesignatedbystrikingchalklines.Itiscriticalthattheintersectionofthechalklinesbesquareat90º.Allbordertilesshouldbeofnearlyequaldimensionsandatleastone-halfofatilewide.Carefulandprecisemeasurementsmustbetakenduring tile layout. Adjust this established line to accommodate a balanced layout and then transpose this line to a comfortable width away from the starting wall (approximately 2’ to 3’ wide). Apply the adhesive in this area and begininstallingthetiles.Layalltilesinthesamedirection,alldirectionalarrowspointinginthesamedirection.
B. Nature’s Paths and Nature’s Path Select Plank layoutItisalsoimportanttobalancethelayoutoftheplankformat.Properplanningandlayoutwillpreventnarrowplank widths at wall junctures. Determine layout to prevent having less than ½ plank width or very short length pieces. As with all plank products, lay the long dimension of the plank parallel to the long dimension of the work area. Accurately measure the room to determine the center line, adjust this established line to accommodate a balanced layout and then transpose this line to a comfortable width away from the starting wall (approximately 2’ to 3’ wide). Apply the adhesive in this area and begin installing planks.
C. Combinations – Nature’s Paths Select Tile & Plank layoutThemodularityofManningtonCommercialNature’sPathsSelectallowsforinterestinganddecorativecombinationsoftileandplanks.Whendeterminingproperlayoutforthiscustominstallationitisimportanttoconsider the dimensions of the modular “design unit” and then balance the design unit in the work area. Careful and precise measurements must be taken to insure success with a combination design.
D. Adhesive applicationManningtonCommercialV-82,M-GuardV-88,MT-711orV-95adhesiveisrequiredforadheringManningtonCommercialLVTexceptNature’sPathsLockSolidtoallapprovedsubstrates.
Nature’sPathsLockSolidutilizesaproprietarylockingsystemthatisinstalledasa“floating”flooranddoesnotrequireadhesive.
ForNature’sPathsandNature’sPathsSelectapplytheV-82adhesivewitha1/16”wide,1/32”deep,1/32”apartnotchedtrowel.Beginapplyingadhesiveatthepre-determinedchalklinesworkingintwotothreefootincrementsworkingtowardsanexitoftheroom.TheV-82adhesivehasa30minuteworkingtime.Donotapplymoreadhesivethancanbecoveredinthistime.SetManningtonCommercialLVTintothewetadhesiveandneverworkdirectlyontopofthefreshlyinstalledproduct.Rolleachinstalledsectionofflooringwithathree-section 100 pound floor roller.
Porous surfaces: ManningtonCommercialM-GuardV-88maybeusedeitherwetorasapressuresensitiveadhesiveoverporoussurfaces.Tousewet,applyadhesivewiththerecommendedtrowelandallowtoflashofffor5-10minutesbeforeinstallingflooring.Laytile,plankorsheetgoodsintowetadhesiveaccordingtoinstructions.Adhesivemusttransfertofloorproducttoensureproperbond.Touseasapressuresensitiveadhesive, allow to dry to a tacky state and then install flooring according to instructions within 3 hours.
Non-porous surfaces: tile & plank:Applywiththerecommendedtrowel,allowtodrycompletelyfromyellowtotan,andlayinthetileorplankaccordingtoinstructionswithin3hours.Thehighlyaggressivepressuresensitivegrippreventsslippageandminimizesseamgaps.Dryingtimeis45-90minutesandwillvarydependingontemperature and humidity. Installation over areas of incomplete drying can result in job failure.
12

ManningtonCommercialV-95two-partepoxyadhesiveisusedwithManningtonCommercialLVTovernon-poroussubstratesorwherehighperformanceadhesiveisrequired.Applytheadhesivewitha1/16”wide,1/32”deep,1/32”apartnotchedtrowelandthenrolltheadhesiveridgessmoothwithapre-soaked3/8”naproller.Wait10-20minutestheninstallflooringmaterial.Becarefultoinsurepropertransferasmaterialislaidintotheadhesive.Properadhesivetransfertothebackingshouldbeconfirmedperiodicallybyliftingthematerial.(Notethatfloortemperaturedirectlyaffectssettingtime:Thewarmeritgets,thefasteritsets.)Beginapplyingadhesiveatthepre-determinedchalklinesworkingintwotothreefootincrementsworkingtowardsanexitoftheroom.TheV-95adhesiveshouldbeprovideda30to40minuteopentime.SetManningtonCommercialLVTinto the wet adhesive and never work directly on top of the freshly installed product. Immediately roll each installedsectionofflooringwithathree-section100poundfloorroller.Waitapproximately1hourandthenre-rolltheinstalledsections.DonotpermitV-95todryonthesurfaceoftheflooring.
E. Tile & plank installationNature’sPathsandNature’sPathsSelectshallbeinstalledusingthe“wetset”method.Thismeansthatthetilesandplanksmustbesetbeforetheadhesivebeginstoskinoverorset.Thisrequiresthatthetilesandplanksbeinstalled from a wall working backwards towards an exit. Move the established lines to within 2’ or 3’ of the starting wallandapplytheappropriateManningtonadhesive.Setthetileintothewetadhesive;donotslidetiles/planksintoplace.Thoroughlyrolleachsectionofinstalledproductwitha100poundthree-sectionfloorroller.Donotwalkorwork on newly installed tile except to roll. Continue this process by striking parallel chalk lines, applying adhesive and setting product along the line. Continue this process working towards the exit.
ManningtonCommercialLVTtileshavearrowsimprintedonthebackofthetiles.Layalltilesinthesamedirection, all directional arrows pointing in the same direction.
Aftertheappropriateadhesivehasbeenapplied,beginlayingManningtonCommercialLVTplanksalongthedesignatedstartingline,workingbacktothestartingwall.Planksendsshouldbestaggeredinarandommannersoastoavoidclusteringtheendjoints.Varyingthelengthofthestartingplankcanassuresufficientstaggerofendjoints.Endjointsshouldbestaggeredbyatleast4”.Payparticularattentiontotherandomnessoftheplanklayout, avoid establishing a repeating pattern. Continue installing the planks in a random fashion and complete eachareabeforebeginningthenext.Ifrequireduseakneelingboardtoavoidwalkingonfreshlyinstalledplanks.
F. Cutting and fitting border planks and tilesManningtonCommercialLVTcanbecutwithalargetilecutterorbyusingthescoreandsnaptechnique.Directorpatternscribetheflooringtofitintocomplicated,irregularwallsorpipes,etc.WheninstallingNature’sPathsLockSolid,maintaina5/16”gapatallfixedverticalsurfaces.
G. Finishing the jobFullyadheredManningtonCommercialLVTmustberolledwithaminimum100poundthree-sectionfloorrollerimmediately after installation. Roll the flooring in both directions to firmly seat the tile into the adhesive.
Coverallexposededges.Usewoodmoldingorvinylcovebasealongallwalls,cabinettoekicks,etc.Usetransition strips in doorways or where new flooring joins another floor covering. Caulk along tubs, toilet bowls, etc.
Donotwashthefloorfor48hoursafterinstallation.After48hours,dampmoptoremoveresidualsurfacedirt.FollowappropriatemaintenancescheduleforManningtonCommercialLVT.
Cautions and miscellaneous A. Furniture should be moved onto the newly installed floor using an appliance hand truck over hardboard runways. B. Do not place heavy items on newly installed floor covering for at least 24 hours after completion of the installation.Heavyfurnitureshouldbeequippedwithsuitablenon-staining,wide-bearingcaster. C. Floorcoveringsubjectedtoexcessiveheatandlightexposureissubjecttothermaldegradation.Use appropriate precautions to minimize potential affects on the floor covering. D.Oilorpetroleumbasedproductscanresultinsurfacestaining.Donottrackasphaltdrivewaysealeror automobile oil drips onto the vinyl floor covering. E. Useanon-stainingwalkoffmats.Rubbercandiscolorresilientfloorcoverings.
13

Vinyl composition tile and premium tile
General informationAlwaysstoreManningtonCommercialVinylCompositionTile(VCT)andPremiumTile(PT)inaprotected,dryinteriorarea.Donotdouble-stackpallets.Keepthejobsite,adhesives,andtileataminimumtemperatureof65°Fandmaximumof85°Fforatleast48hoursbeforeinstallation.Maintainthisminimumtemperatureduringtheinstallationandfor48hoursaftertheinstallation,toassureproperbondoftheadhesives.
StoreVCTandPTonadry,levelsurface.DonotstackVCTorPTcartonsmorethanfivecartonshigh.Becarefultostackcartoonsinstraighttiers.Neverdouble-stackpalletsofVCTorPTcartons.Storepalletssotheyareprotectedfromaccidentaldamagefromforklifttrucksorothertraffic.Protectionofthecartoncornersishighlyrecommended.
If you intend to cover a concrete slab with resilient floor covering, always test the concrete slab for the presence of moisture.
Therequiredquantitativetestsarethecalciumchloridetestortheinsiturelativehumiditytest.Themaximumacceptablemoisturevaporemissionspecificationisnottoexceed8lbsper1,000sqftper24hoursornotexceed85%RHforallVinylCompositionTileandPremiumTileproductswheninstalledwithManningtonM-GuardV-11VinylCompositionTileadhesive.ThisonlyappliestoManningtonCommercialVCTandPTinstallationsusingM-GuardV-11adhesive.Ifanyotheradhesiveisspecifiedorselected,followtheadhesivemanufacturer’s warranty and recommendations regarding acceptable maximum moisture emission levels.
NOTE: Moisture testing can only indicate conditions at the time of the test and cannot predict any future changes in moisture levels. Neither Mannington nor the flooring contractor can be responsible if moisture levels change in the future.
InstallManningtonVCTandPTonlyafterthejobsitehasbeencleanedandclearedofothertradeapparatusthatmaydamagethefinishedtileinstallation.Thelightingonthejobsitemustbesufficienttopermitinspectionand preparation of the underfloor, layout, installation, cleanup, and final inspection of the tile. Always check the cartonstoassurethepatternnumberiscorrectandthatthereisasufficientquantityoftilefortheinstallation.Makecertainthelotnumbersarethesameonallcartons.Tominimizeanyminorshadevariationonlargeinstallations, mix and install tiles from several different cartons. If the shade variation is extreme, do not install the tile.
NOTE:PleasebeawarethatinstallingVinylCompositionTile(VCT)andPremiumTile(PT)overexistingflooringmay reduce its excellent indentation resistance.
Tile layoutYoumaypositionVCTandPTeithersquareordiagonaltotheroom.Inbothcases,layoutiscritical.Allbordertilesshouldberelativelyeveninwidthand,ifpossible,atleastone-halfofatilewide.Additionally,ifyoulaythetileonadiagonal,bordertilecolorand/orgrainingagainstthewallshouldbeconsistentwithinthearea.
14
Dividetheroomintoequalquadrants.Because most sites will not be perfectrectangles and will have irregular walls, begin laying the tiles from the center of the work area.Todeterminethecenter,takeaccuratemeasurements of the length and width of the room, disregarding small offsets, alcoves, etc. Find and mark the midpoints of the end
walls (AC & BD) and strike a chalk line betweenthesepoints.Thislinebisectsthework area across the length of the room.MeasurelineAC/BDtofindandmarkthemidpoint (m).

Square layoutNOTE:DonotinstallVCTorPToverexistingVCTorPTbelowgrade.
Diagonal layoutIfyouintendtolaythetileonadiagonal(45°)totheworkarea,squaretheroomasoutlinedinthediagram.
Adhesive recommendations & applicationM-GuardV-11isapremiummoisture-resistantpressure-sensitiveadhesivedevelopedspecificallyforinstallingManningtonVinylCompositionTile(VCT)andPremiumTile(PT)overapprovedsubstrates.IntendedUse:M-GuardV-11maybeusedonconcreteorapprovedandappropriatelyconstructedwoodorwoodcomposition
15
Usingpointmasthecenter,measureoutanequaldistancefromthecenteronbothsides of the midpoint (usually 3” to 5”) and mark points m1 and m2.
Usinganyconvenientmeasurementgreater than m to m1, strike two arcs perpendiculartolineAC/BDfrompointsm1 and m2.
Strike a chalk line between the arcs from theintersectionofthearcs.Thislinewillpass through point m at right angles to lineAC/BD.Oncetheworkareaisdividedintoequalquadrants,thetileshouldbedry-laid,orprecisemeasurementstakentodetermine the size of the border tile. Adjust linesAB/CDand/orAC/BDtoensureequalbordertile(atleastone-halfofatile).
MarklineAB/CD,creatingpointsm3andm4.Usingpointmasacenter,measureoutanyworkabledimensionalonglinesAC/BDandAB/CD.Typically,themeasurementwillbeequaltomtom1andm2.
Usingadimensiongreaterthanmtom1,etc., strike an arc from m1, m2, m3, and m4.
Connect the intersecting points to create lines ADandBC.Dry-laytileortakeaccuratemeasurements along lines AD and BC to determine the size of the border tile. If proper tile size or color is not obtained, adjust the diagonallines.Thegrainofbordertileslaidona diagonal should run in the same direction as the grain of the corresponding tile.

subfloors/underlayments.M-GuardV-11issuitableforuseovernewconcretesubstrateswithin-situmoisturemeasurementsof85%RHasmeasuredbyASTMF2170ormoisturevaporemissionrate(MVER)ofupto8lbs(3.6Kg)perASTMF1869,andapHbelow11.(M-GuardV-11isnotdesignedtobeusedoverfloorswithmoisturevaporemissions(MVE)fromwaterofintrusionorhydrostaticpressure.Itisdesignedonlyforslabswithhigh vapor emission from water of hydration.) All concrete slabs on or below grade must have a functioning vapor barrier directly under the concrete slab.
Useofadhesivescontrarytothisrecommendationisstrictlytheresponsibilityoftheflooringcontractorand/orthe adhesive manufacturer.
Application •Makesurethesubflooriscleanofdirt,paint,oils,wax,etc.Thesubfloormustbesmoothandlevelbefore starting the installation. •Maintaintheadhesive,tile,andjobsiteataminimumtemperatureof65°Fandamaximumtemperatureof 100°Fduringtheinstallation,andfor48hoursaftertheinstallation. •Afteryoucompletethetilelayout,applyadhesivetoone-halfoftheworkarea.Exercisecautiontomaintain theworkinglines.Ifnecessary,re-striketheworkinglinesovertheadhesiveafteritdriesclear. •ApplyM-GuardV-11withatrowelnotched1/16”wide,1/32”deep,and1/32”apart.M-GuardV-11canalso be applied using a roller or a brush. •Applyadhesiveevenly,withnobarespotsorheavypuddles.Avoidoverlappingedgesofadhesive. •Beforeinstallingtile,allowM-GuardV-11adhesivetodeveloptackanddry.Thisnormallytakes45to50 minutes.Humidityand/orsubfloorporosity,however,alwaysdictatetheproperopentime. •Settilesfirmlyagainstadjoiningtilesandpressintoadhesive.Donotslidetilesintoplace. •Youcanremovefreshadhesivesmearswithaclothdampenedwithwater.Driedadhesivemaybecleaned using mineral spirits and a clean cloth.
Tile installationAftertheM-GuardV-11adhesivedries,beginlayingtileattheintersectionoftheworkinglines.Placethefirsttilesquarelyagainsttheworkinglines.Sincethepositioningofthistiledeterminestheaccuracyoftheentireinstallation, it is critical to lay the starter tile exactly on the lines.
Onceyouhavesetthefirsttilefirmlyinplace,beginlayingtilesoutwardalongbothguidelines.Placetilesfirmlyagainst adjoining tiles and press into adhesive. Do not slide into place. Keep tiles on the guide line.
Afteryouhavepositionedseveraltilesalongtheworkinglines,beginstair-steppingtilesintothefieldarea.Thiswillkeeptilessquaretoeachotherthroughouttheinstallation.Laytilesuptowherebordertilesmustbecuttofit. Apply adhesive to the second half of the work area, let it dry clear, then continue laying tile.
Cutting & fitting border tilesYoumaycutbordertiletofit,usingseveraltechniques.Themostcommontechniqueforsquarelayoutsistoplaceafulltiledirectlyoverthelastfullfieldtile.Usinganotherfulltileplacedfirmlyagainstthewallandoverthe border tile, score the border tile. Be certain the graining of the border tile is properly aligned. Cut the border tile along the scored line and position factory edges of tiles together with the cut edge against the wall.
Useatemplatecutfromstiffcardboardorhardboardtocutbordertileindiagonallayouts.ForManningtonCommercial12”VCTandPT,cutthetemplatetothediagonaldimensionofthetile,approximately17”square.Useaccuratemeasurementstomeasureandcutthetemplate.Usethetemplateinplaceofthetileandproceedas outlined above.
You may direct scribe or pattern scribe the border tile for irregular walls, pipes, etc. For intricate cuts, werecommend you heat the tile from the back and cut with a sharp utility knife along the scribed marks.
Finishing & maintenanceDo not wash or scrub the floor for at least 4 or 5 days after installation, to allow the floor tiles to bond to theunderlayment/subfloor.Keepheavyfurnitureandequipmentoffthefloorforatleast48hourstoallowtheadhesive to set. Sweep or vacuum thoroughly, and remove any residual adhesive with a clean, white cloth dampenedwithmineralspirits.Applyaminimumoftwocoatsofahigh-qualitycross-linkedacrylicfloorpolish to temporarily protect the floor until regular maintenance procedures can begin.
16

Rubber tile
IntroductionTheseinstructionsaddresstheinstallationofMannington’sRubberTile.
ColorScape/ColorSpecRubberTileisavailablein181/8”x181/8”(460.38mmx460.38mm).
ImportantWithrespecttothetypeofconcreteorothercementitiouspatchingmaterialusedinthesubfloor,responsibilityfor a warranty and performance of the subfloor belongs to the concrete or cementitious patching material manufacturer and the installer.
Rubber tile installationOnlyApprovedAdhesivesMustBeUsedForManningtonWarrantytoApply: •MR-721epoxyadhesive–solventfree •MR-725polyurethaneadhesive–solventfree •MR-911AcrylicAdhesive–solventfree
A. Checkorderforcorrectmaterial,color,profileortextureandsufficientquantity. B. Store tiles off the ground and out of the elements. Do not stack skids, or stack other materials on tiles. C. Ifthetilesaretobere-stacked,thetilesmustbestackedprofiletoprofileandbacktobacktoavoidmold release or wax transfer from the profile side to the back side. D.Priortoinstallation,thetilesandadhesivemustbeconditionedtoanambienttemperatureattheactualjob siteofnotlessthan65°F(18°C)tonotmorethan85ºF(29ºC)foratleast48hours.Insevereclimatesan8 day conditioning period may be necessary.
Subfloor preparationForAdditionalRequiredInformation,refertoASTMF-710–PracticeforPreparingConcreteFloorstoReceiveResilient Flooring.
A. Concrete subfloorOn-gradeandbelow-gradesubfloorsmusthaveasuitablevaporbarrier,asrecommendedinACI302.1installeddirectly below the slab. New concrete subfloors should be allowed to cure a minimum of 6 weeks.
Moisture testingManningtonrequires,beforeourrubberflooringisinstalled,thattheconcretesubfloor,regardlessofage,betestedtoverifythatexcessmoistureconditionsdonotexist.Twotestsarerecommended,eitherASTMF-1869(CalciumChloride)orASTMF-2170(Insitu%RH).TheManningtonrubberflooringcanbeinstallediftheASTMF-1869testresultis3lbsorbeloworifthe%RHvaluepertheASTMF-2170is75%orbelow.Testkitscanbepurchasedfromyourlocalflooringsuppliesdistributor.DONOTINSTALLifmoisturelevelsareaboverecommended levels.
1. ConcreteSubfloorCondition:Theconcretesubfloorshouldbedry,clean,non-scaledandfreeofdustand flattowithin1/8”in10linearfeet.Thesurfaceshouldalsobefinishedtoatexturesimilarto100grit sandpaper. If the concrete is glazed or very smooth, it must be thoroughly sanded or shot blasted to assure proper adhesion. Remove all dust by vacuuming.
Adhesion (bond) testA bond test of at least 24 hour duration should be performed. Recommended to cut Mannington tile into 9”x 9”piecesandinstallthemusingtherecommendedadhesive.Thesetestpatchesshouldremaininplaceforaminimum of 24 hours to determine if there is good bond to the subfloor and also to observe if there is sufficient transfer of adhesive both to the subfloor and to the back of the floor tile. Removing the test patches from the subfloor should be difficult with most of the cured adhesive remaining bonded to the subfloor. If proper bond is not accomplished, do not proceed with the installation.
17

2. Curing compounds, bond breakers or sealers will seriously inhibit the adhesion of the tile to the subfloor. Theyshouldbecompletelyremovedbyscarifying,grinding(withaterrazzogrinder)orbyshotblasting.For moreinformation,contactU.S.FilterBlastracblastingmachine,Blastrac,ismadebyU.S.FilterBlastrac; (405)478-3440;(800)256-3440;www.surfacepreparation.com. 3. OilorGreaseonthesubfloor.Greaseoroilstainmustbethoroughlywashedwithadegreaserand thoroughly flushed. If the concrete subfloor is impregnated with oil or grease, do not attempt to install ManningtonRubberTile. 4. ManningtonCommercialdoesnotwarrantinstallationofManningtonRubberTileoveroldfloorcoverings (such as vinyl tile), coatings and adhesives. Should the installer elect to install over old floor coatings or coveringssuchastile,adhesivesorpaint,adequateadhesionmaynotbeachieved.Oldblackasphalt“cut back” adhesives are harmful to a good bond and must be mechanically removed or properly covered with approvedcementitiouspatchingcompound(see#9below),suchasManningtonMVP2023orequivalent. ManningtonMR-725polyurethanecanbeusedovercut-backresidueleftafterthebulkofithasbeen scrapedoffthefloor.DonotuseMannington’sMR-721epoxyorcontactadhesivesovercut-back adhesive residue. 5. InstallingManningtonRubberTileoverceramictilesisnotrecommended.However,whentheceramictileis well adhered and the the ceramic glaze is sanded thoroughly and when the grout lines are filled and leveled properlywithacementitiousleveler,theinstallationmaybesuccessful.Overterrazzosubfloorsadhesionis sometimes difficult due to waxes burnished into its very smooth surface. If installation over terrazzo is contemplated, the minimum preparation should be shot blasting or terrazzo grinding to remove all waxes. Remove all dust by vacuuming. An adhesive bond testing must be performed. Mannington Bond or ManningtonMR-721epoxyorMR-725polyurethaneadhesivesarethebestsuitedadhesivesforgood bond, but caution is recommended. Mannington does not warrant our products when installed over old floorcoverings.AriskassessmentmustbemadeandagreeduponbetweenFlooringContractor,General Contractor,ArchitectandOwnerbeforeproceeding. 6. Cracks,depressions,“saw-cut”constructionjoints(non-moving)androughareasshouldbecleanedand filledwithatopqualitycementitiouspatchingcompoundsuchasManningtonMVP2023orequivalent. IfManningtonMR-721epoxyisusedasacrackfiller,plowtheepoxywellintothedepression.Allowto cure completely. Sand the cured epoxy for better adhesion. Do not use gypsum based leveling or patchingcompoundsunderanycircumstances.Useonlycementitiousbasedtrowelablepatching or self leveling compounds. 7. No attempt should be made to lay Mannington rubber tile over an architectural concrete expansion joint thatisdesignedtomove.Instead,thetileshouldstopbeforethejointonbothsides.Thejointshouldbe protected with a metal cap fastened on one side allowing the joint to move without restriction. 8. Exposuretoextremeheatfromsun,blowersorradiantheatontheflooringduringtheadhesivecurewill/ can cause the tiles to expand and peak. During the period of 24 hours before installation and throughout the adhesive curing period, the subfloor temperature should be at 72º F (24º C) and must not be colder than65ºF(18ºC)orwarmerthan85ºF(29ºC).RefertocuretimechartinSectionIVB.2.Directsunlight shouldbeblockedduringinstallationandforthefirst8–12hoursofadhesivecuretime.Alternatively,the installation could be scheduled in the evening and during the night.
B. Wood subfloors 1. Woodsubfloorsmustbedouble-layerconstructionplywoodwithaminimumtotalthicknessof1”. Hardboard,Luan,MDF,chipboardsorotherengineeredwoodsubstrates,arenotstrongorstableenough and are not recommended. 2. Woodsubfloorswillrequireventilationwhenlaidoverconcretetoavoidwetanddryrot.Atleast18”of airspace and air circulation between an on grade or below grade concrete subfloor and the wood subfloor is mandatory. 3. Plankedwoodfloorsusedasasubfloormay“telegraph”throughaManningtonRubberTileinstallation.Itis best to install plywood over plank floors. 4. Unevennessofwoodsubfloorsshouldbeplanedormachinesanded.Removealldustbyvacuuming. 5. Loosesubfloorpanelsshouldbesecuredbynailingorrefasteningwithscrews. 6. Protrudingnailsorscrewsshouldbeleveledorremoved.Holdfastorscrewnailsshouldbeused. 7. Dents,seamsandholesmaybeleveledwiththeManningtonMR-721epoxyadhesiveorcementitious leveling compound. After cure, the surface adhesive must be sanded to roughen its smooth surface. 8. Plywoodsubfloorsshouldbescreweddown,stapledorsecuredusingflooringringnails.Useaminimum of1fastenerper9squareinchesofsubfloor.
18

Note:TheuseofcementboardsuchasHardieBackerisacceptable.BesuretosmoothallpointsanddimplesmadebyfastenerswithacementitiouspatchingcompoundsuchasManningtonMVP2023orequivalent.
A. Sufficientlightisessential.Lightingconditionsmustbebrightenoughtoobservecolorconsistency, registrationandseamingqualityduringdryfitinspection. B. Dryfittingrubbertileisrequired.Dryfitanentirefloorbysections,positioningthetilespointtopoint.Tile willdisplayaraisedlocationmarkinonecorneronthetopsurface.Positionthetilesothattheraised locationmarksareallinthesameposition.LineupthefirstrowofManningtontilewithachalkline.Laya second row again point to point.
NOTE:Anydefectsinthetile,includingcolorvariation,registration,squarenessetc.mustbereportedbeforethetile is adhered or the installer will be liable for replacement labor and material.
Tile adhesive descriptions & proceduresOnlyapprovedadhesivesmustbeusedforwarrantytoapply.
A. Adhesive descriptions 1. ManningtonMR-721epoxy–solventfree.ThisisthestandardManningtonRubberTileadhesivewhere solidstrengthbutaflexiblebondisrequiredforheavydutyfootandvehicletraffic.Above,onorbelow grade concrete or wood subfloors, this adhesive has high water resistance to surface flooding. 2. ManningtonMR-725polyurethane–solventfree.Thisadhesivewilloperateattemperaturesdownto50ºF (7º C). It can be used where some traces of asphalt or “cut back” adhesive remain in the pores of the slab after most of the “cut back” has been scraped off. 3. MR-911AcrylicAdhesive–ForusewithManningtonRubberTile,RubberandVinylStairTreads.MR-911 AcrylicAdhesiveisawater-resistant,solventfree,highstrengthwaterbasedacryliclatexadhesivespecially formulated for the installation of Mannington Commercial rubber flooring and vinyl and rubber stair treads oncleanporousandnonporoussurfaces.MR-911issuitableforuseonsuspendedwoodfloors,dry concrete floors and staircases above or on grade where concrete substrate moisture does not exceed manufacturer’srecommendations.ConcretesubstratemoisturemustbetestedbyusingeitherASTM F-1869CalciumChlorideTestMethodwithresultsnotexceeding3poundsper24hoursper1000square feetorASTMF-2170DeterminationofRelativeHumiditywithintheConcrete(insitu)TestMethodwith results not exceeding 75%
B. Two part adhesive mixing instructions 1. TwoPartAdhesive–ThepackagedunitsofepoxyorurethanearemarkedAorB.TheA&Bunitshouldbe mixedtogetherthoroughlyandwitharotarymotionwhileatthesametimeliftingfromthebottom.Usean electric drill and paddle for thorough mixing. After mixing, the color of the adhesive must be uniform (i.e., nostreaking).NevermixPartsAandBonthesubflooritself.Oncetheadhesiveismixeditmustbe removed from the container to slow its curing time – pot life ranges between 15 and 20 minutes for ManningtonMR-721.ThepotlifeforManningtonMR-725polyurethaneis40minutes. 2. Temperature–Thesubfloortemperatureaffectsthecuringrateoftwopartadhesives.Curingwilltakeplace between65ºF(18ºC)and85ºF(29ºC).Theidealtemperaturefortheadhesivecureis72ºF(24ºC).This willnormallytake8-12hours.At65ºF(18ºC)curewilltakeapproximatelythreetimeslongerforepoxyand abouttwiceaslongwithurethane.At85ºF(29ºC)curewilltakeapproximatelyhalfthetime.Thechart below shows approximate temperature and appropriate cure times of Mannington’s epoxy and urethane adhesives:
Mannington MR-721 Actual Floor Temperature
MinimumRequiredCureTime 65ºF(18ºC) 72º F (24º C) 85ºF(29ºC)
Heavy Rolling Stock 4 Days 4 Days 3 Days
FootTraffic 12 Hrs. 7 Hrs. 6 Hrs.
Mannington MR-725 Actual Floor Temperature
MinimumRequiredCureTime 65ºF(18ºC) 72º F (24º C) 85ºF(29ºC)
Heavy Rolling Stock 5 Days 4 Days 4 Days
FootTraffic 16 Hrs. 7 Hrs. 6 Hrs.
19

3. Pourtheentiremixedcontentsoutofthecanimmediatelyontothesubfloorintheareasofapplication. Troweltheadhesivewitha1/16”x1/16”x1/16”squarenotchedtrowel.Yields:Theaverageadhesiveyield fromagallonunitofMR-725epoxywillbeapproximately100squarefeetpergallon,dependingonthe smoothnessofthesubfloor.CoverageforMR-725urethaneadhesivewillbeapproximately135squarefeet per gallon. Rough subfloor surfaces and improper or worn trowel notching will affect the adhesive spread rate. Do not apply adhesive to the tile.
Twopartadhesiveaverageworkinglifeisonehouratatemperatureof72ºF(24ºC).Tilesmaybelaidshortlyafter spreading as no open time is needed. However, if the spread adhesive is allowed to remain open 15–20 minutes the adhesive will develop more initial tack and will help reduce tile slipping.
4. Laytilespointtopointasperdrylayinginstructions(SectionIII). 5. Rolltheadheredtileswitha100lb.rollerdiagonally,slowly,intwodirections.Thisshouldbedonesoon after laying the tile into the adhesive. . 6. Asecondrollingshouldbedoneonehourafterthefirstrolling.Weightcornerswithsandbags,oruseduct tape on corners if necessary. Hand roll all seams with a narrow 2” hand roller to level the tile edges to one another. A third rolling may be advisable if the subfloor temperature is cool. 7. Sweep upon completion of laying to detect dropped or oozing adhesive. Remove any such adhesive with waterormineralspiritsonacloth.Donotuseturpentine(seeSection1ofMaintenanceInstructions).Note: Remove adhesive before it cures. It is nearly impossible to remove adhesive after it cures without damaging the tile surface. 8. Anunshelteredbutroofedinstallationshouldbeprotectedfromtheheatofthesunorfromwetnessforat least8-12hoursafterinstallation.Layalightcoloredopaquecoverovertheinstallationifnecessaryfor adequateprotectionfromthesunandwetness. 9. No pedestrian foot traffic should be allowed before at least 12 hours after laying and for a longer period if thesubfloortemperatureisbelow72ºF(24ºC).Thesecuretimescanbedoubledortripledasthe temperatureapproaches65ºF(18ºC)(seeadhesivecurechartonpreviouspage).Scaffoldingorwheeled conveyances must not be allowed for at least 4 days (see adhesive cure chart). Construction foot traffic is possibleifplywood(one-inchplywood)islaidovertheentireinstallationafterthesecondrollingplusat leastandafter8hours.Trafficdirectlyonthetileweakensorbreakstheadhesivebondandwillcausetiles to buckle or lift within one year of installation if traffic is allowed too soon.
20

Rubber and vinyl wall base
IntroductionTheseinstructionsaddresstheinstallationofManningtonOptimumEdge™(TypeTS),PremiumEdge™(TypeTP)orManningtonEdge™(TypeTV).
ManningtonOptimumEdge™(TypeTS),isavailablein21/2”,4”,and6”,PremiumEdge™(TypeTP)orManningtonEdge™(TypeTV)areavailableinheightsof21/2”,4”,41/2”and6”andcovedortoelessprofiles.
PreparationTheflooringinstallationmustbecompletedbeforeinstallingOptimumEdge™,PremiumEdge™,orManningtonEdge™wallbase.Theflooringmustbeinstalledclosetothewalltoprovideevensupporttothebaseandinsureatight,smoothfit.Thedrywallorotherwallsubstratemustextenddowntowithin¾”ofthefloor.
Priortoinstallation,allflooringproductsandadhesivesmustbeconditionedtoanambienttemperatureattheactualjobsiteofnotlessthan65°F(18.3C)normorethan85°F(29.5C)foratleast48hours.Surfacetemperature should be between 63° F (17.2 C) and 72° F (22.2 C) during installation and curing time.
Avoid excessive heat exposure until adhesive is thoroughly set. Coiled or rolled base should be unrolled and allowedtolieflatfor24hoursbeforeinstallationtoregainnormalshape.Thewallsurfacemustbestructurallysound, clean, dry, smooth, and free of oil, grease, rust, paint, varnish, shellac, or any other foreign substances that may interfere with proper bonding. Cracks, holes, and wall imperfections should be filled and smoothed with latex underlayment.
Donotinstallovernon-poroussurfacessuchasvinylwallcoverings,laminatedmasonite,plasticlaminates,somepaintedsurfaces,andanyothernon-poroussurface.Eitherremovethenon-porouscoveringtoexposeaclean,dry,poroussurfacebeforeinstallingoruseacontactcementforinstallationtonon-poroussurfaces.
OndryandporoussurfacesthebaseshouldbecementedtothewallwithManningtonMR-101Acrylicadhesive.
THEUSEOFANYOTHERADHESIVEWILLVOIDManningtonCommercialWARRANTY.
Application A1/8”V-notchedtrowelisrecommended.Adhesiveshouldbespreadonthebackofthebaseandtowithina¼”fromthetoporspreadonthewall.Ifusingacartridgethenbeadtheadhesivetoapproximatelyaninchfromthetop.Ifyouareusingamultiple-holenozzleonyourcartridge,usea2-holenozzlefor2.5”,a3-holefor4”anda5-holenozzlefor6”.
Ifthewallorfloorisuneven,youmightneedtotrimsomewallbaseendsbeforeadjoiningpieces.Useasharprazor-edgedutilityknifetotrim,cuttingfromthefacetotheback.
Apply wall base to the wall within 20 minutes after spreading adhesive. Be sure to “work” the wall base back towardyourstartingpoint.Thisslightlycompressesthepiecestogetherandeliminatesthepossibilityofgappingattheseamsduetoimproperinstallationtechnique.Alwayspressfirmlytowardthelastpieceyouinstalledusingyour hand and a clean rag or a clean hand roller. Base that is installed on a curved or irregular surface may need bracing until adhesive sets.
Outside cornersToformoutsidecorners,foldthebaseattheproperpointandscribethebacksidewithaV-knifeorawallbasegougingtool.Removenomorethan20%ofthebasethickness.WheninstallingRubber,TypeTPorVinyl,TypeTVwallbase,heatthecutbacksideareawithahotairgun.Applyheatcarefully,excessiveheatwilldeformorblisterthebase.Creasethebaseatthefoldwithyourhandsorahandroller.Letcooltothetouch.Applyadhesiveandinstall.Pressfirmlytothewallandbraceifneeded.Useawetcleanclothtocoolthebaseifhotfromheatingprocess.HeatingtheOptimumEdgeTypeTSwallbaseisnotnecessary.
Install all corners first. Always maximize the length of the wall base measured from the edge of an outside corner.Extend the job formed corner wall base length on each side of the corner at least 6 inches … or more, if possible. Thelongerthelengthofwallbaseextendsbackfromthecorner,thebetter.
21

Inside cornersToforminsidecorners,markonthebackofthebasewherethecornerwillbe.Useastraightedgeandautilityknife or wall base gouging tool to cut the back of base. Remove no more than 20% of full thickness. If installing covedbase,cutasmall90°triangularwedgefromthetoeatthecornerpoint.WheninstallingRubber,TypeTPorVinyl,TypeTVwallbase,heatthebackofthebaseatthecornerpointwithahotairgun.Applyheatcarefully,excessive heat will deform or blister the base. Fold base, apply adhesive while still warm to the touch, and press thecornerintoplace.Carefullypushthetoeofthebaseintothecorneruntilyourcuttrianglecloses.Pressfirmlyto insure good adhesive contact. Hold a wet cloth to base to cool. Again, it is important to maximize the length ofthebasethatextendsoutfromtheinsidecorner.HeatingtheOptimumEdgeTypeTSwallbaseisnotnecessary.
Clean upRemoveallexcessadhesivebeforeitdries,usingaclothdampenedwithwater.Oncedry,itisdifficulttoremove.Mineralspiritsmayhelp.MineralspiritsisflammableandcontributestoVOC.Usesparinglyandwithadequateventilation.
Recommended adhesiveManningtonMR-101Acrylicadhesiveisawhite,solvent-free,environmentallysafebaseadhesivetobeusedwheninstallingonanyclean,dry,poroussurface.Fornon-poroussurfaces,usecontactcement.
22

Carpet Installation Procedures
Mannington Infinity® and Infinity® RE modular carpet tile
ImportantRoom temperatures must be a minimum of 65° for 24 hours prior to installation. Floor temperature can usually vary5-10°lowerthanroomtemperature.Modulesmustbeconditionedtoroomtemperaturefor24hourspriortoinstallation.Relativehumiditymustbebetween12%-65%maximumfor24hourspriortoinstallation.Theseconditionsmustalsobemaintainedfor48hoursaftercompletionofinstallation.
Surface preparationDust, dirt, debris, and noncompatible adhesive must be removed before installation begins. Surfaces must be smoothandlevelwithallholesandcracksfilledwithalatexbasedPortlandcementpatchingcompound.
Latex adhesivesMustberemovedandfloorssandedorcoveredwithaskimcoatofPortlandpatchingcompound.LatexadhesivemayalsobecoveredwithTriSealadhesivesealer(800-367-4583).
Note: Failure to remove or seal old latex adhesive may cause installation failure, plasticizer migration, shifting, buckling or edge curling; these conditions will not be covered under warranty.
Existingflooringmayreducetheirexcellentindentationresistance.Theseproductsmayalsobeinstalledoverproperly prepared and approved wood panel or wood composition panel underlayments on wood subfloor systems.
Cut back adhesivesMustbewetscrappedandcoveredwithTriSeal(800-367-4583).
Note: Failure to remove or seal old cut back adhesive may cause installation failure, plasticizer migration, shifting, buckling or edge curling; these conditions will not be covered under warranty.
Moisture testingSubfloor surfaces must be tested for moisture content. It is the responsibility of the general contractor to perform moisturetestpriortostartingtheinstallation.MANNINGTONrecommendstheRelativeHumidityASTM-F-2170testbeperformedtodetectthepresenceofmoisture.Acceptableresultsrequirethatmoisturecontentdoesnotexceed 75% maximum relative humidity. Mannington will also accept the Calcium Chloride test at 3 pounds or less,howevertheRHASTM-F-2170testisthequalifyingstandard.AlkalinitymusthaveamaximumPhlevelof9orless.ContactTechnicalServicesforcorrectivemeasuresforsubstratesthattestover9Ph.Note:Moistureemissionsinexcessoftherecommendedlevelscancausetheadhesivetochemicallybreakdownandfail.Thiscondition can result in shifting, bucking, or edge curling of the modules.
SubfloorsNew Concrete –Newconcretemustbefullycuredandfreeofmoisture.Newconcreterequiresacuringperiodofapproximately90days.Testformoistureandalkalinitymustbeperformed.pHshouldregisterbetween5and9.
Old Concrete –Oldconcreteshouldbecheckedformoisture.Dry,dusty,porousfloorsmustbesealedwithanappropriate dust sealer.
Wood – Woodfloorsmustbesmoothandlevel.Iffloorisuneven,anapprovedunderlaymentmayberequired.Oldfinishesmustbetestedforcompatibilitywithadhesivesorremovedandporouswoodsealed.
Terrazzo / Marble – LevelallgroutlineswithalatexbasedPortlandcementpatchingcompound.Glossysurfaces must be sanded for adhesive bond.
Hard Surfaces –Tilesmustbewellsecuredtothefloororremoved.Broken,damaged,orloosetilesmustbereplaced.WaxmustberemovedfromVCTbeforeapplyingadhesive.
23

Old carpetRemoveoldcarpetandcheckadhesiveforcompatibility.IfunsureremoveorcoveradhesivewithaPortlandbasedpatchingcompoundorencapsulatewithTriSeal(800-367-4583)
Full adhesive methodsMannington recommends a full spread adhesive system for the most trouble free installation. Modules can easily shift during the installation process or by heavy rolling traffic if not fully adhered to the substrate. Fully spread Mannington’sINFINITYpressuresensitiveadhesiveinstartingquadrantusinga“U”notchtrowel1/16x1/32x1/32(1/16”notchwidth,1/32”notchdepth,1/32”toothtipwidth)oranequivalentthatwillachievethepropercoverage.Allowtodrysoadhesivedoesnottransferwhentouched.Proceedwithtileplacement.Spreadrateshouldbeapproximately25sq.yds.pergallonfortrowelonapplications.
Note:Inadequateamountsofadhesivecancausemodulestoshiftandmoveandwillnotbecoveredunderwarranty.Strictlyadheretorecommendedspreadrates.Usetherecommendnotchtroweloranequivalentthatwill achieve the proper coverage.
Note:ForMannington’sLifetimebondwarrantyINFINITYadhesivemustbeused.Manningtonwillnotberesponsible for the adhesive bond where other adhesives have been used.
MeasurementsMeasure area to be carpeted to determine best staring positions. Chalk two lines that intersect these positions at rightangles.Properplanningshouldavoidtrimmingperimetertilesmorethan½theirwidth(12inchesfor24”x24” tiles).
Installation methodsMannington’s carpet tile may have a specific recommended installtion method. Please refer to the product specification sheet or architect folder for installation recommendations. Mannington Commercial’s modular carpettilecanbeinstalledinanyconfigurationaslongasitisvisuallyacceptabletotheenduser.Theinstallationmethodhasnothingtodowithperformanceorwarranties.Pleasenotethatallpatternsandcolorsmaynotbeaesthetically acceptable with certain installations methods. A mock up area is recommended to allow all parities toreviewmodulesinvariousconfigurationsi.e.;monolithic,quarterturn,random,ashlaretc.Manningtonevaluates each product and recommends the installation method for the best aesthetics other methods would be at the owner’s discretion.
Tile placementStartinginthecornerofonequadrant,installtilesinapyramidfashion.Installbybuttingedgestogetherevenly,being careful not to compress modules (this can cause peaked edges). Arrows are embossed or printed on the modulebackingtoshowpiledirection.Toensureproperalignment,checkspacingeverytenmodules.Measureeight24-inchmodulesforatotalof192inches;properspacingshouldbewithin¼inch.Continuetocheckspacing every eight modules throughout the entire installation.
Pallet and box sequencingItisveryimportanttoinstallMANNINGTONModulartilesintheordertheyweremanufactured;thisiseasilyaccomplishedbyselectingpalletsinsequentialorderandfollowingthenumberslocatedoneachcartonoftiles.Typicallyaninstallationwillbeginwiththelowestcartonnumbersandprogressthroughthehighestnumbersuntilprojectiscomplete.InstallingMANNINGTONModulartilesbycartonsequencewillassurethemostevenuniform look possible.
Cutting / trimmingCarpetmoduleswillrequirecuttingatperimeters,floorelectricaloutlets,anddooropenings.Trimmedorsmallpiecesofcarpettileshouldalsohaveglueappliedtothebackingtohelpholdtheminplace.Looppilemodulesmayrequiresometrimmingorclippingoftufts.Thisistypicalofthistypeconstructionandisnotamanufacturingproblem.
Flatwire cable / trench headersFlatwire cables are easily accessible when carpet modules are used. Cable should be centered under modules andnoadhesiveusedunlessapprovedbythemanufacturer.Trenchheadersrequireacontrolgridofadhesiveoneither side of header panels to prevent movement.
24

StairsUsearaisedstairnosingandcuttilestofitnosing,bothstepandriser.Applyfullspreadadhesivetoboththesubstrate and back of tile.
Finished installationWhenheavyfurnitureandwheeledtrafficismovedovertiles,useplywoodrunnertoavoidtileshifting.Rollentirejobwith75-100lbrolleraftercompletionofinstallation.
Chair padsChair pads are recommended for use under chairs with roller casters. Casters should be the flat round type with 5/8”to1”widthminimum.Ifchairpadsarenotused,theappearanceofthemoduleswilldecreaseandmaintenanceand/orshiftingofthemodulesmayberequiredmorefrequently.
Loop pile constructionCarpet modules with loop pile constructions may experience yarn blossoming at the edges, which is consistent with this type of construction. Clipping or shearing the yarn edges can remedy this condition.
Tile arrangementSomecarpetstylesrequiremoreattentionfromtheinstallersduringinstallation.Duetothelightrow,darkrowconstructionoftheseproducts,darklinesmayappearattheedges.Thisisnotamanufacturingdefect.Theseproductswillrequireshiftingtilesaroundtoavoiddarklinesattheedges.Somecarpettileconstructionsaredesignedforrandominstallation.Thistypeofcarpettileinstallationisveryinstallerfriendlybecauseiteliminateshavingtolocatethedirectionalarrowonbackofthetile.Thereisstillapossibility of having to shift the tiles around to avoid dark lines at the edges.
Replacement tilesOnoccasion,itmaybenecessarytoreplacedamagedorheavilysoiledmodules.ModulescanbereplacedwithnewMANNINGTONtilesfromon-siteinventoryorfromotherareasoftheinstallation.Adifferenceofappearance may be noticed when modules are replaced; this difference usually diminishes in a short time.
Carpet tile appearanceCarpet modules seams are usually noticeable on a new installation and do not typically have a seamless appearancelikebroadloomcarpet.Theyarediecutfromtheface,whichcancreatesmallgapsattheseams.Pilecrush can occur from the bottom to the top of the pallets and may appear to have a color shade variance from tiletotile.Bothoftheseconditionswillimproveconsiderablyaftera“walk-in”periodofapproximately60-90days.Thisallowstheyarntoacclimateandrespondtothecrushfromthestackedcartonsonthepallets.Normalfoottrafficandregularvacuumingwillalsoimproveseamappearance.Theuseofaseamtractorcannormallyblendtheyarnattheseamsquickly.Pileliftingand/orwetextractioncandecreasethetimeneededfor“walk-in”acclamation.
TheprocedureslistedaboveareourbestrecommendationsforinstallingINFINITYMODULAR(CarpetTile)Backing.Thisdocumentandotherliteratureareavailableuponrequest.Ifyouhavefurtherquestionsorrequireadditionalinformation,pleasecontactourTechnicalServicesDepartmentat800-241-2262Ext.3.
25

Mannington integra HP RE backing – integra 2 adhesive
OverviewMANNINGTONhasdevelopedandtestedinstallationproceduresforallproductsthatwemanufacture.Ourproceduresaredocumentedthroughoutthisbulletinandotherliteraturethatisavailableuponrequest.TheseinstallationtechniqueshavebeendevelopedinconjunctionwithCRI#104,onlyexpandingontechniquesandprocedures,whichmaybevague.Weareconfidenttheproceduresdocumentedwillprovideexcellentresults;therefore, they should be thoroughly followed by the installation contractor.
Inspection •Manningtonrequiresthatthecarpetbeinspectedpriortoinstallationforproperstyle,colorandpotentialdefects. •Mannington’sclaimspolicyviewsinstallationofthecarpetasacceptanceofthemerchandiseandlimitsthe type of claims that can be honored on installed carpet. •Layoutallcarpetandallowtoacclimatepriortoadheringtothefloor. •Rollsshouldbeinstalledbyrollnumbersinconsecutiveorder.Forpatternedcarpetinstallrollsbypattern size not by roll numbers. Do not mix dye lots. •Thecarpetistoacclimatetoatleast65°Fahrenheitfor24hourspriortoinstallationwithrelativehumidityof 12-65%.Theseconditionsmustbemaintainedthroughouttheinstallationandfor72hoursafterthe installation has been completed. •Manningtoncarpetsaretobeinstalledbyprofessionalinstallerswhohavethetraining,skillsandtoolsto properly install technically advanced commercial carpets.
Floor preparation •Manningtoncannotberesponsibleforclaimsregardingsub-floorconditions. •Floorsmustbecured,dryandclearofanyforeigndebris.Cracksshouldbefilledwithalatexbasedportland cement patching compound. •Slabtemperaturemustbeatleast65°Fahrenheit. •Moisturetestingmustbeperformedtodeterminetheamountofmoisturethatistrappedintheconcrete slab.AcceptableresultsforASTMF2170relativeHumidityis85%orbelow,forASTMF1869Calcium Chloride8poundsorless.WherebothtestsareperformedtheRHtestwillbethequalifyingstandard. •Alkalinitytestsmustalsobeperformed.pHshouldregisterbetween5and10.IfpHexceeds10contact TechnicalServicesat800-241-2262Ext.3. •PleasenotethatRH,calciumchlorideandalkalinitytestsstateonlytheconditionoftheflooratthetimeof thetest.Testresultsarenotindicative,nordotheypredict,howenvironmentalconditionsmayimpact moisture or alkalinity in the future. •Alltestsshouldbedocumentedandresultssaved.
Existing adhesives •Mannington’sIntegraHPREbackingcanbeinstalleddirectlyoveronelayerofpre-existinglatex multipurpose or acrylic pressure sensitive adhesives that are well bonded to the sub floor. If adhesive is dried outandcrystallizedornotfullybondedtothesubflooritmustberemovedorcovered.The8lb.,85%RH moisturewarrantyisonlyforbareconcreteslabsthatdonothavepre-existingadhesiveorcuringagentsthat may be affected by the moisture emission rate. •Multiplelayersofpre-existingadhesivemustberemovedorcoveredwithlatexbasedPortlandcementor sealed with an approved adhesive sealer. •CutBackadhesivemustberemovedorcoveredwithanappropriatecementiousskimcoat.
Seal the floor / old adhesives •Existingcutback,ormultiplelayersofadhesivesmustbesealedorcovered.TRISEAL or a latex based portland cement can be used as a sealer between the old and new adhesive. If in doubt about the compatibilityofexistingadhesivealwayssealthefloor.ToobtainTRISEALcallXLBrandsat800-367-4583. •IntegraHPREBackcanbeinstalledovermanyexistingfloorsiftheyaresecurelybondedtothesubstrate. ContactMannington’sTechnicalServicesDepartmentifyouhavequestionsconcerningpre-existingfloors.
Seam trimming •Measureareastobecarpeted,makecutsanddryfitcutsintoplace.Overlapthecarpet3inchesatseams and 1 inch at walls. •SeamsarethebycutviathedoublecutmethodwithNationalEquipment’s#575commercial“glass”seamcutter.
26

•Patternedcarpetsorcarpetsthathaveacolorlineupatseamswillneedtoberowcutinsteadofthedouble cut method. *Thecutterisspecificallydesignedtorowcutthetopbreadthofcarpet * Simply run a screwdriver down the length of the top breadth of carpet to open a row, adjust the , while simultaneously trace cutting the lower breadth. blade to the proper gauge, align the cutter and cut the seam. *The#575seamcutterwillproducenetfittingseamswithoutgapsorfullness. *Seamsaretobedrycut.Wetcuttingofseamswillproduceaweakbondandpossibleseamfailure. * Mannington will not be responsible for any seam not trimmed with a #575 Commercial Seam Cutter! *Mannington’sIntegraHPREBackingwillnotacceptfullness,seamsmustbecutnetfit. *Toobtaina#575cutter,call800-245-0267foradistributornearestyou.
Cross seamsAftertrimmingcrossseamsmaydevelopaslightupcurlattheedges.Thisconditioncaneasilybecorrectedbyhandbackcurlingtheedgesbeforeplacingintoadhesives.Thiswilleliminatepeakedcrossseams.AdhesivesMannington’sINTEGRA2vinylcompatibleadhesivemustbeusedwheninstallingIntegraHPREBacking. •Donotusethisadhesivewithlatexorpolyurethanebackedcarpets,sheetvinyl,VCT,etc. •INTEGRAisanacrylicadhesiveandassuchwillnotdevelopstickylegslikeamultipurposeadhesive. ADHESIVESPREAD •Afteredgeshavebeentrimmed,carefullyfoldbackseamsone-halfoftheirwidth,exposingsub-floor. •ApplyMannington’sINTEGRA2adhesivewithaminimum1/16”x1/16”x1/16”squarenotchedtrowel.The spread rate should be approximately 15 yards of carpet per gallon of adhesive for smooth floors. Coverage will be less per gallon over rough subfloors. •Theadhesiveisdesignedtobeawetsetformostsubfloors.Temperatureandhumiditywillaffectthesetup time. Do not allow adhesive to skin over before installing carpet. Adhesive must transfer to carpet backing. •INTEGRA2adhesivedoesnotdevelopastickytack,whenworkingwithpatterncarpetsitmaybenecessary to use stay nails until the adhesive sets. •Layonebreadthofthecarpetintotheadhesiveandrolloutairbubblesusinga35-75poundroller. •Sealseamedgebyapplyinga1/8”beadofMT-800seamsealer.Usecautionnottooverapplyseamsealer. •Placeoppositebreadthintopositionandworkseamwithslightcompressionensuringseamsealertransfer. •Rolloppositebreadthforcingairpocketsoutawayfromtheseam. •CleanawayexcessadhesivethathaswickedupthroughseamusingMannington’sMT-900SeamCleaner. •Continuethesetechniquesthroughoutremainderofinstallation.
Adhesive spread•Afteredgeshavebeentrimmed,carefullyfoldbackseamsone-halfoftheirwidth,exposingsub-floor.•ApplyMannington’sINTEGRA2adhesivewithaminimum1/16”x1/16”x1/16”squarenotchedtrowel.The spread rate should be approximately 15 yards of carpet per gallon of adhesive for smooth floors. Coverage will be less per gallon over rough subfloors.•Theadhesiveisdesignedtobeawetsetformostsubfloors.Temperatureandhumiditywillaffectthesetup time. Do not allow adhesive to skin over before installing carpet. Adhesive must transfer to carpet backing.•INTEGRA2adhesivedoesnotdevelopastickytack,whenworkingwithpatterncarpetsitmaybenecessaryto use stay nails until the adhesive sets.•Layonebreadthofthecarpetintotheadhesiveandrolloutairbubblesusinga35-75poundroller.•Sealseamedgebyapplyinga1/8”beadofMT-800seamsealer.Usecautionnottooverapplyseamsealer.•Placeoppositebreadthintopositionandworkseamwithslightcompressionensuringseamsealertransfer.•Rolloppositebreadthforcingairpocketsoutawayfromtheseam.•CleanawayexcessadhesivethathaswickedupthroughseamusingMannington’sMT-900SeamCleaner.•Continuethesetechniquesthroughoutremainderofinstallation.
Seam sealerMannington’sseamsealerMT-800mustbeusedonIntegraHPBackingseams.Theinstructionsareasfollows: •Fillapplicatorbottlewithseamsealer. •Adjustnozzletocontrolflow.Abeadofsealerapproximately1/8”thick,equaltothethicknessofthe backing, should be laid along the edge of the backing. •CoverageforMT-800isapproximately500linealfeetperpint. •Underslightcompression,fitandsmoothoutcompletejoint.Thiscompleteoperationmustbeperformedin 10 minutes before the sealer dries out.
27

•Dampenacleanwhite,absorbentcottonclothwithMANNINGTON’SseamcleanerMT-900andgentlyrub theseamwheresealerhassurfacedtothecarpetpile.Donotpourseamcleanerdirectlyonthecarpet.This step acts as final inspection to ensure that the seam is proper and tight. •Ifsealerthickensaddsmallamountofcleanerandstiruntil“honey”consistencyreturns.
Stairs / steps •IntegraHPREBackcanbeusedformoststairsbycuttingseparatepiecesforstepandriserandusingastair nosing at the edge. •IntegraHPREBackcanberolledoverthenoseofcertaintypesofstepsthatdonothaveasharpedge. IntegraHPREBackingmustbepre-creasedbeforeapplyingcontactadhesivetoboththestepandtheHP backing. •IntegraHPREbackingwillnotformatightbend,andshouldnotbeusedforconturedseatingorsteps.
Tips •Longdropswillrequireextramanpowertoavoidshiftingthecarpetwhenfoldingback. •Whentrimmingwalls,notethatIntegraHPBackingsdonotacceptfullness.Itisrecommendedthatwallsare trimmed net fit or slightly under net with the use of a wall trimmer. •Placingslightbackcurloncrossseamedgespriortoplacingcarpetintoadhesivewillhelptominimizeseam peaking. •Minimizefoottrafficfor24hoursandnorollingtrafficfor72hours. •Carpetmaybewalkedonimmediately.Useplywoodrunnertoprotectcarpetwhenmovingheavyfurniture. •Chairpadsarenotrequiredbutrecommendedunderchairsforappearanceretention.
TheprocedureslistedaboveareourbestrecommendationforinstallingIntegraHPREBacking.Thisdocumentandotherliteratureareavailableuponrequest.Ifyouhavefurtherquestionsorrequireadditionalinformation,pleasecontactourTechnicalServicesDepartmentat800-241-2262Ext.3.
28

rEvolve™ carpet tile
Important Make sure you inspect carpet modules prior to installation. No claims will be honored if modules are installed with visible defects. Read all instructions prior to beginning installation.
Site and modular material conditioning is a mustModules must be conditioned to room temperature for 24 hours prior to installation. Floor temperatures must be a minimum of 65° for 24 hours prior to installation.Floortemperaturecanusuallyvary5-10°lowerthanroomtemperature.Relativehumiditymustbebetween10%-65%maximumfor24hourspriortoinstallation.Theseconditionsmustalsobemaintainedfor48hoursaftercompletionofinstallation.
Surface preparationDust, dirt, debris, and noncompatible adhesive must be removed before installation begins. Surfaces must be smoothandlevelwithallholesandcracksfilledwithalatexbasedPortlandcementpatchingcompound.
Latex adhesivesMustberemovedandfloorssandedorcoveredwithaskimcoatofPortlandpatchingcompound.Latexadhesivemay also be covered with TRISEALadhesivesealer(800-367-4583).
Note: Failure to remove or seal old latex adhesive may cause installation failure, plasticizer migration, shifting, buckling or edge curling; these conditions will not be covered under warranty.
Cut back adhesives Must be wet scrapped and covered with 2 applications of TRISEAL(800-367-4583).
Note: Failure to remove or seal old cut back adhesive may cause installation failure, plasticizer migration, shifting, buckling or edge curling; these conditions will not be covered under warranty.
Moisture testingSubfloorsurfacesmustbetestedformoisturecontent.Itistheresponsibilityofthegeneralcontractorand/orinstallertoperformmoisturetestpriortostartingtheinstallation.MANNINGTONrecommendscalciumchloridetests be performed to detect the presence of moisture. Acceptable results require that moisture content does not exceed 3lbs. Per 1,000 square feet per 24 hours. Mannington also accepts the Relative Humidity ASTME-F-2170testmethod.Acceptable moisture leves are 75% maximum relative humidity. Alkalinity must haveamaximumPhlevelof9orless.ContactTechnicalServicesforrecommendationsformoisturereadingsover3lbs.,75%RHorPhlevelsover9.
Note: Moisture emissions in excess of the recommended levels can cause the adhesive to chemically break downandfail.Thisconditioncanresultinshifting,bucking,oredgecurlingofthemodules.
Subfloors New Concrete –Newconcretemustbefullycuredandfreeofmoisture.Newconcreterequiresacuringperiodofapproximately90days.Testformoistureandalkalinitymustbeperformed.Phshouldregisterbetween5and9.Ifamoisturecontrolsystemisrequiredcontacttechnicalserviesforadditionalinformation.
Old Concrete –Oldconcreteshouldalsobecheckedformoisture.Dry,dusty,porousfloorsmustbesealedwitha latex primer.
Wood – Woodfloorsmustbesmoothandlevel.Iffloorisuneven,anapprovedunderlaymentmayberequired.Oldfinishesmustbetestedforcompatibilitywithadhesivesorremovedandporouswoodsealed.
Terrazzo / Marble –LevelallgroutlineswithalatexbasedPortlandcementpatchingcompound.Glossysurfaces must be sanded for adhesive bond.
Hard Surfaces –Tilesmustbewellsecuredtothefloororremoved.Broken,damaged,orloosetilesmustbereplaced.WaxmustberemovedfromVCTbeforeapplyingadhesive.Existingsheetvinylisnotasuitablesubstrate for modular installation and should be removed.
29
Old carpet Removeoldcarpetandcheckadhesiveforcompatibility.IfunsureremoveorcoveradhesivewithaPortlandbased patching compound or encapsulate with TRISEAL(800-367-4583).
Full adhesive methods Mannington recommends a full spread adhesive system for the most trouble free installation. Modules can easily shift during the installation process or by heavy rolling traffic if not fully adhered to the substrate. Fully spread Mannington’sRV-500pressuresensitiveadhesiveinstartingquadrantusinga1/16x1/32x1/32“U”notchtroweloranequivalentthatwillachievethepropercoverage.Allowtodrysoadhesivedoesnottransferwhentouched.Proceedwithtileplacement.Spreadrateshouldbeapproximately25sq.yds.pergallonfortrowelonapplications.
Note:Inadequateamountsofadhesivecancausemodulestoshiftandmoveandwillnotbecoveredunderwarranty.Strictlyadheretorecommendedspreadrates.Usea1/16x1/32x1/32“U”notchtroweloranequivalentthatwillachievethepropercoverage.
Note:ForMannington’slifetimelimitedbondwarrantyRV-500mustbeused.Manningtonwillnotberesponsiblefor the adhesive bond where other adhesives have been used.
Pallet and box sequencingItisveryimportanttoinstallMANNINGTONModulartilesintheordertheyweremanufactured;thisiseasilyaccomplishedbyselectingpalletsinsequentialorderandfollowingthenumberslocatedoneachcartonoftiles.Typicallyaninstallationwillbeginwiththelowestcartonnumbersandprogressthroughthehighestnumbersuntilprojectiscomplete.InstallingMANNINGTONModulartilesbycartonsequencewillassurethemostevenuniform look possible.
Installation methodsMannington’s carpet tile may have a specific recommended installtion method. Please refer to the product specification sheet or architect folder for installation recommendations. Mannington Commercial’s modular carpettilecanbeinstalledinanyconfigurationaslongasitisvisuallyacceptabletotheenduser.Theinstallationmethodhasnothingtodowithperformanceorwarranties.Pleasenotethatallpatternsandcolorsmaynotbeaesthetically acceptable with certain installations methods. A mock up area is recommended to allow all parities toreviewmodulesinvariousconfigurationsi.e.;monolithic,quarterturn,random,ashlaretc.Manningtonevaluates each product and recommends the installation method for the best aesthetics other methods would be at the owner’s discretion.
Tile placement Startinginthecornerofonequadrant,installtilesinapyramidfashion.Installbybuttingedgestogetherevenly,being careful not to compress modules (this can cause peaked edges). Arrows are embossed or printed on the modulebackingtoshowpiledirection.Toensureproperalignment,checkspacingeverytenmodules.Measureten24-inchmodulesforatotalof240inches;properspacingshouldnotbelessthan240inchesandnomorethan240¼inches.Continuetocheckspacingeverytenmodulesthroughouttheentireinstallation.Rollentirejobwith75-100lbrolleraftercompletionofinstallation.Expansion gap at perimeter walls Itisveryimportanttoleavea¼”gapatallperimeterwalls.
Cut doorways net to frames.
Cutting / trimmingCarpetmoduleswillrequirecuttingatperimeters,floorelectricaloutlets,anddooropenings.Whenevermodulesarecutortrimmed,adhesivemustbeused.Looppilemodulesmayrequiresometrimmingorclippingoftufts.Thisistypicalofthistypeconstructionandisnotamanufacturingproblem.Smallpiecesofcarpettileshouldalso have glue applied to the backing to help hold them in place.
Flatwire cable / trench headersFlatwire cables are easily accessible when carpet modules are used. Cable should be centered under modules andnoadhesiveusedunlessapprovedbythemanufacturer.Trenchheadersrequireacontrolgridofadhesiveoneither side of header panels to prevent movement.
30

Stairs Usearaisedstairnosingandcuttilestofitnosing,bothstepandriser.Usefullspreadadhesiveundermodules.
Finished installationWhenheavyfurnitureandwheeledtrafficismovedovertiles,useplywoodrunnertoavoidtileshifting.
Chair padsChair pads are recommended for use under chairs with roller casters. Casters should be the flat round type with 5/8”to1”widthminimum.Ifchairpadsarenotused,theappearanceofthemoduleswilldecreaseandmaintenanceand/orshiftingofthemodulesmayberequiredmorefrequently.
Loop pile constructionCarpet modules with loop pile constructions may experience yarn blossoming at the edges, which is consistent with this type of construction. Clipping or shearing the yarn edges can remedy this condition.
Tile arrangementSomecarpetstylesrequiremoreattentionfromtheinstallersduringinstallation.Duetothelightrow,darkrowconstructionoftheseproducts,darklinesmayappearattheedges.Thisisnotamanufacturingdefect.Theseproductswillrequireshiftingtilesaroundtoavoiddarklinesattheedges.
Somecarpettileconstructionsaredesignedforrandominstallation.Thistypeofcarpettileinstallationisveryinstallerfriendlybecauseiteliminateshavingtolocatethedirectionalarrowonbackofthetile.Thereisstillapossibility of having to shift the tiles around to avoid dark lines at the edges.
Replacement tilesOnoccasion,itmaybenecessarytoreplacedamagedorheavilysoiledmodules.ModulescanbereplacedwithnewManningtontilesfromon-siteinventoryorfromanotherareaoftheinstallation.Adifferenceofappearancemay be noticed when modules are replaced; this difference usually diminishes in a short time.
Carpet tile appearance Carpet module seams are usually noticeable on a new installation and do not typically have a seamless appearancelikebroadloomcarpet.Theyarediecutfromtheface,whichcancreatesmallgapsattheseams.Pilecrush can occur from the bottom to the top of the pallets and may appear to have a color shade variance from tiletotile.Bothoftheseconditionswillimproveconsiderablyaftera“walk-in”periodofapproximately60-90days.Thisallowstheyarntoacclimateandrespondtothecrushfromthestackedcartonsonthepallets.Normalfoottrafficandregularvacuumingwillalsoimproveseamappearance.Theuseofaseamtractorcannormallyblendtheyarnattheseamsquickly.Pileliftingand/orwetextractioncandecreasethetimeneededfor“walk-in”acclamation.
TheprocedureslistedaboveareourbestrecommendationsforinstallingrEvolve™(CarpetTile)Backing.Thisdocumentandotherliteratureareavailableuponrequest.Ifyouhavefurtherquestionsorrequireadditionalinformation,pleasecontactourTechnicalServicesDepartmentat800-241-2262Ext.3.
31

Mannington latex backings – woven synthetic & ultrabac RE
OverviewManningtonhasdevelopedandtestedinstallationproceduresforallproductsthatwemanufacture.Ourproceduresaredocumentedthroughoutthisbulletinandotherliteraturethatisavailableuponrequest.TheseinstallationtechniqueshavebeendevelopedinconjunctionwithCRI#104,onlyexpandingontechniquesandprocedures,whichmaybevague.Weareconfidenttheproceduresdocumentedwillprovideexcellentresults;therefore, they should be thoroughly followed by the installation contractor.
Inspection •Manningtonrequiresthatthecarpetbeinspectedpriortoinstallationforproperstyle,colorandpotential defects. •Mannington’sclaimspolicyviewsinstallationofthecarpetasacceptanceofthemerchandiseandlimitsthe type of claims that can be honored on installed carpet. •Layoutallcarpetandallowtoacclimatepriortoadheringtothefloor. •Rollsshouldbeinstalledbyrollnumbersinconsecutiveorder.Forpatternedcarpetinstallsrollsbypattern size not by roll numbers. Do not mix dye lots. •Thecarpetistoacclimatetoatleast65°Fahrenheitfor24hourspriortoinstallationwithrelativehumidityof 12-65%.Theseconditionsmustbemaintainedthroughouttheinstallationandfor72hoursafterthe installation has been completed. •Mannington’slatexbackingsaretobeinstalledbythedirectgluemethodonly.Stretchinovercushionand double glue down installtion methods will not be warranted. •Manningtoncarpetsaretobeinstalledbyprofessionalinstallerswhohavethetraining,skillsandtoolsto properly install technically advanced commercial carpets.
Floor preparation •Manningtoncannotberesponsibleforclaimsregardingsub-floorconditions. •Floorsmustbecured,dryandclearofanyforeigndebris.Cracksshouldbefilledwithalatexbased,portland cement patching compound. •Slabtemperaturemustbeatleast65°Fahrenheit. •Acalciumchloridetestshouldbeperformedontheconcretetodetectthepresenceofmoisture.Acceptable resultsrequirethatmoisturecontentdoesnotexceed5lbs.per1,000squarefeetper24hours.Onecalcium chloridetestshouldbeperformedforevery300yardsofcarpet.CalciumChlorideTestmustbepreformedin accordancewithASTM-F-1869-98testingprocedures.Mannington’sULTRAadhesivemustbeusedforthe 5lb.warranty.ManningtonwillalsoaccepttheRelativeHumidityASTM-F-2170testmentod.Acceptable moisturelevelsare80%maximumrelativehumidity. •Alkalinitytestsmustalsobeperformed.pHshouldregisterbetween5and9.IfpHexceeds9contact TechnicalServicesat800-241-2262Ext.3. •Pleasenotethatcalciumchloride,relativehumidityandalkalinitytestsstateonlytheconditionofthefloorat thetimeofthetest.Testresultsarenotindicative,nordotheypredict,howenvironmentalconditionsmay impact moisture or alkalinity in the future. •Alltestsshouldbedocumentedandresultssaved. •Oldadhesivesmustbecompatible,removedorcoveredwithinappropriatecementiousskimcoat. •CutBackadhesivemustberemovedorcoveredwithanappropriatecementiousskimcoatorTRISEAL (800-367-4583).
Seal the floor •Note: Porousordustyfloorsmayneedtobesealedtopreventadhesivefromtackingtooquickly.Ifthe adhesive tacks too fast, there may be no transfer of adhesive from the floor to the carpet backing; therefore, the carpet will not adhere to the substrate. •Ifvacuumingormoppingdoesnotcorrectadustyorporousconditions,sealthefloorwithalatexprimer (latexmilk).Thesealercanbeappliedwithapaintroller,flattrowelorsprayed.Thesealermustbe completely dry before beginning installation.
InstallationSeam TrimmingAllseamsshouldbetrimmedbyrowcutting.Torowcutaseamsimply: * Begin by opening a row with a flat blade screwdriver.
32

* Usingalooppileorcushionbackcutterwithasharpblade,followtheopenedrowwiththecutter.Make sure the cutting blade is adjacent to the edge of the carpet that will be kept to make the seam. * Change the cutting blade and row cut the opposite breadth. * Continue this seam trimming procedure for all side seams.Wheninstallingcarpetswithoutpatterns,alternateseamtrimmingproceduresmaybeused.However,werecommend row cutting as the superior method of seam trimming, thus minimizing cutting through yarn tufts. Alternatemethodsofseamtrimmingincluderow/tracecutting,row/doublecuttingwithNational’s#575seamcutter and straight edging.
Adhesives •Afteredgeshavebeentrimmed,carefullyfoldbackseamsone-halfoftheirwidth,exposingsub-floor. •ApplyMannington’sULTRAadhesivewithaminimum1/8”x1/8x1/8”“U”notchedtrowel.Thespreadrate shouldbeapproximately6-8yardsofcarpetpergallonofadhesiveonsmoothconcrete. •Allowadhesivetoremainopenlongenoughtodeveloptack,butremainwetenoughtoensuretransferto thebacking.Temperatureandhumiditywillaffecttheamountoftacktimeneeded.Adhesivetransfermust be100%.Ifa1/8”“U”notchedtroweldoesnotprovide100%transfer,adeepernotchedtrowelmustbe used. •Layonebreadthofthecarpetintotheadhesiveandrolloutairbubblesusinga75-100poundroller. •Sealtheseamedgebyapplyinga1/8”beadofseamsealer. •Placeoppositebreadthintopositionandworkseamwithslightcompressionensuringseamsealertransfer. •Rolloppositebreadthforcingairpocketsoutawayfromtheseam. •Cleanawayanyexcessadhesivethatmayhavewicked-upthroughseam. •Continuethesetechniquesthroughoutremainderofinstallation. •Manningtondoesnnotrecommendourlatexbackingsfordoubleglueorstretch-ininstallations. •Porosityofthesub-floorand/orcarpetbackingmayrequireadeepernotchedtrowel.Theinstallation contractor must ensure that the trowel is notched deep enough to provide 100% adhesive transfer to the carpet backing. •Wheninstallingthesebackings,asufficientopentimemustbeobserved.Goingintotheadhesive“wet“can cause carpet to expand, thus causing bubbles. •Re-Rollcarpet3to4hoursafterinstallationtoresetbackingintoadhesive. •Re-Rollortractorseamsonlyafteradhesivehashadsufficienttimetoachievegoodbondingstrength.
Note: Do not over roll seams while ahesive is wet.
Seam sealer •Mannington’slatexbackingrequirea1/8”beadofMannington’sEdgeGuardacryliclatexseamsealerwhen installedviathedirectgluedownmethod.Thesealershouldbeappliedsothatitencapsulatesthebaseof the yarn tufts, the primary backing and secondary backing.
Tips •Longdropswillrequireextramanpowertoavoidshiftingthecarpetwhenfoldingback. •Placingslightbackcurloncrossseamedgespriortoplacingcarpetintoadhesivewillhelptominimizeseam peaking •Useblowerstoexpeditetacktime,especiallyintimesofhighhumidity. •Minimizefoottrafficfor24hoursandnorollingtrafficfor72hours. •Carpetmaybewalkedonimmediately.Useplywoodrunnerstoprotectcarpetwhenmovingheavyfurniture. •Chairpadsarerequiredforwovensyntheticbackingwarranty. •ChairpadsarerecommenedforappearanceretentionforUltraBacRE.
TheprocedureslistedaboveareourbestrecommendationsforinstallingManningtonlatexbackings.Thisdocumentandotherliteratureareavailableuponrequest.Ifyouhavefurtherquestionsorrequireadditionalinformation,pleasecontactourTechnicalServicesDepartmentat800-241-2262Ext.3.
33