infoblox data connector user's guide - activetrust...
TRANSCRIPT

Infoblox Data ConnectorUser’s Guide
Release 2.0

Copyright Statements© 2017, Infoblox Inc.— All rights reserved.The contents of this document may not be copied or duplicated in any form, in whole or in part, without the prior
written permission of Infoblox, Inc.
The information in this document is subject to change without notice. Infoblox, Inc. shall not be liable for any
damages resulting from technical errors or omissions which may be present in this document, or from use of this
document.
This document is an unpublished work protected by the United States copyright laws and is proprietary to Infoblox,
Inc. Disclosure, copying, reproduction, merger, translation, modification, enhancement, or use of this document by
anyone other than authorized employees, authorized users, or licensees of Infoblox, Inc. without the prior written
consent of Infoblox, Inc. is prohibited.
For Open Source Copyright information, see Appendix C, Open Source Copyright and License Statements in the
Infoblox NIOS Administrator Guide.
Trademark StatementsInfoblox, the Infoblox logo, DNSone, NIOS, Keystone, IDeal IP, bloxSDB, bloxHA and bloxSYNC are trademarks or
registered trademarks of Infoblox Inc.
All other trademarked names used herein are the properties of their respective owners and are used for identification
purposes only.
Company Informationhttp://www.infoblox.com/contact
Product InformationDocument Number: 400-0624-002 Rev. D
Document Updated: December 14, 2017
Warranty InformationYour purchase includes a 90-day software warranty and a one year limited warranty on the Infoblox appliance, plus
an Infoblox Warranty Support Plan and Technical Support. For more information about Infoblox Warranty information,
refer to Infoblox Web site, or contact Infoblox Technical Support.
Preface. . . . . . . . . . . . . . . . . . . . . . . . . . . . . . . . . . . . . . . . . . . . . . . . . . . . . . . . . . . . . . . . . . . 1
Document Overview . . . . . . . . . . . . . . . . . . . . . . . . . . . . . . . . . . . . . . . . . . . . . . . . . . . . . . . . . . . . . . . . . . . . . . . . . . . . . 2
Documentation Organization . . . . . . . . . . . . . . . . . . . . . . . . . . . . . . . . . . . . . . . . . . . . . . . . . . . . . . . . . . . . . . . . . 2
Conventions . . . . . . . . . . . . . . . . . . . . . . . . . . . . . . . . . . . . . . . . . . . . . . . . . . . . . . . . . . . . . . . . . . . . . . . . . . . . . . . 2
Related Documentation. . . . . . . . . . . . . . . . . . . . . . . . . . . . . . . . . . . . . . . . . . . . . . . . . . . . . . . . . . . . . . . . . . . . . . . . . . . 3
Customer Care . . . . . . . . . . . . . . . . . . . . . . . . . . . . . . . . . . . . . . . . . . . . . . . . . . . . . . . . . . . . . . . . . . . . . . . . . . . . . . . . . . 4
User Accounts . . . . . . . . . . . . . . . . . . . . . . . . . . . . . . . . . . . . . . . . . . . . . . . . . . . . . . . . . . . . . . . . . . . . . . . . . . . . . 4
Software Upgrades . . . . . . . . . . . . . . . . . . . . . . . . . . . . . . . . . . . . . . . . . . . . . . . . . . . . . . . . . . . . . . . . . . . . . . . . . 4
Technical Support . . . . . . . . . . . . . . . . . . . . . . . . . . . . . . . . . . . . . . . . . . . . . . . . . . . . . . . . . . . . . . . . . . . . . . . . . . 4
Chapter 1 Deploying the Infoblox Data Connector . . . . . . . . . . . . . . . . . . . . . . . . . . . . . . . 5
About Infoblox Data Connector. . . . . . . . . . . . . . . . . . . . . . . . . . . . . . . . . . . . . . . . . . . . . . . . . . . . . . . . . . . . . . . . . . . . . 6
Requirements . . . . . . . . . . . . . . . . . . . . . . . . . . . . . . . . . . . . . . . . . . . . . . . . . . . . . . . . . . . . . . . . . . . . . . . . . . . . . . . . . . 7
Data Connector Specifications . . . . . . . . . . . . . . . . . . . . . . . . . . . . . . . . . . . . . . . . . . . . . . . . . . . . . . . . . . . . . . . . 7
Deploying the Data Connector Virtual Appliance. . . . . . . . . . . . . . . . . . . . . . . . . . . . . . . . . . . . . . . . . . . . . . . . . . . . . . . 8
Installing the Data Connector Virtual Appliance . . . . . . . . . . . . . . . . . . . . . . . . . . . . . . . . . . . . . . . . . . . . . . . . . . 8
Configuring the Virtual NIC . . . . . . . . . . . . . . . . . . . . . . . . . . . . . . . . . . . . . . . . . . . . . . . . . . . . . . . . . . . . . . . . . . . 9
Powering on the Data Connector Virtual Appliance. . . . . . . . . . . . . . . . . . . . . . . . . . . . . . . . . . . . . . . . . . . . . . . . 9
Configuring the Data Connector Virtual Appliance . . . . . . . . . . . . . . . . . . . . . . . . . . . . . . . . . . . . . . . . . . . . . . . 10
Upgrading the Infoblox Data Connector . . . . . . . . . . . . . . . . . . . . . . . . . . . . . . . . . . . . . . . . . . . . . . . . . . . . . . . . . . . . . 15
Upgrade Prerequisites. . . . . . . . . . . . . . . . . . . . . . . . . . . . . . . . . . . . . . . . . . . . . . . . . . . . . . . . . . . . . . . . . . . . . . 15
Installing the Upgrade Package . . . . . . . . . . . . . . . . . . . . . . . . . . . . . . . . . . . . . . . . . . . . . . . . . . . . . . . . . . . . . . 15
Reverting the Data Connector to the Previous Version . . . . . . . . . . . . . . . . . . . . . . . . . . . . . . . . . . . . . . . . . . . . . . . . . 18
Verifying the Registered Data Connector . . . . . . . . . . . . . . . . . . . . . . . . . . . . . . . . . . . . . . . . . . . . . . . . . . . . . . . . . . . . 18
VLAN Tagging Support. . . . . . . . . . . . . . . . . . . . . . . . . . . . . . . . . . . . . . . . . . . . . . . . . . . . . . . . . . . . . . . . . . . . . . . . . . . 19
Configuring Data Retention Period. . . . . . . . . . . . . . . . . . . . . . . . . . . . . . . . . . . . . . . . . . . . . . . . . . . . . . . . . . . . . . . . . 20
Events Tagging. . . . . . . . . . . . . . . . . . . . . . . . . . . . . . . . . . . . . . . . . . . . . . . . . . . . . . . . . . . . . . . . . . . . . . . . . . . . . . . . . 20
Changing the Destination Mode. . . . . . . . . . . . . . . . . . . . . . . . . . . . . . . . . . . . . . . . . . . . . . . . . . . . . . . . . . . . . . . . . . . 21
Purge the Data . . . . . . . . . . . . . . . . . . . . . . . . . . . . . . . . . . . . . . . . . . . . . . . . . . . . . . . . . . . . . . . . . . . . . . . . . . . . . . . . . 21
Configuring Data Filters . . . . . . . . . . . . . . . . . . . . . . . . . . . . . . . . . . . . . . . . . . . . . . . . . . . . . . . . . . . . . . . . . . . . . . . . . 22
Adding Data Filters . . . . . . . . . . . . . . . . . . . . . . . . . . . . . . . . . . . . . . . . . . . . . . . . . . . . . . . . . . . . . . . . . . . . . . . . 22
Importing Data Filters . . . . . . . . . . . . . . . . . . . . . . . . . . . . . . . . . . . . . . . . . . . . . . . . . . . . . . . . . . . . . . . . . . . . . . 23
Exporting Data Filters . . . . . . . . . . . . . . . . . . . . . . . . . . . . . . . . . . . . . . . . . . . . . . . . . . . . . . . . . . . . . . . . . . . . . . 24
Viewing Data Filters. . . . . . . . . . . . . . . . . . . . . . . . . . . . . . . . . . . . . . . . . . . . . . . . . . . . . . . . . . . . . . . . . . . . . . . . 24
Health Monitoring . . . . . . . . . . . . . . . . . . . . . . . . . . . . . . . . . . . . . . . . . . . . . . . . . . . . . . . . . . . . . . . . . . . . . . . . . . . . . . 25
Chapter 2 Configuring NIOS for Data Connector . . . . . . . . . . . . . . . . . . . . . . . . . . . . . . . . 27
Configuring DNS Queries and Responses . . . . . . . . . . . . . . . . . . . . . . . . . . . . . . . . . . . . . . . . . . . . . . . . . . . . . . . . . . . 28
Capturing DNS Queries . . . . . . . . . . . . . . . . . . . . . . . . . . . . . . . . . . . . . . . . . . . . . . . . . . . . . . . . . . . . . . . . . . . . . 28
Capturing DNS Responses . . . . . . . . . . . . . . . . . . . . . . . . . . . . . . . . . . . . . . . . . . . . . . . . . . . . . . . . . . . . . . . . . . 29
Configuring DNS Queries and Responses on NIOS . . . . . . . . . . . . . . . . . . . . . . . . . . . . . . . . . . . . . . . . . . . . . . . 30
Viewing Registered Data Connector Details. . . . . . . . . . . . . . . . . . . . . . . . . . . . . . . . . . . . . . . . . . . . . . . . . . . . . . . . . . 32
Chapter 3 Configuring Data Connector for Reporting Destination. . . . . . . . . . . . . . . . . . 33
Configuring Reporting Destination. . . . . . . . . . . . . . . . . . . . . . . . . . . . . . . . . . . . . . . . . . . . . . . . . . . . . . . . . . . . . . . . . 33
Viewing DNS Query Capture Reports . . . . . . . . . . . . . . . . . . . . . . . . . . . . . . . . . . . . . . . . . . . . . . . . . . . . . . . . . . . . . . . 34

Chapter 4 Configuring Data Connector for Splunk Destination . . . . . . . . . . . . . . . . . . . . 35
Configuring Splunk Destination . . . . . . . . . . . . . . . . . . . . . . . . . . . . . . . . . . . . . . . . . . . . . . . . . . . . . . . . . . . . . . . . . . . 35
Chapter 5 Configuring Data Connector for Infoblox ActiveTrust Cloud Destination . . . . 37
Configuring ActiveTrust Cloud Destination . . . . . . . . . . . . . . . . . . . . . . . . . . . . . . . . . . . . . . . . . . . . . . . . . . . . . . . . . . 37
Configuring Threat Insight for Cloud Destination . . . . . . . . . . . . . . . . . . . . . . . . . . . . . . . . . . . . . . . . . . . . . . . . . . . . . 40
Appendix A CLI Commands . . . . . . . . . . . . . . . . . . . . . . . . . . . . . . . . . . . . . . . . . . . . . . . . . 43
Appendix B Open Source Copyright and License Statements . . . . . . . . . . . . . . . . . . . . 129
Perl Artistic License . . . . . . . . . . . . . . . . . . . . . . . . . . . . . . . . . . . . . . . . . . . . . . . . . . . . . . . . . . . . . . . . . . . . . . . . . . . . 130
Apache Software License, Version 2.0 . . . . . . . . . . . . . . . . . . . . . . . . . . . . . . . . . . . . . . . . . . . . . . . . . . . . . . . . . . . . . 132
BSD License . . . . . . . . . . . . . . . . . . . . . . . . . . . . . . . . . . . . . . . . . . . . . . . . . . . . . . . . . . . . . . . . . . . . . . . . . . . . . . . . . . 136
GNU General Public License . . . . . . . . . . . . . . . . . . . . . . . . . . . . . . . . . . . . . . . . . . . . . . . . . . . . . . . . . . . . . . . . . . . . . 137
GNU General Public License Version 3 . . . . . . . . . . . . . . . . . . . . . . . . . . . . . . . . . . . . . . . . . . . . . . . . . . . . . . . . . . . . . 141
The FreeType Project License . . . . . . . . . . . . . . . . . . . . . . . . . . . . . . . . . . . . . . . . . . . . . . . . . . . . . . . . . . . . . . . . . . . . 152
ISC License (ISC) . . . . . . . . . . . . . . . . . . . . . . . . . . . . . . . . . . . . . . . . . . . . . . . . . . . . . . . . . . . . . . . . . . . . . . . . . . . . . . 155
Japan Registry Services License version 1.1 . . . . . . . . . . . . . . . . . . . . . . . . . . . . . . . . . . . . . . . . . . . . . . . . . . . . . . . . 156
GNU Lesser General Public License . . . . . . . . . . . . . . . . . . . . . . . . . . . . . . . . . . . . . . . . . . . . . . . . . . . . . . . . . . . . . . . 160
MIT License . . . . . . . . . . . . . . . . . . . . . . . . . . . . . . . . . . . . . . . . . . . . . . . . . . . . . . . . . . . . . . . . . . . . . . . . . . . . . . . . . . 162
Mozilla Public License 2.0 (MPL-2.0) . . . . . . . . . . . . . . . . . . . . . . . . . . . . . . . . . . . . . . . . . . . . . . . . . . . . . . . . . . . . . . 163
Python License . . . . . . . . . . . . . . . . . . . . . . . . . . . . . . . . . . . . . . . . . . . . . . . . . . . . . . . . . . . . . . . . . . . . . . . . . . . . . . . 168
The Zope Public License Ver.2.0 (ZPL-2.0) . . . . . . . . . . . . . . . . . . . . . . . . . . . . . . . . . . . . . . . . . . . . . . . . . . . . . . . . . . 173
SGI Free Software License. . . . . . . . . . . . . . . . . . . . . . . . . . . . . . . . . . . . . . . . . . . . . . . . . . . . . . . . . . . . . . . . . . . . . . . 174
Mesa license . . . . . . . . . . . . . . . . . . . . . . . . . . . . . . . . . . . . . . . . . . . . . . . . . . . . . . . . . . . . . . . . . . . . . . . . . . . . . . . . . 174

Preface
The preface describes the content and organization of this guide, how to find additional product information, and
how to contact Infoblox Technical Support. It includes the following topics:
• Document Overview on page 2
— Documentation Organization on page 2
— Conventions on page 2
• Related Documentation on page 3
• Customer Care on page 4
— User Accounts on page 4
— Software Upgrades on page 4
— Technical Support on page 4
Infoblox User Guide Data Connector 2.0 1

Preface
Document Overview
This guide introduces the Infoblox Data Connector.
For complete information about administering Infoblox appliances, refer to the Infoblox NIOS Administrator Guide.
For the latest Infoblox documentation, visit the Infoblox Support web site at https://support.infoblox.com.
Documentation Organization
This guide covers the following topics:
Conventions
This guide follows the Infoblox documentation style conventions, as listed in the following table.
Navigation
Infoblox technical documentation uses an arrow “->” to represent navigation through the GUI. For example, to access
member information, the description is as follows:
From the Grid tab, select the Grid Manager tab -> Members tab.
Chapter Content
Deploying the Infoblox Data Connector on page 5
An overview of the Data Connector VM and how to deploy it with the
Infoblox Grid.
Configuring NIOS for Data Connector on page 27
Information about how to configure NIOS to work with the Data
Connector.
Configuring Data Connector for Infoblox ActiveTrust Cloud Destination on page 37
Information about how to configure the Data Connector to send data to
Infoblox cloud destinations.
Style Usage
bold Indicates anything that you input by clicking, choosing, selecting, typing
or by pressing on the keyboard.
input Signifies command line entries that you type.
variable Signifies variables typed into the GUI that you need to modify specifically
for your configuration, such as command line variables, file names, and
keyboard characters.
2 Data Connector 2.0 Infoblox User Guide

Related Documentation
Related Documentation
Other NIOS appliance documentation:
• Infoblox NIOS Administrator Guide
• Infoblox CLI Guide
• Infoblox API Documentation
• Infoblox CSV Import Reference
• Infoblox Installation Guide for the Trinzic 100 Appliance
• Infoblox Installation Guide for the 800 Series Platforms
• Infoblox Installation Guide for the 1400 Series Platforms
• Infoblox Installation Guide for the 2200 Series Platforms
• Infoblox Installation Guide for the 4000 Series Platforms
• Infoblox Installation Guide for the Infoblox-4010 Appliance
• Infoblox Installation Guide for the IB-4030 and IB-4030-10GE Appliances
• Infoblox DNS Cache Acceleration Administrator Guide
• Infoblox Installation Guide for vNIOS Software on Riverbed Services Platforms
• Infoblox Installation Guide for Installing vNIOS Software on Cisco Platforms
• Infoblox Installation Guide for vNIOS Software on VMware
• Infoblox Installation Guide for vNIOS on Microsoft 2008 R2 for Hyper-V
• Infoblox Installation Guide for vNIOS for KVM Hypervisor and KVM-based OpenStack
• Infoblox Safety Guide
To provide feedback on any of the Infoblox technical documents, please e-mail [email protected].
Infoblox User Guide Data Connector 2.0 3
Preface
Customer Care
This section addresses user accounts, software upgrades, licenses and warranties, and technical support.
User Accounts
The Infoblox appliance ships with a default user name and password. Change the default admin account password
immediately after the system is installed to safeguard its use. Make sure that the appliance has at least one
administrator account with superuser privileges at all times, and keep a record of your account information in a safe
place. If you lose the admin account password, and did not already create another superuser account, the system will
need to be reset to factory defaults, causing you to lose all existing data on the appliance. You can create new
administrator accounts, with or without superuser privileges.
Software Upgrades
Software upgrades are available according to the Terms of Sale for your system. Infoblox notifies you when an
upgrade is available. Register immediately with Infoblox Technical Support at
http://www.infoblox.com/support/customer/evaluation-and-registration to maximize your Technical Support.
Technical Support
Infoblox Technical Support provides assistance via the Web, e-mail, and telephone. The Infoblox Support web site at
https://support.infoblox.com provides access to product documentation and release notes, but requires the user ID
and password you receive when you register your product online at:
http://www.infoblox.com/support/customer/evaluation-and-registration.
4 Data Connector 2.0 Infoblox User Guide

Chapter 1 Deploying the Infoblox Data Connector
This chapter provides information about the Infoblox Data Connector VM and how to deploy it with your Infoblox Grid
to collect DNS query and response data. It also provides information about upgrades, VLAN tagging support, health
monitoring, and commonly used CLI commands.
It includes the following sections:
• About Infoblox Data Connector on page 6
• Requirements on page 7
— Data Connector Specifications on page 7
• Deploying the Data Connector Virtual Appliance on page 8
— Installing the Data Connector Virtual Appliance on page 8
— Configuring the Virtual NIC on page 9
— Powering on the Data Connector Virtual Appliance on page 9
— Configuring the Data Connector Virtual Appliance on page 10
• Upgrading the Infoblox Data Connector on page 15
• Reverting the Data Connector to the Previous Version on page 18
• Verifying the Registered Data Connector on page 18
• VLAN Tagging Support on page 19
• Configuring Data Retention Period on page 20
• Events Tagging on page 20
• Changing the Destination Mode on page 21
• Purge the Data on page 21
• Configuring Data Filters on page 22
— Adding Data Filters on page 22
— Importing Data Filters on page 23
— Exporting Data Filters on page 24
— Viewing Data Filters on page 24
— Deleting Data Filters on page 24
• Health Monitoring on page 25
Infoblox User Guide Data Connector 2.0 5

Deploying the Infoblox Data Connector
About Infoblox Data Connector
The Infoblox Data Connector is a utility designed to collect DNS query and response data from the Infoblox Grid, and
then transfers the data to destinations such as the Infoblox ActiveTrust Cloud, NIOS reporting server, and third-party
Splunk Indexer. The Data Connector filters data based on user criteria (thus reducing data quantity) and converts the
data to a format that can be securely transferred to the supported destinations. It acts as a central point for data
collection across your network devices, which reduces the impact of data exchange and improves your Grid
performance.
The Data Connector collects DNS query and response data from the Grid members that are answering queries, and
then forwards this data to the NIOS reporting server and third-party indexers through the SCP protocol. Similarly, it
collects RPZ Hits, DHCP Leasing Information and IPAM, User Info data if available, from the Grid members, generates
parquet files and sends the parquet files to the Infoblox ActiveTrust Cloud destination via HTTP requests.
The Data Connector is designed to run on VMware ESXi servers. You can install the Data Connector VM software
package on a host with VMware ESXi 5.x or later installed, and then configure it as a virtual appliance. After
configuring the Data Connector VM, you must register it with the Infoblox Grid and configure certain NIOS parameters
before it can collect DNS query and response data from the Grid. Note that you can register only one Data Connector
with a Grid running NIOS 7.3.0 and later.
When you set up a Data Connector VM, you use it solely for collecting DNS data from the Grid and sending the data
to the desired destination. You cannot add licenses to run other services, such as DNS and DHCP.
Note: When upgrading NIOS appliances in your Grid, it is not required that you upgrade the Data Connector VM.
The following are some key features for using the Data Connector:
• The Data Connector collects DNS query data from the NIOS Grid and forwards this data to the NIOS reporting
server through the SCP protocol and to the Infoblox cloud destination via HTTP requests.
• To ensure confidentiality, all protocol exchanges to and from the Data Connector VM are encrypted.
• The Data Connector VM has firewall enabled.
• You can make a remote serial connection to the Data Connector VM using SSH port 2020. Example: ssh
admin@DCVM_IP -p 2020.
• Infoblox Technical Support can use port 2222 to access the Data Connector VM. Example: ssh
dcadmin@DCVM_IP -p 2222.
Figure 1.1 illustrates the basic concept of the data collection process, which includes collecting query and response
data from Grid members, storing them, and sending it back to the supported destinations. You can then monitor the
trend of DNS queries by client, domain, time, record type, query type, and DNS view. For more information, see
Viewing DNS Query Capture Reports on page 34.
6 Data Connector 2.0 Infoblox User Guide

Requirements
Figure 1.1 Data Connection Process
Requirements
The following are required for the installation of the Data Connector VM on a VMware ESXi server:
• The Data Connector VM software package: Contact your Infoblox representative to obtain the Data Connector
VM software package, which consists of a template file with an .ova extension.
You can deploy the Data Connector VM from a remote web server or a local file system accessible from your
management system.
• A management system that has vSphere Client installed.
• If your Grid is running NIOS 7.3 or later, you must install the Security Ecosystem license on your Grid to configure
the Splunk destination.
• For upgrades only: To upgrade your Data Connector, obtain the latest Data Connector VM software package from
your Infoblox representative and then follow the upgrade procedures described in Upgrading the Infoblox Data Connector on page 15. Note that your Data Connector must have software version 1.1.0 and later running in
order to upgrade to future releases and hotfixes.
Data Connector Specifications
The following are specifications for the Data Connector VM:
• Image Specifications
The Data Connector VM image is an OVA package file that is compatible with VMware ESXi 5.x and later versions.
• VM Hardware Specifications
The Data Connector VM is configured with the following components:
• Virtual Machine Minimum 4 cores, 8 GB memory, and 500GB disk.
— CPU: 1 socket, 4 cores
— Memory: 8 GB
— Network: Single NIC connected to the network
— Hard disk drives: 500 GB
Data Connector
VMReporting Member
ActiveTrust Cloud
Grid Master
Query Response Logs*
Campus DNS Resolvers
Splunk>
*For Active Trust Cloud destination, Data Connector collects additional data from the Grid for reporting and analytics. For more information, see Chapter 5 Configuring Data Connector for Infoblox ActiveTrust Cloud Destination.
Infoblox User Guide Data Connector 2.0 7
Deploying the Infoblox Data Connector
— The Data Connector VM has two hard disk drives: Hard Disk 1 and Hard Disk 2. Hard Disk 2 is used for
data storage, and you may substitute it for a larger drive to expand the data storage space.
Note: If you substitute Hard Disk 2 with another drive, the disk will be formatted by the Data Connector VM
during the next reboot.
Deploying the Data Connector Virtual Appliance
You can deploy the Data Connector VM from a remote web server or a local file system accessible from your
management system. Instructions in this section assume that you have configured the server on your network, and
that you are able to connect to it from your management system.
To deploy the Data Connector VM, log in to the vSphere Client, connect to the ESXi 5.x server, and then complete the
following:
1. Obtain the Data Connector virtual machine image file from Infoblox. For more information, see Requirements on
page 7.
2. Install the Data Connector VM on the ESXi server, as described in Installing the Data Connector Virtual Appliance on page 8.
3. Configure the NIC (Virtual Network Adapter) for the Data Connector VM, as described in Configuring the Virtual NIC on page 9.
4. Power on the Data Connector VM, as described in Powering on the Data Connector Virtual Appliance on page 9.
5. Configure the Data Connector VM to collect DNS data from the Infoblox Grid, as described in Configuring the Data Connector Virtual Appliance on page 10.
Installing the Data Connector Virtual Appliance
To install the Data Connector VM:
1. Obtain the Data Connector VM image file from Infoblox.
2. Download the .OVA package file(s) for the Data Connector VM.
3. From the vSphere Client, click File -> Deploy OVF Template to start the Deploy OVF Template wizard, as shown in
Figure 1.2. You use this feature to open the .OVA file to deploy your Data Connector VM.
8 Data Connector 2.0 Infoblox User Guide

Deploying the Data Connector Virtual Appliance
Figure 1.2 Deploy OVF Template Wizard
4. Depending on the download location of the Data Connector VM, select Deploy from file to deploy the .OVA file
from a local file system, or select Deploy from URL to deploy from a remote web server. Locate the .OVA file or
enter the URL of the file, and then click Next.
5. Verify the .OVA package file details and click Next.
6. Specify a name for the Data Connector VM instance and click Next.
7. Select the network for the Data Connector VM instance and click Next.
8. Verify the information in the summary screen and click Finish.
The Data Connector VM installation begins. The Deployment Completed Successfully dialog box appears after
the installation is complete.
9. Click Close to close the dialog box.
10. To verify the installation of the Data Connector VM, click the Virtual Machines tab in the vSphere Client.
Configuring the Virtual NIC
1. From the vSphere Client, select the newly deployed Data Connector VM instance.
2. Click Inventory -> Virtual Machine -> Edit Settings.
3. In the Virtual Machine Properties dialog box, select the Hardware tab.
4. From the Hardware list, select the network interface that the Data Connector VM uses to communicate with the
Grid.
5. Click OK.
Powering on the Data Connector Virtual Appliance
1. From the vSphere Client, select the Data Connector VM instance.
2. Click Inventory -> Virtual Machine -> Power -> Power On.
Note: After you power on the Data Connector VM, it may take a few minutes for the CLI prompt to appear while the
appliance initializes.
Infoblox User Guide Data Connector 2.0 9

Deploying the Infoblox Data Connector
Configuring the Data Connector Virtual Appliance
After you have successfully installed the Data Connector VM software package on the ESXi server, power on the Data
Connector VM and configure the Data Connector VM. You can configure the Data Connector VM using a Wizard or CLI
commands. For more information, see Configuring the Data Connector Virtual Appliance using a Wizard on page 10.
For more information, see Configuring the Data Connector Virtual Appliance using the CLI on page 14.
The data source, which is an Infoblox Grid, is connected to the Infoblox Data Connector VM that collects DNS data
from the Grid and transfers it to the destination, either a Reporting member, Splunk Indexer or an ActiveTrust Cloud.
You must configure the following in order to transfer data through the Data Connector VM:
1. Configure the source.
2. Configure the destination.
3. Add SCP users who can upload files to the Data Connector VM.
4. Configure the Data Connector VM.
For an ActiveTrust Cloud destination, the Data Connector VM also collects additional data from the Grid for reporting
and analytics. You can view these reports using the ActiveTrust Cloud portal when you configure Unified Reporting.
For more information, see Configuring ActiveTrust Cloud Destination on page 37.
Note: You must register a Data Connector VM with the Grid Master to forward output files to a Reporting destination.
However, registration is not required for forwarding these files to an Infoblox ActiveTrust Cloud or a Splunk
destination.
To reduce data transfer between the Grid, Data Connector and ActiveTrust Cloud, enable the NIOS Object Change
Tracking feature. When you enable this feature, the appliance tracks the changes that are made to NIOS objects and
periodically synchronizes changed objects, through Data Connector, with the ActiveTrust Cloud destination. For more
information, refer to the Infoblox NIOS Administrator Guide.
Note that you must configure the NIOS appliance to send syslog messages to an external Data Connector VM over TCP.
By default, the NIOS appliance sends these messages over UDP. To configure the NIOS appliance to send messages
over TCP, log in to Grid Manager and from the Grid tab -> select the Grid Manager tab -> Members tab, and then click
Grid Properties -> Edit from the Toolbar. In the Grid Properties editor, select the Monitoring tab, select the Log to
External Syslog Servers check box, click the Add icon and specify the IP address of the Data Connector VM. Next,
select Secure TCP or TCP as the Transport option. For more information about syslog, refer to the Infoblox NIOS Administrator Guide.
Configuring the Data Connector Virtual Appliance using a Wizard
Complete the following to configure the Data Connector VM with the Infoblox Grid:
1. Connect to the CLI using the following command:
ssh admin@vm_ip_address -p 2020
admin@<vm_ip_address>'s password: password
Name: DataCollector
Version: 2.0.0-348708
Infoblox Data Collection Virtual Machine
In the above command, the variable vm_ip_address is the IP address of the Data Connector VM. You can get
the IP address from the VM console on the VMware ESXi server. The default username is admin and the default
password is infoblox.
2. You can run the wizard command to configure of the Data Connector VM. Using the wizard command, you can
configure network settings, register the Data Connector VM with the Infoblox Grid, and add an SCP user who is
allowed to upload files to the Data Connector VM. Note that you can register only one Data Connector VM with
the NIOS Grid.
10 Data Connector 2.0 Infoblox User Guide

Deploying the Data Connector Virtual Appliance
Note: Ensure that your network configuration allows data exchange between the Data Connector VM and the
destination, which can be the Reporting member, Splunk, or an Infoblox ActiveTrust Cloud.
Note that the following wizard output contains configuration of all the destinations as an example. To configure
a Reporting destination, see Configuring Reporting Destination on page 33. For information about configuring a
Splunk destination, see Configuring Splunk Destination on page 35. To configure an ActiveTrust Cloud, see
Configuring ActiveTrust Cloud Destination on page 37.
Run the wizard command as follows and enter the information as prompted:
> wizard
Do you want to configure admin network settings y/n [y]:
y
Please use: '?' for help on available command options.
Please enter IPv4 configuration in format: 'mode [gateway address mask vlanid]'
Current settings are [ static 10.36.0.1 10.36.130.1 255.255.0.0 0 ]:
static 10.36.0.1 10.36.130.1 255.255.0.0 0
ok
Please enter dns configuration[ 10.0.0.0 ]:
10.0.0.0
DNS servers obtained by DHCP (if any) have higher precedence
ok
Please enter domain configuration[ dc-xyz.com ]:
dc-xyz.com
ok
Please enter hostname configuration[ dc-xyz ]:
dc-xyz
ok
Configured System Setting:
gateway: 10.36.0.1
mask: 255.255.0.0
mode: static
address: 10.36.130.1
vlanid: 0
vlan configuration is only in effect in the static mode.
Configured DNS Setting:
Dns Server(s): ['10.0.0.0']
domain: dc-xyz.com
hostname: dc-xyz
Is it correct? y/n [y]:
y
Do you want to configure data output cloud registration settings y/n [y]:
y
Please use: '?' for help on available command options.
Please enter cloud url[ https://usa-va.csp.infoblox.com/dnslog ]:
Settings unchanged.
Please enter api_key[ 1234 ]:
Infoblox User Guide Data Connector 2.0 11

Deploying the Infoblox Data Connector
Settings unchanged.
Please enter agent_id[ 8 ]:
Settings unchanged.
url: https://usa-va.csp.infoblox.com/dnslog
api_key: 1234
agent_id: 8
Is it correct? y/n [y]:
y
Do you want to configure data output cloud settings y/n [y]:
y
Please use: '?' for help on available command options.
Please enter Output cloud mode configuration[ hold ]:
hold
ok
The output mode is hold
Is it correct? y/n [y]:
y
Do you want to configure data output splunk settings y/n [y]:
y
Please use: '?' for help on available command options.
Please enter splunk indexers[ 10.10.1.2 ]:
y
'y' is not a valid IP address
Please enter splunk indexers[ 10.10.1.2 ]:
10.10.1.2
Indexer 10.10.1.2 already defined
Please enter splunk indexers[ 10.10.1.2 ]:
10.10.1.3
ok
Do you want to add more values? y/n [n]:
n
Please enter splunk index name[ xyz ]:
xyz
ok
Please enter splunk source type[ ib:dns:captures ]:
Settings unchanged.
Please enter splunk default indexer port[ 9997 ]:
Settings unchanged.
Please enter splunk mode[ disabled ]:
hold
ok
Indexers:
10.10.1.2
10.10.1.3
Index name is xyz
12 Data Connector 2.0 Infoblox User Guide

Deploying the Data Connector Virtual Appliance
Source type is ib:dns:captures
Default indexer port is 9997
The output mode is hold
Is it correct? y/n [y]:
y
Do you want to configure admin system settings y/n [y]:
y
Please use: '?' for help on available command options.
Please enter Greeting banner text[ This is Infoblox Data Connection Virtual Machine ]:
This is Infoblox Data Connector VM.
ok
This is Infoblox Data Connector VM.
Is it correct? y/n [y]:
y
Do you want to configure data input scp settings y/n [y]:
y
Please use: '?' for help on available command options.
Please enter SCP users[ dc_scp_user ]:
dc_scp_user
Enter password for user dc_scp_user:
Enter again:
ok
Do you want to add more values? y/n [n]:
n
Registered user(s):
admin1
user123
dc_scp_user
Is it correct? y/n [y]:
y
Do you want to configure data input grid settings y/n [y]:
y
Please use: '?' for help on available command options.
Enter the IP address (or FQDN) of the NIOS Grid Master[ 10.35.5.49 ]:
Settings unchanged.
Enter the NIOS admin username[ admin ]:
Settings unchanged.
10.35.5.49
admin
Is it correct? y/n [y]:
y
Do you want to configure data output reporting settings y/n [y]:
y
Please use: '?' for help on available command options.
Please enter reporting mode[ hold ]:
Settings unchanged.
Infoblox User Guide Data Connector 2.0 13

Deploying the Infoblox Data Connector
The output mode is hold
Is it correct? y/n [y]:
y
Setup wizard finished successfully
3. After successfully completing the configuration for the Data Connector VM, you can log in to the NIOS Grid and
enable the Grid to start capturing DNS queries and/or DNS responses to be sent to the Data Connector VM. For
more information, see Configuring DNS Queries and Responses on page 28. You can configure the Data
Connector VM to send additional information, such as the DNS RPZ events from a Grid syslog, Microsoft Active
Directory user name and other IPAM/lease information, to the Cloud destination.
4. You must also add the IP address of the Data Connector VM and the user credentials of the SCP user to the
Logging tab -> Advanced tab of the Grid DNS Properties editor. For more information, refer to the Infoblox NIOS Administrator Guide.
Note: You must add user credentials of only superuser administrators.
5. For Reporting destinations, use the following command to register the Data Connector VM with the Grid Master:
data.destination.reporting.registration > register
Getting Grid Data Connector information... done.
Generating certificate for Splunk forwarder... done.
Signing Splunk forwarder certificate with the Grid... done.
Registering Data Connector with the Grid... done.
Saving changes to database... done.
Configuring the Data Connector Virtual Appliance using the CLI
Besides the wizard, you can execute the following commands in the CLI to configure the Data Connector VM for
respective output destinations:
1. Connect to the CLI using the following command:
ssh admin@vm_ip_address -p 2020
admin@<vm_ip_address>'s password: password
Name: DataCollector
Version: 2.0.0-348708
Infoblox Data Collection Virtual Machine
In the above command, the variable vm_ip_address is the IP address of the Data Connector VM. You can get
the IP address from the VM console on the VMware ESXi server. The default username is admin and the default
password is infoblox.
2. Configure the data source for the Data Connector VM to collect DNS query and response data. Next, configure
relevant output destinations. An output destination can be a Reporting member, Splunk Indexer or an ActiveTrust
Cloud. For more information about configuring the source and Reporting destination for a Data Connector VM,
see Configuring Reporting Destination on page 33. To configure the source and Splunk destination, see
Configuring Splunk Destination on page 35. For more information about configuring the source and Infoblox
ActiveTrust Cloud destination, see Configuring ActiveTrust Cloud Destination on page 37.
3. Add SCP user details on the Grid members to allow them to upload files to the Data Connector VM. For
information, see Configuring NIOS for Data Connector on page 27.
4. Configure Data Connector VM for output destination. For more information about configuring the Reporting
destination, see Configuring Reporting Destination on page 33. To configure the Splunk destination, see
Configuring Splunk Destination on page 35. For more information about configuring the Infoblox ActiveTrust
Cloud destination, see Configuring ActiveTrust Cloud Destination on page 37.
14 Data Connector 2.0 Infoblox User Guide

Upgrading the Infoblox Data Connector
Upgrading the Infoblox Data Connector
Note: Your Data Connector must be running software version 1.1.0 or later in order to support installing future
upgrades and hotfixes.
Depending on your deployment requirements, you can install the upgrade package using one of the following
methods:
• In-place Upgrade: Upgrading the existing Data Connector by uploading a new software package to replace the
existing software.
• External Upgrade: Deploy a new Data Connector, install the latest .OVA package file on the new Data Connector,
back up the configuration file from the old Data Connector, shut down the old Data Connector, and then move
the configuration file over to the new Data Connector.
For more information, see Installing the Upgrade Package on page 15.
Upgrade Prerequisites
Ensure that you have completed the following before upgrading:
• Contact your Infoblox representative about how to obtain the upgrade software package.
• Ensure that you have properly set up and configure an external server to which you upload the upgrade
package. The Data Connector supports SCP and FTP servers.
• Check the connection between the Data Connector and the external server to which you plan to upload the
upgrade package.
• Ensure that the connection between the Data Connector and the destination server (Infoblox reporting server
and Infoblox cloud destination) is up and running.
Installing the Upgrade Package
Follow these procedures to install the software upgrade package on the Infoblox Data Connector:
1. Upload the upgrade packet to an external SCP or FTP server.
2. Log in to the Data Connector CLI.
3. Download the upgrade package from the external server using the admin.system.upgrade > load CLI
command.
Example:
admin.system.upgrade > load <scp|ftp>://loginname@serverIP:[port:]path
where path is the <path of the upgrade package>
Note: This operation might take a longer time depending on network conditions.
Enter Password:
Received upgrade package. Validating...
Upgrade package is ready
ok
Note: <path of the upgrade package> is the absolute path to the file on the server.
4. Before you upgrade, you can check the current status of the upgrade package using the admin.system.upgrade > status CLI command.
Infoblox User Guide Data Connector 2.0 15

Deploying the Infoblox Data Connector
Example:
admin.system.upgrade > status
System version: 1.1.0-123456
Upgrade version: 2.0.0-348708
Upgrade package: DataConnector_2.0.0-123456_2016-04-13-12-01-01_x86_64.upg
No upgrade or revert operation is running
ok
5. Obtain a manual backup of the existing configuration file on the Data Connector and export it to an external
server of your choice, as follows:
admin.system > backup <scp|ftp>://loginname@serverIP:[port:]path
Note: If you are performing an external upgrade, you must restore this backup file on the new Data Connector.
For an in-place upgrade however, backing up the configuration file is a best practice.
Example:
admin.system > backup scp://[email protected]/DataCollector-7.3/backup-restore
Enter password:
Backup file dc_backup_dc-xyz_dc-xyz.com_20170324090152.tgz is created.
Uploaded backup to [email protected]
ok
The backup file is created in this format: dc_backup_dc-infoblox__yyyymmddhhmmss.tgz
6. Optionally, use the data.destination > stats CLI command to view pipeline statistics and the number of
output files in queue waiting to be transferred to the destination server (such as the Infoblox reporting or Infoblox
cloud server). If there are a lot of output files, the Data Connector might not be able to transfer all the data to the
destination servers before the configured timeout period. In this case, you can decide whether to terminate the
upgrade when the timeout period expires or continue with the upgrade. If you select to continue with the
upgrade, the Data Connector proceeds to transfer the remaining output files to the destination server after the
upgrade is complete. If desired, you can also force an upgrade on the Data Connector after the timeout period.
However, be aware that data loss might happen if there are still output files waiting to be transferred when you
force an upgrade after the timeout period expires.
Note: A large number of output files in queue, could be an indication that the Infoblox reporting or Infoblox cloud
server is busy or the connection is down. Check the connections between the Data Connector and these
servers to ensure that the connections are up and running.
Example:
data.destination > stats
Cloud output stats:
# of files Size in kb Oldest
pending pending file
0 0.000 N/A
Reporting output stats:
# of files Size in kb Oldest
pending pending file
0 0.000 N/A
7. Apply the uploaded upgrade package and perform the upgrade using the following CLI command:
admin.system.upgrade > apply [timeout] [force]
where
timeout is the number of seconds the system waits for the output files in the Splunkforwarder and
dc_cloud_out containers to be transferred to the corresponding destination servers before starting an upgrade.
The default is 600 seconds. Note that if there are still output files in queue on the Data Connector when the
timeout expires, the upgrade will terminate. However, if you choose to continue with the upgrade, Data
16 Data Connector 2.0 Infoblox User Guide

Upgrading the Infoblox Data Connector
Connector disables the data source so there is no new data being collected. After the upgrade is complete, Data
Connector resumes the data transfer for the output files that are remained in the containers.
force is used to perform a force upgrade when necessary.
Example:
admin.system.upgrade > apply 300
Upgrading from version 1.1.0-cloud-xxxxxx to version 2.0.0-xxxxxx
Wait up to 300 sec. to forward all files
***UPGRADE WILL BE CANCELLED*** after wait time is expired if data are not completely forwarded.
Proceed with upgrade? (y/n): y
27% complete Data forwarding
8. To verify that the upgrade package has been installed successfully, use the admin.system.upgrade > status
command to check the system versions.
Example:
admin.system.upgrade > status
System version: 2.0.0-348708
Revert version: 1.1.0-123456
No upgrade or revert operation is running
ok
9. This step applies only to an external upgrade in which you have configured a new Data Connector and need to
move the configuration file from the old Data Connector to the new one. For an in-place upgrade, this step is not
necessary because the restoration of the configuration file is automatically performed during the upgrade.
After you have successfully installed the upgrade package on the new Data Connector, use the admin.system > restore commands to restore the configuration file you obtained earlier from the previous version of Data
Connector.
Example:
admin.system > restore scp://[email protected]:/ DataConnector-7.3/backup-restore/dc-backup-20160411173718.tgz
Enter password:
Received backup package from [email protected].:
admin.system > restore
The following backup file(s) in the system:
dc-backup-20160411173718.tgz
dc-backup-20160322303030.tgz
dc-backup-20160211101010.tgz
admin.system > set restore dc-backup-20160411173718.tgz
File dc-backup-20160411173718.tgz is restored
ok
Note: Note that after upgrading the Data Connector to version 2.0.0, you must manually reconfigure the Data
Connector and register the Data Connector with the NIOS Grid. For more information, see Configuring the Data Connector Virtual Appliance on page 10.
Infoblox User Guide Data Connector 2.0 17

Deploying the Infoblox Data Connector
Reverting the Data Connector to the Previous Version
You can revert the Data Connector to a version that it was previously running. Before reverting, you can use the
admin.system.upgrade > status command to find out if there is a software version to which you can revert
and confirm its version number. Note that when you revert the Data Connector to a previous version, any changes
made since the last upgrade will be lost.
You can use the following CLI command to revert the Data Connector to a previous version:
admin.system.upgrade > revert [timeout] [force]
where
timeout is the number of seconds the system waits for the output files to be transferred to the corresponding
destination servers before starting the revert operation. The default is 600 seconds. Note that if there are still
output files in queue on the Data Connector when the timeout expires, the revert operation is terminated.
force is used to force the revert operation when necessary.
Example:
admin.system.upgrade > revert 300
Wait up to 300 sec. to forward all files
***REVERT WILL BE CANCELLED*** after wait time is expired if data are not completely forwarded.
Proceed with revert? (y/n): y
Disabling data source.
Total # of files will be forwarded before revert are 0
Data forwarding complete, continue reverting
The session will be terminated while reverting
ok
Verifying the Registered Data Connector
After you configure and register the Data Connector VM with the Grid, you can log in to Grid Manager to verify the
registered Data Connector VM.
To verify the Data Connector VM:
1. Log in to Grid Manager.
2. Navigate to the Grid tab -> Grid Manager tab, and then click Data Collection from the Toolbar.
3. In the Data Connector VMs editor, you can view the details of the registered Data Connector VM in the Data
Connector Cluster tab, as shown in Figure 1.3. For more information, see Viewing Registered Data Connector Details on page 32.
18 Data Connector 2.0 Infoblox User Guide

VLAN Tagging Support
Figure 1.3 Data Connector VMs editor in the Grid Tab
VLAN Tagging Support
VLAN tagging involves adding a VLAN tag or ID to the header of an IP packet in order to identify the VLAN to which the
packet belongs. You can configure a VLAN ID from 2 to 4094. By default, the VLAN ID is set to 0.
Note: VLAN tagging is supported only in static mode.
To configure the VLAN tag or ID, you can log in to the Data Connector CLI and run the following command:
admin.network > set ip4 mode [gateway address mask vlanid]
To view the VLAN tag or ID, you can run the following command:
admin.network > ip4
Actual System Settings:
gateway: 10.36.0.1
mask: 255.255.0.0
mode: dynamic
address: 10.36.122.9
vlanid: 3635
Configured System Setting:
gateway: 10.36.0.1
mask: 255.255.0.0
mode: static
address: 10.36.117.17
vlan id: 3636
vlan configuration is only in effect in the static mode.
Infoblox User Guide Data Connector 2.0 19

Deploying the Infoblox Data Connector
Configuring Data Retention Period
The Data Connector retains data in its output folders for a limited period due to limited file system space. You can
define global data retention period that is applicable to all data destinations. By default, the Data Connector can hold
data in its output folders for four hours. You can configure the retention period from a minimum of one hour up to 720
hours (30 days).
To configure the global data retention period, you can log in to the Data Connector CLI and run the following
command:
data.destination.global > set retention <Enter the duration in hours or days>
Example
data.destination.global > set retention 4h
ok
To view the configured data retention period, you can run the following command:
data.destination.global > show retention
4 hours
Events Tagging
Currently, the Data Connector supports only the dns_view tag. DNS views provide the ability to serve one version of
DNS data to one set of clients and another version to another set of clients. With DNS views the Data Connector can
provide different answer to the same DNS query, depending on the source of the query. You can set either Internal or
External as the default value for the dns_view tag.
To configure the event tag, you can log in to the Data Connector CLI and execute the following:
1. Use the data.destination.global.tags.dns_view > set default command to set either Internal or
External as the default value for dns_view tag.
Example:
data.destination.global.tags.dns_view > set default External
ok
To view the default value set for dns_view tag, run the following command:
data.destination.global.tags.dns_view > show default
External
2. Configure the extensible attribute value using the data.destination.global.tags.dns_view > set ext_attribute command. You must configure the same extensible attribute that has been configured on NIOS.
Example:
data.destination.global.tags.dns_view > set ext_attribute dns_role
ok
To view the configured extensible attribute, run the following command:
data.destination.global.tags.dns_view > show ext_attribute
dns_role
20 Data Connector 2.0 Infoblox User Guide

Changing the Destination Mode
Changing the Destination Mode
By default, the destination mode is set to Disabled for all destinations. You can change the default destination mode
to one of the following:
• Forward: When the destination mode is set to Forward, the data files are generated for the output and forwarded
to the remote host. The data files are deleted after successful transfer of the data files to the destination. If
transfer of any data file fails, then such file is deleted when the disk space of the Data Connector is low and
when the file is older than the retention period.
• Hold: Data files are generated for the specific destination, but the data files are not forwarded to the remote
host. The data files are deleted as soon as they get older than the retention period.
• Disabled: Generation of data files will be disabled for the destination.
To change the default mode for Infoblox cloud destination, you can log in to the Data Connector CLI and run the
following command:
data.destination.cloud > set mode [forward|hold|disabled]
To change the default mode for Infoblox reporting destination, you can log in to the Data Connector CLI and run the
following command:
data.destination.reporting > set mode [forward|hold|disabled]
To change the default mode for Splunk destination, you can log in to the Data Connector CLI and run the following
command:
data.destination.splunk > set mode [forward|hold|disabled]
To view the destination mode, you can run the following command:
For Infoblox cloud destination:
data.destination.cloud > show mode
The output mode is forward
For Infoblox reporting destination:
data.destination.reporting > show mode
The output mode is hold
For Splunk destination:
data.destination.splunk > show mode
The output mode is hold
Purge the Data
You can use the purge command to delete the output files that are in queue waiting to be transferred to the
destination.
To purge the output data waiting to be transferred to the Infoblox cloud destination, you can log in to the Data
Connector CLI and run the following command:
data.destination.cloud > purge
To purge the output data waiting to be transferred to the Infoblox reporting destination, you can log in to the Data
Connector CLI and run the following command:
data.destination.reporting > purge
To purge the output data waiting to be transferred to the Splunk destination, you can log in to the Data Connector CLI
and run the following command:
data.destination.splunk > purge
Infoblox User Guide Data Connector 2.0 21

Deploying the Infoblox Data Connector
Configuring Data Filters
You can configure data filters in order to filter certain events from the generated output. When you configure data
filters, the Data Connector excludes those events that match the data filter from the DNS query/response events, IP
meta data, and RPZ events. You can globally configure data filters that are applied to all the destinations or you can
configure filters specifically for Infoblox reporting output, Infoblox cloud output, and Splunk output. This section
describes how to add, import, export and delete data filters. It includes the following sections:
• Adding Data Filters on page 22
• Importing Data Filters on page 23
• Exporting Data Filters on page 24
• Viewing Data Filters on page 24
• Deleting Data Filters on page 24
Adding Data Filters
You can globally add the data filters that are applicable to all the configured destinations or you can add destination
specific filters. The Data Connector supports the following types of data filters:
• client_ip: The client_ip data filter is applied to DNS query/response events, IPmeta data, and RPZ events. You
can specify the query source IP address when the event is a query and the destination IP address when the
event is a response. You can specify the client_ip filter in the following formats:
— IPv4 or IPv6 address. Example: 10.10.1.0, 2620:10a:6000:661e::523, etc.
— Range of IPv4 addresses. This is applicable to IPv4 addresses only. IPv6 address uses CIDR notation.
Example: 10.10.1.0-10.10.2.35
— Network/Mask. This is applicable to IPv4 addresses only. Example: 10.10.1.0/255.255.255.0
— CIDR block. Example: 10.10.0.1/15, 2001:cdba:9abc:5678::/64, etc.
• dns_view: The dns_view data filter is applied to DNS query/response events and RPZ events. Valid values are
Internal or External. You can just specify 'I' or 'E' also.
• member: The member data filter is applied to DNS query/response events and RPZ events. Specify the Grid
member name that processed the query.
• query FQDN: The query FQDN data filter is applied to DNS query/response events and RPZ events. A query filter
is a combination of valid FQDN and wildcards.
Note the following about wildcards:
— You can specify a wildcard either on the left or on the right side of the domain name.
— A rule can have either 0, 1, or 2 wildcards.
— If a rule has 2 wildcards, they have to be on the opposite ends of the FQDN.
— A wildcard on the left side must be followed by a dot (.), except for the ‘?’ wildcard.
— A wildcard on the right side must be preceded by a dot (.) except for the ‘?’ wildcard.
Table 1.1 List of supported wildcards
Wildcard Description Example
* Applicable for zero or more domain name labels. It can be
specified only on the left side of the domain name.
*.foo.com
# Applicable for one or more domain name labels. It can be
specified only on the left side of the domain name.
#.foo.com
? For exactly one domain name label. It can be specified either on
the left or right side of the domain name.
?.foo.com, ?, ?., xyz.?.,
test.?, etc.
22 Data Connector 2.0 Infoblox User Guide

Configuring Data Filters
To configure global filters, you can log in to the Data Connector CLI and run the following commands for the respective
filter type:
For client_ip filter type:
data.destination.global.filters.client_ip > add <ip|ip/cidr|ip4/netmask|first_ip4-last_ip4>
Example:
data.destination.global.filters.client_ip > add 10.1.0.1
Filter added
For dns_view filter type:
data.destination.global.filters.dns_view > add <Internal|External>
Example:
data.destination.global.filters.dns_view > add Internal
Filter added
For member filter type:
data.destination.global.filters.member > add member_regular_expression
where member_regular_expression is the Grid member name.
Example:
data.destination.global.filters.member > add ns2.site1.xyz.com
Filter added
For query filter type:
data.destination.global.filters.query > add fqdn_with_wildcards
Example:
data.destination.global.filters.query > add *.foo.com
Filter added
Importing Data Filters
You can define data filters in a CSV file and import the data filter file from your local management system, a SCP
server, or an FTP server. When you import the file, it overrides all existing imported and manually added data filters.
The Data Connector validates the imported data filters after a successful import and if the validation fails, the Data
Connector displays an error message.
Note: When you define data filters in a CSV file, you can enter a comment preceded by a semicolon (;). A semicolon
(;) denotes the start of a comment in the data filter file.
To import the data filters from a local file or from a remote host, you can log in to the Data Connector CLI and run the
following commands for the respective filter types:
For client_ip filter type:
data.destination.global.filters.client_ip > import <scp|ftp>://loginname@serverIP:[port:]path
For dns_view filter type:
data.destination.global.filters.dns_view > import <scp|ftp>://loginname@serverIP:[port:]path
For member filter type:
data.destination.global.filters.member > import <scp|ftp>://loginname@serverIP:[port:]path
For query filter type:
data.destination.global.filters.query > import <scp|ftp>://loginname@serverIP:[port:]path
Infoblox User Guide Data Connector 2.0 23

Deploying the Infoblox Data Connector
Exporting Data Filters
You can export the data filters, which includes both the previously imported data filter files and the manually added
data filters to a remote host in .csv format. The CSV file can be exported to a SCP server or an FTP server.
To export the data filters to a remote host, you can log in to the Data Connector CLI and run the following commands
for the respective filter types:
For client_ip filter type:
data.destination.global.filters.client_ip > export <scp|ftp>://loginname@serverIP:[port:]path
For dns_view filter type:
data.destination.global.filters.dns_view > export <scp|ftp>://loginname@serverIP:[port:]path
For member filter type:
data.destination.global.filters.member > export <scp|ftp>://loginname@serverIP:[port:]pat
For query filter type:
data.destination.global.filters.query > export <scp|ftp>://loginname@serverIP:[port:]path
Viewing Data Filters
To view all the imported and manually added data filters, you can log in to the Data Connector CLI and run the
following commands for the respective filter types:
For client_ip filter type:
data.destination.global.filters.client_ip > show filters
For dns_view filter type:
data.destination.global.filters.dns_view > show filters
For member filter type:
data.destination.global.filters.member > show filters
For query filter type:
data.destination.global.filters.query > show filters
You can run show imported command to view the timestamp and the source of the last imported data filter.
Deleting Data Filters
You can delete all the imported and manually added data filters or delete any specific manually added data filter.
To delete data filters, you can log in to the Data Connector CLI and run the following command for the respective filter
type:
For client_ip filter type:
data.destination.global.filters.client_ip > delete <filter|all>
For dns_view filter type:
data.destination.global.filters.dns_view > delete <filter|all>
For member filter type:
data.destination.global.filters.member > delete <filter|all>
For query filter type:
data.destination.global.filters.query > delete <filter|all>
Note the following:
• delete all: Deletes all the imported and manually added data filters.
• delete <filter>: Deletes only a specific data filter that is added manually.
24 Data Connector 2.0 Infoblox User Guide

Health Monitoring
Health Monitoring
You can monitor the health state of the Data Connector through the admin.system.performance commands.
You can monitor the CPU usage, memory usage, disk usage, network interfaces, etc.
Log in to the Data Connector CLI and run the following commands to get the corresponding health information of the
Data Connector.
CPU
Use the cpu command to view the percentage of CPU that is in use.
Syntax
admin.system.performance > cpu
Example
admin.system.performance > cpu
CPU Load, % : 1.9
Disk
Use the disk command to view information about the hard disk that is currently in use.
Syntax
admin.system.performance > disk
Example
admin.system.performance > disk
Block read, kbps : 0.0
Block write, kbps : 6.2
Disk space usage:
/ 2.0%
/boot 15.9%
/infoblox/data 0.0%
Memory
Use the memory command to view the percentage of memory that is currently in use.
Syntax
admin.system.performance > memory
Example
admin.system.performance > memory
Memory usage, % : 2.8
Network
The network command provides information about the network interfaces.
Syntax
admin.system.performance > network
Example
admin.system.performance > network
Network receive, kbps : 20.2
Network send, kbps : 1.2
Network interfaces statistics
Name RX RX Drop RX Error TX TX Drop TX Error
eth0 88848 0 0 2430 0 0
Infoblox User Guide Data Connector 2.0 25

Deploying the Infoblox Data Connector
26 Data Connector 2.0 Infoblox User Guide
Chapter 2 Configuring NIOS for Data Connector
Before you can capture DNS query and response data from the Infoblox Grid, you must configure certain settings in
NIOS to ensure that the Data Connector can collect DNS data from the respective Grid members, and then send the
data to designated destinations. This chapter walks you through these procedures.
It includes the following sections:
• Configuring DNS Queries and Responses on page 28
— Capturing DNS Queries on page 28
— Capturing DNS Responses on page 29
• Viewing Registered Data Connector Details on page 32
Data Connector 2.0 Infoblox User Guide 27

Configuring NIOS for Data Connector
Configuring DNS Queries and Responses
After you set up your Data Connector virtual appliance, you must set up certain configuration so the Data Connector
can gather relevant information from the Grid members, and then send the data to the destination.
When configuring the Grid to capture DNS queries and responses, you can choose to save the capture file locally on
your appliance, or configure a SCP (Secure Copy) server and provide the credentials for the users configured on the
Data Connector.
Note: The DNS queries and responses captured on an IB-4030 appliance does not contain cached query
information.
A capture file for logging DNS queries and responses is rolled over based on the configured time limit or when the file
reaches 100 MB in size, whichever is sooner. The default time limit is 10 minutes. The capture file is automatically
saved and exported to a SCP server based on your configuration. When you configure the appliance to save the
capture file locally and later enable SCP, the appliance copies all the data starting with the oldest data. Infoblox
recommends that you constantly monitor the SCP server to ensure that it has sufficient disk space. DNS queries and
responses are stored on the appliance if the SCP server becomes unreachable. The maximum storage capacity varies
based on the appliance model. After reaching the maximum limit, the appliance overwrites the old data with the new
one. For information about the maximum hard drive space, see Maximum Hard Drive Space used for DNS queries and Responses on page 31. The amount of data captured depends on the DNS query rate and the domains that are
included in or excluded from the capture. For information about how to exclude domains, see Viewing Registered Data Connector Details on page 32.
Capturing DNS Queries
You can capture queries to all domains or limit the capture to specific domains. You can also apply the Bulk Add
Domains feature to tailor query capture to a desired subset of domains or zones. When capturing DNS queries, NIOS
matches the specified domain name(s) and everything that belongs to the domain. For example, when you specify
‘foo.com’ as the domain, NIOS captures queries sent to ‘foo.com,’ ‘mail.foo.com,’ and ‘ftp.foo.com.’ NIOS captures
queries to domains for which a name server is authoritative; it also captures recursive queries. Note that this feature
does not support wildcard characters or regular expressions.
DNS Query Message Format
The DNS query generates a query message in the following format:
<dd-mmm-YYYY HH:MM:SS.uuu> <client IP>#<port> query: <query_Domain name> <class name> <type name> <- or +>[SETDC] <(name server ip)>
where
+ = recursion
- = no recursion
S = TSIG
E = EDNS option set
T = TCP query
D = EDNS ‘DO’ flag set
C = ‘CD’ message flag set
Following is a sample DNS query message:
30-Apr-2013 13:35:02.187 client 10.120.20.32#42386: query: foo.com IN A + (100.90.80.102)
28 Infoblox User Guide Data Connector 2.0

Configuring DNS Queries and Responses
Capturing DNS Responses
You can capture DNS responses for the DNS queries sent to the server. The amount of data captured depends on the
domains that are included in or excluded from the capture. A DNS response is based on a query generated for a
domain. In the response message, NIOS captures the TTL value of a resource record, the resource record type, and
resource data.
Following are characteristics of the response messages:
• They log only the answer section and do not include the authority and additional sections.
• Responses to all queries are logged, including queries with the type “ANY.”
• The RR (resource record) list is not available at the end of a response message if rcode has a value other than
NOERROR or if the response is NOERROR (nodata).
• Responses to all RR types, including those records not managed by NIOS such as HINFO records, are logged.
However, there are few exceptions for some of the scenarios with DNSSEC records.
• Responses containing DNSSEC RRs (DNSKEY, DS, NSEC, NSEC3, NSEC3PARAM, RRSIG) when queried for
non-DNSSEC RRs are not logged. However, responses are logged if a DNSSEC RR is explicitly queried.
• DNS updates are not logged in responses.
DNS Response Message Format and Examples
The DNS query generates a response message in the following format:
<dd-mmm-YYYY HH:MM:SS.uuu> client <client ip>#port <UDP or TCP>: [view: DNS view] query: <queried domain name> <class name> <type name> response: <rcode> <flags> [<RR in text format>; [<RR in text format>;] ...]
Flags = <- or +>[ATEDVL]
where
- = recursion not available
+ = recursion available (from DNS message header)
A = authoritative answer (from DNS message header)
t = truncated response (from DNS message header)
E = EDNS OPT record present (from DNS message header)
D = DNSSEC OK (from EDNS OPT RR)
V = responding server has validated DNSSEC records
L = response contains GSLB synthetic record
Following are some DNS response samples:
Example 1: When querying an A record
07-Apr-2013 20:16:49.083 client 10.120.20.198#57398 UDP: query: a2.foo.com IN A response: NOERROR +AED a2.foo.com. 28800 IN A 1.1.1.2;
Example 2: When querying an AAAA record
07-Apr-2013 20:16:49.083 client 10.120.20.198#57398 UDP: query: a4.foo.com IN AAAA response: NOERROR +AED a4.foo.com. 28800 IN AAAA ab::a;
Example 3: When querying an A record over IPv6
07-Apr-2013 20:16:49.083 client 2001::2#57398 UDP: query: a2.foo.com IN A response: NOERROR +AED a2.foo.com. 28800 IN A 1.1.1.2;
Example 4: When querying an A record over TCP
07-Apr-2013 20:16:49.083 client 10.120.20.198#57398 TCP: query: a2.foo.com IN A response: NOERROR +ED a2.foo.com. 28800 IN A 1.1.1.2;
Example 5: When querying ANY record
07-Apr-2013 20:16:49.083 client 10.120.20.198#57398 UDP: query: a2.foo.com IN ANY response: NOERROR +ED a2.foo.com. 28800 IN A 1.1.1.2;
Example 6: When querying an A record with multiple addresses
07-Apr-2013 20:16:49.083 client 10.120.20.198#57398 UDP: query: a1.foo.com IN A response: NOERROR +ED a1.foo.com. 28800 IN A 1.1.1.1; a1.foo.com. 28800 IN A 11.1.1.1;
Data Connector 2.0 Infoblox User Guide 29

Configuring NIOS for Data Connector
Example 7: When querying an aliased A record
07-Apr-2013 20:16:49.083 client 10.120.20.198#57398 UDP: query: c2.foo.com IN A response: NOERROR +ED c2.foo.com. 28800 IN CNAME a2.foo.com.; a2.foo.com. 28800 IN A 1.1.1.2;
Example 8: When querying an NXDOMAIN
07-Apr-2013 20:16:49.083 client 10.120.20.198#57398 UDP: query: non-exist.foo.com IN A response: NXDOMAIN +ED
Example 9: Response message for NOERROR/nodata
07-Apr-2013 20:16:49.083 client 10.120.20.198#57398 UDP: query: a1.foo.com IN SRV response: NOERROR +ED
Example 10: Response message for refused query
07-Apr-2013 20:16:49.083 client 10.120.20.198#57398 UDP: query: refused.com IN A response: REFUSED +ED
Example 11: Response message when server fails
07-Apr-2013 20:16:49.083 client 10.120.20.198#12345 UDP: query: servfail.com IN A response: SERVFAIL +E
Example 12: Response message when query A record in a signed zone
07-Apr-2013 20:16:49.083 client 10.120.20.198#57398 UDP: query: a1.signed.com IN A response: NOERROR +ED a1.signed.com. 28800 IN A 1.1.1.1;
Example 13: Response message for explicit query to DNSSEC RRs
07-Apr-2013 20:16:49.083 client 10.120.20.198#57398 UDP: query: a1.signed.com IN RRSIG response: NOERROR +ED a1.signed.com. 28800 IN RRSIG A 5 3 28800 20130616004903 20130611234903 4521 signed.com. evROKe7RbnkjFTsumT3JJg76bduFLfdEEnszitXHQCbVYBS5rDy+qbUI HCQuN/ldCNTJbZQ8MEhuatzfms+2Y5K2sU67P9Yg6GkOMxsT2LcJiBm/ YqrYiZBWGKpLF6J0PdX05133Xwq8XxUStUEJxKfuzcKSY6jaSduQIdFL v6A=; a1.signed.com. 900 IN RRSIG NSEC 5 3 900 20130616004903 20130611234903 4521 signed.com. CnFmXMx9D+ZkDsztQbW2xx8XCROGNMBp0baxFXS/Pxxhg4PQcq58laI97y2Xgqswn/wKNhY8p9hkes5+6t/ihCOIbwFryxtdivPfYYFf3jafedFN ymZu05K9bYUfCUzZTGiRzoJYhxBM7xFT8fMvxni9ngsbLym82Tqv3Nua 6wU=;
Configuring DNS Queries and Responses on NIOS
To configure DNS queries and responses:
1. Grid: From the Data Management tab, select the DNS tab, expand the Toolbar and click Grid DNS Properties.
Member: From the Data Management tab, select the DNS tab and click the Members tab -> member check box ->
Edit icon.
2. In the Grid DNS Properties or Member DNS Properties editor, click Toggle Advanced Mode and select the Logging
tab.
3. Under Data Connection for all DNS Queries/Responses to a Domain, complete the following:
— Select the Capture DNS Queries check box to start capturing DNS queries. This enables the feature set for
configuration. When you enable this option at the member level, the appliance captures DNS queries for
the selected members only.
— Select the Capture DNS Responses check box to start capturing DNS responses. This enables the feature set
for configuration. When you enable this option at the member level, the appliance captures DNS responses
for the selected members only.
Note: Enabling the logging of queries and responses at the same time can increase disk space usage and
adversely affect DNS services and performance. Infoblox recommends that you do not configure both
logging at the same time.
— Select Capture queries/responses for all domains to capture queries and responses to all domains and
zones.
— Select Limit capture to these domains to capture DNS queries and responses to domains and zones one at
a time.
30 Infoblox User Guide Data Connector 2.0

Configuring DNS Queries and Responses
— Specify domains for DNS capture operations in the Domain table by clicking the Add icon, and choosing
Add Domain or Bulk Add Domains from the menu.
— To define the destination for capture files, do the following:
— Retain captured queries on the local disk: Select this check box to save the DNS queries on the
appliance. In addition to the local disk, you can select to export the DNS queries to the Data Connector
by selecting SCP in the Export to drop-down list.
— Export to: From the drop-down list, select SCP to back up the DNS queries on the Data Connector and
None to save queries only on the appliance. To save the captured DNS queries on both the appliance
and the Data Connector, select the Retain captured queries on the local disk check box and SCP from
the Export to drop-down list.
Note: When you configure an SCP server and enable the MGMT port, the NIOS appliance uses SSH for data
transfer. It uses the same authentication and provides the same security as SSH. SCP uses the LAN1 port
to communicate with the external servers.
— When you select SCP from the Export to drop-down list, complete the following:
• In the Directory Path field, enter the directory to which the capture file will be saved on the server.
Infoblox recommends that you use the ~ symbol for the Data Connector VM.
• In the Server Address field, enter the IP address of the Data Connector VM to which the capture
files will be saved.
• Enter the file server account Username and Password values.
— Limit query data collected per file to minutes or 100MB (whichever comes first): This option limits the
collection of query data per capture file. A capture file for logging DNS queries and responses is rolled over
based on the configured time limit or when the file reaches 100 MB in size, whichever is sooner. The default
time limit is 10 minutes. You can enter a value from 1 to 10.
4. Save the configuration.
Table 2.1 lists the maximum hard drive space required for capturing DNS queries and responses for supported
Infoblox appliance models.
Table 2.1 Maximum Hard Drive Space used for DNS queries and Responses
Supported Infoblox AppliancesMaximum Hard Drive Space for DNS Query /Response Capture (MB)
Trinzic 100 400
Trinzic 810 900
Trinzic 815 and IB-V815 900
Trinzic 820 3100
Trinzic 825 and IB-V825 3100
Trinzic 1410 6000
Trinzic 1415 and IB-V1415 6000
Trinzic 1420 10000
Trinzic 1425 and IB-V1425 10000
Trinzic 2210 12000
Trinzic 2215 and IB-V2215 12000
Trinzic 2220 28000
Data Connector 2.0 Infoblox User Guide 31
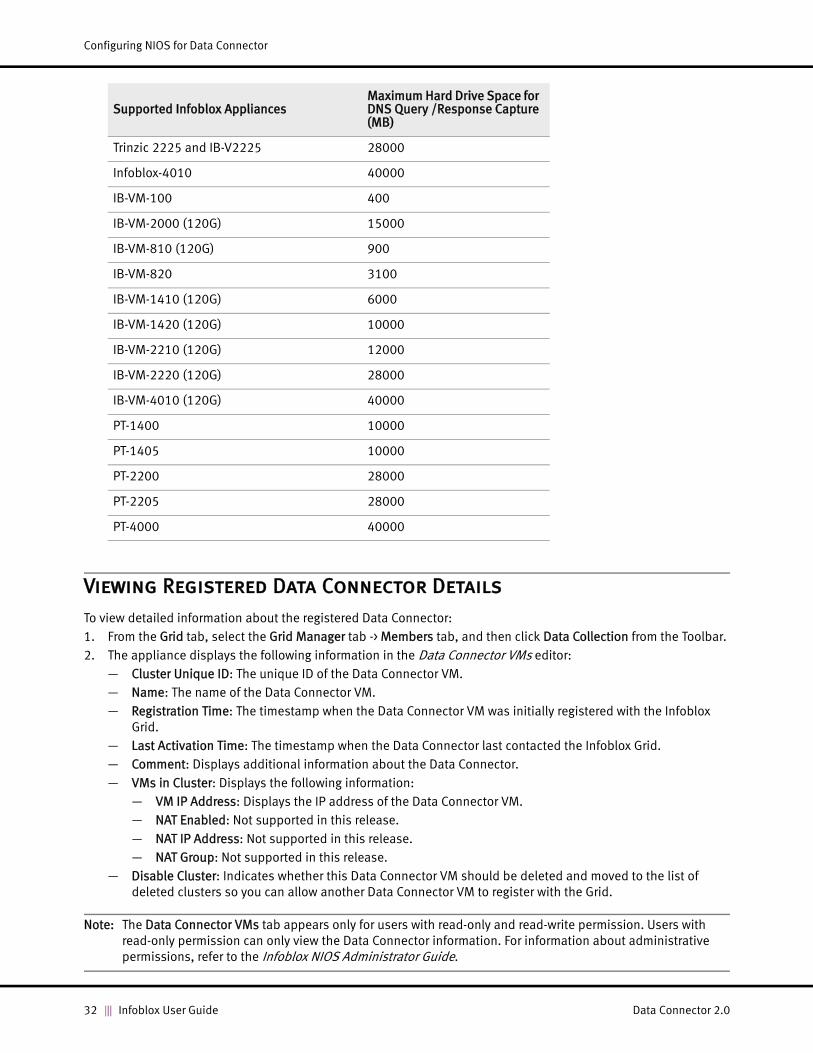
Configuring NIOS for Data Connector
Viewing Registered Data Connector Details
To view detailed information about the registered Data Connector:
1. From the Grid tab, select the Grid Manager tab -> Members tab, and then click Data Collection from the Toolbar.
2. The appliance displays the following information in the Data Connector VMs editor:
— Cluster Unique ID: The unique ID of the Data Connector VM.
— Name: The name of the Data Connector VM.
— Registration Time: The timestamp when the Data Connector VM was initially registered with the Infoblox
Grid.
— Last Activation Time: The timestamp when the Data Connector last contacted the Infoblox Grid.
— Comment: Displays additional information about the Data Connector.
— VMs in Cluster: Displays the following information:
— VM IP Address: Displays the IP address of the Data Connector VM.
— NAT Enabled: Not supported in this release.
— NAT IP Address: Not supported in this release.
— NAT Group: Not supported in this release.
— Disable Cluster: Indicates whether this Data Connector VM should be deleted and moved to the list of
deleted clusters so you can allow another Data Connector VM to register with the Grid.
Note: The Data Connector VMs tab appears only for users with read-only and read-write permission. Users with
read-only permission can only view the Data Connector information. For information about administrative
permissions, refer to the Infoblox NIOS Administrator Guide.
Trinzic 2225 and IB-V2225 28000
Infoblox-4010 40000
IB-VM-100 400
IB-VM-2000 (120G) 15000
IB-VM-810 (120G) 900
IB-VM-820 3100
IB-VM-1410 (120G) 6000
IB-VM-1420 (120G) 10000
IB-VM-2210 (120G) 12000
IB-VM-2220 (120G) 28000
IB-VM-4010 (120G) 40000
PT-1400 10000
PT-1405 10000
PT-2200 28000
PT-2205 28000
PT-4000 40000
Supported Infoblox AppliancesMaximum Hard Drive Space for DNS Query /Response Capture (MB)
32 Infoblox User Guide Data Connector 2.0

Chapter 3 Configuring Data Connector for Reporting Destination
This chapter explains how to configure the Infoblox Data Connector so it can forward DNS query and response data
gathered from the Infoblox Grid to a reporting server.
Configuring Reporting Destination
After you set up your Data Connector virtual appliance, you must set up certain configurations so the Data Connector
can gather relevant information from the Grid members, and then send the data to the reporting server.
Note: The Data Connector VM and the reporting member must be on the same network so that the data exchange
between them will not be blocked by firewalls.
To configure the Data Connector to send DNS data to a reporting server, you can log in to the Data Connector CLI and
complete the following:
1. Enable DNS service on the Grid Master. For information about enabling DNS service on the Grid Master, refer to
the Infoblox NIOS Administrator Guide.
2. Configure and register the Data Connector, as described in Deploying the Data Connector Virtual Appliance on
page 8.
3. Configure the Grid to capture DNS queries and responses, as described in Configuring DNS Queries and Responses on NIOS on page 30.
4. Log in to the Data Connector CLI.
5. Verify the configured network settings of the Data Connector using the admin.network > ip4 get command.
Example:
admin.network > ip4 get
Configured System Setting:
gateway: 10.35.0.1
mask: 255.255.0.0
mode: static
address: 10.35.1.1
vlanid: 0
vlan configuration is only in effect in the static mode.
6. Use the data.source.grid > set address command to set the Grid IP, admin username, and password.
Example:
data.source.grid > set address 10.0.0.22
Data Connector 2.0 Infoblox User Guide 33

Configuring Data Connector for Reporting Destination
Command applied successfully.
data.source.grid > set username admin
Command applied successfully.
data.source.grid > password
Enter the NIOS admin's password:
Enter again:
Password updated
7. Use the data.destination.reporting.registration > register command to register the Data
Connector with the NIOS Grid, as follows:
data.destination.reporting.registration > register
Getting Grid Data Connector information... done.
Generating certificate for Splunk forwarder... done.
Signing Splunk forwarder certificate with the Grid... done.
Registering Data Collector with the Grid... done.
Saving changes to database... done.
8. Configure a reporting server as the destination using data.destination.reporting > set mode command
and set the reporting output mode to forward, as follows:
data.destination.reporting > set mode forward
Data will start transmitting immediately
ok
or
You can run the wizard command while configuring the Data Connector VM. Using the wizard command, you can
configure the network settings, register the Data Connector VM with the Infoblox Grid, and add an SCP user who is
allowed to upload files to the Data Connector VM. For more information, see Configuring the Data Connector Virtual Appliance on page 10. Note that you can register only one Data Connector VM with the NIOS Grid. For information,
see Configuring the Data Connector Virtual Appliance on page 10.
Viewing DNS Query Capture Reports
In a Grid that includes a reporting server, you can view reports that contain information about the client IP addresses
or domains being queried in your network. For more information about the reporting and analytics service and
reports, refer to the Infoblox NIOS Administrator Guide.
Note: Information in the following DNS Query Capture reports is displayed only if a Data Connector VM is registered
with the Infoblox Grid and options for capturing DNS queries and DNS responses are enabled.
• DNS Domain Query Trend
The DNS Domain Query Trend dashboard shows the trend of DNS queries for specific domains. This dashboard
displays the DNS query trends for queries generated from both the internal and external sources.
• DNS Domains Queried by Client
The DNS Domain Queried by Client dashboard shows the DNS domains being queried by the client. This
dashboard displays the DNS domains that are being queried from both the internal and external sources.
• Top DNS Clients by Query Type
The Top DNS Clients by Query Type dashboard lists the top DNS resource records that have been queried per
client. This dashboard displays the DNS records query trends for queries that originate from both the internal
and external sources.
• Top DNS Clients Querying MX Records
The Top DNS Clients Querying MX Records dashboard lists the top MX records that have been queried per client.
This dashboard displays the MX records query trends for queries that originate from both the internal and
external sources.
34 Infoblox User Guide Data Connector 2.0

Chapter 4 Configuring Data Connector for Splunk Destination
This chapter explains how to configure the Infoblox Data Connector so it can forward DNS query and response data
gathered from the Infoblox Grid to Splunk destination.
Configuring Splunk Destination
After you set up your Data Connector virtual appliance, you must set up certain configurations so the Data Connector
can gather relevant information from the Grid members, and then send the data to the Splunk destination.
The following are required to configure a Splunk destination:
• Data Connector version 2.0 and later
• Security Ecosystem license installed on your NIOS Grid, if the Grid is running version NIOS 7.3 or later.
To configure the Data Connector to send DNS data to a Splunk destination, you can log in to the Data Connector CLI
and complete the following:
1. Add one or more Splunk indexers to which the Data Connector sends DNS data. Enter a valid indexer IP address
and (optionally) enter the indexer port number between 1 and 65536. The default indexer port number is 9997.
If you do not specify the port number in this step, you can configure it later using the set port <number>
command.
Run the following command to add Splunk indexers:
data.destination.splunk > add indexer <address>[:optional_port]
Example:
data.destination.splunk > add indexer 10.1.1.0
ok
data.destination.splunk > add indexer 10.1.1.2
ok
2. Specify the index name where the DNS data will be saved. You can get the index name from your Splunk
administrator. Run the following command to specify the index name:
data.destination.splunk > set indexname <string>
Example:
data.destination.splunk > set indexname xyz
ok
Data Connector 2.0 Infoblox User Guide 35

Configuring Data Connector for Splunk Destination
3. Optionally, specify the Splunk sourcetype. The Splunk sourcetype is used to tag DNS data. The default
sourcetype is ib:dns:captures. Run the following command:
data.destination.splunk > set sourcetype <string>
Example:
data.destination.splunk > set sourcetype ib:dns:captures
ok
4. Upload the Certification Authority bundle in .PEM format which is used to authenticate Splunk forwarder traffic
with Splunk indexers. You can get the Certification Authority bundle from your Splunk administrator. Run the
following command to import the Certification Authority bundle from a SCP server or an FTP server:
data.destination.splunk > cacertificate import <scp|ftp>://loginname@serverIP:[port:]path
Example:
data.destination.splunk > cacertificate import scp://[email protected]:999/DB1/
5. Generate a certificate request in .PEM format. This certificate request must be signed by the third-party
Certification Authority to get a Forwarder Certificate. Run the following command:
data.destination.splunk > certificate request
Generating Forwarder Private key... Done
Below is Certificate Request.
Please pass it to your Certification Authority for signing to get Forwarder Certificate.
-----BEGIN CERTIFICATE REQUEST-----
CUEybjcJD/4+Q8cSHmMU7VOpp1VEs9W4Fwi5QHtn0/zz4a2bEIlJ/
-----END CERTIFICATE REQUEST-----
ok
You must send the generated certificate request to the Certification Authority for signing and get the Forwarder
Certificate.
6. Upload the Forwarder Certificate signed by the third-party Certification Authority. Run the following command to
import the Forwarder Certificate from a SCP server or an FTP server:
data.destination.splunk > certificate import <scp|ftp>://loginname@serverIP:[port:]path>
Example:
data.destination.splunk > certificate import scp://[email protected]:999/DC2/
7. Change the default output mode for the Splunk output. By default, the Splunk output mode is set to ‘disabled’.
You can change the Splunk output mode to ‘forward’ only after you have configured all the above parameters.
Run the following command to change the default output mode:
data.destination.splunk > set mode [forward|hold|disabled]
Example:
data.destination.splunk > set mode forward
Data will start transmitting immediately
ok
For information about changing the output mode, see Changing the Destination Mode on page 21.
36 Infoblox User Guide Data Connector 2.0

Chapter 5 Configuring Data Connector for Infoblox ActiveTrust Cloud Destination
This chapter explains how to configure the Infoblox Data Connector so it can forward DNS query and response data
gathered from the Infoblox Grid to Infoblox ActiveTrust Cloud destination.
Infoblox ActiveTrust Cloud is an extension of the ActiveTrust Suite that provides visibility into infected and
compromised off-premise devices, roaming users, and branch and remote offices. You can subscribe to Infoblox
ActiveTrust Cloud and use its functionality to mitigate and control malware as well as provide unprecedented insight
into your network security posture and enable timely action. ActiveTrust Cloud also offers unified policy management,
reporting, and threat analytics across the entire spectrum. For more information about ActiveTrust Cloud, visit the
Infoblox web site at www.infoblox.com.
You can also configure and enable Threat Insight to block malicious domains on a cloud destination. For more
information, see Configuring Threat Insight for Cloud Destination on page 40.
Configuring ActiveTrust Cloud Destination
After you set up your Data Connector virtual appliance, you must set up certain configurations so the Data Connector
can gather relevant information from the Grid members, and then send the data to the Infoblox ActiveTrust Cloud
destination.
You must have Data Connector version 2.0 and later installed in order to support Infoblox ActiveTrust Cloud
configuration. You can either configure a new Data Connector using the correct version or upgrade your existing Data
Connector to 2.0 or later. For information about new installation, see Deploying the Data Connector Virtual Appliance on page 8. To upgrade an existing Data Connector, see Upgrading the Infoblox Data Connector on page 15.
After you have the latest software version installed and the Data Connector is up and running, perform the following
to set up your cloud environment to receive data from the Data Connector. To configure Data Connector VM to send
DNS data from Infoblox Grid to ActiveTrust Cloud, complete the following:
1. Configure the Grid to capture DNS queries and responses, as described in Configuring DNS Queries and Responses on NIOS on page 30. Next, add the SCP user details on the Grid members to send DNS log data to the
Data Connector VM. For information, see Configuring NIOS for Data Connector on page 27.
2. Configure the Data Connector as an external syslog server, so that the Grid members can send syslog to the Data
Connector VM using TCP. Select DNS RPZ and Threat Protection as the logging category while configuring the Data
Connector as an external syslog server. For information about configuring external syslog servers in NIOS, refer
to the Infoblox NIOS Administrator Guide.
Data Connector 2.0 Infoblox User Guide 37

Configuring Data Connector for Infoblox ActiveTrust Cloud Destination
Note: Grid must transfer Syslog using TCP, either encrypted or unencrypted.
3. Enable DNS service on the Grid members.
4. Log in to the Data Connector CLI.
5. Configure the Data Connector, as described in Deploying the Data Connector Virtual Appliance on page 8.
6. Verify the configured network settings of the Data Connector using the admin.network > ip4 get command.
Example:
admin.network > ip4 get
Configured System Setting:
gateway: 10.36.0.1
mask: 255.255.0.0
mode: static
address: 10.36.130.1
vlanid: 0
vlan configuration is only in effect in the static mode.
7. Use the data.source.grid > set address command to set the Grid IP, admin username, and password.
Example:
data.source.grid > set address 10.0.0.22
Command applied successfully.
data.source.grid > set username admin
Command applied successfully.
data.source.grid > password
Enter the NIOS admin's password:
Enter again:
Password updated
8. Configure ActiveTrust Cloud as destination using data.destination.cloud.registration > set command
and set the URL, Agent ID, and API key for the ActiveTrust Cloud output, as follows:
Note: In order to get the ActiveTrust cloud configuration parameters such as the URL, Agent ID, and API key, you
can log in to your ActiveTrust cloud portal and navigate to Administration tab -> Unified Reporting tab. In
the Unified Reporting panel, the values for Agent ID, URL, and API key are displayed in the Name, URL, and
API Access Key columns of the Data Collectors table respectively.
data.destination.cloud.registration > set agent_id <Your_Agent_ID>
ok
data.destination.cloud.registration > set url https://usa-va.csp.infoblox.com/dnslog
ok
data.destination.cloud.registration > set api_key <Your_API_Key>
ok
Note: You must specify the same agent_id and api_key that you specify in the Cloud Services Portal
(ActiveTrust Cloud Portal -> Administration -> Unified Reporting) where Name is the agent_id and API
Access Key is the api_key.
After setting the URL, Agent ID, and API key for the ActiveTrust Cloud output, you can use the ping or account
command to verify, as follows:
data.destination.cloud.registration > ping
Cloud server "usa-va.csp.infoblox.com" is available
38 Infoblox User Guide Data Connector 2.0

Configuring ActiveTrust Cloud Destination
9. Use the data.destination.cloud > set mode command and set the cloud output mode to forward, as
follows:
data.destination.cloud > set mode forward
Data will start transmitting immediately
ok
10. Configure Infoblox Grid as source of DNS data and RPZ logs using data.source.grid > set username command and set the address, username, and password, as follows:
data.source.grid > set username admin
Command applied successfully.
data.source.grid > set address 10.0.0.22
Command applied successfully.
data.source.grid > password
Enter the NIOS admin's password:
Enter again:
Password updated
After setting the address, username, and password, you can use the data.source.grid > sync command to
verify, as follows
data.source.grid > sync
Reregistering Data Collector with the Grid... done.
Updating Grid configuration... done.
This function will synchronize NIOS Grid state with the Data Connector VM.
11. Use the data.source.syslog > set mode command and configure the mode to send the RPZ logs, as follows:
data.source.syslog > set mode secure
ok
data.source.syslog > set mode unencrypted
ok
data.source.syslog > set mode both
ok
12. Generate a certificate request in .PEM format. This certificate request must be signed to get an operable syslog
certificate. Run the following command:
data.source.syslog > certificate request
You can self-sign the generated certificate or send it to the Certification Authority for signing and get the
operable Syslog Certificate.
13. Upload the signed Syslog Certificate. Run the following command to import the certificate from a SCP server or
an FTP server:
data.source.syslog > certificate import <scp|ftp>://loginname@serverIP:[port:]path
Example:
data.source.syslog > certificate import scp://[email protected]:999/DC2/
Note: The secure port number must be the same secure TCP port number configured on NIOS.
14. Configure Infoblox Grid as source of IP Metadata using data.source.grid > set query command, as follows:
data.source.grid > set query userinfo enabled
ok
data.source.grid > set query ipam enabled
ok
Data Connector 2.0 Infoblox User Guide 39
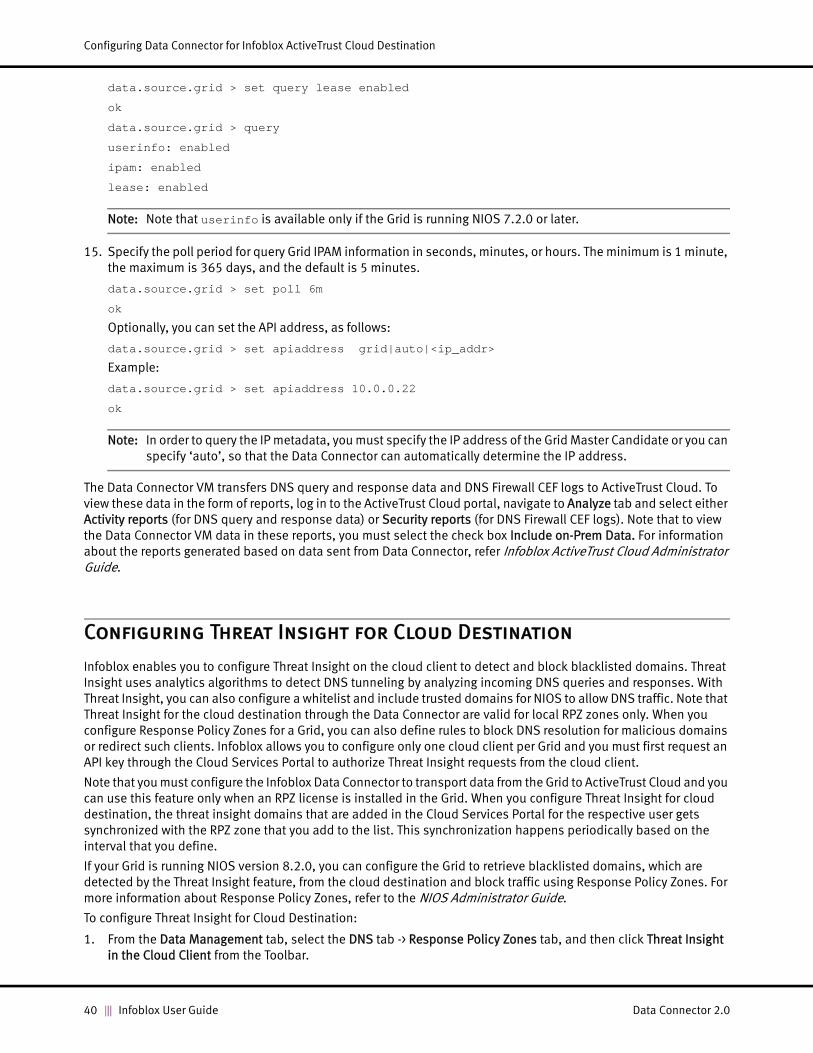
Configuring Data Connector for Infoblox ActiveTrust Cloud Destination
data.source.grid > set query lease enabled
ok
data.source.grid > query
userinfo: enabled
ipam: enabled
lease: enabled
Note: Note that userinfo is available only if the Grid is running NIOS 7.2.0 or later.
15. Specify the poll period for query Grid IPAM information in seconds, minutes, or hours. The minimum is 1 minute,
the maximum is 365 days, and the default is 5 minutes.
data.source.grid > set poll 6m
ok
Optionally, you can set the API address, as follows:
data.source.grid > set apiaddress grid|auto|<ip_addr>
Example:
data.source.grid > set apiaddress 10.0.0.22
ok
Note: In order to query the IP metadata, you must specify the IP address of the Grid Master Candidate or you can
specify ‘auto’, so that the Data Connector can automatically determine the IP address.
The Data Connector VM transfers DNS query and response data and DNS Firewall CEF logs to ActiveTrust Cloud. To
view these data in the form of reports, log in to the ActiveTrust Cloud portal, navigate to Analyze tab and select either
Activity reports (for DNS query and response data) or Security reports (for DNS Firewall CEF logs). Note that to view
the Data Connector VM data in these reports, you must select the check box Include on-Prem Data. For information
about the reports generated based on data sent from Data Connector, refer Infoblox ActiveTrust Cloud Administrator Guide.
Configuring Threat Insight for Cloud Destination
Infoblox enables you to configure Threat Insight on the cloud client to detect and block blacklisted domains. Threat
Insight uses analytics algorithms to detect DNS tunneling by analyzing incoming DNS queries and responses. With
Threat Insight, you can also configure a whitelist and include trusted domains for NIOS to allow DNS traffic. Note that
Threat Insight for the cloud destination through the Data Connector are valid for local RPZ zones only. When you
configure Response Policy Zones for a Grid, you can also define rules to block DNS resolution for malicious domains
or redirect such clients. Infoblox allows you to configure only one cloud client per Grid and you must first request an
API key through the Cloud Services Portal to authorize Threat Insight requests from the cloud client.
Note that you must configure the Infoblox Data Connector to transport data from the Grid to ActiveTrust Cloud and you
can use this feature only when an RPZ license is installed in the Grid. When you configure Threat Insight for cloud
destination, the threat insight domains that are added in the Cloud Services Portal for the respective user gets
synchronized with the RPZ zone that you add to the list. This synchronization happens periodically based on the
interval that you define.
If your Grid is running NIOS version 8.2.0, you can configure the Grid to retrieve blacklisted domains, which are
detected by the Threat Insight feature, from the cloud destination and block traffic using Response Policy Zones. For
more information about Response Policy Zones, refer to the NIOS Administrator Guide.
To configure Threat Insight for Cloud Destination:
1. From the Data Management tab, select the DNS tab -> Response Policy Zones tab, and then click Threat Insight
in the Cloud Client from the Toolbar.
40 Infoblox User Guide Data Connector 2.0

Configuring Threat Insight for Cloud Destination
2. Complete the following in the Threat Insight in the Cloud Integration Client wizard:
— Enable Cloud Client: Select this check box to enable Threat Insight in the cloud client.
— API Key: You must request an API key to establish an authorized connection with the cloud client through
the Data Connector. Click Request API Key to request an API key. Do the following in the Request API Key from the Cloud Services Portal dialog box:
— Email: Enter the email address that is registered in the Infoblox Cloud Services Portal.
— Password: Enter the password that is registered in the Infoblox Cloud Services Portal.
An API key is displayed in the API Key text box only when you enter the correct email address and password.
An error message is displayed for an invalid email address and password.
— Interval: You can specify how often to request Threat Insight results from the cloud client in seconds or
minutes. The default is 10 minutes.
— The list of Response Policy Zones to use for blacklisted domains: Click the Add icon to add an RPZ to the
list. When there are multiple zones, Grid Manager displays the Zone Selector dialog box from which you can
select one. You can add an RPZ from different network and DNS views. Whenever a new RPZ is added and
the cloud client requests data, Grid Manager displays a Warning dialog box to confirm that you wish to
request all detected domains by Threat Insight in the cloud client. Even if you have clicked No in the
Warning dialog box, you can use the set cloud_services_portal_force_refresh CLI command in
maintenance mode and set the flag to request all domains detected in the cloud client.
3. Click Save & Close.
Data Connector 2.0 Infoblox User Guide 41

Configuring Data Connector for Infoblox ActiveTrust Cloud Destination
42 Infoblox User Guide Data Connector 2.0

Appendix A CLI Commands
The following are some of the most commonly used CLI commands for the Data Connector VM:
Note: The CLI commands, info, stats, and wizard are general commands that are available at different levels
depending on whether they are applicable to that level or not.
Table A.1 Data Connector VM CLI Commands
Commands
admin > wizard on page 48 admin.support > show debug on page 54
admin.network > set dns on page 50 admin.support > getbundle on page 55
admin.network > show dns on page 50 admin.system > set banner on page 55
admin.network > delete dns on page 50 admin.system > show banner on page 55
admin.network > set domain on page 50 admin.system > password on page 55
admin.network > show domain on page 50 admin.system > show uuid on page 55
admin.network > set hostname on page 51 admin.system > version on page 56
admin.network > show hostname on page 51 admin.system > restart on page 56
admin.network > add route on page 51 admin.system > backup on page 56
admin.network > show route on page 51 admin.system > restore on page 56
admin.network > delete route on page 51 admin.system > set restore on page 57
admin.network > show ip4 on page 51 admin.system > show restore on page 57
admin.network > set ip4 mode on page 52 admin.system > delete restore on page 57
admin.network > ping on page 52 admin.system > info on page 57
admin.network > resolve on page 52 admin.system > shutdown on page 58
admin.network > wizard on page 53 admin.system > show time on page 58
admin.support > set access on page 54 admin.system > wizard on page 58
admin.support > show access on page 54 admin.system.performance > cpu on page 59
admin.support > set debug on page 54 admin.system.performance > disk on page 59
Data Connector 2.0 Infoblox User Guide 43

CLI Commands
admin.system.performance > memory on page 59 data.source.syslog > print certificate on page 70
admin.system.performance > network on page 59 data.source.syslog > certificate request on page 70
admin.system.performance > stats on page 59 data.source.syslog > certificate import on page 70
admin.system.upgrade > load on page 60 data.source.syslog > certificate export on page 70
admin.system.upgrade > status on page 60 data.source.syslog > exit on page 71
admin.system.upgrade > apply on page 61 data.source.syslog > info on page 71
admin.system.upgrade > revert on page 61 data.source.syslog > port on page 71
data > wizard on page 61 data.source.syslog > set port on page 71
data.source.grid > set address on page 63 data.source.syslog > set cn on page 72
data.source.grid > show address on page 63 data.source.syslog > show cn on page 72
data.source.grid > set username on page 63 data.source.syslog > set mode on page 72
data.source.grid > show username on page 64 data.source.syslog > show mode on page 72
data.source.grid > password on page 64 data.source.syslog > set secureport on page 72
data.source.grid > set refresh on page 64 data.source.syslog > show secureport on page 73
data.source.grid > show refresh on page 64 data.destination > wizard on page 73
data.source.grid > status on page 64 data.source > wizard on page 74
data.source.grid > test on page 65 data.destination.cloud > wizard on page 75
data.source.grid > sync on page 65 data.destination.cloud > stats on page 76
data.source.grid > set apiaddress on page 66 data.destination.cloud > purge on page 76
data.source.grid > show apiaddress on page 66 data.destination.cloud > set mode on page 77
data.source.grid > set poll on page 66 data.destination.cloud > show mode on page 77
data.source.grid > show poll on page 66 data.destination.cloud.registration > set agent_id on
page 77
data.source.grid > set query on page 67 data.destination.cloud.registration > show agent_id on page 77
data.source.grid > show query on page 67 data.destination.cloud.registration > delete agent_id on page 77
data.source.grid > info on page 67 data.destination.cloud.registration > set api_key on
page 77
data.source.scp > add user on page 68 data.destination.cloud.registration > show api_key on page 78
data.source.scp > set user on page 68 data.destination.cloud.registration > delete api_key on page 78
data.source.scp > show user on page 68 data.destination.cloud.registration > set url on page
78
data.source.scp > delete user on page 68 data.destination.cloud.registration > show url on
page 78
Commands
44 Infoblox User Guide Data Connector 2.0

data.source.scp > wizard on page 68 data.destination.cloud.filters.member > help on page
84
data.source.scp > stats on page 69 data.destination.cloud.filters.member > exit on page
85
data.source.scp > info on page 69 data.destination.cloud.filters.query > add on page 85
data.source.syslog > certificate on page 69 data.destination.cloud.filters.query > delete on page
85
data.source.syslog > show certificate on page 69 data.destination.cloud.filters.query > show on page
85
data.destination.cloud.registration > delete url on
page 78
data.destination.cloud.filters.query > import on page
86
data.destination.cloud.registration > ping on page 79 data.destination.cloud.filters.query > export on page
86
data.destination.cloud.filters.client_ip > add on page
79
data.destination.cloud.filters.query > help on page 87
data.destination.cloud.filters.client_ip > delete on
page 79
data.destination.cloud.filters.query > exit on page 87
data.destination.cloud.filters.client_ip > show on
page 79
data.destination.global.tags > info on page 87
data.destination.cloud.filters.client_ip > import on
page 80
data.destination.global.tags > dns_view on page 87
data.destination.cloud.filters.client_ip > export on
page 80
data.destination.global.filters.client_ip > add on page
88
data.destination.cloud.filters.client_ip > help on
page 81
data.destination.global.filters.client_ip > delete on
page 88
data.destination.cloud.filters.client_ip > exit on page
81
data.destination.global.filters.client_ip > show on
page 88
data.destination.cloud.filters.dns_view > add on
page 81
data.destination.global.filters.client_ip > import on
page 89
data.destination.cloud.filters.dns_view > delete on
page 81
data.destination.global.filters.client_ip > export on
page 89
data.destination.cloud.filters.dns_view > show on
page 82
data.destination.global.filters.client_ip > help on
page 89
data.destination.cloud.filters.dns_view > import on
page 82
data.destination.global.filters.client_ip > exit on page
90
data.destination.cloud.filters.dns_view > export on
page 82
data.destination.global.filters.dns_view > add on
page 90
data.destination.cloud.filters.dns_view > help on
page 83
data.destination.global.filters.dns_view > delete on
page 90
data.destination.cloud.filters.dns_view > exit on
page 83
data.destination.global.filters.dns_view > show on
page 90
Commands
Data Connector 2.0 Infoblox User Guide 45

CLI Commands
data.destination.cloud.filters.member > add on page
83
data.destination.reporting > show mode on page 97
data.destination.cloud.filters.member> delete on
page 83
data.destination.reporting.registration > register on
page 98
data.destination.cloud.filters.member > show on
page 83
data.destination.reporting.registration > unregister on page 98
data.destination.cloud.filters.member > import on
page 84
data.destination.reporting.registration > info on page
98
data.destination.cloud.filters.member > export on
page 84
data.destination.reporting.filters.client_ip > add on
page 98
data.destination.global.filters.dns_view > import on
page 91
data.destination.reporting.filters.client_ip > delete on page 99
data.destination.global.filters.dns_view > export on
page 91
data.destination.reporting.filters.client_ip > show on
page 99
data.destination.global.filters.dns_view > help on
page 91
data.destination.reporting.filters.client_ip > import on page 99
data.destination.global.filters.dns_view > exit on
page 91
data.destination.reporting.filters.client_ip > export on page 100
data.destination.global.filters.member > add on
page 92
data.destination.reporting.filters.client_ip > help on
page 100
data.destination.global.filters.member> delete on
page 92
data.destination.reporting.filters.client_ip > exit on
page 100
data.destination.global.filters.member > show on
page 92
data.destination.reporting.filters.dns_view > add on
page 101
data.destination.global.filters.member > import on
page 92
data.destination.reporting.filters.dns_view > delete on page 101
data.destination.global.filters.member > export on
page 93
data.destination.reporting.filters.dns_view > show on
page 101
data.destination.global.filters.member > help on
page 93
data.destination.reporting.filters.dns_view > import on page 101
data.destination.global.filters.member > exit on page
93
data.destination.reporting.filters.dns_view > export on page 102
data.destination.global.filters.query > add on page
93
data.destination.reporting.filters.dns_view > help on
page 102
data.destination.global.filters.query > delete on page
94
data.destination.reporting.filters.dns_view > exit on
page 102
data.destination.global.filters.query > show on page
94
data.destination.reporting.filters.member > add on
page 102
data.destination.global.filters.query > import on
page 94
data.destination.reporting.filters.member> delete on
page 103
data.destination.global.filters.query > export on
page 95
data.destination.reporting.filters.member > show on
page 103
Commands
46 Infoblox User Guide Data Connector 2.0

data.destination.global.filters.query > help on page
95
data.destination.reporting.filters.member > import on page 103
data.destination.global.filters.query > exit on page
95
data.destination.reporting.filters.member > export on
page 104
data.destination.reporting > info on page 95 data.destination.reporting.filters.member > help on
page 104
data.destination.reporting > wizard on page 96 data.destination.reporting.filters.member > exit on
page 104
data.destination.reporting > stats on page 96 data.destination.reporting.filters.query > add on
page 104
data.destination.reporting > purge on page 97 data.destination.reporting.filters.query > delete on
page 105
data.destination.reporting > set mode on page 97 data.destination.reporting.filters.query > show on
page 105
data.destination.splunk > set port on page 108 data.destination.reporting.filters.query > import on
page 105
data.destination.splunk > show port on page 108 data.destination.reporting.filters.query > export on
page 106
data.destination.splunk > set sourcetype on page
108
data.destination.reporting.filters.query > help on
page 106
data.destination.splunk > sourcetype on page 108 data.destination.reporting.filters.query > exit on page
106
data.destination.splunk > cacertificate import on
page 109
data.destination.splunk > wizard on page 106
data.destination.splunk > show cacertificate on page
109
data.destination.splunk > add indexer on page 107
data.destination.splunk > print cacertificate on page
109
data.destination.splunk > show indexer on page 107
data.destination.splunk > certificate request on page
109
data.destination.splunk > delete indexer on page 107
data.destination.splunk > certificate import on page
110
data.destination.splunk > set indexname on page 108
data.destination.splunk > show certificate on page
110
data.destination.splunk > show indexname on page
108
data.destination.splunk > print certificate on page
110
data.destination.splunk.filters.client_ip > add on
page 112
data.destination.splunk > set mode on page 110 data.destination.splunk.filters.client_ip > delete on
page 112
data.destination.splunk > show mode on page 110 data.destination.splunk.filters.client_ip > show on
page 112
data.destination.splunk > stats on page 111 data.destination.splunk.filters.client_ip > import on
page 113
Commands
Data Connector 2.0 Infoblox User Guide 47

CLI Commands
admin > wizard
The admin > wizard command allows you to configure the network settings.
Syntax
admin > wizard
Example
admin > wizard
Please use: '?' for help on available command options.
Do you want to configure admin network settings y/n [y]:
y
data.destination.splunk > purge on page 111 data.destination.splunk.filters.client_ip > export on
page 113
data.destination.splunk > info on page 112 data.destination.splunk.filters.client_ip > help on
page 114
data.destination.splunk.filters.dns_view > add on
page 114
data.destination.splunk.filters.client_ip > exit on
page 114
data.destination.splunk.filters.dns_view > delete on
page 114
data.destination.splunk.filters.member > add on
page 116
data.destination.splunk.filters.dns_view > show on
page 115
data.destination.splunk.filters.member> delete on
page 116
data.destination.splunk.filters.dns_view > import on
page 115
data.destination.splunk.filters.member > show on
page 116
data.destination.splunk.filters.dns_view > export on
page 115
data.destination.splunk.filters.member > import on
page 117
data.destination.splunk.filters.dns_view > help on
page 116
data.destination.splunk.filters.member > export on
page 117
data.destination.splunk.filters.dns_view > exit on
page 116
data.destination.splunk.filters.member > help on
page 117
data.destination.splunk.filters.query > add on page
118
data.destination.splunk.filters.member > exit on page
118
data.destination.splunk.filters.query > delete on
page 118
exit on page 120
data.destination.splunk.filters.query > show on page
118
help on page 120
data.destination.splunk.filters.query > import on
page 119
info on page 121
data.destination.splunk.filters.query > export on
page 119
stats on page 123
data.destination.splunk.filters.query > help on page
119
wizard on page 124
data.destination.splunk.filters.query > exit on page
120
Commands
48 Infoblox User Guide Data Connector 2.0
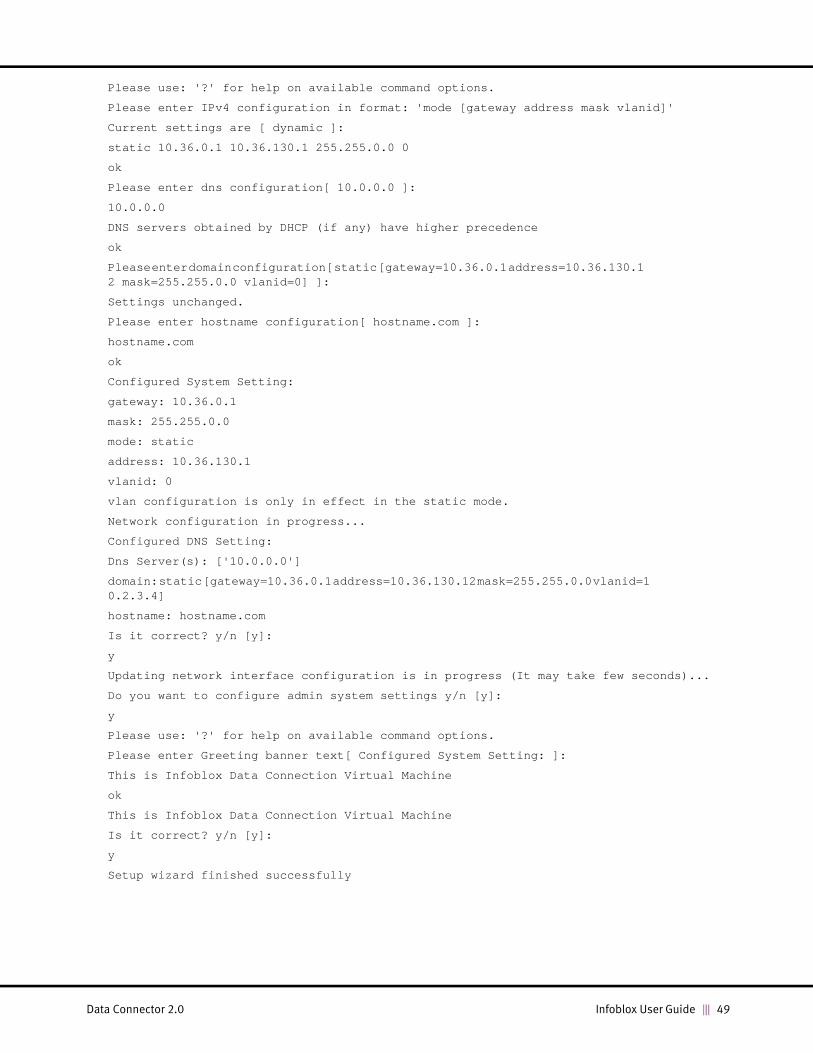
Please use: '?' for help on available command options.
Please enter IPv4 configuration in format: 'mode [gateway address mask vlanid]'
Current settings are [ dynamic ]:
static 10.36.0.1 10.36.130.1 255.255.0.0 0
ok
Please enter dns configuration[ 10.0.0.0 ]:
10.0.0.0
DNS servers obtained by DHCP (if any) have higher precedence
ok
Please enter domain configuration[ static [gateway=10.36.0.1 address=10.36.130.1 2 mask=255.255.0.0 vlanid=0] ]:
Settings unchanged.
Please enter hostname configuration[ hostname.com ]:
hostname.com
ok
Configured System Setting:
gateway: 10.36.0.1
mask: 255.255.0.0
mode: static
address: 10.36.130.1
vlanid: 0
vlan configuration is only in effect in the static mode.
Network configuration in progress...
Configured DNS Setting:
Dns Server(s): ['10.0.0.0']
domain: static [gateway=10.36.0.1 address=10.36.130.12 mask=255.255.0.0 vlanid=1 0.2.3.4]
hostname: hostname.com
Is it correct? y/n [y]:
y
Updating network interface configuration is in progress (It may take few seconds)...
Do you want to configure admin system settings y/n [y]:
y
Please use: '?' for help on available command options.
Please enter Greeting banner text[ Configured System Setting: ]:
This is Infoblox Data Connection Virtual Machine
ok
This is Infoblox Data Connection Virtual Machine
Is it correct? y/n [y]:
y
Setup wizard finished successfully
Data Connector 2.0 Infoblox User Guide 49

CLI Commands
admin.network > set dns
The admin.network > set dns command enables you to set the IP address of the DNS server.
Syntax
admin.network > set dns <address>
Example
admin.network > set dns 10.0.2.35
DNS servers obtained by DHCP (if any) have higher precedence
ok
admin.network > show dns
The admin.network > show dns command displays the IP address of the DNS server.
Syntax
admin.network > show dns
Example
admin.network > show dns
Actual DNS Setting:
Dns Server(s): 10.0.2.20 10.0.2.35 10.0.2.60
Configured DNS Setting (DNS servers obtained by DHCP have higher precedence):
Dns Server(s): ['10.0.2.35']
admin.network > delete dns
The admin.network > delete dns command enables you to delete the IP address of the DNS server.
Syntax
admin.network > delete dns <address>
Example
admin.network > delete dns 10.0.2.35
ok
admin.network > set domain
The admin.network > set domain command enables you to set the domain name of the DNS server.
Syntax
admin.network > set domain <domainname>
Example
admin.network > set domain foo.com
ok
admin.network > show domain
The admin.network > show domain command displays the domain name of the DNS server.
Syntax
admin.network > show domain
Example
admin.network > show domain
domain: foo.com
50 Infoblox User Guide Data Connector 2.0

admin.network > set hostname
The admin.network > set hostname command enables you to set the host name of the Data Connector.
Syntax
admin.network > set hostname <hostname>
Example
admin.network > set hostname dc.com
ok
admin.network > show hostname
The admin.network > show hostname command displays the host name of the Data Connector.
Syntax
admin.network > show hostname
Example
admin.network > show hostname
hostname: dc.com
admin.network > add route
The admin.network > add route command enables you to set or modify the static route configuration.
Syntax
admin.network > add route address=<IP address> mask=<Netmask> gateway=<Gateway address>
Example
admin.network > add route address=10.34.28.9 mask=255.255.255.255 gateway=10.34.28.1
ok
admin.network > show route
The admin.network > show route command displays the static route configuration.
Syntax
admin.network > show route
Example
admin.network > show route
address: 10.34.28.9
mask: 255.255.255.255
gateway: 10.34.28.1
admin.network > delete route
The admin.network > delete route command deletes the current static route.
Syntax
admin.network > delete route address=<IP address> mask=<Netmask> gateway=<Gateway address>
Example
admin.network > delete route address=10.34.28.9 mask=255.255.255.255 gateway=10.34.28.1
ok
admin.network > show ip4
The admin.network > show ip4 command displays the IPv4 network address.
Syntax
admin.network > show ip4
Data Connector 2.0 Infoblox User Guide 51

CLI Commands
Example
admin.network > show ip4
Configured System Setting:
gateway: 10.36.0.1
mask: 255.255.0.0
mode: static
address: 10.36.130.1
vlanid: 0
vlan configuration is only in effect in the static mode.
admin.network > set ip4 mode
The admin.network > set ip4 mode command enables you to configure the IPv4 network address.
Syntax
set ip4 mode [gateway address mask vlanid]
mode=static|dynamic
gateway=<IP>
address=<IP>
mask=<IP>
vlanid=<0,2..4094>
Example
admin.network > set ip4 static 10.36.0.1 10.36.117.17 255.255.0.0 0
Updating network interface configuration is in progress (It may take few seconds)...
admin.network > ping
The admin.network > ping command allows you to verify if the network is accessible and active.
Syntax
admin.network > ping <address|fqdn>
Example
admin.network > ping 10.120.20.170
PING 10.120.20.170 (10.120.20.170) 56(84) bytes of data.
64 bytes from 10.120.20.170: icmp_seq=1 ttl=59 time=11.3 ms
64 bytes from 10.120.20.170: icmp_seq=2 ttl=59 time=11.0 ms
64 bytes from 10.120.20.170: icmp_seq=3 ttl=59 time=13.9 ms
64 bytes from 10.120.20.170: icmp_seq=4 ttl=59 time=9.93 ms
64 bytes from 10.120.20.170: icmp_seq=5 ttl=59 time=11.6 ms
--- 10.120.20.170 ping statistics ---
5 packets transmitted, 5 received, 0% packet loss, time 4005ms
rtt min/avg/max/mdev = 9.932/11.593/13.965/1.321 ms
admin.network > resolve
The admin.network > resolve command enables you to view the network information, such as IP address,
hostname, etc.
Syntax
admin.network > resolve [fqdn]
52 Infoblox User Guide Data Connector 2.0

Example
admin.network > resolve www.google.com
Server: 10.0.2.20
Address: 10.0.2.20#53
Non-authoritative answer:
Name: www.google.com
Address: 74.125.28.105
Name: www.google.com
Address: 74.125.28.147
Name: www.google.com
Address: 74.125.28.99
Name: www.google.com
Address: 74.125.28.104
Name: www.google.com
Address: 74.125.28.106
Name: www.google.com
Address: 74.125.28.103
admin.network > wizard
The admin.network > wizard command enables you to configure the network settings.
Syntax
admin.network > wizard
Example
admin.network > wizard
Do you want to configure admin network settings y/n [y]:
y
Please use: '?' for help on available command options.
Please enter IPv4 configuration in format: 'mode [gateway address mask vlanid]'
Current settings are [ dynamic ]:
static 10.36.0.1 10.36.130.12 255.255.0.0 3625
ok
Please enter dns configuration:
10.0.0.0
DNS servers obtained by DHCP (if any) have higher precedence
ok
Please enter domain configuration[ infoblox.com ]:
ok
Please enter hostname configuration[ dc-infoblox ]:
ok
Configured System Setting:
gateway: 10.36.0.1
mask: 255.255.0.0
mode: static
address: 10.36.130.12
vlanid: 3625
vlan configuration is only in effect in the static mode.
Data Connector 2.0 Infoblox User Guide 53

CLI Commands
Network configuration in progress...
Configured DNS Setting:
Dns Server(s): ['10.0.0.0']
domain: infoblox.com
hostname: dc-infoblox
Is it correct? y/n [y]:
Updating network interface configuration is in progress (It may take few seconds)...
admin.support > set access
The admin.support > set access command enables or disables support access for the Data Connector VM.
Syntax
admin.support > set access [on|off]
Example
admin.support > set access on
Access code( Expires at 24:00 of Mar23,2017 ): 4U5YA7UZ
Current time is Wed Mar 22 09:14:53 UTC 2017
ok
admin.support > show access
The admin.support > show access displays whether support access is enabled or disabled.
Syntax
admin.support > show access
Example
admin.support > show access
Support access is on
Access code ( Expires at 24:00 of Mar23,2017 ): 4U5YA7UZ
Current time is Wed Mar 22 09:15:35 UTC 2017
admin.support > set debug
The admin.support > set debug command enables or disables the debug mode.
Syntax
admin.support > set debug [on|off]
Example
admin.support > set debug on
ok
admin.support > show debug
The admin.support > show debug command displays whether debug mode is enabled or disabled.
Syntax
admin.support > show debug
Example
admin.support > show debug
Debug mode is on
54 Infoblox User Guide Data Connector 2.0

admin.support > getbundle
The admin.support > getbundle command enables you to generate and upload the support bundle to the
specified location.
Syntax
admin.support > getbundle <scp|ftp>://loginname@serverIP:[port:]path
Example
admin.support > getbundle scp://[email protected]/path/file
Enter Password:
Bundle file
dc_bundle_dc-infoblox__20160413105208.tgz is created.
Uploaded bundle to [email protected]
ok
admin.system > set banner
The admin.system > set banner command enables you to set a greeting banner for the Data Connector VM.
Note that the banner message can be up to 64 characters long.
Syntax
admin.system > set banner <banner-text>
Example
admin.system > set banner Infoblox Data Connection Virtual Machine
ok
admin.system > show banner
The admin.system > show banner command displays the greeting banner of the Data Connector VM.
Syntax
admin.system > show banner
Example
admin.system > show banner
Infoblox Data Connection Virtual Machine
admin.system > password
The admin.system > password command sets the password for admin.
Syntax
admin.system > password
Example
admin.system > password
Enter password:
Enter again:
password is changed.
ok
admin.system > show uuid
The admin.system > show uuid command displays the unique ID of the Data Connector VM.
Syntax
admin.system > show uuid
Data Connector 2.0 Infoblox User Guide 55

CLI Commands
Example
admin.system > show uuid
564DDD78-06A3-84FD-8EFC-36F30E9E39FD
admin.system > version
The admin.system > version command displays the current version of the Data Connector VM.
Syntax
admin.system > version
Example
admin.system > version
Name: DataCollector
Version: 2.0.0-348708
admin.system > restart
The admin.system > restart command restarts the Data Connector VM. Default timeout value is 600 seconds.
Syntax
admin.system > restart [timeout] [force]
Example
admin.system > restart 300 force
Wait up to 300 sec. to forward all files
Proceed with restart after wait time is expired.
Some data may be lost.
Proceed with restart? (y/n): y
Disabling data input.
Total # of files will be forwarded before restart are 0
Data forwarding complete, continue restart the system
ok
admin.system > backup
The admin.system > backup command enables to back up the configuration file and export it to an external
server.
Syntax
admin.system > backup <scp|ftp>://loginname@serverIP:[port:]path
Example
admin.system > backup scp://[email protected]/DataCollector-7.3/backup-restore
Enter password:
Backup file dc_backup_dc-xyz_dc-xyz.com_20170324090152.tgz is created.
Uploaded backup to [email protected]
ok
admin.system > restore
The admin.system > restore command enables to import the backup configuration file from the external
server.
Syntax
admin.system > restore <scp|ftp>://loginname@serverIP:[port:]path
56 Infoblox User Guide Data Connector 2.0

Example
admin.system > restore scp://[email protected]/DataCollector-7.3/backup-restore/dc-backup-20160411173711.tgz
Enter password:
Received backup package from [email protected].
The following backup file(s) in the system:
dc-backup-20160411173711.tgz
admin.system > set restore
The admin.system > set restore command restores the Data Connector configuration from the backup file.
Syntax
admin.system > set restore <backupfile_name>
Example
admin.system > set restore dc-backup-20160411173711.tgz
File dc-backup-20160411173711.tgz is restored
ok
admin.system > show restore
The admin.system > show restore command lists all the backup files currently on the Data Connector VM.
Syntax
admin.system > show restore
Example
admin.system > show restore
The following backup file(s) in the system:
dc-backup-20160411173718.tgz
dc-backup-20160322303030.tgz
dc-backup-20160211101010.tgz
admin.system > delete restore
The admin.system > delete restore command deletes the backup file.
Syntax
admin.system > delete restore <backupfile_name>
Example
admin.system > delete restore dc_backup_hostname2.com_com.domain.com_20160518093241.tgz
File dc_backup_hostname2.com_com.domain.com_20160518093241.tgz is deleted
ok
admin.system > info
The admin.system > info command displays information such as banner, UUID, and current version of the Data
Connector.
Syntax
admin.system > info
Example
admin.system > info
Greeting banner:
Infoblox Data Connection Virtual Machine
UUID value:
Data Connector 2.0 Infoblox User Guide 57

CLI Commands
564DDD78-06A3-84FD-8EFC-36F30E9E39FD
Current version:
Name: DataCollector
Version: 2.0.0-348708
admin.system > shutdown
The admin.system > shutdown command enables to shutdown the Data Connector VM. Default timeout value
is 600 seconds.
Syntax
admin.system > shutdown [timeout] [force]
Example
admin.system > shutdown 300 force
Wait up to 600 sec. to forward all files
***SHUTDOWN WILL BE CANCELLED*** after wait time is expired
if data are not completely forwarded.
Proceed with shutdown? (y/n): y
Disabling data input.
Total # of files will be forwarded before shutdown are 0
Data forwarding complete, continue shutdown the system
ok
admin.system > show time
The admin.system > show time command displays current date and time settings.
Syntax
admin.system > show time
Example
admin.system > show time
2017-04-14 18:01:33 +00:00
admin.system > wizard
The admin.system > wizard command allows you to configure the system settings.
Syntax
admin.system > wizard
Example
admin.system > wizard
Do you want to configure admin system settings y/n [y]:
y
Please use: '?' for help on available command options.
Please enter Greeting banner text[ Infoblox Data Connection Virtual Machine ]:
This is Infoblox Data Connection Virtual Machine
ok
This is Infoblox Data Connection Virtual Machine
Is it correct? y/n [y]:
y
Setup wizard finished successfully
58 Infoblox User Guide Data Connector 2.0

admin.system.performance > cpu
The admin.system.performance > cpu command displays the CPU usage.
Syntax
admin.system.performance > cpu
Example
admin.system.performance > cpu
CPU Load, % : 1.7
admin.system.performance > disk
The admin.system.performance > disk command displays the disk storage utilization.
Syntax
admin.system.performance > disk
Example
admin.system.performance > disk
Block read, kbps : 0.0
Block write, kbps : 14.0
Disk space usage:
/ 1.9%
/boot 15.9%
/infoblox/data 0.0%
admin.system.performance > memory
The admin.system.performance > memory command displays the memory utilization.
Syntax
admin.system.performance > memory
Example
admin.system.performance > memory
Memory usage, % : 10.0
admin.system.performance > network
The admin.system.performance > network command displays the network interface statistics.
Syntax
admin.system.performance > network
Example
admin.system.performance > network
Network receive, kbps : 24.2
Network send, kbps : 0.0
Network interfaces statistics
Name RX RX Drop RX Error TX TX Drop TX Error
eth0 7626 0 0 154 0 0
admin.system.performance > stats
This admin.system.performance > stats command displays system performance/statistics.
Syntax
admin.system.performance > stats
admin.system.performance > stats reset
admin.system.performance > stats detailed
Data Connector 2.0 Infoblox User Guide 59

CLI Commands
Example
admin.system.performance > stats
CPU stats:
CPU Load, % : 8.4
Disk stats:
Block read, kbps : 0.0
Block write, kbps : 35.3
Disk space usage:
/ 1.9%
/boot 15.9%
/infoblox/data 0.0%
Memory stats:
Memory usage, % : 9.9
Network stats:
Network receive, kbps : 36.9
Network send, kbps : 0.0
Network interfaces statistics
Name RX RX Drop RX Error TX TX Drop TX Error
eth0 8013 0 0 163 0 0
admin.system.upgrade > load
The admin.system.upgrade > load command downloads the upgrade package from an external server to the
Data Connector VM. The previous upgrade package file is overwritten when you load a new upgrade file.
Syntax
admin.system.upgrade > load <scp|ftp>://loginname@serverIP:[port:]path
Example
admin.system.upgrade > load scp://[email protected]/DataCollector7.3/DataCollector_1.1.0-123456_2016-04-13-12-01-01_x86_64.upg
Enter Password:
Received upgrade package. Validating...
Upgrade package is ready
ok
admin.system.upgrade > status
The admin.system.upgrade > status command allows you to check the current status of the upgrade
package. It displays the following details:
• current software version.
• version to possibly upgrade to if an upgrade file is successfully loaded after the most recent upgrade or initial
VM installation.
• version to possibly revert to if there was a successful recent upgrade.
• if an upgrade or revert is currently in progress.
Syntax
admin.system.upgrade > status
Example
admin.system.upgrade > status
System version: 2.0.0-348708
Revert version: 1.1.0-123456
No upgrade or revert operation is running
60 Infoblox User Guide Data Connector 2.0

admin.system.upgrade > apply
The admin.system.upgrade > apply command initiates upgrade to the previously loaded upgrade file.
timeout is the number of seconds the system waits until the Data Connector transfers the output files to the
corresponding destination servers before starting an upgrade. Default timeout value is 600 seconds.
Syntax
admin.system.upgrade > apply [timeout] [force]
Default: timeout = 600 sec, and no force
Example
admin.system.upgrade > apply 200
Upgrading from version 1.1.0-cloud-xxxxxx to version 1.1.0-xxxxxx
Wait up to 200 sec. to forward all files
***UPGRADE WILL BE CANCELLED*** after wait time is expired if data are not completely forwarded.
Proceed with upgrade? (y/n): y
27% complete Data forwarding
Data forwarding complete, continue upgrading
admin.system.upgrade > revert
The admin.system.upgrade > revert command reverts the most recent software upgrade.
Syntax
admin.system.upgrade > revert [timeout] [force]
Default: timeout = 600 sec, and no force
Example
admin.system.upgrade > revert 20 force
Reverting from version 9.0.2- to version 1.1.0-328409
Wait up to 20 sec. to forward all files
***REVERT WILL BE CANCELLED*** after wait time is expired if data are not completely forwarded.
Proceed with revert? (y/n): y
Disabling data source.
Total # of files will be forwarded before revert are 0
Data forwarding complete, continue reverting
The session will be terminated while reverting
ok
data > wizard
The data > wizard command configures the cloud destination, SCP users, and reporting output for Data
Connector.
Syntax
data > wizard
Example
data > wizard
Do you want to configure data output cloud registration settings y/n [y]:
y
Please use: '?' for help on available command options.
Please enter cloud url[ https://usa-va.csp.infoblox.com/dnslog ]:
Settings unchanged.
Data Connector 2.0 Infoblox User Guide 61

CLI Commands
Please enter api_key[ 1234 ]:
Settings unchanged.
Please enter agent_id[ 8 ]:
Settings unchanged.
url: https://usa-va.csp.infoblox.com/dnslog
api_key: 1234
agent_id: 8
Is it correct? y/n [y]:
y
Do you want to configure data output cloud settings y/n [y]:
y
Please use: '?' for help on available command options.
Please enter Output cloud mode configuration[ hold ]:
Settings unchanged.
The output mode is hold
Is it correct? y/n [y]:
Do you want to configure data output splunk settings y/n [y]:
y
Please use: '?' for help on available command options.
Please enter splunk indexers[ 10.10.1.2, 10.10.1.3 ]:
Settings unchanged.
Please enter splunk index name[ xyz ]:
Settings unchanged.
Please enter splunk source type[ ib:dns:captures ]:
Settings unchanged.
Please enter splunk default indexer port[ 9997 ]:
Settings unchanged.
Please enter splunk mode[ hold ]:
Settings unchanged.
Indexers:
10.10.1.2
10.10.1.3
Index name is xyz
Source type is ib:dns:captures
Default indexer port is 9997
The output mode is hold
Is it correct? y/n [y]:
y
Do you want to configure data output reporting settings y/n [y]:
y
Please use: '?' for help on available command options.
Please enter reporting mode[ hold ]:
Settings unchanged.
The output mode is hold
Is it correct? y/n [y]:
62 Infoblox User Guide Data Connector 2.0

Do you want to configure data input scp settings y/n [y]:
y
Please use: '?' for help on available command options.
Please enter SCP users[ dc_scp_user_1 ]:
Enter password for user dc_scp_user_1:
Enter again:
ok
Registered user(s):
admin1
user123
dc_scp_user
dc_scp_user_1
Is it correct? y/n [y]:
y
Do you want to configure data input grid settings y/n [y]:
y
Please use: '?' for help on available command options.
Enter the IP address (or FQDN) of the NIOS Grid Master[ 10.35.5.49 ]:
Settings unchanged.
Enter the NIOS admin username[ admin ]:
Settings unchanged.
10.35.5.49
admin
Is it correct? y/n [y]:
y
Setup wizard finished successfully
data.source.grid > set address
The data.source.grid > set address command sets the IP address or FQDN of the NIOS Grid.
Syntax
data.source.grid > set address <IP/FQDN>
Example
data.source.grid > set address 10.0.0.22
Command applied successfully.
data.source.grid > show address
The data.source.grid > show address command displays the IP address of the Grid Master.
Syntax
data.source.grid > show address
Example
data.source.grid > show address
10.0.0.22
data.source.grid > set username
The data.source.grid > set username command sets the username of the NIOS administrator.
Syntax
data.source.grid > set username <username>
Data Connector 2.0 Infoblox User Guide 63

CLI Commands
Example
data.source.grid > set username admin
Command applied successfully.
data.source.grid > show username
The data.source.grid > show username command displays the username of NIOS administrator.
Syntax
data.source.grid > show username
Example
data.source.grid > show username
admin
data.source.grid > password
The data.source.grid > password command sets the password of NIOS administrator.
Syntax
data.source.grid > password
Example
data.source.grid > password
Enter the NIOS admin's password: ******
Enter again: ******
Password updated
data.source.grid > set refresh
The data.source.grid > set refresh command sets the refresh time interval. It is the time interval for
synchronizing NIOS Grid data with the Data Connector.
Syntax
data.source.grid > set refresh <duration(m,h,or d)>
Example
data.source.grid > set refresh 1h
Command applied successfully.
data.source.grid > show refresh
The data.source.grid > show refresh command displays the refresh time interval. It is the time interval
for synchronizing NIOS Grid data with the Data Connector.
Syntax
data.source.grid > show refresh
Example
data.source.grid > show refresh
1 hour
data.source.grid > status
The data.source.grid > status command displays the current NIOS Grid registration data.
Syntax
data.source.grid > status
Example
data.source.grid > status
Grid Master address: 10.35.5.49
Grid admin username: admin
64 Infoblox User Guide Data Connector 2.0

Grid admin password: ********
Grid access is: Verified
Grid state refresh interval: 1 hour
Grid registration time: Fri Mar 24 08:42:03 2017
Grid registration uuid: 564DDD7806A384FD8EFC36F30E9E39FD
DC address registered: 10.36.130.1
Cached Grid member timezones:
infoblox.localdomain: (UTC) Coordinated Universal Time, None
reporting-1.com: (UTC) Coordinated Universal Time, None
member.com: (UTC) Coordinated Universal Time, None
Cached Grid views:
0: default, None
1: default.MS-2016, None
2: default.MS-2012, None
3: default.MS-2008, None
data.source.grid > test
The data.source.grid > test command accesses the NIOS Grid using the current Grid registration data.
Syntax
data.source.grid > test
Example
data.source.grid > test
Grid member time zones:
xyz.localdomain: (UTC) Coordinated Universal Time
reporting_member.com: (UTC) Coordinated Universal Time
DNS views:
0: default
Splunk indexers: 10.35.117.17:9997
Splunk index information:
index: ib_dns_capture
source: query_capture
sourcetype: ib:dns:capture
data.source.grid > sync
The data.source.grid > sync command synchronizes NIOS Grid state with the Data Connector VM. This
function will synchronize the following data with the NIOS Grid:
• Grid member timezones cached on Data Collector.
• Updates Grid registration if Data Connector VM IP address has changed.
• Updates DNS view names cached on VM.
• Updates Splunk forwarder configuration if the list of indexers on the Grid has changed.
• Generates and signs new certificate for the Splunk forwarder if reporting root CA certificate of the Grid has
changed.
Note: You can use the sync all command to force the regeneration of all of the above.
Syntax
data.source.grid > sync
Data Connector 2.0 Infoblox User Guide 65

CLI Commands
Example
data.source.grid > sync
Reregistering Data Collector with the Grid... done.
Updating Grid configuration... done.
data.source.grid > set apiaddress
The data.source.grid > set apiaddress command sets the API address. You can configure which member
in the Grid must be queried to obtain the information enabled by query.
Syntax
data.source.grid > set apiaddress [ grid | auto | <ip_addr> ]
grid : use the same member as configured by address configuration item. This is selected by default.
auto : automatically find a Grid Master Candidate enabled for Read-Only API access in the configured Grid.
address : explicitly use the given address to query. Must be a Grid Master Candidate enabled for Read-Only API access.
Example
data.source.grid > set apiaddress grid
ok
data.source.grid > set apiaddress 10.0.0.22
ok
data.source.grid > show apiaddress
The data.source.grid > show apiaddress command displays the API address.
Syntax
data.source.grid > show apiaddress
Example
data.source.grid > show apiaddress
API address: grid
data.source.grid > set poll
The data.source.grid > set poll command sets the poll period for query Grid IPAM information in seconds,
minutes, or hours. Minimum value is one minute, the maximum value is 365 days, and the default value is five
minutes.
Syntax
data.source.grid > set poll <duration(s,m,h)>
Example
data.source.grid > set poll 6m
ok
data.source.grid > show poll
The data.source.grid > show poll command shows the poll period set for query Grid IPAM information.
Syntax
data.source.grid > show poll
Example
data.source.grid > show poll
poll period: 6 minutes
66 Infoblox User Guide Data Connector 2.0

data.source.grid > set query
The data.source.grid > set query command sets the query configuration and allows you to enable or
disable specific category of information from the Grid. All categories are enabled by default. Note that data is queried
only if cloud destination mode is set to hold or forward.
Syntax
data.source.grid > set query [userinfo|ipam|lease] [enabled|disabled]
lease : allows to query lease related information such as hostname and MAC address.
userinfo : allows to query user identity mapping information.
ipam : allows to query IP related information such as Extensible Attributes.
Example
data.source.grid > set query userinfo enabled
ok
data.source.grid > set query ipam enabled
ok
data.source.grid > show query
The data.source.grid > show query command displays whether query is enabled for lease, userinfo and
ipam related information.
Syntax
data.source.grid > show query
Example
data.source.grid > show query
userinfo: enabled
ipam: enabled
lease: disabled
data.source.grid > info
The data.source.grid > info command displays actual configuration according to the current CLI context.
Syntax
data.source.grid > info
Example
data.source.grid > info
IP address or DNS name for the NIOS Grid:
10.35.1.18
Grid IPAM information API address:
API address: grid
Grid IPAM information poll period:
poll period: 6 minutes
Grid IPAM information query types:
userinfo: enabled
ipam: disabled
lease: disabled
NIOS Grid admin user name:
admin
Data Connector 2.0 Infoblox User Guide 67
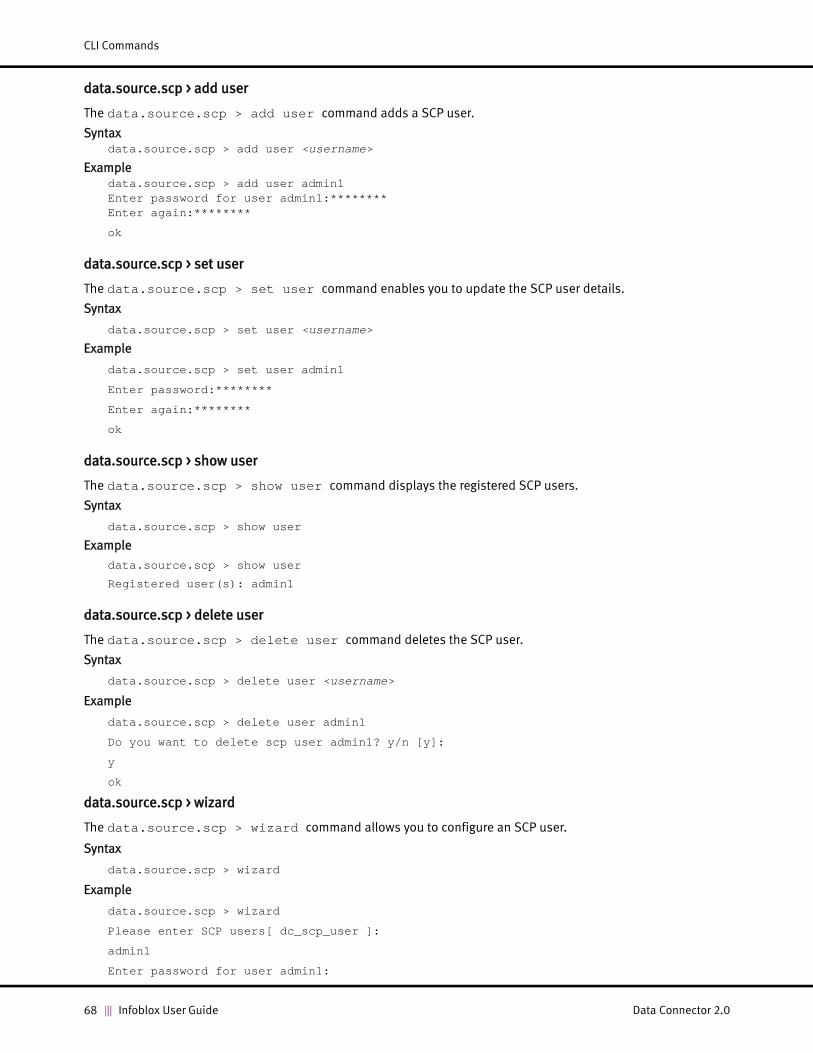
CLI Commands
data.source.scp > add user
The data.source.scp > add user command adds a SCP user.
Syntaxdata.source.scp > add user <username>
Exampledata.source.scp > add user admin1Enter password for user admin1:********Enter again:********
ok
data.source.scp > set user
The data.source.scp > set user command enables you to update the SCP user details.
Syntax
data.source.scp > set user <username>
Example
data.source.scp > set user admin1
Enter password:********
Enter again:********
ok
data.source.scp > show user
The data.source.scp > show user command displays the registered SCP users.
Syntax
data.source.scp > show user
Example
data.source.scp > show user
Registered user(s): admin1
data.source.scp > delete user
The data.source.scp > delete user command deletes the SCP user.
Syntax
data.source.scp > delete user <username>
Example
data.source.scp > delete user admin1
Do you want to delete scp user admin1? y/n [y]:
y
ok
data.source.scp > wizard
The data.source.scp > wizard command allows you to configure an SCP user.
Syntax
data.source.scp > wizard
Example
data.source.scp > wizard
Please enter SCP users[ dc_scp_user ]:
admin1
Enter password for user admin1:
68 Infoblox User Guide Data Connector 2.0

Enter again:
ok
Do you want to add more values? y/n [n]:
n
Registered user(s):
admin1
Is it correct? y/n [y]:
y
Setup wizard finished successfully
data.source.scp > stats
The data.source.scp > stats command displays the number of files in queue waiting to be transferred to the
destination.
Syntax
data.source.scp > stats
data.source.scp > stats reset
data.source.scp > stats detailed
Example
data.source.scp > stats
Input stats:
# of files Size in kb # of files Size in kb Oldest
processed processed pending pending file
0 0.000 0 0.000 N/A
data.source.scp > info
The data.source.scp > info command displays the registered SCP users.
Syntax
data.source.scp > info
Example
data.source.scp > info
SCP users configuration:
Registered user(s): admin1
data.source.syslog > certificate
The data.source.syslog > certificate command displays the certificate in .PEM format that is used to
encrypt the syslog traffic.
Syntax
data.source.syslog > certificate
Example
data.source.syslog > certificate
data.source.syslog > show certificate
The data.source.syslog > show certificate command displays the syslog certificate information.
Syntax
data.source.syslog > show certificate
Example
data.source.syslog > show certificate
Data Connector 2.0 Infoblox User Guide 69

CLI Commands
data.source.syslog > print certificate
The data.source.syslog > print certificate command prints the syslog certificate in .PEM format.
Syntax
data.source.syslog > print certificate
Example
data.source.syslog > print certificate
-----BEGIN CERTIFICATE-----
MIICyjCCAbICCQDewaCSeKIbWjANBgkqhkiG9w0BAQUFADBCMQswCQYDVQQGEwJYElQNiI6IN8YghmnTfUEMvyGQyBCEpg==
-----END CERTIFICATE-----
data.source.syslog > certificate request
The data.source.syslog > certificate request command gets the certificate request in .PEM format
and generates a Certificate Signing Request. This certificate request must be signed by a third party Certification
Authority to get an operable Syslog Certificate.
Syntax
data.source.syslog > certificate request
Example
data.source.syslog > certificate request
Below is Certificate Request.
Please pass it to your Certification Authority for signing to get Syslog Certificate.
-----BEGIN CERTIFICATE REQUEST-----
MIICUzCCATsCAQAwDjEMMAoGA1UEAwwDeHl6MIIBIjANBgkqhkiG9w0BAQEFAAOC
AoI=
-----END CERTIFICATE REQUEST-----
ok
data.source.syslog > certificate import
The data.source.syslog > certificate import command enables you to upload a Syslog Certificate
that is signed by a third party Certification Authority. This certificate must be generated from Certificate Request
created using the certificate request command.
Syntax
data.source.syslog > certificate import <scp|ftp>://loginname@serverIP:[port:]path
Example
data.source.syslog > certificate import scp://[email protected]:999/DC2/
data.source.syslog > certificate export
The data.source.syslog > certificate export command enables you to export a certificate in .PEM
format to an external server.
Syntax
data.source.syslog > certificate export <scp|ftp>://loginname@serverIP:[port:]path
Example
data.source.syslog > certificate export scp://[email protected]:999/DC2/
70 Infoblox User Guide Data Connector 2.0

data.source.syslog > exit
The data.source.syslog > exit command enables you to exit the current CLI level or logout from the top
level.
Syntax
data.source.syslog > exit
Example
data.source.syslog > exit
data.source.syslog > info
The data.source.syslog > info command displays an actual syslog configuration.
Syntax
data.source.syslog > info
Example
data.source.syslog > info
Data source syslog certificate CN:
cn: xyz
Data source syslog mode:
mode: disabled
Data source syslog port:
port: 514
Data source syslog secure port:
secure port: 6514
data.source.syslog > port
The data.source.syslog > port or data.source.syslog > show port command displays the port
number or sets a syslog port.
Syntax
data.source.syslog > port
data.source.syslog > show port
Example
data.source.syslog > port
port: 514
data.source.syslog > show port
port: 514
data.source.syslog > set port
The data.source.syslog > set port command allows you to configure the port to listen on for unencrypted
connections. The default value is 514.
Syntax
data.source.syslog > set port <1..65535>
Example
data.source.syslog > set port 254
ok
Data Connector 2.0 Infoblox User Guide 71

CLI Commands
data.source.syslog > set cn
The data.source.syslog > set cn command sets a CN(Common Name) for a syslog certificate request.
Syntax
data.source.syslog > set cn <common_name>
Example
data.source.syslog > set cn xyz
ok
data.source.syslog > show cn
The data.source.syslog > show cn command displays the CN(Common Name) of a syslog certificate..
Syntax
data.source.syslog > show cn
Example
data.source.syslog > show cn
cn: xyz
data.source.syslog > set mode
The data.source.syslog > set mode command allows you to configure the syslog listener on the DC VM to
the following:
• disabled: turns off syslog listening. This is selected by default.
• secure: turns on syslog listening, allowing only TLS connections on the configured secureport. Note that to set
the mode to secure, you must set a valid certificate.
• unencrypted: turns on syslog listening, allowing only unencrypted connection on the configured port.
• both: enables both secure and unencrypted simultaneously.
Syntax
data.source.syslog > set mode <secure|unencrypted|both|disabled>
Example
data.source.syslog > set mode disabled
ok
data.source.syslog > show mode
The data.source.syslog > show mode command displays the syslog mode.
Syntax
data.source.syslog > show mode
Example
data.source.syslog > show mode
mode: disabled
data.source.syslog > set secureport
The data.source.syslog > set secureport command allows you to configure the port to listen on for
encrypted connections. The default value is 6514.
Syntax
data.source.syslog > set secureport <1..65535>
Example
data.source.syslog > set secureport 6514
ok
72 Infoblox User Guide Data Connector 2.0

data.source.syslog > show secureport
The data.source.syslog > show secureport command displays the syslog port number that is used for
secure connections.
Syntax
data.source.syslog > show secureport
Example
data.source.syslog > show secureport
secure port: 6514
data.destination > wizard
The data.destination > wizard command enables you to configure the cloud and reporting destination for
Data Connector.
Syntax
data.destination > wizard
Example
data.destination > wizard
Do you want to configure data output cloud registration settings y/n [y]:
y
Please use: '?' for help on available command
options.
Please enter cloud url[ https://usa-va.csp.infoblox.com ]:
Settings unchanged.
Please enter api_key[ <Your_API_Key> ]:
Settings unchanged.
Please enter agent_id[ <Your_Agent_ID> ]:
Settings unchanged.
url: https://usa-va.csp.infoblox.com
api_key: <Your_API_Key>
agent_id: <Your_Agent_ID>
Is it correct? y/n [y]:
y
Do you want to configure data output cloud settings
y/n [y]:
y
Please use: '?' for help on available command options.
Please enter Output cloud mode configuration[disabled ]:
forward
Data will start transmitting immediately
ok
The output mode is forward
Is it correct? y/n [y]:
y
Do you want to configure data output splunk settings y/n [y]:
y
Please use: '?' for help on available command options.
Data Connector 2.0 Infoblox User Guide 73

CLI Commands
Please enter splunk indexers:
10.10.1.2
ok
Do you want to add more values? y/n [n]:
n
Please enter splunk index name:
test
ok
Please enter splunk source type[ ib:dns:captures ]:
Settings unchanged.
Please enter splunk default indexer port[ 9997 ]:
Settings unchanged.
Please enter splunk mode[ disabled ]:
Settings unchanged.
Indexers:
10.10.1.2
Index name is test
Source type is ib:dns:captures
Default indexer port is 9997
The output mode is disabled
Is it correct? y/n [y]:
y
Do you want to configure data output reporting settings y/n [y]:
y
Please use: '?' for help on available command options.
Please enter reporting mode[ disabled ]:
forward
Data will start transmitting immediately
ok
The output mode is forward
Is it correct? y/n [y]:
y
Setup wizard finished successfully
data.source > wizard
The data.source > wizard command allows you to configure the data source SCP settings.
Syntax
data.source > wizard
Example
data.source > wizard
Do you want to configure data input scp settings y/n [y]:
y
Please use: '?' for help on available command options.
Please enter SCP users[ dc_scp_user ]:
admin
74 Infoblox User Guide Data Connector 2.0

Enter password for user admin:
Enter again:
Error: Password doesn't match
Please enter SCP users[ dc_scp_user ]:
admin
Enter password for user admin:
Enter again:
ok
Do you want to add more values? y/n [n]:
y
Please enter SCP users[ dc_scp_user ]:
user1
Enter password for user user1:
Enter again:
ok
Do you want to add more values? y/n [n]:
n
Registered user(s):
admin
user1
Is it correct? y/n [y]:
y
Do you want to configure data input grid settings y/n [y]:
y
Please use: '?' for help on available command options.
Enter the IP address (or FQDN) of the NIOS Grid Master[ 127.0.0.1 ]:
ok
Enter the NIOS admin username[ admin ]:
Enter the NIOS admin's password:
Enter again:
ok
127.0.0.1
admin
Is it correct? y/n [y]:
y
Setup wizard finished successfully
data.destination.cloud > wizard
The data.destination.cloud > wizard command allows you to configure the cloud destination for Data
Connector.
Syntax
data.destination.cloud > wizard
Example
data.destination.cloud > wizard
Do you want to configure data output cloud registration settings y/n [y]:
y
Data Connector 2.0 Infoblox User Guide 75

CLI Commands
Please use: '?' for help on available command options.
Please enter cloud url[ https://usa-va.csp.infoblox.com/dnslog ]:
Settings unchanged.
Please enter api_key[ 1234 ]:
Settings unchanged.
Please enter agent_id[ 2345 ]:
Settings unchanged.
url: https://usa-va.csp.infoblox.com/dnslog
api_key: 1234
agent_id: 2345
Is it correct? y/n [y]:
y
Do you want to configure data output cloud settings y/n [y]:
y
Please use: '?' for help on available command options.
Please enter Output cloud mode configuration[ forward ]:
hold
ok
The output mode is hold
Is it correct? y/n [y]:
y
Setup wizard finished successfully
data.destination.cloud > stats
The data.destination.cloud > stats command displays the number of output files in queue waiting to be
transferred to the cloud server.
Syntax
data.destination.cloud > stats
Example
data.destination.cloud > stats
Cloud output stats:
# of files Size in kb # of files Size in kb Oldest
processed processed pending pending file
0 0.000 0 0.000 N/A
data.destination.cloud > purge
The data.destination.cloud > purge command deletes all the output files in queue waiting to be
transferred to the cloud server.
Syntax
data.destination.cloud > purge
Example
data.destination.cloud > purge
Delete all cloud output files? y/n [y]:
y
Cloud output files are deleted
ok
76 Infoblox User Guide Data Connector 2.0

data.destination.cloud > set mode
The data.destination.cloud > set mode command sets the cloud output mode.
Syntax
data.destination.cloud > set mode <forward|hold|disabled>
Example
data.destination.cloud > set mode hold
ok
data.destination.cloud > show mode
The data.destination.cloud > show mode command displays the cloud output mode.
Syntax
data.destination.cloud > show mode
Example
data.destination.cloud > show mode
The output mode is hold
data.destination.cloud.registration > set agent_id
The data.destination.cloud.registration > set agent_id command allows you to set the cloud
agent ID.
Syntax
data.destination.cloud.registration > set agent_id <agent_id>
Example
data.destination.cloud.registration > set agent_id <Your_Agent_ID>
ok
data.destination.cloud.registration > show agent_id
The data.destination.cloud.registration > show agent_id command displays the cloud agent ID.
Syntax
data.destination.cloud.registration > show agent_id
Example
data.destination.cloud.registration > show agent_id
agent_id: <Your_Agent_ID>
data.destination.cloud.registration > delete agent_id
The data.destination.cloud.registration > delete agent_id command deletes the cloud agent
ID.
Syntax
data.destination.cloud.registration > delete agent_id
Example
data.destination.cloud.registration > delete agent_id
ok
data.destination.cloud.registration > set api_key
The data.destination.cloud.registration > set api_key command allows you to set the cloud API
key.
Syntax
data.destination.cloud.registration > set api_key <api_key>
Data Connector 2.0 Infoblox User Guide 77

CLI Commands
Example
data.destination.cloud.registration > set api_key <Your_API_Key>
ok
data.destination.cloud.registration > show api_key
The data.destination.cloud.registration > show api_key command displays the cloud API key.
Syntax
data.destination.cloud.registration > show api_key
Example
data.destination.cloud.registration > show api_key
api_key: <Your_API_Key>
data.destination.cloud.registration > delete api_key
The data.destination.cloud.registration > delete api_key command deletes the cloud API key.
Syntax
data.destination.cloud.registration > delete api_key
Example
data.destination.cloud.registration > delete api_key
ok
data.destination.cloud.registration > set url
The data.destination.cloud.registration > set url command sets the cloud URL.
Syntax
data.destination.cloud.registration > set url <url>
Example
data.destination.cloud.registration > set url https://usa-va.csp.infoblox.com/dnslog
ok
data.destination.cloud.registration > show url
The data.destination.cloud.registration > show url command displays the cloud URL.
Syntax
data.destination.cloud.registration > show url
Example
data.destination.cloud.registration > show url
url: https://usa-va.csp.infoblox.com/dnslog
data.destination.cloud.registration > delete url
The data.destination.cloud.registration > delete url command deletes the cloud URL.
Syntax
data.destination.cloud.registration > delete url
Example
data.destination.cloud.registration > delete url
ok
78 Infoblox User Guide Data Connector 2.0
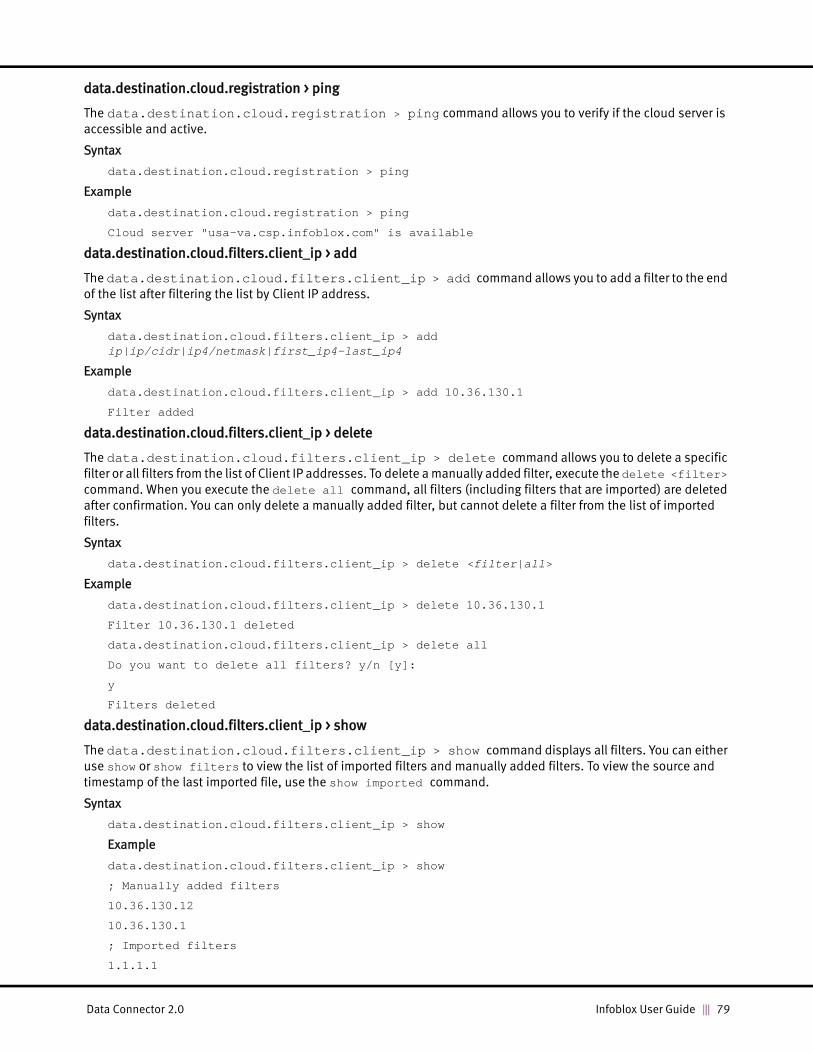
data.destination.cloud.registration > ping
The data.destination.cloud.registration > ping command allows you to verify if the cloud server is
accessible and active.
Syntax
data.destination.cloud.registration > ping
Example
data.destination.cloud.registration > ping
Cloud server "usa-va.csp.infoblox.com" is available
data.destination.cloud.filters.client_ip > add
The data.destination.cloud.filters.client_ip > add command allows you to add a filter to the end
of the list after filtering the list by Client IP address.
Syntax
data.destination.cloud.filters.client_ip > add ip|ip/cidr|ip4/netmask|first_ip4-last_ip4
Example
data.destination.cloud.filters.client_ip > add 10.36.130.1
Filter added
data.destination.cloud.filters.client_ip > delete
The data.destination.cloud.filters.client_ip > delete command allows you to delete a specific
filter or all filters from the list of Client IP addresses. To delete a manually added filter, execute the delete <filter>
command. When you execute the delete all command, all filters (including filters that are imported) are deleted
after confirmation. You can only delete a manually added filter, but cannot delete a filter from the list of imported
filters.
Syntax
data.destination.cloud.filters.client_ip > delete <filter|all>
Example
data.destination.cloud.filters.client_ip > delete 10.36.130.1
Filter 10.36.130.1 deleted
data.destination.cloud.filters.client_ip > delete all
Do you want to delete all filters? y/n [y]:
y
Filters deleted
data.destination.cloud.filters.client_ip > show
The data.destination.cloud.filters.client_ip > show command displays all filters. You can either
use show or show filters to view the list of imported filters and manually added filters. To view the source and
timestamp of the last imported file, use the show imported command.
Syntax
data.destination.cloud.filters.client_ip > show
Example
data.destination.cloud.filters.client_ip > show
; Manually added filters
10.36.130.12
10.36.130.1
; Imported filters
1.1.1.1
Data Connector 2.0 Infoblox User Guide 79

CLI Commands
1.1.1.2
1.1.1.3
1.1.1.4
1.1.1.5
1.1.1.6
1.1.1.7
1.1.1.8
1.1.1.9
1.1.1.10
data.destination.cloud.filters.client_ip > show filters
data.destination.cloud.filters.client_ip > show imported
data.destination.cloud.filters.client_ip > import
The data.destination.reporting.filters.client_ip > import command allows you to import
filters from a local or a remote file. When you import a file, it overwrites all existing imported and manually entered
filters after confirmation. Note that parsing and validation are invoked after the file is imported successfully. The
imported file is rejected and an error message is displayed in case of any validation error.
Note the following:
• Import a single IPv4 or IPv6 address. Example: 10.10.1.0 or 2620:10a:6000:661e::523.
• Import a range of IPv4 addresses: two single IPs with a dash between them, no spaces. Example:
10.10.1.0-10.10.2.35. This format is applicable to IPv4 address format only as IPv6 uses CIDR notation.
• Import a Network/Mask, that is, a single IPv4 address followed by a slash and mask without spaces. Example:
10.10.1.0/255.255.255.0. This format is applicable to IPv4 address format only.
• Import a CIDR block, that is, a single IPv4 or IPv6 address followed by a slash and a number without spaces.
Example: 10.10.0.1/15 and 2001:cdba:9abc:5678::/64
Syntax
data.destination.cloud.filters.client_ip > import <scp|ftp>://loginname@serverIP:[port:]path
Example
data.destination.cloud.filters.client_ip > import scp://[email protected]:/import/qaddi/DATACOLLECTOR/Filters/client_ip_10.csv
Import will remove all previously imported and added filters. Are you sure you want to proceed? y/n [y]:
y
Enter password:
Filters imported
data.destination.cloud.filters.client_ip > export
The data.destination.cloud.filters.client_ip > export command allows you to export filters to
a remote file. Note that the manually added filters are appended to the end of exported csv file whereas imported
filter files are exported along with comments and white spacing.
Syntax
data.destination.cloud.filters.client_ip > export <scp|ftp>://loginname@serverIP:[port:]path
80 Infoblox User Guide Data Connector 2.0

Example
data.destination.cloud.filters.client_ip > export scp://[email protected]:/import/qaddi/DATACOLLECTOR/Filters/client_ip_10.csv
Enter password:
Filters exported
data.destination.cloud.filters.client_ip > help
The data.destination.cloud.filters.client_ip > help command allows you to view the list of
commands that can be executed at the current CLI level.
Syntax
data.destination.cloud.filters.client_ip > help
Example
data.destination.cloud.filters.client_ip > help
data.destination.cloud.filters.client_ip > exit
The data.destination.cloud.filters.client_ip > exit command allows you to exit from the current
CLI level or logout from the top level.
Syntax
data.destination.cloud.filters.client_ip > exit
Example
data.destination.cloud.filters.client_ip > exit
data.destination.cloud.filters.dns_view > add
The data.destination.cloud.filters.dns_view > add command allows you to add a filter to the end
of the list. Note that you can add only one filter.
Syntax
data.destination.cloud.filters.dns_view > add Internal|I|External|E
Example
data.destination.cloud.filters.dns_view > add I
data.destination.cloud.filters.dns_view > delete
The data.destination.cloud.filters.dns_view > delete command allows you to delete a specific
filter or all filters. To delete a manually added filter, execute the delete <filter> command. When you execute the
delete all command, all filters (including filters that are imported) are deleted after confirmation. You can only
delete a manually added filter, but cannot delete a filter from the list of imported filters.
Syntax
data.destination.cloud.filters.dns_view > delete <filter|all>
Example
data.destination.cloud.filters.dns_view > delete I
Filter I deleted
data.destination.cloud.filters.dns_view > delete all
Do you want to delete all filters? y/n [y]:
y
Filters deleted
Data Connector 2.0 Infoblox User Guide 81

CLI Commands
data.destination.cloud.filters.dns_view > show
The data.destination.cloud.filters.dns_view > show command displays the list of filters. You can
either use show or show filters to view the list of imported filters and manually added filters. To view the source
and timestamp of the last imported file, use the show imported command.
Syntax
data.destination.cloud.filters.dns_view > show
Example
data.destination.cloud.filters.dns_view > show
; Manually added filters
I
data.destination.cloud.filters.dns_view > show filters
; Manually added filters
I
data.destination.cloud.filters.dns_view > show imported
data.destination.cloud.filters.dns_view > import
The data.destination.cloud.filters.dns_view > import command allows you to import filters from
a local or a remote file. When you import a file, it overwrites all existing imported and manually entered filters after
confirmation. Note that parsing and validation are invoked after the file is imported successfully. The imported file is
rejected and an error message is displayed in case of any validation error.
Syntax
data.destination.cloud.filters.dns_view > import <scp|ftp>://loginname@serverIP:[port:]path
Example
data.destination.cloud.filters.dns_view > import scp://[email protected]:/import/qaddi/DATACOLLECTOR/Filters/dns_view_10.csv
Import will remove all previously imported and added filters. Are you sure you want to proceed? y/n [y]:
y
Enter password:
Filters imported
data.destination.cloud.filters.dns_view > export
The data.destination.cloud.filters.dns_view > export command allows you to export filters to a
remote file. Note that the manually added filters are appended to the end of exported .csv file whereas imported filter
files are exported along with comments and white spacing.
Syntax
data.destination.cloud.filters.dns_view > export <scp|ftp>://loginname@serverIP:[port:]path
Example
data.destination.cloud.filters.dns_view > export scp://[email protected]:/import/qaddi/DATACOLLECTOR/Filters/dns_view_10.csv
Enter password:
Filters exported
82 Infoblox User Guide Data Connector 2.0

data.destination.cloud.filters.dns_view > help
The data.destination.cloud.filters.dns_view > help command allows you to view the list of
commands that can be executed at the current CLI level.
Syntax
data.destination.cloud.filters.dns_view > help
Example
data.destination.cloud.filters.dns_view > help
data.destination.cloud.filters.dns_view > exit
The data.destination.cloud.filters.dns_view > exit command allows you to exit from the current
CLI level or logout from the top level.
Syntax
data.destination.cloud.filters.dns_view > exit
Example
data.destination.cloud.filters.dns_view > exit
data.destination.cloud.filters.member > add
The data.destination.cloud.filters.member > add command allows you to add a filter to the end of
the list.
Syntax
data.destination.cloud.filters.member > add member_regular_expression
Example
data.destination.cloud.filters.member > add 10.36.130.1
Filter added
data.destination.cloud.filters.member> delete
The data.destination.cloud.filters.member > delete command allows you to delete a specific filter
or all filters. To delete a manually added filter, execute the delete <filter> command. When you execute the
delete all command, all filters (including filters that are imported) are deleted after confirmation. The delete
operation does not affect imported filters. You can only delete a manually added filter, but cannot delete a filter from
the list of imported filters.
Syntax
data.destination.cloud.filters.member > delete <filter|all>
Example
data.destination.cloud.filters.member > delete 10.36.130.1
Filter 10.36.130.1 deleted
data.destination.cloud.filters.member > delete all
Do you want to delete all filters? y/n [y]:
y
Filters deleted
data.destination.cloud.filters.member > show
The data.destination.cloud.filters.member > show command displays the list of existing filters. You
can either use show or show filters to view the list of imported filters and manually added filters. To view the
source and timestamp of the last imported file, use the show imported command.
Syntax
data.destination.cloud.filters.member > show
Data Connector 2.0 Infoblox User Guide 83

CLI Commands
Example
data.destination.cloud.filters.member > show
; Manually added filters
10.36.130.1
data.destination.cloud.filters.member > show filters
; Manually added filters
10.36.130.1
data.destination.cloud.filters.member > show imported
data.destination.cloud.filters.member > import
The data.destination.cloud.filters.member > import command allows you to import filters from a
local or a remote file. When you import a file, it overwrites all existing imported and manually entered filters after
confirmation. Note that parsing and validation are invoked after the file is imported successfully. The imported file is
rejected and an error message is displayed in case of any validation error.
Syntax
data.destination.cloud.filters.member > import <scp|ftp>://loginname@serverIP:[port:]path
Example
data.destination.cloud.filters.member > import scp://[email protected]:/import/qaddi/DATACOLLECTOR/Filters/member_10.csv
Import will remove all previously imported and added filters. Are you sure you want to proceed? y/n [y]:
y
Enter password:
Filters imported
data.destination.cloud.filters.member > export
The data.destination.cloud.filters.member > export command allows you to export filters to a
remote file. Note that the manually added filters are appended to the end of exported .csv file whereas imported filter
files are exported along with comments and white spacing.
Syntax
data.destination.cloud.filters.member > export <scp|ftp>://loginname@serverIP:[port:]path
Example
data.destination.cloud.filters.member > export scp://[email protected]:/import/qaddi/DATACOLLECTOR/Filters/member_10.csv
Enter password:
Filters exported
data.destination.cloud.filters.member > help
The data.destination.cloud.filters.member > help command allows you to view the list of
commands that can be executed at the current CLI level.
Syntax
data.destination.cloud.filters.member > help
Example
data.destination.cloud.filters.member > help
84 Infoblox User Guide Data Connector 2.0
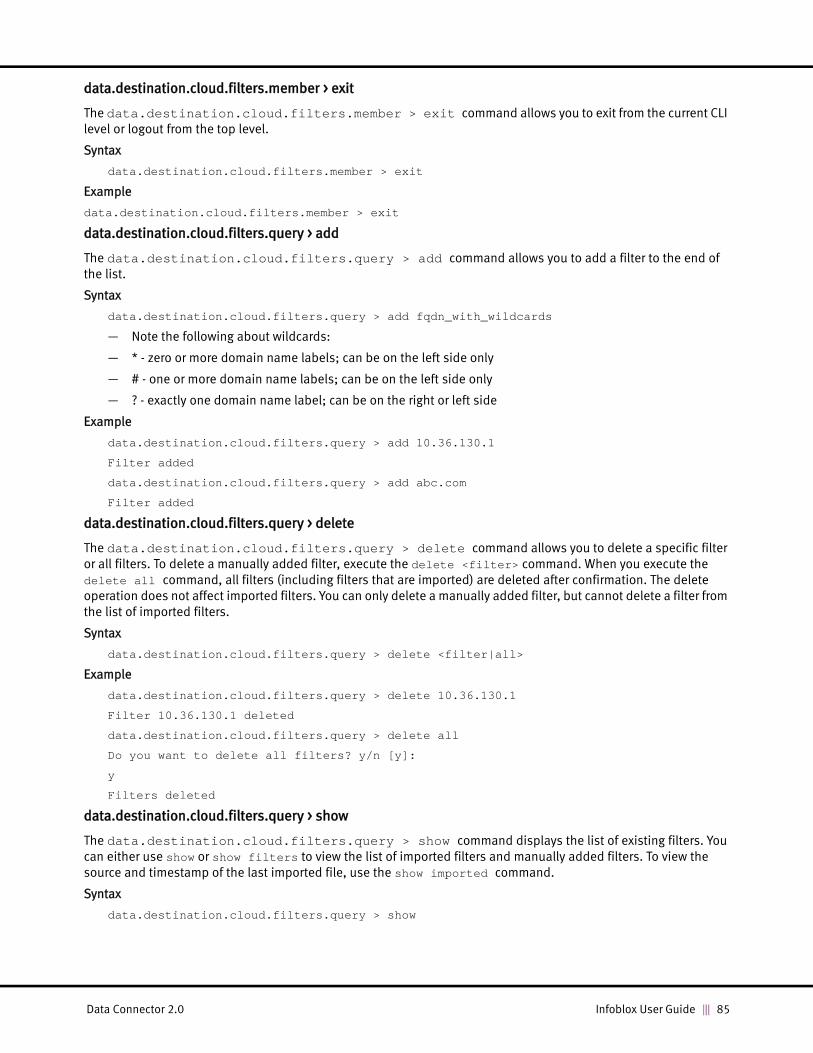
data.destination.cloud.filters.member > exit
The data.destination.cloud.filters.member > exit command allows you to exit from the current CLI
level or logout from the top level.
Syntax
data.destination.cloud.filters.member > exit
Example
data.destination.cloud.filters.member > exit
data.destination.cloud.filters.query > add
The data.destination.cloud.filters.query > add command allows you to add a filter to the end of
the list.
Syntax
data.destination.cloud.filters.query > add fqdn_with_wildcards
— Note the following about wildcards:
— * - zero or more domain name labels; can be on the left side only
— # - one or more domain name labels; can be on the left side only
— ? - exactly one domain name label; can be on the right or left side
Example
data.destination.cloud.filters.query > add 10.36.130.1
Filter added
data.destination.cloud.filters.query > add abc.com
Filter added
data.destination.cloud.filters.query > delete
The data.destination.cloud.filters.query > delete command allows you to delete a specific filter
or all filters. To delete a manually added filter, execute the delete <filter> command. When you execute the
delete all command, all filters (including filters that are imported) are deleted after confirmation. The delete
operation does not affect imported filters. You can only delete a manually added filter, but cannot delete a filter from
the list of imported filters.
Syntax
data.destination.cloud.filters.query > delete <filter|all>
Example
data.destination.cloud.filters.query > delete 10.36.130.1
Filter 10.36.130.1 deleted
data.destination.cloud.filters.query > delete all
Do you want to delete all filters? y/n [y]:
y
Filters deleted
data.destination.cloud.filters.query > show
The data.destination.cloud.filters.query > show command displays the list of existing filters. You
can either use show or show filters to view the list of imported filters and manually added filters. To view the
source and timestamp of the last imported file, use the show imported command.
Syntax
data.destination.cloud.filters.query > show
Data Connector 2.0 Infoblox User Guide 85

CLI Commands
Example
data.destination.cloud.filters.query > show
; Manually added filters
xyz.com
abc.com
10.36.130.12
10.36.130.1
data.destination.cloud.filters.query > show filters
; Manually added filters
xyz.com
abc.com
10.36.130.12
10.36.130.1
data.destination.cloud.filters.query > show imported
data.destination.cloud.filters.query > import
The data.destination.cloud.filters.query > import command allows you to import filters from a
local or a remote file. When you import a file, it overwrites all existing imported and manually entered filters after
confirmation. Note that parsing and validation are invoked after the file is imported successfully. The imported file is
rejected and an error message is displayed in case of any validation error.
Syntax
data.destination.cloud.filters.query > import <scp|ftp>://loginname@serverIP:[port:]path
Example
data.destination.cloud.filters.query > import scp://[email protected]:/import/qaddi/DATACOLLECTOR/Filters/query_10.csv
Import will remove all previously imported and added filters. Are you sure you want to proceed? y/n [y]:
y
Enter password:
Filters imported
data.destination.cloud.filters.query > export
The data.destination.cloud.filters.query > export command allows you to export filters to a
remote file. Note that the manually added filters are appended to the end of exported .csv file whereas imported filter
files are exported along with comments and white spacing.
Syntax
data.destination.cloud.filters.query > export <scp|ftp>://loginname@serverIP:[port:]path
Example
data.destination.cloud.filters.query > export scp://[email protected]:/import/qaddi/DATACOLLECTOR/Filters/query_10.csv
Enter password:
Filters exported
86 Infoblox User Guide Data Connector 2.0

data.destination.cloud.filters.query > help
The data.destination.cloud.filters.query > help command allows you to view the list of commands
that can be executed at the current CLI level.
Syntax
data.destination.cloud.filters.query > help
Example
data.destination.cloud.filters.query > help
data.destination.cloud.filters.query > exit
The data.destination.cloud.filters.query > exit command allows you to exit from the current CLI
level or logout from the top level.
Syntax
data.destination.cloud.filters.query > exit
Example
data.destination.cloud.filters.query > exit
data.destination.global.tags > info
The data.destination.global.tags > info command displays the member and view type tag
configuration.
Syntax
data.destination.global.tags > info
Example
data.destination.global.tags > info
Default value for the dns_view tag:
Internal
Grid ext_attribute name for the dns_view tag:
dns_role
data.destination.global.tags > dns_view
The data.destination.global.tags > dns_view command displays the view tag configuration of the NIOS
Grid. To view or set a default value for the output, use the dns_view command. You can use the ext_attribute
command to view or set an external attribute name for the DNS view.
Syntax
data.destination.global.tags.dns_view > default
Internal
data.destination.global.tags.dns_view > ext_attribute
dns_role
Example
data.destination.global.tags.dns_view > default
Internal
data.destination.global.tags.dns_view > ext_attribute
dns_role
Data Connector 2.0 Infoblox User Guide 87

CLI Commands
data.destination.global.filters.client_ip > add
The data.destination.global.filters.client_ip > add command allows you to add a filter to the
end of the list.
Syntax
data.destination.global.filters.client_ip > add ip|ip/cidr|ip4/netmask|first_ip4-last_ip4
Example
data.destination.global.filters.client_ip > add 10.36.130.1
Filter added
data.destination.global.filters.client_ip > delete
The data.destination.global.filters.client_ip > delete command allows you to delete a specific
filter or all filters. To delete a manually added filter, execute the delete <filter> command. When you execute the
delete all command, all filters (including filters that are imported) are deleted after confirmation. You can only
delete a manually added filter, but cannot delete a filter from the list of imported filters.
Syntax
data.destination.global.filters.client_ip > delete <filter|all>
Example
data.destination.global.filters.client_ip > delete 10.36.130.1
Filter 10.36.130.1 deleted
data.destination.global.filters.client_ip > delete all
Do you want to delete all filters? y/n [y]:
y
Filters deleted
data.destination.global.filters.client_ip > show
The data.destination.global.filters.client_ip > show command displays all filters. You can either
use show or show filters to view the list of imported filters and manually added filters. To view the source and
timestamp of the last imported file, use the show imported command.
Syntax
data.destination.global.filters.client_ip > show
Example
data.destination.global.filters.client_ip > show
; Manually added filters
10.36.130.12
10.36.130.1
; Imported filters
1.1.1.1
1.1.1.2
1.1.1.3
1.1.1.4
1.1.1.5
1.1.1.6
1.1.1.7
1.1.1.8
1.1.1.9
1.1.1.10
data.destination.global.filters.client_ip > show filters
data.destination.global.filters.client_ip > show imported
88 Infoblox User Guide Data Connector 2.0

data.destination.global.filters.client_ip > import
The data.destination.global.filters.client_ip > import command allows you to import filters
from a local or a remote file. When you import a file, it overwrites all existing imported and manually entered filters
after confirmation. Note that parsing and validation are invoked after the file is imported successfully. The imported
file is rejected and an error message is displayed in case of any validation error.
Note the following:
• Import a single IPv4 or IPv6 address. Example: 10.10.1.0 or 2620:10a:6000:661e::523.
• Import a range of IPv4 addresses: two single IPs with a dash between them, no spaces. Example:
10.10.1.0-10.10.2.35. This format is applicable to IPv4 address format only as IPv6 uses CIDR notation.
• Import a Network/Mask, that is, a single IPv4 address followed by a slash and mask without spaces. Example:
10.10.1.0/255.255.255.0. This format is applicable to IPv4 address format only.
• Import a CIDR block, that is, a single IPv4 or IPv6 address followed by a slash and a number without spaces.
Example: 10.10.0.1/15 and 2001:cdba:9abc:5678::/64
Syntax
data.destination.global.filters.client_ip > import <scp|ftp>://loginname@serverIP:[port:]path
Example
data.destination.global.filters.client_ip > import scp://[email protected]:/import/qaddi/DATACOLLECTOR/Filters/client_ip_10.csv
Import will remove all previously imported and added filters. Are you sure you want to proceed? y/n [y]:
y
Enter password:
Filters imported
data.destination.global.filters.client_ip > export
The data.destination.global.filters.client_ip > export command allows you to export filters to
a remote file. Note that the manually added filters are appended to the end of exported csv file whereas imported
filter files are exported along with comments and white spacing.
Syntax
data.destination.global.filters.client_ip > export <scp|ftp>://loginname@serverIP:[port:]path
Example
data.destination.global.filters.client_ip > export scp://[email protected]:/import/qaddi/DATACOLLECTOR/Filters/client_ip_10.csv
Enter password:
Filters exported
data.destination.global.filters.client_ip > help
The data.destination.global.filters.client_ip > help command allows you to view the list of
commands that can be executed at the current CLI level.
Syntax
data.destination.global.filters.client_ip > help
Example
data.destination.global.filters.client_ip > help
Data Connector 2.0 Infoblox User Guide 89

CLI Commands
data.destination.global.filters.client_ip > exit
The data.destination.global.filters.client_ip > exit command allows you to exit from the
current CLI level or logout from the top level.
Syntax
data.destination.global.filters.client_ip > exit
Example
data.destination.global.filters.client_ip > exit
data.destination.global.filters.dns_view > add
The data.destination.global.filters.dns_view > add command allows you to add a filter to the end
of the list. Note that you can add only one filter.
Syntax
data.destination.global.filters.dns_view > add Internal|I|External|E
Example
data.destination.global.filters.dns_view > add I
data.destination.global.filters.dns_view > delete
The data.destination.global.filters.dns_view > delete command allows you to delete a specific
filter or all filters. To delete a manually added filter, execute the delete <filter> command. When you execute the
delete all command, all filters (including filters that are imported) are deleted after confirmation. You can only
delete a manually added filter, but cannot delete a filter from the list of imported filters.
Syntax
data.destination.global.filters.dns_view > delete <filter|all>
Example
data.destination.global.filters.dns_view > delete I
Filter I deleted
data.destination.global.filters.dns_view > delete all
Do you want to delete all filters? y/n [y]:
y
Filters deleted
data.destination.global.filters.dns_view > show
The data.destination.global.filters.dns_view > show command displays the list of filters. You can
either use show or show filters to view the list of imported filters and manually added filters. To view the source
and time stamp of the last imported file, use the show imported command.
Syntax
data.destination.global.filters.dns_view > show
Example
data.destination.global.filters.dns_view > show
; Manually added filters
I
data.destination.global.filters.dns_view > show filters
; Manually added filters
I
data.destination.global.filters.dns_view > show imported
90 Infoblox User Guide Data Connector 2.0

data.destination.global.filters.dns_view > import
The data.destination.global.filters.dns_view > import command allows you to import filters
from a local or a remote file. When you import a file, it overwrites all existing imported and manually entered filters
after confirmation. Note that parsing and validation are invoked after the file is imported successfully. The imported
file is rejected and an error message is displayed in case of any validation error.
Syntax
data.destination.global.filters.dns_view > import <scp|ftp>://loginname@serverIP:[port:]path
Example
data.destination.global.filters.dns_view > import scp://[email protected]:/import/qaddi/DATACOLLECTOR/Filters/dns_view_10.csv
Import will remove all previously imported and added filters. Are you sure you want to proceed? y/n [y]:
y
Enter password:
Filters imported
data.destination.global.filters.dns_view > export
The data.destination.global.filters.dns_view > export command allows you to export filters to
a remote file. Note that the manually added filters are appended to the end of exported .csv file whereas imported
filter files are exported along with comments and white spacing.
Syntax
data.destination.global.filters.dns_view > export <scp|ftp>://loginname@serverIP:[port:]path
Example
data.destination.global.filters.dns_view > export scp://[email protected]:/import/qaddi/DATACOLLECTOR/Filters/dns_view_10.csv
Enter password:
Filters exported
data.destination.global.filters.dns_view > help
The data.destination.global.filters.dns_view > help command allows you to view the list of
commands that can be executed at the current CLI level.
Syntax
data.destination.global.filters.dns_view > help
Example
data.destination.global.filters.dns_view > help
data.destination.global.filters.dns_view > exit
The data.destination.global.filters.dns_view > exit command allows you to exit from the current
CLI level or logout from the top level.
Syntax
data.destination.global.filters.dns_view > exit
Example
data.destination.global.filters.dns_view > exit
Data Connector 2.0 Infoblox User Guide 91

CLI Commands
data.destination.global.filters.member > add
The data.destination.global.filters.member > add command allows you to add a filter to the end of
the list.
Syntax
data.destination.global.filters.member > add member_regular_expression
Example
data.destination.global.filters.member > add 10.36.130.1
Filter added
data.destination.global.filters.member> delete
The data.destination.global.filters.member > delete command allows you to delete a specific
filter or all filters. To delete a manually added filter, execute the delete <filter> command. When you execute the
delete all command, all filters (including filters that are imported) are deleted after confirmation. The delete
operation does not affect imported filters. You can only delete a manually added filter, but cannot delete a filter from
the list of imported filters.
Syntax
data.destination.global.filters.member > delete <filter|all>
Example
data.destination.global.filters.member > delete 10.36.130.1
Filter 10.36.130.1 deleted
data.destination.global.filters.member > delete all
Do you want to delete all filters? y/n [y]:
y
Filters deleted
data.destination.global.filters.member > show
The data.destination.global.filters.member > show command displays the list of existing filters.
You can either use show or show filters to view the list of imported filters and manually added filters. To view the
source and timestamp of the last imported file, use the show imported command.
Syntax
data.destination.global.filters.member > show
Example
data.destination.global.filters.member > show
; Manually added filters
10.36.130.1
data.destination.global.filters.member > show filters
; Manually added filters
10.36.130.1
data.destination.global.filters.member > show imported
data.destination.global.filters.member > import
The data.destination.global.filters.member > import command allows you to import filters from
a local or a remote file. When you import a file, it overwrites all existing imported and manually entered filters after
confirmation. Note that parsing and validation are invoked after the file is imported successfully. The imported file is
rejected and an error message is displayed in case of any validation error.
Syntax
data.destination.global.filters.member > import <scp|ftp>://loginname@serverIP:[port:]path
92 Infoblox User Guide Data Connector 2.0

Example
data.destination.global.filters.member > import scp://[email protected]:/import/qaddi/DATACOLLECTOR/Filters/member_10.csv
Import will remove all previously imported and added filters. Are you sure you want to proceed? y/n [y]:
y
Enter password:
Filters imported
data.destination.global.filters.member > export
The data.destination.global.filters.member > export command allows you to export filters to a
remote file. Note that the manually added filters are appended to the end of exported .csv file whereas imported filter
files are exported along with comments and white spacing.
Syntax
data.destination.global.filters.member > export <scp|ftp>://loginname@serverIP:[port:]path
Example
data.destination.global.filters.member > export scp://[email protected]:/import/qaddi/DATACOLLECTOR/Filters/member_10.csv
Enter password:
Filters exported
data.destination.global.filters.member > help
The data.destination.global.filters.member > help command allows you to view the list of
commands that can be executed at the current CLI level.
Syntax
data.destination.global.filters.member > help
Example
data.destination.global.filters.member > help
data.destination.global.filters.member > exit
The data.destination.global.filters.member > exit command allows you to exit from the current
CLI level or logout from the top level.
Syntax
data.destination.global.filters.member > exit
Example
data.destination.global.filters.member > exit
data.destination.global.filters.query > add
The data.destination.global.filters.query > add command allows you to add a filter to the end of
the list.
Syntax
data.destination.global.filters.query > add fqdn_with_wildcards
— Note the following about wildcards:
— * - zero or more domain name labels; can be on the left side only
— # - one or more domain name labels; can be on the left side only
— ? - exactly one domain name label; can be on the right or left side
Data Connector 2.0 Infoblox User Guide 93

CLI Commands
Example
data.destination.global.filters.query > add 10.36.130.1
Filter added
data.destination.global.filters.query > add abc.com
Filter added
data.destination.global.filters.query > delete
The data.destination.global.filters.query > delete command allows you to delete a specific filter
or all filters. To delete a manually added filter, execute the delete <filter> command. When you execute the
delete all command, all filters (including filters that are imported) are deleted after confirmation. The delete
operation does not affect imported filters. You can only delete a manually added filter, but cannot delete a filter from
the list of imported filters.
Syntax
data.destination.global.filters.query > delete <filter|all>
Example
data.destination.global.filters.query > delete 10.36.130.1
Filter 10.36.130.1 deleted
data.destination.global.filters.query > delete all
Do you want to delete all filters? y/n [y]:
y
Filters deleted
data.destination.global.filters.query > show
The data.destination.global.filters.query > show command displays the list of existing filters. You
can either use show or show filters to view the list of imported filters and manually added filters. To view the
source and timestamp of the last imported file, use the show imported command.
Syntax
data.destination.global.filters.query > show
Example
data.destination.global.filters.query > show
; Manually added filters
xyz.com
abc.com
10.36.130.12
10.36.130.1
data.destination.global.filters.query > show filters
; Manually added filters
xyz.com
abc.com
10.36.130.12
10.36.130.1
data.destination.global.filters.query > show imported
data.destination.global.filters.query > import
The data.destination.global.filters.query > import command allows you to import filters from a
local or a remote file. When you import a file, it overwrites all existing imported and manually entered filters after
confirmation. Note that parsing and validation are invoked after the file is imported successfully. The imported file is
rejected and an error message is displayed in case of any validation error.
94 Infoblox User Guide Data Connector 2.0

Syntax
data.destination.global.filters.query > import <scp|ftp>://loginname@serverIP:[port:]path
Example
data.destination.global.filters.query > import scp://[email protected]:/import/qaddi/DATACOLLECTOR/Filters/query_10.csv
Import will remove all previously imported and added filters. Are you sure you want to proceed? y/n [y]:
y
Enter password:
Filters imported
data.destination.global.filters.query > export
The data.destination.global.filters.query > export command allows you to export filters to a
remote file. Note that the manually added filters are appended to the end of exported .csv file whereas imported filter
files are exported along with comments and white spacing.
Syntax
data.destination.global.filters.query > export <scp|ftp>://loginname@serverIP:[port:]path
Example
data.destination.global.filters.query > export scp://[email protected]:/import/qaddi/DATACOLLECTOR/Filters/query_10.csv
Enter password:
Filters exported
data.destination.global.filters.query > help
The data.destination.global.filters.query > help command allows you to view the list of
commands that can be executed at the current CLI level.
Syntax
data.destination.global.filters.query > help
Example
data.destination.global.filters.query > help
data.destination.global.filters.query > exit
The data.destination.global.filters.query > exit command allows you to exit from the current CLI
level or logout from the top level.
Syntax
data.destination.global.filters.query > exit
Example
data.destination.global.filters.query > exit
data.destination.reporting > info
The data.destination.reporting > info command displays information about the reporting output
configuration.
Syntax
data.destination.reporting > info
Example
data.destination.reporting > info
Reporting mode configuration:
Data Connector 2.0 Infoblox User Guide 95

CLI Commands
The output mode is forward
Reporting mode registration:
Grid Master address: 10.35.5.49
Grid admin username: admin
Grid admin password: ********
Grid access is: Verified
Grid state refresh interval: 1 hour
Grid registration time: Fri Mar 24 00:36:02 2017
Grid registration uuid: 564DDD7806A384FD8EFC36F30E9E39FD
DC address registered: 10.36.130.1
Cached Grid member timezones:
infoblox.localdomain: (UTC) Coordinated Universal Time, None
reporting-1.com: (UTC) Coordinated Universal Time, None
member.com: (UTC) Coordinated Universal Time, None
Cached Grid views:
0: default, None
1: default.MS-2016, None
2: default.MS-2012, None
3: default.MS-2008, None
Reporting indexers:
10.35.2.59:9997 Connected
data.destination.reporting > wizard
The data.destination.reporting > wizard command allows you to configure the reporting output
settings.
Syntax
data.destination.reporting > wizard
Example
data.destination.reporting > wizard
Do you want to configure data output reporting settings y/n [y]:
y
Please use: '?' for help on available command options.
Please enter reporting mode[ forward ]:
hold
ok
The output mode is hold
Is it correct? y/n [y]:
y
Setup wizard finished successfully
data.destination.reporting > stats
The data.destination.reporting > stats command displays the number of output files in queue waiting
to be transferred to the reporting server.
Syntax
data.destination.reporting > stats
data.destination.reporting > stats reset
data.destination.reporting > stats detailed
96 Infoblox User Guide Data Connector 2.0

Example
data.destination.reporting > stats
Reporting output stats:
# of files Size in kb # of files Size in kb Oldest
processed processed pending pending file
1798 40960.216 0 0.000 N/A
data.destination.reporting > stats reset
Do you want to reset all statics on this level? y/n [y]:
y
Reporting output stats:
# of files Size in kb # of files Size in kb Oldest
processed processed pending pending file
0 0.000 0 0.000 N/A
data.destination.reporting > stats detailed
Reporting output stats:
No pending files
data.destination.reporting > purge
The data.destination.reporting > purge command deletes all the output files in queue waiting to be
transferred to the reporting server.
Syntax
data.destination.reporting > purge
Example
data.destination.reporting > purge
Delete all reporting output files? y/n [y]:
y
Reporting output files are deleted
ok
data.destination.reporting > set mode
The data.destination.reporting > set mode command sets the reporting output mode.
Syntax
data.destination.reporting > set mode <forward|hold|disabled>
Example
data.destination.reporting > set mode forward
Data will start transmitting immediately
ok
data.destination.reporting > show mode
The data.destination.reporting > show mode command displays the reporting output mode.
Syntax
data.destination.reporting > show mode
Example
data.destination.reporting > show mode
The output mode is forward
Data Connector 2.0 Infoblox User Guide 97

CLI Commands
data.destination.reporting.registration > register
The data.destination.reporting.registration > register command registers the Data Connector
VM with the Reporting Server.
Syntax
data.destination.reporting.registration > register
Example
data.destination.reporting.registration > register
Getting Grid Data Connection information... done.
Generating certificate for Splunk forwarder... done.
Signing Splunk forwarder certificate with the Grid...done.
Registering Data Collector with the Grid... done.
Saving changes to database... done.
data.destination.reporting.registration > unregister
The data.destination.reporting.registration > unregister command unregisters the Data
Connector VM from Reporting Server.
Syntax
data.destination.reporting.registration > unregister
Example
data.destination.reporting.registration > unregister
Unregistering Data Collector from the Grid... done.
Saving changes to database... done.
Note: When you use the register and unregister commands, the Data Connector VM is registered/unregistered
against the Grid, if the Grid is running NIOS 7.3 or later. The register command does not configure reporting
on the Grid and you cannot enable reporting until you configure a target Grid. When you enable the output, the
target Grid reporting member accepts the Data Connector VM as the source for reporting destination.
data.destination.reporting.registration > info
The data.destination.reporting.registration > info command displays configuration details for
the reporting output mode.
Syntax
data.destination.reporting.registration > info
Example
data.destination.reporting.registration > info
data.destination.reporting.filters.client_ip > add
The data.destination.reporting.filters.client_ip > add command allows you to add a filter to
the end of the list.
Syntax
data.destination.reporting.filters.client_ip > add ip|ip/cidr|ip4/netmask|first_ip4-last_ip4
Example
data.destination.reporting.filters.client_ip > add 10.36.130.1
Filter added
98 Infoblox User Guide Data Connector 2.0

data.destination.reporting.filters.client_ip > delete
The data.destination.reporting.filters.client_ip > delete command allows you to delete a
specific filter or all filters. To delete a manually added filter, execute the delete <filter> command. When you
execute the delete all command, all filters (including filters that are imported) are deleted after confirmation. You
can only delete a manually added filter, but cannot delete a filter from the list of imported filters.
Syntax
data.destination.reporting.filters.client_ip > delete <filter|all>
Example
data.destination.reporting.filters.client_ip > delete 10.36.130.1
Filter 10.36.130.1 deleted
data.destination.reporting.filters.client_ip > delete all
Do you want to delete all filters? y/n [y]:
y
Filters deleted
data.destination.reporting.filters.client_ip > show
The data.destination.reporting.filters.client_ip > show command displays all filters. You can
either use show or show filters to view the list of imported filters and manually added filters. To view the source
and timestamp of the last imported file, use the show imported command.
Syntax
data.destination.reporting.filters.client_ip > show
Example
data.destination.reporting.filters.client_ip > show
; Manually added filters
10.36.130.12
10.36.130.1
; Imported filters
1.1.1.1
1.1.1.2
1.1.1.3
1.1.1.4
1.1.1.5
1.1.1.6
1.1.1.7
1.1.1.8
1.1.1.9
1.1.1.10
data.destination.reporting.filters.client_ip > show filters
data.destination.reporting.filters.client_ip > show imported
data.destination.reporting.filters.client_ip > import
The data.destination.reporting.filters.client_ip > import command allows you to import
filters from a local or a remote file. When you import a file, it overwrites all existing imported and manually entered
filters after confirmation. Note that parsing and validation are invoked after the file is imported successfully. The
imported file is rejected and an error message is displayed in case of any validation error.
Note the following:
• Import a single IPv4 or IPv6 address. Example: 10.10.1.0 or 2620:10a:6000:661e::523.
• Import a range of IPv4 addresses: two single IPs with a dash between them, no spaces. Example:
10.10.1.0-10.10.2.35. This format is applicable to IPv4 address format only as IPv6 uses CIDR notation.
Data Connector 2.0 Infoblox User Guide 99

CLI Commands
• Import a Network/Mask, that is, a single IPv4 address followed by a slash and mask without spaces. Example:
10.10.1.0/255.255.255.0. This format is applicable to IPv4 address format only.
• Import a CIDR block, that is, a single IPv4 or IPv6 address followed by a slash and a number without spaces.
Example: 10.10.0.1/15 and 2001:cdba:9abc:5678::/64
Syntax
data.destination.reporting.filters.client_ip > import <scp|ftp>://loginname@serverIP:[port:]path
Example
data.destination.reporting.filters.client_ip > import scp://[email protected]:/import/qaddi/DATACOLLECTOR/Filters/client_ip_10.csv
Import will remove all previously imported and added filters. Are you sure you want to proceed? y/n [y]:
y
Enter password:
Filters imported
data.destination.reporting.filters.client_ip > export
The data.destination.reporting.filters.client_ip > export command allows you to export
filters to a remote file. Note that the manually added filters are appended to the end of exported csv file whereas
imported filter files are exported along with comments and white spacing.
Syntax
data.destination.reporting.filters.client_ip > export <scp|ftp>://loginname@serverIP:[port:]path
Example
data.destination.reporting.filters.client_ip > export scp://[email protected]:/import/qaddi/DATACOLLECTOR/Filters/client_ip_10.csv
Enter password:
Filters exported
data.destination.reporting.filters.client_ip > help
The data.destination.reporting.filters.client_ip > help command allows you to view the list
of commands that can be executed at the current CLI level.
Syntax
data.destination.reporting.filters.client_ip > help
Example
data.destination.reporting.filters.client_ip > help
data.destination.reporting.filters.client_ip > exit
The data.destination.reporting.filters.client_ip > exit command allows you to exit from the
current CLI level or logout from the top level.
Syntax
data.destination.reporting.filters.client_ip > exit
Example
data.destination.reporting.filters.client_ip > exit
100 Infoblox User Guide Data Connector 2.0

data.destination.reporting.filters.dns_view > add
The data.destination.reporting.filters.dns_view > add command allows you to add a filter to the
end of the list. Note that you can add only one filter.
Syntax
data.destination.reporting.filters.dns_view > add Internal|I|External|E
Example
data.destination.reporting.filters.dns_view > add I
data.destination.reporting.filters.dns_view > delete
The data.destination.reporting.filters.dns_view > delete command allows you to delete a
specific filter or all filters. To delete a manually added filter, execute the delete <filter> command. When you
execute the delete all command, all filters (including filters that are imported) are deleted after confirmation. You
can only delete a manually added filter, but cannot delete a filter from the list of imported filters.
Syntax
data.destination.reporting.filters.dns_view > delete <filter|all>
Example
data.destination.reporting.filters.dns_view > delete I
Filter I deleted
data.destination.reporting.filters.dns_view > delete all
Do you want to delete all filters? y/n [y]:
y
Filters deleted
data.destination.reporting.filters.dns_view > show
The data.destination.reporting.filters.dns_view > show command displays the list of filters. You
can either use show or show filters to view the list of imported filters and manually added filters. To view the
source and timestamp of the last imported file, use the show imported command.
Syntax
data.destination.reporting.filters.dns_view > show
Example
data.destination.reporting.filters.dns_view > show
; Manually added filters
I
data.destination.reporting.filters.dns_view > show filters
; Manually added filters
I
data.destination.reporting.filters.dns_view > show imported
data.destination.reporting.filters.dns_view > import
The data.destination.reporting.filters.dns_view > import command allows you to import filters
from a local or a remote file. When you import a file, it overwrites all existing imported and manually entered filters
after confirmation. Note that parsing and validation are invoked after the file is imported successfully. The imported
file is rejected and an error message is displayed in case of any validation error.
Syntax
data.destination.reporting.filters.dns_view > import <scp|ftp>://loginname@serverIP:[port:]path
Data Connector 2.0 Infoblox User Guide 101

CLI Commands
Example
data.destination.reporting.filters.dns_view > import scp://[email protected]:/import/qaddi/DATACOLLECTOR/Filters/dns_view_10.csv
Import will remove all previously imported and added filters. Are you sure you want to proceed? y/n [y]:
y
Enter password:
Filters imported
data.destination.reporting.filters.dns_view > export
The data.destination.reporting.filters.dns_view > export command allows you to export filters
to a remote file. Note that the manually added filters are appended to the end of exported .csv file whereas imported
filter files are exported along with comments and white spacing.
Syntax
data.destination.reporting.filters.dns_view > export <scp|ftp>://loginname@serverIP:[port:]path
Example
data.destination.reporting.filters.dns_view > export scp://[email protected]:/import/qaddi/DATACOLLECTOR/Filters/dns_view_10.csv
Enter password:
Filters exported
data.destination.reporting.filters.dns_view > help
The data.destination.reporting.filters.dns_view > help command allows you to view the list of
commands that can be executed at the current CLI level.
Syntax
data.destination.reporting.filters.dns_view > help
Example
data.destination.reporting.filters.dns_view > help
data.destination.reporting.filters.dns_view > exit
The data.destination.reporting.filters.dns_view > exit command allows you to exit from the
current CLI level or logout from the top level.
Syntax
data.destination.reporting.filters.dns_view > exit
Example
data.destination.reporting.filters.dns_view > exit
data.destination.reporting.filters.member > add
The data.destination.reporting.filters.member > add command allows you to add a filter to the
end of the list.
Syntax
data.destination.reporting.filters.member > add member_regular_expression
Example
data.destination.reporting.filters.member > add 10.36.130.1
Filter added
102 Infoblox User Guide Data Connector 2.0

data.destination.reporting.filters.member> delete
The data.destination.reporting.filters.member > delete command allows you to delete a specific
filter or all filters. To delete a manually added filter, execute the delete <filter> command. When you execute the
delete all command, all filters (including filters that are imported) are deleted after confirmation. The delete
operation does not affect imported filters. You can only delete a manually added filter, but cannot delete a filter from
the list of imported filters.
Syntax
data.destination.reporting.filters.member > delete <filter|all>
Example
data.destination.reporting.filters.member > delete 10.36.130.1
Filter 10.36.130.1 deleted
data.destination.reporting.filters.member > delete all
Do you want to delete all filters? y/n [y]:
y
Filters deleted
data.destination.reporting.filters.member > show
The data.destination.reporting.filters.member > show command displays the list of existing
filters. You can either use show or show filters to view the list of imported filters and manually added filters. To
view the source and timestamp of the last imported file, use the show imported command.
Syntax
data.destination.reporting.filters.member > show
Example
data.destination.reporting.filters.member > show
; Manually added filters
10.36.130.1
data.destination.reporting.filters.member > show filters
; Manually added filters
10.36.130.1
data.destination.reporting.filters.member > show imported
data.destination.reporting.filters.member > import
The data.destination.reporting.filters.member > import command allows you to import filters
from a local or a remote file. When you import a file, it overwrites all existing imported and manually entered filters
after confirmation. Note that parsing and validation are invoked after the file is imported successfully. The imported
file is rejected and an error message is displayed in case of any validation error.
Syntax
data.destination.reporting.filters.member > import <scp|ftp>://loginname@serverIP:[port:]path
Example
data.destination.reporting.filters.member > import scp://[email protected]:/import/qaddi/DATACOLLECTOR/Filters/member_10.csv
Import will remove all previously imported and added filters. Are you sure you want to proceed? y/n [y]:
y
Enter password:
Filters imported
Data Connector 2.0 Infoblox User Guide 103

CLI Commands
data.destination.reporting.filters.member > export
The data.destination.reporting.filters.member > export command allows you to export filters to
a remote file. Note that the manually added filters are appended to the end of exported .csv file whereas imported
filter files are exported along with comments and white spacing.
Syntax
data.destination.reporting.filters.member > export <scp|ftp>://loginname@serverIP:[port:]path
Example
data.destination.reporting.filters.member > export scp://[email protected]:/import/qaddi/DATACOLLECTOR/Filters/member_10.csv
Enter password:
Filters exported
data.destination.reporting.filters.member > help
The data.destination.reporting.filters.member > help command allows you to view the list of
commands that can be executed at the current CLI level.
Syntax
data.destination.reporting.filters.member > help
Example
data.destination.reporting.filters.member > help
data.destination.reporting.filters.member > exit
The data.destination.reporting.filters.member > exit command allows you to exit from the
current CLI level or logout from the top level.
Syntax
data.destination.reporting.filters.member > exit
Example
data.destination.reporting.filters.member > exit
data.destination.reporting.filters.query > add
The data.destination.reporting.filters.query > add command allows you to add a filter to the end
of the list.
Syntax
data.destination.reporting.filters.query > add fqdn_with_wildcards
— Note the following about wildcards:
— * - zero or more domain name labels; can be on the left side only
— # - one or more domain name labels; can be on the left side only
— ? - exactly one domain name label; can be on the right or left side
Example
data.destination.reporting.filters.query > add 10.36.130.1
Filter added
data.destination.reporting.filters.query > add abc.com
Filter added
104 Infoblox User Guide Data Connector 2.0

data.destination.reporting.filters.query > delete
The data.destination.reporting.filters.query > delete command allows you to delete a specific
filter or all filters. To delete a manually added filter, execute the delete <filter> command. When you execute the
delete all command, all filters (including filters that are imported) are deleted after confirmation. The delete
operation does not affect imported filters. You can only delete a manually added filter, but cannot delete a filter from
the list of imported filters.
Syntax
data.destination.reporting.filters.query > delete <filter|all>
Example
data.destination.reporting.filters.query > delete 10.36.130.1
Filter 10.36.130.1 deleted
data.destination.reporting.filters.query > delete all
Do you want to delete all filters? y/n [y]:
y
Filters deleted
data.destination.reporting.filters.query > show
The data.destination.reporting.filters.query > show command displays the list of existing filters.
You can either use show or show filters to view the list of imported filters and manually added filters. To view the
source and timestamp of the last imported file, use the show imported command.
Syntax
data.destination.reporting.filters.query > show
Example
data.destination.reporting.filters.query > show
; Manually added filters
xyz.com
abc.com
10.36.130.12
10.36.130.1
data.destination.reporting.filters.query > show filters
; Manually added filters
xyz.com
abc.com
10.36.130.12
10.36.130.1
data.destination.reporting.filters.query > show imported
data.destination.reporting.filters.query > import
The data.destination.global.filters.query > import command allows you to import filters from a
local or a remote file. When you import a file, it overwrites all existing imported and manually entered filters after
confirmation. Note that parsing and validation are invoked after the file is imported successfully. The imported file is
rejected and an error message is displayed in case of any validation error.
Syntax
data.destination.reporting.filters.query > import <scp|ftp>://loginname@serverIP:[port:]path
Example
data.destination.reporting.filters.query > import scp://[email protected]:/import/qaddi/DATACOLLECTOR/Filters/query_10.csv
Data Connector 2.0 Infoblox User Guide 105

CLI Commands
Import will remove all previously imported and added filters. Are you sure you want to proceed? y/n [y]:
y
Enter password:
Filters imported
data.destination.reporting.filters.query > export
The data.destination.global.filters.query > export command allows you to export filters to a
remote file. Note that the manually added filters are appended to the end of exported .csv file whereas imported filter
files are exported along with comments and white spacing.
Syntax
data.destination.reporting.filters.query > export <scp|ftp>://loginname@serverIP:[port:]path
Example
data.destination.reporting.filters.query > export scp://[email protected]:/import/qaddi/DATACOLLECTOR/Filters/query_10.csv
Enter password:
Filters exported
data.destination.reporting.filters.query > help
The data.destination.reporting.filters.query > help command allows you to view the list of
commands that can be executed at the current CLI level.
Syntax
data.destination.reporting.filters.query > help
Example
data.destination.reporting.filters.query > help
data.destination.reporting.filters.query > exit
The data.destination.reporting.filters.query > exit command allows you to exit from the current
CLI level or logout from the top level.
Syntax
data.destination.reporting.filters.query > exit
Example
data.destination.reporting.filters.query > exit
data.destination.splunk > wizard
The data.destination.splunk > wizard command allows you to configure the Splunk output settings.
Syntax
data.destination.splunk > wizard
Example
data.destination.splunk > wizard
Do you want to configure data output splunk settings y/n [y]:
y
Please use: '?' for help on available command options.
Please enter splunk indexers:
10.1.1.0
ok
Do you want to add more values? y/n [n]:
n
106 Infoblox User Guide Data Connector 2.0

Please enter splunk index name[ xyz ]:
abc
ok
Please enter splunk source type[ ib:dns:captures ]:
Settings unchanged.
Please enter splunk default indexer port[ 9997 ]:
9997
ok
Please enter splunk mode[ disabled ]:
hold
ok
Indexers:
10.1.1.0
Index name is abc
Source type is ib:dns:captures
Default indexer port is 9997
The output mode is hold
Is it correct? y/n [y]:
y
Setup wizard finished successfully
data.destination.splunk > add indexer
The data.destination.splunk > add indexer command enables you to add Splunk indexers to send DNS
captures.
Syntax
data.destination.splunk > add indexer <address>[:optional_port]
Example
data.destination.splunk > add indexer 10.1.1.0
ok
data.destination.splunk > show indexer
The data.destination.splunk > show indexer command displays the list of Splunk indexers.
Syntax
data.destination.splunk > show indexer
Example
data.destination.splunk > show indexer
Indexers:
10.10.1.2
10.1.1.0
data.destination.splunk > delete indexer
The data.destination.splunk > delete indexer command deletes Splunk indexers.
Syntax
data.destination.splunk > delete indexer <address>[:optional_port]
Example
data.destination.splunk > delete indexer 10.1.1.0
ok
Data Connector 2.0 Infoblox User Guide 107

CLI Commands
data.destination.splunk > set indexname
The data.destination.splunk > set indexname command allows you to specify the Splunk index name.
Syntax
data.destination.splunk > set indexname <string>
Example
data.destination.splunk > set indexname xyz
ok
data.destination.splunk > show indexname
The data.destination.splunk > show indexname command displays the Splunk index name.
Syntax
data.destination.splunk > show indexname
Example
data.destination.splunk > show indexname
Index name is xyz
data.destination.splunk > set port
The data.destination.splunk > set port command sets the Splunk default indexer port. This port is used
if an indexer lacks port specification.
Syntax
data.destination.splunk > set port <number>
Example
data.destination.splunk > set port 9997
ok
data.destination.splunk > show port
The data.destination.splunk > show port command displays the Splunk default indexer port.
Syntax
data.destination.splunk > show port
Example
data.destination.splunk > show port
Default indexer port is 9997
data.destination.splunk > set sourcetype
The data.destination.splunk > set sourcetype command allows you to specify the Splunk source type.
Syntax
data.destination.splunk > set sourcetype <string>
Example
data.destination.splunk > set sourcetype ib:dns:captures
ok
data.destination.splunk > sourcetype
The data.destination.splunk > sourcetype command displays the Splunk source type.
Syntax
data.destination.splunk > sourcetype
Example
data.destination.splunk > sourcetype
Source type is ib:dns:captures
108 Infoblox User Guide Data Connector 2.0

data.destination.splunk > cacertificate import
The data.destination.splunk > cacertificate import command enables you to upload the
Certification Authority bundle in .PEM format which is used to authenticate Splunk forwarder traffic with Splunk
indexers.
Syntax
data.destination.splunk > cacertificate import <scp|ftp>://loginname@serverIP:[port:]path
Example
data.destination.splunk > cacertificate import scp://[email protected]:999/DB1/
data.destination.splunk > show cacertificate
The data.destination.splunk > show cacertificate command prints the Certification Authority
bundle information such as subject, expiry date, fingerprint etc.
Syntax
data.destination.splunk > show cacertificate
Example
data.destination.splunk > show cacertificate
data.destination.splunk > print cacertificate
The data.destination.splunk > print cacertificate command enables you to print the Certification
Authority bundle in .PEM format.
Syntax
data.destination.splunk > print cacertificate
Example
data.destination.splunk > print cacertificate
-----BEGIN CERTIFICATE-----
MIIDrDCCApQCCQChUsCxGi8wzDANBgkqhkiG9w0BAQsFADCBlzELMAkGA1UEBhMC
BpbmZvYmxveC5jb20wHhcNMTYwNzIxMDEwMzE4WhcNMTkwNzIxMDEwMzE4WjCBlzE
LMAkGA1UEBhMCdXMxEzARB
-----END CERTIFICATE-----
data.destination.splunk > certificate request
The data.destination.splunk > certifticate request command enables you to generate a certificate
request in .PEM format that must be signed by a third party certification authority to get a Forwarder certificate.
Syntax
data.destination.splunk > certificate request
Example
data.destination.splunk > certificate request
Generating Forwarder Private key... Done
Below is Certificate Request.
Please pass it to your Certification Authority for signing to get Forwarder Certificate.
-----BEGIN CERTIFICATE REQUEST-----
CUEybjcJD/4+Q8cSHmMU7VOpp1VEs9W4Fwi5QHtn0/zz4a2bEIlJ/
-----END CERTIFICATE REQUEST-----
ok
Data Connector 2.0 Infoblox User Guide 109

CLI Commands
data.destination.splunk > certificate import
The data.destination.splunk > certificate import command imports the Forwarder Certificate that
is signed by a third party certification authority from an SCP server or an FTP server.
Syntax
data.destination.splunk > certificate import <scp|ftp>://loginname@serverIP:[port:]path>
Example
data.destination.splunk > certificate import scp://[email protected]:999/DC2/
data.destination.splunk > show certificate
The data.destination.splunk > show certificate command prints the certificate information, such
as subject, expiry date, fingerprint etc, after it is generated and imported.
Syntax
data.destination.splunk > show certificate
Example
data.destination.splunk > show certificate
data.destination.splunk > print certificate
The data.destination.splunk > print certificate command prints the certificate information in .PEM
format.
Syntax
data.destination.splunk > print certificate
Example
data.destination.splunk > print certificate
-----BEGIN CERTIFICATE-----
MIIDMjCCAhoCCQDyctaScOw5CDANBgkqhkiG9w0BAQsFADCBlzELMAkGA1UEBhMC
dXMxEzARBgNVBAgMCmNhbGlmb3JuaWExFDASBgNVBAcMC3NhbnRhIGNsYXJhMREw
DSfwP7YknnzOCCf1Sm1vrZeci1dCZYQLlfJKz/gP
-----END CERTIFICATE-----
data.destination.splunk > set mode
The data.destination.splunk > set mode command enables you to change the default output mode for
the Splunk output.
Syntax
data.destination.splunk > set mode [forward|hold|disabled]
Example
data.destination.splunk > set mode forward
Data will start transmitting immediately
ok
data.destination.splunk > show mode
The data.destination.splunk > show mode command displays the output mode for the Splunk output.
Syntax
data.destination.splunk > show mode
Example
data.destination.splunk > show mode
The output mode is forward
110 Infoblox User Guide Data Connector 2.0

data.destination.splunk > stats
The data.destination.splunk > stats command displays system performance/statistics.
Syntax
data.destination.splunk > stats
data.destination.splunk > stats [get]
data.destination.splunk > stats reset
data.destination.splunk > stats detailed
Example
data.destination.splunk > stats
Splunk output stats:
# of files Size in kb # of files Size in kb Oldest
processed processed pending pending file
0 0.000 0 0.000 N/A
data.destination.splunk > stats reset
Do you want to reset all statics on this level? y/n [y]:
y
Splunk output stats:
# of files Size in kb # of files Size in kb Oldest
processed processed pending pending file
0 0.000 0 0.000 N/A
data.destination.splunk > stats detailed
Splunk output stats:
No pending files
data.destination.splunk > purge
The data.destination.splunk > purge command enables you to delete all the output files in queue waiting
to be transferred to the Splunk destination. When you provide the regexp parameter, all files matching the provided
parameter are deleted. If you do not provide the parameter, only pending output files are deleted.
Syntax
data.destination.splunk > purge [regexp]
regxep - regular expression with posix-egrep syntax.
Example
data.destination.splunk > purge
Delete all splunk output files? y/n [y]:
y
Splunk output files are deleted
ok
Data Connector 2.0 Infoblox User Guide 111

CLI Commands
data.destination.splunk > info
The data.destination.splunk > info command displays actual configuration of the Splunk destination.
Syntax
data.destination.splunk > info
Example
data.destination.splunk > info
Splunk indexers:
No indexers defined
Splunk index name:
Index name is xyz
Splunk mode configuration:
The output mode is disabled
Splunk default indexer port:
Default indexer port is 9997
Splunk source type:
Source type is ib:dns:captures
data.destination.splunk.filters.client_ip > add
The data.destination.splunk.filters.client_ip > add command allows you to add a filter to the
end of the list after filtering the list by Client IP address.
Syntax
data.destination.splunk.filters.client_ip > add ip|ip/cidr|ip4/netmask|first_ip4-last_ip4
Example
data.destination.splunk.filters.client_ip > add 10.36.130.1
Filter added
data.destination.splunk.filters.client_ip > delete
The data.destination.splunk.filters.client_ip > delete command allows you to delete a specific
filter or all filters from the list of Client IP addresses. To delete a manually added filter, execute the delete <filter>
command. When you execute the delete all command, all filters (including filters that are imported) are deleted
after confirmation. You can only delete a manually added filter, but cannot delete a filter from the list of imported
filters.
Syntax
data.destination.splunk.filters.client_ip > delete <filter|all>
Example
data.destination.splunk.filters.client_ip > delete 10.36.130.1
Filter 10.36.130.1 deleted
data.destination.splunk.filters.client_ip > delete all
Do you want to delete all filters? y/n [y]:
y
Filters deleted
data.destination.splunk.filters.client_ip > show
The data.destination.splunk.filters.client_ip > show command displays all filters. You can either
use show or show filters to view the list of imported filters and manually added filters. To view the source and time
stamp of the last imported file, use the show imported command.
Syntax
data.destination.splunk.filters.client_ip > show
112 Infoblox User Guide Data Connector 2.0

Example
data.destination.splunk.filters.client_ip > show
; Manually added filters
10.36.130.12
10.36.130.1
; Imported filters
1.1.1.1
1.1.1.2
1.1.1.3
1.1.1.4
1.1.1.5
1.1.1.6
1.1.1.7
1.1.1.8
1.1.1.9
1.1.1.10
data.destination.splunk.filters.client_ip > show filters
data.destination.splunk.filters.client_ip > show imported
data.destination.splunk.filters.client_ip > import
The data.destination.reporting.filters.client_ip > import command allows you to import
filters from a local or a remote file. When you import a file, it overwrites all existing imported and manually entered
filters after confirmation. Note that parsing and validation are invoked after the file is imported successfully. The
imported file is rejected and an error message is displayed in case of any validation error.
Note the following:
• Import a single IPv4 or IPv6 address. Example: 10.10.1.0 or 2620:10a:6000:661e::523.
• Import a range of IPv4 addresses: two single IPs with a dash between them, no spaces. Example:
10.10.1.0-10.10.2.35. This format is applicable to IPv4 address format only as IPv6 uses CIDR notation.
• Import a Network/Mask, that is, a single IPv4 address followed by a slash and mask without spaces. Example:
10.10.1.0/255.255.255.0. This format is applicable to IPv4 address format only.
• Import a CIDR block, that is, a single IPv4 or IPv6 address followed by a slash and a number without spaces.
Example: 10.10.0.1/15 and 2001:cdba:9abc:5678::/64
Syntax
data.destination.splunk.filters.client_ip > import <scp|ftp>://loginname@serverIP:[port:]path
Example
data.destination.splunk.filters.client_ip > import scp://[email protected]:/import/qaddi/DATACOLLECTOR/Filters/client_ip_10.csv
Import will remove all previously imported and added filters. Are you sure you want to proceed? y/n [y]:
y
Enter password:
Filters imported
data.destination.splunk.filters.client_ip > export
The data.destination.splunk.filters.client_ip > export command allows you to export filters to
a remote file. Note that the manually added filters are appended to the end of exported csv file whereas imported
filter files are exported along with comments and white spacing.
Data Connector 2.0 Infoblox User Guide 113
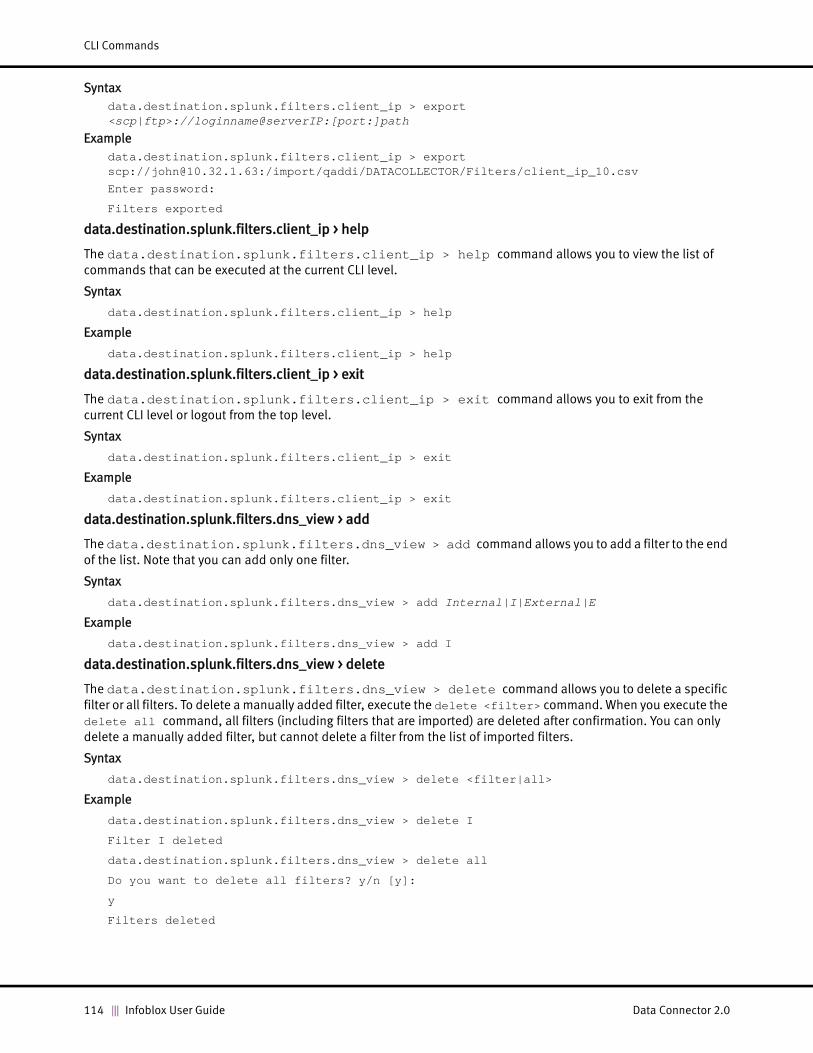
CLI Commands
Syntax
data.destination.splunk.filters.client_ip > export <scp|ftp>://loginname@serverIP:[port:]path
Example
data.destination.splunk.filters.client_ip > export scp://[email protected]:/import/qaddi/DATACOLLECTOR/Filters/client_ip_10.csv
Enter password:
Filters exported
data.destination.splunk.filters.client_ip > help
The data.destination.splunk.filters.client_ip > help command allows you to view the list of
commands that can be executed at the current CLI level.
Syntax
data.destination.splunk.filters.client_ip > help
Example
data.destination.splunk.filters.client_ip > help
data.destination.splunk.filters.client_ip > exit
The data.destination.splunk.filters.client_ip > exit command allows you to exit from the
current CLI level or logout from the top level.
Syntax
data.destination.splunk.filters.client_ip > exit
Example
data.destination.splunk.filters.client_ip > exit
data.destination.splunk.filters.dns_view > add
The data.destination.splunk.filters.dns_view > add command allows you to add a filter to the end
of the list. Note that you can add only one filter.
Syntax
data.destination.splunk.filters.dns_view > add Internal|I|External|E
Example
data.destination.splunk.filters.dns_view > add I
data.destination.splunk.filters.dns_view > delete
The data.destination.splunk.filters.dns_view > delete command allows you to delete a specific
filter or all filters. To delete a manually added filter, execute the delete <filter> command. When you execute the
delete all command, all filters (including filters that are imported) are deleted after confirmation. You can only
delete a manually added filter, but cannot delete a filter from the list of imported filters.
Syntax
data.destination.splunk.filters.dns_view > delete <filter|all>
Example
data.destination.splunk.filters.dns_view > delete I
Filter I deleted
data.destination.splunk.filters.dns_view > delete all
Do you want to delete all filters? y/n [y]:
y
Filters deleted
114 Infoblox User Guide Data Connector 2.0

data.destination.splunk.filters.dns_view > show
The data.destination.splunk.filters.dns_view > show command displays the list of filters. You can
either use show or show filters to view the list of imported filters and manually added filters. To view the source
and timestamp of the last imported file, use the show imported command.
Syntax
data.destination.splunk.filters.dns_view > show
Example
data.destination.splunk.filters.dns_view > show
; Manually added filters
I
data.destination.splunk.filters.dns_view > show filters
; Manually added filters
I
data.destination.splunk.filters.dns_view > show imported
data.destination.splunk.filters.dns_view > import
The data.destination.splunk.filters.dns_view > import command allows you to import filters
from a local or a remote file. When you import a file, it overwrites all existing imported and manually entered filters
after confirmation. Note that parsing and validation are invoked after the file is imported successfully. The imported
file is rejected and an error message is displayed in case of any validation error.
Syntax
data.destination.splunk.filters.dns_view > import <scp|ftp>://loginname@serverIP:[port:]path
Example
data.destination.splunk.filters.dns_view > import scp://[email protected]:/import/qaddi/DATACOLLECTOR/Filters/dns_view_10.csv
Import will remove all previously imported and added filters. Are you sure you want to proceed? y/n [y]:
y
Enter password:
Filters imported
data.destination.splunk.filters.dns_view > export
The data.destination.splunk.filters.dns_view > export command allows you to export filters to
a remote file. Note that the manually added filters are appended to the end of exported .csv file whereas imported
filter files are exported along with comments and white spacing.
Syntax
data.destination.splunk.filters.dns_view > export <scp|ftp>://loginname@serverIP:[port:]path
Example
data.destination.splunk.filters.dns_view > export scp://[email protected]:/import/qaddi/DATACOLLECTOR/Filters/dns_view_10.csv
Enter password:
Filters exported
Data Connector 2.0 Infoblox User Guide 115
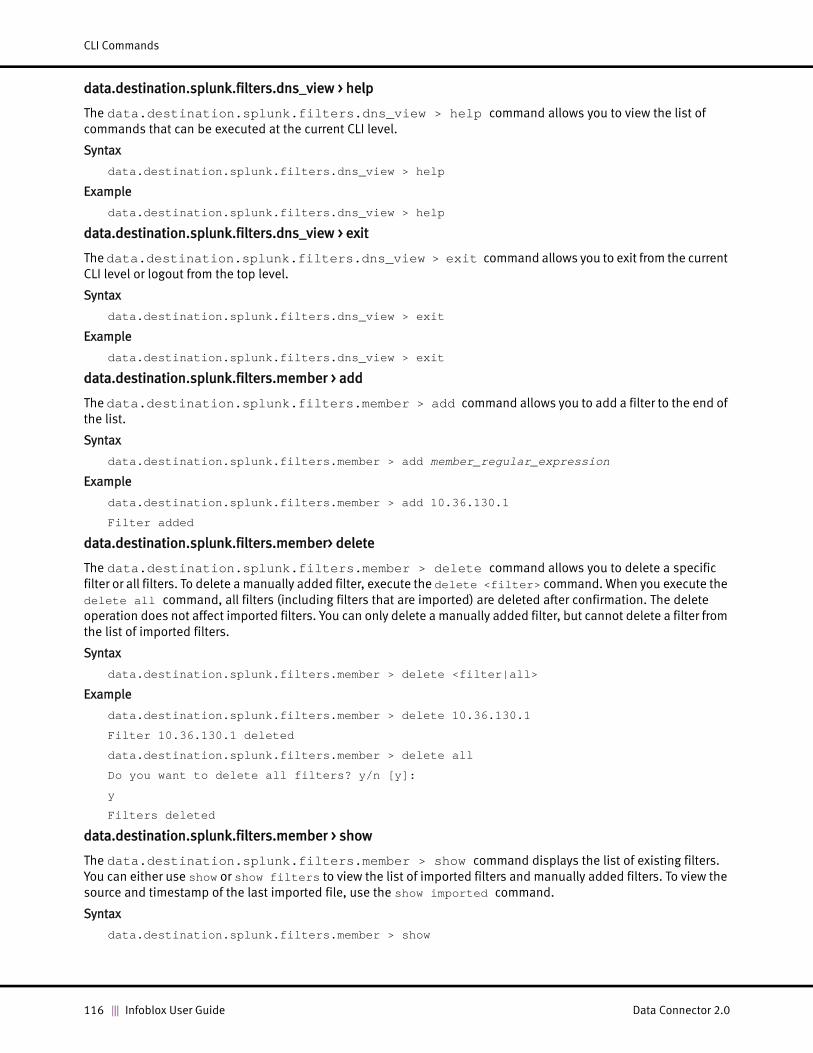
CLI Commands
data.destination.splunk.filters.dns_view > help
The data.destination.splunk.filters.dns_view > help command allows you to view the list of
commands that can be executed at the current CLI level.
Syntax
data.destination.splunk.filters.dns_view > help
Example
data.destination.splunk.filters.dns_view > help
data.destination.splunk.filters.dns_view > exit
The data.destination.splunk.filters.dns_view > exit command allows you to exit from the current
CLI level or logout from the top level.
Syntax
data.destination.splunk.filters.dns_view > exit
Example
data.destination.splunk.filters.dns_view > exit
data.destination.splunk.filters.member > add
The data.destination.splunk.filters.member > add command allows you to add a filter to the end of
the list.
Syntax
data.destination.splunk.filters.member > add member_regular_expression
Example
data.destination.splunk.filters.member > add 10.36.130.1
Filter added
data.destination.splunk.filters.member> delete
The data.destination.splunk.filters.member > delete command allows you to delete a specific
filter or all filters. To delete a manually added filter, execute the delete <filter> command. When you execute the
delete all command, all filters (including filters that are imported) are deleted after confirmation. The delete
operation does not affect imported filters. You can only delete a manually added filter, but cannot delete a filter from
the list of imported filters.
Syntax
data.destination.splunk.filters.member > delete <filter|all>
Example
data.destination.splunk.filters.member > delete 10.36.130.1
Filter 10.36.130.1 deleted
data.destination.splunk.filters.member > delete all
Do you want to delete all filters? y/n [y]:
y
Filters deleted
data.destination.splunk.filters.member > show
The data.destination.splunk.filters.member > show command displays the list of existing filters.
You can either use show or show filters to view the list of imported filters and manually added filters. To view the
source and timestamp of the last imported file, use the show imported command.
Syntax
data.destination.splunk.filters.member > show
116 Infoblox User Guide Data Connector 2.0

Example
data.destination.splunk.filters.member > show
; Manually added filters
10.36.130.1
data.destination.splunk.filters.member > show filters
; Manually added filters
10.36.130.1
data.destination.splunk.filters.member > show imported
data.destination.splunk.filters.member > import
The data.destination.splunk.filters.member > import command allows you to import filters from
a local or a remote file. When you import a file, it overwrites all existing imported and manually entered filters after
confirmation. Note that parsing and validation are invoked after the file is imported successfully. The imported file is
rejected and an error message is displayed in case of any validation error.
Syntax
data.destination.splunk.filters.member > import <scp|ftp>://loginname@serverIP:[port:]path
Example
data.destination.splunk.filters.member > import scp://[email protected]:/import/qaddi/DATACOLLECTOR/Filters/member_10.csv
Import will remove all previously imported and added filters. Are you sure you want to proceed? y/n [y]:
y
Enter password:
Filters imported
data.destination.splunk.filters.member > export
The data.destination.splunk.filters.member > export command allows you to export filters to a
remote file. Note that the manually added filters are appended to the end of exported .csv file whereas imported filter
files are exported along with comments and white spacing.
Syntax
data.destination.splunk.filters.member > export <scp|ftp>://loginname@serverIP:[port:]path
Example
data.destination.splunk.filters.member > export scp://[email protected]:/import/qaddi/DATACOLLECTOR/Filters/member_10.csv
Enter password:
Filters exported
data.destination.splunk.filters.member > help
The data.destination.splunk.filters.member > help command allows you to view the list of
commands that can be executed at the current CLI level.
Syntax
data.destination.splunk.filters.member > help
Example
data.destination.splunk.filters.member > help
Data Connector 2.0 Infoblox User Guide 117

CLI Commands
data.destination.splunk.filters.member > exit
The data.destination.splunk.filters.member > exit command allows you to exit from the current
CLI level or logout from the top level.
Syntax
data.destination.splunk.filters.member > exit
Example
data.destination.splunk.filters.member > exit
data.destination.splunk.filters.query > add
The data.destination.splunk.filters.query > add command allows you to add a filter to the end of
the list.
Syntax
data.destination.splunk.filters.query > add fqdn_with_wildcards
— Note the following about wildcards:
— * - zero or more domain name labels; can be on the left side only
— # - one or more domain name labels; can be on the left side only
— ? - exactly one domain name label; can be on the right or left side
Example
data.destination.splunk.filters.query > add 10.36.130.1
Filter added
data.destination.splunk.filters.query > add abc.com
Filter added
data.destination.splunk.filters.query > delete
The data.destination.splunk.filters.query > delete command allows you to delete a specific filter
or all filters. To delete a manually added filter, execute the delete <filter> command. When you execute the
delete all command, all filters (including filters that are imported) are deleted after confirmation. The delete
operation does not affect imported filters. You can only delete a manually added filter, but cannot delete a filter from
the list of imported filters.
Syntax
data.destination.splunk.filters.query > delete <filter|all>
Example
data.destination.splunk.filters.query > delete 10.36.130.1
Filter 10.36.130.1 deleted
data.destination.splunk.filters.query > delete all
Do you want to delete all filters? y/n [y]:
y
Filters deleted
data.destination.splunk.filters.query > show
The data.destination.splunk.filters.query > show command displays the list of existing filters. You
can either use show or show filters to view the list of imported filters and manually added filters. To view the
source and timestamp of the last imported file, use the show imported command.
Syntax
data.destination.splunk.filters.query > show
118 Infoblox User Guide Data Connector 2.0

Example
data.destination.splunk.filters.query > show
; Manually added filters
xyz.com
abc.com
10.36.130.12
10.36.130.1
data.destination.splunk.filters.query > show filters
; Manually added filters
xyz.com
abc.com
10.36.130.12
10.36.130.1
data.destination.splunk.filters.query > show imported
data.destination.splunk.filters.query > import
The data.destination.splunk.filters.query > import command allows you to import filters from a
local or a remote file. When you import a file, it overwrites all existing imported and manually entered filters after
confirmation. Note that parsing and validation are invoked after the file is imported successfully. The imported file is
rejected and an error message is displayed in case of any validation error.
Syntax
data.destination.splunk.filters.query > import <scp|ftp>://loginname@serverIP:[port:]path
Example
data.destination.splunk.filters.query > import scp://[email protected]:/import/qaddi/DATACOLLECTOR/Filters/query_10.csv
Import will remove all previously imported and added filters. Are you sure you want to proceed? y/n [y]:
y
Enter password:
Filters imported
data.destination.splunk.filters.query > export
The data.destination.splunk.filters.query > export command allows you to export filters to a
remote file. Note that the manually added filters are appended to the end of exported .csv file whereas imported filter
files are exported along with comments and white spacing.
Syntax
data.destination.splunk.filters.query > export <scp|ftp>://loginname@serverIP:[port:]path
Example
data.destination.splunk.filters.query > export scp://[email protected]:/import/qaddi/DATACOLLECTOR/Filters/query_10.csv
Enter password:
Filters exported
data.destination.splunk.filters.query > help
The data.destination.splunk.filters.query > help command allows you to view the list of
commands that can be executed at the current CLI level.
Syntax
data.destination.splunk.filters.query > help
Data Connector 2.0 Infoblox User Guide 119

CLI Commands
Example
data.destination.splunk.filters.query > help
data.destination.splunk.filters.query > exit
The data.destination.splunk.filters.query > exit command allows you to exit from the current CLI
level or logout from the top level.
Syntax
data.destination.splunk.filters.query > exit
Example
data.destination.splunk.filters.query > exit
exit
The exit command terminates the command line interface and halts the CLI session.
Syntax
> exit
Examples
admin.network > exit
admin > exit
help
The help command displays information about a specified CLI command. If you do not specify a command, a list of
all available commands is shown.
Syntax
> help
Examples
> help
Available commands:
===================
add data exit help info request show wizard
admin delete export import print set stats
> help admin
admin: DC management configuration
Supported arguments:
network: Admin network configuration
support: Admin support configuration
system: System Configuration for Data Collector
admin > help
Available commands:
===================
add exit info set stats system
delete help network show support wizard
admin > network
admin.network > help
Available commands:
===================
add dns exit hostname ip4 resolve set wizard
delete domain help info ping route show
120 Infoblox User Guide Data Connector 2.0

info
The info command displays information about the Data Connector VM.
Syntax
> info
Example
> info
DNS configuration:
Actual DNS Setting:
Dns Server(s): 10.0.2.20 10.0.2.35 10.0.2.60
Configured DNS Setting (DNS servers obtained by DHCP have higher precedence):
There is no DNS server
Domain configuration:
domain: None
Hostname configuration:
hostname: None
IPv4 configuration:
Actual System Settings:
gateway: 10.36.0.1
mask: 255.255.0.0
mode: dynamic
address: 10.36.130.1
vlanid: 0
Configured System Setting:
gateway: None
mask: None
mode: dynamic
address: None
vlanid: 0
vlan configuration is only in effect in the static mode.
Static routes configuration:
There is no static route configured
Greeting banner:
This is Infoblox Data Connection Virtual Machine
UUID value:
564DDD78-06A3-84FD-8EFC-36F30E9E39FD
Current version:
Name: DataCollector
Version: 2.0.0-348708
Output cloud mode configuration:
The output mode is hold
agent_id configuration:
agent_id: None
api_key configuration:
api_key: None
Data Connector 2.0 Infoblox User Guide 121

CLI Commands
Cloud url configuration:
url: None
Retention period in hours:
4 hours
Default value for the dns_view tag:
Internal
Grid ext_attribute name for the dns_view tag:
dns_role
Reporting mode configuration:
The output mode is hold
Reporting mode registration:
Grid Master address: 10.35.5.49
Grid admin username: admin
Grid admin password: ********
Grid access is: Verified
Grid state refresh interval: 1 hour
Grid registration time: Fri Mar 24 04:39:02 2017
Grid registration uuid: 564DDD7806A384FD8EFC36F30E9E39FD
DC address registered: 10.36.130.1
Cached Grid member timezones:
infoblox.localdomain: (UTC) Coordinated Universal Time, None
reporting-1.com: (UTC) Coordinated Universal Time, None
member.com: (UTC) Coordinated Universal Time, None
Cached Grid views:
0: default, None
1: default.MS-2016, None
2: default.MS-2012, None
3: default.MS-2008, None
Reporting indexers:
10.35.2.59:9997
Splunk indexers:
Indexers:
10.10.1.2
Splunk index name:
Index name is xyz
Splunk mode configuration:
The output mode is disabled
Splunk default indexer port:
Default indexer port is 9997
Splunk source type:
Source type is ib:dns:captures
IP address or DNS name for the NIOS Grid:
10.35.5.49
Grid IPAM information API address:
API address: grid
122 Infoblox User Guide Data Connector 2.0

Grid IPAM information poll period:
poll period: 6 minutes
Grid IPAM information query types:
userinfo: enabled
ipam: disabled
lease: disabled
NIOS Grid admin user name:
admin
SCP users configuration:
Registered user(s):
admin1
user123
Data source syslog certificate CN:
cn: None
Data source syslog mode:
mode: disabled
Data source syslog port:
port: 514
Data source syslog secure port:
secure port: 6514
stats
The stats command displays the system statistics.
Syntax
> stats
Example
> stats
CPU stats:
CPU Load, % : 15.9
Disk stats:
Block read, kbps : 0.0
Block write, kbps : 19.6
Disk space usage:
/ 2.0%
/boot 15.9%
/infoblox/data 0.0%
Memory stats:
Memory usage, % : 19.9
Network stats:
Network receive, kbps : 45.5
Network send, kbps : 0.0
Network interfaces statistics
Name RX RX Drop RX Error TX TX Drop TX Error
eth0 2307067 0 0 488359 0 0
Cloud output stats:
# of files Size in kb # of files Size in kb Oldest
Data Connector 2.0 Infoblox User Guide 123

CLI Commands
processed processed pending pending file
1499 16177.090 367 3858.860 4 hours 3 seconds ago
Reporting output stats:
# of files Size in kb # of files Size in kb Oldest
processed processed pending pending file
1798 40960.216 20 12.828 30 minutes 36 seconds ago
Splunk output stats:
# of files Size in kb # of files Size in kb Oldest
processed processed pending pending file
0 0.000 0 0.000 N/A
Input stats:
# of files Size in kb # of files Size in kb Oldest
processed processed pending pending file
1818 2906.289 0 0.000 N/As
wizard
The wizard command enables you to configure the Data Connector VM.
Syntax
> wizard
Example
> wizard
Do you want to configure admin network settings y/n [y]:
y
Please use: '?' for help on available command options.
Please enter IPv4 configuration in format: 'mode [gateway address mask vlanid]'
Current settings are [ static 10.36.0.1 10.36.130.1 255.255.0.0 0 ]:
static 10.36.0.1 10.36.130.1 255.255.0.0 0
ok
Please enter dns configuration[ 10.0.0.0 ]:
10.0.0.0
DNS servers obtained by DHCP (if any) have higher precedence
ok
Please enter domain configuration[ dc-xyz.com ]:
dc-xyz.com
ok
Please enter hostname configuration[ dc-xyz ]:
dc-xyz
ok
Configured System Setting:
gateway: 10.36.0.1
mask: 255.255.0.0
mode: static
address: 10.36.130.1
vlanid: 0
vlan configuration is only in effect in the static mode.
Configured DNS Setting:
124 Infoblox User Guide Data Connector 2.0

Dns Server(s): ['10.0.0.0']
domain: dc-xyz.com
hostname: dc-xyz
Is it correct? y/n [y]:
y
Do you want to configure data output cloud registration settings y/n [y]:
y
Please use: '?' for help on available command options.
Please enter cloud url[ https://usa-va.csp.infoblox.com/dnslog ]:
Settings unchanged.
Please enter api_key[ 1234 ]:
Settings unchanged.
Please enter agent_id[ 8 ]:
Settings unchanged.
url: https://usa-va.csp.infoblox.com/dnslog
api_key: 1234
agent_id: 8
Is it correct? y/n [y]:
y
Do you want to configure data output cloud settings y/n [y]:
y
Please use: '?' for help on available command options.
Please enter Output cloud mode configuration[ hold ]:
hold
ok
The output mode is hold
Is it correct? y/n [y]:
y
Do you want to configure data output splunk settings y/n [y]:
y
Please use: '?' for help on available command options.
Please enter splunk indexers[ 10.10.1.2 ]:
10.10.1.3
ok
Do you want to add more values? y/n [n]:
n
Please enter splunk index name[ xyz ]:
xyz
ok
Please enter splunk source type[ ib:dns:captures ]:
Settings unchanged.
Please enter splunk default indexer port[ 9997 ]:
Settings unchanged.
Please enter splunk mode[ disabled ]:
hold
Data Connector 2.0 Infoblox User Guide 125

CLI Commands
ok
Indexers:
10.10.1.2
10.10.1.3
Index name is xyz
Source type is ib:dns:captures
Default indexer port is 9997
The output mode is hold
Is it correct? y/n [y]:
y
Do you want to configure admin system settings y/n [y]:
y
Please use: '?' for help on available command options.
Please enter Greeting banner text[ This is Infoblox Data Connection Virtual Machine ]:
This is Infoblox Data Connector VM.
ok
This is Infoblox Data Connector VM.
Is it correct? y/n [y]:
y
Do you want to configure data input scp settings y/n [y]:
y
Please use: '?' for help on available command options.
Please enter SCP users[ dc_scp_user ]:
dc_scp_user
Enter password for user dc_scp_user:
Enter again:
ok
Do you want to add more values? y/n [n]:
n
Registered user(s):
admin1
user123
dc_scp_user
Is it correct? y/n [y]:
y
Do you want to configure data input grid settings y/n [y]:
y
Please use: '?' for help on available command options.
Enter the IP address (or FQDN) of the NIOS Grid Master[ 10.35.5.49 ]:
Settings unchanged.
Enter the NIOS admin username[ admin ]:
Settings unchanged.
10.35.5.49
admin
Is it correct? y/n [y]:
126 Infoblox User Guide Data Connector 2.0

y
Do you want to configure data output reporting settings y/n [y]:
y
Please use: '?' for help on available command options.
Please enter reporting mode[ hold ]:
Settings unchanged.
The output mode is hold
Is it correct? y/n [y]:
y
Setup wizard finished successfully
Data Connector 2.0 Infoblox User Guide 127

CLI Commands
128 Infoblox User Guide Data Connector 2.0

Appendix B Open Source Copyright and License Statements
Infoblox has made every attempt to adhere to the guidelines for use and contribution to the open source community.
Please report back to Infoblox any suspected violations of the copyrights, use of open source contributions via the
distribution of binaries and/or source from Infoblox. It is the intent of Infoblox to comply with the open source rules
of use, and comply with the various copyrights found in the distribution of the products from Infoblox.
This appendix contains the copyright notices for the binary-only distribution from Infoblox. Source changes are
contributed back to the open source community when the copyright holder states this is desired. As stated by the
enclosed copyrights, a copy of open source files used in our binary-only distribution is available from Infoblox. There
is a nominal cost to obtain a CD containing the source files, to cover our costs of duplication and distribution. To
obtain a copy of the source, contact us via e-mail at [email protected], or call us at 1.408.625.4200. The sections
in this appendix include:
• Perl Artistic License on page 130
• Apache Software License, Version 2.0 on page 132
• BSD License on page 136
• GNU General Public License on page 137
• GNU General Public License Version 3 on page 141
• The FreeType Project License on page 152
• ISC License (ISC) on page 155
• Japan Registry Services License version 1.1 on page 156
• GNU Lesser General Public License on page 160
• MIT License on page 162
• Mozilla Public License 2.0 (MPL-2.0) on page 163
• Python License on page 168
• The Zope Public License Ver.2.0 (ZPL-2.0) on page 173
• SGI Free Software License on page 174
• Mesa license on page 174
Data Connector 2.0 Infoblox User Guide 129

Open Source Copyright and License Statements
Perl Artistic License
Copyright (c) 2000-2006, The Perl Foundation.
Everyone is permitted to copy and distribute verbatim copies of this license document, but changing it is not allowed.
Preamble:
This license establishes the terms under which a given free software Package may be copied, modified, distributed, and/or redistributed. The intent is that the Copyright Holder maintains some artistic control over the development of that Package while still keeping the Package available as open source and free software.
You are always permitted to make arrangements wholly outside of this license directly with the Copyright Holder of a given Package. If the terms of this license do not permit the full use that you propose to make of the Package, you should contact the Copyright Holder and seek a different licensing arrangement.
Definitions:
"Copyright Holder" means the individual(s) or organization(s) named in the copyright notice for the entire Package.
"Contributor" means any party that has contributed code or other material to the Package, in accordance with the Copyright Holder's procedures.
"You" and "your" means any person who would like to copy, distribute, or modify the Package.
"Package" means the collection of files distributed by the Copyright Holder, and derivatives of that collection and/or of those files. A given Package may consist of either the Standard Version, or a Modified Version.
"Distribute" means providing a copy of the Package or making it accessible to anyone else, or in the case of a company or organization, to others outside of your company or organization.
"Distributor Fee" means any fee that you charge for Distributing this Package or providing support for this Package to another party. It does not mean licensing fees.
"Standard Version" refers to the Package if it has not been modified, or has been modified only in ways explicitly requested by the Copyright Holder.
"Modified Version" means the Package, if it has been changed, and such changes were not explicitly requested by the Copyright Holder.
"Original License" means this Artistic License as Distributed with the Standard Version of the Package, in its current version or as it may be modified by The Perl Foundation in the future.
"Source" form means the source code, documentation source, and configuration files for the Package.
"Compiled" form means the compiled bytecode, object code, binary, or any other form resulting from mechanical transformation or translation of the Source form.
Permission for Use and Modification Without Distribution:
(1) You are permitted to use the Standard Version and create and use Modified Versions for any purpose without restriction, provided that you do not Distribute the Modified Version.
Permissions for Redistribution of the Standard Version
(2) You may Distribute verbatim copies of the Source form of the Standard Version of this Package in any medium without restriction, either gratis or for a Distributor Fee, provided that you duplicate all of the original copyright notices and associated disclaimers. At your discretion, such verbatim copies may or may not include a Compiled form of the Package.
130 Infoblox User Guide Data Connector 2.0

Perl Artistic License
(3) You may apply any bug fixes, portability changes, and other modifications made available from the Copyright Holder. The resulting Package will still be considered the Standard Version, and as such will be subject to the Original License.
Distribution of Modified Versions of the Package as Source:
(4) You may Distribute your Modified Version as Source (either gratis or for a Distributor Fee, and with or without a Compiled form of the Modified Version) provided that you clearly document how it differs from the Standard Version, including, but not limited to, documenting any non-standard features, executables, or modules, and provided that you do at least ONE of the following:
(a) make the Modified Version available to the Copyright Holder of the Standard Version, under the Original License, so that the Copyright Holder may include your modifications in the Standard Version.
(b) ensure that installation of your Modified Version does not prevent the user installing or running the Standard Version. In addition, the Modified Version must bear a name that is different from the name of the Standard Version.
(c) allow anyone who receives a copy of the Modified Version to make the Source form of the Modified Version available to others under
(i) the Original License or
(ii) a license that permits the licensee to freely copy, modify and redistribute the Modified Version using the same licensing terms that apply to the copy that the licensee received, and requires that the Source form of the Modified Version, and of any works derived from it, be made freely available in that license fees are prohibited but Distributor Fees are allowed.
Distribution of Compiled Forms of the Standard Version or Modified Versions without the Source:
(5) You may Distribute Compiled forms of the Standard Version without the Source, provided that you include complete instructions on how to get the Source of the Standard Version. Such instructions must be valid at the time of your distribution. If these instructions, at any time while you are carrying out such distribution, become invalid, you must provide new instructions on demand or cease further distribution. If you provide valid instructions or cease distribution within thirty days after you become aware that the instructions are invalid, then you do not forfeit any of your rights under this license.
(6) You may Distribute a Modified Version in Compiled form without the Source, provided that you comply with Section 4 with respect to the Source of the Modified Version.
Aggregating or Linking the Package:
(7) You may aggregate the Package (either the Standard Version or Modified Version) with other packages and Distribute the resulting aggregation provided that you do not charge a licensing fee for the Package. Distributor Fees are permitted, and licensing fees for other components in the aggregation are permitted. The terms of this license apply to the use and Distribution of the Standard or Modified Versions as included in the aggregation.
(8) You are permitted to link Modified and Standard Versions with other works, to embed the Package in a larger work of your own, or to build stand-alone binary or bytecode versions of applications that include the Package, and Distribute the result without restriction, provided the result does not expose a direct interface to the Package.
Items That are Not Considered Part of a Modified Version:
(9) Works (including, but not limited to, modules and scripts) that merely extend or make use of the Package, do not, by themselves, cause the Package to be a Modified Version. In addition, such works are not considered parts of the Package itself, and are not subject to the terms of this license.
General Provisions:
(10) Any use, modification, and distribution of the Standard or Modified Versions is governed by this Artistic License. By using, modifying or distributing the Package, you accept this license. Do not use, modify, or distribute the Package, if you do not accept this license.
Data Connector 2.0 Infoblox User Guide 131
Open Source Copyright and License Statements
(11) If your Modified Version has been derived from a Modified Version made by someone other than you, you are nevertheless required to ensure that your Modified Version complies with the requirements of this license.
(12) This license does not grant you the right to use any trademark, service mark, tradename, or logo of the Copyright Holder.
(13) This license includes the non-exclusive, worldwide, free-of-charge patent license to make, have made, use, offer to sell, sell, import and otherwise transfer the Package with respect to any patent claims licensable by the Copyright Holder that are necessarily infringed by the Package. If you institute patent litigation (including a cross-claim or counterclaim) against any party alleging that the Package constitutes direct or contributory patent infringement, then this Artistic License to you shall terminate on the date that such litigation is filed.
(14) Disclaimer of Warranty: THE PACKAGE IS PROVIDED BY THE COPYRIGHT HOLDER AND CONTRIBUTORS "AS IS' AND WITHOUT ANY EXPRESS OR IMPLIED WARRANTIES. THE IMPLIED WARRANTIES OF MERCHANTABILITY, FITNESS FOR A PARTICULAR PURPOSE, OR NON-INFRINGEMENT ARE DISCLAIMED TO THE EXTENT PERMITTED BY YOUR LOCAL LAW. UNLESS REQUIRED BY LAW, NO COPYRIGHT HOLDER OR CONTRIBUTOR WILL BE LIABLE FOR ANY DIRECT, INDIRECT, INCIDENTAL, OR CONSEQUENTIAL DAMAGES ARISING IN ANY WAY OUT OF THE USE OF THE PACKAGE, EVEN IF ADVISED OF THE POSSIBILITY OF SUCH DAMAGE.
Apache Software License, Version 2.0
Copyright (c) 2004 The Apache Software Foundation. All rights reserved.
TERMS AND CONDITIONS FOR USE, REPRODUCTION, AND DISTRIBUTION
1. Definitions.
"License" shall mean the terms and conditions for use, reproduction,
and distribution as defined by Sections 1 through 9 of this document.
"Licensor" shall mean the copyright owner or entity authorized by
the copyright owner that is granting the License.
"Legal Entity" shall mean the union of the acting entity and all
other entities that control, are controlled by, or are under common
control with that entity. For the purposes of this definition,
"control" means (i) the power, direct or indirect, to cause the
direction or management of such entity, whether by contract or
otherwise, or (ii) ownership of fifty percent (50%) or more of the
outstanding shares, or (iii) beneficial ownership of such entity.
"You" (or "Your") shall mean an individual or Legal Entity
exercising permissions granted by this License.
"Source" form shall mean the preferred form for making modifications,
including but not limited to software source code, documentation
source, and configuration files.
132 Infoblox User Guide Data Connector 2.0
Apache Software License, Version 2.0
"Object" form shall mean any form resulting from mechanical
transformation or translation of a Source form, including but
not limited to compiled object code, generated documentation,
and conversions to other media types.
"Work" shall mean the work of authorship, whether in Source or
Object form, made available under the License, as indicated by a
copyright notice that is included in or attached to the work
(an example is provided in the Appendix below).
"Derivative Works" shall mean any work, whether in Source or Object
form, that is based on (or derived from) the Work and for which the
editorial revisions, annotations, elaborations, or other modifications
represent, as a whole, an original work of authorship. For the purposes
of this License, Derivative Works shall not include works that remain
separable from, or merely link (or bind by name) to the interfaces of,
the Work and Derivative Works thereof.
"Contribution" shall mean any work of authorship, including
the original version of the Work and any modifications or additions
to that Work or Derivative Works thereof, that is intentionally
submitted to Licensor for inclusion in the Work by the copyright owner
or by an individual or Legal Entity authorized to submit on behalf of
the copyright owner. For the purposes of this definition, "submitted"
means any form of electronic, verbal, or written communication sent
to the Licensor or its representatives, including but not limited to
communication on electronic mailing lists, source code control systems,
and issue tracking systems that are managed by, or on behalf of, the
Licensor for the purpose of discussing and improving the Work, but
excluding communication that is conspicuously marked or otherwise
designated in writing by the copyright owner as "Not a Contribution."
"Contributor" shall mean Licensor and any individual or Legal Entity
on behalf of whom a Contribution has been received by Licensor and
subsequently incorporated within the Work.
2. Grant of Copyright License. Subject to the terms and conditions of
this License, each Contributor hereby grants to You a perpetual,
worldwide, non-exclusive, no-charge, royalty-free, irrevocable
copyright license to reproduce, prepare Derivative Works of,
publicly display, publicly perform, sublicense, and distribute the
Work and such Derivative Works in Source or Object form.
3. Grant of Patent License. Subject to the terms and conditions of
this License, each Contributor hereby grants to You a perpetual,
Data Connector 2.0 Infoblox User Guide 133

Open Source Copyright and License Statements
worldwide, non-exclusive, no-charge, royalty-free, irrevocable
(except as stated in this section) patent license to make, have made,
use, offer to sell, sell, import, and otherwise transfer the Work,
where such license applies only to those patent claims licensable
by such Contributor that are necessarily infringed by their
Contribution(s) alone or by combination of their Contribution(s)
with the Work to which such Contribution(s) was submitted. If You
institute patent litigation against any entity (including a
cross-claim or counterclaim in a lawsuit) alleging that the Work
or a Contribution incorporated within the Work constitutes direct
or contributory patent infringement, then any patent licenses
granted to You under this License for that Work shall terminate
as of the date such litigation is filed.
4. Redistribution. You may reproduce and distribute copies of the
Work or Derivative Works thereof in any medium, with or without
modifications, and in Source or Object form, provided that You
meet the following conditions:
(a) You must give any other recipients of the Work or
Derivative Works a copy of this License; and
(b) You must cause any modified files to carry prominent notices
stating that You changed the files; and
(c) You must retain, in the Source form of any Derivative Works
that You distribute, all copyright, patent, trademark, and
attribution notices from the Source form of the Work,
excluding those notices that do not pertain to any part of
the Derivative Works; and
(d) If the Work includes a "NOTICE" text file as part of its
distribution, then any Derivative Works that You distribute must
include a readable copy of the attribution notices contained
within such NOTICE file, excluding those notices that do not
pertain to any part of the Derivative Works, in at least one
of the following places: within a NOTICE text file distributed
as part of the Derivative Works; within the Source form or
documentation, if provided along with the Derivative Works; or,
within a display generated by the Derivative Works, if and
wherever such third-party notices normally appear. The contents
of the NOTICE file are for informational purposes only and
do not modify the License. You may add Your own attribution
notices within Derivative Works that You distribute, alongside
or as an addendum to the NOTICE text from the Work, provided
134 Infoblox User Guide Data Connector 2.0

Apache Software License, Version 2.0
that such additional attribution notices cannot be construed
as modifying the License.
You may add Your own copyright statement to Your modifications and
may provide additional or different license terms and conditions
for use, reproduction, or distribution of Your modifications, or
for any such Derivative Works as a whole, provided Your use,
reproduction, and distribution of the Work otherwise complies with
the conditions stated in this License.
5. Submission of Contributions. Unless You explicitly state otherwise,
any Contribution intentionally submitted for inclusion in the Work
by You to the Licensor shall be under the terms and conditions of
this License, without any additional terms or conditions.
Notwithstanding the above, nothing herein shall supersede or modify
the terms of any separate license agreement you may have executed
with Licensor regarding such Contributions.
6. Trademarks. This License does not grant permission to use the trade
names, trademarks, service marks, or product names of the Licensor,
except as required for reasonable and customary use in describing the
origin of the Work and reproducing the content of the NOTICE file.
7. Disclaimer of Warranty. Unless required by applicable law or
agreed to in writing, Licensor provides the Work (and each
Contributor provides its Contributions) on an "AS IS" BASIS,
WITHOUT WARRANTIES OR CONDITIONS OF ANY KIND, either express or
implied, including, without limitation, any warranties or conditions
of TITLE, NON-INFRINGEMENT, MERCHANTABILITY, or FITNESS FOR A
PARTICULAR PURPOSE. You are solely responsible for determining the
appropriateness of using or redistributing the Work and assume any
risks associated with Your exercise of permissions under this License.
8. Limitation of Liability. In no event and under no legal theory,
whether in tort (including negligence), contract, or otherwise,
unless required by applicable law (such as deliberate and grossly
negligent acts) or agreed to in writing, shall any Contributor be
liable to You for damages, including any direct, indirect, special,
incidental, or consequential damages of any character arising as a
result of this License or out of the use or inability to use the
Work (including but not limited to damages for loss of goodwill,
work stoppage, computer failure or malfunction, or any and all
other commercial damages or losses), even if such Contributor
has been advised of the possibility of such damages.
Data Connector 2.0 Infoblox User Guide 135

Open Source Copyright and License Statements
9. Accepting Warranty or Additional Liability. While redistributing
the Work or Derivative Works thereof, You may choose to offer,
and charge a fee for, acceptance of support, warranty, indemnity,
or other liability obligations and/or rights consistent with this
License. However, in accepting such obligations, You may act only
on Your own behalf and on Your sole responsibility, not on behalf
of any other Contributor, and only if You agree to indemnify,
defend, and hold each Contributor harmless for any liability
incurred by, or claims asserted against, such Contributor by reason
of your accepting any such warranty or additional liability.
END OF TERMS AND CONDITIONS
APPENDIX: How to apply the Apache License to your work.
To apply the Apache License to your work, attach the following
boilerplate notice, with the fields enclosed by brackets "[]"
replaced with your own identifying information. (Don't include
the brackets!) The text should be enclosed in the appropriate
comment syntax for the file format. We also recommend that a
file or class name and description of purpose be included on the
same "printed page" as the copyright notice for easier
identification within third-party archives.
Copyright [yyyy] [name of copyright owner]
Licensed under the Apache License, Version 2.0 (the "License");
you may not use this file except in compliance with the License.
You may obtain a copy of the License at
http://www.apache.org/licenses/LICENSE-2.0
Unless required by applicable law or agreed to in writing, software
distributed under the License is distributed on an "AS IS" BASIS,
WITHOUT WARRANTIES OR CONDITIONS OF ANY KIND, either express or implied.
See the License for the specific language governing permissions and
limitations under the License.
BSD License
Redistribution and use in source and binary forms, with or without modification, are permitted provided that the following conditions are met:
1. Redistributions of source code must retain the above copyright notice, this list of conditions and the following disclaimer.
136 Infoblox User Guide Data Connector 2.0

GNU General Public License
2. Redistributions in binary form must reproduce the above copyright notice, this list of conditions and the following disclaimer in the documentation and/or other materials provided with the distribution.
THIS SOFTWARE IS PROVIDED BY THE COPYRIGHT HOLDERS AND CONTRIBUTORS "AS IS" AND ANY EXPRESS OR IMPLIED WARRANTIES, INCLUDING, BUT NOT LIMITED TO, THE IMPLIED WARRANTIES OF MERCHANTABILITY AND FITNESS FOR A PARTICULAR PURPOSE ARE DISCLAIMED. IN NO EVENT SHALL THE COPYRIGHT HOLDER OR CONTRIBUTORS BE LIABLE FOR ANY DIRECT, INDIRECT, INCIDENTAL, SPECIAL, EXEMPLARY, OR CONSEQUENTIAL DAMAGES (INCLUDING, BUT NOT LIMITED TO, PROCUREMENT OF SUBSTITUTE GOODS OR SERVICES; LOSS OF USE, DATA, OR PROFITS; OR BUSINESS INTERRUPTION) HOWEVER CAUSED AND ON ANY THEORY OF LIABILITY, WHETHER IN CONTRACT, STRICT LIABILITY, OR TORT (INCLUDING NEGLIGENCE OR OTHERWISE) ARISING IN ANY WAY OUT OF THE USE OF THIS SOFTWARE, EVEN IF ADVISED OF THE POSSIBILITY OF SUCH DAMAGE.
GNU General Public License
GNU GENERAL PUBLIC LICENSE
Version 2, June 1991
Copyright (C) 1989, 1991 Free Software Foundation, Inc.
51 Franklin Street, Fifth Floor, Boston, MA 02110-1301 USA
Everyone is permitted to copy and distribute verbatim copies
of this license document, but changing it is not allowed.
Preamble
The licenses for most software are designed to take away your freedom to share and change it. By contrast, the GNU General Public License is intended to guarantee your freedom to share and change free software--to make sure the software is free for all its users. This General Public License applies to most of the Free Software Foundation's software and to any other program whose authors commit to using it. (Some other Free Software Foundation software is covered by the GNU Library General Public License instead.) You can apply it to your programs, too.
When we speak of free software, we are referring to freedom, not price. Our General Public Licenses are designed to make sure that you have the freedom to distribute copies of free software (and charge for this service if you wish), that you receive source code or can get it if you want it, that you can change the software or use pieces of it in new free programs; and that you know you can do these things.
To protect your rights, we need to make restrictions that forbid anyone to deny you these rights or to ask you to surrender the rights. These restrictions translate to certain responsibilities for you if you distribute copies of the software, or if you modify it.
For example, if you distribute copies of such a program, whether gratis or for a fee, you must give the recipients all the rights that you have. You must make sure that they, too, receive or can get the source code. And you must show them these terms so they know their rights.
We protect your rights with two steps: (1) copyright the software, and (2) offer you this license which gives you legal permission to copy, distribute and/or modify the software.
Also, for each author's protection and ours, we want to make certain that everyone understands that there is no warranty for this free software. If the software is modified by someone else and passed on, we want its recipients to know that what they have is not the original, so that any problems introduced by others will not reflect on the original authors' reputations.
Finally, any free program is threatened constantly by software patents. We wish to avoid the danger that redistributors of a free program will individually obtain patent licenses, in effect making the program proprietary. To prevent this, we have made it clear that any patent must be licensed for everyone's free use or not licensed at all.
The precise terms and conditions for copying, distribution and modification follow.
Data Connector 2.0 Infoblox User Guide 137

Open Source Copyright and License Statements
TERMS AND CONDITIONS FOR COPYING, DISTRIBUTION AND MODIFICATION
0. This License applies to any program or other work which contains a notice placed by the copyright holder saying it may be distributed under the terms of this General Public License. The "Program", below, refers to any such program or work, and a "work based on the Program" means either the Program or any derivative work under copyright law: that is to say, a work containing the Program or a portion of it, either verbatim or with modifications and/or translated into another language. (Hereinafter, translation is included without limitation in the term "modification".) Each licensee is addressed as "you".
Activities other than copying, distribution and modification are not covered by this License; they are outside its scope. The act of running the Program is not restricted, and the output from the Program is covered only if its contents constitute a work based on the Program (independent of having been made by running the Program). Whether that is true depends on what the Program does.
1. You may copy and distribute verbatim copies of the Program's source code as you receive it, in any medium, provided that you conspicuously and appropriately publish on each copy an appropriate copyright notice and disclaimer of warranty; keep intact all the notices that refer to this License and to the absence of any warranty; and give any other recipients of the Program a copy of this License along with the Program.
You may charge a fee for the physical act of transferring a copy, and you may at your option offer warranty protection in exchange for a fee.
2. You may modify your copy or copies of the Program or any portion of it, thus forming a work based on the Program, and copy and distribute such modifications or work under the terms of Section 1 above, provided that you also meet all of these conditions:
a) You must cause the modified files to carry prominent notices stating that you changed the files and the date of any change.
b) You must cause any work that you distribute or publish, that in whole or in part contains or is derived from the Program or any part thereof, to be licensed as a whole at no charge to all third parties under the terms of this License.
c) If the modified program normally reads commands interactively when run, you must cause it, when started running for such interactive use in the most ordinary way, to print or display an announcement including an appropriate copyright notice and a notice that there is no warranty (or else, saying that you provide a warranty) and that users may redistribute the program under these conditions, and telling the user how to view a copy of this License. (Exception: if the Program itself is interactive but does not normally print such an announcement, your work based on the Program is not required to print an announcement.)
These requirements apply to the modified work as a whole. If identifiable sections of that work are not derived from the Program, and can be reasonably considered independent and separate works in themselves, then this License, and its terms, do not apply to those sections when you distribute them as separate works. But when you distribute the same sections as part of a whole which is a work based on the Program, the distribution of the whole must be on the terms of this License, whose permissions for other licensees extend to the entire whole, and thus to each and every part regardless of who wrote it.
Thus, it is not the intent of this section to claim rights or contest your rights to work written entirely by you; rather, the intent is to exercise the right to control the distribution of derivative or collective works based on the Program.
In addition, mere aggregation of another work not based on the Program with the Program (or with a work based on the Program) on a volume of a storage or distribution medium does not bring the other work under the scope of this License.
3. You may copy and distribute the Program (or a work based on it, under Section 2) in object code or executable form under the terms of Sections 1 and 2 above provided that you also do one of the following:
a) Accompany it with the complete corresponding machine-readable source code, which must be distributed under the terms of Sections 1 and 2 above on a medium customarily used for software interchange; or,
138 Infoblox User Guide Data Connector 2.0
GNU General Public License
b) Accompany it with a written offer, valid for at least three years, to give any third party, for a charge no more than your cost of physically performing source distribution, a complete machine-readable copy of the corresponding source code, to be distributed under the terms of Sections 1 and 2 above on a medium customarily used for software interchange; or,
c) Accompany it with the information you received as to the offer to distribute corresponding source code. (This alternative is allowed only for noncommercial distribution and only if you received the program in object code or executable form with such an offer, in accord with Subsection b above.)
The source code for a work means the preferred form of the work for making modifications to it. For an executable work, complete source code means all the source code for all modules it contains, plus any associated interface definition files, plus the scripts used to control compilation and installation of the executable. However, as a special exception, the source code distributed need not include anything that is normally distributed (in either source or binary form) with the major components (compiler, kernel, and so on) of the operating system on which the executable runs, unless that component itself accompanies the executable.
If distribution of executable or object code is made by offering access to copy from a designated place, then offering equivalent access to copy the source code from the same place counts as distribution of the source code, even though third parties are not compelled to copy the source along with the object code.
4. You may not copy, modify, sublicense, or distribute the Program except as expressly provided under this License. Any attempt otherwise to copy, modify, sublicense or distribute the Program is void, and will automatically terminate your rights under this License. However, parties who have received copies, or rights, from you under this License will not have their licenses terminated so long as such parties remain in full compliance.
5. You are not required to accept this License, since you have not signed it. However, nothing else grants you permission to modify or distribute the Program or its derivative works. These actions are prohibited by law if you do not accept this License. Therefore, by modifying or distributing the Program (or any work based on the Program), you indicate your acceptance of this License to do so, and all its terms and conditions for copying, distributing or modifying the Program or works based on it.
6. Each time you redistribute the Program (or any work based on the Program), the recipient automatically receives a license from the original licensor to copy, distribute or modify the Program subject to these terms and conditions. You may not impose any further restrictions on the recipients' exercise of the rights granted herein. You are not responsible for enforcing compliance by third parties to this License.
7. If, as a consequence of a court judgment or allegation of patent infringement or for any other reason (not limited to patent issues), conditions are imposed on you (whether by court order, agreement or otherwise) that contradict the conditions of this License, they do not excuse you from the conditions of this License. If you cannot distribute so as to satisfy simultaneously your obligations under this License and any other pertinent obligations, then as a consequence you may not distribute the Program at all. For example, if a patent license would not permit royalty-free redistribution of the Program by all those who receive copies directly or indirectly through you, then the only way you could satisfy both it and this License would be to refrain entirely from distribution of the Program.
If any portion of this section is held invalid or unenforceable under any particular circumstance, the balance of the section is intended to apply and the section as a whole is intended to apply in other circumstances.
It is not the purpose of this section to induce you to infringe any patents or other property right claims or to contest validity of any such claims; this section has the sole purpose of protecting the integrity of the free software distribution system, which is implemented by public license practices. Many people have made generous contributions to the wide range of software distributed through that system in reliance on consistent application of that system; it is up to the author/donor to decide if he or she is willing to distribute software through any other system and a licensee cannot impose that choice.
Data Connector 2.0 Infoblox User Guide 139

Open Source Copyright and License Statements
This section is intended to make thoroughly clear what is believed to be a consequence of the rest of this License.
8. If the distribution and/or use of the Program is restricted in certain countries either by patents or by copyrighted interfaces, the original copyright holder who places the Program under this License may add an explicit geographical distribution limitation excluding those countries, so that distribution is permitted only in or among countries not thus excluded. In such case, this License incorporates the limitation as if written in the body of this License.
9. The Free Software Foundation may publish revised and/or new versions of the General Public License from time to time. Such new versions will be similar in spirit to the present version, but may differ in detail to address new problems or concerns.
Each version is given a distinguishing version number. If the Program specifies a version number of this License which applies to it and "any later version", you have the option of following the terms and conditions either of that version or of any later version published by the Free Software Foundation. If the Program does not specify a version number of this License, you may choose any version ever published by the Free Software Foundation.
10. If you wish to incorporate parts of the Program into other free programs whose distribution conditions are different, write to the author to ask for permission. For software which is copyrighted by the Free Software Foundation, write to the Free Software Foundation; we sometimes make exceptions for this. Our decision will be guided by the two goals of preserving the free status of all derivatives of our free software and of promoting the sharing and reuse of software generally.
NO WARRANTY
11. BECAUSE THE PROGRAM IS LICENSED FREE OF CHARGE, THERE IS NO WARRANTY FOR THE PROGRAM, TO THE EXTENT PERMITTED BY APPLICABLE LAW. EXCEPT WHEN OTHERWISE STATED IN WRITING THE COPYRIGHT HOLDERS AND/OR OTHER PARTIES PROVIDE THE PROGRAM "AS IS" WITHOUT WARRANTY OF ANY KIND, EITHER EXPRESSED OR IMPLIED, INCLUDING, BUT NOT LIMITED TO, THE IMPLIED WARRANTIES OF MERCHANTABILITY AND FITNESS FOR A PARTICULAR PURPOSE. THE ENTIRE RISK AS TO THE QUALITY AND PERFORMANCE OF THE PROGRAM IS WITH YOU. SHOULD THE PROGRAM PROVE DEFECTIVE, YOU ASSUME THE COST OF ALL NECESSARY SERVICING, REPAIR OR CORRECTION.
12. IN NO EVENT UNLESS REQUIRED BY APPLICABLE LAW OR AGREED TO IN WRITING WILL ANY COPYRIGHT HOLDER, OR ANY OTHER PARTY WHO MAY MODIFY AND/OR REDISTRIBUTE THE PROGRAM AS PERMITTED ABOVE, BE LIABLE TO YOU FOR DAMAGES, INCLUDING ANY GENERAL, SPECIAL, INCIDENTAL OR CONSEQUENTIAL DAMAGES ARISING OUT OF THE USE OR INABILITY TO USE THE PROGRAM (INCLUDING BUT NOT LIMITED TO LOSS OF DATA OR DATA BEING RENDERED INACCURATE OR LOSSES SUSTAINED BY YOU OR THIRD PARTIES OR A FAILURE OF THE PROGRAM TO OPERATE WITH ANY OTHER PROGRAMS), EVEN IF SUCH HOLDER OR OTHER PARTY HAS BEEN ADVISED OF THE POSSIBILITY OF SUCH DAMAGES.
END OF TERMS AND CONDITIONS
How to Apply These Terms to Your New Programs
If you develop a new program, and you want it to be of the greatest possible use to the public, the best way to achieve this is to make it free software which everyone can redistribute and change under these terms.
To do so, attach the following notices to the program. It is safest to attach them to the start of each source file to most effectively convey the exclusion of warranty; and each file should have at least the "copyright" line and a pointer to where the full notice is found.
One line to give the program's name and a brief idea of what it does.
Copyright (C) <year> <name of author>
This program is free software; you can redistribute it and/or modify it under the terms of the GNU General Public License as published by the Free Software Foundation; either version 2 of the License, or (at your option) any later version.
140 Infoblox User Guide Data Connector 2.0

GNU General Public License Version 3
This program is distributed in the hope that it will be useful, but WITHOUT ANY WARRANTY; without even the implied warranty of MERCHANTABILITY or FITNESS FOR A PARTICULAR PURPOSE. See the GNU General Public License for more details.
You should have received a copy of the GNU General Public License along with this program; if not, write to the Free Software Foundation, Inc., 59 Temple Place, Suite 330, Boston, MA 02111-1307 USA
Also add information on how to contact you by electronic and paper mail.
If the program is interactive, make it output a short notice like this when it starts in an interactive mode:
Gnomovision version 69, Copyright (C) year name of author Gnomovision comes with ABSOLUTELY NO WARRANTY; for details type `show w'. This is free software, and you are welcome to redistribute it under certain conditions; type `show c' for details.
The hypothetical commands `show w' and `show c' should show the appropriate parts of the General Public License. Of course, the commands you use may be called something other than ̀ show w' and ̀ show c'; they could even be mouse-clicks or menu items--whatever suits your program.
You should also get your employer (if you work as a programmer) or your school, if any, to sign a "copyright disclaimer" for the program, if necessary. Here is a sample; alter the names:
Yoyodyne, Inc., hereby disclaims all copyright interest in the program `Gnomovision' (which makes passes at compilers) written by James Hacker.
signature of Ty Coon, 1 April 1989
Ty Coon, President of Vice
This General Public License does not permit incorporating your program into proprietary programs. If your program is a subroutine library, you may consider it more useful to permit linking proprietary applications with the library. If this is what you want to do, use the GNU Library General Public License instead of this License.
GNU General Public License Version 3
GNU GENERAL PUBLIC LICENSE
Version 3, 29 June 2007
Copyright (C) 2007 Free Software Foundation, Inc. <http://fsf.org/>
Everyone is permitted to copy and distribute verbatim copies of this license document, but changing it is not allowed.
Preamble
The GNU General Public License is a free, copyleft license for software and other kinds of works.
The licenses for most software and other practical works are designed to take away your freedom to share and change the works. By contrast, the GNU General Public License is intended to guarantee your freedom to share and change all versions of a program--to make sure it remains free software for all its users. We, the Free Software Foundation, use the GNU General Public License for most of our software; it applies also to any other work released this way by its authors. You can apply it to your programs, too.
Data Connector 2.0 Infoblox User Guide 141

Open Source Copyright and License Statements
When we speak of free software, we are referring to freedom, not price. Our General Public Licenses are designed to make sure that you have the freedom to distribute copies of free software (and charge for them if you wish), that you receive source code or can get it if you want it, that you can change the software or use pieces of it in new free programs, and that you know you can do these things.
To protect your rights, we need to prevent others from denying you these rights or asking you to surrender the rights. Therefore, you have certain responsibilities if you distribute copies of the software, or if you modify it: responsibilities to respect the freedom of others.
For example, if you distribute copies of such a program, whether gratis or for a fee, you must pass on to the recipients the same freedoms that you received. You must make sure that they, too, receive or can get the source code. And you must show them these terms so they know their rights.
Developers that use the GNU GPL protect your rights with two steps: (1) assert copyright on the software, and (2) offer you this License giving you legal permission to copy, distribute and/or modify it.
For the developers' and authors' protection, the GPL clearly explains that there is no warranty for this free software. For both users' and authors' sake, the GPL requires that modified versions be marked as changed, so that their problems will not be attributed erroneously to authors of previous versions.
Some devices are designed to deny users access to install or run modified versions of the software inside them, although the manufacturer can do so. This is fundamentally incompatible with the aim of protecting users' freedom to change the software. The systematic pattern of such abuse occurs in the area of products for individuals to use, which is precisely where it is most unacceptable. Therefore, we have designed this version of the GPL to prohibit the practice for those products. If such problems arise substantially in other domains, we stand ready to extend this provision to those domains in future versions of the GPL, as needed to protect the freedom of users.
Finally, every program is threatened constantly by software patents. States should not allow patents to restrict development and use of software on general-purpose computers, but in those that do, we wish to avoid the special danger that patents applied to a free program could make it effectively proprietary. To prevent this, the GPL assures that patents cannot be used to render the program non-free.
The precise terms and conditions for copying, distribution and modification follow.
TERMS AND CONDITIONS
0. Definitions.
“This License” refers to version 3 of the GNU General Public License.
“Copyright” also means copyright-like laws that apply to other kinds of works, such as semiconductor masks.
“The Program” refers to any copyrightable work licensed under this License. Each licensee is addressed as “you”. “Licensees” and “recipients” may be individuals or organizations.
142 Infoblox User Guide Data Connector 2.0

GNU General Public License Version 3
To “modify” a work means to copy from or adapt all or part of the work in a fashion requiring copyright permission, other than the making of an exact copy. The resulting work is called a “modified version” of the earlier work or a work “based on” the earlier work.
A “covered work” means either the unmodified Program or a work based on the Program.
To “propagate” a work means to do anything with it that, without permission, would make you directly or secondarily liable for infringement under applicable copyright law, except executing it on a computer or modifying a private copy. Propagation includes copying, distribution (with or without modification), making available to the public, and in some countries other activities as well.
To “convey” a work means any kind of propagation that enables other parties to make or receive copies. Mere interaction with a user through a computer network, with no transfer of a copy, is not conveying.
An interactive user interface displays “Appropriate Legal Notices” to the extent that it includes a convenient and prominently visible feature that (1) displays an appropriate copyright notice, and (2) tells the user that there is no warranty for the work (except to the extent that warranties are provided), that licensees may convey the work under this License, and how to view a copy of this License. If the interface presents a list of user commands or options, such as a menu, a prominent item in the list meets this criterion.
1. Source Code.
The “source code” for a work means the preferred form of the work for making modifications to it. “Object code” means any non-source form of a work.
A “Standard Interface” means an interface that either is an official standard defined by a recognized standards body, or, in the case of interfaces specified for a particular programming language, one that is widely used among developers working in that language.
The “System Libraries” of an executable work include anything, other than the work as a whole, that (a) is included in the normal form of packaging a Major Component, but which is not part of that Major Component, and (b) serves only to enable use of the work with that Major Component, or to implement a Standard Interface for which an implementation is available to the public in source code form. A “Major Component”, in this context, means a major essential component (kernel, window system, and so on) of the specific operating system (if any) on which the executable work runs, or a compiler used to produce the work, or an object code interpreter used to run it.
The “Corresponding Source” for a work in object code form means all the source code needed to generate, install, and (for an executable work) run the object code and to modify the work, including scripts to control those activities. However, it does not include the work's System Libraries, or general-purpose tools or generally available free programs which are used unmodified in performing those activities but which are not part of the work. For example, Corresponding Source includes interface definition files associated with source files for the work, and the source code for shared libraries and dynamically linked subprograms that the work is specifically designed to require, such as by intimate data communication or control flow between those subprograms and other parts of the work.
Data Connector 2.0 Infoblox User Guide 143

Open Source Copyright and License Statements
The Corresponding Source need not include anything that users can regenerate automatically from other parts of the Corresponding Source.
The Corresponding Source for a work in source code form is that same work.
2. Basic Permissions.
All rights granted under this License are granted for the term of copyright on the Program, and are irrevocable provided the stated conditions are met. This License explicitly affirms your unlimited permission to run the unmodified Program. The output from running a covered work is covered by this License only if the output, given its content, constitutes a covered work. This License acknowledges your rights of fair use or other equivalent, as provided by copyright law.
You may make, run and propagate covered works that you do not convey, without conditions so long as your license otherwise remains in force. You may convey covered works to others for the sole purpose of having them make modifications exclusively for you, or provide you with facilities for running those works, provided that you comply with the terms of this License in conveying all material for which you do not control copyright. Those thus making or running the covered works for you must do so exclusively on your behalf, under your direction and control, on terms that prohibit them from making any copies of your copyrighted material outside their relationship with you.
Conveying under any other circumstances is permitted solely under the conditions stated below. Sublicensing is not allowed; section 10 makes it unnecessary.
3. Protecting Users' Legal Rights From Anti-Circumvention Law.
No covered work shall be deemed part of an effective technological measure under any applicable law fulfilling obligations under article 11 of the WIPO copyright treaty adopted on 20 December 1996, or similar laws prohibiting or restricting circumvention of such measures.
When you convey a covered work, you waive any legal power to forbid circumvention of technological measures to the extent such circumvention is effected by exercising rights under this License with respect to the covered work, and you disclaim any intention to limit operation or modification of the work as a means of enforcing, against the work's users, your or third parties' legal rights to forbid circumvention of technological measures.
4. Conveying Verbatim Copies.
You may convey verbatim copies of the Program's source code as you receive it, in any medium, provided that you conspicuously and appropriately publish on each copy an appropriate copyright notice; keep intact all notices stating that this License and any non-permissive terms added in accord with section 7 apply to the code; keep intact all notices of the absence of any warranty; and give all recipients a copy of this License along with the Program.
You may charge any price or no price for each copy that you convey, and you may offer support or warranty protection for a fee.
5. Conveying Modified Source Versions.
You may convey a work based on the Program, or the modifications to produce it from the Program, in the form of source code under the terms of section 4, provided that you also meet all of these conditions:
144 Infoblox User Guide Data Connector 2.0

GNU General Public License Version 3
a) The work must carry prominent notices stating that you modified it, and giving a relevant date.
b) The work must carry prominent notices stating that it is released under this License and any conditions added under section 7. This requirement modifies the requirement in section 4 to “keep intact all notices”.
c) You must license the entire work, as a whole, under this License to anyone who comes into possession of a copy. This License will therefore apply, along with any applicable section 7 additional terms, to the whole of the work, and all its parts, regardless of how they are packaged. This License gives no permission to license the work in any other way, but it does not invalidate such permission if you have separately received it.
d) If the work has interactive user interfaces, each must display Appropriate Legal Notices; however, if the Program has interactive interfaces that do not display Appropriate Legal Notices, your work need not make them do so.
A compilation of a covered work with other separate and independent works, which are not by their nature extensions of the covered work, and which are not combined with it such as to form a larger program, in or on a volume of a storage or distribution medium, is called an “aggregate” if the compilation and its resulting copyright are not used to limit the access or legal rights of the compilation's users beyond what the individual works permit. Inclusion of a covered work in an aggregate does not cause this License to apply to the other parts of the aggregate.
6. Conveying Non-Source Forms.
You may convey a covered work in object code form under the terms of sections 4 and 5, provided that you also convey the machine-readable Corresponding Source under the terms of this License, in one of these ways:
a) Convey the object code in, or embodied in, a physical product (including a physical distribution medium), accompanied by the Corresponding Source fixed on a durable physical medium customarily used for software interchange.
b) Convey the object code in, or embodied in, a physical product (including a physical distribution medium), accompanied by a written offer, valid for at least three years and valid for as long as you offer spare parts or customer support for that product model, to give anyone who possesses the object code either (1) a copy of the Corresponding Source for all the software in the product that is covered by this License, on a durable physical medium customarily used for software interchange, for a price no more than your reasonable cost of physically performing this conveying of source, or (2) access to copy the Corresponding Source from a network server at no charge.
c) Convey individual copies of the object code with a copy of the written offer to provide the Corresponding Source. This alternative is allowed only occasionally and noncommercially, and only if you received the object code with such an offer, in accord with subsection 6b.
d) Convey the object code by offering access from a designated place (gratis or for a charge), and offer equivalent access to the Corresponding Source in the same way through the same place at no further charge. You need not require recipients to copy the Corresponding Source along with the object code. If the place to copy the object code is a network server, the Corresponding Source may be on a different server (operated by you or a third party) that supports equivalent copying facilities, provided you maintain clear directions next to the object code saying where to find the Corresponding Source. Regardless of what server hosts the Corresponding Source, you remain obligated to ensure that it is available for as long as needed to satisfy these requirements.
e) Convey the object code using peer-to-peer transmission, provided you inform other peers where the object code and Corresponding Source of the work are being offered to the general public at no charge under subsection 6d.
Data Connector 2.0 Infoblox User Guide 145
Open Source Copyright and License Statements
A separable portion of the object code, whose source code is excluded from the Corresponding Source as a System Library, need not be included in conveying the object code work.
A “User Product” is either (1) a “consumer product”, which means any tangible personal property which is normally used for personal, family, or household purposes, or (2) anything designed or sold for incorporation into a dwelling. In determining whether a product is a consumer product, doubtful cases shall be resolved in favor of coverage. For a particular product received by a particular user, “normally used” refers to a typical or common use of that class of product, regardless of the status of the particular user or of the way in which the particular user actually uses, or expects or is expected to use, the product. A product is a consumer product regardless of whether the product has substantial commercial, industrial or non-consumer uses, unless such uses represent the only significant mode of use of the product.
“Installation Information” for a User Product means any methods, procedures, authorization keys, or other information required to install and execute modified versions of a covered work in that User Product from a modified version of its Corresponding Source. The information must suffice to ensure that the continued functioning of the modified object code is in no case prevented or interfered with solely because modification has been made.
If you convey an object code work under this section in, or with, or specifically for use in, a User Product, and the conveying occurs as part of a transaction in which the right of possession and use of the User Product is transferred to the recipient in perpetuity or for a fixed term (regardless of how the transaction is characterized), the Corresponding Source conveyed under this section must be accompanied by the Installation Information. But this requirement does not apply if neither you nor any third party retains the ability to install modified object code on the User Product (for example, the work has been installed in ROM).
The requirement to provide Installation Information does not include a requirement to continue to provide support service, warranty, or updates for a work that has been modified or installed by the recipient, or for the User Product in which it has been modified or installed. Access to a network may be denied when the modification itself materially and adversely affects the operation of the network or violates the rules and protocols for communication across the network.
Corresponding Source conveyed, and Installation Information provided, in accord with this section must be in a format that is publicly documented (and with an implementation available to the public in source code form), and must require no special password or key for unpacking, reading or copying.
7. Additional Terms.
“Additional permissions” are terms that supplement the terms of this License by making exceptions from one or more of its conditions. Additional permissions that are applicable to the entire Program shall be treated as though they were included in this License, to the extent that they are valid under applicable law. If additional permissions apply only to part of the Program, that part may be used separately under those permissions, but the entire Program remains governed by this License without regard to the additional permissions.
146 Infoblox User Guide Data Connector 2.0

GNU General Public License Version 3
When you convey a copy of a covered work, you may at your option remove any additional permissions from that copy, or from any part of it. (Additional permissions may be written to require their own removal in certain cases when you modify the work.) You may place additional permissions on material, added by you to a covered work, for which you have or can give appropriate copyright permission.
Notwithstanding any other provision of this License, for material you add to a covered work, you may (if authorized by the copyright holders of that material) supplement the terms of this License with terms:
a) Disclaiming warranty or limiting liability differently from the terms of sections 15 and 16 of this License; or
b) Requiring preservation of specified reasonable legal notices or author attributions in that material or in the Appropriate Legal Notices displayed by works containing it; or
c) Prohibiting misrepresentation of the origin of that material, or requiring that modified versions of such material be marked in reasonable ways as different from the original version; or
d) Limiting the use for publicity purposes of names of licensors or authors of the material; or
e) Declining to grant rights under trademark law for use of some trade names, trademarks, or service marks; or
f) Requiring indemnification of licensors and authors of that material by anyone who conveys the material (or modified versions of it) with contractual assumptions of liability to the recipient, for any liability that these contractual assumptions directly impose on those licensors and authors.
All other non-permissive additional terms are considered “further restrictions” within the meaning of section 10. If the Program as you received it, or any part of it, contains a notice stating that it is governed by this License along with a term that is a further restriction, you may remove that term. If a license document contains a further restriction but permits relicensing or conveying under this License, you may add to a covered work material governed by the terms of that license document, provided that the further restriction does not survive such relicensing or conveying.
If you add terms to a covered work in accord with this section, you must place, in the relevant source files, a statement of the additional terms that apply to those files, or a notice indicating where to find the applicable terms.
Additional terms, permissive or non-permissive, may be stated in the form of a separately written license, or stated as exceptions; the above requirements apply either way.
8. Termination.
You may not propagate or modify a covered work except as expressly provided under this License. Any attempt otherwise to propagate or modify it is void, and will automatically terminate your rights under this License (including any patent licenses granted under the third paragraph of section 11).
However, if you cease all violation of this License, then your license from a particular copyright holder is reinstated (a) provisionally, unless and until the copyright holder explicitly and finally terminates your license, and (b) permanently, if the copyright holder fails to notify you of the violation by some reasonable means prior to 60 days after the cessation.
Data Connector 2.0 Infoblox User Guide 147
Open Source Copyright and License Statements
Moreover, your license from a particular copyright holder is reinstated permanently if the copyright holder notifies you of the violation by some reasonable means, this is the first time you have received notice of violation of this License (for any work) from that copyright holder, and you cure the violation prior to 30 days after your receipt of the notice.
Termination of your rights under this section does not terminate the licenses of parties who have received copies or rights from you under this License. If your rights have been terminated and not permanently reinstated, you do not qualify to receive new licenses for the same material under section 10.
9. Acceptance Not Required for Having Copies.
You are not required to accept this License in order to receive or run a copy of the Program. Ancillary propagation of a covered work occurring solely as a consequence of using peer-to-peer transmission to receive a copy likewise does not require acceptance. However, nothing other than this License grants you permission to propagate or modify any covered work. These actions infringe copyright if you do not accept this License. Therefore, by modifying or propagating a covered work, you indicate your acceptance of this License to do so.
10. Automatic Licensing of Downstream Recipients.
Each time you convey a covered work, the recipient automatically receives a license from the original licensors, to run, modify and propagate that work, subject to this License. You are not responsible for enforcing compliance by third parties with this License.
An “entity transaction” is a transaction transferring control of an organization, or substantially all assets of one, or subdividing an organization, or merging organizations. If propagation of a covered work results from an entity transaction, each party to that transaction who receives a copy of the work also receives whatever licenses to the work the party's predecessor in interest had or could give under the previous paragraph, plus a right to possession of the Corresponding Source of the work from the predecessor in interest, if the predecessor has it or can get it with reasonable efforts.
You may not impose any further restrictions on the exercise of the rights granted or affirmed under this License. For example, you may not impose a license fee, royalty, or other charge for exercise of rights granted under this License, and you may not initiate litigation (including a cross-claim or counterclaim in a lawsuit) alleging that any patent claim is infringed by making, using, selling, offering for sale, or importing the Program or any portion of it.
11. Patents.
A “contributor” is a copyright holder who authorizes use under this License of the Program or a work on which the Program is based. The work thus licensed is called the contributor's “contributor version”.
A contributor's “essential patent claims” are all patent claims owned or controlled by the contributor, whether already acquired or hereafter acquired, that would be infringed by some manner, permitted by this License, of making, using, or selling its contributor version, but do not include claims that would be infringed only as a consequence of further modification of the contributor version. For purposes of this definition, “control” includes the right to grant patent sublicenses in a manner consistent with the requirements of this License.
148 Infoblox User Guide Data Connector 2.0
GNU General Public License Version 3
Each contributor grants you a non-exclusive, worldwide, royalty-free patent license under the contributor's essential patent claims, to make, use, sell, offer for sale, import and otherwise run, modify and propagate the contents of its contributor version.
In the following three paragraphs, a “patent license” is any express agreement or commitment, however denominated, not to enforce a patent (such as an express permission to practice a patent or covenant not to sue for patent infringement). To “grant” such a patent license to a party means to make such an agreement or commitment not to enforce a patent against the party.
If you convey a covered work, knowingly relying on a patent license, and the Corresponding Source of the work is not available for anyone to copy, free of charge and under the terms of this License, through a publicly available network server or other readily accessible means, then you must either (1) cause the Corresponding Source to be so available, or (2) arrange to deprive yourself of the benefit of the patent license for this particular work, or (3) arrange, in a manner consistent with the requirements of this License, to extend the patent license to downstream recipients. “Knowingly relying” means you have actual knowledge that, but for the patent license, your conveying the covered work in a country, or your recipient's use of the covered work in a country, would infringe one or more identifiable patents in that country that you have reason to believe are valid.
If, pursuant to or in connection with a single transaction or arrangement, you convey, or propagate by procuring conveyance of, a covered work, and grant a patent license to some of the parties receiving the covered work authorizing them to use, propagate, modify or convey a specific copy of the covered work, then the patent license you grant is automatically extended to all recipients of the covered work and works based on it.
A patent license is “discriminatory” if it does not include within the scope of its coverage, prohibits the exercise of, or is conditioned on the non-exercise of one or more of the rights that are specifically granted under this License. You may not convey a covered work if you are a party to an arrangement with a third party that is in the business of distributing software, under which you make payment to the third party based on the extent of your activity of conveying the work, and under which the third party grants, to any of the parties who would receive the covered work from you, a discriminatory patent license (a) in connection with copies of the covered work conveyed by you (or copies made from those copies), or (b) primarily for and in connection with specific products or compilations that contain the covered work, unless you entered into that arrangement, or that patent license was granted, prior to 28 March 2007.
Nothing in this License shall be construed as excluding or limiting any implied license or other defenses to infringement that may otherwise be available to you under applicable patent law.
12. No Surrender of Others' Freedom.
If conditions are imposed on you (whether by court order, agreement or otherwise) that contradict the conditions of this License, they do not excuse you from the conditions of this License. If you cannot convey a covered work so as to satisfy simultaneously your obligations under this License and any other pertinent obligations, then as a consequence you may not convey it at all. For example, if you agree to terms that obligate you to collect a royalty for further conveying from those to whom you convey the Program, the only way you could satisfy both those terms and this License would be to refrain entirely from conveying the Program.
13. Use with the GNU Affero General Public License.
Data Connector 2.0 Infoblox User Guide 149

Open Source Copyright and License Statements
Notwithstanding any other provision of this License, you have permission to link or combine any covered work with a work licensed under version 3 of the GNU Affero General Public License into a single combined work, and to convey the resulting work. The terms of this License will continue to apply to the part which is the covered work, but the special requirements of the GNU Affero General Public License, section 13, concerning interaction through a network will apply to the combination as such.
14. Revised Versions of this License.
The Free Software Foundation may publish revised and/or new versions of the GNU General Public License from time to time. Such new versions will be similar in spirit to the present version, but may differ in detail to address new problems or concerns.
Each version is given a distinguishing version number. If the Program specifies that a certain numbered version of the GNU General Public License “or any later version” applies to it, you have the option of following the terms and conditions either of that numbered version or of any later version published by the Free Software Foundation. If the Program does not specify a version number of the GNU General Public License, you may choose any version ever published by the Free Software Foundation.
If the Program specifies that a proxy can decide which future versions of the GNU General Public License can be used, that proxy's public statement of acceptance of a version permanently authorizes you to choose that version for the Program.
Later license versions may give you additional or different permissions. However, no additional obligations are imposed on any author or copyright holder as a result of your choosing to follow a later version.
15. Disclaimer of Warranty.
THERE IS NO WARRANTY FOR THE PROGRAM, TO THE EXTENT PERMITTED BY APPLICABLE LAW. EXCEPT WHEN OTHERWISE STATED IN WRITING THE COPYRIGHT HOLDERS AND/OR OTHER PARTIES PROVIDE THE PROGRAM “AS IS” WITHOUT WARRANTY OF ANY KIND, EITHER EXPRESSED OR IMPLIED, INCLUDING, BUT NOT LIMITED TO, THE IMPLIED WARRANTIES OF MERCHANTABILITY AND FITNESS FOR A PARTICULAR PURPOSE. THE ENTIRE RISK AS TO THE QUALITY AND PERFORMANCE OF THE PROGRAM IS WITH YOU. SHOULD THE PROGRAM PROVE DEFECTIVE, YOU ASSUME THE COST OF ALL NECESSARY SERVICING, REPAIR OR CORRECTION.
16. Limitation of Liability.
IN NO EVENT UNLESS REQUIRED BY APPLICABLE LAW OR AGREED TO IN WRITING WILL ANY COPYRIGHT HOLDER, OR ANY OTHER PARTY WHO MODIFIES AND/OR CONVEYS THE PROGRAM AS PERMITTED ABOVE, BE LIABLE TO YOU FOR DAMAGES, INCLUDING ANY GENERAL, SPECIAL, INCIDENTAL OR CONSEQUENTIAL DAMAGES ARISING OUT OF THE USE OR INABILITY TO USE THE PROGRAM (INCLUDING BUT NOT LIMITED TO LOSS OF DATA OR DATA BEING RENDERED INACCURATE OR LOSSES SUSTAINED BY YOU OR THIRD PARTIES OR A FAILURE OF THE PROGRAM TO OPERATE WITH ANY OTHER PROGRAMS), EVEN IF SUCH HOLDER OR OTHER PARTY HAS BEEN ADVISED OF THE POSSIBILITY OF SUCH DAMAGES.
17. Interpretation of Sections 15 and 16.
If the disclaimer of warranty and limitation of liability provided above cannot be given local legal effect according to their terms, reviewing courts shall apply local law that most closely approximates an absolute waiver of all civil liability in connection with the Program, unless a warranty or assumption of liability accompanies a copy of the Program in return for a fee.
END OF TERMS AND CONDITIONS
150 Infoblox User Guide Data Connector 2.0

GNU General Public License Version 3
How to Apply These Terms to Your New Programs
If you develop a new program, and you want it to be of the greatest possible use to the public, the best way to achieve this is to make it free software which everyone can redistribute and change under these terms.
To do so, attach the following notices to the program. It is safest to attach them to the start of each source file to most effectively state the exclusion of warranty; and each file should have at least the “copyright” line and a pointer to where the full notice is found.
<one line to give the program's name and a brief idea of what it does.>
Copyright (C) <year> <name of author>
This program is free software: you can redistribute it and/or modify
it under the terms of the GNU General Public License as published by
the Free Software Foundation, either version 3 of the License, or
(at your option) any later version.
This program is distributed in the hope that it will be useful,
but WITHOUT ANY WARRANTY; without even the implied warranty of
MERCHANTABILITY or FITNESS FOR A PARTICULAR PURPOSE. See the
GNU General Public License for more details.
You should have received a copy of the GNU General Public License
along with this program. If not, see <http://www.gnu.org/licenses/>.
Also add information on how to contact you by electronic and paper mail.
If the program does terminal interaction, make it output a short notice like this when it starts in an interactive mode:
<program> Copyright (C) <year> <name of author>
This program comes with ABSOLUTELY NO WARRANTY; for details type `show w'.
This is free software, and you are welcome to redistribute it
under certain conditions; type `show c' for details.
The hypothetical commands `show w' and `show c' should show the appropriate parts of the General Public License. Of course, your program's commands might be different; for a GUI interface, you would use an “about box”.
You should also get your employer (if you work as a programmer) or school, if any, to sign a “copyright disclaimer” for the program, if necessary. For more information on this, and how to apply and follow the GNU GPL, see <http://www.gnu.org/licenses/>.
The GNU General Public License does not permit incorporating your program into proprietary programs. If your program is a subroutine library, you may consider it more useful to permit linking proprietary applications with the library. If this is what you want to do, use the GNU Lesser General Public License instead of this License. But first, please read <http://www.gnu.org/philosophy/why-not-lgpl.html>.
Data Connector 2.0 Infoblox User Guide 151

Open Source Copyright and License Statements
The FreeType Project License
2002-Apr-11
Copyright 1996-2002 by
David Turner, Robert Wilhelm, and Werner Lemberg
Introduction
============
The FreeType Project is distributed in several archive packages;
some of them may contain, in addition to the FreeType font engine,
various tools and contributions which rely on, or relate to, the
FreeType Project.
This license applies to all files found in such packages, and
which do not fall under their own explicit license. The license
affects thus the FreeType font engine, the test programs,
documentation and makefiles, at the very least.
This license was inspired by the BSD, Artistic, and IJG
(Independent JPEG Group) licenses, which all encourage inclusion
and use of free software in commercial and freeware products
alike. As a consequence, its main points are that:
o We don't promise that this software works. However, we will be
interested in any kind of bug reports. (`as is' distribution)
o You can use this software for whatever you want, in parts or
full form, without having to pay us. (`royalty-free' usage)
o You may not pretend that you wrote this software. If you use
it, or only parts of it, in a program, you must acknowledge
somewhere in your documentation that you have used the
FreeType code. (`credits')
We specifically permit and encourage the inclusion of this
software, with or without modifications, in commercial products.
We disclaim all warranties covering The FreeType Project and
assume no liability related to The FreeType Project.
152 Infoblox User Guide Data Connector 2.0

The FreeType Project License
Finally, many people asked us for a preferred form for a
credit/disclaimer to use in compliance with this license. We thus
encourage you to use the following text:
"""
Portions of this software are copyright © 1996-2002 The FreeType
Project (www.freetype.org). All rights reserved.
"""
Legal Terms
===========
0. Definitions
--------------
Throughout this license, the terms `package', `FreeType Project',
and `FreeType archive' refer to the set of files originally
distributed by the authors (David Turner, Robert Wilhelm, and
Werner Lemberg) as the `FreeType Project', be they named as alpha,
beta or final release.
`You' refers to the licensee, or person using the project, where
`using' is a generic term including compiling the project's source
code as well as linking it to form a `program' or `executable'.
This program is referred to as `a program using the FreeType
engine'.
This license applies to all files distributed in the original
FreeType Project, including all source code, binaries and
documentation, unless otherwise stated in the file in its
original, unmodified form as distributed in the original archive.
If you are unsure whether or not a particular file is covered by
this license, you must contact us to verify this.
The FreeType Project is copyright (C) 1996-2000 by David Turner,
Robert Wilhelm, and Werner Lemberg. All rights reserved except as
specified below.
1. No Warranty
--------------
THE FREETYPE PROJECT IS PROVIDED `AS IS' WITHOUT WARRANTY OF ANY
KIND, EITHER EXPRESS OR IMPLIED, INCLUDING, BUT NOT LIMITED TO,
Data Connector 2.0 Infoblox User Guide 153

Open Source Copyright and License Statements
WARRANTIES OF MERCHANTABILITY AND FITNESS FOR A PARTICULAR
PURPOSE. IN NO EVENT WILL ANY OF THE AUTHORS OR COPYRIGHT HOLDERS
BE LIABLE FOR ANY DAMAGES CAUSED BY THE USE OR THE INABILITY TO
USE, OF THE FREETYPE PROJECT.
2. Redistribution
-----------------
This license grants a worldwide, royalty-free, perpetual and
irrevocable right and license to use, execute, perform, compile,
display, copy, create derivative works of, distribute and
sublicense the FreeType Project (in both source and object code
forms) and derivative works thereof for any purpose; and to
authorize others to exercise some or all of the rights granted
herein, subject to the following conditions:
o Redistribution of source code must retain this license file
(`FTL.TXT') unaltered; any additions, deletions or changes to
the original files must be clearly indicated in accompanying
documentation. The copyright notices of the unaltered,
original files must be preserved in all copies of source
files.
o Redistribution in binary form must provide a disclaimer that
states that the software is based in part of the work of the
FreeType Team, in the distribution documentation. We also
encourage you to put an URL to the FreeType web page in your
documentation, though this isn't mandatory.
These conditions apply to any software derived from or based on
the FreeType Project, not just the unmodified files. If you use
our work, you must acknowledge us. However, no fee need be paid
to us.
3. Advertising
--------------
Neither the FreeType authors and contributors nor you shall use
the name of the other for commercial, advertising, or promotional
purposes without specific prior written permission.
We suggest, but do not require, that you use one or more of the
following phrases to refer to this software in your documentation
or advertising materials: `FreeType Project', `FreeType Engine',
`FreeType library', or `FreeType Distribution'.
154 Infoblox User Guide Data Connector 2.0

ISC License (ISC)
As you have not signed this license, you are not required to
accept it. However, as the FreeType Project is copyrighted
material, only this license, or another one contracted with the
authors, grants you the right to use, distribute, and modify it.
Therefore, by using, distributing, or modifying the FreeType
Project, you indicate that you understand and accept all the terms
of this license.
4. Contacts
-----------
There are two mailing lists related to FreeType:
Discusses general use and applications of FreeType, as well as
future and wanted additions to the library and distribution.
If you are looking for support, start in this list if you
haven't found anything to help you in the documentation.
Discusses bugs, as well as engine internals, design issues,
specific licenses, porting, etc.
o http://www.freetype.org
Holds the current FreeType web page, which will allow you to
download our latest development version and read online
documentation.
You can also contact us individually at:
David Turner <[email protected]>
Robert Wilhelm <[email protected]>
Werner Lemberg <[email protected]>
ISC License (ISC)
Copyright (C) 1996-2002 Internet Software Consortium.
Data Connector 2.0 Infoblox User Guide 155

Open Source Copyright and License Statements
Permission to use, copy, modify, and/or distribute this software for any purpose with or without fee is hereby granted, provided that the above copyright notice and this permission notice appear in all copies.
THE SOFTWARE IS PROVIDED "AS IS" AND THE AUTHOR DISCLAIMS ALL WARRANTIES WITH REGARD TO THIS SOFTWARE INCLUDING ALL IMPLIED WARRANTIES OF MERCHANTABILITY AND FITNESS. IN NO EVENT SHALL THE AUTHOR BE LIABLE FOR ANY SPECIAL, DIRECT, INDIRECT, OR CONSEQUENTIAL DAMAGES OR ANY DAMAGES WHATSOEVER RESULTING FROM LOSS OF USE, DATA OR PROFITS, WHETHER IN AN ACTION OF CONTRACT, NEGLIGENCE OR OTHER TORTIOUS ACTION, ARISING OUT OF OR IN CONNECTION WITH THE USE OR PERFORMANCE OF THIS SOFTWARE.
Japan Registry Services License version 1.1
TERMS AND CONDITIONS
FOR
OPEN SOURCE CODE LICENSE
Version 1.1
Japan Registry Services Co., Ltd. ("JPRS"), a Japanese corporation
having its head office at Chiyoda First Bldg. East 13F 3-8-1 Nishi-Kanda,
Chiyoda-ku, Tokyo 101-0065, Japan, grants you the license for open source
code specified in EXHIBIT A the "Code" subject to the following Terms and
Conditions ("OSCL").
1. License Grant.
JPRS hereby grants you a worldwide, royalty-free, non-exclusive
license, subject to third party intellectual property claims:
(a) under intellectual property rights (other than patent or
trademark) licensable by JPRS to use, reproduce, modify, display,
perform, sublicense and distribute the Code (or portions thereof)
with or without modifications, and/or as part of a derivative work;
or
(b) under claims of the infringement through the making, using,
offering to sell and/or otherwise disposing the JPRS Revised Code
(or portions thereof);
(c) the licenses granted in this Section 1(a) and (b) are effective on
the date JPRS first distributes the Code to you under the terms of
this OSCL;
(d) Notwithstanding the above stated terms, no patent license is
granted:
1) for a code that you delete from the Code;
2) separate from the Code; or
3) for infringements caused by:
i) modification of the Code; or
ii) combination of the Code with other software or devices.
2. Consents.
156 Infoblox User Guide Data Connector 2.0

Japan Registry Services License version 1.1
You agree that:
(a) you must include a copy of this OSCL and the notice set forth in
EXHIBIT A with every copy of the Code you distribute;
(b) you must include a copy of this OSCL and the notice set forth in
EXHIBIT A with every copy of binary form of the Code in the
documentation and/or other materials provided with the distribution;
(c) you may not offer or impose any terms on any source code version
that alters or restricts the applicable version of this OSCL or
the recipients' rights hereunder.
(d) If the terms and conditions are set forth in EXHIBIT A, you must
comply with those terms and conditions.
3. Proprietary Information.
All trademarks, service marks, patents, copyrights, trade secrets, and
other proprietary rights in or related to the Code are and will remain
the exclusive property of JPRS or its licensors, whether or not
specifically recognized or perfected under local law except specified
in this OSCL; provided however you agree and understand that the JPRS
name may not be used to endorse or promote this Code without prior
written approval of JPRS.
4. WARRANTY DISCLAIMER.
JPRS MAKES NO REPRESENTATIONS AND WARRANTIES REGARDING THE USE OF THE
CODE, NOR DOES JPRS MAKE ANY REPRESENTATIONS THAT THE CODE WILL BECOME
COMMERCIALLY AVAILABLE. JPRS, ITS AFFILIATES, AND ITS SUPPLIERS DO NOT
WARRANT OR REPRESENT THAT THE CODE IS FREE OF ERRORS OR THAT THE CODE
IS SUITABLE FOR TRANSLATION AND/OR LOCALIZATION. THE CODE IS PROVIDED
ON AN "AS IS" BASIS AND JPRS AND ITS SUPPLIERS HAVE NO OBLIGATION TO
CORRECT ERRORS OR TO SUPPORT THE CODE UNDER THIS OSCL FOR ANY REASON.
TO THE FULL EXTENT PERMITTED BY LAW, ALL OBLIGATIONS ARE HEREBY
EXCLUDED WHETHER EXPRESS, STATUTORY OR IMPLIED UNDER LAW, COURSE OF
DEALING, CUSTOM, TRADE USAGE, ORAL OR WRITTEN STATEMENT OR OTHERWISE,
INCLUDING BUT NOT LIMITED TO ANY IMPLIED WARRANTIES OF MERCHANTABILITY
OR FITNESS FOR A PARTICULAR PURPOSE CONCERNING THE CODE.
5. NO LIABILITY.
UNDER NO CIRCUMSTANCES SHALL JPRS AND/OR ITS AFFILIATES, LICENSORS, OR
REPRESENTATIVES BE LIABLE FOR ANY DAMAGES INCLUDING BUT NOT LIMITED TO
CONSEQUENTIAL, INDIRECT, SPECIAL, PUNITIVE OR INCIDENTAL DAMAGES,
WHETHER FORESEEABLE OR UNFORESEEABLE, BASED ON YOUR CLAIMS, INCLUDING,
BUT NOT LIMITED TO, CLAIMS FOR LOSS OF DATA, GOODWILL, PROFITS, USE OF
MONEY, INTERRUPTION IN USE OR AVAILABILITY OF DATA, STOPPAGE, IMPLIED
WARRANTY, BREACH OF CONTRACT, MISREPRESENTATION, NEGLIGENCE, STRICT
LIABILITY IN TORT, OR OTHERWISE.
Data Connector 2.0 Infoblox User Guide 157

Open Source Copyright and License Statements
6. Indemnification.
You hereby agree to indemnify, defend, and hold harmless JPRS for any
liability incurred by JRPS due to your terms of warranty, support,
indemnity, or liability offered by you to any third party.
7. Termination.
7.1 This OSCL shall be automatically terminated in the events that:
(a) You fail to comply with the terms herein and fail to cure such
breach within 30 days of becoming aware of the breach;
(b) You initiate patent or copyright infringement litigation against
any party (including a cross-claim or counterclaim in a lawsuit)
alleging that the Code constitutes a direct or indirect patent or
copyright infringement, in such case, this OSCL to you shall
terminate as of the date such litigation is filed;
7.2 In the event of termination under Sections 7.1(a) or 7.1(b) above,
all end user license agreements (excluding distributors and
resellers) which have been validly granted by You or any distributor
hereunder prior to termination shall survive termination.
8. General.
This OSCL shall be governed by, and construed and enforced in
accordance with, the laws of Japan. Any litigation or arbitration
between the parties shall be conducted exclusively in Tokyo, Japan
except written consent of JPRS provides other venue.
EXHIBIT A
The original open source code of idnkit-2 is idnkit-1.0 developed and
conceived by Japan Network Information Center ("JPNIC"), a Japanese
association, Kokusai-Kougyou-Kanda Bldg 6F, 2-3-4 Uchi-Kanda,
Chiyoda-ku, Tokyo 101-0047, Japan, and JPRS modifies above original code
under following Terms and Conditions set forth by JPNIC.
JPNIC
Copyright (c) 2000-2002 Japan Network Information Center. All rights reserved.
By using this file, you agree to the terms and conditions set forth bellow.
LICENSE TERMS AND CONDITIONS
The following License Terms and Conditions apply, unless a different
license is obtained from Japan Network Information Center ("JPNIC"),
a Japanese association, Kokusai-Kougyou-Kanda Bldg 6F, 2-3-4 Uchi-Kanda,
Chiyoda-ku, Tokyo 101-0047, Japan.
158 Infoblox User Guide Data Connector 2.0

Japan Registry Services License version 1.1
1. Use, Modification and Redistribution (including distribution of any
modified or derived work) in source and/or binary forms is permitted
under this License Terms and Conditions.
2. Redistribution of source code must retain the copyright notices as they
appear in each source code file, this License Terms and Conditions.
3. Redistribution in binary form must reproduce the Copyright Notice,
this License Terms and Conditions, in the documentation and/or other
materials provided with the distribution. For the purposes of binary
distribution the "Copyright Notice" refers to the following language:
"Copyright (c) 2000-2002 Japan Network Information Center. All rights reserved."
4. The name of JPNIC may not be used to endorse or promote products
derived from this Software without specific prior written approval of
JPNIC.
5. Disclaimer/Limitation of Liability: THIS SOFTWARE IS PROVIDED BY JPNIC
"AS IS" AND ANY EXPRESS OR IMPLIED WARRANTIES, INCLUDING, BUT NOT
LIMITED TO, THE IMPLIED WARRANTIES OF MERCHANTABILITY AND FITNESS FOR A
PARTICULAR PURPOSE ARE DISCLAIMED. IN NO EVENT SHALL JPNIC BE LIABLE
FOR ANY DIRECT, INDIRECT, INCIDENTAL, SPECIAL, EXEMPLARY, OR
CONSEQUENTIAL DAMAGES (INCLUDING, BUT NOT LIMITED TO, PROCUREMENT OF
SUBSTITUTE GOODS OR SERVICES; LOSS OF USE, DATA, OR PROFITS; OR
BUSINESS INTERRUPTION) HOWEVER CAUSED AND ON ANY THEORY OF LIABILITY,
WHETHER IN CONTRACT, STRICT LIABILITY, OR TORT (INCLUDING NEGLIGENCE OR
OTHERWISE) ARISING IN ANY WAY OUT OF THE USE OF THIS SOFTWARE, EVEN IF
ADVISED OF THE POSSIBILITY OF SUCH DAMAGES.
JPRS Public License Notice
For
idnkit-2.
The contents of this file are subject to the Terms and Conditions for
the Open Source Code License (the "OSCL"). You may not use this file
except in compliance with above terms and conditions. A copy of the OSCL
is available at <http://jprs.co.jp/idn/>.
The JPRS Revised Code is idnkit-2.
The Initial Developer of the JPRS Revised Code is Japan Network
Information Center ("JPNIC"), a Japanese association,
Kokusai-Kougyou-Kanda Bldg 6F, 2-3-4 Uchi-Kanda, Chiyoda-ku, Tokyo
101-0047, Japan.
"Copyright (c) 2000-2002 Japan Network Information Center. All rights reserved."
"Copyright (c) 2010-2012 Japan Registry Services Co., Ltd. All rights reserved."
Data Connector 2.0 Infoblox User Guide 159

Open Source Copyright and License Statements
Contributor(s): ______________________________________.
If you wish to allow use of your version of this file only under the
above License(s) and not to allow others to use your version of this
file, please indicate your decision by deleting the relevant provisions
above and replacing them with the notice and other provisions required
by the above License(s). If you do not delete the relevant provisions,
a recipient may use your version of this file under either the above
License(s).
GNU Lesser General Public License
Version 3, 29 June 2007
Copyright © 2007 Free Software Foundation, Inc. <http://fsf.org/>
Everyone is permitted to copy and distribute verbatim copies of this license document, but changing it is not allowed.
This version of the GNU Lesser General Public License incorporates the terms and conditions of version 3 of the GNU General Public License, supplemented by the additional permissions listed below.
0. Additional Definitions.
As used herein, “this License” refers to version 3 of the GNU Lesser General Public License, and the “GNU GPL” refers to version 3 of the GNU General Public License.
“The Library” refers to a covered work governed by this License, other than an Application or a Combined Work as defined below.
An “Application” is any work that makes use of an interface provided by the Library, but which is not otherwise based on the Library. Defining a subclass of a class defined by the Library is deemed a mode of using an interface provided by the Library.
A “Combined Work” is a work produced by combining or linking an Application with the Library. The particular version of the Library with which the Combined Work was made is also called the “Linked Version”.
The “Minimal Corresponding Source” for a Combined Work means the Corresponding Source for the Combined Work, excluding any source code for portions of the Combined Work that, considered in isolation, are based on the Application, and not on the Linked Version.
The “Corresponding Application Code” for a Combined Work means the object code and/or source code for the Application, including any data and utility programs needed for reproducing the Combined Work from the Application, but excluding the System Libraries of the Combined Work.
160 Infoblox User Guide Data Connector 2.0

GNU Lesser General Public License
1. Exception to Section 3 of the GNU GPL.
You may convey a covered work under sections 3 and 4 of this License without being bound by section 3 of the GNU GPL.
2. Conveying Modified Versions.
If you modify a copy of the Library, and, in your modifications, a facility refers to a function or data to be supplied by an Application that uses the facility (other than as an argument passed when the facility is invoked), then you may convey a copy of the modified version:
a) under this License, provided that you make a good faith effort to ensure that, in the event an Application does not supply the function or data, the facility still operates, and performs whatever part of its purpose remains meaningful, or
b) under the GNU GPL, with none of the additional permissions of this License applicable to that copy.
3. Object Code Incorporating Material from Library Header Files.
The object code form of an Application may incorporate material from a header file that is part of the Library. You may convey such object code under terms of your choice, provided that, if the incorporated material is not limited to numerical parameters, data structure layouts and accessors, or small macros, inline functions and templates (ten or fewer lines in length), you do both of the following:
a) Give prominent notice with each copy of the object code that the Library is used in it and that the Library and its use are covered by this License.
b) Accompany the object code with a copy of the GNU GPL and this license document.
4. Combined Works.
You may convey a Combined Work under terms of your choice that, taken together, effectively do not restrict modification of the portions of the Library contained in the Combined Work and reverse engineering for debugging such modifications, if you also do each of the following:
a) Give prominent notice with each copy of the Combined Work that the Library is used in it and that the Library and its use are covered by this License.
b) Accompany the Combined Work with a copy of the GNU GPL and this license document.
c) For a Combined Work that displays copyright notices during execution, include the copyright notice for the Library among these notices, as well as a reference directing the user to the copies of the GNU GPL and this license document.
d) Do one of the following:
0) Convey the Minimal Corresponding Source under the terms of this License, and the Corresponding Application Code in a form suitable for, and under terms that permit, the user to recombine or relink the Application with a modified version of the Linked Version to produce a modified Combined Work, in the manner specified by section 6 of the GNU GPL for conveying Corresponding Source.
1) Use a suitable shared library mechanism for linking with the Library. A suitable mechanism is one that (a) uses at run time a copy of the Library already present on the user's computer system, and (b) will operate properly with a modified version of the Library that is interface-compatible with the Linked Version.
Data Connector 2.0 Infoblox User Guide 161

Open Source Copyright and License Statements
e) Provide Installation Information, but only if you would otherwise be required to provide such information under section 6 of the GNU GPL, and only to the extent that such information is necessary to install and execute a modified version of the Combined Work produced by recombining or relinking the Application with a modified version of the Linked Version. (If you use option 4d0, the Installation Information must accompany the Minimal Corresponding Source and Corresponding Application Code. If you use option 4d1, you must provide the Installation Information in the manner specified by section 6 of the GNU GPL for conveying Corresponding Source.)
5. Combined Libraries.
You may place library facilities that are a work based on the Library side by side in a single library together with other library facilities that are not Applications and are not covered by this License, and convey such a combined library under terms of your choice, if you do both of the following:
a) Accompany the combined library with a copy of the same work based on the Library, uncombined with any other library facilities, conveyed under the terms of this License.
b) Give prominent notice with the combined library that part of it is a work based on the Library, and explaining where to find the accompanying uncombined form of the same work.
6. Revised Versions of the GNU Lesser General Public License.
The Free Software Foundation may publish revised and/or new versions of the GNU Lesser General Public License from time to time. Such new versions will be similar in spirit to the present version, but may differ in detail to address new problems or concerns.
Each version is given a distinguishing version number. If the Library as you received it specifies that a certain numbered version of the GNU Lesser General Public License “or any later version” applies to it, you have the option of following the terms and conditions either of that published version or of any later version published by the Free Software Foundation. If the Library as you received it does not specify a version number of the GNU Lesser General Public License, you may choose any version of the GNU Lesser General Public License ever published by the Free Software Foundation.
If the Library as you received it specifies that a proxy can decide whether future versions of the GNU Lesser General Public License shall apply, that proxy's public statement of acceptance of any version is permanent authorization for you to choose that version for the Library.
MIT License
Permission is hereby granted, free of charge, to any person obtaining a copy of this software and associated documentation files (the "Software"), to deal in the Software without restriction, including without limitation the rights to use, copy, modify, merge, publish, distribute, sublicense, and/or sell copies of the Software, and to permit persons to whom the Software is furnished to do so, subject to the following conditions:
The above copyright notice and this permission notice shall be included in all copies or substantial portions of the Software.
THE SOFTWARE IS PROVIDED "AS IS", WITHOUT WARRANTY OF ANY KIND, EXPRESS OR IMPLIED, INCLUDING BUT NOT LIMITED TO THE WARRANTIES OF MERCHANTABILITY, FITNESS FOR A PARTICULAR PURPOSE AND NONINFRINGEMENT. IN NO EVENT SHALL THE AUTHORS OR COPYRIGHT HOLDERS BE LIABLE
162 Infoblox User Guide Data Connector 2.0
Mozilla Public License 2.0 (MPL-2.0)
FOR ANY CLAIM, DAMAGES OR OTHER LIABILITY, WHETHER IN AN ACTION OF CONTRACT, TORT OR OTHERWISE, ARISING FROM, OUT OF OR IN CONNECTION WITH THE SOFTWARE OR THE USE OR OTHER DEALINGS IN THE SOFTWARE.
Mozilla Public License 2.0 (MPL-2.0)
Mozilla Public License, version 2.0
1. Definitions
1.1. “Contributor”
means each individual or legal entity that creates, contributes to the creation of, or owns Covered Software.
1.2. “Contributor Version”
means the combination of the Contributions of others (if any) used by a Contributor and that particular Contributor’s Contribution.
1.3. “Contribution”
means Covered Software of a particular Contributor.
1.4. “Covered Software”
means Source Code Form to which the initial Contributor has attached the notice in Exhibit A, the Executable Form of such Source Code Form, and Modifications of such Source Code Form, in each case including portions thereof.
1.5. “Incompatible With Secondary Licenses”
means
that the initial Contributor has attached the notice described in Exhibit B to the Covered Software; or
that the Covered Software was made available under the terms of version 1.1 or earlier of the License, but not also under the terms of a Secondary License.
1.6. “Executable Form”
means any form of the work other than Source Code Form.
1.7. “Larger Work”
means a work that combines Covered Software with other material, in a separate file or files, that is not Covered Software.
1.8. “License”
means this document.
1.9. “Licensable”
means having the right to grant, to the maximum extent possible, whether at the time of the initial grant or subsequently, any and all of the rights conveyed by this License.
Data Connector 2.0 Infoblox User Guide 163

Open Source Copyright and License Statements
1.10. “Modifications”
means any of the following:
any file in Source Code Form that results from an addition to, deletion from, or modification of the contents of Covered Software; or
any new file in Source Code Form that contains any Covered Software.
1.11. “Patent Claims” of a Contributor
means any patent claim(s), including without limitation, method, process, and apparatus claims, in any patent Licensable by such Contributor that would be infringed, but for the grant of the License, by the making, using, selling, offering for sale, having made, import, or transfer of either its Contributions or its Contributor Version.
1.12. “Secondary License”
means either the GNU General Public License, Version 2.0, the GNU Lesser General Public License, Version 2.1, the GNU Affero General Public License, Version 3.0, or any later versions of those licenses.
1.13. “Source Code Form”
means the form of the work preferred for making modifications.
1.14. “You” (or “Your”)
means an individual or a legal entity exercising rights under this License. For legal entities, “You” includes any entity that controls, is controlled by, or is under common control with You. For purposes of this definition, “control” means (a) the power, direct or indirect, to cause the direction or management of such entity, whether by contract or otherwise, or (b) ownership of more than fifty percent (50%) of the outstanding shares or beneficial ownership of such entity.
2. License Grants and Conditions
2.1. Grants
Each Contributor hereby grants You a world-wide, royalty-free, non-exclusive license:
under intellectual property rights (other than patent or trademark) Licensable by such Contributor to use, reproduce, make available, modify, display, perform, distribute, and otherwise exploit its Contributions, either on an unmodified basis, with Modifications, or as part of a Larger Work; and
under Patent Claims of such Contributor to make, use, sell, offer for sale, have made, import, and otherwise transfer either its Contributions or its Contributor Version.
2.2. Effective Date
The licenses granted in Section 2.1 with respect to any Contribution become effective for each Contribution on the date the Contributor first distributes such Contribution.
2.3. Limitations on Grant Scope
164 Infoblox User Guide Data Connector 2.0
Mozilla Public License 2.0 (MPL-2.0)
The licenses granted in this Section 2 are the only rights granted under this License. No additional rights or licenses will be implied from the distribution or licensing of Covered Software under this License. Notwithstanding Section 2.1(b) above, no patent license is granted by a Contributor:
for any code that a Contributor has removed from Covered Software; or
for infringements caused by: (i) Your and any other third party’s modifications of Covered Software, or (ii) the combination of its Contributions with other software (except as part of its Contributor Version); or
under Patent Claims infringed by Covered Software in the absence of its Contributions.
This License does not grant any rights in the trademarks, service marks, or logos of any Contributor (except as may be necessary to comply with the notice requirements in Section 3.4).
2.4. Subsequent Licenses
No Contributor makes additional grants as a result of Your choice to distribute the Covered Software under a subsequent version of this License (see Section 10.2) or under the terms of a Secondary License (if permitted under the terms of Section 3.3).
2.5. Representation
Each Contributor represents that the Contributor believes its Contributions are its original creation(s) or it has sufficient rights to grant the rights to its Contributions conveyed by this License.
2.6. Fair Use
This License is not intended to limit any rights You have under applicable copyright doctrines of fair use, fair dealing, or other equivalents.
2.7. Conditions
Sections 3.1, 3.2, 3.3, and 3.4 are conditions of the licenses granted in Section 2.1.
3. Responsibilities
3.1. Distribution of Source Form
All distribution of Covered Software in Source Code Form, including any Modifications that You create or to which You contribute, must be under the terms of this License. You must inform recipients that the Source Code Form of the Covered Software is governed by the terms of this License, and how they can obtain a copy of this License. You may not attempt to alter or restrict the recipients’ rights in the Source Code Form.
3.2. Distribution of Executable Form
If You distribute Covered Software in Executable Form then:
such Covered Software must also be made available in Source Code Form, as described in Section 3.1, and You must inform recipients of the Executable Form how they can obtain a copy of such Source Code Form by reasonable means in a timely manner, at a charge no more than the cost of distribution to the recipient; and
Data Connector 2.0 Infoblox User Guide 165

Open Source Copyright and License Statements
You may distribute such Executable Form under the terms of this License, or sublicense it under different terms, provided that the license for the Executable Form does not attempt to limit or alter the recipients’ rights in the Source Code Form under this License.
3.3. Distribution of a Larger Work
You may create and distribute a Larger Work under terms of Your choice, provided that You also comply with the requirements of this License for the Covered Software. If the Larger Work is a combination of Covered Software with a work governed by one or more Secondary Licenses, and the Covered Software is not Incompatible With Secondary Licenses, this License permits You to additionally distribute such Covered Software under the terms of such Secondary License(s), so that the recipient of the Larger Work may, at their option, further distribute the Covered Software under the terms of either this License or such Secondary License(s).
3.4. Notices
You may not remove or alter the substance of any license notices (including copyright notices, patent notices, disclaimers of warranty, or limitations of liability) contained within the Source Code Form of the Covered Software, except that You may alter any license notices to the extent required to remedy known factual inaccuracies.
3.5. Application of Additional Terms
You may choose to offer, and to charge a fee for, warranty, support, indemnity or liability obligations to one or more recipients of Covered Software. However, You may do so only on Your own behalf, and not on behalf of any Contributor. You must make it absolutely clear that any such warranty, support, indemnity, or liability obligation is offered by You alone, and You hereby agree to indemnify every Contributor for any liability incurred by such Contributor as a result of warranty, support, indemnity or liability terms You offer. You may include additional disclaimers of warranty and limitations of liability specific to any jurisdiction.
4. Inability to Comply Due to Statute or Regulation
If it is impossible for You to comply with any of the terms of this License with respect to some or all of the Covered Software due to statute, judicial order, or regulation then You must: (a) comply with the terms of this License to the maximum extent possible; and (b) describe the limitations and the code they affect. Such description must be placed in a text file included with all distributions of the Covered Software under this License. Except to the extent prohibited by statute or regulation, such description must be sufficiently detailed for a recipient of ordinary skill to be able to understand it.
5. Termination
5.1. The rights granted under this License will terminate automatically if You fail to comply with any of its terms. However, if You become compliant, then the rights granted under this License from a particular Contributor are reinstated (a) provisionally, unless and until such Contributor explicitly and finally terminates Your grants, and (b) on an ongoing basis, if such Contributor fails to notify You of the non-compliance by some reasonable means prior to 60 days after You have come back into compliance. Moreover, Your grants from a particular Contributor are reinstated on an ongoing basis if such Contributor notifies You of the non-compliance by some reasonable means, this is the first time You have received notice of non-compliance with this License from such Contributor, and You become compliant prior to 30 days after Your receipt of the notice.
166 Infoblox User Guide Data Connector 2.0

Mozilla Public License 2.0 (MPL-2.0)
5.2. If You initiate litigation against any entity by asserting a patent infringement claim (excluding declaratory judgment actions, counter-claims, and cross-claims) alleging that a Contributor Version directly or indirectly infringes any patent, then the rights granted to You by any and all Contributors for the Covered Software under Section 2.1 of this License shall terminate.
5.3. In the event of termination under Sections 5.1 or 5.2 above, all end user license agreements (excluding distributors and resellers) which have been validly granted by You or Your distributors under this License prior to termination shall survive termination.
6. Disclaimer of Warranty
Covered Software is provided under this License on an “as is” basis, without warranty of any kind, either expressed, implied, or statutory, including, without limitation, warranties that the Covered Software is free of defects, merchantable, fit for a particular purpose or non-infringing. The entire risk as to the quality and performance of the Covered Software is with You. Should any Covered Software prove defective in any respect, You (not any Contributor) assume the cost of any necessary servicing, repair, or correction. This disclaimer of warranty constitutes an essential part of this License. No use of any Covered Software is authorized under this License except under this disclaimer.
7. Limitation of Liability
Under no circumstances and under no legal theory, whether tort (including negligence), contract, or otherwise, shall any Contributor, or anyone who distributes Covered Software as permitted above, be liable to You for any direct, indirect, special, incidental, or consequential damages of any character including, without limitation, damages for lost profits, loss of goodwill, work stoppage, computer failure or malfunction, or any and all other commercial damages or losses, even if such party shall have been informed of the possibility of such damages. This limitation of liability shall not apply to liability for death or personal injury resulting from such party’s negligence to the extent applicable law prohibits such limitation. Some jurisdictions do not allow the exclusion or limitation of incidental or consequential damages, so this exclusion and limitation may not apply to You.
8. Litigation
Any litigation relating to this License may be brought only in the courts of a jurisdiction where the defendant maintains its principal place of business and such litigation shall be governed by laws of that jurisdiction, without reference to its conflict-of-law provisions. Nothing in this Section shall prevent a party’s ability to bring cross-claims or counter-claims.
9. Miscellaneous
This License represents the complete agreement concerning the subject matter hereof. If any provision of this License is held to be unenforceable, such provision shall be reformed only to the extent necessary to make it enforceable. Any law or regulation which provides that the language of a contract shall be construed against the drafter shall not be used to construe this License against a Contributor.
10. Versions of the License
10.1. New Versions
Mozilla Foundation is the license steward. Except as provided in Section 10.3, no one other than the license steward has the right to modify or publish new versions of this License. Each version will be given a distinguishing version number.
Data Connector 2.0 Infoblox User Guide 167

Open Source Copyright and License Statements
10.2. Effect of New Versions
You may distribute the Covered Software under the terms of the version of the License under which You originally received the Covered Software, or under the terms of any subsequent version published by the license steward.
10.3. Modified Versions
If you create software not governed by this License, and you want to create a new license for such software, you may create and use a modified version of this License if you rename the license and remove any references to the name of the license steward (except to note that such modified license differs from this License).
10.4. Distributing Source Code Form that is Incompatible With Secondary Licenses
If You choose to distribute Source Code Form that is Incompatible With Secondary Licenses under the terms of this version of the License, the notice described in Exhibit B of this License must be attached.
Exhibit A - Source Code Form License Notice
This Source Code Form is subject to the terms of the Mozilla Public License, v. 2.0. If a copy of the MPL was not distributed with this file, You can obtain one at http://mozilla.org/MPL/2.0/.
If it is not possible or desirable to put the notice in a particular file, then You may include the notice in a location (such as a LICENSE file in a relevant directory) where a recipient would be likely to look for such a notice.
You may add additional accurate notices of copyright ownership.
Exhibit B - “Incompatible With Secondary Licenses” Notice
This Source Code Form is “Incompatible With Secondary Licenses”, as defined by the Mozilla Public License, v. 2.0.
Python License
Python License, Version 2 (Python-2.0)
PYTHON SOFTWARE FOUNDATION LICENSE VERSION 2
--------------------------------------------
1. This LICENSE AGREEMENT is between the Python Software Foundation
("PSF"), and the Individual or Organization ("Licensee") accessing and
otherwise using this software ("Python") in source or binary form and
its associated documentation.
2. Subject to the terms and conditions of this License Agreement, PSF
hereby grants Licensee a nonexclusive, royalty-free, world-wide
license to reproduce, analyze, test, perform and/or display publicly,
prepare derivative works, distribute, and otherwise use Python
alone or in any derivative version, provided, however, that PSF's
168 Infoblox User Guide Data Connector 2.0

Python License
License Agreement and PSF's notice of copyright, i.e., "Copyright (c)
2001, 2002, 2003, 2004, 2005, 2006 Python Software Foundation; All Rights
Reserved" are retained in Python alone or in any derivative version
prepared by Licensee.
3. In the event Licensee prepares a derivative work that is based on
or incorporates Python or any part thereof, and wants to make
the derivative work available to others as provided herein, then
Licensee hereby agrees to include in any such work a brief summary of
the changes made to Python.
4. PSF is making Python available to Licensee on an "AS IS"
basis. PSF MAKES NO REPRESENTATIONS OR WARRANTIES, EXPRESS OR
IMPLIED. BY WAY OF EXAMPLE, BUT NOT LIMITATION, PSF MAKES NO AND
DISCLAIMS ANY REPRESENTATION OR WARRANTY OF MERCHANTABILITY OR FITNESS
FOR ANY PARTICULAR PURPOSE OR THAT THE USE OF PYTHON WILL NOT
INFRINGE ANY THIRD PARTY RIGHTS.
5. PSF SHALL NOT BE LIABLE TO LICENSEE OR ANY OTHER USERS OF PYTHON
FOR ANY INCIDENTAL, SPECIAL, OR CONSEQUENTIAL DAMAGES OR LOSS AS
A RESULT OF MODIFYING, DISTRIBUTING, OR OTHERWISE USING PYTHON,
OR ANY DERIVATIVE THEREOF, EVEN IF ADVISED OF THE POSSIBILITY THEREOF.
6. This License Agreement will automatically terminate upon a material
breach of its terms and conditions.
7. Nothing in this License Agreement shall be deemed to create any
relationship of agency, partnership, or joint venture between PSF and
Licensee. This License Agreement does not grant permission to use PSF
trademarks or trade name in a trademark sense to endorse or promote
products or services of Licensee, or any third party.
8. By copying, installing or otherwise using Python, Licensee
agrees to be bound by the terms and conditions of this License
Agreement.
BEOPEN.COM LICENSE AGREEMENT FOR PYTHON 2.0
-------------------------------------------
BEOPEN PYTHON OPEN SOURCE LICENSE AGREEMENT VERSION 1
1. This LICENSE AGREEMENT is between BeOpen.com ("BeOpen"), having an
office at 160 Saratoga Avenue, Santa Clara, CA 95051, and the
Individual or Organization ("Licensee") accessing and otherwise using
this software in source or binary form and its associated
Data Connector 2.0 Infoblox User Guide 169
Open Source Copyright and License Statements
documentation ("the Software").
2. Subject to the terms and conditions of this BeOpen Python License
Agreement, BeOpen hereby grants Licensee a non-exclusive,
royalty-free, world-wide license to reproduce, analyze, test, perform
and/or display publicly, prepare derivative works, distribute, and
otherwise use the Software alone or in any derivative version,
provided, however, that the BeOpen Python License is retained in the
Software, alone or in any derivative version prepared by Licensee.
3. BeOpen is making the Software available to Licensee on an "AS IS"
basis. BEOPEN MAKES NO REPRESENTATIONS OR WARRANTIES, EXPRESS OR
IMPLIED. BY WAY OF EXAMPLE, BUT NOT LIMITATION, BEOPEN MAKES NO AND
DISCLAIMS ANY REPRESENTATION OR WARRANTY OF MERCHANTABILITY OR FITNESS
FOR ANY PARTICULAR PURPOSE OR THAT THE USE OF THE SOFTWARE WILL NOT
INFRINGE ANY THIRD PARTY RIGHTS.
4. BEOPEN SHALL NOT BE LIABLE TO LICENSEE OR ANY OTHER USERS OF THE
SOFTWARE FOR ANY INCIDENTAL, SPECIAL, OR CONSEQUENTIAL DAMAGES OR LOSS
AS A RESULT OF USING, MODIFYING OR DISTRIBUTING THE SOFTWARE, OR ANY
DERIVATIVE THEREOF, EVEN IF ADVISED OF THE POSSIBILITY THEREOF.
5. This License Agreement will automatically terminate upon a material
breach of its terms and conditions.
6. This License Agreement shall be governed by and interpreted in all
respects by the law of the State of California, excluding conflict of
law provisions. Nothing in this License Agreement shall be deemed to
create any relationship of agency, partnership, or joint venture
between BeOpen and Licensee. This License Agreement does not grant
permission to use BeOpen trademarks or trade names in a trademark
sense to endorse or promote products or services of Licensee, or any
third party. As an exception, the "BeOpen Python" logos available at
http://www.pythonlabs.com/logos.html may be used according to the
permissions granted on that web page.
7. By copying, installing or otherwise using the software, Licensee
agrees to be bound by the terms and conditions of this License
Agreement.
CNRI OPEN SOURCE LICENSE AGREEMENT (for Python 1.6b1)
--------------------------------------------------
IMPORTANT: PLEASE READ THE FOLLOWING AGREEMENT CAREFULLY.
170 Infoblox User Guide Data Connector 2.0

Python License
BY CLICKING ON "ACCEPT" WHERE INDICATED BELOW, OR BY COPYING,
INSTALLING OR OTHERWISE USING PYTHON 1.6, beta 1 SOFTWARE, YOU ARE
DEEMED TO HAVE AGREED TO THE TERMS AND CONDITIONS OF THIS LICENSE
AGREEMENT.
1. This LICENSE AGREEMENT is between the Corporation for National
Research Initiatives, having an office at 1895 Preston White Drive,
Reston, VA 20191 ("CNRI"), and the Individual or Organization
("Licensee") accessing and otherwise using Python 1.6, beta 1
software in source or binary form and its associated documentation,
as released at the www.python.org Internet site on August 4, 2000
("Python 1.6b1").
2. Subject to the terms and conditions of this License Agreement, CNRI
hereby grants Licensee a non-exclusive, royalty-free, world-wide
license to reproduce, analyze, test, perform and/or display
publicly, prepare derivative works, distribute, and otherwise use
Python 1.6b1 alone or in any derivative version, provided, however,
that CNRIs License Agreement is retained in Python 1.6b1, alone or
in any derivative version prepared by Licensee.
Alternately, in lieu of CNRIs License Agreement, Licensee may
substitute the following text (omitting the quotes): "Python 1.6,
beta 1, is made available subject to the terms and conditions in
CNRIs License Agreement. This Agreement may be located on the
Internet using the following unique, persistent identifier (known
as a handle): 1895.22/1011. This Agreement may also be obtained
from a proxy server on the Internet using the
URL:http://hdl.handle.net/1895.22/1011".
3. In the event Licensee prepares a derivative work that is based on
or incorporates Python 1.6b1 or any part thereof, and wants to make
the derivative work available to the public as provided herein,
then Licensee hereby agrees to indicate in any such work the nature
of the modifications made to Python 1.6b1.
4. CNRI is making Python 1.6b1 available to Licensee on an "AS IS"
basis. CNRI MAKES NO REPRESENTATIONS OR WARRANTIES, EXPRESS OR
IMPLIED. BY WAY OF EXAMPLE, BUT NOT LIMITATION, CNRI MAKES NO AND
DISCLAIMS ANY REPRESENTATION OR WARRANTY OF MERCHANTABILITY OR
FITNESS FOR ANY PARTICULAR PURPOSE OR THAT THE USE OF PYTHON 1.6b1
WILL NOT INFRINGE ANY THIRD PARTY RIGHTS.
5. CNRI SHALL NOT BE LIABLE TO LICENSEE OR ANY OTHER USERS OF THE
SOFTWARE FOR ANY INCIDENTAL, SPECIAL, OR CONSEQUENTIAL DAMAGES OR
Data Connector 2.0 Infoblox User Guide 171

Open Source Copyright and License Statements
LOSS AS A RESULT OF USING, MODIFYING OR DISTRIBUTING PYTHON 1.6b1,
OR ANY DERIVATIVE THEREOF, EVEN IF ADVISED OF THE POSSIBILITY
THEREOF.
6. This License Agreement will automatically terminate upon a material
breach of its terms and conditions.
7. This License Agreement shall be governed by and interpreted in all
respects by the law of the State of Virginia, excluding conflict of
law provisions. Nothing in this License Agreement shall be deemed
to create any relationship of agency, partnership, or joint venture
between CNRI and Licensee. This License Agreement does not grant
permission to use CNRI trademarks or trade name in a trademark
sense to endorse or promote products or services of Licensee, or
any third party.
8. By clicking on the "ACCEPT" button where indicated, or by copying,
installing or otherwise using Python 1.6b1, Licensee agrees to be
bound by the terms and conditions of this License Agreement.
ACCEPT
CWI LICENSE AGREEMENT FOR PYTHON 0.9.0 THROUGH 1.2
--------------------------------------------------
Copyright (c) 1991 - 1995, Stichting Mathematisch Centrum Amsterdam,
The Netherlands. All rights reserved.
Permission to use, copy, modify, and distribute this software and its
documentation for any purpose and without fee is hereby granted,
provided that the above copyright notice appear in all copies and that
both that copyright notice and this permission notice appear in
supporting documentation, and that the name of Stichting Mathematisch
Centrum or CWI not be used in advertising or publicity pertaining to
distribution of the software without specific, written prior
permission.
STICHTING MATHEMATISCH CENTRUM DISCLAIMS ALL WARRANTIES WITH REGARD TO
THIS SOFTWARE, INCLUDING ALL IMPLIED WARRANTIES OF MERCHANTABILITY AND
FITNESS, IN NO EVENT SHALL STICHTING MATHEMATISCH CENTRUM BE LIABLE
FOR ANY SPECIAL, INDIRECT OR CONSEQUENTIAL DAMAGES OR ANY DAMAGES
WHATSOEVER RESULTING FROM LOSS OF USE, DATA OR PROFITS, WHETHER IN AN
ACTION OF CONTRACT, NEGLIGENCE OR OTHER TORTIOUS ACTION, ARISING OUT
OF OR IN CONNECTION WITH THE USE OR PERFORMANCE OF THIS SOFTWARE.
172 Infoblox User Guide Data Connector 2.0

The Zope Public License Ver.2.0 (ZPL-2.0)
The Zope Public License Ver.2.0 (ZPL-2.0)
Zope Public License (ZPL) Version 2.0
-----------------------------------------------
This software is Copyright (c) Zope Corporation (tm) and
Contributors. All rights reserved.
This license has been certified as open source. It has also
been designated as GPL compatible by the Free Software
Foundation (FSF).
Redistribution and use in source and binary forms, with or
without modification, are permitted provided that the
following conditions are met:
1. Redistributions in source code must retain the above
copyright notice, this list of conditions, and the following
disclaimer.
2. Redistributions in binary form must reproduce the above
copyright notice, this list of conditions, and the following
disclaimer in the documentation and/or other materials
provided with the distribution.
3. The name Zope Corporation (tm) must not be used to
endorse or promote products derived from this software
without prior written permission from Zope Corporation.
4. The right to distribute this software or to use it for
any purpose does not give you the right to use Servicemarks
(sm) or Trademarks (tm) of Zope Corporation. Use of them is
covered in a separate agreement (see
http://www.zope.com/Marks).
5. If any files are modified, you must cause the modified
files to carry prominent notices stating that you changed
the files and the date of any change.
Disclaimer
THIS SOFTWARE IS PROVIDED BY ZOPE CORPORATION ``AS IS''
AND ANY EXPRESSED OR IMPLIED WARRANTIES, INCLUDING, BUT
NOT LIMITED TO, THE IMPLIED WARRANTIES OF MERCHANTABILITY
Data Connector 2.0 Infoblox User Guide 173

Open Source Copyright and License Statements
AND FITNESS FOR A PARTICULAR PURPOSE ARE DISCLAIMED. IN
NO EVENT SHALL ZOPE CORPORATION OR ITS CONTRIBUTORS BE
LIABLE FOR ANY DIRECT, INDIRECT, INCIDENTAL, SPECIAL,
EXEMPLARY, OR CONSEQUENTIAL DAMAGES (INCLUDING, BUT NOT
LIMITED TO, PROCUREMENT OF SUBSTITUTE GOODS OR SERVICES;
LOSS OF USE, DATA, OR PROFITS; OR BUSINESS INTERRUPTION)
HOWEVER CAUSED AND ON ANY THEORY OF LIABILITY, WHETHER IN
CONTRACT, STRICT LIABILITY, OR TORT (INCLUDING NEGLIGENCE
OR OTHERWISE) ARISING IN ANY WAY OUT OF THE USE OF THIS
SOFTWARE, EVEN IF ADVISED OF THE POSSIBILITY OF SUCH
DAMAGE.
This software consists of contributions made by Zope
Corporation and many individuals on behalf of Zope
Corporation. Specific attributions are listed in the
accompanying credits file.
SGI Free Software License
Copyright (C) [dates of first publication] Silicon Graphics, Inc. All RightsReserved.Permission is hereby granted, free of charge,
to any person obtaining a copy ofthis software and associated documentation files (the "Software"), to deal inthe Software without
restriction, including without limitation the rights touse, copy, modify, merge, publish, distribute, sublicense, and/or sell
copiesof the Software, and to permit persons to whom the Software is furnished to doso, subject to the following conditions:
The above copyright notice including the dates of first publication and eitherthis permission notice or a reference to
http://oss.sgi.com/projects/FreeB/shall be included in all copies or substantial portions of the Software.
THE SOFTWARE IS PROVIDED "AS IS", WITHOUT WARRANTY OF ANY KIND,EXPRESS OR IMPLIED, INCLUDING BUT NOT LIMITED TO THE
WARRANTIESOF MERCHANTABILITY, FITNESS FOR A PARTICULAR PURPOSE ANDNONINFRINGEMENT. IN NO EVENT SHALL SILICON GRAPHICS, INC.
BELIABLE FOR ANY CLAIM, DAMAGES OR OTHER LIABILITY, WHETHER IN ANACTION OF CONTRACT, TORT OR OTHERWISE, ARISING FROM, OUT OF OR IN
CONNECTION WITH THE SOFTWARE OR THE USE OR OTHER DEALINGSIN THE SOFTWARE.Except as contained in this notice, the name of
Silicon Graphics, Inc. shallnot be used in advertising or otherwise to promote the sale, use or otherdealings in this
Software without prior written authorization from SiliconGraphics, Inc.
Mesa license
Copyright (C) 1999-2007 Brian Paul All Rights Reserved.
174 Infoblox User Guide Data Connector 2.0
Mesa license
Permission is hereby granted, free of charge, to any person obtaining a
copy of this software and associated documentation files (the "Software"),
to deal in the Software without restriction, including without limitation
the rights to use, copy, modify, merge, publish, distribute, sublicense,
and/or sell copies of the Software, and to permit persons to whom the
Software is furnished to do so, subject to the following conditions:
The above copyright notice and this permission notice shall be included
in all copies or substantial portions of the Software.
THE SOFTWARE IS PROVIDED "AS IS", WITHOUT WARRANTY OF ANY KIND, EXPRESS
OR IMPLIED, INCLUDING BUT NOT LIMITED TO THE WARRANTIES OF MERCHANTABILITY,
FITNESS FOR A PARTICULAR PURPOSE AND NONINFRINGEMENT. IN NO EVENT SHALL
THE AUTHORS OR COPYRIGHT HOLDERS BE LIABLE FOR ANY CLAIM, DAMAGES OR OTHER
LIABILITY, WHETHER IN AN ACTION OF CONTRACT, TORT OR OTHERWISE, ARISING FROM,
OUT OF OR IN CONNECTION WITH THE SOFTWARE OR THE USE OR OTHER DEALINGS IN THE
SOFTWARE.
Data Connector 2.0 Infoblox User Guide 175

Open Source Copyright and License Statements
176 Infoblox User Guide Data Connector 2.0