industrial automation tech note 53 crimson® cloud connectors: …® cloud connectors... · tech...
TRANSCRIPT

Crimson® Cloud Connectors: Sparkplug
1
Industrial Automation Tech Note 53 Crimson® Cloud Connectors: Sparkplug
Abstract: This document explains how to get Crimson 3.1 to talk to Inductive Automation’s Ignition SCADA using the Sparkplug MQTT Connector. It assumes a basic knowledge of Crimson and its operation. For more details on the Crimson Cloud Connectors, please consult the Crimson User Manual.
Products: CR3000 HMIs / Graphite® HMI / Graphite Controllers
Use Case: Sparkplug Connector Transferring tag data to Inductive Automation’s Ignition SCADA using Sparkplug.
Required Software: Crimson 3.1
Required Firmware: Build 3106.000 or higher
2 Crimson® Cloud Connectors: Sparkplug
Crimson® Cloud Connectors: Sparkplug TNIA53 REV A
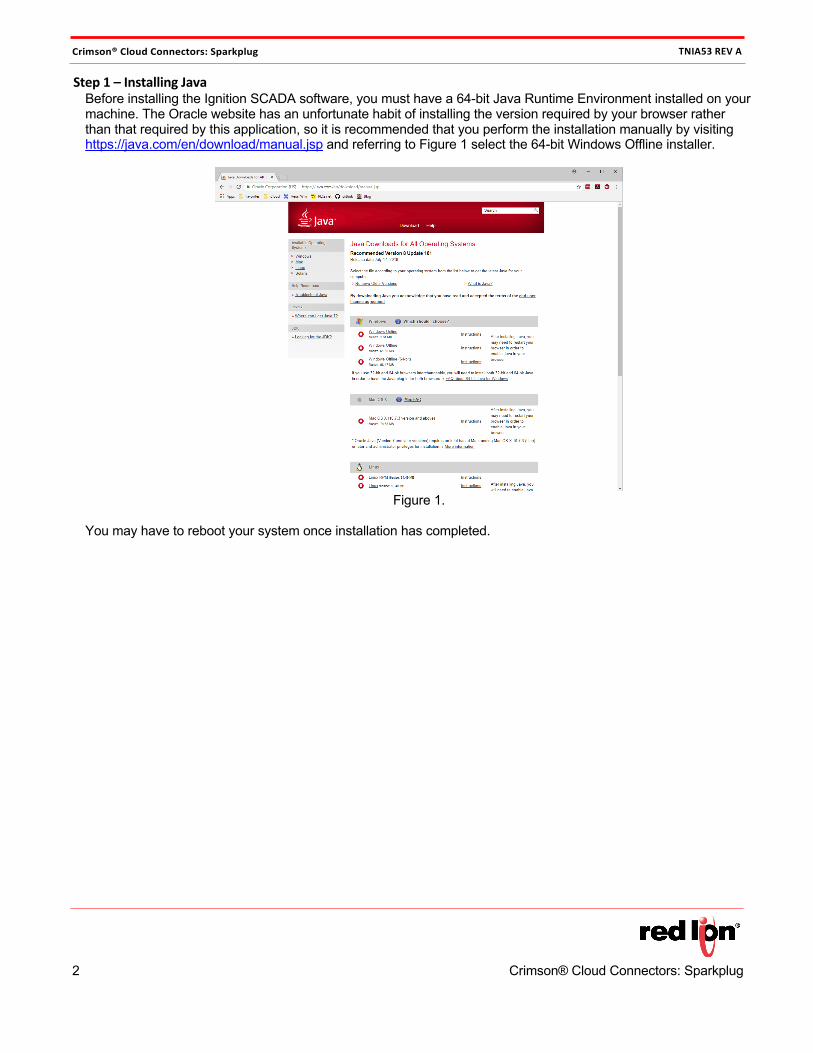
Step 1 – Installing Java Before installing the Ignition SCADA software, you must have a 64-bit Java Runtime Environment installed on your machine. The Oracle website has an unfortunate habit of installing the version required by your browser rather than that required by this application, so it is recommended that you perform the installation manually by visiting https://java.com/en/download/manual.jsp and referring to Figure 1 select the 64-bit Windows Offline installer.
Figure 1.
You may have to reboot your system once installation has completed.
Crimson® Cloud Connectors: Sparkplug TNIA53 REV A
Crimson® Cloud Connectors: Sparkplug 3
Step 2 – Installing Ignition
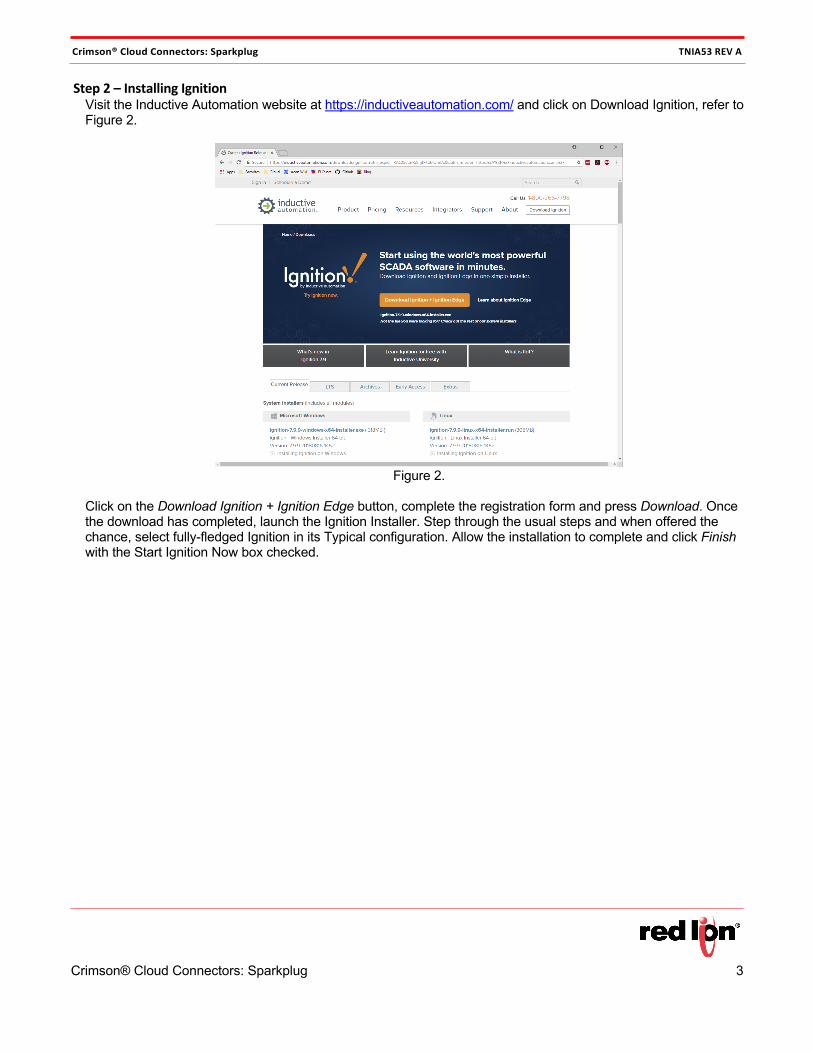
Visit the Inductive Automation website at https://inductiveautomation.com/ and click on Download Ignition, refer to Figure 2.
Figure 2.
Click on the Download Ignition + Ignition Edge button, complete the registration form and press Download. Once the download has completed, launch the Ignition Installer. Step through the usual steps and when offered the chance, select fully-fledged Ignition in its Typical configuration. Allow the installation to complete and click Finish with the Start Ignition Now box checked.

4 Crimson® Cloud Connectors: Sparkplug
Crimson® Cloud Connectors: Sparkplug TNIA53 REV A
Your default web browser should show something similar to Figure 3.
Figure 3.
Make a note of this address or add it to your Bookmarks/Favorites as we shall be using it later.
Crimson® Cloud Connectors: Sparkplug TNIA53 REV A
Crimson® Cloud Connectors: Sparkplug 5
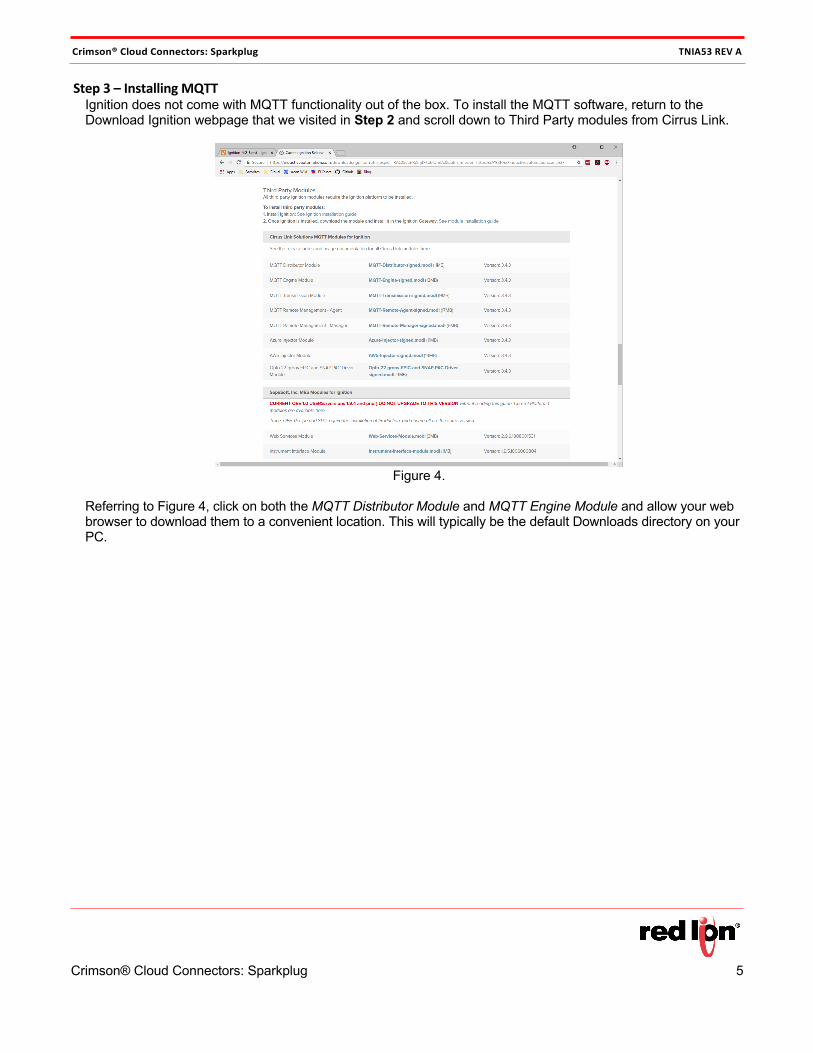
Step 3 – Installing MQTT
Ignition does not come with MQTT functionality out of the box. To install the MQTT software, return to the Download Ignition webpage that we visited in Step 2 and scroll down to Third Party modules from Cirrus Link.
Figure 4.
Referring to Figure 4, click on both the MQTT Distributor Module and MQTT Engine Module and allow your web browser to download them to a convenient location. This will typically be the default Downloads directory on your PC.
6 Crimson® Cloud Connectors: Sparkplug
Crimson® Cloud Connectors: Sparkplug TNIA53 REV A
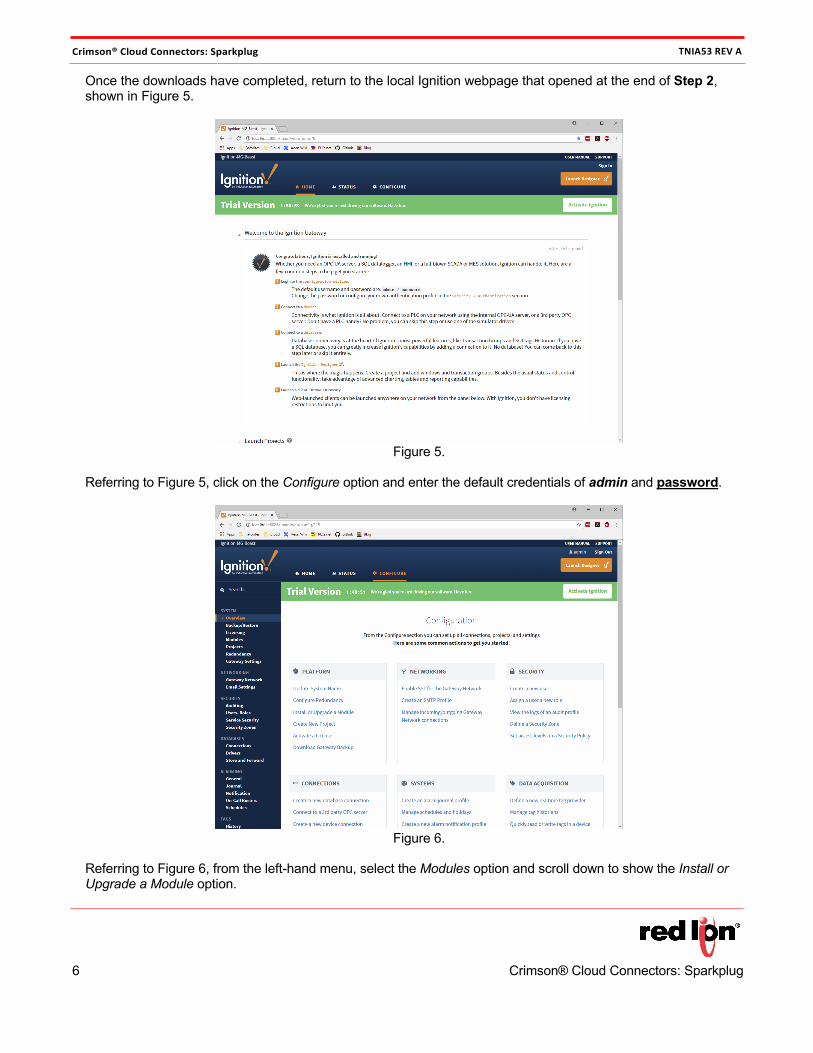
Once the downloads have completed, return to the local Ignition webpage that opened at the end of Step 2, shown in Figure 5.
Figure 5.
Referring to Figure 5, click on the Configure option and enter the default credentials of admin and password.
Figure 6.
Referring to Figure 6, from the left-hand menu, select the Modules option and scroll down to show the Install or Upgrade a Module option.
Crimson® Cloud Connectors: Sparkplug TNIA53 REV A
Crimson® Cloud Connectors: Sparkplug 7
Figure 7.
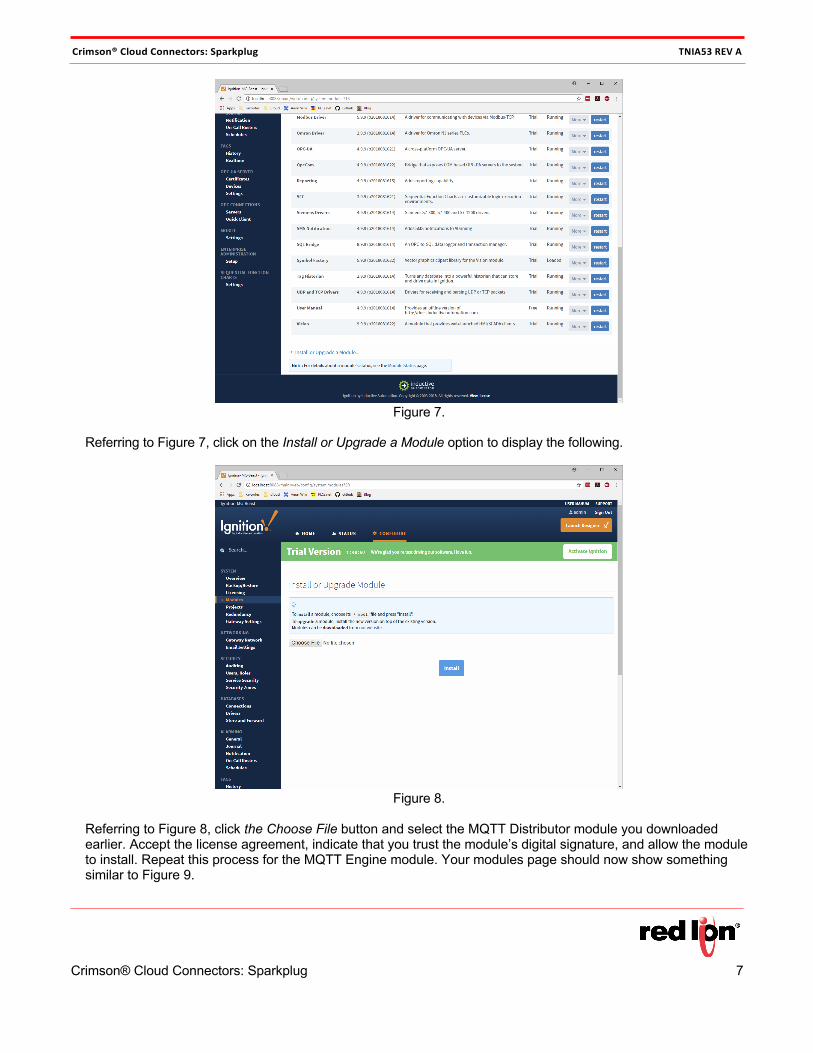
Referring to Figure 7, click on the Install or Upgrade a Module option to display the following.
Figure 8.
Referring to Figure 8, click the Choose File button and select the MQTT Distributor module you downloaded earlier. Accept the license agreement, indicate that you trust the module’s digital signature, and allow the module to install. Repeat this process for the MQTT Engine module. Your modules page should now show something similar to Figure 9.
8 Crimson® Cloud Connectors: Sparkplug
Crimson® Cloud Connectors: Sparkplug TNIA53 REV A
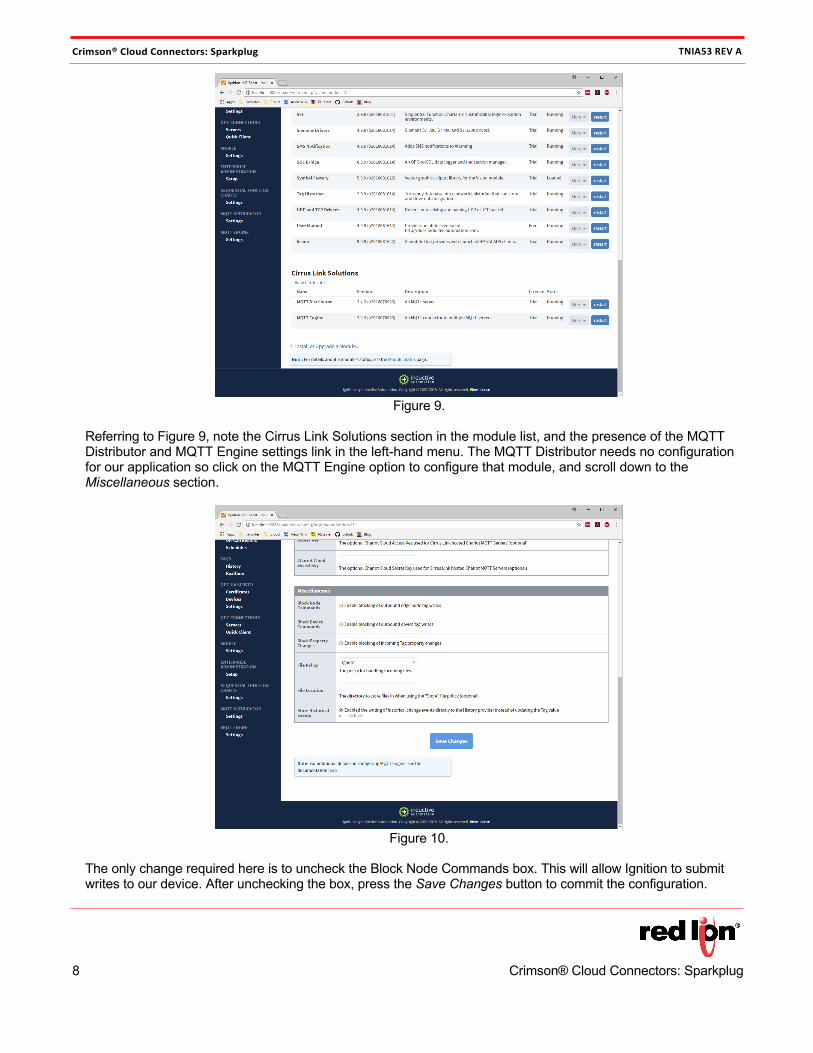
Figure 9.
Referring to Figure 9, note the Cirrus Link Solutions section in the module list, and the presence of the MQTT Distributor and MQTT Engine settings link in the left-hand menu. The MQTT Distributor needs no configuration for our application so click on the MQTT Engine option to configure that module, and scroll down to the Miscellaneous section.
Figure 10.
The only change required here is to uncheck the Block Node Commands box. This will allow Ignition to submit writes to our device. After unchecking the box, press the Save Changes button to commit the configuration.
Crimson® Cloud Connectors: Sparkplug TNIA53 REV A
Crimson® Cloud Connectors: Sparkplug 9
Step 4 – Piercing the Firewall
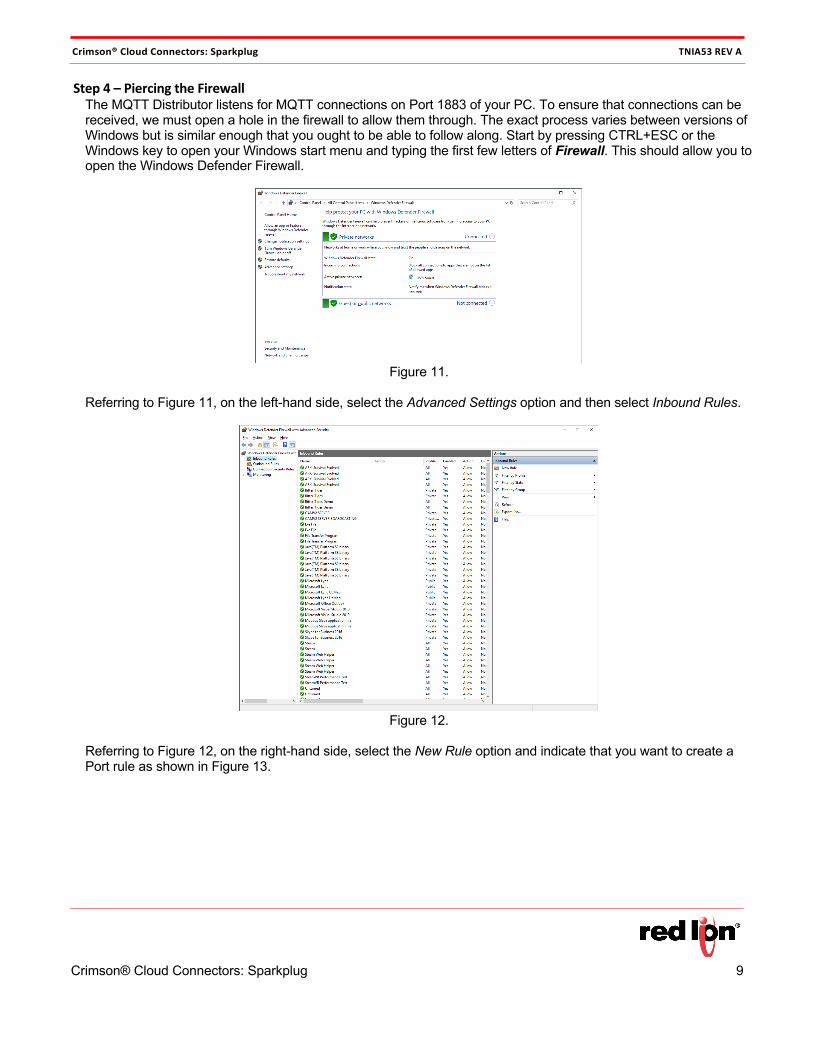
The MQTT Distributor listens for MQTT connections on Port 1883 of your PC. To ensure that connections can be received, we must open a hole in the firewall to allow them through. The exact process varies between versions of Windows but is similar enough that you ought to be able to follow along. Start by pressing CTRL+ESC or the Windows key to open your Windows start menu and typing the first few letters of Firewall. This should allow you to open the Windows Defender Firewall.
Figure 11.
Referring to Figure 11, on the left-hand side, select the Advanced Settings option and then select Inbound Rules.
Figure 12.
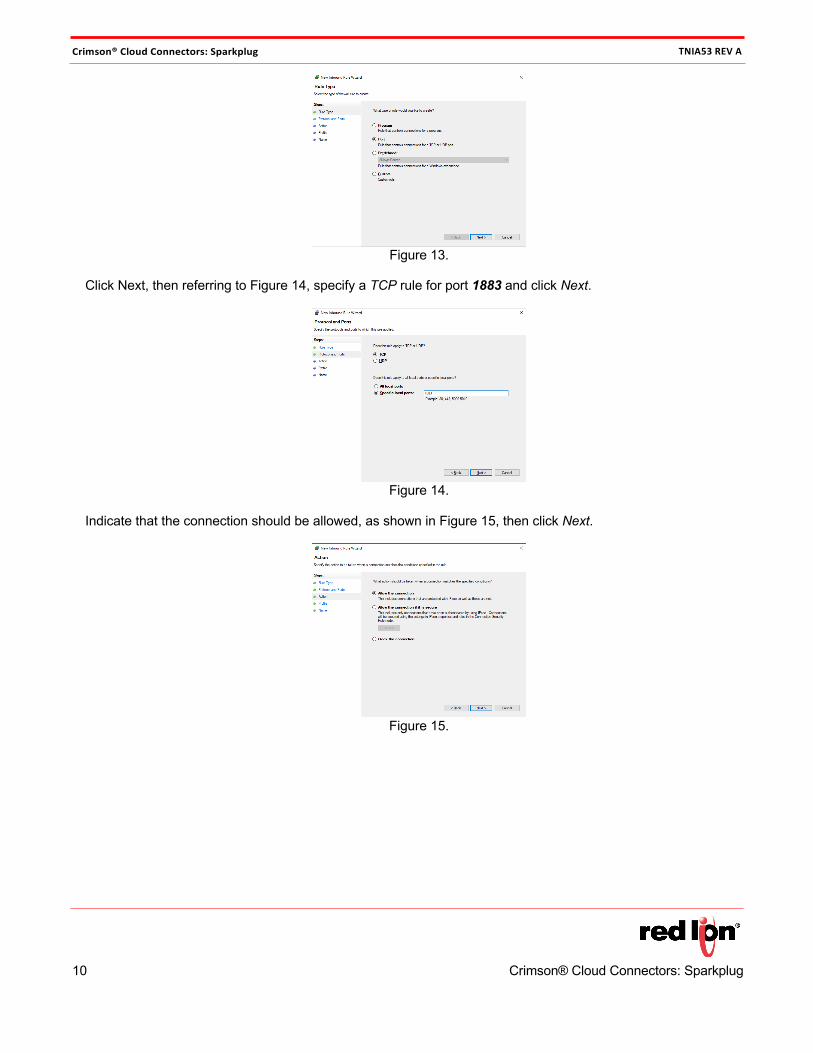
Referring to Figure 12, on the right-hand side, select the New Rule option and indicate that you want to create a Port rule as shown in Figure 13.
10 Crimson® Cloud Connectors: Sparkplug
Crimson® Cloud Connectors: Sparkplug TNIA53 REV A
Figure 13.
Click Next, then referring to Figure 14, specify a TCP rule for port 1883 and click Next.
Figure 14.
Indicate that the connection should be allowed, as shown in Figure 15, then click Next.
Figure 15.

Crimson® Cloud Connectors: Sparkplug TNIA53 REV A
Crimson® Cloud Connectors: Sparkplug 11
Enable the rule for all types of network as shown in Figure 16 and click Next.
Figure 16.
As shown in Figure 17, name it MQTT 1883 and select Finish to create the rule.
Figure 17.
12 Crimson® Cloud Connectors: Sparkplug
Crimson® Cloud Connectors: Sparkplug TNIA53 REV A
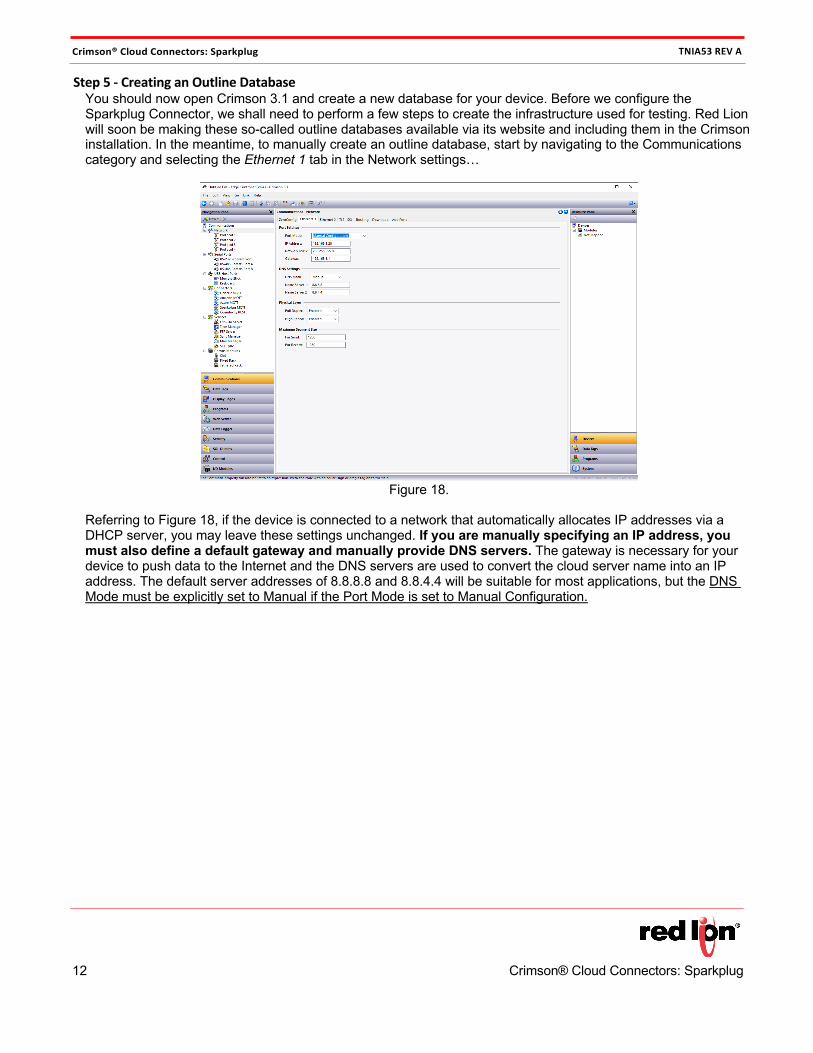
Step 5 - Creating an Outline Database You should now open Crimson 3.1 and create a new database for your device. Before we configure the Sparkplug Connector, we shall need to perform a few steps to create the infrastructure used for testing. Red Lion will soon be making these so-called outline databases available via its website and including them in the Crimson installation. In the meantime, to manually create an outline database, start by navigating to the Communications category and selecting the Ethernet 1 tab in the Network settings…
Figure 18.
Referring to Figure 18, if the device is connected to a network that automatically allocates IP addresses via a DHCP server, you may leave these settings unchanged. If you are manually specifying an IP address, you must also define a default gateway and manually provide DNS servers. The gateway is necessary for your device to push data to the Internet and the DNS servers are used to convert the cloud server name into an IP address. The default server addresses of 8.8.8.8 and 8.8.4.4 will be suitable for most applications, but the DNS Mode must be explicitly set to Manual if the Port Mode is set to Manual Configuration.
Crimson® Cloud Connectors: Sparkplug TNIA53 REV A
Crimson® Cloud Connectors: Sparkplug 13
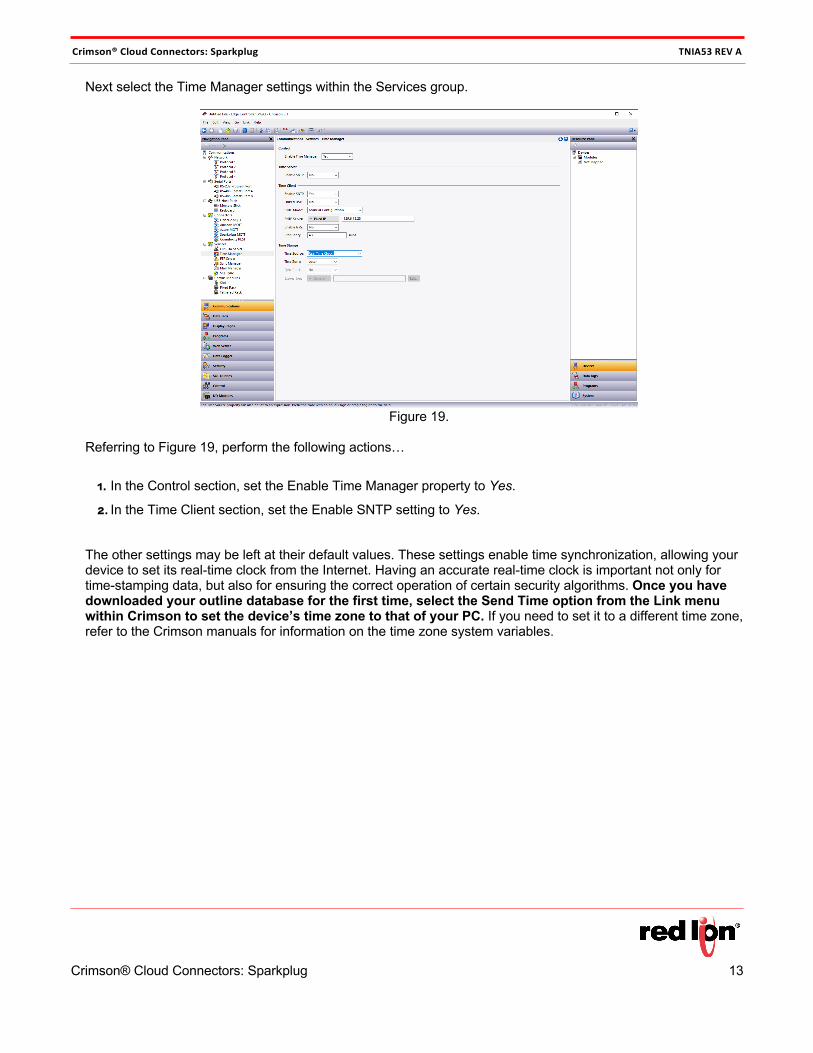
Next select the Time Manager settings within the Services group.
Figure 19.
Referring to Figure 19, perform the following actions…
=. In the Control section, set the Enable Time Manager property to Yes.
>. In the Time Client section, set the Enable SNTP setting to Yes.
The other settings may be left at their default values. These settings enable time synchronization, allowing your device to set its real-time clock from the Internet. Having an accurate real-time clock is important not only for time-stamping data, but also for ensuring the correct operation of certain security algorithms. Once you have downloaded your outline database for the first time, select the Send Time option from the Link menu within Crimson to set the device’s time zone to that of your PC. If you need to set it to a different time zone, refer to the Crimson manuals for information on the time zone system variables.
14 Crimson® Cloud Connectors: Sparkplug
Crimson® Cloud Connectors: Sparkplug TNIA53 REV A
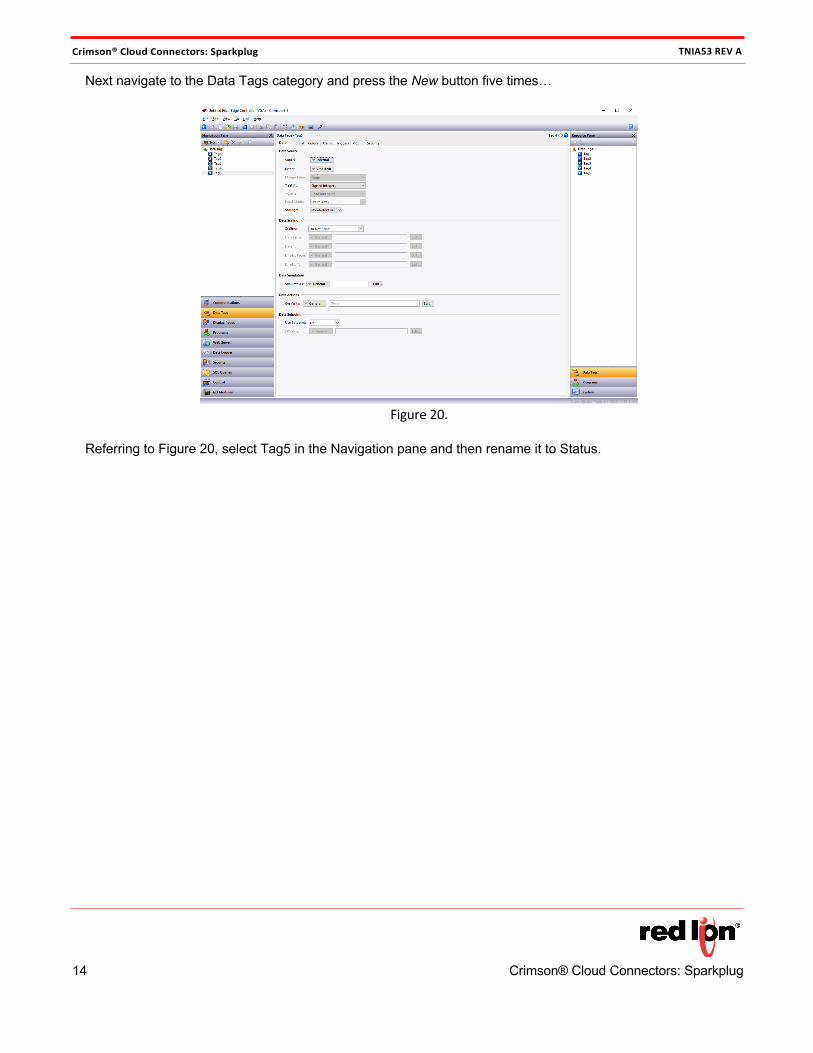
Next navigate to the Data Tags category and press the New button five times…
Figure 20.
Referring to Figure 20, select Tag5 in the Navigation pane and then rename it to Status.
Crimson® Cloud Connectors: Sparkplug TNIA53 REV A
Crimson® Cloud Connectors: Sparkplug 15
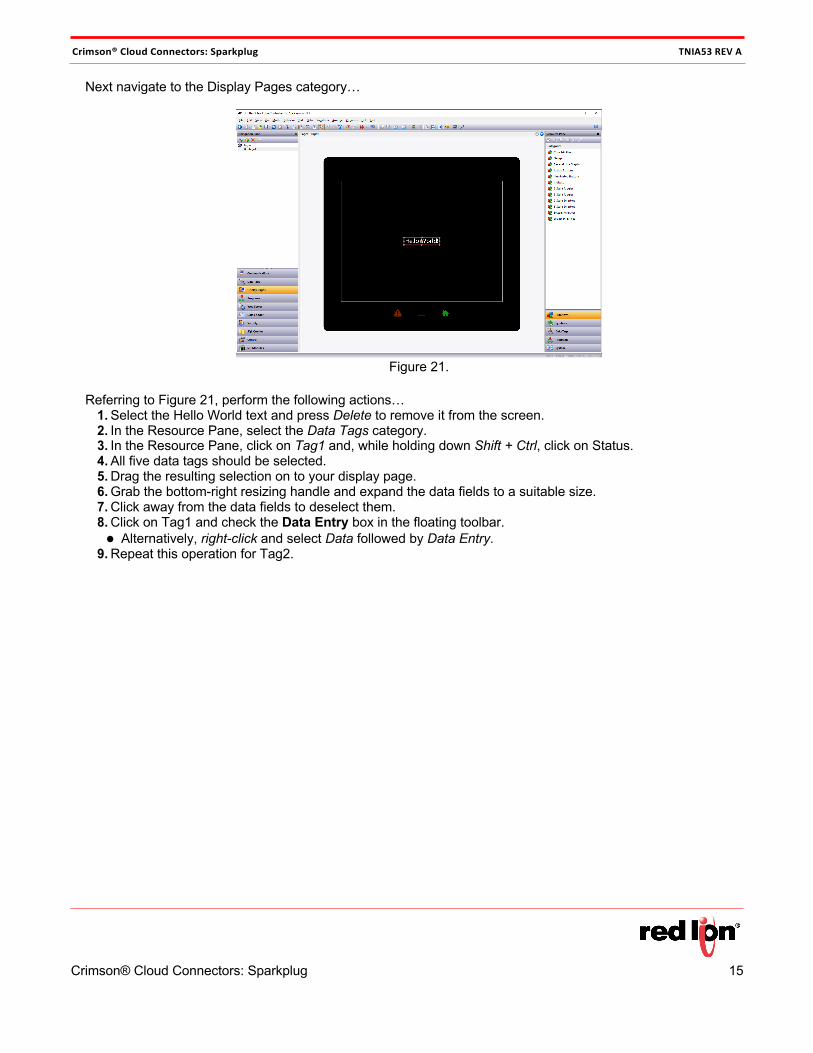
Next navigate to the Display Pages category…
Figure 21.
Referring to Figure 21, perform the following actions…
1. Select the Hello World text and press Delete to remove it from the screen. 2. In the Resource Pane, select the Data Tags category. 3. In the Resource Pane, click on Tag1 and, while holding down Shift + Ctrl, click on Status. 4. All five data tags should be selected. 5. Drag the resulting selection on to your display page. 6. Grab the bottom-right resizing handle and expand the data fields to a suitable size. 7. Click away from the data fields to deselect them. 8. Click on Tag1 and check the Data Entry box in the floating toolbar. • Alternatively, right-click and select Data followed by Data Entry.
9. Repeat this operation for Tag2.
16 Crimson® Cloud Connectors: Sparkplug
Crimson® Cloud Connectors: Sparkplug TNIA53 REV A
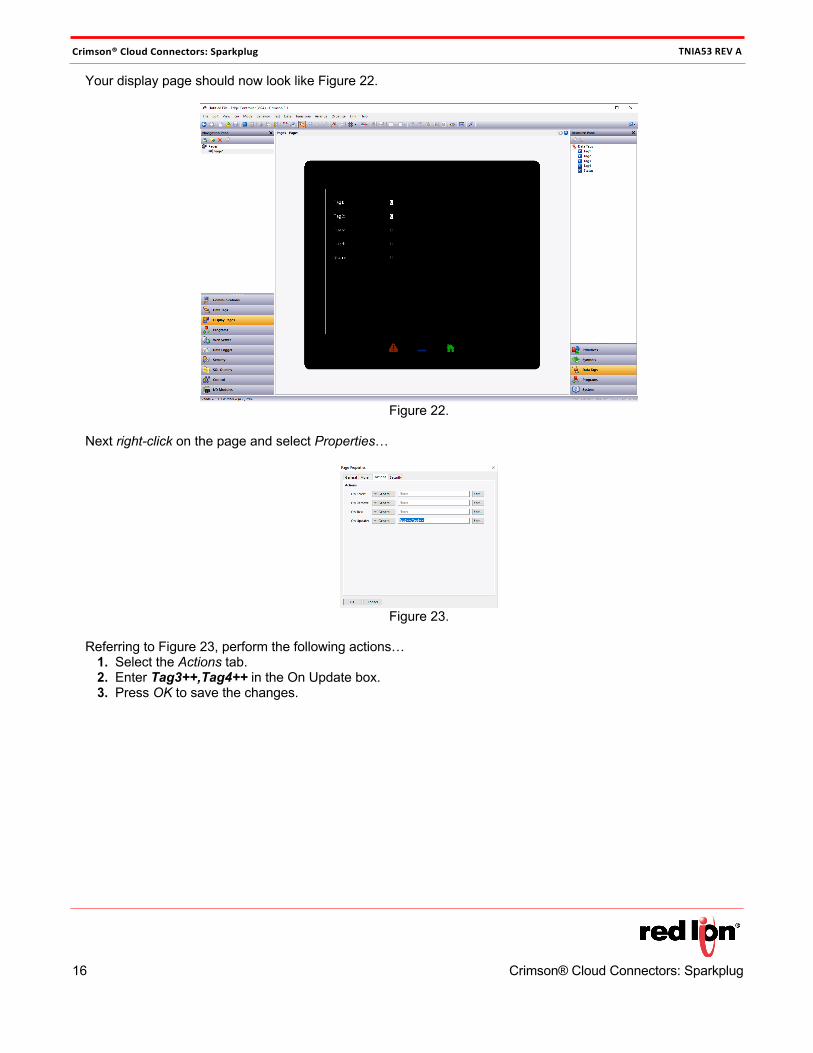
Your display page should now look like Figure 22.
Figure 22.
Next right-click on the page and select Properties…
Figure 23.
Referring to Figure 23, perform the following actions…
1. Select the Actions tab. 2. Enter Tag3++,Tag4++ in the On Update box. 3. Press OK to save the changes.
Crimson® Cloud Connectors: Sparkplug TNIA53 REV A
Crimson® Cloud Connectors: Sparkplug 17
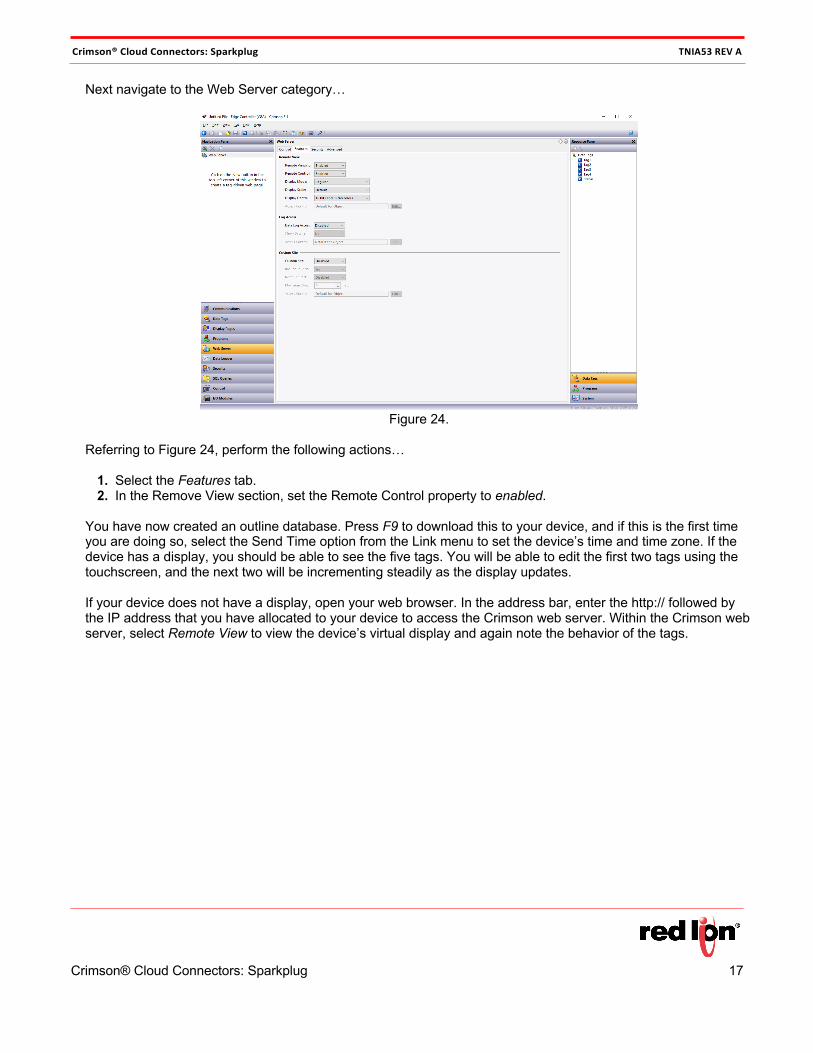
Next navigate to the Web Server category…
Figure 24.
Referring to Figure 24, perform the following actions…
1. Select the Features tab. 2. In the Remove View section, set the Remote Control property to enabled.
You have now created an outline database. Press F9 to download this to your device, and if this is the first time you are doing so, select the Send Time option from the Link menu to set the device’s time and time zone. If the device has a display, you should be able to see the five tags. You will be able to edit the first two tags using the touchscreen, and the next two will be incrementing steadily as the display updates. If your device does not have a display, open your web browser. In the address bar, enter the http:// followed by the IP address that you have allocated to your device to access the Crimson web server. Within the Crimson web server, select Remote View to view the device’s virtual display and again note the behavior of the tags.
18 Crimson® Cloud Connectors: Sparkplug
Crimson® Cloud Connectors: Sparkplug TNIA53 REV A
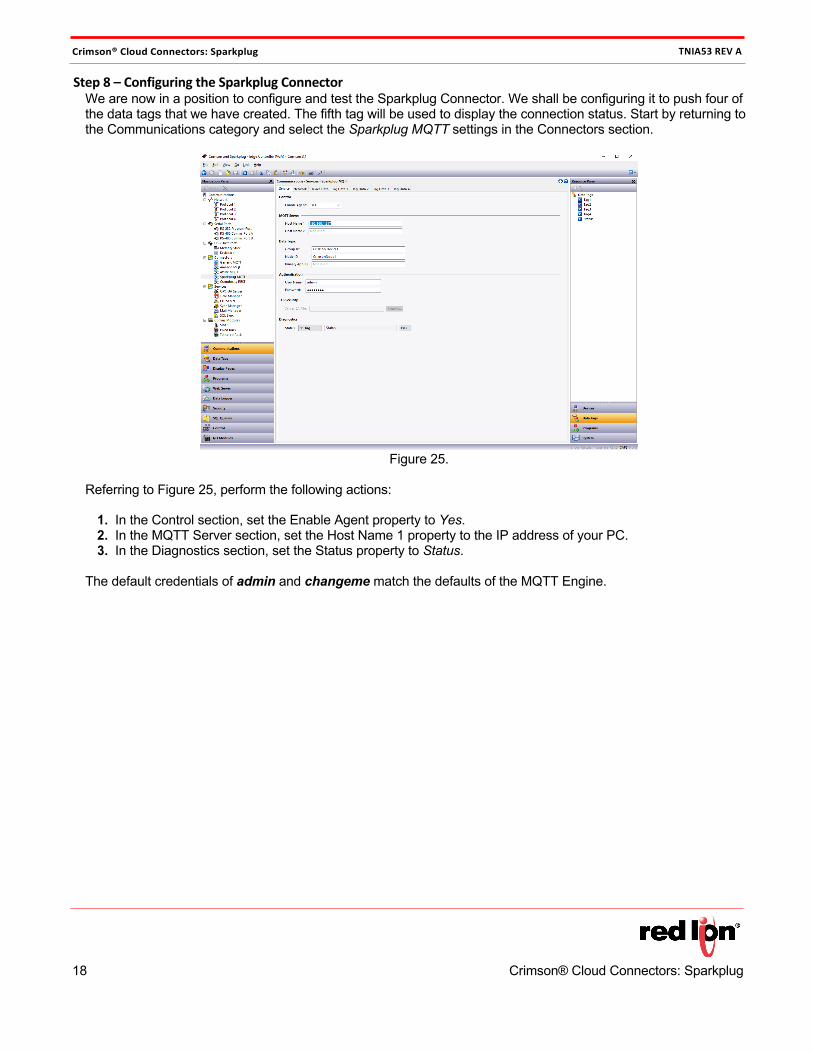
Step 8 – Configuring the Sparkplug Connector We are now in a position to configure and test the Sparkplug Connector. We shall be configuring it to push four of the data tags that we have created. The fifth tag will be used to display the connection status. Start by returning to the Communications category and select the Sparkplug MQTT settings in the Connectors section.
Figure 25.
Referring to Figure 25, perform the following actions:
1. In the Control section, set the Enable Agent property to Yes. 2. In the MQTT Server section, set the Host Name 1 property to the IP address of your PC. 3. In the Diagnostics section, set the Status property to Status.
The default credentials of admin and changeme match the defaults of the MQTT Engine.
Crimson® Cloud Connectors: Sparkplug TNIA53 REV A
Crimson® Cloud Connectors: Sparkplug 19
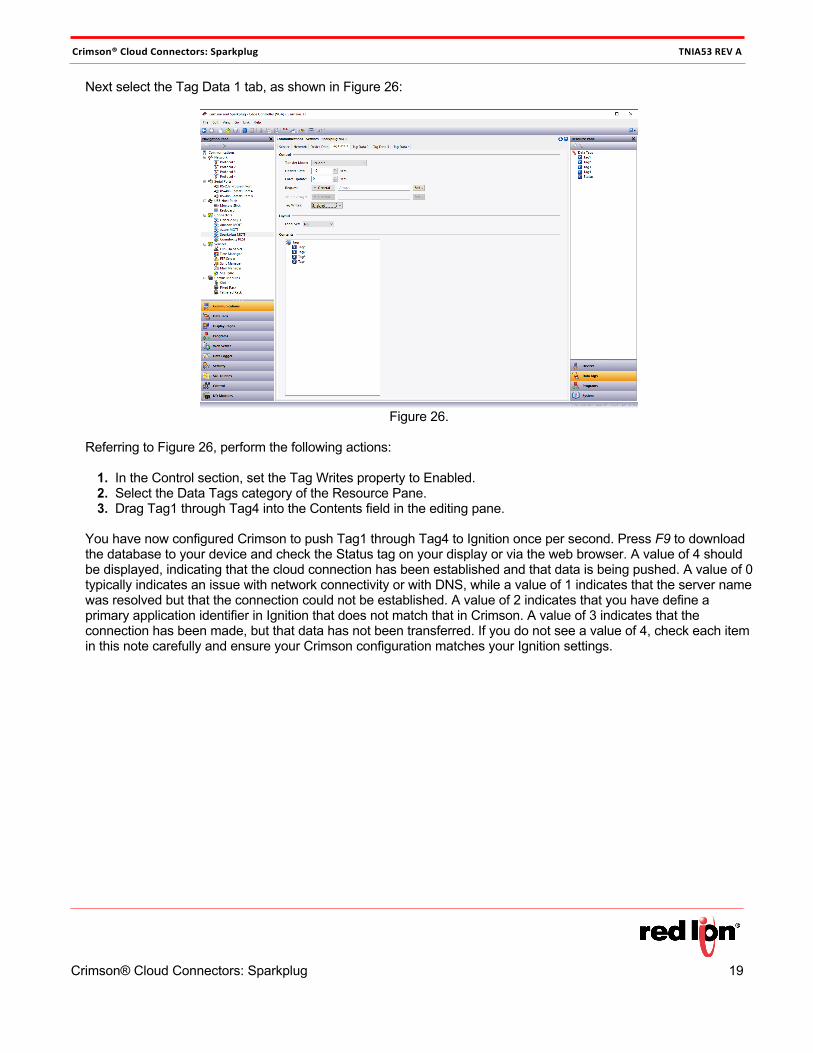
Next select the Tag Data 1 tab, as shown in Figure 26:
Figure 26.
Referring to Figure 26, perform the following actions:
1. In the Control section, set the Tag Writes property to Enabled. 2. Select the Data Tags category of the Resource Pane. 3. Drag Tag1 through Tag4 into the Contents field in the editing pane.
You have now configured Crimson to push Tag1 through Tag4 to Ignition once per second. Press F9 to download the database to your device and check the Status tag on your display or via the web browser. A value of 4 should be displayed, indicating that the cloud connection has been established and that data is being pushed. A value of 0 typically indicates an issue with network connectivity or with DNS, while a value of 1 indicates that the server name was resolved but that the connection could not be established. A value of 2 indicates that you have define a primary application identifier in Ignition that does not match that in Crimson. A value of 3 indicates that the connection has been made, but that data has not been transferred. If you do not see a value of 4, check each item in this note carefully and ensure your Crimson configuration matches your Ignition settings.
20 Crimson® Cloud Connectors: Sparkplug
Crimson® Cloud Connectors: Sparkplug TNIA53 REV A
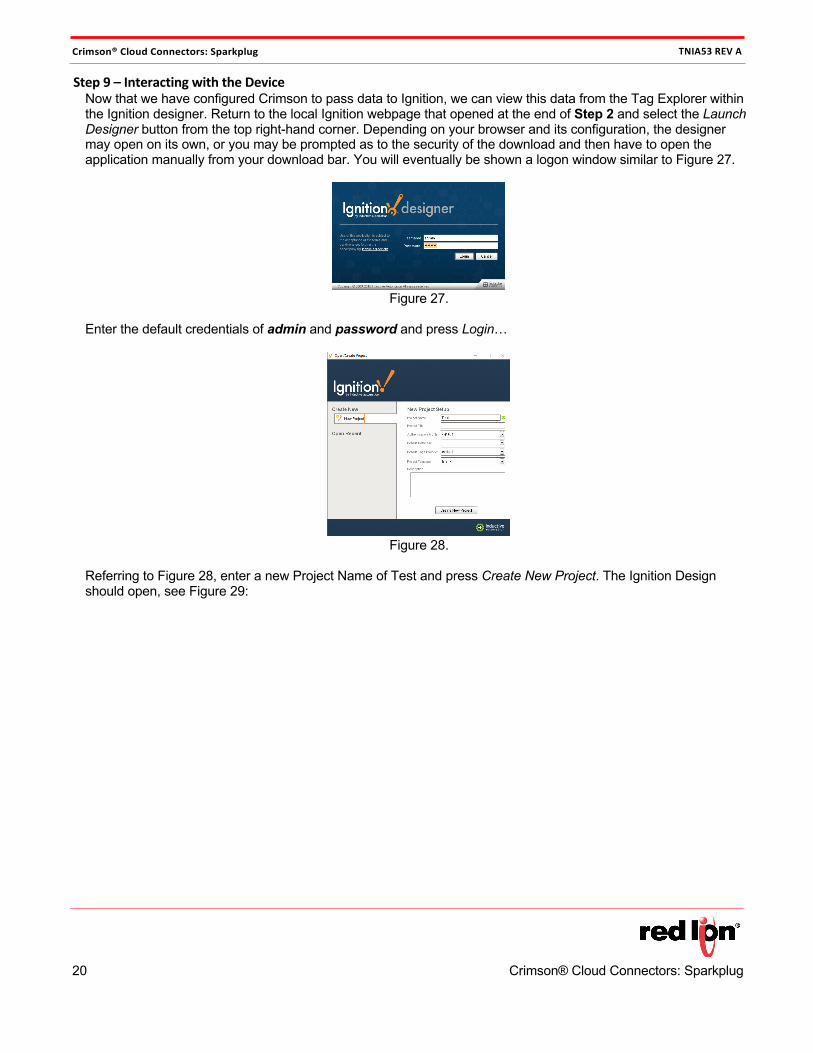
Step 9 – Interacting with the Device Now that we have configured Crimson to pass data to Ignition, we can view this data from the Tag Explorer within the Ignition designer. Return to the local Ignition webpage that opened at the end of Step 2 and select the Launch Designer button from the top right-hand corner. Depending on your browser and its configuration, the designer may open on its own, or you may be prompted as to the security of the download and then have to open the application manually from your download bar. You will eventually be shown a logon window similar to Figure 27.
Figure 27.
Enter the default credentials of admin and password and press Login…
Figure 28.
Referring to Figure 28, enter a new Project Name of Test and press Create New Project. The Ignition Design should open, see Figure 29:
Crimson® Cloud Connectors: Sparkplug TNIA53 REV A
Crimson® Cloud Connectors: Sparkplug 21
Figure 29.
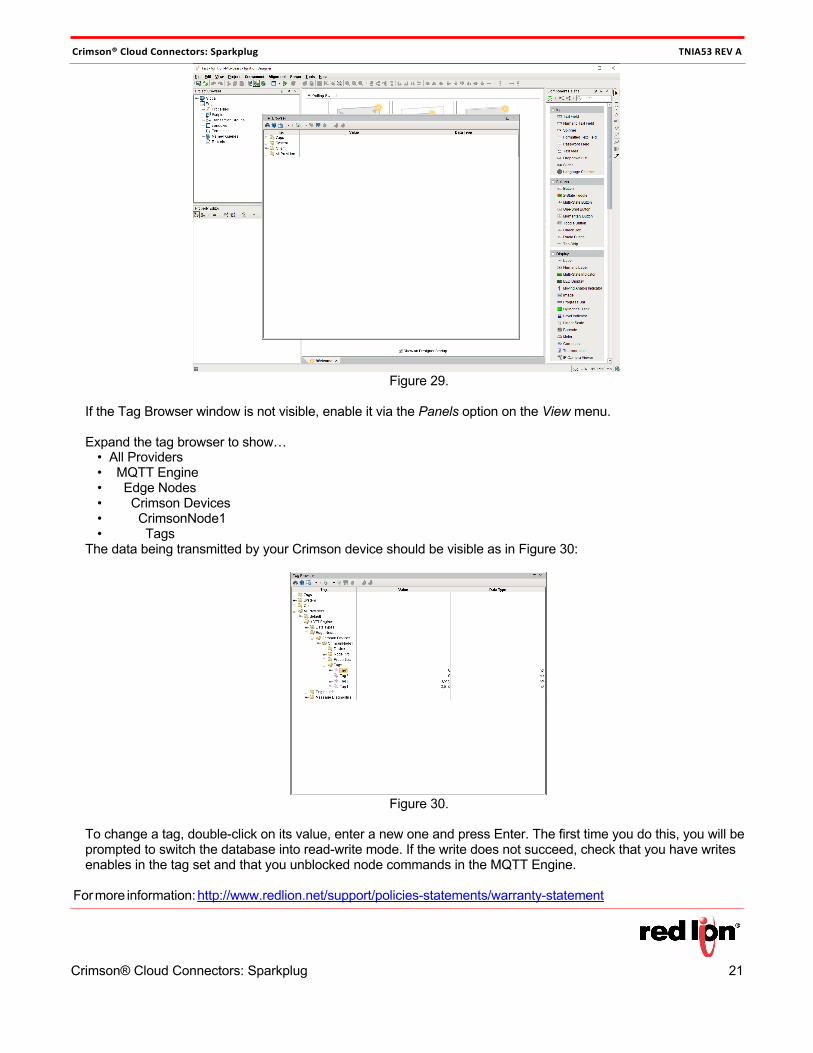
If the Tag Browser window is not visible, enable it via the Panels option on the View menu. Expand the tag browser to show…
• All Providers • MQTT Engine • Edge Nodes • Crimson Devices • CrimsonNode1 • Tags
The data being transmitted by your Crimson device should be visible as in Figure 30:
Figure 30.
To change a tag, double-click on its value, enter a new one and press Enter. The first time you do this, you will be prompted to switch the database into read-write mode. If the write does not succeed, check that you have writes enables in the tag set and that you unblocked node commands in the MQTT Engine.
For more information: http://www.redlion.net/support/policies-statements/warranty-statement