image processing and control - … · image processing and control as a navy photographer, you must...
TRANSCRIPT

CHAPTER 10
IMAGE PROCESSING AND CONTROL
As a Navy photographer, you must realize thatcomposing and exposing a scene on film does notguarantee top-quality photography. The quality of thefinished print depends on the quality of your darkroomwork. A perfectly exposed film is useless if it is fogged,scratched, or under- or overdeveloped. Therefore, eachstep of film processing is important and you must mastereach step.
During the discussion of basic film processingconcepts, both black-and-white and color filmprocessing are covered. The mechanics of black andwhite and color processing are very similar. The primarydifferences between processing color film andprocessing black-and-white film are there are moresteps in a color film process, and the time andtemperature requirements are more critical.
DEVELOPERS AND DEVELOPMENT
The purpose of development is to convert thoseparts of the light-sensitive material (film or paper) thathas been affected by light to black metallic silver. Thisproduces a visible image from the invisible latent image.Development is usually carried out by bringing theexposed film into contact with a solution that contains adeveloping agent, but no silver salt. The silver that formsthe developed image comes from a reduction of theindividual silver halide grains in the film emulsion. Thisprocess is called chemical or direct development.
In another process that is seldom used, thedeveloped image is derived from a soluble silver saltcontained in the developing solution itself. This processis called physical development. The physicaldevelopment process can be difficult to use becausethere is a tendency for silver to be deposited where it isnot wanted.
The process of chemical development is mostcommonly used for film development. Chemicaldevelopment is the process with which you should beconcerned. In chemical development, the individualsilver halide grains in the film emulsion are reduced toa black metallic silver. Each grain in the emulsion actsas a unit, in the sense that a grain is either developableas a whole or is not developable. When filmdevelopment is performed properly, only exposed grains
containing a latent image are reduced to black metallicsilver. You may ask, “Why doesn’t the developerdevelop the unexposed grains as well as the exposedgrains?” Actually, the unexposed grains are developable. When development is carried out over a longenough period of time, all grains are developed orreduced to black metallic silver. The density that resultsfrom the development of unexposed silver halides iscalled fog. Thus development is a rate phenomenon andthe development of the exposed grains takes place at afaster rate than the unexposed grains.
The individual grains of silver halide in an emulsionare protected against the action of the developer by achemical layer. When light strikes the emulsion, itbreaks down the protective layer at one or more pointson each individual light-struck grain. When the exposedfilm is placed into the developer, the grains are actedupon at these points by the developing agent, and eachgrain that received more than minimum exposure isquickly reduced to black metallic silver. The amount ofblackening (density) over the film surface dependsprimarily upon the number of grains that have beenaffected by the developer. Density is also influencedbecause some grains may not develop to completion inthe time the developer is allowed to act on the film.
COMPOSITION OF A DEVELOPER
There are many different formulas used asdeveloping solutions, but most developers contain thefollowing four essential ingredients: developing agent,preservative, accelerator or activator, and restrainer.
DEVELOPING AGENT
The developing agent, commonly referred to as thereducing agent, is the most important chemical in adeveloping solution. It is the developing agent thatactually converts the silver halide grains in the emulsionto metallic silver. Nevertheless, the other ingredients arenecessary to make the solution function properly.
One of the properties of a developing agent is itsreducing potential. This refers to its relative ability todevelop or reduce the silver halides. An activedeveloping agent attacks silver halides vigorously,whereas one of low potential is slower in its action. For
10-1

certain purposes, one agent may be preferred overanother. The temperature of the solution affects theactivity of some agents much more than others.Hydroquinone, Metol, paraphenylenediamine, andphenidone are some of the more commonly useddeveloping agents.
PRESERVATIVE
All developing agents in an alkaline state areaffected by oxygen. When the developing agentcombines with the oxygen in the air, the efficiency ofthe developing agent is reduced. When elementscombine with free oxygen from the air or water,oxidation occurs. Therefore, a preservative is added todeveloping solutions to prevent excessive oxidation.The preservative prolongs the useful life of thedeveloping solution and prevents stains caused by theformation of colored oxidation products.
The preservative is a chemical with a greatattraction for free oxygen and combines with it whenmixed into a solution. A large amount of free oxygen isin the water used for solutions. When the free oxygen isleft in the water, it oxidizes most of the developing agentand produces stains before the metallic silver image isdeveloped completely. By adding enough preservative,you may remove practically all of the free oxygen fromthe solution, the developing agent works as intended,and no stains are produced. Sodium sulfite is thepreservative most commonly used in developingsolutions.
ACCELERATOR
All developing agents (not developing solutions)are either neutral or slightly acid. Most developingagents must be in an alkaline state to be effectivereducing agents, thus solutions require an alkali toactivate the developing agent. A developing solutioncontains an accelerator so the solution becomes alkaline.
The accelerator serves two functions. First, it speedsup the swelling of the gelatin in the emulsion. Thisswelling permits the solution to penetrate the entireemulsion more quickly. The effect of this action isphysical. The second action is completely chemical. Asthe silver halide salts in the latent image are reduced bythe developing agent, the halide elements freed from thesilver are absorbed by the accelerator and combined intoneutral salts. This prevents harmful effects in thesolution.
Because the accelerator is a determining factor inthe activity of a developing solution, it affects the degree
of graininess produced in the negative. This graininessis dependent upon the clumping action of the silvergrains during the development process. The more activethe developer, the higher the pH, and the greater theclumping action. Therefore, the milder or less alkalinedevelopers yield finer grain. Common accelerators usedin developing solutions are sodium carbonate andpotassium carbonate.
Without an accelerator, there is little or no action.With some accelerators there is too much action. By theaddition of a bromide restrainer, you may slow down theaction of the developing solution to a controllabledegree.
RESTRAINER
Without a restrainer most developing solutions acttoo rapidly and develop unexposed silver halides nearthe surface of the emulsion. This causes chemical fog,developing streaks, and an image with low contrast.During development, some restrainer is released fromthe silver and has a restraining action on the reducingagent during development. However, its action is notenough to prevent fog. When a restrainer is added,development time is prolonged and fog is minimized.Contrast is increased because the activity of thedeveloping agent is cut down in unexposed areas.However, too much restrainer greatly retards the amountof development. The chemical most commonly used asa restrainer is potassium bromide.
TYPES OF BLACK-AND-WHITEDEVELOPERS
As stated previously, when a photographic emulsionis exposed to light, there is an invisible change producedin the minute crystals of silver halides that results in alatent image. To make the image visible, you must treatthe exposed emulsion in a solution known as adeveloper. This solution converts the halides affected bylight to black metallic silver. These black metallic silverparticles form the visible image on the negative.
At the beginning of development, there is littledifference in density between the highlight and shadowareas of the film. However, during normal development,this difference increases because the highlight densitiescontinue to increase after the shadow areas arecompletely developed. Development should stop whenthe contrast between the shadows and highlights reachesa desired difference. The activity of the developer, andto some extent the type of film, primarily determines thisdeveloping action.
10-2

One type of developer cannot cover all situations;for example, film exposed by poor lighting conditionsmay require an active developer to bring out as much ofthe image as possible, while a film exposed undernormal conditions requires a normal working developer.There are many different developers, each providesdifferent activity and quality of development. The actualchoice of the developer to use depends on the type offilm, conditions under which it was exposed, type ofnegative required, and the developing time that is bestfor your development method.
GENERAL-PURPOSE DEVELOPERS
A developer for general-purpose work shouldproduce moderate grain, normal contrast images. Clearareas of the negative, as well as the image areas, shouldbe basically fog free.
Some general-purpose developers are as follows:
HC-110
DK-50
Microdol
FINE-GRAIN DEVELOPERS
All photographic emulsions have a grainy structure.Although this grainy structure is not normally visible tothe naked eye, it becomes visible whenever highmagnifications are used to make prints. The tendency touse small-format film and make large enlargements hasresulted in the need for fine-grain developers.
When enlargements are made from small negativesdeveloped in other than fine-grain developer, the grainof the film may be objectionable. Graininess in the filmshould be controlled in the development of the film.Keep in mind, however, that every film has its own grainstructure or characteristics. For 35mm-roll film, it isnormally best to use a fine-grain developer.
Fine-grain developers achieve the desired result inseveral ways:
They are usually soft working and this tends toreduce clumping of the silver grains.
Some fine-grain developers actually producesmaller individual grains of black metallic silver. This,however, tends to reduce the film speed.
The grayish white images produced by somefine-grain developers help by providing for increased
passage of light between individual grains. This resultsin less local variation in density.
Most fine-grain developers produce relativelylow-contrast negatives. A reduction in contrast in thenegative tends to reduce the graininess of the negative.However, this may not contribute significantly to areduction in the graininess of the final print. Anyadvantage achieved by lowering negative contrast maybe offset by the need to use a higher contrast printingfilter to print the negative.
Some fine-grain developers are as follows:
ID-l1 (Ilford)
D-76 (Kodak)
Atomal (Agfa)
HIGH-CONTRAST DEVELOPERS
To produce maximum contrast on process and linecopy type of films, you must have a developer thatproduces density readily and is free from any tendencyto produce fog within the time of development.
Some of the most popular high-contrast developersare as follows:
Kodalith (Kodak)
D-11 (Kodak)
D-19 (Kodak)
To prevent staining when using a high-contrastdeveloper, you should rinse the negative well betweendeveloping and fixing.
HIGH-DEFINITION DEVELOPERS
A high-definition, or compensating, developer addsincreased sharpness to the image by enhancing contrastof image edges and fine detail in the negative.High-definition developers may increase film speed byone or two f/stops, but they also increase graininess.High-definition developers are recommended for useonly with fine-grain (slow or medium speed) films.
Some of the high-definition developers are asfollows:
Acufine
Ethol TEC
10-3
You should consult the film data sheets or thePhoto-Lab-Index for the recommended developers foreach particular type of film to be processed.
CHANGES IN DEVELOPER WITH USE
The function of a developer is to change chemicallythe sensitized material treated in it. It stands to reasonthen that a chemical change also takes place to thedeveloper itself. Most developers are used more thanonce. Therefore, you must know what changes to thedeveloper can be expected and what can be done toprevent them or at least compensate for them. Theprimary changes that occur to a developer as it is usedare as follows:
Some developer is removed or carried out withthe film and on the film hangers or reels.
The developing agents are used up by reductionof silver halides to black metallic silver and by aerialoxidation. When the developing agents are used up bythe reduction of silver halides, the by-products of thereaction cause the pH of the solution to drop, thusbecoming more acid. When the developer agents areused up by oxidation, the pH tends to rise.
The preservative is used up, thus the developingagents oxidize faster.
The bromide within the solution is increasedbecause the bromide is released from the film emulsionitself.
The effects of these changes to a developer are asfollows:
The development time required to reach a givencontrast index or gamma is increased. Therefore, whena developer is used over and over, development timemust be increased as more film is developed.
The effective film speed produced by thedeveloper decreases because of the increased bromide(a restrainer) in solution. However, this speed loss maybe partially offset by increasing development time tomaintain image contrast.
Complete exhaustion of a developer occurs whenthe developing agents are all used up. The approach ofexhaustion is characterized by a brown color of thesolution. Since a developer in this state can stainsensitized materials, it should not be used.
In most Navy imaging facilities, it is not economicalto use a developer to the practical exhaustion point andthen discard it. The quality of the image usually suffers
long before the exhaustion point of the developer isreached. Replenishers are usually used to prevent thisfrom happening.
Replenishment of a developer involves replacingthose chemicals in the used developer that are exhaustedby a replenisher so that the developer remainsconsistent. The aim of replenishment is not to keep thecomposition of the developer constant but to keep itsactivity constant.
There are two commonly used methods ofreplenishment. The first or “topping off” method is usedextensively in tank processing. When topping off isused, the developer solution is maintained at a constantlevel in the tank by adding replenisher, so the volumeadded is equal to the amount of developer carried out.When you are replenishing by this method, it is possibleto maintain consistency in development for only acertain period of time. After a given volume ofreplenisher has been added to the developer, thedeveloper must be discarded. This procedure is thenrepeated with new developer.
The second replenishment method is called the"bleed" method. The bleed method is used primarilywith machine processing where a circulating developersystem is used. In the bleed method, used developer isdrained off and replenisher (in proportion to the amountof film processed) is fed in, so the characteristics andthe level of the developer in the machine remainconstant.
FIXING, WASHING, AND DRYING
As soon as a light-sensitive material is developed,it contains a visible silver image, but the image is notready to be exposed to light. Only a portion of the silverhalides in the emulsion were reduced to black metallicsilver by the developer. The silver halides that were notreduced restrict both the immediate usefulness and thepermanence of the image. These undeveloped silverhalides must be removed. This is the purpose of thefixing bath. Before treating the sensitized material in thefixer (as it is called), you must stop or at least slow downthe action of the developer. When the light-sensitivematerial is removed from the developer solution, thereis a small amount of developer both in the emulsion andon the surface that must be removed or neutralized. Forthis, you use either a water rinse bath or an acid stopbath.
10-4

WATER RINSE BATH
To slow down the action of development, you mustimmerse the film in a water rinse bath. A plain waterrinse bath is commonly used between development andfixation to slow down the development by removing allthe developer that is clinging to the film (or paper)surface. A rinse bath does not completely stopdevelopment but retards it. A rinse bath has little affecton the developer that is actually in the swollen emulsion.
Rinsing is accomplished by quickly immersing thefilm in plain, clean water. A water rinse bath should bechanged often to ensure it does not become loaded withdeveloper. It is better to use running water.
The rinse bath, then, serves two purposes: first, itslows down development and second, it reduces thework that has to be done by the acid in the fixer. Rinsing,therefore, protects or prolongs the useful life of the fixer.
Following rinsing in plain water, the material (thatis still light sensitive) must be treated in an acid fixingbath to stop the development.
ACID STOP BATH
Although a plain water rinse bath is commonly usedbetween development and fixation, a better procedure isto use an acid stop bath. The function of a stop bath isnot only to remove the developer that is clinging to thesurface of the material but to also neutralize thedeveloper in the swollen emulsion to stop developmentcompletely.
The acid stop bath stops the action of the developerbecause developing agents cannot work in an acidsolution. An acid stop bath also helps protect or prolongthe life of the fixer by neutralizing developer carry-over.
An acid stop bath should meet the followingrequirements:
lThe pH must be low enough to neutralize theaction of the developer carried over.
The acidity should be limited so the small amountcarried over into the fixing bath does not increase thefree-acid content of the fixing bath and causesulfurization.
It must not contain enough acid to produce blisterformations in an emulsion.
You should use only a weak acid stop bath betweendevelopment and fixation. Strong acid and the acid inthe fixing bath have a tendency to form carbon dioxide
gas bubbles in the emulsion. When the film is taken fromthe developer and placed directly into a strong acid orfixing bath, these bubbles may break and cause small,round holes in the emulsion. These bubbles aresometimes mistaken for pinholes like those caused bydust particles settling on the emulsion before cameraexposure.
When you are using an acid stop bath, rememberthat some of the stop bath is carried into the fixer whenmaterials pass through it. Therefore, you cannot use astrong acid (such as sulfuric acid) because it can causeprecipitation of sulphur in the fixer. Acetic acid is thetype of acid used for stop baths. In its pure form asglacial acetic acid (99.5 percent), it freezes at atemperature of about 61°F. Its freezing tendency givesit the name “glacial.” For use as a stop bath, 99.5 percentglacial acetic acid is diluted with water to make a 28percent working solution. Approximately 1/2 ounce of28 percent acetic (not glacial) acid is added to 32 ouncesof water. The process of determining the concentrationof a liquid is discussed in chapter 8.
FIXING
When a light-sensitive material is removed from thedeveloping solution, the emulsion contains a largeamount of silver salts (halides) that has not been affected(developed) by the developing agents. This silver salt isstill sensitive to light, and if it remains in the emulsion,light ultimately darkens and discolors the salt whichobscures the image. Obviously, when this action occurs,the negative (or print) is useless.
The fixing bath is used to prevent this discolorationand to make the developed image permanent. Itaccomplishes this by removing the undeveloped silverhalides by making them water soluble. Therefore, tomake an image permanent, you must “fix” thelight-sensitive material by removing all of theunaffected silver salt from the emulsion.
The fixing bath contains five basic ingredients: thefixing agent, preservative, neutralizer or acidifier,hardening agent, and an antisludge agent.
Fixing Agent
All fixing baths must contain a silver halide (salt)solvent. This solvent is known as a fixer or fixing agent.The two most commonly used in photography aresodium and ammonium thiosulfate, commonly termedhypo (taken from their other chemical namehyposulfite). Ammonium thiosulfate is used in rapidfixers that are stronger and require less fixing time.
10-5

Sodium and ammonium thiosulfate changesundeveloped silver halide to soluble silver sodiumthiosulfate. It removes this compound from theemulsion and refills the space it occupied withnonexhausted fixing solution. Therefore, the function ofthe fixing agent is to convert the silver salts remainingin the emulsion after development to soluble compoundsand to remove these soluble compounds by constantlydiluting and replacing them in the emulsion. The numberof substances capable of functioning as fixing agents issmall because a good fixer must meet the followingrequirements:
It must dissolve silver salts without affecting themetallic silver image.
The compounds it forms must be soluble so theycan be removed from the emulsion.
The fixer should neither swell excessively norsoften the gelatin.
Preservative
A preservative prevents oxidation of the developingagents that are carried over into the fixing bath by thefilm. It also prevents decomposition of the fixer.Oxidized developer in a fixing bath produces stains.
Strong acids may cause a fixing agent to decompose(sulfurize). You must add preservative (sodium sulfite)in the fixer to prevent sulfurization. The preservativeprevents the acid from decomposing hypo into freesulfur, prevents discoloration of the solution because ofoxidation, and aids in preventing stains.
Neutralizer
After development, the pores of the swollenemulsion retain a portion of the developer. If allowed toremain, the developer continues its activity. Even whenthe emulsion is thoroughly rinsed in a water bath beforebeing placed in the fixer, some developer activityremains. This causes uneven stains in the gelatin of theemulsion and makes the negative unusable. To stopdevelopment and prevent stains, you must add an acidneutralizer to the fixer. The most frequently usedneutralizer is acetic acid.
Hardening Agent
During development, the gelatin becomes softenedand swells. Frilling, reticulation, scratches, and otherundesirable effects may result when processing iscontinued without hardening the emulsion. A hardening
agent is included in the fixer to harden the emulsion inthe fixing bath. The most common hardening agent ispotassium alum. The hardening and toughening of thegelatin by the alum stops the tendency of the emulsionto swell but leaves it expanded and rigid enough for thewashing process.
Antisludge Agent
The pH range of the fixer is limited. It must be lowenough to neutralize the activity of the developer andalso be high enough to prevent sulfurization. Thereduced acidity of the bath is gradually neutralized bythe alkali of the developer carried into the fixer by thefilm. When the active acidity is neutralized too far, asludge of aluminum sulfite forms that can make the fixeruseless. An antisludge agent, such as boric acid, is addedto the fixer. This agent is capable of absorbing a largequantity of the developer before sludge occurs, thuslengthening the useful life of the fixer.
Time Required for Fixing
The time required for film to fix depends on severalfactors:
The type of emulsion and its thickness. All elsebeing equal. fine-grain emulsions fix faster thancoarse-grained ones. Thin emulsions require less timeto fix than thick emulsions.
The type of fixing bath and degree of exhaustion.When sodium thiosulfate is the fixing agent, aconcentration of about 75 percent gives the fastest rateof fixation. However, because of the tendency of hypoto bleach out the image, most fixers for negatives havea concentration between 20 and 40 percent.
The fixing bath temperature. An increase in thetemperature increases the rate of fixation. (Do notinterpret this to mean that you can raise the temperatureof the fixer above the temperature called for by theparticular process being used.) The temperature of thefixer is not as critical as the temperature of the developer.However, you should keep all processing solutiontemperatures constant to avoid an increase of graininess.
The amount of agitation. The rate of fixation isaffected by diffusion of the chemicals, so agitationreduces fixation time.
The amount of exposure. The more exposure thefilm has to light, the less unused silver halide to beremoved by the fixer, and hence the faster the rate offixation.
10-6
As a general rule, a film is considered completelyfixed after twice the time it takes to clear it. Clearing orfixation occurs when all visible traces of the silverhalides (a milky appearance) have disappeared. Theclearing time can be determined by taking anundeveloped piece of the same type of film and agitatingthe film in the fixer until it clears. This procedure can beperformed under normal room lights. The tongue cutfrom the beginning of the 35mm film may be used forthis purpose.
Life of a Fixing Bath
The useful life of a fixing bath depends on severalfactors. One of which is the amount of material treatedin the fixing bath. You cannot state accurately the exactamount of film or paper that can be safely fixed in agiven amount of fixer. It is common practice to considerthe fixer exhausted when the clearing time for the filmis double the time it was originally. For a fixer usedsolely for prints, this is not easy to determine; therefore,the life of the fixer is considered ended after a givenamount of paper has passed through it. This is usuallyabout 200 8x10 prints (or equivalent) per gallon of fixer.
Using an exhausted or near exhausted fixing bathmay cause the staining of films and paper. To avoid suchstaining, use two fixing baths in succession is the bestpractice. Initially, two fresh fixing baths are used. Thematerials are treated in the first bath until they are justcleared; then they are transferred to the second fixingbath for an equal period of time. In time, clearing timein the first bath (which is doing most of the fixation) isdoubled from the original time required when the bathwas fresh. When this occurs, the first bath is removedfrom use and replaced by the second bath. The secondfixing bath is replaced by a completely fresh solution.This process is repeated as required, so the second bathis always relatively fresh. Using this procedure ensuresthat all film (and photographic paper) leaves the secondfixer in stable condition and does not fade with time.This method is also economical, because all fixer is usedto a point beyond that at which a single bath could beused.
WASHING
An unwashed or improperly washed emulsion willstain, crystallize, and fade. Therefore, the washing of thephotographic emulsion is as important as any other partof processing. Removing as much of the salt and fixer
from the emulsion is essential. Only by good washingtechniques can image permanence be assured.
The purpose of washing is to remove the solublesalts from the emulsion. Fixing converts silver salts intosoluble salts that must be removed. If the fixing processis incomplete, even prolonged washing cannot make theimage permanent. This is because the compounds ofsilver sodium thiosulfate remaining in the emulsiondiscolor in time and produce stains. Thorough washingis necessary to remove the fixing agent that, if allowedto remain, slowly combines with the silver image toproduce brownish yellow stains of silver sulfide andcauses the image to fade.
10-7
Water containing iron should not be used forwashing. However, impurities, such as rust, dirt, or silt,can be removed by installing a 5 micron water filter inthe supply line.
Seawater may be used to wash negatives if it isfollowed with a freshwater rinse. Salt water removes thehypo from film in about two thirds of the time requiredfor a freshwater wash. However, a short rinse with freshwater is required to remove the salt from the film.
Temperature, chemical contamination, and rate ofwater change all affect the time required to wash filmcorrectly.
Temperature
The wash should be kept within a range of 60°F to75°F (15.6°C to 23.9°C). Within this range of washtemperatures, the warmer the water, the shorter thewashing time required. However, for black-and-whitefilm, a wash temperature of 75°F should not beexceeded. Water at temperatures above 75°F swells thegelatin and tends to inhibit diffusion. It also can damagethe emulsion. Therefore, you should keep thetemperature of the wash water constant with theprocessing solutions.
Chemical Contamination
Adding negatives fresh from the fixer into a tank ofpartially washed negatives nullifies the effects ofprevious washing, and you must start the washingprocedure again. The reason for this is that the negativeswith the higher concentration of fixer add enoughchemicals to the washed negatives to contaminate thepartially washed film. This situation can also occur if

your hands are contaminated by chemicals when youplace them in the wash tank.
Rate of Water Change
The length of washing time also depends on thediffusion of the hypo from the emulsion of the material.The rate of diffusion depends on the amount of freshwater coming into contact with the emulsion. Hyporemaining in the emulsion is continually halved in equalperiods of time as the washing proceeds; for example,the average negative gives up about one half of the hypoit contains in 1 minute when in direct contact withrunning water. After 2 minutes, one fourth of the hyporemains, and so on, until the amount of hypo remainingeventually becomes negligible. Thus the rate of washingdepends upon the degree of agitation and the amount offresh water that comes in contact with the emulsion. Theminimum washing time for negatives in running wateris 20 minutes when a complete change of water occursevery 3 minutes.
Rapid film washers are designed to provide aconstant freshwater exchange across the film emulsion.When rapid film washers are used, such as a Hurricanetype of film washer, the film can be washedsatisfactorily in 5 minutes.
WETTING AGENT
After washing, water often drains from film in anirregular manner, clinging to both emulsion and basesides in drops, streaks, and uneven patterns. When suchpartially drained or incompletely wiped films aresubjected to hot air or radiant heat, the areas under thesestreaks and drops of water dry much more slowly thanthe surrounding film. The swollen gelatin at these pointsis subjected to stresses and shrinks unevenly, changingthe density of the silver image. When surplus water isremoved from the emulsion side and drops of waterremain on the base side, drying of the emulsionimmediately opposite the water spots is retarded anddrying marks usually result. The use of a wetting agenthelps to prevent the formation of these water spots.
Wetting agents are chemicals that “superwet” thefilm to promote faster and more even drying. Wettingagents are chemically different from soaps, but theyperform a related function. They all lower surfacetension of liquids so the film surfaces are wetted quicklyand evenly. Kodak Photo-Flo is a wetting agent used inimaging facilities.
After washing, bathe the film in a 1- or 2percentsolution of wetting agent (prepared according toinstructions provided by the manufacturer) for about 2minutes. Then drain the film briefly for about 30seconds. Squeegee the film between your index andmiddle finger to remove surface foam and excesswetting agent. Be sure your hands are clean anddampened with the wetting solution before squeegeeingthe film.
DRYING
The final step in processing is to dry the wet film.This step should be given special attention. Film dryinghas two distinct phases. The first is the removal of excesswater from the film surfaces. The second is the dryingof the film by evaporation.
When you are drying the film, the primary problemsyou must guard against are uneven drying, dust,scratches, and damage to the emulsion caused byoverheating. Dry the film in a vertical position, hangingit from a line or beam by film clips. When you are dryingroll film, curling can be avoided by hanging another filmclip at the bottom of a strip of film. Sheet film should behung from one corner of the film to prevent dryingstreaks. Film should not normally be dried in the hangeror reel in which it was processed, since uneven dryingresults.
Dust and water spots are the problems youencounter most frequently when drying films. When thedust is not embedded in the emulsion, you can removeit with a camel-hair brush. Embedded dust in the filmrequires the film to be rewashed and dried properly.Water spots are more serious, since uneven drying cancause not only white stains but also small craterlikeformations in the film under each spot. The white stainscan be removed with alcohol, but the craterlike spotsbecome a permanent defect. The best cure is prevention.You can avoid these problems by keeping the filmsurface clean and by using a wetting agent before drying.
The photographic emulsion consists of one or morelayers of gelatin with silver halides of varying sizesdistributed through the layers. After exposure anddevelopment, the halides are changed to metallic silverthat occupies space and does not absorb water. In anemulsion that is unexposed, the undeveloped silver saltsare made soluble and are removed from the emulsionduring the fixing and washing stages. Only the gelatinand the space occupied by the halides remain, and thesedo absorb water. Because of these conditions, dense
10-8

negatives, or negatives containing many heavilyexposed areas, contain less water and dry faster than thinnegatives. When you think about this for a moment, youcan see that since the heavily exposed and lightlyexposed areas are distributed randomly throughout theaverage negative, drying occurs rapidly in the denseareas, more slowly in the intermediate areas, and mostslowly in the thin or unexposed areas. Obviously, then,film does not dry uniformly.
When gelatin dries, the water it contains must firstmigrate to the surface and then evaporate into the air.Ideally, these processes should take placesimultaneously and at the same rate. However, when thesurface moisture evaporates too rapidly, the surfacebecomes hard, and the internal moisture is unable toescape it. In addition, when drying is too rapid, the outersurface shrinks while the rest of the gelatin layer is in anexpanded state. This causes strains that can have aharmful effect upon the emulsion.
For a negative to dry, it must be surrounded by dryair; that is, air that contains a lower relative percentageof moisture than the gelatin. When the heated aircirculates, the damp air moves away from the surface ofthe wet film and replaces it with dry air that permits thedrying process to continue. This is the principle behindthe air impingement dryers currently in use. Heated airaccepts more moisture than cool air. When the air doesnot move, air can become heated and rapidly reach astate of equilibrium with the moist film, and dryingstops.
In an air impingement drying system, air is warmedand blown against (impinges upon) the surface of thewet film. The warm, dry air picks up moisture and moveson. It is immediately replaced by more warm, dry air,and the process continues until the film is dry. The rateof drying is controlled by adjusting the velocity,temperature, and humidity of the air in the dryingchamber. In hot and humid climates where the air issaturated with moisture, the air must be passed througha dehumidifier before it enters the drying chamber.When this is not done, the film does not dry. In dryclimates, you must reduce both the heat and the airvelocity to prevent overdrying.
Photographic films begin drying at the corners andedges as well as in the areas of heaviest density. Thisintroduces strains in the direction of the dry areas. As afilm continues to dry, the strains gradually begin toequalize, and the film, when dried properly, ultimatelylies flat. The surface is not moist to the touch, but it isfirm and soft enough that flexing does not damage it. If
10-9
overdried, the film curls toward the emulsion and canbecome brittle.
The rate of drying and the amount of curl alsodepend upon how thick the emulsion layer is andwhether or not the film has a gelatin backing. Naturally,the thicker the layer, the longer the drying time. A gelatinbacking takes time to dry, but it introduces an opposingcurl and causes the dried negative to lie quite flat.
FILM PROCESSING EQUIPMENT
Hand processing of photographic film is best carriedout in a darkroom that is properly equipped. Whetherthe darkroom is large or small, certain essentials arenecessary for good quality processing.
The darkroom must be clean and well ventilated.Shelves, bottles, racks, processing equipment, walls,and floors that are spotted with dried chemicals areharmful to photographic images. Navy photo labequipment, therefore, must always be spotlessly clean.
The arrangement of a darkroom should beconvenient, “a place for everything and everything in itsplace.” There should be adequate and correct safelightsplaced at recommended working distances. Onlynecessary sensitized material should be in the darkroom.Temperatures in the lab should be maintained as closelyas possible to the normal processing temperature-about70°F to 75°F. The well-equipped darkroom shouldcontain the following items: sink, graduates, requiredchemicals, waterproof aprons to protect clothing, cleantowels, accurate thermometer and timer, and thenecessary film hangers, trays, reels, and tanks. Alldarkrooms should be well stocked with preparedchemicals in containers that are labeled properly. Ingeneral, good photographic quality demands that allwork must be conducted in a clean, orderly, andsystematic manner.
DARKROOM SINKS
Sinks in the photographic darkroom should be sizedadequately and constructed properly. Most sinks inNavy labs are factory-made and meet all therequirements for photographic work Sinks should bebig enough and built so they drain thoroughly. The sinkshould have duckbords to keep trays and tanks off thebottom and to permit water to circulate under and aroundthe solution tanks to maintain correct and constanttemperatures. Sinks, also, should have a mixing valveto control the temperature of the water in the sink and a

standpipe to hold water in the sink at the correct depth,yet still allow water to flow out (fig. 10-1).
SAFELIGHTS
The function of a safelight is to transmit themaximum amount of light that can be used safelywithout damaging the sensitized materials beingprocessed. The color sensitivity of different sensitizedmaterials varies. Therefore, the color and intensity oftransmitted light must be varied accordingly. Adarkroom safelight is the combination of a rated lightsource and a filter designated to protect a specificsensitized material.
The word safe. of course, is a relative term since nosensitized photographic materials are ever completelysafe from the effects of safelight illumination. However,a filtered light is accepted as safe when the sensitizedmaterials can be handled under the illumination with noevidence of fogging for at least twice as long as thenormal processing time. No procedures must befollowed precisely when safelights are used:
303.23Figure 10-1.–Photographic processing sink
Use only the size of incandescent bulb specified;for example, 7 1/2 watt, 15 watt, or 25 watt.
Handle sensitized material at the distancerecommended by the manufacturer. This is usuallybetween 3 and 6 feet.
To determine whether a safelight is safe, you shouldfollow these procedures:
1. In the dark, place a sheet of unexposed film,emulsion-side up, on the working area where the film isto be processed.
2. Place several coins on the emulsion and turn onthe safelight. Leave the safelight on for twice the lengthof time the film will normally be processed.
3. Process the film normally and check to seewhether there is less density in the areas covered by thecoins. When there is less density, it indicates the filmwas fogged by the safelight and the safelight is not safe.A safelight that causes fogging may be corrected byreplacing the filter, by installing a lower rated bulb, or
10-10
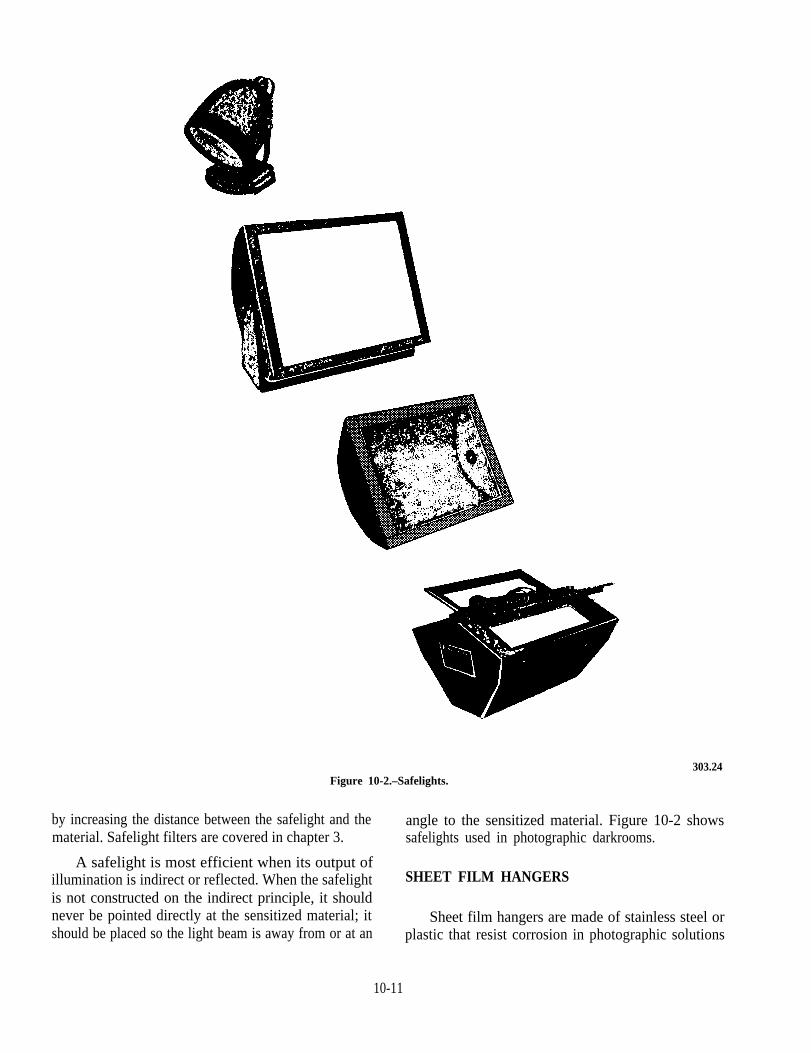
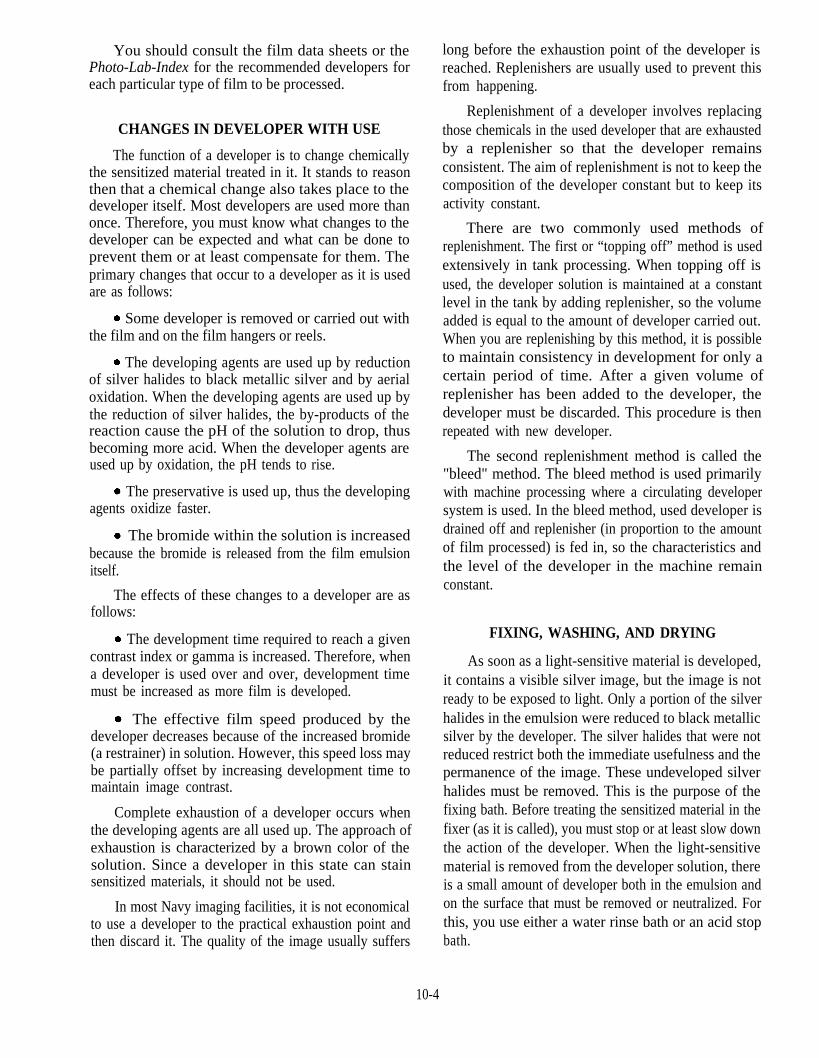
Figure 10-2.–Safelights.303.24
by increasing the distance between the safelight and thematerial. Safelight filters are covered in chapter 3.
A safelight is most efficient when its output of
angle to the sensitized material. Figure 10-2 showssafelights used in photographic darkrooms.
illumination is indirect or reflected. When the safelightis not constructed on the indirect principle, it shouldnever be pointed directly at the sensitized material; itshould be placed so the light beam is away from or at an
SHEET FILM HANGERS
Sheet film hangers are made of stainless steel orplastic that resist corrosion in photographic solutions
10-11

Figure 10-3.–Sheet film hangers.
Figure 10-4.–Roll film processing tank and reel.
(fig. 10-3). They are constructed of perforated metal orplastic and channeled to receive and suspend film insolution. This allows the solution to circulate freely overthe film surface. Sheet film hangers are used in tankdeveloping and their use is described later in the thischapter.
ROLL FILM TANKS AND REELS
Hand processing of roll film is usually done on reelsin roll film tanks. The center-feed reel and tanks usedmost commonly in the Navy are made of stainless steel.The film is wound onto a spiral reel. The reel is thenplaced into a tank for processing (fig. 10-4).
TRAYS
Trays used for processing photographic film (roll orsheet) are the same as those used for processingphotographic prints. They may be made of any materialthat is not affected by, or cause contamination of,
photographic solutions. Most trays used today are madeof stainless steel or plastic.
SHEET FILM DEVELOPING TANKS
Tanks used for developing sheet film come in avariety of shapes and sizes. They are usually made ofstainless steel.
To process sheet film in tanks, load the film intosheet film hangers and then place it into the developingtanks of solutions (fig. 10-5).
FILM WASHING EQUIPMENT
Film washing does not require special equipment.Sheet film can be washed in the same type of tank ortray that is used to process the film or in tanks designedfor film washing.
When a tray is used, only one film at a time shouldbe washed. When more than one piece of film is washedat a time, the films will probably rub together and be
10-12

Figure 10-5.–Film developing tanks.
Figure 10-6.–Washing film in trays.
scratched. Only line copy types of negatives are usuallywashed in a tray.
The most effective washing method in a tray is whena siphon device is attached to the edge of the tray. Thedevice siphons water from the bottom of the tray, whilefresh water enters at the top (fig. 10-6). Because fixer isheavier than water, it sinks to the bottom of the tray.
The best way to wash hand-processed sheet film(especially more than one sheet at a time) is in asheet-film washing tank. Film hangers hold individualnegatives suspended separately in the tank. Fresh waterflows into the bottom of the tank and runs out aroundthe sides at or near the top of the tank (fig. 10-7). Whenyou place the film hangers into the tank, ensure thenegatives are separated, so sufficient fresh water reachesall areas of each negative.
WARNING
Figure 10-7.–Film washing tank
Figure 10-8.–Rapid roll-film washer.237.126
A rapid roll-film washer is excellent for washinghand-processed roll film. It is a cylindrical tank, largeenough to hold several spiral reels. The washers comein a variety of sizes that will wash from two 35mm reelsto as many as six or eight 120 reels (fig. 10-8).
Aboard ship, hoses attached to potablewater spigots can back siphon chemicals orwash water from the trays or sink into thedrinking water supply. These hoses must havea backflow preventer installed in the plumbing The rapid roll-film washer is constructed so thesystem. wash water enters the tank at the base and flows up
10-13

Figure 10-9.–Washing film in processing roll-film tank.
through the tank and around the film at a rapid rate. Bydischarging the water from the top of the tank, you canremove more hypo in a shorter time.
Roll film also can be washed in the roll-film tank inwhich it was processed. To wash roll film in a roll-filmprocessing tank, simply push a small hose down into thecenter of the reel and have the faucet turned on, so thewater overflows steadily from the tank (fig. 10-9).
TIMERS
Every darkroom should have a reliable timer.Ideally, the timer should have both a minute hand and asweep second hand. The timer most commonly used inthe Navy is a Gray Lab timer (fig. 10-10). Not only doesthis timer have a minute and sweep second hand but thenumbers and hands are fluorescent so they can be seenin the dark A Gray Lab timer also has an alarm (buzzer)that indicates when the time for processing is up.
PROCESSING METHODS
No matter how many rolls or sheets of film youdevelop, it helps when you carry out the processing inthree distinct phases, beginning with preparation. First,your work area must be clean, and the equipment neededmust be arranged so it is easy to locate in the dark Thesecond phase is processing. If you are not familiar withdarkroom work, you should complete ALL theprocessing steps with dummy or practice film and waterto substitute for processing solutions under white lightand then practice a few times in the dark. The third phaseis film drying.
Figure 10-10.–Gray Lab timer.302.285
To make the latent image visible and permanent,you must process the film in different chemicalsolutions. There are five steps in the black-and-whiteprocessing phase. The first step is development. In thisstep the film is placed in a developer that transforms thelatent image into a visible black metallic silver image.In the second step the developing solvents areneutralized, and development is retarded or stopped bya rinse bath or acid stop bath, respectively. The third stepinvolves placing the film into a fixing bath to removethe light sensitive, undeveloped silver halides. Thefourth step is to wash the film to remove all thechemicals, and the last step is to dry the film. Each ofthese steps is explained further in this chapter, sincethere are certain controls that must be applied to eachstep.
Some of the processing steps may be carried out inwhite light, while others must be done under appropriatesafelight conditions or in total darkness. The steps thatmust be done in darkness or under suitable safelightconditions begin when the film package, holder, or rollis opened and end when the film is removed from thefixer.
As discussed earlier, there are five steps in filmprocessing. The steps and the lighting conditions underwhich they are carried out are as follows:
1. Development-dark or appropriate safelight
2. Rinse or stop bath-dark or appropriate safelight
10-14

3. Fix-dark or appropriate safelight
4. Wash-white light
5. Dry-white light
In addition to exposure, there are four factors indevelopment that control image density, contrast, and,to a limited degree, the uniformity of individualdensities in a negative. These four factors are the typeof developer used, development time, temperature of thedeveloper, and agitation as follows:
Type of developer. One type of developer cannotcover all film exposure/processing situations. Forexample, film exposed under poor lighting conditionsmay require a vigorous developer to bring out as muchimage detail as possible, while film exposed undernormal conditions requires a normal working developer.There are many different developers, each provides adifferent activity and quality of development. The actualchoice of the developer to use depends on the following:the type of film, conditions under which it was exposed,type of negative required, developing time that is bestfor the method of development to be used, and themanufacturer’s recommendation.
Time and temperature. Many factors must beconsidered if you want to ensure correct developmentduring film processing. Two of these factors are thelength of time the film is allowed to develop and thetemperature of the developer solution. Both factors canhave a significant impact on the quality of the processedfilm.
10-15
The normal temperature for hand processing mostblack-and -white film is 68°F (T-Max film with T-Maxdeveloper is 75°F). There are several reasons for thisstandardization. At a temperature of 68°F, the gelatinswells sufficiently to allow adequate penetration of thedeveloping solution without oversoftening to the pointwhere it is easily damaged (which occurs at highertemperatures). Temperatures lower than 68°F slowdevelopment excessively. Only when time is of theutmost importance are accelerated temperatures used. Inmost instances when high temperatures are used, thefilm is treated in a hardening bath before processing, orthe film is designed specifically for being processed atsuch temperatures. Since a rise of several degrees intemperature shortens development only a small amount,there is little to be gained by deviating from standardprocessing temperatures.
As explained earlier, the activity of a developerincreases as its temperature increases. Filmdevelopment carried out for a given time at a giventemperature produces both predictable and desiredresults-assuming, of course, that the film has beenexposed properly. When film is developed for a giventime at a given temperature, it is called "time andtemperature development."
When you know the time and temperaturerelationship for a given film and developer combination,processing in total darkness becomes simple. Yousimply adjust solutions to the prescribed temperatureand then process the film for the required time.Assuming proper exposure, time and temperatureprocessing can produce a correctly developed negativewithout your having to see what is happening in thesolution.
In the time and temperature method of filmprocessing, as in any method of film processing, if thefilm is developed for too short a time or at too low atemperature, a weak, low-contrast image results.Underdevelopment can result in insufficient highlightdensity. On the other hand, if the negative is developedfor too long a period or at too high a temperature, theresult is a negative having too much density. Thedeveloper solution overdevelops the exposed areas andmay even develop some of the unexposed silver halides.
All solution temperatures (developer, rinse, fix, andwash) should be as close to each other as possible. Whenthere is considerable difference in the temperature of thesolutions, excessive graininess may result, or theemulsion may be subject to excessive expansion andcontraction that causes it to wrinkle or crack This effectis called reticulation. Since reticulation is not correct-able, it causes the negative to be useless for printing.
For correct development, both time and temperaturemust be accurately controlled. Within limits, time can
The temperature of solutions may be adjusted bysurrounding them with hot water, cold water, or ice.Never add water or ice directly to a solution because itdilutes the developer to an unknown degree. Ice may beplaced in a container and suspended in the solution. Animmersion heater may be used in the solution to raise itstemperature.
be adjusted for a given temperature, or temperature canbe adjusted for a given time.
There is a definite correlation between time andtemperature. When it is impossible to maintain solutiontemperature at the desired level, time can be shortenedor lengthened to compensate. As the temperatureincreases, developing time must be decreased to provideequivalent development. As the temperature decreases,development time must be increased.
Agitation. If a film is placed in a developer andallowed to develop without movement, the chemicalaction soon slows down because the developing agentin contact with the surface of the emulsion becomesexhausted and bromide (a restrainer) is released as aby-product. When the film is agitated, however, freshsolution is continually brought to the surfaces of thefilm, and the rate of development remains constant.Therefore, agitation also has an important effect on thedegree of development. An even more important effectof agitation is it prevents uneven development. If thereis no agitation, the exhausted solution that becamesaturated with bromide from the emulsion may flowslowly across the film from the dense highlight areasand produce streaks. Constant agitation is usuallyrecommended for the first 30 seconds of tankdevelopment and for the entire developing time whenthe film is being processed in a tray. After the initial30-second agitation cycle, the film should be agitatedfor 5 seconds, once every minute during the remainingtime.
The time, temperature, and amount of agitationrequired for a film/developer combination arerecommended by each manufacturer of film ordeveloper. These recommendations are in theinstructions that accompany the film or developer.Another reference source is the Photo-Lab-Index.
There are three different methods of processing filmby hand. These are as follows: the tray, the sheet-filmtank, and the roll-film tank. Each method is discussedhere with an example of the darkroom arrangementused.
TRAY PROCESSING
The tray method is used primarily for processingonly a few sheets of film. With a lot of experience, youcan process as many as 6 to 12 sheets of film in a trayat one time. You will find it easier to work with only afew sheets of film at a time, and repeat the process, thanto start all the sheets at the same time and damage them.
The tray processing method described here hasproven satisfactory under most conditions forprocessing one sheet of film at a time. You should usethis method as described and develop the necessary skillusing this procedure before you attempt to usevariations.
The trays should be considerably larger than thefilm being processed; for example, 4x5 film should beprocessed in 8x10 trays, 8x10 film in 11x14 trays, and
11x14 film in 16x20 trays. Ideally, the trays should bearranged in a shallow sink that contains temperature-controlled circulating water. The trays should bearranged with the developer to your left as you face thetrays. The stop bath goes next to the developer, followedby the fixer and the wash tray.
In all Navy imaging facilities, it is standardprocedure when processing film (or prints) by hand towork from left to right.
Rinse the trays with fresh water as a precautionagainst contamination, and prepare the solutions. Whenthe solutions are ready, place the exposed film holder tobe unloaded on a clean, dry area of the workbench nearthe developer. Set the timer for the correct developingtime, and place it in a convenient location near theprocessing solutions. Then, if you are processingpanchromatic film, turn out all the lights. If you areprocessing monochromatic or orthochromatic film, youcan use a suitable safelight.
Remove one sheet of film from the holder andsubmerge it quickly, emulsion-side down, into thedeveloper. Then immediately turn it over (emulsion-sideup) and slide it back under the surface of the developerquickly, and agitate it vigorously to eliminate possibleair bubbles. The surface of the film must be wettedquickly and evenly; otherwise, developing marks mayresult. Start the timer just before the film is placed intothe developer.
During tray development, the tray should be rockedcontinuously to provide constant agitation. Be carefulthat the tray rocking is not too fast and that it is variedat intervals; for example, first front to back, and thenside to side to avoid patterns of uneven developmentcaused by regular waves.
CAUTION
Do not allow your fingernails to touch thefilm emulsion at any time.
Tray development involves constant agitation, anddevelopment time is usually about 20 percent less thanif the same film were being developed with intermittentagitation. When tray agitation is done very slowly, theagitation should be considered intermittent and thedeveloping time adjusted accordingly.
When the timer rings, remove the film from thedeveloper, drain it from one corner, and submerge it inthe stop bath. Agitate the film in the stop bath for about5 seconds; then transfer it to the fixer. You must agitate
10-16

the film vigorously in the stop bath and initially in thefixer because gases are released in these solutions andthere is danger of air bubbles forming on the filmsurface. If you allow these air bells, or bubbles, to form,they may cause dark spots. This is due to the continuedaction of the developer beneath the bubbles. Agitate thefilm in the fixing bath for a few seconds and then thesafelights or the white lights may be turned on. Continueagitating the film until it loses the cloudy or creamyappearance. Note the time required for this change tooccur because it is just half the total required fixing time.Agitate the film several times during the second half ofthe fixing time. After the film clears, continuousagitation is not necessary.
After fixing is completed, transfer the negative tothe wash water and continue to agitate it unless a regularfilm washing tank or tray is available. After washing iscomplete, the film should be treated in a wetting agentand dried.
As stated earlier, with experience you can processseveral sheets of line copy film at a time in a tray.When processing several sheets in a tray at once, thereis an added step. This is a predevelopment rinse inclean water that should be at the same temperature asthe rest of the processing solutions. The predevelop-ment rinse is located to the left of the developer. Itspurpose is to prevent the films from sticking togetherin the developer.
The procedure for processing more than one sheetof line copy film at a time is the following:
1. When the solutions are ready, place a dry,dust-free paper or cardboard on the workbench near thepredevelopment rinse. Place the exposed film holdersnear this clean working space.
2. Set the timer.
3. Turn out the lights.
4. Remove one film from its holder and place it,emulsion-side down, on the clean paper. Remove thesecond film and place it, emulsion-side down, on top ofthe first. Continue until all the film is placed in a loosepile on the space provided for them.
5. Pick up the film on top of the pile with your lefthand (keep it dry until all films have been placed in thewater), drop it, emulsion-side down, into the water, andimmerse it quickly with your right hand. Pick the filmup immediately, turn it over, emulsion-side up, and pushit back under the solution. Place the wet film,emulsion-side up, at one end of the tray. Immerse thenext film in the same manner. Stack it on top of the first
film, and continue with this procedure until all the filmsare stacked in a pile at one end of the tray. Your left handshould follow the last film into the tray to assist in theagitation of the films.
Wet film may be handled with wet fingers.However, be extremely careful to KEEP WETFINGERS OFF DRY FILMS. Slight pressure with theballs of the fingers is not harmful to a wet emulsionunless it has swollen excessively.
The films should be agitated or shifted constantly toprevent the individual sheets from sticking together.Agitation is accomplished by moving the first film fromthe bottom of the stack and placing it on top or bystarting a new stack at the other end of the tray. Continueagitating the films from bottom to top until they becomecompletely saturated with water-about 1 or 2 minutes issufficient. After the emulsion is completely saturated,the danger of films sticking together is no longer aproblem.
6. Remove the films, one at a time, from thepredevelopment rinse and immerse them in thedeveloper. Place the films in the developer,emulsion-side up; slide them under the surface of thesolution quickly, and agitate them vigorously toeliminate possible air bells. Start the timer just beforethe first film is placed in the developer. Use your lefthand to remove all films from the water, and be carefulnot to get the water contaminated with developer. Yourleft hand should follow the last film transferred from thewater into the developer to help with the agitation.
It is important for you to locate the first sheet of filmplaced in the developer quickly. To do this, align the longdimension of all other films at a right angle to the firstsheet placed in the developer.
The films are immersed, emulsion-side up, in thedeveloper to reduce greater damage that would occur ifthe emulsion, already softened by presoaking, wereallowed to come in contact with the bottom of the tray.Be careful not to dig or drag the comer or edge of a filminto the emulsion surface of the film below it. Do notallow your fingernails to touch the emulsion at any time.Stacking films by aligning their edges against the sidesof the tray helps to reduce scratches and abrasions.
7. Agitate the films constantly, not by rocking thetray, but by moving each film from the bottom of thestack and placing it carefully on top, and pressing itdown gently to assure a flow of solution over its surface.Continue this procedure until the developing time is up.
10-17
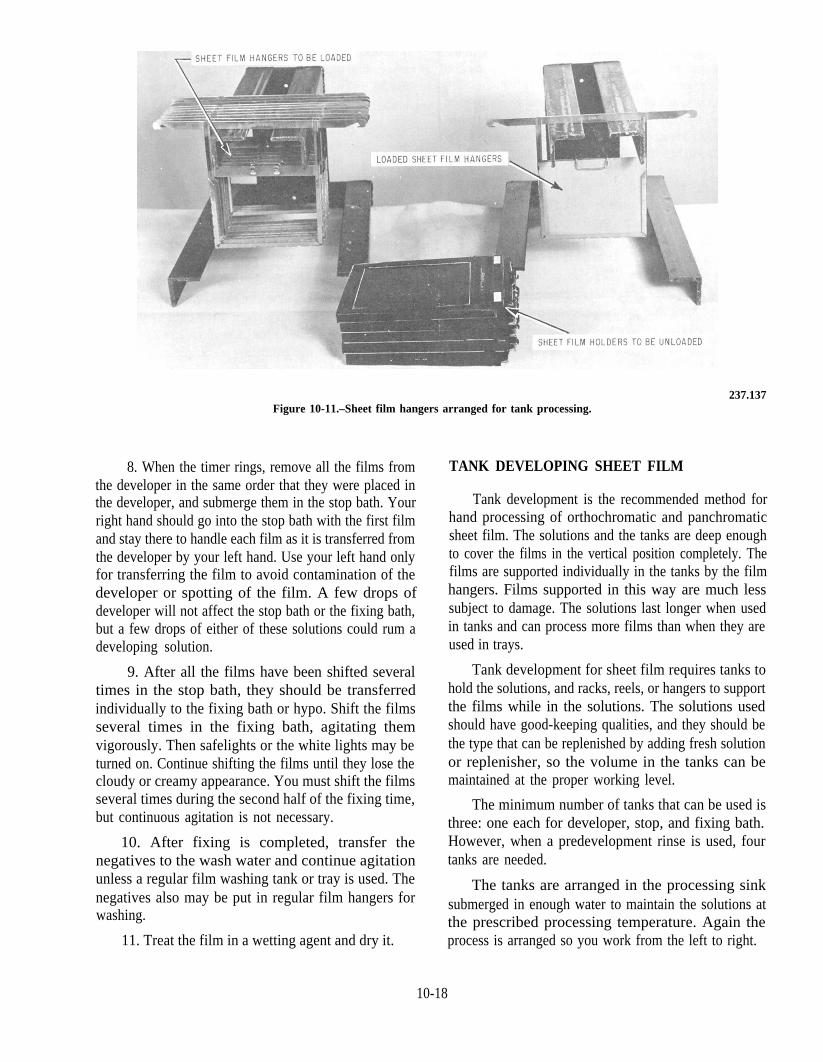
237.137Figure 10-11.–Sheet film hangers arranged for tank processing.
8. When the timer rings, remove all the films fromthe developer in the same order that they were placed inthe developer, and submerge them in the stop bath. Yourright hand should go into the stop bath with the first filmand stay there to handle each film as it is transferred fromthe developer by your left hand. Use your left hand onlyfor transferring the film to avoid contamination of thedeveloper or spotting of the film. A few drops ofdeveloper will not affect the stop bath or the fixing bath,but a few drops of either of these solutions could rum adeveloping solution.
9. After all the films have been shifted severaltimes in the stop bath, they should be transferredindividually to the fixing bath or hypo. Shift the filmsseveral times in the fixing bath, agitating themvigorously. Then safelights or the white lights may beturned on. Continue shifting the films until they lose thecloudy or creamy appearance. You must shift the filmsseveral times during the second half of the fixing time,but continuous agitation is not necessary.
10. After fixing is completed, transfer thenegatives to the wash water and continue agitationunless a regular film washing tank or tray is used. Thenegatives also may be put in regular film hangers forwashing.
11. Treat the film in a wetting agent and dry it.
TANK DEVELOPING SHEET FILM
Tank development is the recommended method forhand processing of orthochromatic and panchromaticsheet film. The solutions and the tanks are deep enoughto cover the films in the vertical position completely. Thefilms are supported individually in the tanks by the filmhangers. Films supported in this way are much lesssubject to damage. The solutions last longer when usedin tanks and can process more films than when they areused in trays.
Tank development for sheet film requires tanks tohold the solutions, and racks, reels, or hangers to supportthe films while in the solutions. The solutions usedshould have good-keeping qualities, and they should bethe type that can be replenished by adding fresh solutionor replenisher, so the volume in the tanks can bemaintained at the proper working level.
The minimum number of tanks that can be used isthree: one each for developer, stop, and fixing bath.However, when a predevelopment rinse is used, fourtanks are needed.
The tanks are arranged in the processing sinksubmerged in enough water to maintain the solutions atthe prescribed processing temperature. Again theprocess is arranged so you work from the left to right.
10-18

The film hangers are simply channeled framessuspended below a bar. The bar is long enough to reachacross the tank and allow the frame to hang below thesurface of the solutions. The frame has channel pieceson the bottom and both sides and a hinged channelacross its top. Each hanger holds from one to four films.The hangers accommodate standard film sizes, such as4x5, 8x10, and so forth. After the films are loaded intothe hangers, they may be carried through the entireprocess without being touched by the hands.
The darkroom should be checked using the stepscommon to all film processing, as explained earlier inthis chapter. After you check the solutions and theirarrangement, check the temperature of the solutions,and check the safelights. Then arrange an adequatesupply of clean, dry, empty film hangers on a rack, andan empty rack to hold the loaded film hangers (fig.10-l1). If the darkroom is not equipped with racks tohold the film hangers, clean, dry tanks can be used tohold both unloaded and loaded hangers. Set the timer,place the exposed film holders between the empty filmhangers and the rack or tank that is used to hold theloaded hangers, and turn out the lights.
To load a sheet film hanger, remove one of the sheetfilms from its holder. Take a hanger in one hand andplace the thumb at one end of the hinged channel. Bushthe hinged channel up and back with the thumb until thefilm can be slid along the inside of the end channels tothe bottom of the frame. HANDLE THE FILM BY THEEDGES ONLY. Make sure the film is seated properly inthe three channels of the hanger. When the film is seatedproperly in the side and bottom channels, bring the topchannel forward and down over its top edge (fig. 10-12).This encloses all four sides of the film in the channeledframe. The hanger should be given a slight shake toensure that the film is in place. Set the loaded hanger onthe rack or in the empty tank to hold it.
The film should be loaded onto the hangers with theemulsion side facing you. This prevents the top channelfrom scratching the emulsion as the film is slid into theframe. Load the other film to be developed in the samemanner. However, do not load more hangers than can behandled conveniently in the tanks at one time.
When the hangers are loaded, lift all of them by theircrossbars and lower them into the predevelopment waterrinse, if one is being used. They should be lowered intothe tank until the hanger crossbars rest on top of the tankThe predevelopment water rinse is optional when usingthe tank method of development, but the water rinse hasthe following advantages:
Figure 10-12.–Loading a sheet film holder.
10-19

Figure 10-13.–Sheet film tank processing agitation.
The air bubbles that usually occur when dry filmis immersed in a solution can be removed withoutharmful effects in the predevelopment water rinse.
When the water-softened emulsion is placed inthe developer, the action of the solution beginsuniformly over the entire emulsion. Thus uneven orstreaky development is avoided.
The predevelopment water rinse removes theantihalation backing dye that interferes with the actionof some developers.
The predevelopment water rinse brings thetemperature of the film and the hangers to the processingtemperature. Maintaining constant temperatures in all ofthe processing solutions is very important.
The predevelopment water rinse is given byimmersing the loaded hangers in a tank of water andagitating them for about 2 minutes. The temperature ofthe water should be the same as that of the otherprocessing solutions. The loaded hangers are then liftedout of the water, drained by one comer, and processedin the usual manner.
Immerse the hangers in the developer slowly andsmoothly to avoid splashing or the formation of air bells.Air bubbles usually result when films are immersedrapidly, especially when a predevelopment water rinsewas not used. All the hangers should be immersedsimultaneously to assure uniform agitation anddevelopment.
Strike the hangers sharply against the sides of thetank several times to dislodge any air bubbles that may
10-20

Figure 10-14.–Reel processing rack.
with a film clip. Dry the hangers, after washing them inhot water, without film in them.
With suitable racks designed to hold reels, roll filmcan also be processed in tanks (fig. 10-14).
TANK DEVELOPING ROLL FILM
have formed. Start the timer and agitate the film for 1minute. After the first minute of development, agitatefor 5 seconds at l-minute intervals.
The most convenient and reliable way to handprocess roll film is in a small roll-film tank. Theconstruction of tanks and reels differ somewhat among
The processing tank usually has enough space forseveral additional hangers. However, this space isneeded for proper agitation of the film hangers.Agitation should be accomplished by lifting the hangersout of the tank draining them momentarily from a
the various manufacturers’ models, resulting in
10-21
differences in loading and use. Generally, the basic unitused in Navy imaging facilities consists of a stainless
different comer each time, and replacing them in thesolution (fig. 10-13). Hangers should not be agitated toovigorously from side to side. This forces the developerthrough the holes in the hangers at high speed, causingdeveloping trails near the holes. The objective is toassure an even flow of fresh solution over the surfacesof the films regularly according to a fixed schedule.
About 10 seconds before completion of thedeveloping time, lift each of the hangers out of thesolution, let them drain for 10 seconds, then lower theminto the stop bath. Agitate them several times in the stopbath, drain them, lower them into the fixing bath, andagitate them constantly for 2 or 3 minutes.
The fixing and the washing requirements are thesame as described previously in this chapter. Whenwashing is complete, place the film hangers and filminto a wetting agent; then remove each sheet from itshanger and hang it up by one corner to dry.
When the film is dried in the hangers, there is anumber of drying marks along the edges of the film, thusreducing the actual usable size of the negative image. Itis better to suspend each film individually from a line
rewound, you do not have to open the cassette to removethe film. The leader or loading tab on 35mm film can becut off square while in the light to ease loading of thespiral reel (fig. 10-15).
Figure 10-15.–Cutting leader tab film 35mm film.
steel, center feed, spiraled reel to hold the film; a tankwith a lighttight cover; and a filler cap. Each reel isconstructed for a specific size roll of film; for example,35mm, 120, and 220. The tank top permits pouring thechemicals in and out of the tank under white lightconditions. The tanks come in sizes to hold from one35mm reel to as many as eight 35mm reels or five 120reels. Small roll-film tanks of all metal construction(tanks, lids, caps) should be numbered or marked in sucha way that prevents mixing different tanks, lids, andcaps.
The proper loading of a film reel in total darknesscan be the most important steps and challenges inprocessing roll film.
When processing roll film with a paper backing, thepaper tape sealing the exposed roll should not be brokenuntil the lights have been turned out. Also, for 35mmfilm, the cassette should not be opened until the lightshave been turned out. If a short length of film is leftprotruding from the 35mm cassette when the film is

There are three ways of loading a center-feed spiralreel. You should practice each method (with a dummyroll), both in white light and in total darkness, and selectthe method that is most comfortable for you. Thenperfect that method. Although the three methods aresimilar, there are differences that may make one methodeasier for you. However, before beginning one of thesemethods, make sure that both the reel and your handsare clean and dry.
First method. Remove the film from the cassette(35mm) or separate it from the paper backing (120 or220). The film must be handled only by the edges toprevent scratches and fingerprints. (When you work
Figure 10-16.–Leading 35mm film on wire reel.
with 35mm film, the tongue of the leader must be cutoff to make a square end before loading the reel.)
If you are right-handed, the ends of the wire spiralmust be positioned on the top and pointing to the right(fig. 10-16, view A). For left-handed people, the ends ofthe wire spiral reel when positioned at the top must pointto the left.
Next, bow the film slightly concave to clear theedges of the spiral and clip or hold the film to the core(center) of the reel (fig. 10-16, view B). The filmemulsion must face in or toward the reel center. Thetension on the film should be firm enough to prevent thefilm from skipping the spiral grooves, but not so firm itoverlaps or falls into the same groove twice.
Turn the reel, apply gentle pressure, and keep yourthumb and forefinger on the film edges. This pressureproduces a slight curl in the film and allows it to passonto the edges of the reel. As you continue to turn thereel, the film straightens out and fits into the groovedspaces in the reel (fig. 10-16, view C). Apply enoughtension to the film so it does not skip grooves. However,too much tension may cause the film to overlap in thesame grooves of the reel.
Second method. Prepare the film as before. Holdthe reel to be loaded on a clean working surface in yourleft hand with the ends of the wire spiral at the top,pointing toward the right (fig. 10-17, view A). If you areleft-handed, hold the reel in your right hand with theends of the spiral wires at the top, pointing toward theleft.
Hold the film by its edges in your right hand andbow it between your thumb and forefinger. With yourleft index finger or thumb, depress the grip clip andgently push the end of the film into the core of the reel(fig. 10-17, view B). When the reel does not have a gripclip, insert the film end about 1/4 to 1/2 inch into the reelcore and hold it there with your left thumb and indexfinger (if right-handed). Remember, always load the reelwith the film emulsion facing in, or toward, the reel core.Be sure the film is held straight at the reel center(fig. 10-17, view C).
Now turn the reel smoothly in a counterclockwisedirection with your left hand, and guide the film into thespiral grooves with the thumb and forefinger of yourright hand (fig. 10-17, view D).
Third method. Slowly unwind the paper backingfrom the film until you feel the film with your finger. Donot completely unwind the paper backing from the film.
10-22

302.286Figure 10-17.–Loading 120 film on reel.
For 35mm film, if the film was not completely rewoundinto the cassette, cut the tongue off and leave the film inthe cassette.
Hold the reel to be loaded in your left hand withthe spiral wire ends at the top, pointing toward theright. Allow about 3 more inches of the paper backingto unroll. Bow the film and place it straight into thereel core. Smoothly and slowly turn the reelcounterclockwise, guiding the film onto the reel.Allow the paper backing to unwind as the film iswound onto the reel.
When all but about 3 inches of the film is on thereel, you will feel the end of the film taped to the paperbacking. With 35mm film in a cassette, the film stopsunrolling from the cassette when the end is reached.
When you feel the tape or the end of the film isabout 3 inches from the reel, carefully separate thefilm from the paper backing or cut the 35mm filmright next to the cassette, being careful not to pull thefilm from the reel. Finish loading the reel.
The paper backing on 220 roll film does not runthe full length of the film as does 120 film. The paperbacking on 220 film serves as a leader and tailer thatare taped to the ends of the film. Therefore, whenusing the third method described above, you mustremove the paper tailer from the film before loadingthe reel.
Before processing film using a reel, you mustpractice loading it by using a roll of practice film inwhite light, then repeating the procedure in totaldarkness until you feel comfortable and do not damagethe film. Only after you have the reel(s) loaded properly,should you think seriously about processing.
When a roll-film tank is used to process fewerrolls of film than the tank can hold, you must take upthe extra space in the tank with enough empty reels tofill the tank. The empty reels go into the tank on topof the reels holding the film. When you are pouringsolutions into the tank, completely cover ALL thereels in the tank.
When processing with a roll-film tank that has alighttight cap, you can add or dump the chemicalswithout removing the cover. Only one tank is neededbecause the required solutions are poured out of andinto the tank through the tank cover duringprocessing. This can be done in white light. Thechemicals should be arranged in the darkroom sinkfrom left to right (developer, stop bath, etc.) and be
10-23

Figure 10-18.–Arrangement of materials for processing film.
brought to the correct processing temperature in a waterbath (fig. 10-18).
A clean, dry area should be provided on the workcounter for loading the film onto the reels. The followingsteps are used to process roll film in small tanks:
1. Load the reel or reels with the film to beprocessed.
2. Place the loaded reels into the tank. If theloaded reels do not come to the top of the tank, addempty reels to take up the space. Place the cover and capon the tank. The lights may now be turned back on. Oncethe lights are on and before the film is fixed, be carefulnot to remove the tank cover or the film will be exposedto light and ruined.
3. Hold the tank in one hand and tilt it slightly;pour the developer directly from the graduate into thetank through the light trap pouring hole. Pour as fast asyou can without spilling. As the developer nears the topof the tank, hold the tank level or set it in the sink. Fillthe tank to just overflowing. This step should take about10 to 20 seconds, depending on the tank size.
4. Once the tank is full, immediately start thetimer, replace the cap, and strike the tank on the edge ofthe sink once or twice to dislodge any air bubbles. Nowagitate the film by inverting the tank slowly end to end(fig. 10-19). The initial agitation should be 30 seconds.Place the tank in the sink on its bottom (cover up).
5. Once every minute, agitate the film for 5seconds by slowly inverting the tank end to end. After
each agitation cycle, place the tank back in the sink. Ifyou are holding the tank during the entire developingperiod, the heat from your hands may heat the developerand produce unpredictable results.
6. When only 10 seconds of developing timeremain, remove the cap from the tank cover.Immediately start pouring the developer out of the tankthrough the light trap pouring hole. Dump thechemicals according to local instructions of theimaging facility. This step should take about 10 secondsto complete.
7. When the developer has been emptied from thetank, fill the tank to overflowing with stop bath. The stopbath must be poured into the tank through the light trappouring hole in the tank cover. Replace the cover cap.Agitate the film in the stop bath for about 30 secondsusing the end-for-end method.
8. When the stop bath portion of the process iscomplete, pour the stop bath through the light trappouring hole in the tank cover.
9. With the tank cover still in place, pour fixer intothe tank and replace the cap. Dislodge the air bubblesand set the timer to the required fixing time. Start thetimer and agitate the film using the same agitation as thedeveloper.
10. When the prescribed fixing time has elapsed,remove the tank cover and pour the fixer from the tankback into the bottle from which it came. Never pour the
10-24

303.41Figure 10-19.–Agitation of a small tank.
fixer into the sink. The fixer can be reused and then latersaved for silver recovery.
11. The film can be washed either in the tank or ina roll-film washer. When the tank is used, insert a hosedown through the center of the reels until it is about 1/2inch from the bottom of the tank. Adjust the water (atthe same temperature the film was processed) so asteady overflow is created. Wash the film for about 20minutes. When you use a rapid roll-film washer, again,adjust the water temperature and place the reelscontaining the processed film into the washer. Adjust therate of water flow until the reels start to turn. When thereels start to turn, adjust the rate of water flow until thereels stop turning. Set the timer and wash the film forabout 5 minutes.
12. While the film is washing, rinse the processingtank, tank cover, and cap with clean water. Fill the tankwith water (check the temperature) and add the wettingagent. After the film has been washed, place the film,still on the reels, into the wetting agent solution. Replacethe tank cover and cap and agitate the film in the wettingsolution very S-L-O-W-L-Y for 1 minute.
13. After 1 minute in the wetting solution, removethe loaded film reels from the tank. (Do not save thewetting solution.)
14. To dry the film, attach the end of the film to afilm clip in the drying cabinet. Let the film unwind fromthe reel as you slowly lower the reel.
When the film is unwound, depress the grip clip (ifthe reel has one) or remove the film from the core of thereel. Squeegee the film and attach a second film clip tothe lower end of the film. Close the drying cabinet doorand dry the film.
Photographer’s Data Sheets
Sometimes a photographer's data sheet willaccompany film that enters your imaging facility to beprocessed. The photographer's data sheet will provideyou with information on how the film was shot, lightingconditions, and specific processing instructions. Whena photographer's data sheet accompanies the film or joborder, you should process the materials specified by theform.
Cleaning Up
10-25
After processing, the darkroom and all equipmentmust be cleaned up immediately. Rinse thoroughly allprocessing equipment: tanks, reels, hangers,thermometers, funnels, and so forth, in clean, warmwater. Place the clean equipment where it can dry beforeit is needed for the next processing run. Always keep theprocessing room shipshape.
REVERSAL PROCESSING
Normal processing of black-and-white filmproduces a negative; from this negative, a positive ismade. However, by using the reversal process, you canproduce a positive image directly on theblack-and-white film.
In the reversal process, a negative image is firstobtained by developing the original latent image in adeveloper that contains a silver halide solvent. Thisdeveloper dissolves some of the excess silver halides.After leaving the developer, the negative image isdissolved away in a bleach bath. The silver halidesremaining are chemically “exposed” (fogged) anddeveloped by a second developer that provides thepositive image.
Not all black-and-white films reverse well. Filmsthat reverse well are Kodak Direct PositivePanchromatic Film 5246 (35mm), T-max 100 DirectPositive Film, and Kodak Technical Pan Films (35mm).Instructions for reversal processing of these films canbe found in the Photo-Lab-Index.

COLOR PROCESSING
Color adds realism to photographs. At one timecolor was difficult to work with. It required specialcameras and specialized films that could be processedonly by the manufacturer of the film. Now, colormaterials have been improved and are used extensivelyin the Navy. They are far more popular than black andwhite.
As discussed in chapter 2, color films have at leastthree emulsion layers. Primary colors affect oneemulsion layer only, while complementary colors affecttwo emulsion layers; for example, the color cyan affectsthe blue and green sensitive layers. White light affectsall three emulsion layers. Black has no effect on anylayer. The type of process used depends on whether thefilm is a negative type of film or a reversal (slide) film.The most common processes used in the Navy areKodak Flexicolor for color negatives and KodakProcess E-6 for color reversal films. The EastmanKodak Company continually strives to improve theirprocesses by making them more environmentally safe.Always consult the Photo-Lab-Index for the mostcurrent information concerning film and paperprocesses.
COLOR NEGATIVE PROCESSING
In negative color film, the dye couplers producedare complimentary to the primary colors of light;therefore, a blue light records as yellow, a green lightrecords as magenta, and a red light records as cyan. Allcolors within a scene are recorded through varyingcombinations of these yellow, magenta, and cyan dyes.The color negative is a halfway stage to a color print.
The cyan and magenta dye image layers formed bycolor processing absorb some light wavelengths thatshould be transmitted. In negative color film, theseabsorbed wavelengths of light cause a color cast whenprinted. To prevent this color shift, the manufacturer hasgiven the green and red sensitive emulsion layers ayellowish and pinkish tint, respectively, duringmanufacturing. These tints are what form the overallorange mask that you see in finished color negatives.Some color film used for aerial photography does nothave this orange mask. This allows for a directinterpretation of the negative image. An orange-masking filter is added when these films are printed.
The Kodak Flexicolor process is used forprocessing color negative films and some monochromefilm, such as Ilford XP2. There are four chemical stepsand two wash cycles in the Flexicolor process. They are
as follows: color developer, bleach, wash, fix, wash, andstabilizer.
Color Developer
The first step in color negative processing is colordevelopment. A color developer in color processesworks nearly the same as a black-and-white developer.The exposed silver is developed by a developing agentand converted to metallic silver and by-products arereleased. As the color developer is working atdeveloping the silver, it becomes oxidized and reactswith nearby dye couplers. Dye couplers are built into theemulsion around all of the metallic silver sites. Theprimary function of a color developer is to develop theexposed silver halide crystals to metallic silver and thenform dye around the metallic silver, using the oxidizedcolor developing agent.
Temperature of the color developer is the mostcritical of all the processing steps. The temperature ofthe color developer must be 100°F ±0.25°F (37.8°C±0.15°C). All other wet steps in the process can bewithin the range of 75°F to 105°F (24°C to 41°C);however, it is best to maintain all solutions at constanttemperatures.
Bleach
Bleach is found in all color processes. The purposeof the bleach is to take the metallic silver still in the colorfilm (or paper) and convert it to a form that can be fixed.In color products, all of the silver must be removed.Only the color dyes form the image. The bleachchemically converts the silver metal back to a solublesilver halide.
Fixer
The function of fixer is the same in color processesas it is in black-and-white processes. A fixer convertsthe silver halide to a water soluble form. Most fixers usethiosulfate as the fixing agent in an acidic solution.When fixing is incomplete, unwanted silver remains inthe image. This causes a loss in contrast, added density,and an unwanted color cast.
Stabilizer
The final wet step in color negative film processingis the stabilizer. The main purpose of this solution is toprovide a wetting agent to prevent spotting of the filmand to prevent unused magenta dye couplers fromattacking the newly formed magenta dye.
10-26

Unlike black-and-white film processing, colornegative film cannot be “push processed” successfully;therefore, you must choose a film with an appropriatefilm speed for the lighting conditions in which youphotograph your subject.
COLOR REVERSAL FILM PROCESSING
Color transparency film forms dyes according to areversed silver positive; for example, a yellow dyeimage forms in the top emulsion that corresponds to anabsence of blue in the original scene. This yellow dyesubtracts blue light. A blue image is formed by magentadye (minus green) and cyan dye (minus red), thusleaving blue. In color transparency film, the dyessubtractively produce a correct color positive image ofthe scene photographed.
The Kodak E-6 Process is used in the Navy forprocessing color reversal film. There are seven chemicalsteps and two wash cycles in the Kodak E-6 Process.They are as follows: first developer, wash, reversalbath, color developer, prebleach, bleach, fixer, wash,and final rinse.
The first chemical step is the first developer. Thefirst developer is a black-and-white developer thatconverts the exposed latent image in each emulsionlayer to a metallic silver. Like black-and-white negativeprocessing, after the film leaves the first developer, thereare undeveloped areas where the silver halides areunaffected by camera exposure. It is these undevelopedareas that the final color positive images are formed inreversal film.
After the first developer, the film is chemicallyfogged or “re-exposed” in the reversal bath. The reversalbath exposes the silver halides that were not developedin the first developer. This re-exposure is what forms thepositive image. After 1 minute in the reversal bath, thenormal room lights can be turned on.
After fogging, the film is developed in a colordeveloper. The color developer works the same way incolor reversal processing as it does in color negativeprocessing. It changes the fogged silver halides to blackmetallic silver and at the same time, cyan, magenta, andyellow dye couplers are formed by the exhausteddeveloper.
At this stage the film looks completely blackbecause the formed dyes are shielded by the developedsilver. The film is then placed in a prebleach. Theprebleach prepares the film for the bleach and alsostabilizes the dye layers.
The metallic silver is removed by the bleach andfixer processes. The bleach and fixer work the same wayas they do for color negative processing. After the silveris removed, only the dyes remain, forming the image.
The film is then washed to rinse away any remainingchemistry and soluble silver. The last chemical step inthe E-6 process is the final rinse. Final rinse provides awetting agent to aid in uniform drying.
It is possible to “push process” (underexpose andoverdevelop) or “pull process” (overexpose andunderdevelop) most color reversal film; however, somesacrifice in quality results in "push processing." Lessdetail in the shadow areas (weaker blacks), lessexposure latitude, and noticeably increased grain occurwhen color reversal film is "push processed." When thefilm speed is altered, only the first developer time ischanged. All other chemical steps remain the same. Youshould not exceed two f/stops when you intend on“push” or “pull” processing.
MACHINE PROCESSING
Today most film processing is performed bymachine, especially in larger imaging facilities.Machine processing has many advantages compared tohand processing. Machines can process high-volumeproduction more efficiently and more consistentlycompared to hand processing. When machines are used,the variables involved in processing can be controlledmore easily. Time, temperature, and agitation can bekept constant if the machine is properly maintained andoperated properly. With fully automatic processingmachines, all you must do is feed the film or paper intothe machine and retrieve the finished product.
When there are advantages, there are alsodisadvantages to machine processing. Machines requiremaintenance, can jam, occupy precious shipboardspace, and may require special plumbing, ventilation, orpower requirements. The need for proper maintenanceis most critical. Poor equipment maintenance isprobably the major cause of machine processingproblems. Therefore, it is very important for scheduledpreventive maintenance to be performed properly on allimaging equipment, especially automatic processors.The best images captured by a camera are not of any useif they are not processed correctly and without defects.You must be qualified completely in the PlannedMaintenance System (PMS) to become a valuablemember of an imaging facility.
In a high-volume production facility, the advantagesof automation far outweigh the disadvantages. There are
10-27
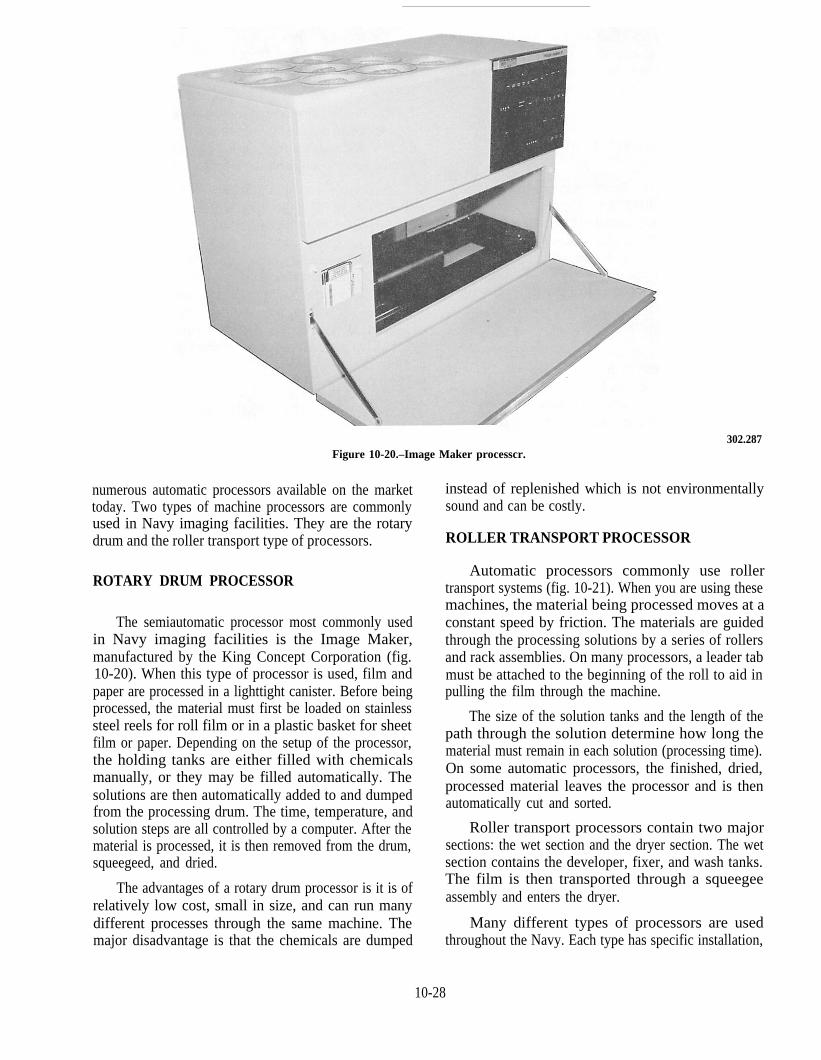
302.287Figure 10-20.–Image Maker processcr.
numerous automatic processors available on the markettoday. Two types of machine processors are commonlyused in Navy imaging facilities. They are the rotarydrum and the roller transport type of processors.
ROTARY DRUM PROCESSOR
The semiautomatic processor most commonly usedin Navy imaging facilities is the Image Maker,manufactured by the King Concept Corporation (fig.10-20). When this type of processor is used, film andpaper are processed in a lighttight canister. Before beingprocessed, the material must first be loaded on stainlesssteel reels for roll film or in a plastic basket for sheetfilm or paper. Depending on the setup of the processor,the holding tanks are either filled with chemicalsmanually, or they may be filled automatically. Thesolutions are then automatically added to and dumpedfrom the processing drum. The time, temperature, andsolution steps are all controlled by a computer. After thematerial is processed, it is then removed from the drum,squeegeed, and dried.
The advantages of a rotary drum processor is it is ofrelatively low cost, small in size, and can run manydifferent processes through the same machine. Themajor disadvantage is that the chemicals are dumped
instead of replenished which is not environmentallysound and can be costly.
ROLLER TRANSPORT PROCESSOR
Automatic processors commonly use rollertransport systems (fig. 10-21). When you are using thesemachines, the material being processed moves at aconstant speed by friction. The materials are guidedthrough the processing solutions by a series of rollersand rack assemblies. On many processors, a leader tabmust be attached to the beginning of the roll to aid inpulling the film through the machine.
The size of the solution tanks and the length of thepath through the solution determine how long thematerial must remain in each solution (processing time).On some automatic processors, the finished, dried,processed material leaves the processor and is thenautomatically cut and sorted.
Roller transport processors contain two majorsections: the wet section and the dryer section. The wetsection contains the developer, fixer, and wash tanks.The film is then transported through a squeegeeassembly and enters the dryer.
Many different types of processors are usedthroughout the Navy. Each type has specific installation,
10-28
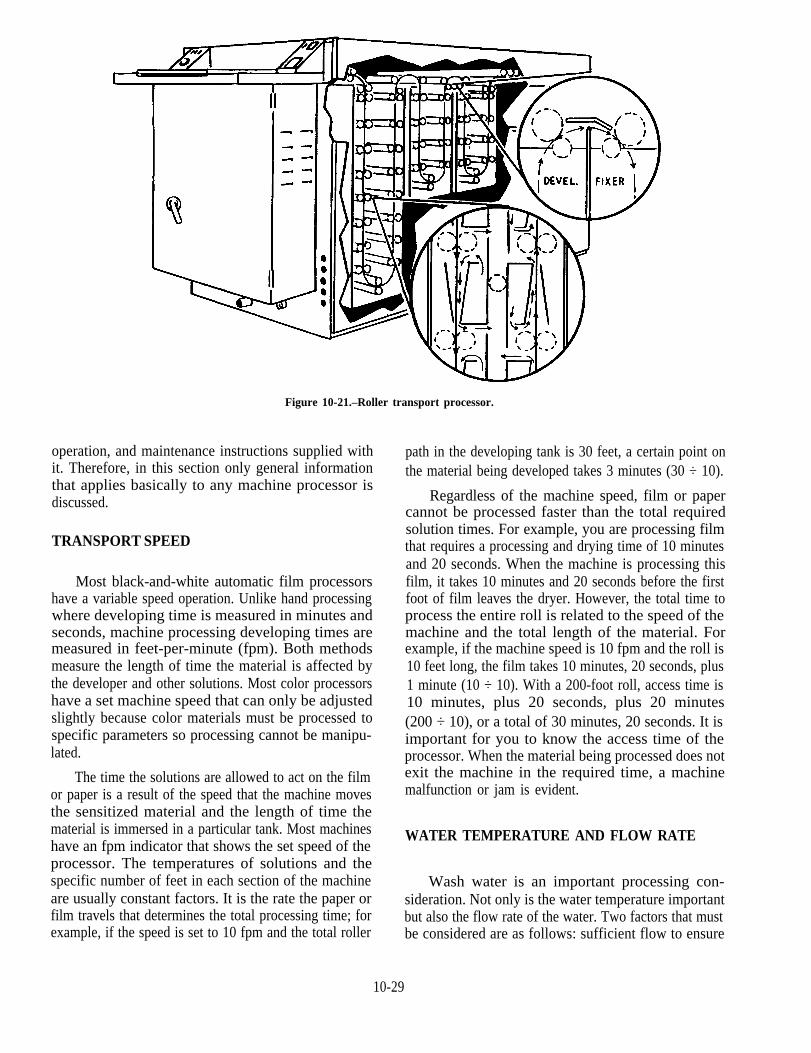
Figure 10-21.–Roller transport processor.
operation, and maintenance instructions supplied withit. Therefore, in this section only general informationthat applies basically to any machine processor isdiscussed.
TRANSPORT SPEED
Most black-and-white automatic film processorshave a variable speed operation. Unlike hand processingwhere developing time is measured in minutes andseconds, machine processing developing times aremeasured in feet-per-minute (fpm). Both methodsmeasure the length of time the material is affected bythe developer and other solutions. Most color processorshave a set machine speed that can only be adjustedslightly because color materials must be processed tospecific parameters so processing cannot be manipu-lated.
The time the solutions are allowed to act on the filmor paper is a result of the speed that the machine movesthe sensitized material and the length of time thematerial is immersed in a particular tank. Most machineshave an fpm indicator that shows the set speed of theprocessor. The temperatures of solutions and thespecific number of feet in each section of the machineare usually constant factors. It is the rate the paper orfilm travels that determines the total processing time; forexample, if the speed is set to 10 fpm and the total roller
path in the developing tank is 30 feet, a certain point onthe material being developed takes 3 minutes (30 ÷ 10).
Regardless of the machine speed, film or papercannot be processed faster than the total requiredsolution times. For example, you are processing filmthat requires a processing and drying time of 10 minutesand 20 seconds. When the machine is processing thisfilm, it takes 10 minutes and 20 seconds before the firstfoot of film leaves the dryer. However, the total time toprocess the entire roll is related to the speed of themachine and the total length of the material. Forexample, if the machine speed is 10 fpm and the roll is10 feet long, the film takes 10 minutes, 20 seconds, plus1 minute (10 ÷ 10). With a 200-foot roll, access time is10 minutes, plus 20 seconds, plus 20 minutes(200 ÷ 10), or a total of 30 minutes, 20 seconds. It isimportant for you to know the access time of theprocessor. When the material being processed does notexit the machine in the required time, a machinemalfunction or jam is evident.
WATER TEMPERATURE AND FLOW RATE
Wash water is an important processing con-sideration. Not only is the water temperature importantbut also the flow rate of the water. Two factors that mustbe considered are as follows: sufficient flow to ensure
10-29

complete washing of the material and to control oreliminate waste.
If the wash-water temperature is allowed to drop to65°F (18°C) or below, emulsion staining may result. Asthe temperature decreases, less emulsion swellingoccurs, reducing the effective penetration of fresh watersupplied to the emulsion. When the emulsion does notswell, the chemical-laden water does not get out throughthe emulsion surface. These retained chemicals cancause stains.
The wash water flow rate is another important factorto consider. This rate must be high enough to wash thematerial, but no more. When insufficient water flow issupplied to the machine, crystallized chemicals may beseen on the material, and additional staining can result.You must not adjust the water flow rate higher than isneeded. A few extra gallons-per-minute flow rate maynot seem important; however, over time this effect canbe extremely costly, particularly aboard ship.
SOLUTION TEMPERATURE
In machine processing, the temperature may vary,depending on the machine and the kind of processingbeing performed. High-speed processing machinesoperate at higher solution temperatures. Temperaturecontrol is critical and must be maintained to producecorrect results. Although this may be considered avariable factor, the temperature is controlledautomatically by processing machines. In somemachines, the solution tanks are immersed in atemperature-controlled water jacket. By controlling thewater temperature within the water jacket, you cancontrol the temperature of the solutions inside the tanks.In other machines, the solution temperature is directlycontrolled by separate heaters or heat exchange controlunits in the recirculation system. A temperature probe inthe solution tank monitors and controls the temperaturecontrol unit.
SOLUTION LEVELS
The solution levels of a processor must be checkedbefore processing material. If the solution level is toolow, stains, improper tracking, and roller marks mayaffect the film or paper. When the machines are shutdown for a period of time, some evaporation occurs.Since only the water from the solution evaporates, youmust top off the solution tanks with water beforeprocessing material. There is a certain amount ofcarry-over of solution from one tank to another withinthe machine. Usually, chemical carry-over is minimized
with roller squeegees. When the replenishment rate ofthe processor is set properly, this carry-over iscompensated by supplying fresh chemistry to thesolution tanks.
REPLENISHMENT
Most processing machines use relatively largequantities of solutions to carry out the process properly.However, even considering the large quantitiesinvolved, certain chemical components within a givensolution are used up at varying rates. In addition, thereare certain reactions that form by-products that build upin the tank of the processor; for example, bromide (arestrainer) gradually builds up in the developingsolution. Also, there is a certain amount of carry-over ofsolutions from one tank to another. This causes acontinuous change in solution strength and solutionpurity. The replenisher solution replaces the usedchemicals, dilutes the excess chemicals or by-productsthat have built up, and replaces the solution lost bycarry-over and evaporation.
The replenishment system used in machineprocessing is called the bleed method. When the bleedsystem is used, a calculated amount of replenishersolution is added and forces some of the used solutionout through an overflow drain in the solution tank. Youmust check the established replenishment rates as wellas the replenisher holding tanks before and duringprocessing. Inconsistent results occur when the processis not replenished correctly.
DRYER TEMPERATURE
After the material is processed and washed, itcontinues through the machine into the drying cabinetwhere moisture is removed. The drying cabinet is morethan a heated compartment for the processed material.In a majority of machines, both the temperature and thehumidity of the cabinet are carefully controlled. Toolittle drying causes the emulsion to be tacky, whereastoo much drying may produce excessive curl andbrittleness. Brittleness, once it occurs, cannot beeliminated; so it must be prevented. Both thetemperature and the relative humidity must be adjustedfor the speed of the machine and the type of materialbeing dried.
Under ideal conditions, the drying cycle shouldyield a stable 50 percent relative air humidity. To lowerthe relative humidity of air, you must heat the air; thisaccelerates the evaporation of moisture. The rate ofevaporation and the relative humidity are directly
10-30
proportional to the temperature. When the temperatureis too low, evaporation is slowed down. When it is toohigh, the emulsion may be damaged.
Roller transport processors provide very consistentprocessing results and can be converted easily to a newprocess. The disadvantages of roller transportprocessors are: they can leave scratches and scuffs fromdirty rollers touching the film, they require a highamount of maintenance due to the large number ofmoving parts, and oxidation can be a problem due to thechurning action of the rollers in the chemistry.
QUALITY PROCESSING
The processing required to produce a qualityproduct of any particular film varies with differentdeveloper and film combinations, time and temperatureof the process, agitation, the film exposure, and the skillof the darkroom worker. A good, high-quality image isone that is free from all processing faults, includingscratches and dirt, and so forth.
When processing black-and-white film, your goal isto produce a “normal” negative that is as fault-free aspossible. Normal is a rather vague term; however, anormal negative is one that yields a pleasing print orreproduction of the original scene when printed withouta printing filter or with a No. 2 printing filter.
When film is exposed and processed properly, it isa normal negative. However, when a negative variesfrom normal, you should be able to determine whatconditions caused the deviation.
A negative has several basic characteristics toconsider when evaluating quality. These basiccharacteristics are as follows:
General negative density or opacity to light.
Image highlights or areas of greatest density.
The shadows or areas of least density.
Contrast or the differences between highlight andshadow densities.
Tonal gradation or the range of grays between thehighlights and the shadows.
Graininess or the appearance of silver grains in anegative that have clumped together. The size of theclumps determines the degree of graininess in theprocessed material.
All the basic characteristics of a negative areaffected to some extent by a combination of exposure
and development. By studying these characteristics, youcan usually determine the cause of an error or poorquality in a negative.
DENSITY
Density determines how much of the incident lightfalling upon a negative passes through the image. Whena small amount of silver is present in the negative, theimage appears thin (transparent), and it has low density.When there is a large amount of silver present, only asmall amount of light passes through the image, and thenegative is said to have high density.
A low density, thin negative can be caused byunderexposure or underdevelopment or by acombination of the two. A heavy or dense negative is theresult of either overexposure or overdevelopment or acombination of the two.
HIGHLIGHTS
The highlights, or dark areas, of a negative for mostpurposes should not lack detail. When detail is lackingbecause the highlights are too dark, the highlights aretoo dense or blocked up. Excessive highlight density iscaused by overexposure and/or overdevelopment.When both the highlights and the shadow areas are toothin and lack detail, the negative is probablyunderexposed. Thin highlights are caused byunderexposure and/or underdevelopment.
This may seem like a repetition of the previousdiscussion on density. However, a negative could andmay have overall good density except in the highlightareas. This situation is a result of exposure latitude thatis not great enough for the scene brightness range.
SHADOWS
The shadows, or the more clear areas of thenegative, also should contain image detail. If these areasare so thin and weak that they are transparent or nearlyso, the shadow areas are said to be lacking in detail. Lossof shadow detail is caused normally by underexposure.
The need for detail in both the highlights and theshadows for photographs of most subjects cannot bestressed too strongly. One is as important as the other inthe production of good photographs.
CONTRAST
Contrast is the difference in density between thehighlights and the shadows in a negative. When this
10-31

difference is great, the negative is said to be contrasty.When the density difference is small, the negative is saidto be flat or lacking in contrast.
For a negative to have normal contrast, the densitydifferences between the highlight and shadow areas ofthe negative must be proportional to the reflectivebrightness range of the subject photographed
A contrasty negative usually is the result ofoverdevelopment but also may be caused by a highscene lighting ratio (a contrasty original scene). A flatnegative, on the other hand, may be caused, primarily,by underdevelopment or a low-contrast original scene.
TONAL GRADATION
Photographers often concentrate on the density anddetail of highlights and shadows when they shouldactually be considering the most important or middletones of the negative. Middle tones are the various tonesof gray between the highlights and the shadows; that is,the densities that are not highlights or shadows aretermed middle tones or intermediate tones. The middletones vary with the type of film and the subject contrast.A negative should have a range of middle tone densitiesthat correspond proportionally to the middle reflectivebrightness of the subject. A panchromatic negative thatdoes not have proportionate midtones is contrasty orflat.
GRAININESS
Because photographic images made from film aremade up of fine silver grains, the images may appear“grainy” or exhibit graininess (fig. 10-22).
All negatives show graininess to some extent. Themost important factors affecting negative graininess areas follows:
The composition of the emulsion or the inherentgraininess of the emulsion. That is to say, the size of thegrains used to produce the emulsion.
The type of developer used. When fine grain isdesired, a fine-grain developer with the appropriate filmshould be used.
The extent of development. Overdevelopment isa major cause of excessive graininess.
Exposure or negative density. Overexposure isanother key contributor to graininess. As negativedensity increases, so does graininess.
Figure 10-22.–Grain structures in emulsions.
Image sharpness. The sharper the film image, thegreater the image detail and the less apparent thegraininess.
EFFECTS OF EXPOSURE ANDDEVELOPMENT VARIATIONS
The nine negatives reproduced in figure 10-23compare the effects of exposure and developmentvariations. From the left, they show the effects ofdevelopment; from the top, they show the effects ofexposure. The center negative has been given bothcorrect exposure and normal development and is a“normal” negative that will print without a filter or witha No. 2 filter.
Negatives 1, 4, and 7 have been underdeveloped,while 3, 6 and 9 have been overdeveloped.
The negatives across the top-1, 2, and 3-areunderexposed and lack detail in the shadow areas.Increasing development (No. 3) had no appreciableeffect on the lack of shadow detail. Little can be done toimprove negative quality when exposure is insufficient.Underexposure is identified by lack of shadow detail.
The negatives across the center-4, 5, and 6-weregiven correct exposure and all have sufficient shadowdetail. However, No. 4 was underdeveloped and is flator lacks adequate contrast. Negative No. 5 receivednormal development, has good shadow detail, and goodcontrast. It is a “normal” negative. Negative No. 6,although having received correct exposure, wasoverdeveloped. This resulted in excessive highlightdensity with a loss of highlight detail and excessivecontrast. The highlights in both 6 and 9 are too dense.
Negatives 3, 6, and 9 are all overdeveloped. Thecorrectly exposed negative, No. 6, is so dense thatalmost no detail is visible in the highlights. Thehighlights of the overexposed and overdevelopednegative, No. 9, are completely blocked up.
When a correctly exposed film is given normaldevelopment as in negative No. 5, the negative has
10-32

303.43Figure 10-23.–Exposure and processing affects.
10-33

clearly defined detail in all parts of the image from thestrongest highlights to the weakest shadows. Thecontrast is satisfactory. It may not reproduce the contrastof the original scene exactly, but it has sufficient contrastto produce a pleasing reproduction.
When the film is overexposed and normallydeveloped, as in No. 8, the highlights in the image showa loss of detail. Giving the overexposed film less than
normal development may save some highlight detail,but it also reduces the contrast. When the overexposedfilm is overdeveloped, as No. 9 was, all highlight detailis destroyed and the contrast is also reduced.
Table 10-1 is a listing of defects that commonlyoccur in film processing. The appearance, the cause, andthe remedy for each of the defects listed are alsoprovided.
Table 10-1.–Negative Defects: Their Appearance, Cause, and Remedy
Defect Appearance Cause Remedy
Abrasionmarks orstreaks.
Fine black lines, usuallyresembling pencil scratchesand running in the samedirection.
Friction on emulsion caused by Great care should beimproper handling or storage. Dirt, taken in storage of film.or grime, in camera or magazine. Boxes containing film
should be stored onend, so no pressure isexerted on the surfaceof the emulsion. Care,also, should be takennot to rub or dragsensitized material overa rough surface. Besure camera back ormagazine is clean andfree from dirt, or grime.
Air bubbles. An air bubble occurring Transparent spots occurring in the Immerse film carefullyduring development shows developer are caused by bubbles and thoroughly inas a small, transparent spot. of air on the surface of the developing and fixingSometimes minute dark emulsion. These prevent the solutions. Move filmstreaks lead from the spot. developer from coming into during developmentWhen the negative is rocked contact with the emulsion. and fixation to break upin a tray, streaks project from Darkened streaks are the result of and prevent air bells.each side of the spot in the excess oxidation of the developer, Water always containsdirection the tray was caused by air in a bubble. Dark some air and whenrocked. If the tray is rocked spots that occur in the fixing bath there is a rise inin two directions, streaks are caused by a pocket of air temperature, air isform a cross with a holding the fixer away from the expelled and gathers intransparent spot in the center. emulsion and allowing a slight the form of smallIn tank development. dark continuation of development. bubbles on the inside ofstreaks usually form at the the tank and also on thelower edge of the transparent surface of the filmspot. In the fixing bath they during preliminaryshow as small, round, dark stages of development.spots.
10-34

Table 10-1.–Negative Defects: Their Appearance, Cause, and Remedy-Continued
Defect
Blisters.
Appearance Cause Remedy
They resemble the familiar Liquid or gas formed between the Blisters can be avoidedones that are caused by slight emulsion and film support when by eliminating theirbums on human skin. the solution has become too warm causes.
and has loosened the gelatin fromits support. Also, produced bydeveloper and fixer being toostrongly concentrated. Changingfilm from one bath to the next maycause the formation of gasbetween the emulsion and sup-port. Frequently caused by takingthe film from an alkali solutionand placing it into a strong acid.Another common cause isallowing water from a faucet toflow directly on the emulsion.
Brown spots. Small brown- or Produced by oxidized developer or Avoid exhausted orsepia-colored areas or spots by fine particles of chemicals oxidized developer.on the negative. settling on the film before Keep processing room
development. May also occur clean and free from dryduring washing, from rust, and chemicals. Filter theother impurities in the water. wash water.
Crystalline Surface of the negative Insufficient washing after fixing. Increase the final washsurface. emulsion has a crystalline Hypo remains in the film and time.
appearance, resembling frost crystallizes.on a windowpane.
Dark lines. These lines are divided into The first class is caused by For the first class, moretwo distinct classes. The first insufficient agitation of the frequent agitationclass, those that run from negative in tank development. during development.dark areas to more Cause of the second class is The remedy for thistransparent areas of the thought to be of an electrolytic class aggravates thenegative, and the second origin. defect in the secondclass, those that run from the class. Only knownmore transparent areas to the remedy is to remove alldarker areas. In both cases, film hangers from thelines are wider, not as clean tank four or five timescut, and not nearly as parallel during the developingas abrasion marks. period, holding the
hangers in a bunch, andallowing the corners ofthe hangers to rest onthe edge of thedeveloping tank for 10to 15 seconds.
10-35

Table 10-1.–Negative Defects Their Appearance, Cause, and Remedy-Contiuued
Defect Appearance Cause Remedy
Fadingtendency.
Sepia- or yellow-colored Incomplete fixation or insufficient Properly fix and washstains or areas in the negative. washing causes fading. Remnants negatives.
of the fixing bath left in theemulsion continues its action, andin time, this defect appears.
Fingermarks. Imprint of fingers shows up Impressing wet or greasy fingers Keep hands clean andon negative. on the emulsion of film before or dry when handling
during development and fixation. film. Sometimes naturalIf mark is merely an outline of the oil on the fingertipsfinger, it was caused by water or causes grease marks.grease on the finger; if dark, it was When fingers becomecaused by developer; if transparent wet with water oror light, it was caused by fixer. solutions, wash and dry
thoroughly beforeattempting to handlefilm.
Fog (Aerial). A slight veiling of the Negative exposed to air duringnegative or parts of the development. Occurs mostnegative. frequently in freshly mixed
developers.
Fog(Dichroic).
Usually a fog of little density, Hypo or excessive amount of Removed by treatingconsisting of finely divided sulfite in the developer. the negative in a weakparticles of silver. When solution of potassiumviewed by transmitted light, permanganate. Furtherit is pinkish; when viewed by prevention through usereflected light, it appears of clean tanks forreddish green. developer and fixer.
Frilling. Edges of the gelatin becomedetached from the base.Detached edge of emulsionmay either break off or foldover.
Careless handling; using solutions Handle film carefullythat are too warm; insufficient and sparingly; usehardening of emulsion due to working solutions thatinsufficient fixation; exhausted are mixed correctly andfixing bath or one containing are at the properinsufficient amount of hardener; or temperature. Wash filmexcessive washing. Frilling is sufficiently, but neverusually caused by a combination excessively.of careless handling and any othermistake that will render theemulsion or film soft.
10-36

Table 10-1.–Negative Defects Their Appearance, Cause, and Remedy–Continued
Defect Appearance
Air bubbles. Minute pimples or blisters.
Cause
Develop by transferring thenegative from strongly
Remedy
Use an acid stop bath.
concentrated developer to stronglyacid fixing bath withoutthoroughly rinsing after removingit from the developer and beforeimmersing it in the fixing bath. Inwarm weather, air bubbles mayappear even when using solutionof normal strength, if rinsingbetween development and fixationhas been insufficient.
Pitmarks. Fine holes or pits in emulsion. Excessive alum in fixing bath; Proper fixing andsulfurous precipitation from fixing drying.bath when negatives are fixed in atray; and film being dried toorapidly.
Pinholes. Minute transparent spots. Dust on film before exposure. Proper handling offilm. Clean cameraback or film holdersbefore use.
Reticulation. Leatherlike graininess or Too great of a difference in the Keep all solutions at thewrinkling of the emulsion. temperature of baths or between same temperature.
final wash water and the air in Reticulation effect maywhich the negative is dried. sometimes be removedGelatin may become badly by placing the negativeswollen due to the temperature of in a10-percent solutiona solution or wash water, and upon of formaldehyde for ashrinking, contracts irregularly few minutes and thendue to the metallic silver drying it rapidly withincorporated in the emulsion. heat. Use ampleExcessive softening of the ventilation when dryingemulsion followed by a strong negatives treated inhardening bath, or an alkaline formaldehyde.treatment followed by strong acid.
10-37

Table 10-1.-Negative Defects: Their Appearance, Cause, and Remedy-Continued
Defect Appearance Cause Remedy
Streaks. Streaks and patches. In thecase of spots, may be dark,white, or transparent.
May be due to unevendevelopment, caused byinsufficient agitation. May also bedue to developer splashed on thefilm before development, a dirtytank, fixer tray or tank used fordeveloping, or a light fog. If theedges of the film are clear, troubleis in the camera; if the edges arefogged, it is due to a light leak inthe film magazine or processingtank. Certain types of resinouswoods and varnishes cause darkpatches. White or transparentpatches may be due toobstructions in the camera thatprevented light from acting on thefilm; an oil or grease thatprevented action of the developer;hypo on film before development.Drying marks in the form ofteardrops or white patches arecaused by splashes of water on adry negative or by leaving spots ofwater on the film before drying,especially if the film is dried inwarm air.
Trace the cause of thestreaks. In many cases,they can be avoided inthe operation andmaintenance ofequipment. Whendrying negatives, besure to use wettingagent or stabilizer.
PROCESS MONITORING
To consistently produce the highest qualityphotographic products possible and to prevent chemicalprocessing defects, you must monitor the photographicprocesses. From a hand-processing system to asophisticated, computerized processing system, processmonitoring is necessary to achieve high quality on aconsistent basis. When it is performed routinely, processmonitoring can detect minor problems before a majorcasualty to your imagery results as well as aid in theproper replenishment of your processing system.
The area of quality control and process monitoringcan be very complex. Some Navy Photographer's Matesearn an NEC and specialize in the field of quality controlfor photographic processes. It is not the intention of thistraining manual to provide you with the informationnecessary to become a specialist in photographic quality
control; however, you must learn the appropriate stepsto monitor the process.
The production of high-quality photographicproducts requires control over all the factors that affectlight-sensitive materials. Film exposure and processingare the most important of these factors. Negatives orpositives that have not been uniformly and correctlyexposed and processed may provide unusable results.By monitoring the process and providing high-qualityproducts, you can save time and operating costs byreducing waste and retakes.
Any monitoring system for the photographicprocess requires a reference or standard, andcomparison of daily production to this standard. Visualcomparison of the reference to the standard is verysubjective and limited in accuracy because of personalopinion. A more accurate method is to measure yourproduction against the standard. Two means of making
10-38

Figure 10-24.–EG&G sensitometer.
Courtesy of EG&G, Inc.302.288X
these measurements are through sensitometry anddensitometry. When sensitometry and densitometry areused, variations from the standard and the correctionsrecommended are expressed in numbers, not in terms ofpersonal opinion.
SENSITOMETRY
Sensitometry is the science of determining thephotographic characteristics of light-sensitivematerials. In sensitometry, special test or control stripsare prepared by accurately exposing the material withvarying amounts of light. These test strips are thenprocessed.
A sensitometer is an instrument used to produce thespecial test strips called sensitometric strips. Asensitometer is used to produce these sensitometricstrips because it provides consistent and repeatableexposures of a known quantity and quality of light. Thesensitometer is used to expose a strip of film withvarying amounts of known exposure on the same stripof film. Since the sensitometer provides repeatableexposures each time, any changes in density indicates achange in processing. In Navy photography, thesensitometer is used to expose black-and-whitematerials only. There are several uses for sensitometric
strips; but in this training manual, we are only concernedwith monitoring a process. Here the sensitometric stripsare used as control strips. Control strips are made andprocessed under the controlled conditions of time,temperature, and agitation. This is true for bothblack-and-white and color materials. Black-and-whitecontrol strips are usually made in the photo lab, whilecolor control strips are obtained by the manufacturer ofeach material.
Ideally, a sensitometer should be designed so youcan accomplish the following objectives:
1. Predetermine the total amount of exposure.
2. Determine the difference in exposures given tovarious areas.
3. Control the color quality of the light.
4. Consistently reproduce or duplicate the samelighting conditions.
5. Provide a wide range of exposures.
The sensitometer used most commonly in the Navytoday is the Egerton, Germeshausen, and Grier (EG&G)sensitometer (fig. 10-24). This sensitometer uses a
10-39

Figure 10-26.–Densitometer with both transmission and reflectioncapabilities.
Figure 10-25.–Step tablets.
daylight balanced xenon flashtube. It can also produceexposure times from 1/100 to 1/10,000 second.
Step Tablets
A sensitometer is set up to make only one exposure.In order to provide a range of exposures, a step tablet isplaced between the light source and the light-sensitivematerial. The step tablet is a strip of neutral-densityfilters in equal increments, ranging from 0.05 to 3.05.This range provides a 10 f/stop range. The most commonstep tablets are as follows (fig. 10-25):
1. 21-step tablet-1/2 f/stop between eachincrement.
2. 11-step tablet-1 full f/stop between eachincrement.
Courtesy of X-Rite, Inc.302.339X
Control Strips
A sensitometric control strip should be processed asa minimum-at the beginning of a production day (orshift), before any production is processed, and beforeshutdown. You should process a control strip just beforean important mission, or a special-interest film isprocessed.
To expose and process a control strip, you shouldtake the following steps:
1. Take the film (in a lighttight container) and place
2. Turn on the sensitometer and allow it to warm
3. Turn off the room lights.
4. Place the film emulsion-side down on the
5. When hand processing or using a rotary tube
6. When a roller transport processor is used, check
7. Stick the film into the processor so the lightly
it next to the sensitometer.
up for a minimum of 15 seconds.
sensitometer and lower the platen to make yourexposure.
type of processor, load the control strip on thereel. When machine processing, replace the filmin a lighttight container. Turn on the room lightsand turn off the sensitometer.
the speed, temperatures, and the properoperation of all systems.
exposed end of the film enters the machine first.When hand processing or using a rotary tubetype of processor, process normally.
10-40

302.290Figure 10-27.–Control strips read from center of each step with emulsion facing up.
DENSITOMETRY
A densitometer is an instrument used for measuringand reading the density of film and paper directly. Filmis read on a transmission densitometer, and paper is readon a reflection densitometer. Most densitometerssupplied by the Navy today have both transmission andreflection reading capabilities on the same meter (fig.10-26).
A densitometer uses a photoelectric cell to measurethe light transmitted through film or reflected frompaper electronically. Before a densitometer can be used,it must be checked and calibrated against a referencestandard. To use the meter, you must place the materialto be measured, emulsion-side up, in the light beambetween the source and the photocell. The densityreading is then read directly from the meter.
There are several sets of filters incorporated in thehead of the densitometer. When you are readingblack-and-white materials, the yellow filter must be inplace. When color materials are read, there are twodifferent sets of filters that are used. They are Status Aand Status M filters. Status A filters are used to readcolor transparencies and prints. Status M is used to readcolor negative film that has an orange mask
Only certain steps of the control strip are read. Thesteps that you are required to read are established by themanufacturer of the material or are established by thequality control technician within your imaging facility.When you are reading the steps on your control strip, besure that the emulsion side is facing up and take thereading from the center area of each step (fig. 10-27).
PROCESS CONTROL CHARTS
A process control chart provides a visualrepresentation of a process. Control strips that areprocessed and read on a densitometer are then plottedon a control chart. The points plotted on the graphindicate what has occurred in the process at the time thecontrol strip was processed. Through the use of controlcharts, a determination can be make whether the processis operating normally. As stated before, only selectedsteps of a control strip are monitored. For black-and-white film, the minimum steps monitored are asfollows: base plus fog (B + F) or gross fog, high density,low density, speed point, and contrast.
For each step monitored on a control chart, there arethree lines. The center line represents the mean (X)(pronounced “bar X”), or average, a top line thatrepresents the upper control limit (UCL), and a bottomline that represents the lower control limit (LCL).
10-41

Figure 10-28.–Process control chart.
Refer to figure 10-28. For example purposes only, B+F is 0.12.the following steps are monitored and plotted on acontrol chart below. The steps being monitored are asfollows:
High density (HD) is step 17 and reads 1.20.
Low density (LD) is step 6 and reads 0.60.
Speed point (SP) is step 4 and reads 0.23.
When plotting a control strip, you should alwaysannotate the date and the time the control strip wasprocessed. When all points plot within the upper andlower control limits, the film can be processed. Whenany point plots outside the upper control limit (UCL) orlower control limit (LCL), the process is out of control.You should notify your supervisor before processingany material through that particular process.
10-42