idm browser client for windows indexing of all types of document. the server has a series of .net...
TRANSCRIPT

Version 20.1 rev 1
IDM Browser Client for Windows
Technical Reference
Notices
PUBLISHERThis document is published anddistributed by Vignette Corporation. It wasdesigned and produced using FrameMakerpublishing software.
VERSIONIDM Browser Client for Windows TechnicalReference, version 20.1 rev 1 (PublicationDate: 8 December 2006)
DISCLAIMERVignette does not warrant, guarantee, ormake representations concerning thecontents of this document. All informationis provided "AS-IS," without express orimplied warranties of any kind including,without limitation, the warranties ofmerchantability, fitness for a particularpurpose, quality and title.
Any information provided by Vignettecustomers or partners was obtained afterthe implementation of Vignette softwareand may have changed as of thePublication Date. You may not achieve thesame results or benefits from usingVignette as described in this document.Nothing in this document is considered tobe part of any product documentation orspecification for any purpose. Vignettereserves the right to change the contents
of this document and the features orfunctionalities of its products and servicesat any time without obligation to notifyanyone of such changes.
COPYRIGHT AND TRADEMARKS
Copyright © 2006 Vignette Corporation. Allrights reserved. Vignette, the V Logo,e:fficiency and e:fficiency experts aretrademarks or registered trademarks ofVignette Corporation in the United Statesand other countries. All other company,product, and service names and brandsare the trademarks or registeredtrademarks of their respective owners.
SEND US YOUR COMMENTS
If you have comments or suggestions aboutthis manual, please send them to thisaddress:
A member of the Publications team willacknowledge your mail as soon aspossible.
You can also reach us at the followingaddress:
Vignette CorporationPublications Department1301 South MoPac Expressway, Suite 100Austin, TX 78746USA
© 2006 Vignette Corporation. All rights reserved.2 v20.1 rev 1

v20.1 rev 1 3IDM Browser Client for Windows Technical Reference
Table of Contents
Chapter 1. IBCW Overview 5Introduction 5Architecture 6
The data storage tier 7The middle tier 7The presentation tier 7
Licensing 8License model 8
Examples 9Bills and Customer Statements 9Public archives and registries 9
Chapter 2. Document delivery 11The rendering process 11
Chapter 3. Configuration: repository component 13Introduction 13Configuration 14
Connection pooling configuration 14System configuration 14Size of title list 14Case sensitivity 14Templates and external validation 15Configurable display of frames 15Setting up a distributed annotations server 16Setting up the hardcopy system 16Setup of remoting objects 17Tracing 20Security 21
Advanced configuration 22
Chapter 4. Configuration: web server component23Configuration 23
Creating the virtual directory 23

© 2006 Vignette Corporation. All rights reserved.4 v20.1 rev 1
Table of Contents
Configuring pass-through document extension 24Web Server session timeout 24Document caching 25Defining the IDM Server 25Changing the Windows Rendering IP address 25Changing the remoting interface IP Address 25Multiple repositories on a single host 26Date format 26Custom log file and pre-rendering. 26Assigning document type to renderers 26Document pass-through 27Error/trace logging 27Password expiry 28Configuring for large files 28
Chapter 5. Windows-based rendering 29Supported renderers and file types 29Setting the rendition image format 29
Chapter 6. Configuration: the viewer 31Introduction 31Using the viewer applet 32
Configuring Java Advanced Imaging support 32Large tiff images 33Configuring the annotations toolbar 33
Using the standard viewer 36Setting the server zoom option 36
Appendix A. Uploading large files 37Explanatory detail 37

Chapter
v20.1 rev 1 5IDM Browser Client for Windows Technical Reference
1IBCW Overview
IntroductionThis chapter describes the three-tier IBCW architecture. It also describes the licensing model. Finally, it outlines the ways IBCW can be used in business, including access by staff and by external users such as customers.

© 2006 Vignette Corporation. All rights reserved.6 v20.1 rev 1
1Chapter
ArchitectureIBCW has a three-tier architecture, where the presentation tier is a web browser, the middle tier is the web server, and the data storage tier is the IDM Server. This is shown in the diagram:
IBCW Architecture
code behind/ASPX
Web Server
IDM Repository
.NET Remoting Objects
Internet
Netscape
Other Browser
InternetExplorer

IBCW Overview
v20.1 rev 1 7IDM Browser Client for Windows Technical Reference
The data storage tierThe data storage tier is an instance of the IDM Server. This server manages the storage and indexing of all types of document. The server has a series of .NET objects to handle requests from the middle tier.
The middle tierThe middle tier consists of a server, running a web server (IIS) to meet HTTP requests. The web server processes requests, and:
• For static web pages, it returns these pages straight to the browser.
• For active web pages (aspx), it interacts with the storage tier through a series of .NET objects to perform searches and to retrieve documents. The results of these interactions are delivered to the browser.
When integration with existing systems is necessary, it is usually performed in the middle tier. For example, a bank might provide web pages that integrate access to both a host-based account management system and the IDM Server, with the latter managing associated documents such as cheques, customer statements, and ad-hoc correspondence.
The presentation tierThe presentation tier consists of an Internet browser running on a machine connected to the Internet. Two options are available:
• An optional, downloadable viewer applet, providing advanced features, such as annotations support.
(The applet viewer may not run correctly if you do not use the JRE included in the released version.)
• A standard viewer. The standard viewer does not rely on browser specific technologies (e.g. ActiveX), operating system specific technologies (e.g. Plug-Ins, external viewers), or downloaded components such as Applets; it does not, however, provide the advanced features of the viewer applet.
For viewing Web Capture files, an ActiveX plugin has to be downloaded and installed.
Browsers access the middle tier by requesting web pages using Hypertext Transfer Protocol (HTTP), and displaying the pages to the user.
Since IBCW uses the HTTP protocol, it can operate without modification through existing firewalls between the web server and the Internet.
© 2006 Vignette Corporation. All rights reserved.8 v20.1 rev 1
1Chapter
LicensingLicense model
IDM Browser Client for Windows uses a concurrent user licensing model. That is, it keeps track of, and limits, the number of users “connected” to the web server at any time. Connections are established when users first log in, and are explicitly freed when users log out, or automatically freed after a configurable period of inactivity. Technically, licenses are allocated when the method logon.login() is called, and are freed when the method logon.logout() is called.
License controlLicenses are enforced via a license file provided by Vignette. This license file is stored on the IDM Server. If a number of web servers are deployed against a single IDM Server, they will share the available licenses on an ‘on demand’ basis.

IBCW Overview
v20.1 rev 1 9IDM Browser Client for Windows Technical Reference
ExamplesIDM Browser Client for Windows is an enabling technology, which can be deployed across a wide range of business applications that require document access over the Internet. These business applications include providing access to:
• Bills and customer statements
• Public registries and archives
• Home-based process workers (tele-commuters)
• Brokers
In all of these applications, IBCW is not typically deployed as an out of the box solution, but is integrated into existing web sites to enhance the information and functionality provided.
The first two of these business applications are described in the following sections.
Bills and Customer StatementsMany industries have regular bills and customer statements that customers want to access over the Internet. Typical industries are:
• Banking (e.g. bank accounts, credit cards)
• Insurance (e.g. bills, annual statements)
• Other financial services
• Utilities (e.g. phone, gas, water, electricity, statements)
• Local government (e.g. land rates)
Bills and statements are typically generated monthly or yearly on a mainframe or mid-range system, and are either printed in-house on high speed printers or via a printing bureau service organization, before delivery to customers.
The Internet opens many possibilities, including providing:
• Access to current bills and statements electronically
• Email notification of the availability of bills and statements
• Access to historical bills and statements
• Self service mail requests for particular statements or bills
Public archives and registriesThere are many Government archives and registries that provide either free or fee-for-service access to public document archives. The following are common examples:
• Land titles
• Sewerage diagrams
• Birth/death/marriage certificates
• Government transcripts
• Mineral resources
These documents are mostly paper records, and typically must be kept for many years or decades. There may be multiple versions of documents, as they may be updated over time. In some cases, imaging solutions have already been deployed to avoid physical handling of the documents, and to reduce physical storage costs.
The Internet opens the possibility of providing fee-for-service access to these documents, without over-the-counter operations. This has the potential to provide massive cost savings while improving customer service.

© 2006 Vignette Corporation. All rights reserved.10 v20.1 rev 1
1Chapter

Chapter
v20.1 rev 1 11IDM Browser Client for Windows Technical Reference
2Document delivery
IBCW can be configured to deliver documents in any of three ways, depending on document type. The options are:
• Pass-through, where the document is sent to the browser exactly as it was originally stored on the repository;
• Prerendered, where the document is converted to a browser-capable format and stored in that format on the repository;
• Rendered on demand, where the document is converted to a browser-capable format immediately before being sent to the browser.
The relationships between these three methods are illustrated in the flowchart overleaf.
The rendering processTo render a document is to convert it to a standard displayable format. If rendering is enabled, a requested document will be rendered using the appropriate rendition object. Documents stored in IDM Server are broken down into pages. Pages themselves can represent documents of different types. IBCW renders and delivers documents one page at a time.
Document rendering on IBCW is optional. If rendering is implemented, the rendition objects can run on on a separate machine called a rendering server. (Multiple rendering servers are recommended for high-volume on-the-fly renditions). Rendering documents is a CPU-intensive operation; it is recommended that VRS be installed on a separate machine(s). If rendering is not implemented, the requested documents are ‘passed through’ directly to the browser; see Document pass-through on page 27.

© 2006 Vignette Corporation. All rights reserved.12 v20.1 rev 1
2Chapter
The relationships between pass-through, prerendering, and on-demand rendering
Is file extension inpass-through list?
Is the prerenderingsystem enabled?
Permission toexport documents?
Was a pre-rendered rendition
found?
Is there an on-demand renditionobject available?
Did on-demandrendering complete
successfully?
Original documentpassed-through
Prerenderedrendition displayed
Exception passedto JSP level
On-demandrendition displayed
YesNo
Exception passedto JSP level
Error messagedisplayed
No Yes
YesNo
YesNo
YesNo
No Yes
Start

Chapter
v20.1 rev 1 13IDM Browser Client for Windows Technical Reference
3Configuration: repository component
IntroductionThis chapter describes the post-installation configuration of the software components of the IDM Browser Client for Windows Repository Objects that run on the IDM Server machine.
Before proceeding further, it is important to understand the following terms:
Remoting host IDM Browser Client for Windows implements the remoting host as an executable configured to host a remoting object. IDM Browser Client for Windows is implemented as a single host/single remoting object.
Remoting object A IDM Browser Client for Windows remoting object is typically a dynamic linked library (DLL) that utilizes .NET remoting technology and contains the business logic. The .NET remoting technology is a form of remote process communication mechanism that allows objects or processes to communicate across process or machine boundaries using the .NET framework. The functionality in a remoting object can only be utilized if the remoting object has been hosted.
© 2006 Vignette Corporation. All rights reserved.14 v20.1 rev 1
3Chapter
Configuration
Connection pooling configurationIf the IDM Server is configured to use an Oracle or SQL Server database, ensure that connection pooling is enabled.
To enable connection pooling
1. Open up the “Data Sources (ODBC)” control panel. This is located in Start > Settings > Control Panel > Administrative Tools > Data Sources (ODBC).
2. Select the “Connection Pooling” tab.
3. Locate the relevant database ODBC driver—for Oracle it is “Oracle in OraHome92”, for SQL Server it is “SQL Server”. Double-click on the selected driver and a dialog should appear. Ensure that “Pool connections to this driver” is selected. Leave the unused time period at the default value of 60 seconds. Apply these changes.
System configurationIn the System folder of IDM System Administration, there are two variables related to sessions. These variables are set to their default values and can be modified according to custom requirements.
IDM Repository: Ticket alive period (in mins)The time a ticket must exist before it can timeout or is considered for cleanup. This setting is measured in minutes with a default minimum value of 1 minute.As the consequence of this variable, if the user logs off and then on again the number of logged-in users will not decrease immediately; refreshing the frame that displays the number of current users after “ticket_alive_interval” will decrease the number.
The value of this parameter is also used for session timeout.
IDM Repository: Ticket timeout period (in mins)The period of inactivity of tickets before tickets will timeout. This setting is measured in minutes with a default value of 60 minutes.
NOTE: Here, “ticket” refers to a successful login session.
Size of title listYou can configure the maximum number of titles returned from a search, by using the IDM Configuration Management component of IDM System Administration. This value is configured for individual user groups.
In the folder for the relevant group, set Max Rows in Title List to the required value.
Case sensitivitySearches for text in a query field might be case sensitive or case insensitive, depending on two factors:
• Whether the database in the IDM Server supports case-sensitive searches;

Configuration: repository component
v20.1 rev 1 15IDM Browser Client for Windows Technical Reference
• Whether IBCW has been configured to convert string query fields to UPPERCASE or lowercase, or to leave them as entered.
In the IDM Configuration Management component of IDM System Administration, using IDM Client: Force case of string fields in document titles to MIXED/UPPER/LOWER in the System folder, you can configure IBCW to force string fields in document titles to UPPERCASE or lowercase, or leave them unchanged (“mixed case”). Note that, if a string field in a QBE template is set up as a drop-down list box, the values specified in the list must be in the correct case.
Templates and external validationIBCW allows customer-defined validation functions to be used on input fields. These fields include input/select fields on QBE forms, indexing forms, and title forms. When a user submits a QBE, indexing, or title form, all input fields on the form will be validated against the standard validation functions and any customer-defined validation functions. The existing standard validation functions for IBCW are checkDate(), checkNumber(), and checkSmall_Int().
The formatted HTML strings returned by IBCW not only contain strings for the HTML forms but also the Java Script function tdpCheckAllFields(). This function validates all the fields on the form using standard validation functions (date, small integer, etc.)
How to use a customer defined validation functionYou should write the function in Java Script, and place it in a file with extension .js. The file must be placed on the web server in the directory <IBCW Installation Directory>\jscript where all IBCW Java Script files are located.
The function must take one parameter, the value of the id property of the field. It should return true when the value in the field is valid, and false otherwise.
IDM System Administration should be used to specify the validation function for a field; see the IDM System Administration User Guide for details. The module name specified for the validation function must be the name of the Java Script file containing the function, without the filename extension.
Templates and default valuesDefault values are supported for edit fields and drop-down list boxes in the QBE and INDEX templates. If a template field’s entry type is drop-down list or drop-down combo, the HTML field is displayed as a drop-down list.
If a template field has an associated default value, the HTML field is displayed with this default value.
If the conversion function of a template field is today’s date, user id, or user name, the HTML field is displayed with today’s date, the current user id, or the current user name.
Document type to slevel conversion handling is also available in QBE, INDEX, and TITLELIST templates.
Configurable display of framesYou can configure the way the QBE, Title List, and Import frames are displayed.
To customize the display
This is the easiest way:
1. Using IDM System Administration, create a new template with required fields. Obviously, such fields should have been defined in the application.
2. Shut down the IBCW processes.

© 2006 Vignette Corporation. All rights reserved.16 v20.1 rev 1
3Chapter
3. Configure towerdotnet.config (in $CTL_RUNTIME/is/system) to use the appropriate template, using “add key” statements as follows.
• The format of the “add key” statement is
add key=”key-name” value=”template-name”
• The template used for the QBE frame is specified by the key-name TemplateNameQbe;
• The template used for the column headings in the title list frame is specified by the key-name TemplateNameHead;
• The template used for the column data in the title list frame is specified by the key-name TemplateNameData;
• The template used for the indexing (import) dialog is specified by the key-name TemplateNameIndex;
• The template used for the add/modify title dialogs is specified by the key-name TemplateField.
The following example shows the default values for each of these settings:
<add key="TemplateNameQbe" value="qbe0" /><add key="TemplateNameHead" value="head0" /><add key="TemplateNameData" value="data0" /><add key="TemplateNameIndex" value="idx0" /><add key="TemplateField" value="idx0" />
4. Restart the IBCW processes.
NOTE: If a template name defined in towerdotnet.config was created for an application,this template will be used. If such a template was not created for other applications, thedefault template will be used.
For example, if a QBE template named cust_qbe was defined for the Customers applicationand configured in towerdotnet.config, it will be used. If cust_qbe was not created for theSales application, IBCW will try to use the qbe0 template.
Setting up a distributed annotations serverYou can store annotations on a distributed annotations server, separately from the related documents. Refer to the IDM System Administration manual for more information.
Setting up the hardcopy systemThe fax device must be called “fax”, and the email device must be called “email”. However, multiple print devices are supported and there is no special restriction on names. The separate publication Output System Technical Reference provides detailed instructions on the creation and configuration of the Hardcopy System, Hard Copy Devices, Hardcopy Templates, Hardcopy Page Banners, and Hardcopy Fax Banners. It also provides a sample configuration.
FaxingIf a “Cover sheet” is selected from the fax dialog then fax_mail_hdr.rfax (if RightFax) or fax_mail_hdr.ssol (if SystemSolution) must contain the following names to be substituted by real values (if they are to be substituted, that is):
1. $HC.dest_fullname
2. $HC.dest_company

Configuration: repository component
v20.1 rev 1 17IDM Browser Client for Windows Technical Reference
3. $HC.dest_faxnum
4. $IFN_PAGES
5. $HC.total_pages
6. $HC.sender_fullname
7. $HC.banner_string
Server printThe names of variables to be substituted are as follow:
1. HC.user_fullname
2. HC.user_location
3. HC.user_telephone
4. HC.banner_string
EmailIBCW hardcopy requires that the Subject and other fields be defined in the fax_mail_hdr file, located in the $CTL_RUNTIME/is/bin directory.
A sample file is shown here:
#!/bin/shif [ "$HC_COMTYPE" = "EMAIL" ]thenecho "$HC_dest_faxnum"echo "To: $HC_TO"echo "Cc: $HC_CC"echo "Subject: $HC_SUBJECT"echo ""echo "$HC_BODY"elseecho "[email protected]"fiecho "Subject: ${HC_SUBJECT}"
Email does not have a “cover sheet” option as with fax.
Setup of remoting objects1. Login to IDM Server as the instance user.
2. The internal remoting service ports are configured in the $CTL_RUNTIME_DIR/is/config/services file. The port numbers must be unique on the server (regardless of the IDM Server instance or type of process). If they are not unique assign different port numbers.
The default remoting object port numbers in the $CTL_RUNTIME/is/config/services file are:
rlogin 9500/tcp # Login services remoting objectrdb 9510/tcp # Data services remoting objectrdoc 9520/tcp # Retrieval services remoting objectrimport 9530/tcp # Import services remoting objectrmisc 9540/tcp # Miscellaneous services remoting objectrsys 9550/tcp # System Services remoting objectrtitlelist 9560/tcp # Title List services remoting objectrqbe 9570/tcp # QBE services remoting objectrapplist 9580/tcp # Application services remoting object.rannot 9590/tcp # Annotation service remoting objectrhcp 9600/tcp # Hard Copy services remoting object

© 2006 Vignette Corporation. All rights reserved.18 v20.1 rev 1
3Chapter
rstrsrch 9610/tcp # String Search objectrdm 9615/tcp # Document management
If you change this file, the format must be strictly followed:
[service name] [unique port #/tcp] # description
The sections of each entry must be separated by tab characters (not by space characters), and at least the “start description” character (#) must be present.
These service port numbers are classified as “internal” because they are used exclusively on the IDM Server. No external processes will communicate on these ports.
3. If any of the port numbers in the $CTL_RUNTIME_DIR/is/config/services file needs to be changed, restart the honcho service to allow the changes to take effect.
4. Ensure that the remoting hosts are configured with the external service port numbers.
For every remoting host, there is a corresponding configuration file, installed in $CTL_RUNTIME_DIR/is/system directory.
The remoting hosts, their configuration files and default port numbers are listed in this table:
These port numbers are exposed and are external to IDM Server. The external service port number is contained in the <channel> XML tag within the remoting host configuration file. For example:
<channel ref="tcp" port="9020"> ... </channel>
5. If the repository services need to be tunnelled through a firewall, then the firewall needs to be configured to allow communication through these ports.
All the remoting hosts except ttnloginhost utilize the services provided by the other remoting hosts.
For example, ttndbhost, ttndochost, and ttnimporthost use the services provided by ttnloginhost. Therefore, the external port number for the service ttnloginhost must be defined in the configuration file (using the <client> XML tag) for the remoting hosts ttndbhost, ttndochost, and ttnimporthost.
In the example below, the remoting host being configured requires the services of the login remoting object, which is listening on the local machine on external port number 9000.
Remoting host Configuration file Default port number
ttnloginhost ttnloginhost.exe.config 9000
ttndbhost ttndbhost.exe.config 9010
ttndochost ttndochost.exe.config 9020
ttnimporthost ttnimporthost.exe.config 9030
ttnmischost ttnmischost.exe.config 9040
ttnsyshost ttnsyshost.exe.config 9050
ttntitlelisthost ttntitlelisthost.exe.config 9060
ttnqbehost ttnqbehost.exe.config 9070
ttnapplisthost ttnapplisthost.exe.config 9080
ttnannothost ttnannothost.exe.config 9090
ttnhcphost ttnhcphost.exe.config 9100
ttnqueuehost ttnqueuehost.exe.config 9105
ttnstrsrchhost ttnstrsrchhost.exe.config 9110
ttndmhost ttndmhost.exe.config 9115

Configuration: repository component
v20.1 rev 1 19IDM Browser Client for Windows Technical Reference
(Note, however, that it is possible to define multiple repository servers as “Business Hosts”; all defined servers will be available in the Business Hosts drop-down in the Login screen.)
<client>
<wellknown
type="Towertech.Common.RemotingInterface.ITTRLogin, ttnRemotingInterface"
url="tcp://dotnettdp:9000/Login" />
</client>
Starting remoting hosts
The honcho process can start and stop the Remoting Hosts automatically when IDM Server is started and shutdown. To do this, edit the following files.
1. The following lines should be present in the $CTL_RUNTIME_DIR/is/admin/HANDLERS file, having been added by the installer. If they are not present, add them:
# .NET remoting host names
#
ttnloginhost 8 ttnloginhost -s rlogin
ttndbhost 8 ttndbhost -s rdb
ttndochost 8 ttndochost -s rdoc
ttnimporthost 8 ttnimporthost -s rimport
ttnmischost 8 ttnmischost -s rmisc
ttnsyshost 8 ttnsyshost -s rsys
ttntitlelisthost 8 ttntitlelisthost -s rtitlelist
ttnqbehost 8 ttnqbehost -s rqbe
ttnapplisthost 8 ttnapplisthost -s rapplist
ttnannothost 8 ttnannothost -s rannot
ttnhcphost 8 ttnhcphost -s rhcp
ttnstrsrchhost 8 ttnstrsrchhost -rstrsrch
ttndmhost 8 ttndmhost -s rdm
2. Add the following lines to the $CTL_RUNTIME_DIR/is/config/STARTUP file. (If there is no STARTUP file, create one with the following onctents)
run ttnloginhost
run ttndbhost
run ttndochost
run ttnimporthost
run ttnmischost
run ttnsyshost
run ttntitlelisthost
run ttnqbehost
run ttnapplisthost
run ttnannothost
run ttnstrsrchhost
run ttnqueuehostrun ttnhcphost
run ttndmhost
Restart the IDM Server instance to start the Remoting Hosts.
NOTE: The IDM Server instance or instances of ttndbhost MUST be restarted afterdropping either an index or a table from the database.

© 2006 Vignette Corporation. All rights reserved.20 v20.1 rev 1
3Chapter
TracingAll trace files are located in $CTL_RUNTIME_DIR/is/log. Errors will be written to the trace file and the errorlog ($CTL_RUNTIME_DIR/is/log/errorlog). The trace file names and their locations are not configurable.
A feature of the tracing facility is the ability to set trace levels to control the amount of tracing information output to all the trace files. The trace level feature is governed by a configuration variable in the System folder of IDM System Administration, called IDM Repository: Trace Level (MAX, HIGH, MEDIUM, LOW, MIN). The default setting is MAX. This variable refers to the severity of logged records. Therefore MAX means “maximum severity” (effectively errors) and MIN refers to minimum severity (all available trace messages).
The trace level configuration variable accepts the following values:
MAX Only errors are traced and errors are always logged
HIGH High severity trace messages
MEDIUM Medium severity trace messages
LOW Low severity trace messages
MIN Debug mode showing function entry and exit
This should only be changed if there are problems that need to be diagnosed.
Remoting object trace filesThese are trace files for information generated by the remoting objects. Remoting objects are those components that expose an interface to the IDM Server. The name of these trace files begin with a lowercase ‘r’.
Tracing information will be recorded in the following files:
rlogin This log contains tracing related to allocation, deallocation and verification of licenses.
rdoc This log contains tracing related to retrieval of documents.
rimport This log contains tracing related to the importing of documents.
rdb This log contains tracing related to the database operations.
rmisc This log contains tracing related to system configuration and application list.
rtitlelist This log contains tracing related to the title list operations.
rsys This log contains tracing related to extended system configuration.
rqbe This log contains tracing related to QBE operations.
rapplist This log contains tracing related to the application list operations.
rannot Annotation
rhc Server print/email/fax
rstrsrch Text search
rdm This log contains tracing related to document management functionality.
Low level component trace filesThese are trace files for information generated by lower level components, which are used by the remoting objects. The name of these trace files begin with a lowercase ‘m’.
These trace files should only be enabled if there is no corresponding remoting object trace file or if more detailed information is required.

Configuration: repository component
v20.1 rev 1 21IDM Browser Client for Windows Technical Reference
Tracing information will be recorded in the following files:
mlogon This log contains tracing of low level operations related to license management.
mdb This log contains tracing related to database operations including each SQL statement issued to the database.
mdoc This log contains tracing of low level operations related to retrieval of documents.
mmisc This log contains tracing related to general operations such as retrieval of application lists and retrieval of configuration variables.
mimport This log contains tracing of low level operations related to the importing of documents.
mtitleist This log contains tracing related to the title list operations.
msys This log contains tracing related to extended system configuration.
mqbe This log contains tracing related to QBE operations.
mapplist This log contains tracing related to the application list operations.
mannot Annotation
mhc Server print/email/fax
mstrsrch Text search
mdm This log contains tracing of low level document management operations.
Security
LoginIBCW identifies users when they first connect to your web site. All other security features are dependent on correct user identification. The list of users that can connect to the IDM Server is defined using IDM System Administration.
Title list filteringWhen a list of documents is displayed, it is filtered so that the user is only presented with documents that they have permission to access. This filtering can be performed using document type security. An example of this is to classify all documents as either public or internal, with a single guest Internet user having access to only the public documents. See the IDM System Administration manual, Configuration and Applications sections, for more information on setting up title list filtering.
© 2006 Vignette Corporation. All rights reserved.22 v20.1 rev 1
3Chapter
Advanced configurationThis section describes how to configure IDM Browser Client for Windows .NET Repository to run more than one instance of a particular service.
For example, consider the situation where an extra document retrieval remoting service is desired to improve the response time of document retrieval. The steps to perform this configuration are similar to those explained in the previous sections.
1. Select the particular service to be duplicated. Do not select the login service, as there can only be one instance of the login service running at a time. The remaining options are data, document retrieval, importing and miscellaneous services.
2. Make a copy of the remoting host and its configuration file. In a Korn shell, enter:
cd $CTL_RUNTIME_DIR/is/systemcp ttndochost.exe ttndochost2.execp ttndochost.exe.config ttndochost2.exe.config
3. Change the external remoting object port number in the remoting host configuration file from:
<channel ref="tcp" port="9020">
to:
<channel ref="tcp" port="9021">
All other settings in the remoting host configuration file should remain unchanged. The remoting host trace filename can be changed, if desired.
4. Add an internal remoting service port in $CTL_RUNTIME_DIR/is/config/services. For example:
rdoc2 9521/tcp Second Retrieval Services Remoting Object
5. Add a command entry in $CTL_RUNTIME_DIR/is/admin/HANDLERS.
ttndochost2 8 ttndochost2 –s rdoc2
6. Add a “run” command in $CTL_RUNTIME_DIR/is/config/STARTUP to automatically start up this second service.
run ttndochost2
7. Stop and restart the IDM Server instance to start up the remoting services.
Chapter
v20.1 rev 1 23IDM Browser Client for Windows Technical Reference
4Configuration: web server component
ConfigurationThe configuration settings for the web server are stored in a .NET standard file called Web.config, which is installed in the root of IBCW virtual directory.
If you change any settings it is recommended that you restart Internet Information Services.
Creating the virtual directoryThe virtual directory for IBCW must be created manually if it does not already exist. The physical directory is created during installation.
The virtual directory will exist if you are using IIS 6 and installing to the default location (<SystemDrive>:\Inetpub\wwwroot\).
To manually create the virtual directory
1. Select Start > Programs > Administrative Tools > Internet Information Services Manager.
2. Expand the IIS tree.
3. Expand Default Web Site.
4. Ensure that the Default Web Site is started. If not, restart the IIS service.
5. Create a virtual directory (right-click the Default Web Site and select New > Virtual Directory) with the following settings:
• Alias: e.g. IDMWebClient
• Directory: <IBCW Installation Directory>
For example, C:\Inetpub\wwwroot\IDMWebClient
• Permissions: Default (Read), unless document caching is enabled. Please see DocumentPoolThreshold Web.Config setting—if enabled then write permission is required. With caching enabled, a directory called docs will be created in <IBCW Installation Directory> during installation, with the Internet Guest Account and Everybody having full permission.
NOTE: The <IBCW Installation Directory>\docs directory will be created automatically ifdoes not exist with the first document retrieval request, but the permissions are notset programmatically and must be set manually.

© 2006 Vignette Corporation. All rights reserved.24 v20.1 rev 1
4Chapter
6. Set permissions. In the IIS Manager window, right-click on the IDMWebClient virtual directory folder (which has a globe icon) and select Properties > Directory tab > click on the Create button under Application settings.
Set Executive permissions to Scripts only and click OK.
Configuring pass-through document extensionLinks to an ifn (for example, "doc export", "string/text search", etc.) must be mapped to a document name/extension.
Although it is not feasible to translate such a link to [actual internal file name].[actual ext] (which would enable auto-launch), an alternative solution is to provide a neutral (and configurable) extension, which allows custom mime mapping or, in most cases, will trigger the Windows Open With... dialog box. The default extension is ibcw, as in the following extract from a typical Web.config file:
<!-- Loader file extension --><add key="docLoaderExt" value="ibcw"/>
If the extension is not defined in the browser's mime types, you will be prompted with a list of available applications in the Open with... dialog.
Additional configuration is required, as follows:
1. Open the IIS administration console.
2. On the Virtual directory tab, click on Configuration.
3. Add the following mapping:
Executable: %windir%\Microsoft.NET\Framework\<version of ASP.NET>\aspnet_isapi.dllExtension: .ibcw (be aware there is a dot in front of the extension).Limit to: GET,POST
4. Save and exit
For AFP documents in pass-through mode, add the following to Web.config in the “<!-- content types-->“ section:
<add key="contenttype.afp" value="application/application/vnd.ibm.modcap" />
For WebCapture, add:
<mime-mapping><extension>tcc</extension><mime-type>application/tower-webcapture</mime-type>
</mime-mapping>
For PS and PCL, add:
<add key="contenttype.eps" value="application/postscript" /><add key="contenttype.ps" value="application/postscript" /><add key="contenttype.pcl" value="application/vnd.hp-PCL" /><add key="contenttype.pcl" value="application/x-pcl" />
Web Server session timeoutThe name of the session timeout parameter for IBCW virtual directory is “session timeout”. For example, in an Intranet environment it might be beneficial to set the value to, for example, 480 min (8 hours) contrary to Internet environment where the preferred choice could be a low value, i.e. 1 or 2 min.
When the session expires the cleanup process will:
1. Free the license.
2. Remove web server caching directory (if web server caching was enabled).
A session can become invalid when:
Configuration: web server component
v20.1 rev 1 25IDM Browser Client for Windows Technical Reference
• The Web Server session timeout occurs or,
• The login timeout occurs, whatever happens first.
Document cachingCaching is disabled when DocumentPoolThreshold = 0 and enabled when the value is anything but 0.
If the Web Server is configured to take advantage of “ASP.NET Session State”, which is beneficial when using Web Farming (for more information please check MSDN) the document caching must be disabled (set to 0). This is because the first request to retrieve a document can go through one Web Server and second through the 2nd Web Server, which did not cache the first document, etc.
In such cases make sure that the following line exists in Web.config:
<add key="DocumentPoolThreshold" value="0" />
If “sticky routing” is acceptable in a Web Farm environment or a single Web Server is used it is recommended to enable document caching, either “per user’s session”:
<add key="DocumentPoolThreshold" value="-1/>
or caching with a timeout:
<add key="DocumentPoolThreshold" value="100000" />
(cached document will expire in 100 seconds; if another request from the same user (session) for the same document will be issued such document will be (again) retrieved from IDM Server—and cached again, for 100 seconds.)
Defining the IDM ServerNext, the IDM Server to be accessed from IBCW must be declared. The default Web.config file defines two servers; more can be added or the second can be deleted according to requirements.
The default part of Web.config that refers to the IDM Server definition:
<add key="AppServer.Count" value="no-of-IDM-hosts" /><add key="AppServer.Name.1" value="REPOSITORY_1_ADDR" /><add key="AppServer.Description.1" value="REPOSITORY_1_DESC" /><add key="AppServer.Name.2" value="REPOSITORY_2_ADDR" /><add key="AppServer.Description.2" value="REPOSITORY_2_DESC" />
can be changed to, for example, a single IDM Server:
<add key="AppServer.Count" value="1" /><add key="AppServer.Name.1" value="<IDM Server_IP>" /><add key="AppServer.Description.1" value="<My Rep Business Name/abbreviation >" />
where <IDM Server_IP> can be either “hostname” or IP address.
Changing the Windows Rendering IP address<add key="RenderManagerService" value="http://Render_Manager_Addr/RenderManager/RenderManager.dll?Handler=Default" />
Change “Render_Manager_Addr” to the IP address or hostname of the server that has the Windows Rendering Web Services (Render Manager Virtual Directory) installed.
Changing the remoting interface IP Address<wellknown type="Towertech.Common.RemotingInterface.ITTRLogin, ttnRemotingInterface" url="tcp://REPOSITORY_1_ADDR:9000/Login" />
Change “REPOSITORY_1_ADDR” to the IP address or hostname of the server that has the IBCW Repository components installed.

© 2006 Vignette Corporation. All rights reserved.26 v20.1 rev 1
4Chapter
Change the port numbers for all objects to match the external port numbers defined in the corresponding configuration files located in the $CTL_RUNTIME_DIR/is/system directory.
Do that for all objects listed in the Web.config file.
Multiple repositories on a single hostIf more than one IDM Server is to be hosted on a single server machine, the IP address will be the same, so a special definition process is required to distinguish them. In such a case, you must define a unique hostame for each instance in the server hosts file. These hostnames must be mapped to the same IP address.
Then an add key=AppServer.Name.<n> entry must be included for each instance, with an appropriate value of <n> and with the corresponding hostname in the value parameter. Finally, the appropriate port numbers must be included in the url parameter in the wellknown specification as described under Changing the remoting interface IP Address above.
Date formatOther settings: Date Format and Start Year (to display “xx” years in a DDLB (QBE)) can also be configured, if required.
Custom log file and pre-rendering.In custom code written for use in IBCW, you can log messages (as a string) to a file. Both the file name and location can be configured in the Web.config file, as follows:
<add key="CustomLogFile" value="C:\\home\\runtime\\is\\log\\custom.log" />
To enable pre-rendering, if required, make the following change to Web.config:
<add key="UsePrerenderedDocument" value="false" />
Change false to true.
Assigning document type to renderersThe “RENDERING SETTING” section in Web.config specifies the renderer to be used for different document types (based on file ending). For example,
<!-- RENDERING SETTINGif no renderer defined for a file extension, the file is passed through.Note: A document's extension is case sensitive!-->
<add key="RenderManagerService" value="http://172.16.1.235/RenderManager/RenderManager.dll?Handler=Default" /><add key="RenderAgentType" value="soap" />
<add key="Renderer.tif" value="TIFRenderer" /><add key="Renderer.afp" value="AFPRenderer" /><add key="Renderer.pcl" value="PCLRenderer" /><add key="Renderer.ps" value="PSRenderer" /><add key="Renderer.doc" value="OutInRenderer" /><add key="Renderer.xls" value="OutInRenderer" /><add key="Renderer.pct" value="OutInRenderer" /><add key="Renderer.drw" value="OutInRenderer" /><add key="Renderer.sdw" value="OutInRenderer" /><add key="Renderer.dxf" value="OutInRenderer"/><add key="Renderer.ppt" value="OutInRenderer"/><add key="Renderer.lwp" value="OutInRenderer"/>

Configuration: web server component
v20.1 rev 1 27IDM Browser Client for Windows Technical Reference
It might be necessary to provide mapping for both ps and eps document types, and for tif and tiff document types.
These entries can be changed and new ones added as necessary.
Document pass-throughIf rendering is not enabled, a requested document is passed-through to the web browser as a single file in its original format. This offers the advantage that, if the MIME format of a document is registered, the document can be opened in its native application. Pass-through is available only if “IDM Client: Permission to export documents” permission to export documents is set to Y. (This permission can be set by running IDM System Administration and selecting the Groups folder in the IDM Configuration Management option.)
Many web browsers have plug-ins that allow certain document types to be displayed within the browser. For example, if the Acrobat Reader plug-in has been installed, a PDF document can be opened directly in the browser window, with the appropriate controls.
IBCW can be configured to let certain document types pass through directly to the browser, while others are rendered. The process is governed by file type, as follows:
1. If the document’s file type is in the pass-through list, the document is passed directly to the browser.
2. If the document’s file type is specified for a particular rendering object, that object is invoked.
3. If none of the above, an error message is sent to the browser. If the user has export permission, an option to retrieve the document in “raw” form is also offered.
Enabling pass-through
To enable pass-through for the document types configured in the IDM Server.
Use the IDM Configuration Management component of IDM System Administration.
1. Determine the number of document types (file extensions) for which pass-through is to be enabled. Set Number of document types to pass through for IBC/CDP to this value.
2. The option File extension of document type <n> will be issued for values of <n> from zero to (one less than the number of document types). For each, enter a file extension (html, jpeg, doc, txt, etc.)
3. By default, only the first page of a document is passed through. If all pages of a document should be passed through, set IBC/CDP: pass through all pages (Y) or single page (N) to Y. (Note that this setting is applicable to all types of document; it cannot be configured separately for individual types of document.)
For more details, refer to the IDM System Administration User Guide.
Error/trace logging
Level of loggingThe logging level is defined in the “system.diagnostics” section in Web.config.
<system.diagnostics><switches>
<!-- This switch controls general messages. In order toreceive general trace messages change the value to the appropriatelevel."1" gives error messages,"2" gives errors and warnings,"3" gives more detailed error information, and"4" gives verbose trace information -->

© 2006 Vignette Corporation. All rights reserved.28 v20.1 rev 1
4Chapter
<add name="TdpNetSwitch" value="4" /></switches>
</system.diagnostics>
Log file
To configure the log file
1. The following line in Web.config specifies the file in which to log. This can be changed to any desired name. The file will be created if it does not exist.
<add key="traceFile" value="C:\temp\tdpntrace.log" />
2. The directory will not be created. If it does not already exist, create it.
Password expiryIf a user tries to log in using an expired password, the user will receive a “password expired” message and will be asked to change the password using an extra field in the login window.
Please refer to the IDM System Administration Technical Reference and the IBC User Guide for further information on the optional parameter:
Security: Maximum number of days between password changes
Configuring for large filesBy default, ASP.NET permits only files that are 4096 kilobytes (KB) (that is, 4 megabytes) or less to be uploaded to the web server but you may allow larger files by changing the maxRequestLength parameter in the <httpRuntime> section of the Web.config file.
For further information, refer to Appendix A, Uploading large files.

Chapter
v20.1 rev 1 29IDM Browser Client for Windows Technical Reference
5Windows-based rendering
Windows-based rendering can be configured through installing the Vignette Rendition Server product. Refer to the Vignette Rendition Server Technical Reference for further information. The Render Manager is used by the IDM Browser Client for Windows for on-the-fly renditioning of documents.
Supported renderers and file typesSupported renderers for IBCW are:
AFP Renderer, Outside-In Renderer, PS Renderer, PCL Renderer, TIF Renderer. Please refer to the 19.2 Vignette Rendition Server Technical Reference manual for further detail on these rendition options.
All supported file types are rendered to PNG format. The rendered image is scalable in the browser’s display frame or in the viewer applet window.
For rendering under Windows, the rendering server must be running one of the following libraries:
• Lincoln
• AFP
• Victor
• OutsideIn
• LincPDF (requires separate license from Lincoln)
Setting the rendition image formatIn IDM System Administration, set the parameter IBCU property: conv file output format png/jpg to jpg or png to specify the image format to render to. The default and recommended value is png.

© 2006 Vignette Corporation. All rights reserved.30 v20.1 rev 1
5Chapter

Chapter
v20.1 rev 1 31IDM Browser Client for Windows Technical Reference
6Configuration: the viewer
IntroductionThis chapter describes the configuration of the IDM viewers. Details are provided for both the downloadable viewer applet and the standard document frame viewer.

© 2006 Vignette Corporation. All rights reserved.32 v20.1 rev 1
6Chapter
Using the viewer appletIn IDM System Administration, set the parameter IBCU property: use the document viewer applet to Y to enable use of the viewer applet for a user group, or N to disable it. If the viewer applet is disabled, the standard display frame is used instead; see Using the standard viewer on page 36. The default value is N.
If the viewer applet is enabled for the user’s group and the renderer’s output format is set to png, then SUN JRE plugin version 1.4.1_03 must be installed on the user’s PC to display the image correctly. If it is not installed, the user will be prompted to download and install the SUN JRE 1.4.1_03 plugin (from the IBCW Web Server).
NOTE: The standard Sun JRE will be downloaded. In some cases, this file may not have therequired AuthentiCode. If this happens the browser settings must allow the download ofunsigned ActiveX controls, or an error message will be displayed. The browser setting onlyneeds to be enabled for the download, and once the JRE has been downloaded successfullycan the setting be changed back to disabled. The system administrator can supply theAuthentiCode for the JRE themselves, in which case the browser setting does not matter.
In this configuration, the user will be prompted to download the SUN JRE plugin every time a document is selected from the Title List and IBCU property: conv file output format png/jpg is set to png, until the SUN JRE plugin is installed.
A message "Unsupported document type" will be displayed in the applet's status bar if document's format is not supported by JRE/JAI (only GIF, TIFF, PNG, JPEG are supported).
The viewer applet supports English and German languages. The required language must be installed on the machine and the Windows locale must be set to the appropriate country.
Configuring Java Advanced Imaging support
To ensure that JAI support for the applet viewer is correctly downloaded
This procedure requires that you have a JDK installed, so that you can use tdpviewer.jar.
If there is no JDK installed, you can transmit MANIFEST.MF and tdpviewer.jar to some other machine that does have a JDK (via binary mode FTP or some other mechanism), perform the following operations, with suitable adjustments to the paths, and then transmit the files back.
1. Ensure that you have a JDK installed.
2. Change directory to $TDP_NET_HOME\jre.
3. Open MANIFEST.MF for editing, and look for the line reading
jai-Implementation-URL: http://172.16.1.233/tower/jsp/jre/jai_win.jar
Make the following changes to this line:
• Replace /tower/jsp with the name of the virtual directory.
• Change the IP address 172.16.1.233 to your web server’s IP address.
• If you are not using the default port number (80), add the port number. For example, if you are using port number 8000:
http://172.16.1.233:8000/IDMWebClient/jre/jai_win.jar
4. Change to the parent directory ($TDP_NET_HOME) and run this command:
jar -ufm viewer/tdpviewer.jar jre/MANIFEST.MF

Configuration: the viewer
v20.1 rev 1 33IDM Browser Client for Windows Technical Reference
Large tiff imagesWhen the applet viewer is used to view a tiff image, best efforts are made to display the image as close as possible to its original size. If the image is viewed at too large a size, a JVM “out of memory” exception may be thrown.
NOTE: The larger an image is displayed, the longer it will take to appear on screen.
If this exception is being thrown, it can be resolved by increasing the amount of memory available to the JVM. This can be done by setting min./max. heap limit, e.g. -Xms128m -Xmx256m. For more information refer to the SUN Java website.
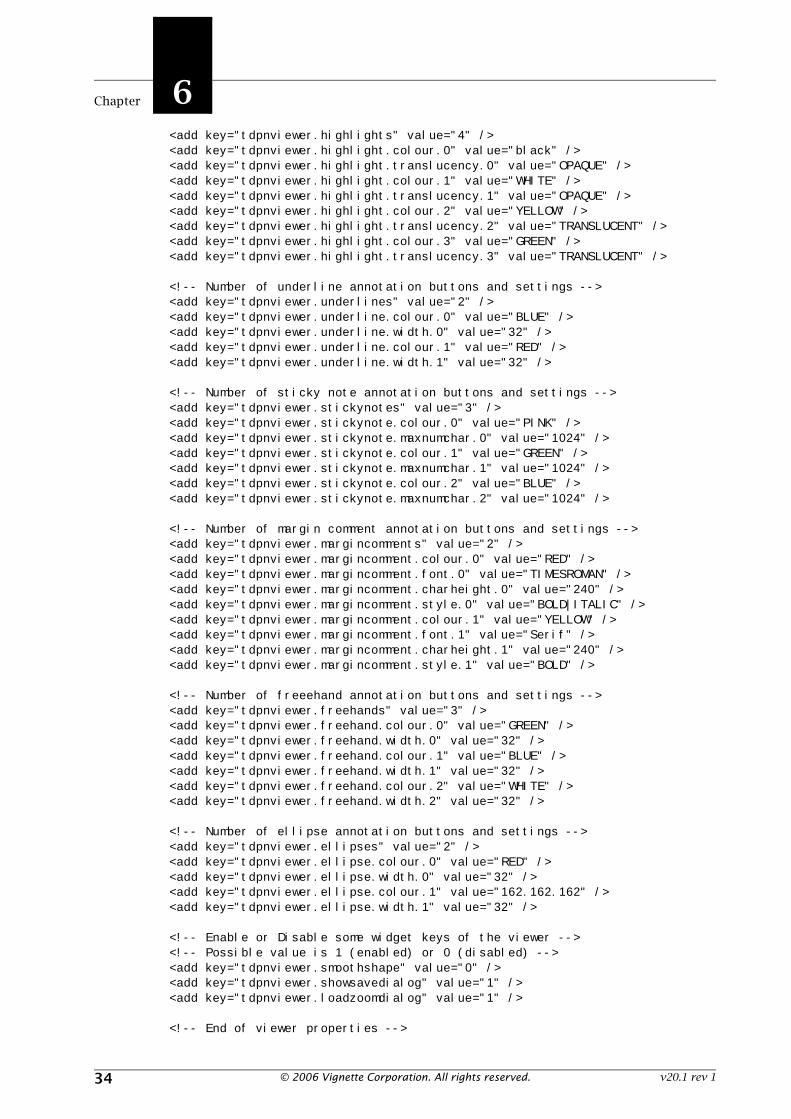
Configuring the annotations toolbarThe configuration of the viewer applet's annotations toolbar is controlled by a section in the file Web.config. The following illustrates the content of this section:
<!-- viewer properties --><!--The display styles
0 - As original1 - Fit to width2 - Fit to height3 - Fit to windowother values - As original
--><add key="tdpnviewer.display" value="0" />
<!--whether the extract region/blank region button is displayed
0 - do not show the button1 - show the button
--><add key="tdpnviewer.extractrgn" value="1" /><add key="tdpnviewer.blankrgn" value="1" />
<!-- maximum subpages to display --><add key="tdpnviewer.maxsubpages" value="10" />
<!-- maximal height (in pixels) of image to zoom --><add key="tdpnviewer.maxzoomheight" value="1200" />
<!-- maximal width (in pixels) of image to zoom --><add key="tdpnviewer.maxzoomwidth" value="1200" />
<!-- minimal height (in pixels) of image to zoom --><add key="tdpnviewer.minzoomheight" value="100" />
<!-- minimal width (in pixels) of image to zoom --><add key="tdpnviewer.minzoomwidth" value="100" />
<!--image type ( "mono", "gray" or "color")"color" - default value--><add key="tdpnviewer.imagetype" value="color" />
<!-- Number of hightlight annotation buttons and settings -->
© 2006 Vignette Corporation. All rights reserved.34 v20.1 rev 1
6Chapter
<add key="tdpnviewer.highlights" value="4" />
<add key="tdpnviewer.highlight.colour.0" value="black" />
<add key="tdpnviewer.highlight.translucency.0" value="OPAQUE" />
<add key="tdpnviewer.highlight.colour.1" value="WHITE" />
<add key="tdpnviewer.highlight.translucency.1" value="OPAQUE" />
<add key="tdpnviewer.highlight.colour.2" value="YELLOW" />
<add key="tdpnviewer.highlight.translucency.2" value="TRANSLUCENT" />
<add key="tdpnviewer.highlight.colour.3" value="GREEN" />
<add key="tdpnviewer.highlight.translucency.3" value="TRANSLUCENT" />
<!-- Number of underline annotation buttons and settings -->
<add key="tdpnviewer.underlines" value="2" />
<add key="tdpnviewer.underline.colour.0" value="BLUE" />
<add key="tdpnviewer.underline.width.0" value="32" />
<add key="tdpnviewer.underline.colour.1" value="RED" />
<add key="tdpnviewer.underline.width.1" value="32" />
<!-- Number of sticky note annotation buttons and settings -->
<add key="tdpnviewer.stickynotes" value="3" />
<add key="tdpnviewer.stickynote.colour.0" value="PINK" />
<add key="tdpnviewer.stickynote.maxnumchar.0" value="1024" />
<add key="tdpnviewer.stickynote.colour.1" value="GREEN" />
<add key="tdpnviewer.stickynote.maxnumchar.1" value="1024" />
<add key="tdpnviewer.stickynote.colour.2" value="BLUE" />
<add key="tdpnviewer.stickynote.maxnumchar.2" value="1024" />
<!-- Number of margin comment annotation buttons and settings -->
<add key="tdpnviewer.margincomments" value="2" />
<add key="tdpnviewer.margincomment.colour.0" value="RED" />
<add key="tdpnviewer.margincomment.font.0" value="TIMESROMAN" />
<add key="tdpnviewer.margincomment.charheight.0" value="240" />
<add key="tdpnviewer.margincomment.style.0" value="BOLD|ITALIC" />
<add key="tdpnviewer.margincomment.colour.1" value="YELLOW" />
<add key="tdpnviewer.margincomment.font.1" value="Serif" />
<add key="tdpnviewer.margincomment.charheight.1" value="240" />
<add key="tdpnviewer.margincomment.style.1" value="BOLD" />
<!-- Number of freeehand annotation buttons and settings -->
<add key="tdpnviewer.freehands" value="3" />
<add key="tdpnviewer.freehand.colour.0" value="GREEN" />
<add key="tdpnviewer.freehand.width.0" value="32" />
<add key="tdpnviewer.freehand.colour.1" value="BLUE" />
<add key="tdpnviewer.freehand.width.1" value="32" />
<add key="tdpnviewer.freehand.colour.2" value="WHITE" />
<add key="tdpnviewer.freehand.width.2" value="32" />
<!-- Number of ellipse annotation buttons and settings -->
<add key="tdpnviewer.ellipses" value="2" />
<add key="tdpnviewer.ellipse.colour.0" value="RED" />
<add key="tdpnviewer.ellipse.width.0" value="32" />
<add key="tdpnviewer.ellipse.colour.1" value="162.162.162" />
<add key="tdpnviewer.ellipse.width.1" value="32" />
<!-- Enable or Disable some widget keys of the viewer -->
<!-- Possible value is 1 (enabled) or 0 (disabled) -->
<add key="tdpnviewer.smoothshape" value="0" />
<add key="tdpnviewer.showsavedialog" value="1" />
<add key="tdpnviewer.loadzoomdialog" value="1" />
<!-- End of viewer properties -->

Configuration: the viewer
v20.1 rev 1 35IDM Browser Client for Windows Technical Reference
Settings for line width and character height are provided for compatibility with other IDM components only; they have no effect in this file.
Available color names are the standard Java color names: black, blue, cyan, darkGray, gray, green, lightGray, magenta, orange, pink, red, white, yellow. Colors can also be specified as RGB mixes, in the form <Red_value>.<Green_value>.<Blue_value>, where each value lies in the range 0–255; 0.0.0 is black, and 255.255.255 is white.

© 2006 Vignette Corporation. All rights reserved.36 v20.1 rev 1
6Chapter
Using the standard viewerIn IDM System Administration, set the parameter IBC property: use the document viewer applet to N to disable use of the viewer applet for a user group, or Y to enable it. If the viewer applet is enabled, the standard document frame is not used.
Setting the server zoom optionRendered documents can be zoomed locally (on the browser) or on the server. (This facility is available with both the standard document frame and the viewer applet.) Zooming on the server is slower, but delivers a better quality image. In IDM System Administration, set the parameter IBCU property: zoom documents on server to Y to render on the server, or to N to zoom locally. The default value is N.
If IBCU property: zoom documents on server is set to N, all images are resized locally (by the browser).
If a subpage is prerendered, then its image is resized locally, regardless of the IBCU property: zoom documents on server setting. Only subpages not found in the prerendered document repository can be resized on the server.

v20.1 rev 1 37IDM Browser Client for Windows Technical Reference
Appendix
AUploading large files
There are two critical stages to uploading a large file from a client PC to IDM Server using IBCW. The first stage is to uploading the file from a client PC to a web server and the second stage is to transfer the file from that web server to IDM Server.
Currently the system relies on ASP .NET to upload a file from the browser to the web server but ASP .NET has limitations on the size of a file to be uploaded.
By default, ASP.NET permits only files that are 4096 kilobytes (KB) (that is, 4 megabytes) or less to be uploaded to the web server but you may allow larger files by changing the maxRequestLength parameter.
To upload larger files
1. Determine whether you wish to change Web.config (for a local change) or Machine.config (for a machine-wide change).
If you choose to change Machine.config, you will find the maxRequestLength parameter already present. If you choose to change Web.config, you will have to add the maxRequestLength parameter and in this case you may find it convenient to copy the syntax from Machine.config.
The Machine.config file is located in the <System Root>\Microsoft.NET\Framework\Version Number\Config folder.
2. Open the file for editing.
3. As appropriate to your situation, either locate and change the maxRequestLength parameter, or add a httpRuntime section with the required maxRequestLength parameter.
4. Save and close the editor.
Note that if this maxRequestLength parameter is set and a request is posted for an upload that exceeds the value of maxRequestLength, a custom error page cannot be displayed. Instead, Microsoft Internet Explorer will display a “Cannot find server or DNS” error message.
Explanatory detailThis information is taken from http://www.microsoft.com, specifically from Article 323245, How to upload a file to a Web server in ASP.NET by using Visual Basic .NET.
Theoretically, the maximum file upload size is fairly large. However, because of ASP.NET health monitoring, you cannot upload very large files in ASP.NET. The ASP.NET worker process has a virtual address space of 2 gigabytes (GB). However, the ASP.NET worker process only uses a little more than 1 GB because of health monitoring and memory fragmentation.
During the upload process, ASP.NET loads the whole file in memory before the user can save the file to the disk. Therefore, the process may recycle because of the memoryLimit

© 2006 Vignette Corporation. All rights reserved.38 v20.1 rev 1
AAppendix
attribute of the processModel tag in the Machine.config file. The memoryLimit attribute specifies the percentage of physical memory that the ASP.NET worker process can exhaust before the process is automatically recycled. Recycling prevents memory leaks from causing ASP.NET to crash or to stop responding.
Additionally, other factors play a role in the maximum file size that can be uploaded. These factors include available memory, available hard disk space, processor speed, and current network traffic. With regular traffic of files being uploaded, Microsoft recommends that you use a maximum file size in the range of 10 to 20 megabytes (MB). If you rarely upload files, the maximum file size may be 100 MB.
NOTE: You can upload files that are larger than 100 MB in ASP.NET. However, Microsoftrecommends that you follow the maximum file upload sizes that are mentioned in thisarticle. To determine more precise file sizes, perform stress testing on computers that aresimilar to the ones that will be used in production.
You may notice the following error messages if you encounter file size limits during the file upload process:
• The page cannot be displayed.
• Server Application is Unavailable
In the event log, the error message will be similar to the following:
aspnet_wp.exe (PID:PIDNumber) was recycled because memory consumption exceeded the SizeLimit MB (Percentage percent of available RAM).
• Exception of type System.OutOfMemoryException was thrown.
You may also find that uploads occur very slowly. If you watch the Aspnet_wp.exe process in Windows Task Manager, you will notice that the memory delta changes by 64 KB every 1 to 2 seconds. Depending on the size of the file, this delay may cause the ASP.NET worker process to recycle because of a responseDeadlock error.