ibm rational build forge evaluation guide: part 2: a ... · capabilities of rational build forge....
TRANSCRIPT

IBM Rational Build Forge Evaluation Guide: Part 2:A closer look at Rational Build ForgeA hosted trial with hands-on experience
Skill Level: Introductory
Paul Boustany ([email protected])Marketing EngineerIBM
29 Mar 2007
This evaluation guide takes you through step-by-step instructions designed to giveyou an overview of some of the features that differentiate IBM® change and releasemanagement software. As you progress through the lab-style exercises in thescenario, the hands-on experience you get shows you how IBM® Rational®ClearQuest®, Rational® ClearCase®, and Rational® Build Forge® are tightlyintegrated to provide development teams with a comprehensive, auditable solution.
Section 1. Before you start
Learn what to expect from this tutorial and how to get the most out of it.
About this series
This series guides you through the core features of IBM® Rational® Build Forge® ina preconfigured environment. By the end of Part 2, you should feel comfortable withthe Build Forge server and the integration with the Rational change and releasemanagement solution.
About this tutorial
This tutorial shows you some of the core features of Rational Build Forge, includingsetting up the server, creating and executing projects, and user administration. It is
Part 2: A closer look at Rational Build Forge© Copyright IBM Corporation 1994, 2008. All rights reserved. Page 1 of 29

intended as an introduction to the full build and release process managementcapabilities of Rational Build Forge.
Objectives
In this part of the evaluation guide, you will explore the Rational Build Forge serverenvironment. You will also see how Build Forge enables you to configure andautomate build processes on any platform.
Prerequisites
This hosted trial provides an environment preconfigured with Rational ClearCase7.0, Rational ClearQuest 7.0, and Rational Build Forge 7.0. Some knowledge ofRational change and release management products may be helpful, but that is notrequired.
System requirements
This online trial program uses the Citrix® Access Gateway™ platform to provide aconnection from your workstation to a remote server running the IBM software.Therefore, you need to download Citrix client software before starting thisevaluation. You can download the Citrix MetaFrame® Presentation Server™ clientat no charge from the Citrix site; many versions, including versions for Microsoft®Windows® and Linux® platforms, are available. After you install the client, you willbe asked to restart your browser. If you do not have the Citrix client installed whenyou attempt to access the online trial, you will be prompted to install the client.
Section 2. Overview of Rational Build Forge advantages
Increases process efficiency
Rational Build Forge provides the automation required to make continuousintegration a reality. As Part 1 of this two-part series demonstrates, Build Forgeautomates the entire build process so that teams can launch code-build-test cycleswith the click of a button.
When these processes are implemented in Build Forge, you can open them up toothers on the development team so that developers can launch their own builds ondemand. By using the Build Forge IDE plug-ins for Eclipse and Microsoft® .NETframework, developers can run processes set up by the Change Management teambefore a nightly run. They can even run these tests before checking files into source
developerWorks® ibm.com/developerWorks
Part 2: A closer look at Rational Build ForgePage 2 of 29 © Copyright IBM Corporation 1994, 2008. All rights reserved.

control. Developers receive immediate feedback on the results and are directedback to any errors within the log files. This automation offloads manual tasks fromthe Change Management team and allows developers to work more efficiently.
Aids in compliance management
Build Forge's approach is unique, because the reporting is based on the only reliablerecord of what you deliver into production: the executable file. Build Forge integrateswith your source control, test. and defect-tracking systems to capture informationrelevant to that release in a detailed Bill of Materials. That way, you don't have to goto each of your systems to collect compliance data, because it's collected for youautomatically.
Another big part of compliance is security, which includes making sure thatprocesses are followed consistently and that only the appropriate people haveaccess. Build Forge has a role-based security system that lets you assign differentpermissions for your developers, quality assurance (QA) teams, project managers,and so on. For example, a developer may be able to run a project, but not be able tochange it. If someone steps outside of the standard controls, alerts are sent to theappropriate people.
This means that Build Forge helps your teams enforce and document theirprocesses, so they can be ready for an audit much faster.
Works for distributed teams
It is rare to find a development organization with the entire team is in the samelocation. Many companies use offshore or outsourced staff in their developmentorganizations to reduce costs or achieve 24x7 development. Others have acquiredcompanies in different locations, and they still maintain these satellite offices.Multisite development can create additional strains on development communicationdue to different time zones and reporting structures. Multisite teams also frequentlyuse different tools, which can make automation difficult. If the build isn't ready to behanded off to the next time zone at the end of the local team's work day, thedevelopment process can get bogged down and result in late releases.
Build Forge provides an environment where global teams can work together muchmore effectively. It enables teams to share common processes and hardware, evenwhen they're using different underlying tools. Processes automatically advance fromone team to another with a complete Bill of Materials, without manual intervention.And all teams can log into the console to get a real-time status reports on therelease, regardless of what time zone they're in. These capabilities keep each teamworking efficiently to get releases out on time.
ibm.com/developerWorks developerWorks®
Part 2: A closer look at Rational Build Forge© Copyright IBM Corporation 1994, 2008. All rights reserved. Page 3 of 29

Section 3. Additional Build Forge features and benefits
There is more to Build Forge than we are able to present here, given the limitationsof the hosted environment. Here are the highlights of other features and theirbenefits that may not be apparent in either Part 1 or Part 2 of this evaluation guide:
Product integration: You can use your existing development environments, so thatyou can leverage your existing infrastructure and current investments.
Web-based user interface: Centralized access allows build system access tocompany personnel around the world, any time, without local installation. This lowersthe cost of implementation. Managers and developers get simple access to thestatus of, potentially, many builds across many systems. This information increasesproductivity significantly in all phases of the project, thereby speeding updevelopment.
Support for multiple platforms: You can use the same solution for all buildimplementations. This leverages current investments and enables implementation ofnew procedures by using existing processes, which reduces development costs.IBM Rational Build Forge adds the most value in large, complex environments thatuse multiple operating systems.
Step-level execution and reporting: Build Engineers need the flexibility to breakdown large builds into individual steps. The steps serve as documentation and allowfor step-level notification of the build activity.
Role-based security: Build Engineers can control access to the builds and therebyavoid putting the production build process at risk. Developers gain in productivity byusing versions of builds that mirror the production builds. Also, the Build Forge abilityto integrate current LDAP security is a must.
Integrated build job processing improvements (threading and chaining):Frequency of builds affects demand and complexity. If you release different projectsfrequently, you probably have large demands on your build and release system. Ifyou can break steps out and run them in parallel by threading and chaining them,you can reduce your build time significantly. If you can reduce the build time, youcan speed up the entire application development process. You can do more frequentbuilds, because Build Forge automates the process, so you don't have to manuallyrun and monitor the builds.
Integrated e-mail notification: This streamlines the entire development and fostersinteraction by getting the build notifications with the needed information to the rightpeople at the right time.
Build logging and auditing: Enabling users to quickly react to build results and geton with the next step in the process speeds up the development cycle. This alsoenables your teams to meet compliance requirements and improve their Gartner
developerWorks® ibm.com/developerWorks
Part 2: A closer look at Rational Build ForgePage 4 of 29 © Copyright IBM Corporation 1994, 2008. All rights reserved.

Maturity Model scores (GMM).
Filters (logs, steps): Filtering ability gives you improved build performance andreliability by allowing steps to continue even if the exit code doesn't match. Thiskeeps the build process going, based on known actions rather than just exit codes.
Developer self-service: The developer self-service feature enables developers totest what they are working on with the rest of the code for a build to make sure thateverything integrates well, in a clean environment, before checking in files ordelivering code.
Integrated fault tolerance (server pooling): A truly integrated fault tolerancefeature reduces this vulnerability dramatically, making the build process much morereliable. The number of build servers is relevant to complexity. The larger thenumber of build servers that you use, the more you can use Build Forge to assist inmanaging your build environment and deployments.
Intelligent build server allocation: Allows flexibility in the allocation of build serversto build tasks. Can allocate servers simply by name, or dynamically by theircapabilities, installed apps, hardware specs, and so forth.
Bill of Materials: Data is the key to meeting regulatory compliance requirements.Build Forge automatically captures and presents meaningful data related to the buildin a Bill of Materials.
Dynamic builds with custom parameters: This saves you time and money bymaking the build process flexible enough for quick, one-time-only builds. It alsoallows you to change source control branches without changing the build scripts.
Integrated database contains build information: You can take advantage of buildsolutions without an additional investment, because you can query the datarepository directly. You are not constrained by proprietary data files.
Integrated reporting of build metrics: Reporting enables you to improve the buildturnaround, which speeds up the entire development process.
Systematic use of environment variables: Having environment variables that arestored in a central location and controlled by the Build Engineer helps you avoidbuild errors and failures that lead to build downtime.
Build purging and system cleanup: Automating the cleanup tasks makes the buildteam more productive and improves resource use.
Flexible build start and integrated scheduling: This enables Build Engineers tobe proactive and to schedule daily and nightly builds. It also allows them to respondto quick changes to ensure that development and QA are not restrained by waitingon scheduled builds.
ibm.com/developerWorks developerWorks®
Part 2: A closer look at Rational Build Forge© Copyright IBM Corporation 1994, 2008. All rights reserved. Page 5 of 29
Section 4. Setting up the Build Forge server environment
The Build Forge Management Console is a Web interface that is ideal for distributedteams, because it gives team members access to the system anytime, anywhere. Italso gives team members a real-time view of all activities, including fine-grained,role-based control to pause, cancel, and resume processes on multiple productionmachines.
Log into the Build Forge management console
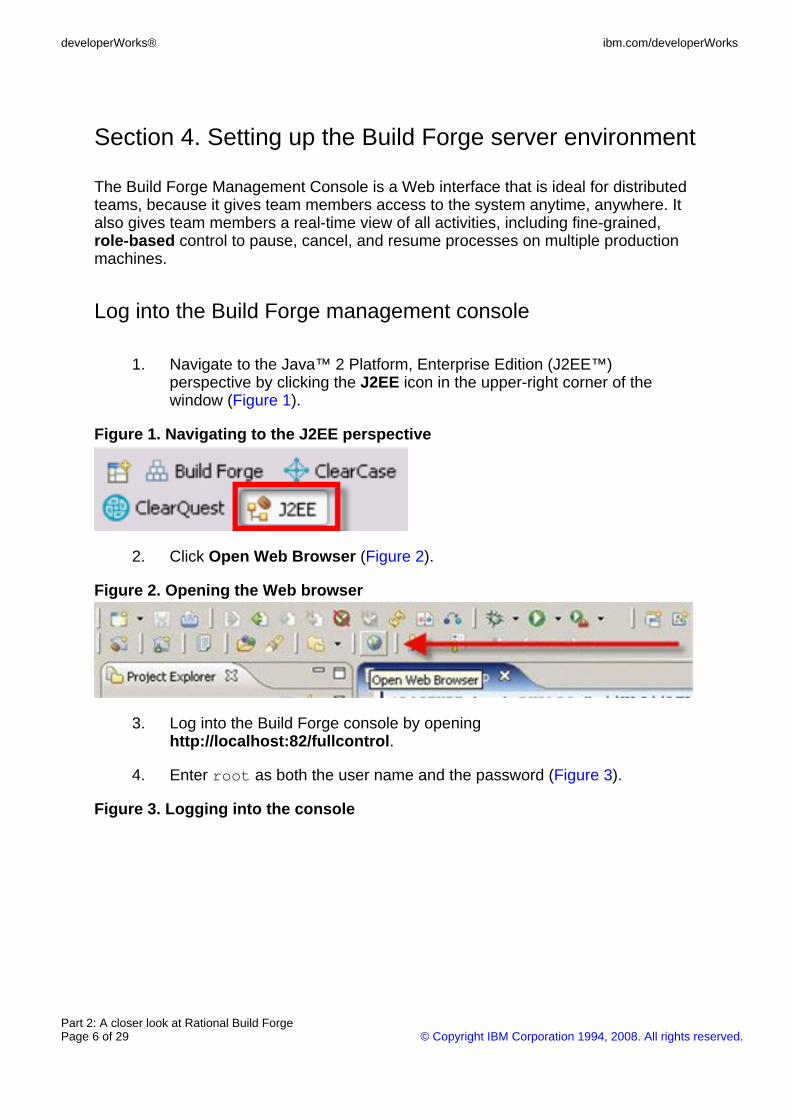
1. Navigate to the Java™ 2 Platform, Enterprise Edition (J2EE™)perspective by clicking the J2EE icon in the upper-right corner of thewindow (Figure 1).
Figure 1. Navigating to the J2EE perspective
2. Click Open Web Browser (Figure 2).
Figure 2. Opening the Web browser
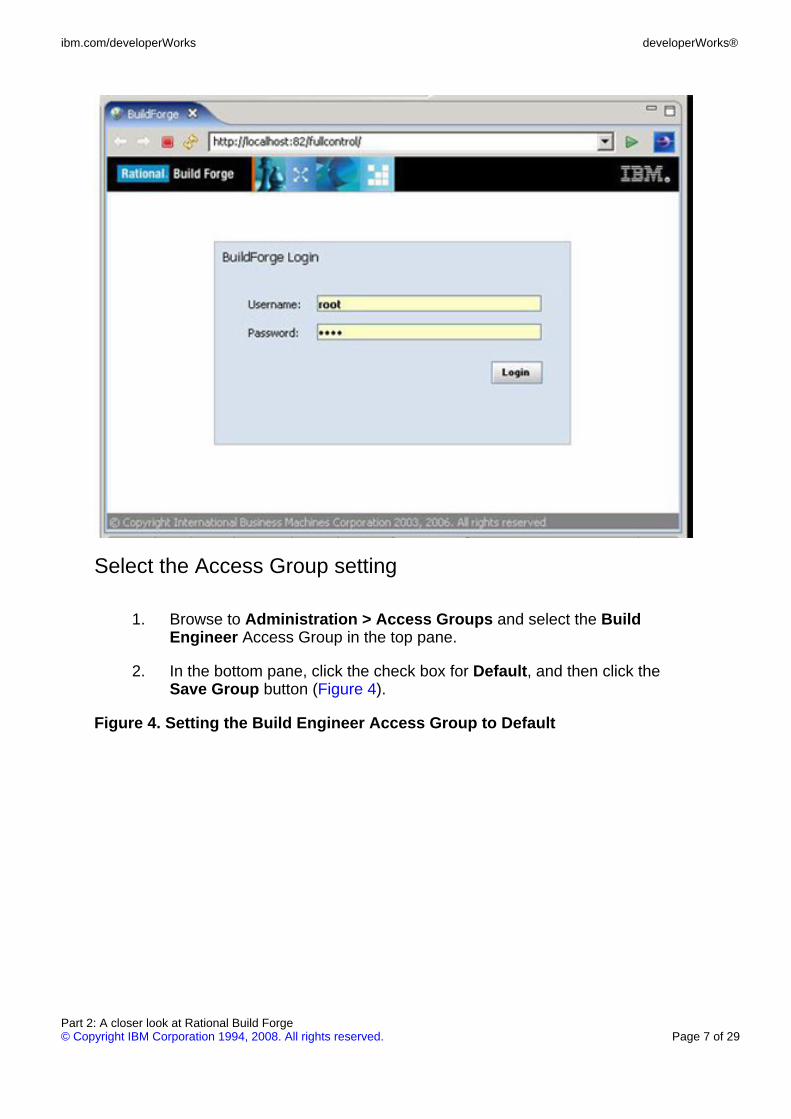
3. Log into the Build Forge console by openinghttp://localhost:82/fullcontrol.
4. Enter root as both the user name and the password (Figure 3).
Figure 3. Logging into the console
developerWorks® ibm.com/developerWorks
Part 2: A closer look at Rational Build ForgePage 6 of 29 © Copyright IBM Corporation 1994, 2008. All rights reserved.
Select the Access Group setting
1. Browse to Administration > Access Groups and select the BuildEngineer Access Group in the top pane.
2. In the bottom pane, click the check box for Default, and then click theSave Group button (Figure 4).
Figure 4. Setting the Build Engineer Access Group to Default
ibm.com/developerWorks developerWorks®
Part 2: A closer look at Rational Build Forge© Copyright IBM Corporation 1994, 2008. All rights reserved. Page 7 of 29

Tips:
• When you set an Access Group to Default, any new users are assignedto that Access Group automatically.
• You can use Access Groups to map users to a set of permissions, to setaccess to projects, and to assign users to Notification Groups.
Add a new user
1. Browse to Administration > Users and click Add User in the top pane tocreate a local user account for yourself in Build Forge.
2. In the bottom pane (Figure 5):
• For Name: Enter your full name.
• Enter this e-mail address: [email protected]
• Create a user name and password (same password as in Verified).
• Set Limit to: 5. This setting dictates the number of project executionsthat a user can start at one time.
developerWorks® ibm.com/developerWorks
Part 2: A closer look at Rational Build ForgePage 8 of 29 © Copyright IBM Corporation 1994, 2008. All rights reserved.

• Uncheck Password Expires.
• Select or verify your correct time zone.
4. Click Save User above the bottom pane to create your new account.
Figure 5. Creating a new user account
Create a new server authentication
1. Browse to Servers > Server Auth.
2. In the bottom pane, under Server Auth Details, enter Administratoras a new Authentication Name, and then enter alex as both the username and password. (See Figure 6.)
3. Click Save Server Authentication.
Note:This user name is not for the new user that you just generated in the previous step.Build Forge uses this authentication user to connect to the Build Forge Agent. It issimilar to a user logging in directly to the machine.
Figure 6. Adding the server authentication user
ibm.com/developerWorks developerWorks®
Part 2: A closer look at Rational Build Forge© Copyright IBM Corporation 1994, 2008. All rights reserved. Page 9 of 29

Enable dynamic selection of servers
Build Forge allows for the dynamic selection of servers (Figure 7) by using thesethree variables:
• Collectors, which create manifests, or lists of properties, associated witheach server reference defined in Build Forge.
• Manifests, which can contain static information, such as platform andcompiler versions, as well as real-time information, such as processor useand hard drive space.
• Selectors are associated with projects. They dictate a set of required oroptional properties that must exist in the server's manifest for theassociated project or step to be able to run on it.
developerWorks® ibm.com/developerWorks
Part 2: A closer look at Rational Build ForgePage 10 of 29 © Copyright IBM Corporation 1994, 2008. All rights reserved.

Figure 7. Collectors screen display
To set up dynamic selection of servers:
1. Browse to Servers > Collectors. In the bottom pane, enter a newCollector called Local, and then click Save.
2. In the top pane, click Add Collector Variable. In the bottom pane, enterthe following parameters:
• Type: Set Value
• Property: _MAXJOBS
• Value: 4
4. Click Save Variable (Figure 8).
Figure 8. Enabling dynamic selection of servers
ibm.com/developerWorks developerWorks®
Part 2: A closer look at Rational Build Forge© Copyright IBM Corporation 1994, 2008. All rights reserved. Page 11 of 29

Create a new server
1. Browse to Servers (Figure 9) and enter the following information to createa new server:
• Server Name: My Build Server
• Path: c:\builds
• Host: localhost
• Collector: Local
• Authentication: Administrator
3. Leave all other settings as they are, and click Save Server.
4. In the top pane. click the link for My Build Server.
5. In the bottom pane, click Test Connection.
Figure 9. Creating a new server
developerWorks® ibm.com/developerWorks
Part 2: A closer look at Rational Build ForgePage 12 of 29 © Copyright IBM Corporation 1994, 2008. All rights reserved.

Note:The Test Results tab should indicate No Errors, and the server icon next to the linkfor My Build Server in the top pane will display as green. You may need to re-clickthe Servers link in the left panel to refresh the server display for the server icon toturn green.
5. Browse to Servers > Selectors. In the bottom pane, enter a newSelector called Local Server2, and then click Save.
6. In the top pane (Figure 10), click Add Selector Variable and enter thefollowing:
• Variable Name: BF_NAME
• Operator: ==
• Value: My Build Server
• Required: Yes
Figure 10. Adding Selector variables
ibm.com/developerWorks developerWorks®
Part 2: A closer look at Rational Build Forge© Copyright IBM Corporation 1994, 2008. All rights reserved. Page 13 of 29

Add an environment
Add an environment by completing these steps:
1. Browse to Environments.
2. In the bottom pane, enter the Environment Name as Web App Env1,and then click Save Environment.
Environments control the variables by which a process will run. For example, youcould have a generic Java compile step and use an environment variable to controlthe SDK used. This flexible architecture allows you to manage environmentvariables separately from the projects and servers that they apply to.
3. Click Add Environment Variable and add each of the variable or valuepairs shown in Table 1. Be sure to click Save Variable after each entry(also see Figure 11).
Table 1. Environment variables and valuesValue Variable
JAVA_HOME=C:\j2sdk1.4.2_13 Action set
ANT_HOME=C:\JavaTools\apache-ant-1.6.5Action set
TOMCAT_HOME=C:\JavaTools\apache-tomcat-5.0.28Action set
developerWorks® ibm.com/developerWorks
Part 2: A closer look at Rational Build ForgePage 14 of 29 © Copyright IBM Corporation 1994, 2008. All rights reserved.

PATH=$JAVA_HOME\bin;$ANT_HOME\binAction append
VIEW_STG=\\localhost\ccstg_c\views Action set
Figure 11. Adding Environment variables
ImportantOrder is important with these variables. For instance, notice that the values beingappended to the PATH use the Java and Ant home directories. You will use thevariable VIEW_STG within your project and reference it as $VIEW_STG. You will alsouse automatically created variables, such as $BF_TAG, which is a unique identifierfor the build.
Section 5. Hands-on exercises
Create a project
1. Browse to Projects.
2. In the bottom pane, enter the following under the Project Details tab:
• Project Name: Web App Production
• Tag Format: $MAJ.$MIN.$PATCH.$BUILD
• Selector: Local Server2
• Environment: Web App Env1
ibm.com/developerWorks developerWorks®
Part 2: A closer look at Rational Build Forge© Copyright IBM Corporation 1994, 2008. All rights reserved. Page 15 of 29

• Pass Notify: Build Engineer
• Fail Notify: Build Engineer
4. Leave the other settings as they are, and click Save Project afterentering the information.
5. After saving the project, click the pencil icon at the left of the projectname to display the project properties.
6. In the Tags tab, delete the B tag variable by dragging it onto the trash canicon, and then cCreate the following four custom Tag Names by enteringthe specified information and clicking Create New Tag for each.
• MAJ Initial Value: 4 Auto-Inc: No
• MIN Initial Value: 6 Auto-Inc: No
• PATCH Initial Value: 10 Auto-Inc: No
• BUILD Initial Value: 1 Auto-Inc: Yes
8. Click Save Project when you are finished. (See Figure 12.)
Figure 12. Creating a project
Tip:Within Rational Build Forge, processes (also referred to as projects) hold a seriesof steps that are necessary to execute a process. A project or process can contain aseries of automated tests, the entire build and release process for a product, asimple Web site update, or all of those. By capturing and documenting these vitalprocesses as they evolve, Rational Build Forge makes it possible for teams to sharetheir workloads and to execute or reproduce builds and distribute releases in arepeatable fashion.
Add steps to the project
Within the Build Forge system, you define a project as a series of steps. Each stepwithin a project is an individual task that contains a set of command lines andenvironment variables that can be distributed to a computer on your network for
developerWorks® ibm.com/developerWorks
Part 2: A closer look at Rational Build ForgePage 16 of 29 © Copyright IBM Corporation 1994, 2008. All rights reserved.

execution. Therefore:
• Projects comprise the multiple steps involved in building an application.You can also include tasks, such as creating views, compiling, testing,and so forth.
• Steps can run scripts, invoke another application, move or copy files,export a project for backup, and more.
This framework enables you to capture, document, and standardize your processes,so that you can easily reuse and replicate them. Having this capability ensuresprocess consistency and significantly reduces new project setup time.
In this phase, you will add steps to your project.
1. Click the Web App Production link on the Projects page. This will takeyou to the Projects Step page. It will be blank, because you have not yetadded any steps.
2. The first step that you add here will create a snapshot view of the sourcecode for this project. In the lower pane (Figure 13):
• For Name, enter: Create View for Source
• Check the Absolute check box. Leave the Dir: setting as / (forwardslash).
• In the Command box type this as one command, but with no linereturns:cleartool mkview -snapshot -tag "MyApp_$BF_TAG"-stgloc Views $BF_SERVER_ROOT\MyApp_$BF_TAG
4. Leave the rest of the step settings as they are, and click Save Step.
Figure 13. Creating a snapshot view of the source code
ibm.com/developerWorks developerWorks®
Part 2: A closer look at Rational Build Forge© Copyright IBM Corporation 1994, 2008. All rights reserved. Page 17 of 29

4. Add another step in the same manner to set the configurationspecifications (config spec) for this view (see Figure 14:
• Name: Set Config Spec for View
• Check the Absolute check box and set the step Dir: to/MyApp_$BF_TAG. This will make the current working directoryC:\builds\MyApp_$BF_TAG, which is the view context created in theprevious step.
• Set the Command to:echo element * CHECKEDOUT > ..\config.spececho element * /main/LATEST >> ..\config.spececho load /BFLab >> ..\config.speccleartool setcs ..\config.specdel ..\config.spec
6. Leave the rest of the step settings as they are and click Save Step.
Figure 14. Setting the config specs
developerWorks® ibm.com/developerWorks
Part 2: A closer look at Rational Build ForgePage 18 of 29 © Copyright IBM Corporation 1994, 2008. All rights reserved.

6. Execute your project to test the first two steps that you have configured:
A. On the Project page, click Start Project.
B. On the resulting Execute page, click the Execute button.
C. You will be moved immediately to the Project Runs page and theRunning tab.
8. Click the Tag for the run to watch the execution of the steps (Figure 15).
Figure 15. Step execution in progress
ibm.com/developerWorks developerWorks®
Part 2: A closer look at Rational Build Forge© Copyright IBM Corporation 1994, 2008. All rights reserved. Page 19 of 29

8. Click a step to see the results for the step (Figure 16).
9. Continue adding steps to your project.
Figure 16. Checking results of the step run
developerWorks® ibm.com/developerWorks
Part 2: A closer look at Rational Build ForgePage 20 of 29 © Copyright IBM Corporation 1994, 2008. All rights reserved.

How Build Forge handles server pathsThe current working directory for this step, which is Absolute, is ofthe form:<Server Path><Step Dir>
The Server Path is the path defined for the server that is selectedfor the project to run on. In this example, your server is My BuildServer and the path associated with that is c:\builds/ The StepDir is whatever path that entered the Dir: box, and it is appended tothe server path. Therefore, the working path for this step becomes:c:\builds\MyApp_$BF_TAG
You will find the view that is created by this step in that directory. Anon-absolute path (when Absolute is unchecked) would be of theform:<Server Path><Project Name>\<Build Tag>\<Step Dir>or, in this case:c:\builds\Web_App_Production\4.6.10.x\MyApp_$BF_TAG
Rational Build Forge automatically creates this directory structurewhen a step is set to not Absolute. This is extremely handy whencreating archive directory structures.
You will be setting all of the steps of this project to Absolute. This isOK, because the view that you are creating already contains thebuild ID, which will be your way of associating the view with aspecific execution of the project.
.
Modify the Index.html file
1. Browse to Projects and click the name of your project. The index.htmlfile, in the root of your sample VOB, is the file that you will be modifyingbefore you rebuild your Web application.
Note:Normally, a developer would modify the source code, but Build Forge can do thatautomatically by performing a simple string substitution in the file that will write thecurrent build number. You will be able to see this change when you view the Webapplication through a browser.
The Index.html file has a string in it that reads @VERSION@ This string should besubstituted with the version number tag configured previously. To do that, you needto complete these tasks:
2. Create a step called Checkout Index.html by using this command:cleartool co -unreserved -nc index.html
A. Set the step Dir to: /MyApp_$BF_TAG/BFLab/. This will make thecurrent working directory C:\builds\MyApp_$BF_TAG\BFLab\,which is the location of the Ant script.
B. Check the Absolute check box and leave the rest of the step
ibm.com/developerWorks developerWorks®
Part 2: A closer look at Rational Build Forge© Copyright IBM Corporation 1994, 2008. All rights reserved. Page 21 of 29

settings as they are.
C. Click Save Step.
4. Create another step called Update Index.html with the same workingdirectory as the previous step, which uses the Build Forge .strsubcommand to substitute the current build tag ($BF_TAG) for instances of@VERSION@. The command is:.strsub @VERSION@ $BF_TAG index.html
5. Create a step that displays the config spec of the newly created view:
A. Call the Show the config spec step by using the followingcommand:cleartool catcs
B. Set the step Dir to: /MyApp_$BF_TAG/BFLab/
C. Check the Absolute check box and leave the rest of the stepsettings as they are.
D. Click Save Step.
7. Set the Show the config spec and Checkout Index.html steps to run inparallel by using the Build Forge threading functionality.
A. Select each step and, in the bottom pane, set Thread to Yes.
B. Save the steps. Both steps will now have a Threaded icon next totheir names.
Tip:The Thread status for a step can also be set to Join. This allows you to place twosets of threaded steps, with one right after the other, without having to create adummy non-threaded step in between them. For instance, if you wanted to threadtwo steps and then, immediately afterward, thread three more steps, you would setthe second step of the five to Join.
Create a library project
Create a library project for Inline from the testing step when it passes:
1. Browse to Libraries. In the bottom pane, and create a library calledTesting Library.
2. Leave the Selector set to None, which will make the project a library.Libraries are intended to be chained from a master project; therefore, theyinherit their default selectors from the calling project step.
3. Add a single step to the new library project that will simply echo a
developerWorks® ibm.com/developerWorks
Part 2: A closer look at Rational Build ForgePage 22 of 29 © Copyright IBM Corporation 1994, 2008. All rights reserved.

message.
4. Check the Absolute check box before saving the step.
5. Browse to Projects and click Web App Production to see the list ofsteps in the project.
6. Select the Test Application step to see the step properties.
7. Set Inline to Library: Testing Library, and then click Save Step. You willsee an indicator that there is an Inline on the Test Application step.
Create an audit trail
Add additional steps to your Web App Production project to create an audit trail forthe project that you have defined in Build Forge. Use the Build Forge .exportcommand to create a Build Configuration file in XML format:
1. Create a step in your Web App Production project that will check theproject.xml file out:cleartool co -unreserved -nc project.xml
Important:Note the working directory for this step. It should be your new config directory. Thenext two steps must have the same working directory.
2. Use the Export command to create another step that will write a newversion of the project.xml file: export project.xml
3. Create a final step that will check the file back in:cleartool ci -c "$BF_TAG" -identical project.xml
4. Run the project again:
A. On the Project page, click Start Project.
B. On the resulting Execute page, click Execute.
C. You will be moved immediately to the Project Runs page and theRunning tab.
D. Click the Tag for the run to watch the execution of the steps.
E. Click the Tag for the completed build to review the status of eachstep, the server where it executed, and the duration.
F. Click a step name to see the output for a particular step.
ibm.com/developerWorks developerWorks®
Part 2: A closer look at Rational Build Forge© Copyright IBM Corporation 1994, 2008. All rights reserved. Page 23 of 29

Add optional information to the Bill of Materials
In addition to the Bill of Materials (BOM) entries made by the ClearCase andClearQuest adapters, it is also possible to include ad hoc information in the BOM.This could include tests that were run and the results, lists of components that werebuilt, baselines and checkpoints on the source code used for the build, and so on.Any information that assists with build auditing can be added to the BOM.
Create a build baseline and checkpoint
Build Forge has a built-in dot command that you can use to create a baseline andcheckpoint for a build. A baseline is a list of files in a specific build directory or tree,and a checkpoint is a list of the files changed as a result of the build, based on acomparison of MD5 checksums.
To add baseline and checkpoint steps to the Web App Production project:
1. Use this command to add a step to the Web App Production projectbefore the Checkout Index.html step:.scan baseline
2. Set the Thread status on this step to Yes.
3. Use this command to add a step to the Web App Production project afterthe Create WAR File step:.scan checkpoint
Note:The working directory for both of these steps should be the snapshot view that waspreviously created by the project.
Add other options
Now, use the adaptor interface to add other information to the Bill of Materials:
1. Open the Build Forge console and browse to Administration >Adaptors.
2. Click the Add Adaptor button in the top pane and, in the lower pane,name the new adaptor Test, and then select the test mode.
3. Click the Save Adaptor button.
4. Click the link for the new Test adaptor in the top pane, and paste the XMLcontents that you copied into the Interface text area.
5. Then click Save Adaptor.
developerWorks® ibm.com/developerWorks
Part 2: A closer look at Rational Build ForgePage 24 of 29 © Copyright IBM Corporation 1994, 2008. All rights reserved.

6. Browse to Environments and add an environment called Test Env thatcontains the following variables and sample values:
• TestType=junit
• Status=Passed
• Results= (leave this blank)
• SERVER_NAME=My Build Server
You can use the .bset command in Build Forge to change the value of anenvironment variable during a project run. Add a step above the initial step in theTesting Library to do this:
1. Check the Absolute check box and use the following command to set thevalue for the Results variable:.set env 'Test Env' 'Results=http://www.google.com'
2. Edit the one step in Testing Library to execute the following command:.test 'Test' AddBom
3. Set the Environment of the step to Test Env.
4. Execute the Web App Production project again. Confirm that the sampletest data displays in the Bill of Materials when the execution completes.
The c:\builds directory contains a file with several lines of delimited informationcalled info.txt. Edit the Test adaptor to read this file:
1. Use the DOS type command, and assign these values to the appropriatefields in the interface.
2. You will also need to edit the match pattern. Your delimiter used to be \s, and now it is ~ .
3. Execute the project again and confirm that the new sample test datadisplays in the Bill of Materials.
Associate a task with the cleanup stage
Build Forge classes provide mechanisms to clean up old build activity at regularintervals. This process also allows you to specify particular tasks to execute whenthe cleanup task is triggered. In this exercise, you configure a class and thenassociate it with a cleanup project.
1. Purge all but three executions of the Web App Production project from
ibm.com/developerWorks developerWorks®
Part 2: A closer look at Rational Build Forge© Copyright IBM Corporation 1994, 2008. All rights reserved. Page 25 of 29

the Project Runs page (under the Completed tab) by selecting the checkbox next to the items to purge, and then clicking the Purge button.
2. Browse to Projects, and create a new project called Cleanup View.
3. Set the class of this project to Scratch.
4. Create one step in this project, and set the command to:cleartool rmview –force c:\builds\MyApp_$BF_CALLER_TAG
5. Go to Administration > Classes, and create a new class called WebApp Prod with the following settings:
• Delete files: Everything
• Start on purge: Cleanup View
• Days: Forever
• Count: 3
• Which : Keep 1 Pass
7. Click Save Class.
8. Edit the Scratch class as follows:
• Delete Files: Everything
• Start on purge: (none)
• Days: Forever
• Count: 1
• Which: Any Build
10. Click Update Class.
11. Modify the Web App Production project by setting the class to Web AppProd.
12. Save the project.
13. After setting up the Web App Prod Class, execute the Web AppProduction project four times. After it executes four times, the project willstart to purge automatically. When it does, the Cleanup View project willbe executed, and you will see one entry for it in the Completed tab on theProject Runs page.
Section 6. Summary
developerWorks® ibm.com/developerWorks
Part 2: A closer look at Rational Build ForgePage 26 of 29 © Copyright IBM Corporation 1994, 2008. All rights reserved.

By now, you have seen how Rational Build Forge helps you achieve dramaticimprovements in build and release reliability, repeatability, and traceability. BuildForge makes it possible to centralize, automate, and accelerate your softwaredevelopment, while leveraging your investment in existing tools.
ibm.com/developerWorks developerWorks®
Part 2: A closer look at Rational Build Forge© Copyright IBM Corporation 1994, 2008. All rights reserved. Page 27 of 29

Resources
Learn
• IBM Rational Build Forge Evaluation Guide, Part 1: Integrating Build Forge withClearCase and ClearQuest for unified change and release management Learnabout the build and release capabilities of Rational Build Forge while loggingand correcting a defect found in a typical Web-based application.
• The ClearQuest area of the IBM developerWorks Rational zone is where,ClearQuest users and administrators can find more resources, includingClearQuest hooks, Eclipse plug-ins, scripts and triggers, productdocumentation, articles and whitepapers, with links to training courses,discussion forums, and support.
• ClearQuest and ClearCase training: SCM215, Essentials of IBM RationalClearCase UCM for Developers This online course introduces you to theconcepts of Unified Change Management. You learn to use ClearCase UCMand ClearQuest to perform common, day-to-day software development tasks.
• ClearQuest training: SCM010, Getting Started with IBM Rational ClearQuest Ifyou are new to IBM Rational ClearQuest, this Short Learning Module is for you.The Web-based training Rational ClearQuest SLM emphasizes the practicaluses of Rational ClearQuest for both the Web and Windows and introduces youto operational basics of using Rational's defect-tracking tool.
• ClearQuest training: SCM010, Getting Started with IBM Rational ClearQuest Ifyou are new to IBM Rational ClearQuest, this Short Learning Module is for you.The Web-based training Rational ClearQuest SLM emphasizes the practicaluses of Rational ClearQuest for both the Web and Windows and introduces youto operational basics of using Rational's defect-tracking tool.
• ClearQuest training: SCM110, Principles of Defect and Change Tracking withIBM Rational ClearQuest Take this online introduction to defect and changerequest tracking to learn how to use IBM Rational ClearQuest to submit changerequests, track requests from submission to resolution, and generate charts andreports for change and defect tracking results.
• ClearQuest training: SCM205, Essentials of IBM Rational ClearQuest Thiscourse introduces students to using IBM Rational ClearQuest to track changerequests. It covers the basic concepts involved in change management andhow ClearQuest facilitates creating change records, controlling the changemanagement process, and communicating status to project stakeholders byusing queries, reports, and charts.
• ClearCase training: SCM101, Principles of Software Configuration Managementwith IBM Rational ClearCase UCM This online course introduces the softwaredeveloper to the principles of software configuration management, as well as toIBM Rational's software configuration management solution: IBM RationalClearCase UCM. Conceptual explanations, typical user scenarios, andself-check exercises introduce you to using UCM to maintain and track softwarechanges.
developerWorks® ibm.com/developerWorks
Part 2: A closer look at Rational Build ForgePage 28 of 29 © Copyright IBM Corporation 1994, 2008. All rights reserved.

• ClearCase training: SCM210, Essentials of IBM Rational ClearCase forDevelopers (for Microsoft Windows) This online course teaches developers howto perform common day-to-day tasks in Rational ClearCase. It focuses onteaching the concepts and skills developers need to successfully managesource code changes in their development environments.
• ClearCase training: SCM250, Essentials of IBM Rational ClearCase LT for UCMand Windows After taking this 4- to 6-hour Web-based training course, you'llunderstand the fundamentals of using IBM Rational ClearCase LT and applyingthe UCM approach to the software development process.
• Agile configuration management for large organizations From The RationalEdge newsletter (15 March 2007). Because of their size and organizationalcomplexity, large companies need to embrace agile development principles.Learn how hundreds, even thousands, can work together efficiently within anagile configuration management environment.
• To learn more about IBM Rational products, visit the developerWorks Rationalzone. You'll find technical documentation, how-to articles, education,downloads, product information, links to training courses, and more.
• Getting Started with the Eclipse Platform (developerWorks article, November2002) provides a history and overview of Eclipse, including details on how toinstall Eclipse and plug-ins.
• Eclipse in Action: A Guide for Java Developers (Independent Pub Group, 2003)is a must-read for Java developers using Eclipse.
• Browse the technology bookstore for books on these and other technical topics.
Get products and technologies
• Download IBM product evaluation versions and get your hands on applicationdevelopment tools and middleware products from DB2®, Lotus®, Rational®,Tivoli®, and WebSphere®.
Discuss
• Check out developerWorks blogs and get involved in the developerWorkscommunity.
About the author
Paul BoustanyPaul Boustany is a change and release management Marketing Engineer with IBMRational Software. He has 7 years of experience with configuration management and10 years experience in the software development industry. Paul has created manyself-running demonstrations of the IBM change and release management solutions,as well as a hosted trial featuring Rational ClearCase and Rational ClearQuest.
ibm.com/developerWorks developerWorks®
Part 2: A closer look at Rational Build Forge© Copyright IBM Corporation 1994, 2008. All rights reserved. Page 29 of 29