i-sheet number: inst-00005 part number c17-qctx …
TRANSCRIPT
12302 Shiloh Church Rd. Houston TX 77066 Phone (281) 880-6322 - Fax (281) 880-6325 REVISION - - © 2018 N-FAB, INC. REVISION DATE 11/08/19
I-SHEET NUMBER: INST-00005
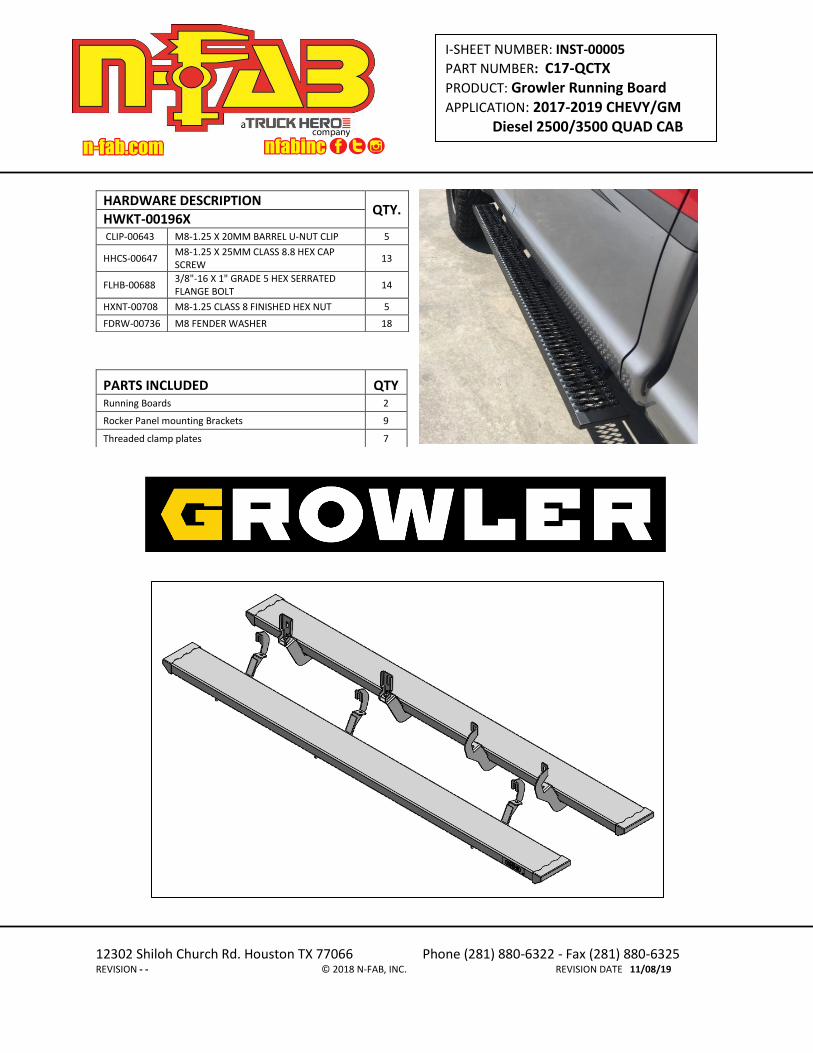
PART NUMBER: C17-QCTX PRODUCT: Growler Running Board APPLICATION: 2017-2019 CHEVY/GM Diesel 2500/3500 QUAD CAB
F
HARDWARE DESCRIPTION QTY.
HWKT-00196X CLIP-00643 M8-1.25 X 20MM BARREL U-NUT CLIP 5
HHCS-00647 M8-1.25 X 25MM CLASS 8.8 HEX CAP SCREW
13
FLHB-00688 3/8"-16 X 1" GRADE 5 HEX SERRATED FLANGE BOLT
14
HXNT-00708 M8-1.25 CLASS 8 FINISHED HEX NUT 5
FDRW-00736 M8 FENDER WASHER 18
PARTS INCLUDED QTY Running Boards 2
Rocker Panel mounting Brackets 9
Threaded clamp plates 7

Step 1: Look on the underside of the body and locate the factory supplied mounting positions.
NOTE: Some vehicles require the use of speed clips and nuts, which are supplied with the hardware
kit.
Step 3: Install the brackets to the mounting locations in the body of the vehicle and install hardware.
Do not tighten all the way.
NOTE: Some vehicles may require the use of additional nuts and washers for the lower portion of
the mounting bracket which are supplied in the hardware kit
Step 2: If your vehicle requires the use of the speed clips, install at this time. This requires the removal of a plastic body plug. Using a flat head screwdriver remove the plug and install one of the supplied speed clips.
DRIVER SIDE

12302 Shiloh Church Rd. Houston TX 77066 Phone (281) 880-6322 - Fax (281) 880-6325 REVISION - - © 2018 N-FAB, INC. REVISION DATE 11/08/19
I-SHEET NUMBER: INST-00005
PART NUMBER: C17-QCTX PRODUCT: Growler Running Board APPLICATION: 2017-2019 CHEVY/GM Diesel 2500/3500 QUAD CAB
Step 4: Set running board along the top of all three brackets and center along the cab.
Step 5: Insert the supplied threaded brackets (x3) inside the running board lip over the top of each bracket. Step 6: With the supplied 3/8” x 1” hex bolts, secure each mounting location and leave loose. Step 7: After final adjustment, tighten all running board threaded mounts. Step 8: Next, adjust frame brackets so the running board is level with body of the vehicle and tighten all factory-mounting locations.

Passenger side with Def Tank
Step 1. Remove the (x3) 13mm bolts, (x2) 10mm bolts and (x2) 10mm nuts that attach the Def tank
cover and remove.

12302 Shiloh Church Rd. Houston TX 77066 Phone (281) 880-6322 - Fax (281) 880-6325 REVISION - - © 2018 N-FAB, INC. REVISION DATE 11/08/19
I-SHEET NUMBER: INST-00005
PART NUMBER: C17-QCTX PRODUCT: Growler Running Board APPLICATION: 2017-2019 CHEVY/GM Diesel 2500/3500 QUAD CAB
Step 2: Take the bracket with the bent hook and feed between the body and DEF tank until you locate the tab into the OE hole. The bracket will hang once placed correctly. Step 3: The second bracket will attach to the body with one of the supplied M8x25 mm hex bolts and washer.
Step 4: Using the supplied M8x25mm hex bolts and washers begin hand tightening both upper and lower mounts to the rear two brackets. Step 5: Next, attach the two front brackets to the rocker panel brackets that you installed in step 2 and 3 hand tighten.

Step 6: Set running board along the top of all four brackets and center along the cab.
Step 7: Insert the supplied threaded brackets (x4) inside the running board lip over the top of each bracket. Step 8: With the supplied 3/8” x 1” hex bolts, secure each mounting location and leave loose. Step 9: After finial adjustment, tighten all running board threaded mounts. Step 10: Next, adjust frame brackets so the running board is level with body of the vehicle and tighten all factory-mounting locations. Step 11: Re-install the DEF tank cover that was removed in step 1 and tighten to factory specs. Step 12: Your install for passenger side is now complete.