hypersnap v.7 manual - hyperionics
TRANSCRIPT

HyperSnap v.7 Manual Copyright © 2011 Hyperionics Technology LLC
All Rights Reserved

2
Welcome to HyperSnap .................................................................................... 9
HyperSnap Licensing ........................................................................................ 9
How to Use This Manual ................................................................................. 11
What’s New in Version 7?............................................................................... 13
Tutorials ......................................................................................................... 17
Capture Overview.......................................................................................... 17
Window Capture ............................................................................................ 18
Region Capture ............................................................................................. 19
Scroll Page Capture ....................................................................................... 20
Ribbon Reference ........................................................................................... 21
File Tab ........................................................................................................ 21
New........................................................................................................ 22
Open ...................................................................................................... 22
Save ....................................................................................................... 22
Save As .................................................................................................. 23
Save All .................................................................................................. 25
Upload to FTP Server ................................................................................ 26
Close ...................................................................................................... 29
Close All .................................................................................................. 29
Acquire ................................................................................................... 30
Select Source .......................................................................................... 30
Print ....................................................................................................... 30
Print Preview ........................................................................................... 30
Page Setup .............................................................................................. 30
Send by Email ......................................................................................... 32
Set as Wallpaper ...................................................................................... 32
Search * ................................................................................................. 33
Recent images * ...................................................................................... 33
Exit ........................................................................................................ 33
Capture Tab ................................................................................................. 34
Region .................................................................................................... 35
Pan Region .............................................................................................. 36
Repeat (Capture) ..................................................................................... 36
Window ................................................................................................... 36
Active Window ......................................................................................... 37

3
Full Screen .............................................................................................. 37
Scroll Region ........................................................................................... 37
Scroll Page .............................................................................................. 38
Virtual Desktop ........................................................................................ 38
Button .................................................................................................... 39
Active Window without Frame .................................................................... 39
Free Hand ............................................................................................... 39
Multi-Region ............................................................................................ 40
Capture Cursor Only ................................................................................. 40
Extended Active Window ........................................................................... 41
Enable Video or Game Capture .................................................................. 42
Presentation after capture ......................................................................... 43
Lock last capture ...................................................................................... 43
Region shape ........................................................................................... 43
Ratio: Any .................................................................................................... 44
Size: Any ..................................................................................................... 44
Copy....................................................................................................... 44
Save ....................................................................................................... 44
Print ....................................................................................................... 45
Want cursor ............................................................................................. 46
Hide window ............................................................................................ 46
Hotkeys on .............................................................................................. 46
Extra delay .............................................................................................. 46
Capture Settings ...................................................................................... 47
Screen Capture Hotkeys ............................................................................ 58
Edit Tab ....................................................................................................... 60
Cut ......................................................................................................... 61
Copy....................................................................................................... 61
Paste ................................................................................................ 63
Undo ...................................................................................................... 63
Redo....................................................................................................... 63
Resize canvas ................................................ Error! Bookmark not defined.
Select Area .............................................................................................. 64
Clear ...................................................................................................... 63
Crop ............................................................. Error! Bookmark not defined.

4
Selection Opacity ........................................ Error! Bookmark not defined.
Copy Format ............................................. Error! Bookmark not defined.
View Only Mode .................................................................................. 66
Magnify ............................................................................................. 68
Flood Fill ............................................................................................. 75
Freehand Draw ..................................................................................... 71
Line ................................................................................................... 68
Air Brush ........................................................................................... 75
Freehand Erase ............................................................................... 75
Arrow .............................................................................................. 74
Highlight ................................................ Error! Bookmark not defined.
Rectangle ........................................................................................... 69
Rounded Rectangle .............................................................................. 71
Ellipse ................................................................................................ 72
Filled Rectangle ................................................................................... 69
Filled Rounded Rectangle ..................................................................... 71
Filled Ellipse ....................................................................................... 73
Add Text ............................................................................................. 71
Stamps .................................................. Error! Bookmark not defined.
Presentation Mode on/off ..................................................................... 65
Line Style ......................................................................................... 75
Standard Color Palette * ........................................................................... 77
Pick Color from Screen *...................................................................... 77
Add to Custom Colors * ...................................................................... 78

5
Use Foreground Color ................................................................... 78
Use Background Color ................................................................... 78
Swap Colors * .................................................................................... 78
Pin Colors * ......................................................................................... 78
Make Background Transparent ............................................................... 78
A (Opacity) and RGB Selection * ................................................................ 79
HTML Settings * ....................................................................................... 81
More colors and options .................................................................... 81
Image Tab.................................................................................................... 82
Crop ....................................................................................................... 83
Cut strip ............................................................................................. 84
Auto-trim ................................................................................................ 84
Resolution ............................................................................................... 85
Scale ...................................................................................................... 86
Mirror ............................................................................................... 87
Rotate 90 deg. Right................................................................................. 95
Rotate 90 deg. Left................................................................................... 95
Any Angle ............................................................................................... 95
Shear ..................................................................................................... 96
Mosaic .................................................................................................... 96
Emboss ................................................................................................... 96
Sharp/Blur .............................................................................................. 96
Shadow................................................................................................... 97
Frame ..................................................................................................... 98
Color Resolution ....................................................................................... 99
Correction ............................................................................................. 101
Substitute Colors .................................................................................... 102
Black/White ........................................................................................... 105
Halftone ................................................................................................ 105
Grayscale .............................................................................................. 105

6
Invert Colors ......................................................................................... 106
Invert Black and White ........................................................................... 106
Unique Colors ................................................ Error! Bookmark not defined.
User Tools ...................................................................................... 106
TextSnap™ Tab ........................................................................................... 106
Text from Region ................................................................................... 108
Under Cursor ......................................................................................... 108
Auto-scroll region ................................................................................... 108
Auto-scroll window ................................................................................. 109
Plain text * ........................................................................................... 109
Formatted RTF * ................................................................................... 109
Tab-delimited data capture * .................................................................. 109
More Settings ........................................................................................ 110
TextSnap™ Hotkeys... ............................................................................ 110
Setup Tab .................................................................................................. 112
Full Screen ............................................................................................ 113
Previous File .......................................................................................... 113
Next File ............................................................................................... 113
Thumbnails * ......................................................................................... 114
Image tabs ............................................................................................ 114
Status bar ............................................................................................. 114
Toolbar ................................................................................................. 114
Drawing Tools ........................................................................................ 115
Menu * ................................................................................................. 115
Backgr. (Background and Position) ........................................................... 115
Skin ................................................................................................. 116
Icon ................................................................................................. 116
Mouse Keys ........................................................................................... 116
Voice .................................................................................................... 117
Hotkeys ................................................................................................ 117
Startup ................................................................................................. 117
File Types .............................................................................................. 119
Customize ............................................................................................. 119
Save CFG (Configuration) ........................................................................ 124
Read CFG (Configuration) ........................................................................ 124

7
Read FF Add-on * .................................................................................. 124
Cascade ................................................................................................ 125
Tile ....................................................................................................... 125
Windows .......................................................................................... 125
Help Tab .................................................................................................... 126
Manual .......................................................... Error! Bookmark not defined.
License ................................................................................................. 126
Updates ................................................................................................ 126
About ................................................................................................... 126
Quick Access Toolbar * ................................................................................ 127
Tab Bar Tools * ........................................................................................... 127
Minimize the ribbon (Ctrl+F1) * ........................................................... 127
What’s this? ............................................. Error! Bookmark not defined.
Toggle zoom * ....................................................................................... 128
Zoom ............................................................................................... 128
Buttons * ...................................... Error! Bookmark not defined.
Other Functions & Buttons .................................... Error! Bookmark not defined.
Image view and edit area ................................ Error! Bookmark not defined.
Apply button .................................................. Error! Bookmark not defined.
Revert button ................................................ Error! Bookmark not defined.
Cancel button ................................................ Error! Bookmark not defined.
OK or Done button ......................................... Error! Bookmark not defined.
Help button ................................................... Error! Bookmark not defined.
Voice command list ................................................................................ 128
Menu Reference ........................................................................................... 130
Change to/from Ribbon/Menu .................................................................. 130
Reference Definitions for Menus ............................................................... 130
Locating Other Important Menu Functions ......... Error! Bookmark not defined.
Contact and Support..................................................................................... 130
Credits ....................................................................................................... 131
Disclaimer Agreement .................................................................................. 132

8

9
Welcome to HyperSnap
HyperSnap is the fastest and easiest way to take screen captures of Windows
screens. The program combines the power of a first-class screen capture
application with an advanced image editing utility, wrapped into one easy-to-
use tool.
Use HyperSnap to quickly share a picture-perfect representation of anything on your
screen. It’s perfect for capturing images for your Help system and online tutorials,
manuals, handouts, marketing materials and presentations, webpages, emails and
more.
With HyperSnap’s versatility and ease-of-use, you can quickly customize menus
and toolbars to fit your needs. You can assign your own keyboard shortcuts,
create instant toolbars, and even control HyperSnap with voice commands!
Top Features
Here are a few of the many features that HyperSnap offers to provide a highly
versatile array of screen captures:
Powerful image capture, editing, annotation and manipulation tools.
Captures saved automatically as graphics files.
An effective image viewer combined with a format converter.
Over a dozen types of captures, including Region, Button, and Auto-scroll
for long web pages.
The ability to work with all Windows PCs from XP through Windows 7.
To work with Windows 2000 or older, you visit our web site and
download HyperSnap 6 or even older version.
HyperSnap Licensing
To register and use HyperSnap, you must purchase a license. Visit our home page
at
http://www.hyperionics.com/?Buy=1
Once there, add the desired license to the “shopping cart” and follow the on-
screen instructions.
Always check our website before ordering to find the most current price, payment
options, and other order information. We offer many different ways to order,
including secure web forms, phone, fax and mail ordering, and corporate
purchase orders.

10
For more information about the licensing agreement, check the Disclaimer
Agreement at the end of this manual.
Bezugsquellen für HyperSnap
Lizenzen
Besuchen Sie unsere Homepage unter
http://de.hyperionics.com/shop/shop.asp
Wir bieten verschiedene Bestellmöglichkeiten an wie z.B. Bestellung per Telefon, Fax
oder Post sowie sichere Internetbestellformulare für Einzel- und Mehrplatz-Lizenzen.
Da sich die Bestellinformationen jedoch regelmäßig ändern, und die Ihnen
vorliegende Version von HyperSnap eventuell bereits mehrere Monate oder sogar
Jahre alt ist, bitten wir Sie unsere Webseite zu besuchen, damit Sie stets die
korrekten Informationen wie Preis, Anschrift und Versionsnummer in Ihrer Bestellung
angeben können.
Achat de licences HyperSnap
Rendez-vous sur notre site Web à l'adresse :
http://fr.hyperionics.com/shop/shop.asp
Nous vous proposons de nombreux moyens pour commander HyperSnap : boutique
en ligne sécurisée, achat par téléphone, fax ou courrier, ainsi qu'une prise en charge
des bons de commande professionnels.
Les informations pour commander étant susceptibles de changer à l'avenir et cette
copie d'HyperSnap pouvant dater de plusieurs mois, nous vous demandons de vous
rendre sur notre site Web pour toujours accéder aux informations les plus récentes.
Les utilisateurs internationaux (hors États-Unis) trouveront également sur notre site
Web une liste complète des distributeurs des produits Hyperionics de par le monde.
A HyperSnap program rendelési
lehetőségei
Kérjük látogassa meg honlapunkat a www.HyperSnap.hu címen, ahonnan letöltheti
programunk legfrissebb verzióját, illetve ahol a rendeléssel kapcsolatos bővebb,
aktuális tájékoztatást kaphat.

11
Amennyiben nem rendelkezik internet kapcsolattal, úgy kérjük használja a
programmappában található "readme.txt" fájlt.
Rendelési lehetőségek
1. Honlapunkon: www.HyperSnap.hu
2. E-mailben: [email protected]
3. Telefonon: +36 (20) 980 44 49
4. Levélben:
HyperSnap és HyperCam rendelés
Hegedűs köz 2.
H-6000 Kecskemét
Magyarország
Lehetőség van 1 példányos rendelésre, ugyanakkor kedvezményes, többfelhasználós
konstrukciókat is kidolgoztunk.
Bármilyen jellegű kérés, kérdés esetén szívesen állunk rendelkezésére!
Üdvözlettel:
Hyperionics termékek
Magyarországi Értékesítési Központ
How to Use This Manual
This online manual is also HyperSnap’s online Help. When you click an item
in the contents or a link in the text, you see the information under that heading in
the manual. (You can also print a PDF version of the manual if you want a paper
copy.)
First Time User: If you are using HyperSnap for the first time, following the
steps below can help you learn to use it more quickly.
Previous User: If you have used HyperSnap in the past, the “What’s New”
section will give you the basics of HyperSnap’s new Ribbon Interface. You can
then review the Ribbon Tabs to identify the new tools
1 Learn about the new Ribbon interface and Thumbnails in the “What’s New”
section.
2 Use Tutorials to practice captures.
3 Search the Ribbon Reference section for descriptions of HyperSnap tabs
and tools.

12
Use these helpful tips:
Place the mouse cursor on a tool to identify it in words.
If a down arrow appears next to an icon or words, click it for options.
If a word has a checkbox next to it, click it to select or deselect the tool.
More help is available if you cannot find what you need in the online Help or if
you would like to read about other uses for HyperSnap. Visit our FAQ page or
access our Technical Support Forum for more information.
If you still cannot find an answer to a question about using HyperSnap, or if you
run into a problem, feel free to contact us.

13
What’s New in Version 7?
HyperSnap 7 has major changes in its basic interface, in the way that tools are
presented, and in new options offered.
Ribbon interface is the new method used in HyperSnap Version 7 to display
the various functions provided. It encompasses tools previously shown in
menus, toolbars, and other taskbars into one easily-viewed area called “The
Ribbon”.
The Ribbon presents groups of tools placed in a set of tabs, as shown
above.
Command tabs are the tab dividers seen at the top. They include File,
Capture, Edit, Image, TextSnap, Setup, and Help.
The Image tab is shown in the example above.
Groups are the collection of tools under each tab, separated by vertical
lines.
The Image tab shown has five groups, Modify, Rotate, Effects, Colors,
and User tools.
Tools are all the items listed within each group.
The Quick Access bar, above the tabs provides easy access to the most-
used tools. It can be customized, as needed.

14
Although Ribbon is the main HyperSnap 7 interface, the former Menu interface
is still available.
T
o
a
c
c
e
s
s the Menu interface from the Ribbon, click Setup.
Then click the check box for Menu.
To return to the Ribbon, click the View Menu.
T
h
e
n
c
l
i
c
k Menu/Ribbon Toggle.
A new drawing editor, available in the Edit Tab and the Draw Tools bar, allows
two modes for editing: Shape editing mode (new) and drawing directly on
image (as in HyperSnap 6 and older).
In shape editing mode, anything you draw is a separate shape. It can be
selected later, moved, edited, hidden and shown again, and deleted.
A new file format specific to HyperSnap 7, .dhs (HyperSnap Drawing)
preserves the separate shapes and lets you edit them later, after closing and
re-opening the file.

15
If you save to standard image formats, the shapes are permanently
“imprinted” on the image and cannot be edited separately when you re-open
this “shapes added” file in HyperSnap.
New polygonal and free-hand selection tools, available in the Edit Tab allow
you to perform two functions.
In image editing mode you can select an irregular part of an image, and copy,
move and scale it.
In shape editing mode you can select shapes contained within a polygonal or
freehand shape.
Thumbnails (small pictures) can be displayed of captures and any other
images opened in HyperSnap. (To see, check Thumbnails in the Setup tab.)
Thumbnails are shown in a vertical bar on the left
side of the screen.
To hide Thumbnails, click the Auto-hide pin tool
next to the Close button in the upper right.
When hidden, you see only the Thumbnails tab
(shown here with the arrow on the left).
To open Thumbnails again, click the tab.
To briefly open Thumbnails, rest the cursor on
the tab.
You may also right-click any of the thumbnails to
show a context menu of functions that can be
executed either on the image to which this
thumbnail belongs, or on a group of images selected
with check-marks found at bottom-left of each
thumbnail.
Multiple Images can be batched to have the same operations applied at one
time.
Region Captures can be fixed to a specified aspect ratio or fixed size.
Save to PDF is enabled, including saving multiple images to one PDF file.
New Image Edits provide a variety of enhancements, including a more
detailed color selection.
New/Added features include a Smart Auto-zoom and a Fit-to-Window
option.

16

17
Tutorials
HyperSnap offers a large variety of captures, each of which is defined under the
Capture Tab in the Ribbon Reference section in this manual.
This section begins with a Capture Overview, which gives the basic steps to follow
for every type of capture. Click the chapter titles below to read the tutorials:
Capture Overview
Window Capture
Region Capture
Scroll Page Capture
Capture Overview
To view your capture's image in HyperSnap check this first:
Click the Capture Menu, then the Capture Settings icon (far right).
In the Capture Settings Dialog box, look down the Capture list and be sure
that Restore HyperSnap window to front after a capture is checked.
To capture anything in HyperSnap, use the program's Hotkey combinations.
All Hotkey combos begin with Ctrl+Shift, followed by a Letter, depending
on the type of capture.
Example: Ctrl+Shift+W is a Window capture (see below)
To see any Hotkey combo, open the Capture tab. Rest the mouse cursor
on any Capture icon and the name and its Hotkey combo appears below.
Option: If you switch to the previous Menu interface, you can see Hotkey
combos when you click open the Capture menu. Every capture type has its
corresponding Hotkey to the right.

18
To more easily use Hotkeys, minimize HyperSnap to the taskbar (also called
"running in background").
(Click the Minimize button, top right.)
You can always open HyperSnap again during a capture to check Hotkeys, if
needed.
With any capture, the area to be captured must be visible on the screen, and
HyperSnap must be either onscreen or minimized.
In the following tutorials, you may want to print the steps first to follow while
trying each capture.
Window Capture
One of the most frequently used, this capture enables you to grab any Window
(the name for any enclosed rectangular area on the screen).
The easiest way to practice this capture is to use HyperSnap’s Help window as
the captured window. (If you’re using a PDF of this manual, open any program on
your screen.)
Step 1 With HyperSnap opened or minimized and the area to capture on
screen:
Click Ctrl+Shift+W (or select Window in Capture tab).
(If you do not remember the correct Hotkey combo, open
HyperSnap and click the Capture tab. Then click the Hotkey
combo above and minimize HyperSnap to see the window you
want again.)
Step 2 Move the cursor around the screen to see the window areas
available, shown outlined with blinking highlights.
Example: If you move
to a Title bar, the entire
application’s window is
highlighted, as shown
here.
Step 3 When the area you want
is highlighted, click the
mouse.
HyperSnap will take the screen shot
and display it in its program window.

19
Tips:
If HyperSnap's window is not full-screen size,
click the Maximize button to make it full size.
Click the button again to reduce screen size (Restore Down).
If the capture is larger than the monitor's screen, use the scroll bar(s)
to see the entire image…OR
Click the button to Toggle zoom to Auto to make
the capture fit the screen.
(See more Zoom options in the Tab Bar Tools section.)
Region Capture
Another frequently-used capture, Region enables you to save almost any section
of a screen or more than one screen, depending on the Region setup you choose.
In its most basic application, this capture is very similar to cropping a photo: You
create a box on the screen with the area you want captured inside it.
As an example, use these steps to capture just the ribbon Help tab:
With HyperSnap opened or minimized and the region (the Help tab) on
screen:
Press Ctrl+Shift+R Hotkey combination (or select Region in Capture tab).
You can begin and end a Region capture anywhere on the screen, but here's an
easy way to do it:
Step 1 Click and hold the primary mouse button in the top, left corner of
the area you want to capture.
(In the Help tab, click the upper left corner, above Manual.)
Step 2 Drag the onscreen cursor diagonally down to the lower right corner
of the area you want, to make a box on the screen.
(In the Help tab, click the lower right corner of the General
group.)
Step 3 Then click again.

20
HyperSnap will capture whatever is in the box and display it in its program
window.
Scroll Page Capture
Scroll page enables you to capture, in one operation, the entire length of a
window that extends down past the bottom of the screen. You can capture and
keep a long page of a website or other application rather than having to chop the
page into multiple captures.
(The easiest way to try this capture is to open your browser to a web page that
has a vertical scroll bar, meaning that the page extends below the bottom of your
screen.)
Step 1 With HyperSnap opened or minimized and the web page on screen,
be sure that the place you want to start the scroll is at the top of
the page.
If you want to start scrolling at the top of the page, simply
leave it as is.
If you want to start at a specific point down the page, scroll
down until that point is at the top of the page.
Step 2 Press Ctrl+Shift+S Hotkey combination (or select Scroll page in
the Capture tab).
Step 3 Click the mouse cursor inside the window (not on the scroll bar).
HyperSnap will start scrolling down the page (called auto-scroll)
until it reaches the bottom, then capture
it.
Step 4 To end the capture early, press the
Escape key.
(If you scroll down more of the page than you
want, you can crop the page or cut strips to remove
unneeded sections later with the Image tab tools.)
Note: There is no horizontal page scroll, and some
applications or web pages with animated or non-
scrolling parts may limit or prevent HyperSnap from
scrolling the entire page.

21
Ribbon Reference
This section provides definitions and examples of the tabs and tools that are the
HyperSnap Ribbon interface. Click Ribbon interface in the “What’s New” section
for a basic explanation of the ribbon.
HyperSnap 7 ribbon contains the following tabs – click each tab name below to
read more:
File Tab
Capture Tab
Edit Tab
Image Tab
TextSnap Tab
Setup Tab
Help
File Tab
The File tab looks different from the other tabs since it contains basic tools
required for any image file, regardless of type. Although most of these tools were
in previous HyperSnap versions, a few new ones have been added.
This tab includes the following functions – click each function name or graphics to
read more about it:
New
Open
Explore
Close
Close all
Save
Save as
Copy file name
Save all
Upload
Select source
Print…
Print!
Print preview
Page setup
Send by email
Set as wallpaper
Search
Options
Exit
22
Acquire
New
Creates a new image file. The image has the same size as that specified on the
Edit tab’s Resize tool and the background color defined under “Capture/Capture
Settings…” menu, on Capture tab.
Open
Opens an existing graphics file. This is a standard Windows “File/Open” dialog
box, extended with a few HyperSnap-specific controls described in the following
paragraphs.
Enable Preview Turn on this option to see a small preview of the graphics file highlighted in
the file list.
Page Number to Open Enables you to specify the number of an image "page" inside a file that you
want opened in a "multi-page" image file.
If you highlight this type of file in the file list, HyperSnap will display the total
number of image pages in that file next to the specified field.
Correct color if color profile found…
Some image files contain complex “color profiles” that aim to reflect more
accurately the colors as the image creator intended them. If you enable this box,
HyperSnap will look for such embedded color profiles inside of PNG, JPEG and
TIFF files, and will try to adjust the colors of an image read from them according
to the profile found.
File Info Click to display detailed information about the highlighted image file.
Explore
Open a folder window with the view of the current HyperSnap folder, where the
program saves images by default, or where the last image was saved.
Save
Saves the current image as a graphics file, based on the format specifications
most recently selected with the “Save As” command.

23
If the current image was saved previously, HyperSnap will use the original format
of the file instead.
Save As
Saves the current image to a graphics file, based on the format specifications and
file name you provide in the Save as file dialog box that appears.
The following text describes HyperSnap-specific fields and controls available in
this dialog box.
Tip: The most common Save as fields required by the average user are:
Save in:, File Name:, Save as type:, and the Save and Cancel buttons.
Minimize HyperSnap window Check this box if you want the HyperSnap window automatically minimized
after you click Save.
Copy file path to clipboard Check this to copy the entire path plus file name of the current image to the
clipboard. This is useful when the image must be uploaded to another
application.
Sub-Format Select the sub-format properties for the desired file type. These include
whether the file is compressed and by what method, as well as other
properties related to the file type you choose from the Save as type: drop-
down menu.
Keep Current Check this box to ensure that when you save a file, HyperSnap keeps the
current image color depth (also called color resolution).
Select Best Check to have HyperSnap examine the image to try to:
Set color depth to the lowest value available for the highest quality image.
Reduce file size if a high color depth is not needed for a good image.
Example: An image may be set to 32 bits per pixel, but only needs to display
200 colors. You could reduce the image size to 8 bits per pixel without
detectable image degradation.
1 bit per pixel Select to save the image with 1 bit per pixel color resolution, which permits
only 2 colors in the image. These may be black and white (if you select Std.
Windows palette below) or 2 colors "optimized" from all the image's pixels.
24
4 bits per pixel Select to save the image with 4 bits per pixel color resolution, which permits
up to 16 colors in the image.
8 bits per pixel Select to save the image with 8 bits per pixel color resolution, which permits
up to 256 colors in the image.
16 bits per pixel Select to save the image with 4 bits per pixel color resolution, which permits
up to 65,536 colors in the image.
24 bits per pixel Select to save the image with 24 bits per pixel color resolution, which permits
millions of colors in the image.
32 bits per pixel Select to save the image with 32 bits per pixel color resolution, which permits
millions of colors in the image.
Palette: Optimized Sets an optimized color palette when you save an image with 1, 4 or 8 bits
per pixel color resolution. HyperSnap selects the color table for your image
that best matches all available colors on the original picture.
Palette: Std. Windows Sets a standard Windows color table for your image when you save an image
with 1, 4 or 8 bits per pixel color resolution. HyperSnap selects the color table
that minimizes desktop "color flicker" when running Windows in the 256 color
mode.
An image saved in 1 bit per pixel resolution will be converted to black and
white (not grayscale).
Quality Factor Select this field to set the quality and subsequent degradation of an image file
format, such as JPEG, that compresses images by degrading their quality and
"averaging" colors across areas. Higher quality values will produce better
images and larger files.
The quality degradation may not be noticeable on real life photos with many
"smooth shaded areas," but can be very obvious on sharp computer screen
capture images.
Experiment with different values and on varying types of images to get a feel
for this function.
Append Check this to append (add) the current file to the end of a previously-saved
file as another image "page."

25
Append only works with formats that support multiple images, such as GIF,
TIFF, or the Windows icon ICL format.
Interlaced or Progressive Check this to save the file in "Progressive" or "Interlaced" formats, depending
on the file type you select. These properties are only supported by certain file
types, such as GIF (which supports Interlaced) and JPG and CMP (which
support Progressive.)
Using these properties, viewers can see the file quickly, with more details
appearing as the file is successively rendered. The most common uses for
these formats are for web page images and when the file must be viewed over
a slow network connection.
Transparent Check this to save the file with a transparent background. This is only
available for certain file formats that support a transparency value, such as
GIF or PNG. The color you have chosen as the background color will be the
color used for the transparent areas.
Save Settings Click this button to save the currently selected options as the default options
for future use. (This does not save the image in the program's workspace.)
Copy file name
Copies the exact directory and file name of the currently opened image to the
clipboard. You can easily paste the name into any text document, email etc. or use it
in File/Open operation of another program to open it.
Save All
Saves all images opened in HyperSnap as graphics files, based on the format
specifications most recently selected with the “Save As” command.
If any image to be saved was saved previously, HyperSnap will use the original
format of that file instead.
Upload
This sub-menu contains functions for uploading images to FTP and WWW servers on
the Web.
Upload to FTP Server
Upload to ImageShack…
Quick upload to ImageShack
Show upload log…

26
Upload to FTP Server
Click this feature to show the FTP server dialog box. This box has important
settings for uploading the current image to an FTP server to which you have
"write" access.
The upper part of this dialog box is very similar to HyperSnap’s Save As window.
It allows you to specify the exact graphics format and options for the uploaded
file.
Remote file name Set a file name with its specific path to be written on the remote host. (If you
attempt to write to a path that does not exist, and you do not have "create
directory" rights on the server, your upload will fail.)
If you simply include a filename here, the file will go to the remote server's
default directory for any uploaded files sent by your account (as set by your
administrator).
If in doubt, do not include the path, or ask your administrator for the directory
name for sending the file.
FTP Server (name or IP address) Enter the name of the server to use. Example: company.com.
(You must have access to the server chosen to send the file there.)
Port Specifies the required outgoing protocol port. Most users will not need to
change this setting.
Advanced users who need to make a change will know the new setting and
how to alter it. If in doubt, leave it at the default 21.
User Specifies your user name on the FTP server. You must enter it exactly as
given to you by your administrator or the connection attempt will fail. The
name may be case sensitive. Contact your administrator if you encounter
connection problems.
Password Enter the site access password given to you by the site administrator. It is
usually case sensitive, so be sure it matches exactly.
Save Password Check to have HyperSnap remember your password between sessions.
Use this option if you are the only one using your computer. However, if
security is an issue (as at work), leave this UNchecked.

27
Use passive mode (PASV) Required by some FTP servers. If you have difficulty accessing your server, try
to enable PASV mode or contact your administrator for help.
Proxy Server settings If you're using a hardware or software proxy server that meets the following
criteria, enter the address of the proxy here.
The server must not use transparent Network Address Translation
(NAT).
Your software must connect through the server address, which it will
then re-route to the outside world.
Copy link text to clipboard… If this option is checked, click it to clear check mark and turn off link text
copying.
If this option is UNchecked, click to check it only if you want to copy a link.
If you do, the Link Specification window appears where you specify the exact
text link to the image file. The link will be copied to clipboard for inserting into
an HTML editor.
FTP Profile Name To save all information required to access any FTP server in a “profile”, type a
name for your profile into this box, then click Save FTP Profile button. The
name includes server address, port, user name and password etc.
To recall previously saved information or a profile, click the down arrow and
select a name from the drop-down list.
To delete a previously saved profile, select it in the drop down list and click
Delete Selected Profile button.
Security warning: if you choose to save also your password, it will be
written in registry database in slightly scrambled form. Although casual users
won't be able to read the password, an experienced hacker or someone
running HyperSnap under a debugger program may decipher your password.
Use caution and do not save passwords routinely!
Save FTP Profile Click this button to save the FTP Profile you have created.
Delete Selected Profile Click this button to delete the profile shown in this box.
Link Specification for FTP upload
If you check Copy link text to clipboard… option on the FTP Upload window, this
dialog box appears and allows you to specify a text link that is automatically
copied to clipboard after a successful FTP upload.

28
You may include macros listed below, which will be expanded as needed.
Example: If you have entered the following data in FTP dialog box:
Remote file name: /img/Snap7.jpg
FTP Server: www.myserver.com
and the image you uploaded was 300 pixels wide and 250 pixels high, the
following text:
<img src="http://%server%%path%" height="%height%"
width="%width%">
will be expanded to:
<img src="http://www.myserver.com/ img/Snap7.jpg" height="250"
width="300">
This expanded text will be automatically copied to the clipboard, and you can
easily paste it into any web page editor.
Link text edit box and expanded text preview
If needed, click in the white space on the left, which is an edit box, to type your
link text. If any macros were entered, the grey preview box below shows the
expanded text.
The buttons on the right, described below, insert the macros.
File Button
Inserts the %file% macro into the link text. This macro is expanded to the
remote file name of the uploaded image file without the path.
Path Button
Inserts the %path% macro into the link text. This macro is expanded to the
remote full file and path name of the uploaded image file.
Width Button
Inserts the %width% macro into the link text. This macro is expanded to the
width in pixels of the uploaded image file.
Height Button
Inserts the %height% macro into the link text. This macro is expanded to the
height in pixels of the uploaded image file.
Server Button
Inserts the %server% macro into the link text. This macro is expanded to the
server name or address entered in the FTP dialog box.
User Button
Inserts the %user% macro into the link text. This macro is expanded to the
user name entered in the FTP dialog box.

29
Upload to ImageShack
Uploads an image to ImageShack.us server on the web and provides links to that
image. This makes it easy to insert the image e.g. into online forum posts, blog
posts, Twitter etc. It provides an option to obtain a shortened link to the image in
the form of http://goo.gl/XXXXX for use on Twitter.
The upper part of this window has the options identical to “Save As” box. Available
file formats are PNG and JPEG. The JPEG format works better for real life photos,
PNG is best for screen captures of windows and program interfaces.
The lower part of “Upload to ImageShack” window contains the setting specific to
ImageShack/yfrog servers – login and password to your account there, optional tags
describing the image, a selection box of which to copy to clipboard after a successful
update, and options to make the image public or private and to open “My Images”
page on ImageShack.us.
You have an option to either use login/password for uploading images, or turn the
login off for anonymous uploads. We recommend using login and password, as this
gives you a greater control over your uploaded images – as far as we know, there is
no way to delete from the server an image uploaded anonymously.
Quick upload to ImageShack
Uploads an image to ImageShack server without asking for any options. This
function simply uses the options selected previously in “Upload to ImageShack”
function.
Show upload log
Displays the log of uploads in a text window (by default using Notepad). The fields in
the log are separated with TAB characters. If you need to delete the log, simply
delete the text using the text editor functions, e.g. Ctrl+A to select all text, followed
by pressing Delete key, although it would be better to leave the top line with column
headers, as it won’t be re-created unless you delete the log file completely.
Close
Closes an open image. If you've changed the image but not saved it, you'll be
prompted to save your changes.
Close All
Closes all images opened in HyperSnap. If you changed one of the images,
HyperSnap prompts you to save that one. If you do not, the image closes as is.
Tip: if you have many pictures with changes, but want to close them quickly
without saving, hold the Ctrl key while clicking Close All. Everything will be
closed instantly with no “save” prompts.

30
Acquire
If you have an image scanning device connected to your system, use this tool to
import a hard copy scan into the HyperSnap workspace.
If you have not already done so, you must first use the Select Source function on
the File menu to select the source for HyperSnap.
Select Source
Use this to choose a device to scan hard copy from the available scanning sources
on your system. If you have more than one device, you'll see a list of compatible
devices, if their drivers have been installed.
Click the device, then Select.
Print and Print! (instantly)
The “Print…” function displays the Printer selection dialog box to print the
current image.
The “Print!” function prints instantly the image to the default printer, without
displaying the Printer selection dialog box.
The look of any printed output is determined by the options you choose in the
Page setup dialog box.
Print Preview
Provides a "what you see is what you get" preview of how your current document
will look when printed.
Page Setup
Enables you to define the layout for printed pages. The options in this dialog box
are similar to those in most print applications, including choices for Paper size,
Margins, Portrait or Landscape format, etc.
The Page setup dialog box provides a real-time preview of how your document
will look when you print it.
Colors Check one if you want to:
Invert Black and White, which switches these colors in the image.
Use Black and White Only, which converts the image from color or
grayscale to black and white, allowing you to print color images to
printer drivers that do not support them, such as dot-matrix printers.

31
Draw Frame, which puts a border around the image to increase
visibility if the image contains a white or very light area that might
cause it to blend with the page's background.
Best Fit Check this to have HyperSnap select the best paper orientation for your
image. (Portrait is a vertical orientation; Landscape is horizontal.)
Example: If the image is wider than its height, HyperSnap will select
Landscape and print it in that orientation.
If you Uncheck this, you can manually choose either Portrait or Landscape.
Center Image Check this to have the program place your image in the center of the page.
Example: If you do not trim the white space around the image, checking this
option will give the image a more finished look on the page.
If you do not choose Center, you can set your own margins by filling in
number for Left/Right and Top/Bottom.
Auto-fit to Fill the Page Scales your image up or down to fill all available space between the margins
on the page, while still preserving the image proportions.
Auto-fit to Page Width Scales your image up or down to fill the entire width of the page between the
margins, while still preserving the image proportions.
Unlike "Auto-fit to Fill the Page", this setting allows printing to extend over
multiple pages.
Scale option Choose this to enter manually the scaling factor for printing your image.
Values above 100% will enlarge the printed image; values below 100% will
shrink it.
Auto-fit if scale too large Functions the same as Auto-fit to Fill the Page, but only if the scale factor
you entered in Scale option makes the image too large to fit on one page.
Header and Footer… Click this button for a dialog box where you can define header and footer text
and position to use on printed pages.
Font Size Enter the font size in "point" units, which are 1/72 of an inch.

32
Header Text Enter the header text that will appear on printed pages above the image you
print.
Justify header text options Select the justification of the header text: left, center, or right
Footer Text Enter the footer text that will appear on printed pages below the image you
print.
Send by Email
Click this to have HyperSnap attempts to contact your system's email program to
send the current image as a graphics file attachment. You'll be required to choose
the image format, file name, recipient, and whatever other options are required
by the email client.
The options in this window are similar to HyperSnap’s Save As window, allowing
you to specify the exact graphics format and options for the emailed file.
Optional file name… Enter a name for this file. HyperSnap will automatically apply the necessary
extension.
Set as Wallpaper
Sets the current image displayed in the HyperSnap window as your Windows
wallpaper. The image must be converted to the correct format, which will change
the currently-specified wallpaper setting to reflect the new setting and filename.
You have options for displaying the wallpaper centered, tiled, or stretched to fit
your current desktop's resolution, which will be needed if the image is smaller
than the desktop.
Caution: Stretching may cause distortion if the image is not the same
horizontal to vertical ratio (aspect ratio) as the Windows screen.
Wallpaper image file name Displays a name for your new wallpaper file image.
To change the name and location of the file, click the Browse button.
Center/Tile/Stretch Center - displays your wallpaper image in the middle of your desktop.
Tile - Multiplies the image as many times across and down as required to
cover the desktop

33
Stretch - Enlarges the image (or shrinks it if needed) to cover your entire
desktop.
(Some distortion may occur on small images if they have an aspect ratio that
differs from your desktop's.)
Remove Wallpaper Removes your current wallpaper image, leaving only the desktop color.
Search
To find the location of a tool or
function in the ribbon:
Type the name in this bar.
Then click the mouse or
press Enter.
Tools/functions with that name
will be shown.
Recent images
This space shows a numbered
list of the images that have
appeared in the HyperSnap
workspace during the current
session.
Click on any one of these to op the image to the HyperSnap workspace.
Options
This button brings up the “Startup and tray icon” options dialog box available also
and described in detail under the Control group of the Setup ribbon tab.
Exit
Exits HyperSnap. This will prompt you to save any images that you have edited,
but did not yet save.

34
Capture Tab
This tab contains the various capture types available in HyperSnap and methods
for changing capture and Hotkey settings.
The tab is divided into four groups shown by the group name labels at the bottom
of the tab: Capture Image, Region Setup, Auto, and Settings (not labeled).
Important! The tools in each group are described as shown vertically, from
top to bottom, starting at the left side of the group.
This tab includes the following groups – click each group name or graphics below
to read more:
Capture image
Region setup
Auto
Capture settings

35
Capture Image Group
This group includes the following functions – click each function name or graphics
to read more about it:
Region Window Scroll region
Pan region Active window Scroll page
Repeat Full screen
Under the “More…” button there are these additional capture
functions:
Virtual Desktop
Button
Active Window without Frame
Free hand
Multi-Region
Cursor
Extended Active WindowEnable Video or Game Capture
Presentation after capture
Lock last capture
Region
Ctrl+Shift+R - Captures a defined area of your choice. It can encompass
multiple windows, your desktop, or virtually anything that is visible on your
desktop.
Unlike a Window or Virtual Desktop capture, this function does not discriminate
between the various windows on the screen.
To capture a Region, you can use the same steps as for cropping a photo:
Step 1 Click Ctrl+Shift+R.
Step 2 Click the cross-hairs that appear to define the area.
Step 3 Move diagonally to a place that encloses the area you want to
capture.
Step 4 When you have completely “blocked” the area, click the mouse.
You’ll see the area you have blocked (the Region) in the HyperSnap
workspace.
(See Region Capture tutorial for an example.)

36
Pan Region
Ctrl+Shift+P - Captures the same region size as the previous capture command,
but allows it to be taken from any area of the screen. You can take your defined
region box and, essentially, "slide" it around the screen to choose another same-
size area to capture.
Example: Use this technique if you want to fit captures into specific-sized frames
to be placed in a document. The task becomes much easier since each capture
will be the exact same shape and size as the previous capture.
For a Pan Region capture:
Step 1 Move the mouse cursor to another point on the screen where you
want to begin a capture of the same size block as the previous
Region capture.
Step 2 Click Ctrl+Shift+P to capture the same size region.
You’ll see the new area, the same size as the previous Region, in the
HyperSnap workspace.
Repeat (Capture)
Ctrl+Shift+F11 - Repeats the last capture performed, exactly as you performed
it. Repeat lets you capture the "in progress" screens of a running program. By
selecting this over a period of time or by repeatedly pressing the appropriate
Hotkeys, you can repeatedly grab the same region, window, or control to show an
ongoing process or program function.
For a Repeat capture:
Step 1 Move the mouse cursor to a point on the screen where you want to
begin the same type of capture as the previous one.
Step 2 Click Ctrl+Shift+F11 to repeat the capture.
You’ll see a repeat of the previous capture in the HyperSnap workspace.
Window
Ctrl+Shift+W - Captures a restricted, pre-defined section on the screen, such as
one window of a program or one piece of an application. Use this function to
capture any window from a small part of a running application to Windows itself.
As you move the mouse over the area to be captured, the various parts of the
applications open and you see a dark blinking border around a section that shows
what is to be captured.
To capture a window:
Step 1 Click Ctrl+Shift+W.
Step 2 Move the cursor around the screen to see the window areas
available, shown outlined with blinking highlights.

37
Step 3 When the area you want is highlighted, click the mouse.
You’ll see the window you have chosen in the HyperSnap workspace.
(See Window Capture tutorial for an example.)
Active Window
Ctrl+Shift+A - Captures the active (sometimes called the "front") program
window, which is the one with an active cursor in it.
To capture the Active Window:
Step 1 Move the mouse cursor to a point inside the window you want to
capture.
Step 2 Click Ctrl+Shift+A.
You’ll see active window in the HyperSnap workspace.
Full Screen
Ctrl+Shift+F - Captures everything on the current screen/desktop. On a multi-
monitor system captures the desktop from the active monitor (the one with the
mouse cursor).
Use Virtual Desktop capture to capture ALL monitors together in a single frame.
To capture the entire Windows desktop:
1 Step Click Ctrl+Shift+F.
You’ll see the complete screen in the HyperSnap workspace.
Scroll Region
Ctrl+Shift+G - Select this function to scroll down a precise region that extends
down below the viewing area of the screen. Unlike Scroll Page where you capture
everything below the screen, this allows you to capture an area inside a window.
You can avoid unwanted parts, such as columns of advertising on web pages.
When the Region cross-hairs appear on screen, define a region as you would in
the usual Region capture, but add a second step, as described below.
To capture a Region with Scrolling:
Step 1 Click the “Scroll Region” button or press Ctrl+Shift+G key
combination.
Step 2 Click one corner, than move the mouse diagonally to click another
corner, creating an outline or block of the region you want on the
screen.

38
Step 3 To scroll down past the bottom of the window onscreen, click the
down pointing arrow of the vertical scroll bar of the window.
The auto-scroll capture will start at once and when it stops, you’ll see the
defined scrolled area/region in the HyperSnap workspace.
To stop scrolling early, press the Escape key on the keyboard; otherwise wait
until scrolling is complete.
Tip: This method of auto-scrolling can work well for pages that refuse to scroll
and capture with the “Scroll Page” method.
Scroll Page
Ctrl+Shift+S - Captures an image of an entire page or document, required for a
page that extends below the visible screen.
To capture a Page with Scrolling:
Step 1 Position whatever part of the window you want as your “start scroll
capture” point at the top of the workspace.
(It may be the top of the window or any location within the
window.)
Step 2 Click Ctrl+Shift+S .
Step 3 Move your mouse to the middle of the target window and click.
The auto-scroll capture will start at once. When it stops, you’ll see the entire
scrolled page in the HyperSnap workspace.
You can wait until scrolling stops or press the Escape key to stop scrolling at any
time.
(See Scroll Page Capture tutorial for an example.)
Virtual Desktop
Ctrl+Shift+V - Captures the entire Windows desktop, used primarily for systems
with multiple monitors or those with video drivers that offer "pan-able" desktops
that disappear from view on any axis (vertical or horizontal).
To capture the Virtual Desktop:
1 Step Click Ctrl+Shift+V .
You’ll see the all the available Windows desktops in the HyperSnap workspace.
If there is only one monitor attached to the system, you will see the entire
screen, as in the Full Screen capture.

39
Button
Ctrl+Shift+B - Captures a button, including toolbar buttons. Used in many
applications and for most buttons on web pages, etc.
Buttons can be captured as seen, when clicked, and as identified when the mouse
cursor either rests on the button or moves over it. (This latter is commonly used
in word processors and browsers.)
To capture a button:
Step 1 Move the cursor on top of the button you want.
Step 2 Click Ctrl+Shift+B.
Unless the application prohibits this, you’ll see the button in the HyperSnap
workspace.
Note: Some applications will not allow you to capture a button. If you try, you
may capture the entire window or screen instead.
Active Window without Frame
Ctrl+Shift+C - Captures only the "inside" of the active (sometimes called the
"front") program window. This gives you the window's contents rather than its
border.
To capture the Active Window’s contents only:
Step 1 Be sure that the cursor is in the window you want.
Step 2 Click Ctrl+Shift+C.
You’ll see the active window without a frame in the HyperSnap workspace.
Free hand
Ctrl+Shift+H - Captures a hand-drawn, area (non-rectangular) around any part
of the screen. When selected, the cursor changes to large crosshairs and the area
below the cursor shows a magnified preview of the area to be captured.
To capture a Free Hand drawn area:
Step 1 Position the cursor where you want to start drawing.
Step 2 Click Ctrl+Shift+H.
Step 3 Draw around the outside of the area you wish to capture.
Step 4 Press Enter.
OR…
Right-click and select Finish Capture from the popup menu.
OR…

40
Click near the capture starting point to complete the capture.
You’ll see your hand-drawn area in the HyperSnap workspace.
The program fills the area outside the area captures with the pre-defined
background color you've set in the Capture Settings dialog box.
Multi-Region
Ctrl+Shift+M - Captures multiple regions that you define using its built-in tools.
One of HyperSnap's most powerful features, multiple regions can be more than
one area of the screen, such as two rectangular portions of the same window, or
even two different application windows at the same time. They can also be
different shapes and formats.
Example: You can use multi-region to capture a cascading menu, a useful tool
when creating documentation for software.
For a Multi-Region capture:
Step 1 Minimize the HyperSnap window.
Step 2 Open a cascading (multi-level) menu in another program.
Step 3 Right-click on a file's icon.
Step 4 Choose File/Send to which opens the menu.
Step 5 Press Ctrl+Shift+M to start this capture.
Step 6 Click on each menu in turn.
Step 7 Press the Enter key on the keyboard to finish this capture.
You'll see all regions captured with the default background color filling the
area between the regions in HyperSnap’s workspace.
The program fills space between captured regions with the color you select in the
Capture Settings/Capture tab - Default background color for captures.
Cursor
(No Hotkeys defined) - Captures the mouse cursor (pointer) only, drawn on any
background color as selected in Capture Settings/ Capture tab - Default
background color for captures.
To capture only the cursor:
Step 1 In the Capture tab, click More…
Step 2 Click Cursor…
You’ll have an approximate 3- second delay to position the cursor
where you want it.

41
(This allows you to check that it has the shape needed.)
Another Option:
Define a Hotkey combination for this under Customize Keyboard in
the Screen Capture Hotkeys tool.
Click the new Hotkey combination and the current cursor is captured.
Extended Active Window
Ctrl+Shift+X - Captures the last active window, allowing you to change its size.
After selecting this capture, the program prompts you to specify any size image
you want, even sizes much bigger than the visible screen. (Available only in
Windows XP or later operating systems.)
Important! This capture only applies to resizable windows, which are those
that you can resize with your mouse cursor. It does not work on fixed-size
dialog boxes or some tabbed control windows.
Examples: Use this function to grab a web browser window that shows the entire
web page, even if it might be 4000 pixels high. OR capture a spreadsheet table,
even if you'd have to make the application window 5000 pixels wide to fit it.
Width
Enter the width in pixels to resize the window before capturing it. This value
may be larger than your entire screen width.
Height
Enter the height in pixels to resize the window before capturing it. This value
may be larger than your entire screen height.
Delay time before capture
Enter the delay time in milliseconds that HyperSnap should wait between
resizing the window and capturing it.
If you discover after the capture that the external window frame is resized,
but everything inside the frame is not, you may need to repeat the capture
with a longer delay time.
To capture the last Active Window and change its size:
Step 1 Be sure that the active window you want is onscreen.
Step 2 Click Ctrl+Shift+X.
Step 3 In the box that appears, enter in pixels the Width, Height, and/or
the Delay time you want for the next capture of the last active
window.
Step 4 Click OK.
The window you chose and re-sized is shown in the HyperSnap workspace.

42
Enable Video or Game Capture
(No Hotkeys defined) - Enables the special capture function that snaps images
from full screen games that use DirectX or Glide drivers, or from video players
that play in hardware overlays and cannot be captured otherwise.
To use this capture:
Step 1 In the Capture tab, click More…
Step 2 Click Video or Game…
Step 3 Then select one of the options shown, as described below.
Video Capture (Media Players, DVD etc.)
Click to check this option to capture images from video players on systems
older than Vista.
Game Capture
Click to check this option to enable the Special capture feature for full screen
computer games and other accelerated graphics software that uses DirectX®
drivers.
3dfx Glide
(Enabled only if you have an old 3dfx graphics card and Glide drivers installed
in your computer.) Click to check Glide to capture screens from games that
use the proprietary 3dfx Glide drivers.
Enable post-processing… option
Allows you to set the gamma correction factor for images captured from
games or video overlays, and sets some extra post-processing for 3dfx
Voodoo graphics cards.
3D graphics controller types
Use to select the type of graphics card installed. In most cases, leave this at
the default "other than listed below" setting. Change only if you know you
have one of listed controllers in your system.
Gamma Correction Factor
Allows you to set the gamma correction factor for images captured from
games or video overlays. Example: If your captures come up too dark, set
gamma factor to a value higher than 1 (for example, 1.5).
Set Default Gamma Value button
Sets the default gamma correction factor, which is 1 for most graphics boards,
1.7 for Voodoo 1, and 1.3 for Voodoo 2 and 3.

43
Presentation after capture
(No Hotkeys defined) Click this to switch to the Presentation mode after capture.
In this mode the captured image is displayed in full screen mode (without the
HyperSnap window frame, menus, toolbars, etc.). Only the drawing toolbar is
visible, “floating” in the corner of the screen to let you select drawing tools to
draw on the full screen.
When finished, click either the “Presentation Mode on/off” button on the
Drawing Toolbar, or press the Escape key on the keyboard.
This “unfreezes” this mode and returns the HyperSnap window to its normal size
and appearance. The contents of the screen and what you have drawn on it is
preserved inside HyperSnap so that you can save or print, if needed.
Lock last capture
(No Hotkeys defined) Click this to lock the last capture as the one to always be
used when you choose the Repeat Last Capture command (Ctrl+Shift+F11).
When locked in that way, the same capture operation will be repeated each time
you select “Repeat Last Capture” command or press Ctrl+Shift+F11, regardless of
another most recently executed capture function.
Region Setup Group
These tools can be set to determine the shape, ratio, and size of a Region
capture.
Region shape (Rectangle)
Click the down arrow to choose from a list the region shape to use for region
captures. (Rectangle is the default.)
If you choose a non rectilinear shape, HyperSnap will fill the area around the
captured data with the background color you select on Capture tab of Capture
Settings - Default background color for captures.
Rectangle
Small round
Medium round
Large round

44
Ellipse
Ratio: Any
Click the down arrow to set the aspect ratio of the capture to one of the following
or a customized ratio.
1 : 1
4 : 3
16 : 9
Customize…
Size: Any
Click the down arrow to set the size of the capture to one of the following or a
custom size.
320 x 240
640 x 480
800 x 600
Customize…
Auto Group
Click to check (select) or uncheck (deselect) each of the following:
Copy Check this to instruct HyperSnap to automatically place a copy of each captured
image into the Windows clipboard. The image captured is immediately available
for pasting into any program or document that can accept bitmapped-format
images.
Save
Check this to save each capture automatically as a graphic file. This lets you
quickly collect images of a game in progress, or the status of a program operating
over time, without having to stop to specify each filename to use.

45
Print Check this to have HyperSnap automatically print each captured image using the
default system printer and settings.
If "Automatically print…" in Capture Settings is also enabled you’ll see a standard
Windows Print dialog box that allows you to select the printer and printer settings
after each capture.
When disabled, HyperSnap uses the default system printer and settings.

46
Settings Group
Click to check (select) or uncheck (deselect) each of the following:
Want cursor
Check this to have HyperSnap include the mouse cursor in the captured image.
Hide window Check this to hide the HyperSnap window before capturing the image you want.
Turn this option off (UNcheck it), but only if you want to capture the HyperSnap
window itself. This is needed only if HyperSnap is the reason you're creating the
capture.
Example: A capture may help in sending a bug report to HyperSnap or in showing
a problem with the program.
Hotkeys on
Activates or deactivates Hotkeys in this window. Be sure that this is check-
marked if you want your Hotkeys to be active.
You may also toggle Hotkeys on and off with the Activate Hotkeys button on the
optional Toolbar (opened in the Setup bar) or in the Hotkeys settings boxes in
both the Capture and the TextSnap bars.
Extra delay
Check this to add an extra 4 second delay before a capture. This amount is set
automatically and cannot be changed here.
If you want to change this time, go to “Delay time before capture” box in the
Capture tab of the Capture Settings dialog box. That function enables you to
specify the delay time to capture down to milliseconds (1000 milliseconds = one
second).
Capture settings button

47
Hot keys button
Capture Settings
Click this icon to see a dialog box that enables you to define the various capture
options, including rapid repeat capturing with auto renaming and other advanced
features.
Caution: Before you change a default setting in this box, be sure you know
what the function does and how it changes the program. Note your changes
changed, in case you do not like the results and want to restore defaults.
This window contains several tabs with all the different settings. Click the tab name
below to read more:
Capture tab
Region tab
Button tab
TextSnap tab
Crop & Scale tab
View & Edit tab
Copy & Print tab
Quick Save tab
Capture tab
Use this tab to control basic capture functions. The parameters in this tab are
changed more than any of the others.
Important! When used in dialog boxes, “tabs” refer to the tabs at the top of
the box that allow multiple “pages” in the box to open. Do not confuse these
tabs with the Ribbon Tabs.
Delay time before the capture
Set this time in milliseconds (1000 milliseconds = one second) that the
program will wait before executing the desired capture.
Example: If you set this time long enough, you can open a menu or pop-up
screen to capture.

48
This function enables you to change the delay time if the automatic 4-second
delay provided by the Extra delay check box is too long or too short.
Auto-scroll refresh time
Set this time in milliseconds (1000 milliseconds = one second) between
window refresh operations to be used during auto-scroll. HyperSnap will
refresh the window it auto-scrolls at the rate specified here.
Example: Use this to control to determine the speed of the capture. This
allows you to watch the capture and stop it when you’ve captured what is
needed.
Default background color for captures
Sets the default background color for new captures. This color appears if your
capture is non-rectangular (had rounded corners), or is circular, free-hand,
etc. With rectangular captures, this selection provides a defined background
color if you need to edit the image later with a background.
To change this color use the drawing tools in the Edit tab or the Drawing
toolbar.
Opacity setting determines the transparency of the background color, which
determines how much color shows through the image. (Opacity information is
only saved to PNG and GIF files; it is discarded in other file formats.)
Include cursor image
Check this on to have HyperSnap include the mouse cursor in the capture.
Turn off font smoothing for capture
Check this if you want to turn off font smoothing (anti-aliasing, ClearType)
before making the capture. After the capture, font smoothing is restored to
the original setting.
Example: This is often required for publishing images in print (books, articles).
Play sound when making the snapshot
Check this option to cause HyperSnap to play its trademark camera shutter
sound when executing a capture.
If you want silent captures, UNcheck this box.
Hide HyperSnap window before capturing screen
Check this to have the program's window automatically hide before capturing
the image you want.
Turn this option off (UNcheck it) only if you want to capture the HyperSnap
window itself. This is usually needed only if HyperSnap is the reason you're
creating the capture.
Example: A capture may help in sending a bug report to HyperSnap showing a
problem with the program.

49
Restore HyperSnap window to front after a capture
Check this to have the program's window automatically come back to the front
of the screen after a capture to let you examine results.
Enter full screen presentation mode after a capture
When checked, enters a full screen presentation mode immediately after each
screen capture.
In this mode the captured image is displayed in full screen mode (without the
HyperSnap window frame, menus, toolbars, etc.). Only the drawing toolbar is
visible, “floating” in the corner of the screen to let you select drawing tools to
draw on the full screen.
Example: If you want to use this during a live presentation or demonstration:
Use Full Screen Capture (Ctrl+Shift+F) to “freeze” the screen
temporarily and start drawing on it while commenting and explaining.
When finished, click either the “Presentation Mode on/off” button on
the Drawing Toolbar, or press the Escape key on the keyboard.
The screen “unfreezes” and becomes interactive again with the HyperSnap
window returned to its normal size and appearance. The contents of the
screen and what you have drawn on it is preserved inside HyperSnap so that
you can save or print, if needed.
Do automatic paste, print or save ONLY if a new capture is different...
Turn this option on if you’ve also enabled any of the following options, and if
you want to paste, print, or save new captures that are different from the
previous capture.
Automatic paste or print on the Copy & Print tab.
Automatic save on the Quick Save tab.
Even a slight difference (as small as one pixel) in the new image will trigger
the paste, print, or save action.
Clear transparency for Window Captures under Vista
In Windows Vista composing mode, with Enable transparency checked,
translucent parts of windows show a fuzzy image of what lies beneath. Many
publishers require “clean” shots, without this transparency.
Enable this option to have the background of the window cleared, when you
use Capture/Window or Capture/Active Window functions in HyperSnap.
Mark new captures as "modified" (to prompt for saving)
Check this option on to mark all new captures as “modified documents". When
you try to close this type of captured window or the entire HyperSnap window,
the program will ask you if you want to save them.
Region tab
This tab sets options to modify Region capture functions.

50
Settings that affect all Region Capture modes
Show help and zoom area during region capture
Keep this box checked (the default setting) to show help when you begin a
region capture.
UNcheck this box only if you no longer need region capture help.
Default region shape
Choose from a list the region shape you want to use for region captures.
Click the down arrow to see the available choices. If you choose a non-
rectangular shape, HyperSnap will fill the area around the captured data with
the background color you select in the Capture tab/Capture Settings - Default
background color for captures.
Multi-Region Capture Settings
Start multi-region capture with:
Use the down arrow to choose to start multi-region captures with either a
window/control selector or a region capture.
After starting the capture, you can change to the other type as you wish by
hitting the appropriate Hotkey for that type of capture and continuing.
Use the following options to decide how to compose regions (fragments)
captured during a multi-region capture into one image:
Preserve each fragment relative screen position - Captured
fragments will be positioned relative to each other as they were on the
screen, with the background color filling in the space (as selected in
Capture tab/Capture Settings - Default background color for captures).
Tile fragments vertically - Captured fragments are positioned below
one another in capture order.
Tile fragments horizontally - Captured fragments are positioned
next to one another in capture order.
When tiling, insert a margin of__ pixels
Enter an optional margin between pasted images when you use one of the
tiling methods the program offers.
Allows you to specify an extra margin (background color space) inserted
between the captured fragments if you use either the Tile fragments vertically
or Tile fragments horizontally option.
Specify 0 if you don't want any such space inserted.
Button Tab
This tab sets options related to capturing button controls, such as OK or CANCEL
in dialog boxes or other program interface components.
If the captured area needs enlarging beyond the button's edges, enter a specified
number of pixels on each side of the button. This can enhance the capture when
pasted into a document by providing space around the button graphic.

51
Enter negative values to decrease the area.
To change all four values by 1 pixel, up or down, click the [+] and [-]
buttons in the middle of the group.
To reset all values to zero and start over, click the Reset button.
Example: To capture Internet Explorer 6 buttons with a 1 pixel black frame
around them, set each of the Left, Right, Top and Bottom values to 1
pixel.
Left, Top, Right and Bottom
Specify how many extra pixel lines or columns to capture on each side of a
button.
[ - ] button
Click to decrease all four values around by one.
Reset
Click to set all four values around to zero.
[ + ] button
Click to increase all four values around by one.
TextSnap™ tab
This tab sets options related to capturing editable text from almost any place on
the screen. There are some limitations: This method cannot capture text set as a
bitmap image, nor can it capture text from Acrobat Reader (PDF) files.
Enable TextSnap for:
Plain text capture
Formatted text (RTF) capture
Also captures font type and sizes, color etc.
(Un-checking both the above fields off will completely disable TextSnap.)
Tab-delimited data capture
A special mode that disables the two choices above it. It can be used to
capture data from tables, allowing easy pasting into MS Excel or similar
spreadsheet programs.
Copy captured text to clipboard, and…
Check one of the following options to determine what HyperSnap should do
with the captured text after it has copied it to the MSWindows clipboard.
Don’t show inside HyperSnap
Append new text to the same windows inside HyperSnap (the default)
Replace old text with newly captured inside HyperSnap window

52
Create new text window inside HyperSnap for each captured text
Note: Your settings from the Copy & Print tab for pasting each capture to a
selected window are also considered. You may use them to instantly paste
captured fragments of the text elsewhere, for example, a MS Word document.
___ ms additional delay for "Text from an Object under Cursor" command
To capture text from an elusive object that disappears as soon as you press
any key or mouse button, enter a larger value, such as 3000 ms (3 seconds).
Then click OK.
You can now select Text from an Object under Cursor from the HyperSnap
Capture menu, or press the corresponding Hotkey combination. The actual
capture will occur after the time elapses.
Quickly click whatever is needed to display the object, place the mouse cursor
over it, then wait for TextSnap to finish.
Make "Text from an Object under Cursor" auto-scroll
Check this option to enable auto-scrolling of the contents of the object under
the mouse cursor.
Example: You may be able to capture contents of a drop-down box with many
choices and a vertical scroll bar.
Crop & Scale tab
This tab sets options related to automatically removing unwanted parts of your
image or automatically reducing/enlarging the image size.
Crop Image
Check this to enable automatic cropping of captures, using the values defined
in the boxes in tab. This can save time during batch operations if you
repeatedly crop your captures by the same amount.
From Left - Top
Enter your crop start point as an offset in pixels from the top left corner of
the image.
Width - Height
Enter the width and height of the cropped area.
Set to current selection rectangle
If you have defined a crop rectangle on an image in the HyperSnap
workspace, click this button to set your crop image parameters to its size
and position.
If set correctly, you can easily capture the image at the size you wish to
use, mark the crop you want to use from that point on, and click this
button.

53
Scale Image
Check this to enable automatic image scaling of your captured image. You can
automatically re-scale many captures to fit the same specifications, rather
than scaling manually after captures.
Use the values in the data entry boxes of this group to set up scaling
parameters as you desire.
Width and Height
Enter the scaling width and height either in pixels, as a fraction, or as a
multiple of the original image size. You can scale your original captures
(which may be any size) to a specific size using this function.
If the width and height aspect ratio aren't linked, the image will become
distorted after scaling.
In pixels
Click this to define your scaling to be in pixels (versus a fraction or
multiple of the original size).
Scale factor
Click this to define your scaling to be a fraction or multiple of the original
size (versus pixel count).
Set to current selection rectangle
Click this button to set your scale image parameters to the size of the
current selection rectangle (there must be one, of course, defined on the
currently-active image within HyperSnap's workspace).
Keep Aspect
Check this to maintain the aspect ratio of (width and height) of the image to
avoid distortion. If select different ratios for the two dimensions, the image
may appear "squeezed" or "stretched."
Interpolate
Check this to smooth out scaling (especially "upward") by interpolating pixels
between areas to help improve the appearance of scaled images.
The interpolation method used by this function is the same as that in the
Image/Scale tab.
View & Edit tab
In this tab, determine the location of each newly captured image. The default is to
create a new document window for the image inside HyperSnap, but there are
these 3 other choices.
Create a new window for each capture
Select this to have each image you capture placed in a separate document
window inside HyperSnap's workspace. When more than one picture is

54
opened, tabs appear with the capture or image names at the bottom. You can
click each one to work on it, then easily switch between images.
Replace the image in the current window with the new capture
Select this to have the same document window re-used for new captures. This
is similar to the way older HyperSnap ver. 4 worked. If there is no document
window opened yet, one will be created after the first capture.
Note: With this option selected, you must save or print your previous
captures if you need them. Otherwise they'll get discarded when you perform
new captures.
Paste each new capture onto the current image
Select this to paste each new capture onto the current image. This allows you
to collect a series of smaller captures to make a larger image, as in a collage
or album format.
The new data is highlighted as an object and can be moved as long as it is the
active image. When you click elsewhere or perform another operation, the
previous data becomes "glued" to the base image and cannot be moved.
When you select this option, you may also make additional choices, as shown
below:
Extend drawing space and…
Check this to select one of the options below for automatic extension of the
image space to hold new captures or to tile the space.
Preserve new capture relative screen position
Select this to position multiple captures pasted on one image in the same
general space as originally located on screen. Example: You could replicate
a workspace running multiple programs, but capture only one at a time.
Tile vertically or horizontally
Select one of these 2 options to have new captures inserted at the bottom
(vertically) or to the right (horizontally) of the current selection area.
Since a newly inserted image automatically becomes selected, having this
option enabled will automatically tile the images you capture next to each
other in capture order.
When tiling, insert a margin of __ pixels
When using one of the tiling methods, enter an optional margin between
pasted images.
This margin value is also used by the "Paste at Right, Bottom, Left and
Top" in the Edit tab.
Do not change current image
Click this if you want HyperSnap place captures in the Windows clipboard (or
print or save them), rather than placed images in the workspace.
Settings for these options are in the Copy & Print tab or Quick Save tabs.

55
Copy & Print tab
Use the options in this tab to define specific "paths" or destinations for captured
data in addition to the program's workspace.
Copy each capture to clipboard
Check this to also send captures to the Windows clipboard. The image
becomes immediately available for pasting into any program or document that
can accept bitmapped-format images.
Paste each capture to…
Check this to have captures in the clipboard automatically pasted to a running
application that you select in the box below.
Paste capture to… window name
Choose one of the windows available on your desktop to paste the captures.
HyperSnap will attempt to send the image through the clipboard to this
application window.
The window must be active during the capture, so do not close it after
choosing its name. It must also accept bitmap image format formats via
clipboard functions.
Minimize this window before the capture
Check this to have HyperSnap automatically minimize the application window
you’ve chosen before you begin a capture.
Minimize this window after the capture
Check this to have HyperSnap automatically minimize the application window
you’ve chosen after the image was captured and pasted into it.
Automatically print each capture
Check this to have HyperSnap automatically print each capture you make.
Prompt for printer
Check this when you "Automatically print…". HyperSnap will display a
standard Windows Print dialog box for selecting the printer and its settings
after each capture. If this is disabled, HyperSnap will use the default system
printer and settings.
Quick Save tab
This tab contains the settings for one of HyperSnap's most powerful features. It
allows you to quickly assemble a collection of captures, automatically saving and
naming each one, as well as setting repeat capture times.
Example: Use during game play, or during any other rapid actions.
You can re-name the files later, which is a time saver when capturing a long list of
screens for documentation purposes or to illustrate "steps" of operation.

56
Automatically save each capture to a file
Check this to save each capture automatically to a file. This lets you quickly
collect images of a game in progress, or the status of a program operating
over time, even without having to stop to specify each filename to use.
Save (upload) to FTP server
If you select this option, HyperSnap will try to automatically upload your
images to an FTP server (defined when you click Change button) instead of to
a local disk.
Prompt for name on each capture
Check this to have the program ask for a file name after each capture. After
specifying a name, you can continue with more captures simply specifying a
name after each one.
Auto save To:
File Name
Set this as the base or root filename when auto-saving files. The program will
automatically increment the numerical part of a filename as you proceed with
more captures, keeping the root name constant. This is used primarily when
you disable the Prompt for name function, above.
To change the root name, file format, and directory location, or to specify an
FTP server, user and password, click the Change button next to this field.
Change
Displays the HyperSnap Save As dialog box (when saving to a local file) or
Upload to FTP Server box. You can specify a file name, path, graphics
format, and other parameters as needed to save captured images.
Increment file name by
Check this if have a number sequence in the filename and want to specify by
how much each number increases/increments. By default this is 1, as in
Capture001, Capture002, etc.
If you want to set this differently, type the number here. This allows you to
save many images all with the same "root" name, as in a multi-image
procedure or game plan.
Only the last numeric group is incremented. For example if you have a file
name like Img123-017.bmp, the next image captured will be saved as
Img123-018.bmp.
(For more information read the help on "Increment file name" check-box.)
Start at __ Stop saving at __
If you check “Increment”, then type a “Start at” number and a "stop
saving at" number. This controls how many digits are used in that last
numerical segment.

57
Example: If the "stop saving" number was 99, the file name would be:
Img123-18.bmp (only 2 digits). If it was 000: then the file would be
called Img123-0018.bmp (4 digits in 1000).
Advanced users who understand C/C++ language printf() integer format
specification, can use these settings also setting the File Name to
something like Snap%04d.gif. This specification will take precedence and
will be used even if it's not the last group of digits in the name.
Loop from 1 to "stop" number...
Check this box to set a “loop” sequence that uses the numbers in Start and Stop
repeatedly as you capture. Previous captures using the same file names are
overwritten as the program re-uses the names when doing new captures, saving
disk space.
Repeat first capture every __ sec.
Enter a value in seconds have HyperSnap grab captures of the specified type
every X number of seconds.
Example: If you want to capture the same window every 20 seconds:
1. Set the value to 20, and click OK.
2. Click the Hotkey for window capture.
3. Select the window to be captured.
The program will repeat this capture every 20 seconds. You can also use
decimals (such as .5) to capture within fractions of a second, if needed.
Combined with the automatic incrementing of files, this lets you capture
complex program functions automatically.
To stop automatic repeat captures, press the default "stop auto-capture"
Hotkey Shift+F11 (unless you re-defined this Hotkey to something else using
the Options tabs).
Example: Capture a pre-defined fragment of the screen every 30 seconds and
save it to a file or upload to a remote server.
Continue on error
Check this to continue automatic capturing even if a minor error occurs in
capturing or saving the image.
Use the above naming for new captures even if not auto-saving
When "Increment file name" is selected, check this if you want HyperSnap to
use the naming scheme defined in this box to name images in the HyperSnap
window even when not auto-saving to files.

58
Screen Capture Hotkeys
The Hotkeys box allows you to change the default values of HyperSnap system-
wide Hotkey combinations for image capture functions.
If you have a conflict with other applications that require Hotkeys or if you decide
that our default keys are difficult to use or remember, use this box to change the
defaults to keystrokes you prefer.
Stop timed Auto-Capture
If you want to change the current Hotkey or combination for the operation or
function listed to the right of this field, click inside the field and press the
desired key or key combination.
Special Capture (DirectX, Glide, DVD…)
Select the capture function that HyperSnap executes for a special capture, if
different from the one shown.
Print Screen Key Handling
Select the capture function that HyperSnap should execute upon pressing the
Print Screen key. Choose "None" if you want the Windows system or other
program to handle this key.
Other Hotkeys – Customize Keyboard
Enables you to customize the keyboard by modifying keyboard shortcuts for
tool functions and turn on/off their Hotkey status.
Enable Hotkeys
Be sure that this is clicked to enable all Hotkeys. You may also toggle Hotkeys
in the Hotkeys dialog box in the TextSnap™ tab.
Defaults
Click this to restore HyperSnap default Hotkey assignments.
Revert
Click this to revert back to your original settings, if you accidentally change a
keystroke or decide you want to keep a previously-customized value.
Help
Click this for this help information on Hotkeys.
Clear All
Click this to clear all the Hotkeys to "None." This allows you to set the keys
from "scratch" with no conflicts between existing key settings and new ones.
Close
Click to close this selection box.

59
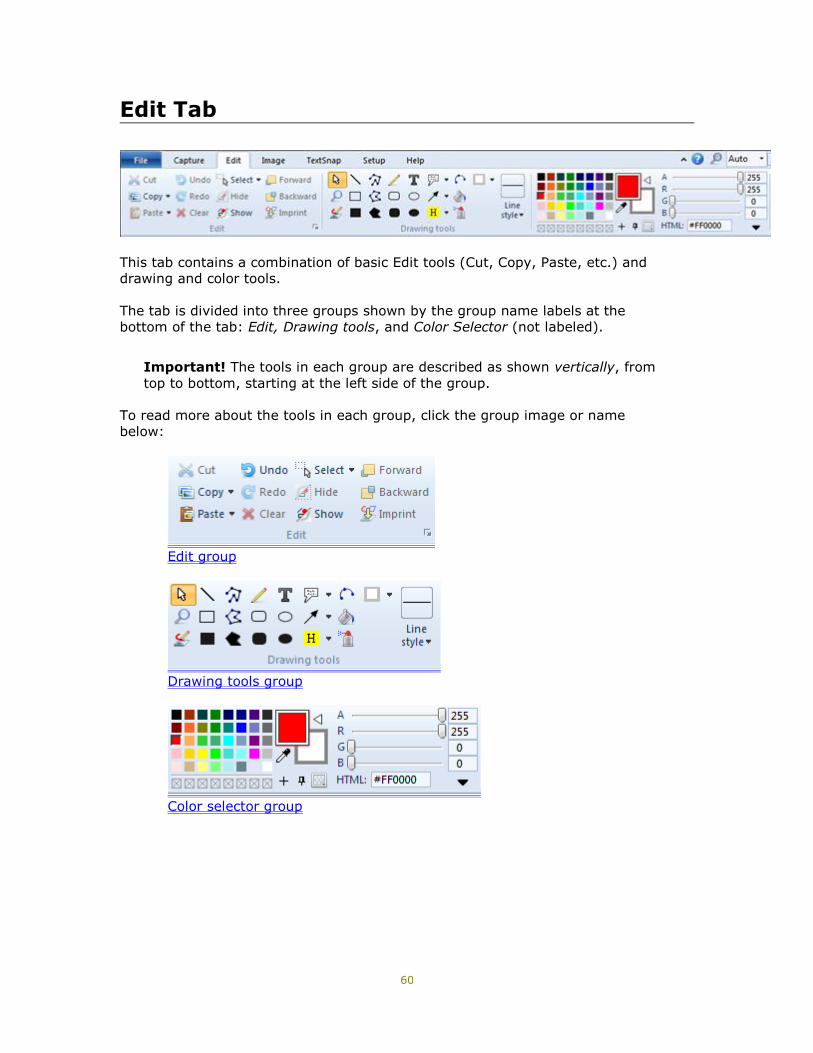
60
Edit Tab
This tab contains a combination of basic Edit tools (Cut, Copy, Paste, etc.) and
drawing and color tools.
The tab is divided into three groups shown by the group name labels at the
bottom of the tab: Edit, Drawing tools, and Color Selector (not labeled).
Important! The tools in each group are described as shown vertically, from
top to bottom, starting at the left side of the group.
To read more about the tools in each group, click the group image or name
below:
Edit group
Drawing tools group
Color selector group
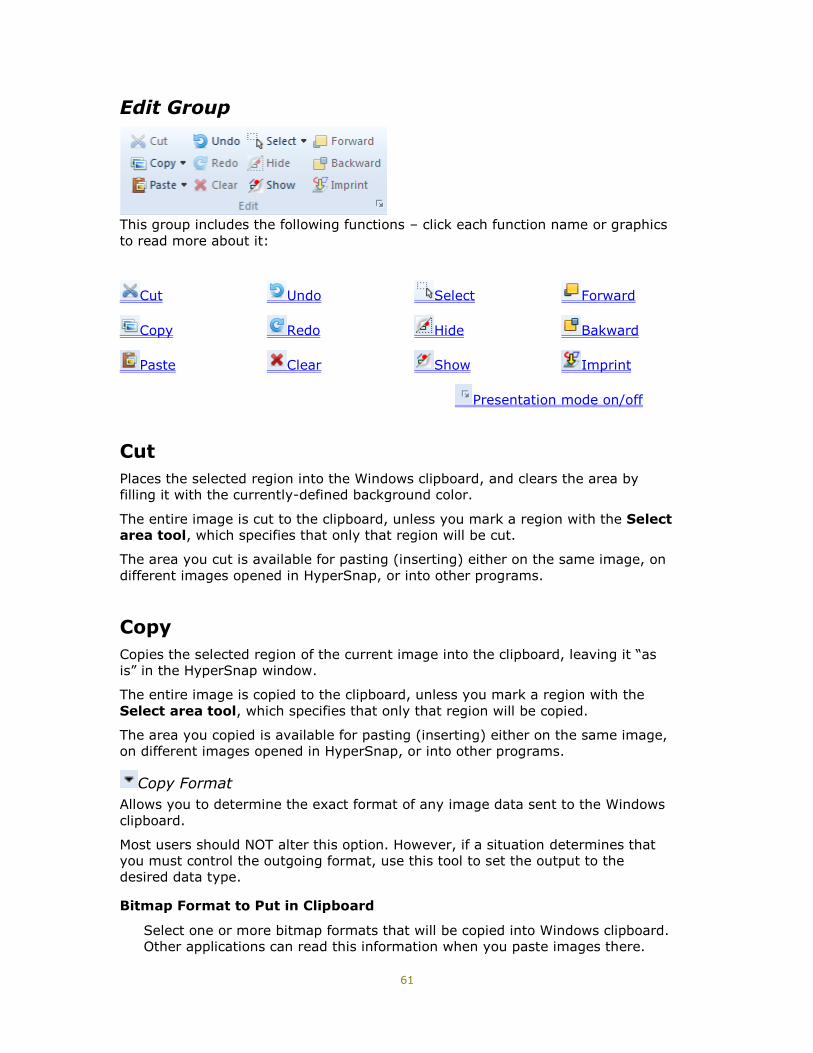
61
Edit Group
This group includes the following functions – click each function name or graphics
to read more about it:
Cut Undo Select Forward
Copy Redo Hide Bakward
Paste Clear Show Imprint
Presentation mode on/off
Cut
Places the selected region into the Windows clipboard, and clears the area by
filling it with the currently-defined background color.
The entire image is cut to the clipboard, unless you mark a region with the Select
area tool, which specifies that only that region will be cut.
The area you cut is available for pasting (inserting) either on the same image, on
different images opened in HyperSnap, or into other programs.
Copy
Copies the selected region of the current image into the clipboard, leaving it “as
is” in the HyperSnap window.
The entire image is copied to the clipboard, unless you mark a region with the
Select area tool, which specifies that only that region will be copied.
The area you copied is available for pasting (inserting) either on the same image,
on different images opened in HyperSnap, or into other programs.
Copy Format
Allows you to determine the exact format of any image data sent to the Windows
clipboard.
Most users should NOT alter this option. However, if a situation determines that
you must control the outgoing format, use this tool to set the output to the
desired data type.
Bitmap Format to Put in Clipboard
Select one or more bitmap formats that will be copied into Windows clipboard.
Other applications can read this information when you paste images there.

62
DIB is Device Independent Bitmap format
DDB is Device Dependent Bitmap format
HTML is the World-Wide Web format, also used by many email clients that
can paste images only in HTML format
If you find that the Copy operation is too slow, disable HTML format, unless you
need it to paste images into Outlook Express or other documents that do not
accept DIB or DDB.
Auto select color format…
Leave this option checked unless you have a specific reason to change it.
Example: One possible reason to change this would be if an image needed to
use less memory, for example when pasting an image into email sent over a
slow Internet connection. This function can automatically reduce image color
resolution from 16 million colors to 256 colors, which produces a smaller
image that will transmit faster.
Select color format - Black and white, 16 colors etc…
If needed, select one of these selections after you Uncheck the Auto select
color format… box. Click the button with the color format you need.
Most users will keep the Auto-select color format option checked rather than
choosing one of these color formats.
Minimize window on Copy operation
Check this option if you often use copy in the HyperSnap window and then
must minimize the program to find the other document window (in an email,
word processor etc.). It saves a step since this tool automatically minimizes
the HyperSnap window, enabling you to more easily see/find the other
document for pasting the image.

63
Paste
Pastes (inserts) the contents of the Windows clipboard into the current image or
as a new image, depending on the paste location selected. (The contents must
have a compatible format with the current image.)
The image is pasted into the currently selected area, as marked by the mouse
cursor, or into the upper left corner if there is no selection.
Immediately after pasting, you may grab the pasted image with primary mouse
button and move it around.
Paste Right, Bottom, Left, or Top Pastes the cut or copied image to the right, bottom, left, or top of either the
currently selected area or the whole image, if no selection is marked.
This function can also add a margin between the selection and the newly
pasted image. (The margin must be previously defined under Capture
Settings/View & Edit tab in the field described as "When tiling, insert a margin
of ... pixels".)
Paste as New Image Opens a new document window within the HyperSnap workspace and pastes
the clipboard's image contents there. (The Windows clipboard must contain a
compatible image for this paste.)
Undo
“Un-does” the last action you performed while making a change to an opened
image. You can click Undo to reverse up to 10 recent changes to your image.
Example: If you changed a color and do not like the result, select Undo to "go
back" to the previous color version, or continue undoing up to 10 changes.
Undo is also one of the default tools shown in the Quick Access toolbar at the
top of the ribbon. This allows you to use this function wherever you are working
in HyperSnap.
Redo
“Re-does” the previous undo action, putting it back one step. A Redo can only
change back an action that has previously been “undone” with the Undo tool.
You can toggle the state of Redo and Undo, back and forth, to examine the last
change you've made to an image as a way of judging if you like the effect.
Redo is also one of the default tools shown in the Quick Access toolbar at the
top of the ribbon. This allows you to use this function wherever you are working
in HyperSnap.
Clear
If image area is selected with the “Select” tool, clears this area to the
current background color. If any shapes are selected, deletes them.

64
Select
Changes the cursor to a Shape Editing or Rectangular selection tool.
In the Edit tab, this tool selects shapes within a rectangle to edit.
In the Image tab this tool selects a rectangular area in the image.
(Needs examples.)
Note: The Select tool must be used to select shapes before the next 5 tools can be
used.
After clicking Select, click the down arrow to select one of these options:
Freehand selection
To manually select the shapes, hold the primary mouse button while dragging the
mouse cursor across the image until the area you want is selected.
Release the button and the area is marked.
"Handles" will appear on the area that will let you alter the selection after it is
marked.
Select all shapes which selects all shapes for changes.
Hide
Click to hide any selected shapes, which makes the shapes invisible.
(Needs how to info.)
Show
Click to show all previously hidden shapes.
Forward
Click to bring forward the selected shapes, which moves these shapes to the front,
above the rest.
Backward
Click to send backward the selected shapes, which moves these shapes down, below
the rest.
Imprint
Click to make the selected shapes a permanent part of the underlying image.

65
The image must then be saved to keep these shapes as part of the image.
Remember to give the image + shapes a new name if you want to also keep the
original image intact.
Presentation Mode on/off
Toggles the full screen Presentation Mode ON and OFF. This shows the image
in the HyperSnap window displayed in full screen mode (without HyperSnap
window frame, menus, toolbars…)
Only the drawing toolbar is visible, “floating” in the corner of the screen. You can
pick different drawing tools from it and draw on the full screen.
Example: This is useful during live presentations because you can:
“Freeze” the screen temporarily and start drawing on it while
describing the process.
When finished, click this button again (or press the Escape key) and
the screen “unfreezes” and becomes interactive again.
The HyperSnap window returns to its normal size and appearance.
The contents of the screen and your drawings are preserved inside
HyperSnap so that you can save or print it if needed.
Note: Another option on the Toolbar is a button described as “Enter full screen
presentation mode after a capture”. This could be used to further automate the
presentation mode. When activated, HyperSnap enters this mode automatically as
soon as you execute any capture.
Drawing Tools Group
The Drawing tools group contains tools for drawing on your images.
To see what each icon does, rest the mouse cursor on it for a name and basic
description. (The individual tool buttons available here are fixed and cannot be
modified.)
Note: These are the same tools with changes and additions that can be found
in the Drawing Toolbar from V.6, and is still available in this version.
(To see the toolbar, click the Setup tab, then Draw tools. The toolbar will
show on the left side of the HyperSnap window.)
This group includes the following functions – click each function name or graphics
to read more about it:

66
View and Shape Selection Mode
Magnify
Drawing Mode Toggle Line
Rectangle
Filled Rectangle
Polyline
Polygon
Filled Polygon
Freehand Draw
Rounded Rectangle
Filled Rounded Rectangle
Add Text
Ellipse
Filled Ellipse
Callout
Arrow
Highlight
Arc
Flood Fill
Air Brush
Freehand Erase Line Style
View and Shape Selection Mode
In this mode, if the image size at currently set zoom level exceeds the
available viewing area, you can press and hold the left mouse button on the
image, and then move it around, or “pan”. It’s a simple and convenient
alternative to using the scroll bars at the bottom or right edge of HyperSnap
window.

67
If you have drawn any shapes over the image, in this mode you may click any
shape to select it for different manipulations. You may select more than one
shape by holding the Ctrl key on the keyboard and clicking on shapes. The
selected shapes are marked with square markers on the shape outline. These
markers serve as handles – they can be grabbed with the left mouse button and
moved to change the shape etc.
Once you have a number of shapes selected, many operations work on that group
of shapes – e.g. “Hide” command will hide all selected shapes, pressing and
holding down the mouse button on one of them and then moving mouse will
move all selected shapes etc.
If you right-click any of the selected shapes and choose an operation with the
menu that appears (e.g. change of line or fill color, adding a shadow), the same
operation will be applied to all selected shapes.
As you can see, the “view and shape selection mode” is very powerful and used
often. For this reason, we programmed the right mouse button to revert to this
mode, when any other mode is currently selected. For example, you may select
“draw arrows” mode and draw several arrows, then right-click on the image to
switch back to selection mode, then pick up and move one of the arrows just
drawn.
If you have several shapes selected and want to de-select all of them, simply click on
the image where there are no other shapes (and don’t hold Ctrl button on keyboard).
You may also select shapes by outlining an area containing them – see the “Select”
tool in the Edit Group of the same ribbon panel.
A right-click on any shape displays a menu that lets you permit to modify this
shape (if no other shapes are selected) or all selected shapes. The functions on this
menu are:
- Set line style – changes the line style of selected shapes to the style currently
shown on the “Line style” button on the ribbon.
- Set line color – changes the line color to the foreground color set on the
“Color selector”.
- Set fill color – changes the shape fill color (if the shape is closed, e.g. circle,
triangle, not opened like a line) to the background/fill color currently set on
the “Color selector”.
- Toggle shadow – shows or hides the shape shadow. The shadow parameters,
like its direction, size, darkness and diffusion are the same as set on the
“Shadow” tool under “Image” tab of the ribbon.
- Edit text and properties – for this function to be enabled, you need to right-
click on a text box, stamp or callout shape, while no other shapes are
selected. You may then edit the text and other properties of the clicked
shape.
- Reset rotation – if the shape on which you clicked was rotated, this will
change it back to not rotated position.

68
- Reset scale – if the shape was scaled to any other size than it was originally
drawn, this will reset it back to its original size.
- Convert to selection – again for this function to be enabled, you must not
have any other shapes selected, and the shape on which you click must be a
closed shape (e.g. circle or ellipse, rectangle, closed polygon etc.) The shape
is converted to image area selection, which then becomes available to any
operations that act on such selection.
Magnify
Acts the same way as a magnifying glass. Move it over the image and press
the primary mouse button to zoom in. The area below the glass is the center of
the zoomed display.
To zoom out, press the alternate mouse button. You can zoom in and out, as
needed.
Drawing Mode Toggle
This tool allows you to toggle between shape editing and drawing directly on
the image.
In shape editing mode, indicated by this button appearance: , anything
you draw on the image may be later selected and moved, hidden, resized,
rotated etc. This mode is best for drawing large shapes over an image, like
circle, rectangles, long lines and arrows or even freehand scribbling, text and
callout items etc. Shapes and text items drawn in this mode may even extend
beyond the image onto the background of HyperSnap window, and later
moved to the image if needed, or you may expand the image area later to
encompass them, if you want them saved to a standard image format like
JPEG, PNG, GIF, BMP.
In “drawing directly on image” mode , the drawing operations change the
underlying image at once – if you draw a line, arrow, circle, text etc. in this
mode, it cannot be edited or changed later any more. You can only undo the
entire operation and repeat it if necessary. This mode is best for correcting
individual pixels on an image, drawing small icons where the exact placement
of every pixel counts etc.
Line
Draws straight lines. To draw a line:
Click where you want the line to start.
Hold down the primary mouse button and drag the tool until the "rubber
band" line has extended to the length and direction you want the line to be
drawn.

69
Release the button and the line will appear, ending wherever the cursor
has stopped.
Rectangle
Draws an empty rectangle on the image using the foreground color defined by
the Foreground color tool in this tab.
To draw an empty rectangle:
Select this tool.
Choose the color and line width you want.
Click where you want the rectangle to start on the image.
Hold down the primary mouse button and drag the tool until the
rectangular box shows around the area you want.
Release the mouse button and the rectangle will be complete.
Filled Rectangle
Draws a filled rectangle on the image using the foreground color defined by
the Foreground color tool in this tab.
To draw a filled rectangle:
Select this tool.
Choose the color and line width you want.
Click where you want the rectangle to start on the image.
Hold down the primary mouse button and drag the tool until the
rectangular box shows around the area you want.
Release the mouse button and the filled rectangle will be complete.
Polyline
Click to draw multiple connected lines on an image. To use this tool, click the
mouse, wherever you want a line to connect with the previous clicked point.
To draw a polyline:
Select this tool.
Choose the color and line style you want.

70
Determine the type of final line you want.
Click where you want the line to start on the image. You’ll see a colored
dot.
Move the mouse to the next point for the line and click. Another dot
appears.
When the line is complete, right click to end the line.
Polygon
Click to draw a closed polygon shape. This is similar to the polyline, except that
the result will be a closed shape.
To draw a polygon:
Select this tool.
Choose the color and line style you want.
Determine the type of final multiple side (polygon) that you want.
Click where you want the line to start on the image. You’ll see a colored
dot.
Move the mouse to the next point for the line and click. Another dot
appears.
When the polygon is complete, right click to end.
Filled Polygon
Click to draw a filled closed polygon shape. The is formed the same way as the
polygon, except for the fill. The shape you draw will be filled in with whatever is
selected as the background color.
To draw a filled polygon:
Select this tool.
Choose the line style and the two colors you want: The Foreground color
for the line and the Background color for the fill.
Determine the type of final multiple side (polygon) that you want.
Click where you want the line to start on the image. You’ll see a colored
dot.
Move the mouse to the next point for the line and click. Another dot
appears. As you continue to draw, the chosen background color fills in
the shape.

71
When the polygon is complete, right click to end.
Freehand Draw
Provides a pencil-like tool for drawing on the image. Choose a color with the
color picking tool, and a width from the Line style drop-down list.
The color picked will become the Foreground color.
Rounded Rectangle
Draws an empty rectangle with rounded corners on the image using the
foreground color defined by the Foreground color tool in this tab.
To draw a rounded-edge empty rectangle:
Select this tool.
Choose the color and line width you want.
Click where you want the rectangle to start on the image.
Hold down the primary mouse button and drag the tool until the
rectangular box shows around the area you want.
Release the mouse button and the rounded-edge rectangle will be
complete.
Filled Rounded Rectangle
Draws a filled rectangle with rounded edges on the image using the
foreground color defined by the Foreground color tool in this tab.
To draw a rounded-edge filled rectangle:
Select this tool.
Choose the color and line width you want.
Click where you want the rectangle to start on the image.
Hold down the primary mouse button and drag the tool until the
rectangular box shows around the area you want.
Release the mouse button and the rounded-edge, filled rectangle will be
complete.
Add Text
Loads a tool that lets you type text onto your image.

72
Define an area on the image for the text. This sets the "wrapping
boundaries" for what you type.
In the dialog box that appears, choose a font from those shown and its
size and color.
(Fonts are any available in your system, as with a Word processor).
Type your text.
When finished, click OK.
After typing text you can move the entire Text box or resize it by clicking view and
shape select tool.
Move the box by holding the mouse button and dragging the crossed arrows.
Resize the box by clicking one of the corners and dragging the double headed
arrow either up or down or diagonally.
Right click the box to change box properties.
Update text immediately
This option appears on the “Text” tab of the Edit Text dialog box. Turn this
option on to instantly preview what you type on the image in HyperSnap
window.
Note: Do not enable this option on double-byte language systems (e.g.
Korean), as it may cause an incorrect text display!
Ellipse
Draws an empty ellipse on the image using the foreground color defined by
the Foreground color tool in this tab.
To draw an empty ellipse:
Select this tool.
Choose the color and line width you want.
Click where you want the ellipse to start on the image.
To draw a circle, hold the SHIFT key while drawing the ellipse.
Hold down the primary mouse button and drag the tool until the ellipse-
shaped box shows around the area you want.
Release the mouse button and the ellipse will be complete.
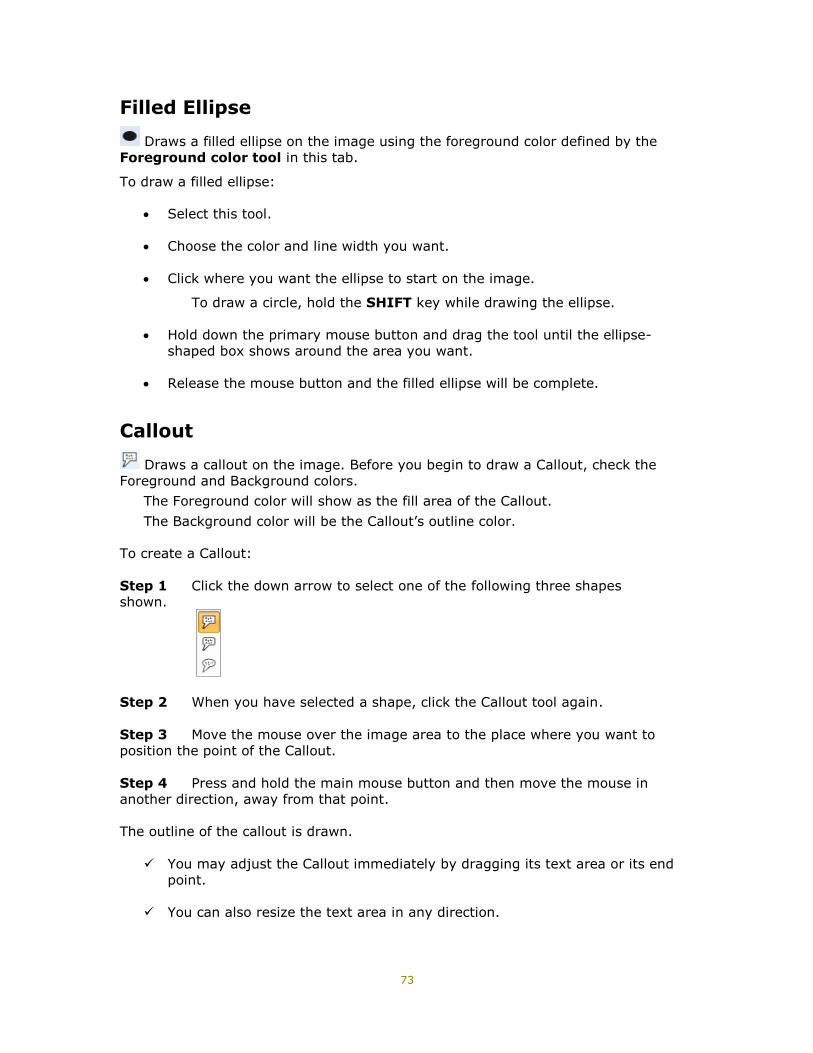
73
Filled Ellipse
Draws a filled ellipse on the image using the foreground color defined by the
Foreground color tool in this tab.
To draw a filled ellipse:
Select this tool.
Choose the color and line width you want.
Click where you want the ellipse to start on the image.
To draw a circle, hold the SHIFT key while drawing the ellipse.
Hold down the primary mouse button and drag the tool until the ellipse-
shaped box shows around the area you want.
Release the mouse button and the filled ellipse will be complete.
Callout
Draws a callout on the image. Before you begin to draw a Callout, check the
Foreground and Background colors.
The Foreground color will show as the fill area of the Callout.
The Background color will be the Callout’s outline color.
To create a Callout:
Step 1 Click the down arrow to select one of the following three shapes
shown.
Step 2 When you have selected a shape, click the Callout tool again.
Step 3 Move the mouse over the image area to the place where you want to
position the point of the Callout.
Step 4 Press and hold the main mouse button and then move the mouse in
another direction, away from that point.
The outline of the callout is drawn.
You may adjust the Callout immediately by dragging its text area or its end
point.
You can also resize the text area in any direction.

74
To enter text, double-click the text area. Then enter text as you would in the
usual Text block.
Arrow
Draws "point to" arrows. You can set the arrow head type (hollow, filled, or
architectural) by choosing a different style from the drop-down list alongside the
tool. This tool uses the Foreground color defined by the color picker
(eyedropper) tool in this tab.
Example: Arrows are extremely handy for pointing to relevant items in a graphic.
You can add to the arrow by using the Text tool to type in a description.
Arrow Settings dialog box
Arrowhead length
Enter the length of the arrowhead, in pixels.
Arrowhead width
Enter the length of the arrowhead, in pixels.
Place arrowheads at the END…
Check this option to have arrowheads placed at the end of the lines you
draw. Clear this selection (uncheck it) to have them at the beginning of
the lines.
Highlight
Click to select this tool, then outline a region on your image.
This area will be “filtered” through whatever color is selected to highlight a particular
image region. The region will look as if the selected color was painted over it using a
translucent medium.
Select Highlight color
Click the right arrow to select the highlight color from the colors shown. You
can also choose whether this will be used for the Foreground or Background.
Arc
Click once to start, then again to set the radius of the arc.
Then click and drag the mouse to set the length of the arc using this radius.

75
Flood Fill
Provides an area fill tool, sometimes called a "bucket fill," because it's similar
to dumping a bucket of paint across the image. The Flood Fill color uses the
Foreground color selected in this tab.
Only pixels of the same color as the one you clicked and those adjacent to it are
changed to the new color.
Air Brush
Functions like an airbrush or a can of spray paint. It uses the value defined on
the Foreground color selected in this tab.
As with Freehand Draw, you can change the Foreground color with the color
picking tool and the size of the spray by selecting a different width from the
Line style drop-down list.
Freehand Erase
Erases parts of the image to the background color defined in the
background color button in this tab.
Change the size of the erasing tool by selecting a different width using the down
arrow and drop-down box alongside this tool.
Eraser Size Box
The drop-down box lets you choose eraser widths from Tiny, Small, Medium,
and Large sizes.
Choose the desired size, then click the Eraser tool to clear areas of the image
using the chosen eraser.
Line Style

76
Set the style of the line used by line drawing commands (arrow, line,
rectangle, rounded rectangle, ellipse, polyline and polygon) by clicking the down
arrow and choosing the style from this dialog box.
The Line Style you choose also changes the widths of all of the painting tools,
including the spray can, pencil, arrow tool. Choosing wider lines broadens the
area of coverage used by these tools on screen.
Smooth lines
When this option is selected, the lines are drawn in “smoothing” mode, using
pixels of the actual line color mixed with the color of the background in different
proportion. This avoids the “staircase effect” that occurs when drawing oblique
lines on most computer screens, which have limited resolution.
Add shadow
This feature enables you to include a shadow with whichever line style you
choose.
Color Selector Group
The graphic below is a summary of the color selection components.
The components are further detailed with examples following this summary.

77
Standard Color Palette
Shows a palette of available colors that can be clicked to be used as
substitute colors for either the foreground or background of an image.
Pick Color from Screen
Provides an color picker (eyedropper) tool to pick the color from the image
by clicking directly on the color desired.
Click the color picker to select a color from anywhere on the image, or choose a
color from the color palette using the tool or the mouse cursor.
The color picker can be used with either the Foreground or the Background color.

78
Add to/Remove from Custom Colors
To keep a color selected for later use, click the + to add the selected color
to the custom colors list and enlarge the palette. If one of the custom colors
below the standard palette is selected, this button changes to a “-“ sign for
removing that color from custom colors palette.
Use Foreground Color
Sets the Foreground and Line color to be used by the various painting
tools. Either click a color in the standard color palette shown, or use the color
picker (eyedropper) tool to pick the color from the image. (The “picked” color
can also be added to the custom colors below the palette.)
The current Foreground color is shown in the top square to the left. When it is
selected, the white arrow points to the left. The Foreground and Background
colors can be swapped by clicking this same arrow.
Use Background Color
Set the Background and Fill color to be used by the various painting
tools. Either click a color in the standard color palette shown, or use the color
picker (eyedropper) tool to pick the color from the image. (The “picked” color
can also be added to the custom colors below the palette.)
The current Background/Fill color is shown in the bottom square to the right.
When it is selected, the white arrow points down. The Background and
Foreground colors can be swapped by clicking this same arrow.
Swap Colors
Click this arrow to swap the Foreground and Background colors.
Pin Colors
Click this pin to use the same color selections for all images.
Make Background Transparent
Click this square to save the file with a transparent background. This is
only available for certain file formats that support a transparency value, such as

79
GIF or PNG. The color you have chosen as the background color from the color
palette will be the color used for transparent areas.
A (Opacity) and RGB Selection A, R, G, B labels to the left of color component sliders are also active and change
mode when clicked.
A – Alpha component or color opacity
Click “A” to toggle the opacity (alpha) only editing mode. When activated,
drawing tools will affect the opacity of pixels only, without affecting color
(RGB).
Choose the opacity of the selected color with the “A” Slider, ranging from 0
(transparent) to 252 (opaque). Opacity determines the transparency of the
background color, which determines how much color shows through the
image.
(Opacity information is only saved to PNG and GIF files; it is discarded in
other file formats.)
A 255 value of Alpha means completely opaque – nothing shows through it.
When background color has an Alpha value less than 255 (32-bits
per pixel images only), you decrease its opacity.
Example: If Alpha = 0, anything you draw will make the image
background completely transparent . You can then draw on it with
foreground colors and an Alpha larger than 0.
When Background color is selected, it disappears for images that use
less than 32 bits per pixel. For these images, background alpha cannot be
changed since all pixels are completely opaque. However, you can make
one background color completely transparent for these images with the
“Make background transparent” tool.
When you draw with Foreground color, alpha decides only how much of
the current color is mixed with what is in the image. This is like painting
with water colors – as you add more water (lower Alpha value) the
painting reveals what’s underneath.
To see which parts of “canvas” are transparent, it’s best to change the smooth
image space of the HyperSnap window to something that has a pattern, such
as a cross-hatch or checker-board pattern. (You can do this under the Setup
tab with the “Backgr.” Button.)
Example 1:
The image here has a white-light gray
checker-board pattern background, with
a red color ellipse shape on top.

80
But since Alpha is set to 128 (50% opacity), the HyperSnap checkered
workspace shows through the red.
In the bottom right corner a rounded rectangular shape has an Alpha = 0,
completely transparent, which means the checkered workspace below shows
through the image with no color.
Example 2:
If you click the “A” label next to Alpha
slider the drawing mode switches to “Alpha
only editing mode”.
Since drawing with background color now
affects the opacity of the image pixels only,
leaving the color values unchanged, the
first image changes to the one shown here
The ellipse with Alpha = 128 no longer
shows the red color, while the rectangular
Alpha = 0 remains essentially the same.
RGB/HSL + Color component sliders
Click either R, G, or B (Red, Green, or Blue), to change to H, S, L (Hue,
Saturation and color Lightness or Luminance). Click them again to toggle
back to RGB.
Slide the Color Component Sliders to the left or right to choose the level of
RGB or HSL you need. You can also click the number values to set those from
0 to 255, if you prefer.
When you have a color selected, such as red, and want to make it
lighter or darker, switch to HSL mode and move the L slider.
If you want the color to become more or less saturated (more or less
grey, instead of showing actual red), move the S slider.
If you want to set all possible colors with the current lightness and
saturation, move the H slider.
The easiest way to see how these look is to choose colors for Foreground and
Background, then use these sliders to see how it changes.
Examples:

81
HTML Code Click the “HTML:” label to copy the RGB code encoded for HTML editing to the
clipboard, and easily paste the value into HTML code editor.
Shows the related HTML Color number based on RGB settings. (HTML colors are
most often used for websites or programs on the web.)
More colors and options
Click to display the alternative colors dialog box where you can use the color
picker (eyedropper) tool to choose your own colors from two color displays.
1. A Standard color matrix array.
2. A Custom color display where you can mix almost any color.

82
Image Tab
This tab contains most of the tools needed to work with any image you capture,
including changing size, shape, colors, and more.
The tab is divided into four groups, shown by the group name labels at the
bottom of the tab: Modify, Rotate, Effects, Colors, and one toolbar, User
tools, at the end of the tab.
Important! The tools in each group are described as shown vertically, from
top to bottom, starting at the left side of the group.
To read more about the tools in each group, click the group image or name
below:
Modify Group
Rotate Group
Effects Group

83
Colors Group
User Tools button
Modify Group
Click below the graphics or name of each button to read more about the tool:
Crop
Cut strip
Auto-trim
Resolution
Scale
Mirror
Resize
Stamp
Crop
Selects a region/section of an image and keeps only the defined area. It’s
similar to using scissors to cut away everything outside the area you want.
When you click Crop, the tool becomes two intersecting lines that you use to
mark the area you want by forming a rectangle over the image.
84
Example: Click and hold the primary mouse button, then drag the lines diagonally
until you enclose the area you want to keep. This is the same process used to
crop a photo. (See the Region Capture tutorial for an example.)
This tool is also in the Edit group in the Edit tab.
Cut strip
This tool opens a drop-down menu with the following two choices:
Cut out strip - Horizontal
Cut out a horizontal strip to remove an unwanted section that runs across an
image.
Examples:
Cut in the middle of an image to remove an unwanted section and join
the remaining parts. (This could be used to remove a horizontal banner
ad from a captured web page.)
Cut at the top or bottom of an image to remove a border or section not
removed when the image was cropped.
Cut out strip - Vertical
Cut out a vertical strip to remove an unwanted section that runs up/down an
image.
Examples:
Cut in the middle of an image and join remaining parts. (This could be
used to remove a vertical "sky-scraper" ad column from a captured
web page.)
Cut along one or the other side of an image to remove a border or
section not removed when the image was cropped.
Auto-trim
Trims off excess blank background from your image, making it smaller.
Results will vary depending on the image.
The best method to see if this works for your current image is to try the function.
You can click Edit /Undo (or the Undo tool in the Quick Access toolbar) if the
image is not trimmed for your needs.
Background Color
Choose Auto-detect or Use current background color. (Auto-detect is the
default and usually the best to use in most situations.

85
Color matching tolerance
Allows you to decide how closely the bitmap pixels of the new color value
must match the "old color" value.
Move the slider all the way to the left (0%) for an exact match. Only
the pixels with the exact specified values of Red, Green and Blue
components will be replaced.
Move the slider to right, selecting higher % values, and more and more
"close color" pixels will be replaced.
Auto-apply effect immediately.
Check this box to see the effect on the image immediately, as you trim it.
Resolution
Use this to change the value of the dots per inch specification. This will
change how different devices or programs render the image. (This is different
from "resizing" or scaling an image.)
Example: If you capture something from a typical computer screen with a
resolution of about 96 dpi, then set the resolution for that image to 200 dpi, your
printer will print this image about half the original size. Why? The dots are now
set to be resolved at a higher count per inch, so the printer driver closes the
space between the dots to match the DPI value within the image.
Horizontal Resolution
Define the horizontal resolution of your captures in Dots Per Inch. Most SVGA
screens are 96 DPI. If you find yourself repeatedly setting this value upward
(or downward) after captures to fit the destination device or usage, change
the default to the value you most commonly require.
Vertical Resolution
Define the vertical resolution of your captures in Dots Per Inch. Most SVGA
screens are 96 DPI. If you find yourself repeatedly setting this value upward
(or downward) after captures to fit the destination device or usage, change
the default to the value you most commonly require.
Apply to current image
Select this check box to apply these settings to the current image.
Use as default for future images…
Check this to use the set value for future images captured from the screen.

86
Scale
This function scales the image inside of the HyperSnap workspace to fit the
dimensions you select. When scaling, you can keep the aspect ratio or you can
alter each axis independently, which will cause the image to distort.
After selecting this function a dialog box appears where you can choose a
percentage of the original size to scale up or down, or change the direct pixel-
based dimensions.
Scale slider
Drag this tool left and right to quickly control the scaling tool percentage of
original size value.
Percent of Original Size
Define a percentage of original image value to use when scaling the image.
The default is 100% or no change.
This value will effect a change in the pixel values, below, as you change it.
You can alternately change the pixel values to effect changes here, the
controls are linked.
Width, in pixels
Define a pixel width size to use for the image. If you’ve checked Keep aspect
ratio, this is linked to the height, which will also change to match the current
ratio.
Height, in pixels
Define a pixel height size to use for the image. If you’ve checked Keep
aspect ratio, this is linked to the width, which will also change to match the
current ratio.
Set scale to current selection rectangle
If a selection rectangle is defined on the active image in the workspace, click
this button to set your scale image parameters to the size of the rectangle.
Keep aspect ratio
Check this to link the aspect ratio of both width and height to keep the image
from becoming distorted. If you do not link the values, and select different
ratios for the two dimensions, the image may appear "squeezed" or
"stretched."
Interpolation mode
Select the method that the program uses to “smooth” pixels of a scaled image
by interpolating between areas. The default method is “High Quality Bicubic”,
which in most cases provides the best results.

87
Mirror
This tool opens a drop-down menu with the following two choices:
Horizontal or Vertical
These functions "flip" the image from left to right (Vertical Mirror) or top to
bottom (Horizontal Mirror), as if seen in a mirror.
Resize canvas
Resizes (by pixel dimension count) both the horizontal and vertical dimensions
of the image. If you resize the image larger, the extra space is filled with the
current background color. You can also change the color depth at the same time
or crop to an existing marked rectangle.
The field described as “Enlarge to contain all shapes” becomes active if any
shapes (lines, rectangle, texts etc.) you have drawn over the image extend
beyond the actual image area. You may select this option to enlarge the image to
contain all such shapes. The space added is filled with the current background
color, which you may set under “Edit” tab of the ribbon, in the “Color” group – for
example the image below shows white as the current background color.
Stamps
Use this tool to define, and later insert Stamps on your image. Stamps are
composed of any other image fragment, and can include styled text that you
define. The stamp text may contain macros with the current date and time, the
image file name, etc.

88
You can put Stamps anywhere on the image or append them to the top or bottom
as graphic headers or footers – image titles or captions.
Clicking the down arrow of this button opens a menu similar to the one shown
above (the menu may contain also additional stamps that you have already
defined.) Clicking the main part of this button or clicking the first item of this
menu brings up the “Edit Stamps” dialog box, show below with a number of
stamps already defined on the list:
This window contains the following controls:
Stamps Folder and Browse button
Displays the path to the current stamps catalog folder. You may change this path
and select a different catalog by clicking the Browse button. You may have up to 40
stamps in a folder. If you need more than allowed, simply create multiple stamp
folders and switch between them as you require.
New Stamp…
Click this to define a new stamp.

89
Edit…
Click this to edit the stamp selected in the list box on the left.
The options available under New Stamp and Edit Stamp are explained in the “New
Stamp/Edit Stamp dialog box” chapter.
Preview…
Click this to preview a stamp selected in the list box on the left.
Delete…
Click this to delete the stamp selected in the list box on the left. The stamp file goes
to Windows Recycle Bin and can be still restored from there until you empty the
bin.
Insert
Click this to insert the stamp selected in the list box on the left onto the image
currently opened within HyperSnap's workspace.
When you click this button, the "Edit Stamps" dialog box will go away and you'll see
the stamp on your image. You may move the inserted stamp around, resize it, or
even double-click it to edit this specific instance of the stamp (for example, to
change the text on it) without altering the originating stamp.
Stamp list
This box lists all the stamps defined so far in the current stamps folder. Click any
stamp name to select a stamp and have the buttons on the right act on it (for
example, edit this stamp, preview it, delete, or insert it on your current image).
The check boxes on the left side of the stamp name indicate stamps that are set to
be auto-inserted on each image you capture. Note that for this to function, also the
box below the list, described as “Auto-insert selected stamps...” must be checked.
Auto-insert selected stamps on newly captured images
The stamps check-marked in the stamp list above will be auto-inserted on newly
captured images only when this option is turned on.
New Stamp/Edit Stamp dialog box
The same dialog box with several tabs at the top shows when you create a new
stamp or edit an existing one. Click the name of the tab below to read more about
it:

90
Image tab
Text tab
Frame tab
Placement tab
Options tab
At the bottom of the window you’ll find the following controls:
Stamp Name
Enter the name of the edited stamp. If the name was already assigned to a
stamp and saved, you may change it here. This creates a copy of the same
stamp under a new name, allowing multiple versions of similar stamps.
Save Stamp/Insert options
These 3 options decide what happens when you click the OK button:
1 Save stamp saves it to your stamp folder for future use, but will not
insert it on the current image in the HyperSnap workspace.
2 Insert on picture only inserts this stamp on the current image within the
HyperSnap workspace. It will not save any changes you make to a disk file
for future use.
3 Insert and save will do both of the above. It saves the changes to disk
and inserts the stamp into the current image or a selected area within the
image.
Preview
Click to see a preview of the fully composed stamp. You may also set the
overall stamp size in this preview mode by re-sizing the preview window.
Image tab
From Selection
Click this to use the image current in the HyperSnap workspace on this stamp.
If a selection rectangle is visible on the workspace image, only the selected
fragment will be used on the stamp, otherwise the entire image is used.
From File…
Click to select an image from a graphics file on disk. This image will be used
as the stamp's background.

91
Edit Image
Click this button to edit the image currently selected for the stamp. The stamp
is saved and the Edit Stamp dialog closes. Your stamp image then appears
inside HyperSnap's workspace, ready for editing with all the program's tools.
Delete Image
Remove an image from the stamp. Only the text part (if any) remains inside
the stamp definition file.
Use this image…
Check to use this image on the stamp. If you clear this box, the image
remains inside the stamp definition file, but when you preview or insert the
stamp, the image is not there.
Image preview frame
This frame displays a preview of a picture you selected to appear on your
stamp.
Text tab
Font button
Click to display a standard Windows font selection box. This new font begins
at the current cursor location. If you selected text prior to opening the font
box, the program applies your font selection to the existing text as well as
from the selected location.
Left-justify text
Click to left-justify the current text paragraph or the selected range of pre-
existing text.
Center text
Click to center the current text paragraph or a previously-selected block of
text.
Right-justify text
Click to right-justify the current text paragraph or a previously-selected block
of text.
Bold, Italics and Underline
Click these buttons to apply bold, italics and underline text styles to a
previously-selected block of text, or to use this new style beginning at the
current cursor location.

92
Date
Inserts the %date% macro into your text box. HyperSnap expands this
macro to the current date at the moment you use this stamp.
Time
Inserts the %time% macro into your text box. HyperSnap expands this
macro to the current time at the moment you use this stamp.
File
Inserts the %file% macro into your text box. HyperSnap expands this macro
to the file name of the image, on which you insert this stamp (for example,
Snap023.bmp).
Path
Inserts the %path% macro into your text box. HyperSnap expands this
macro to the full path and file name of the image, on which you insert this
stamp (for example, C:\Images\Snap097.bmp).
User
Inserts the %uname% macro into your text box. HyperSnap expands this
macro to the name of the user logged into Windows when you use this stamp.
Use this text…
Check to use the text on the stamp. If you clear this box, the text remains in
the stamp definition file, but when you preview or insert the stamp, the text is
not used.
Text edit box
Enter text here. You can apply different fonts, colors, and formatting to any
text fragment, as in a word processor.
Frame tab
Frame width
Enter the width in pixels of a frame to be drawn around your stamp. The
frame is a solid line drawn in the Frame color defined to the left of this field.
Enter 0 (zero) if you don't want any frame.
Make it transparent
Make the selected background color transparent on your stamp. When this
type of stamp is inserted, any part of that color will allow the underlying
image to show through the stamp's contents.
93
Image position: Left and Top
Enter an offset in pixels from stamp top left corner, for the image defined on
Image tab. This value is not used if your stamp does not contain an image.
You may use this together with Text margins values to compose a stamp
that contains non-overlapping image and text.
Text margins: Left, Top, Right and Bottom
Enter the margins for your text field related to the overall stamp size in
pixels. These values are only used if your stamp contains text.
You may use this with Image position values to compose a stamp that
contains non-overlapping image and text, formatted as you desire.
Stamp size: Width, Height and Set to image size
Modify the overall size of your stamp in pixels, using these Width and Height
fields You may also:
Click the Set to image size button to make it exactly the same as the
size of the picture selected on Image tab.
Set the size interactively by clicking the Preview button and resizing
the Stamp Preview pop-up window.
Placement tab
Place at current selection
Select this option to have a stamp placed at the current selection on the
image. If the selected area is too small to fit the stamp, the program expands
it to contain the entire stamp. If you have not defined a selection, the
program places the stamp's origin at the upper-left corner of the image.
Extend picture at top or bottom…
Select this option to insert the stamp to the top (as a header) or attached to
the bottom of the picture (as a footer). The stamp width will be set to the
width of the entire target image. The height will be set large enough to wrap
and fit all of the text and image content of the stamp into the resultant width-
plus-height area.
Place on the picture
Select this option to have this stamp placed on the picture in the HyperSnap
workspace according to options that you make below.
Offset: Horizontal, Vertical and From picture options
Modify the offset in pixels from the selected location in the current image,
using these Horizontal and Vertical fields.

94
Example: If you enter a horizontal offset of 10 pixels, and a vertical offset of
20 pixels, then select From picture: Center, the stamp will be moved 10
pixels to the right and 20 pixels down from the center.
Enter negative values to move in the opposite directions.
Note: if you select any Right edge, the positive horizontal offset is to the left.
Similarly, for any Bottom edge, positive vertical offset is up.
Options tab
Underlay stamp image
Use this option to emboss a sign or logo on an image. Bring a gray embossed
graphics into the stamp, then select this option.
After applying it to an image, the effect looks as if the image is printed on a
very flexible fabric with a 3D embossed logo underneath.
Image masking with a stamp
Check this, then select the color in your stamp that should “mask" the target
image (hide that part of the image as if it was not present) by making all the
pixels to have "transparent" color. If the target image on which the stamp is
inserted does not have any transparency, a transparent color will be selected
automatically.
Blend (Transparent to Opaque)
Use this slider to control how much your stamp blends in with the base image.
It can be set to be Opaque (no blending) to Transparent (100% blended with
the base image).
Auto-add this stamp to all captured images
Automatically inserts this stamp on all images you capture with HyperSnap.
This can save work when must create numerous captures for public release or
other purposes, and you must show ownership, authorship, etc.
Rotate Group

95
Rotate 90 deg. Right
Rotates the image 90 degrees to the right. This is most useful to restore correct
image orientation of digital photos taken when the camera was held vertically.
Rotate 90 deg. Left
Rotates the image 90 degrees to the left. This is most useful to restore correct
image orientation of digital photos taken when the camera was held vertically.
Any Angle
Click here to read more.
Any Angle
Rotates the image to any angle up to 360 degrees, from 180 degrees to the right
or -180 degrees to the left. The image rotates like a spinning painting on a flat
table.
Since the image becomes skewed when you rotate it, the empty areas that
appear to keep the image rectilinear will be filled with the pre-defined default
background color.
Rotate Image Box
Effect application method
Choose Faster or Better Quality, whichever is most important for the image
you want.
Angle
Either move the slide to change the angle, or type in the Angle: box. 180
degrees to the right or -180 degrees to the left.
Auto-apply effect immediately.
Check this box to see the effect on the image immediately, as you rotate it.
Effects Group

96
Click below the graphics or name of each button to read more about the tool:
Shear
Mosaic
Emboss
Sharp/Blur
Shadow
Frame
Shear
This function "shears" the image, which appears as if one horizontal edge is
held in place, while the other is dragged to the left or right. A vertical shear
option is also available.
Examine the preview that appears when you use this function to see how it alters
the image.
Mosaic
Applies a special filter over the image to make it appear to be composed of
mosaic tiles.
Smaller tiles keep more of the original image's information.
Larger tiles replace more of the image with tile borders and can make it
harder to recognize.
Experiment with different tile sizes to see how the effect works.
Emboss
Applies a special filter to the image to give it the appearance of embossed
paper (or metal). You can control the direction of the light, related to where it
appears to originate and in what direction it shines. You can also control the
apparent depth of the embossing.
Tip: Deeper embossing results in more distortion compared to the original image.
Sharp/Blur
Sharpens (focuses) or blurs (softens) your image. You can use it after resizing
an image smaller, to enhance the clarity of text or other small details.

97
Shadow
Adds what looks like a 3D drop shadow to selected areas of your capture.
Shadow has several methods of operation: It can work automatically using your
preferences established within the Shadow dialog each time you capture, or it
can be used manually, applied around a selection as an effect.
Shadow Size slider
Drag this slider to set your shadows to be either closer or farther away from
your selection.
Inner Shade slider
Drag this slider to set the darkness of the shadow's umbra, the core of the
shadow. Dark increases the apparent contrast of the shadow, making light
appear more "harsh and sharp." Lighter values make the shadow "softer", so
the light it is imitating will appear less harsh.
Diffusion slider
Drag this slider to set the diffusion of the shadow.
Moving this slider all the way to left produces a sharp shadow, as if from a
distant point light source.
Moving it to right produces more life-like diffused (soft) shadow, as if from a
closer, sphere shaped lamp.
Direction slider
Drag this slider to change the direction of the shadow. Observe the effect in
the preview window to the right.
Shadow background color
Click the down pointing triangle to select the background color from palette,
or click the color picker (eyedropper) tool to select background color from
anywhere on the screen.
Note: This color is used as a shadow background for the shadow areas that
fall beyond the current image area. If you select a small area inside your
image and add shadow around it, the shadow background will be the old
image, not the new color.
Add around the current image selection option
Check this for HyperSnap to apply the shadow to the image currently loaded
into the HyperSnap workspace. The program will add the shadow around the
current selection on this image, or to entire image if a selection isn't visible.

98
Auto-add this shadow to newly drawn shapes
Select this option to have all shapes subsequently drawn on the image with
any drawing tools include this shadow . You can also turn this feature on or
off with the “Toggle Object Shadow” button on the main toolbar.
Auto-add this shadow to all captured images option
If you have a collection of images that require this shadow (as in a photo
album of screen captures), check this box to force the program to apply the
shadow automatically, without any additional input from you.
Frame
Applies flat or 3D frames around or on your images. You may also set an
option to auto-add a frame to all images you capture with HyperSnap.
Total frame width
Enter the total frame width in pixels.
3D Effect
Click this to give a 3D look to your frame. When enabled, you can modify
additional parameters that will alter the 3D-like appearance.
Outer band parameters
Enter the width in pixels of the outermost part of a 3D frame. Then select
whether it should be raised (has the highlight color) or sunken (has the
shadow color).
Inner band parameters
Enter the width in pixels of the inner part of a 3D frame. Then select whether
it should be raised (has the highlight color) or sunken (has the shadow color).
Add around the current image selection option
Check this to apply the frame to the image currently opened within the
HyperSnap workspace. HyperSnap will draw the frame around the current
selection on the image, if available, or around the entire image, if there is no
visible selection.
Auto-add this frame to all captured images option
Check this to auto-apply this frame to every image you capture.
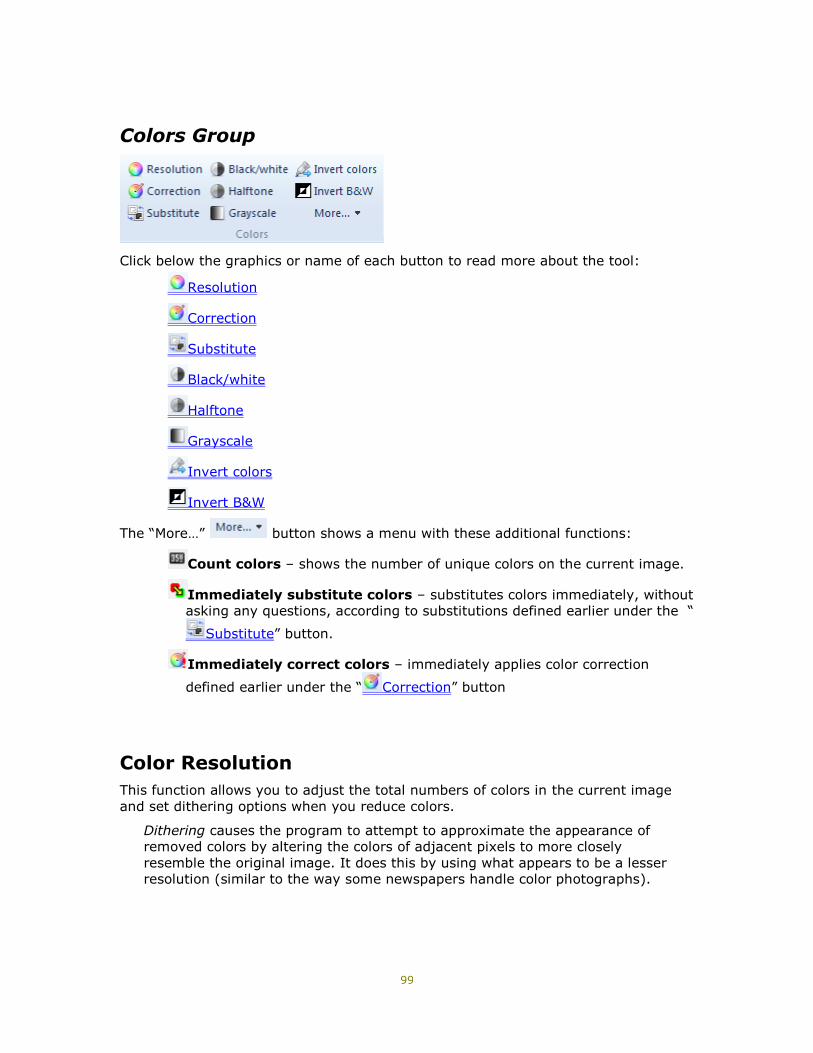
99
Colors Group
Click below the graphics or name of each button to read more about the tool:
Resolution
Correction
Substitute
Black/white
Halftone
Grayscale
Invert colors
Invert B&W
The “More…” button shows a menu with these additional functions:
Count colors – shows the number of unique colors on the current image.
Immediately substitute colors – substitutes colors immediately, without
asking any questions, according to substitutions defined earlier under the “
Substitute” button.
Immediately correct colors – immediately applies color correction
defined earlier under the “ Correction” button
Color Resolution
This function allows you to adjust the total numbers of colors in the current image
and set dithering options when you reduce colors.
Dithering causes the program to attempt to approximate the appearance of
removed colors by altering the colors of adjacent pixels to more closely
resemble the original image. It does this by using what appears to be a lesser
resolution (similar to the way some newspapers handle color photographs).

100
Bits Per Pixel
Select color depth of your image here. The different bits per pixel values
permit the following maximum number of colors in any image:
1 - Only 2 colors, either black and white if you select Std. Windows palette,
or averaged colors from the entire image for Optimized selection
4 - Up to 16 colors
8 - Up to 256 colors
16 - Up to 65536 colors
24 and 32 - Millions of colors.
Bits Per Pixel - Valid for GIF files only
There is no advantage in selecting these bit values, unless you plan to save
your image only to a GIF file, which needs the smallest possible size to
optimize it for fast web page loading. The different values permit the following
maximum numbers of colors:
2 - Up to 4 colors
3 - Up to 8 colors
5 - Up to 32 colors
6 - Up to 64 colors
7 - Up to 128 colors
For file formats other than GIF, select the next number up in the left-most
column.
Example: Instead of 2 or 3 bits per pixel, select 4, which permits up to 16
colors in an image without increasing its file size.
Dithering Methods
Use groups of dots of different colors to approximate any missing colors in an
image color table. These choices are available when you reduce images from
16 or more bits per pixel (bpp) formats to 8 bpp or less.
Click on the different dithering method choices to see an instant preview of
your picture and select the method you prefer.
Palette (color table) choices
If you select 8 bits per pixel or less for your images, these choices tell
HyperSnap the type of color palette (color table) to synthesize when reducing
image colors to the maximum allowed number.
Optimized
Choose a palette that best matches all colors on the original image.
Std. Windows

101
Choose a palette that contains at least the 16 standard Windows colors. The
rest, if available, will be still optimized and available.
Netscape
Choose Netscape browser "safe" palette.
Black & White
Convert the image to black and white colors only.
Revert
Restores the original image, discarding the choices you've made above.
Correction
Use this function to adjust image brightness, contrast, hue, color saturation,
perform gamma correction of colors, convert the image to gray scale or invert
black and white colors.
Convert to Gray Scale
Converts a color image to up to 256 shades of gray.
Invert Black and White
Reverses the black and white values of the image. It only changes areas that
are either pure white or pure black. No other regions are affected unless they
contain spots of either color.
Brightness
Adjusts the overall lightness or darkness of the image (similar to adjusting the
brightness on a TV).
Move the slider to the left or enter a negative value (-1 to -100) to make the
image darker.
Move the slider to the right or enter a positive value to make it brighter.
Contrast
Adjusts the amount of difference between light and dark areas in the same
way the contrast control works on your color television set.
The effect is to "block up" the image (have more contrast between dark and
light areas) or "flatten out" the image (have less contrast between dark and
light areas).
Hue
Adjusts color "bias" of your image, similar to like hue control on your TV. Hue
provides a range of color from one end of the color spectrum to the other, as
in a rainbow.

102
The degrees represent the angle on a "color wheel", where all possible colors
are represented on a wheel like the hours on a clock. By pointing at a certain
degree, you bias the color balance of the image to move closer to that color
position on the wheel.
Saturation
Adjusts the degree or concentration of color from pale to strong.
Example: Your TV often has a control marked "color." Turn it up for more
color; turn it down for less. If turned all the way down, you get a grayscale
image that looks like a black and white photograph.
Gamma Correction
Adjusts the white content of the image, which determines the intensity of the
light and how colors appear on a monitor.
Using gamma correction you can "brighten up" dim images or images that
appear overly "dense." Gamma increases shadow details for image
information that is in darker areas.
You can also darken the look of washed-out images by setting the gamma
level lower.
Apply changes immediately
Allows you to see each change as you make it, rather than waiting to see the
completely changed image.
However, if moving a slider or entering a value takes too long to display, turn
off this option. You may then adjust the controls as quickly as you want, then
click the "Apply" button when you are ready to review all changes.
Automatically apply to all captured images
Turn this on if you want to have the color correction defined above applied
automatically to all images you capture with HyperSnap.
Revert
Click to revert the image to its original state. This will undo all changes made
to the image since you began using this tool.
Reset
Resets all color correction values to neutral values, ones that do not affect the
original image. Reset turns off Gray Scale, Invert Black and White, sets
Brightness correction to 0, Gamma Correction to 1, etc.
Substitute Colors
Performs pixel by pixel substitution of colors on your image, according to the list
you define. You can create each entry in the list as one of two types.

103
A simple one way "replace" substitution.
Example: You can replace green pixels with red.
A two-way substitution or "swap".
Example: Replace a white pixel with black, a black pixel with white.
Color replacement table
Choose color pairs to be replaced or swapped from this list.
The Replace indicator > is a one way operation.
Example: When executed, on white-to-blue, Replace will paint any
white pixel on your image blue with no other changes to the image.
The Swap indicator <> is a two way operation.
Example: Using white-and-blue, the program replaces white pixels with
blue, and blue pixels with white.
This is a multiple selection list box. To select more than one entry, hold the
Ctrl key and click the items you wish to edit.
Example: Selecting two or more items could change all from Replace to
Swap or set the same New Color for all the items.
Add
Add a new entry to the color substitution table. Initially this new entry has
both colors set to white and uses a Replace > operation.
Set the colors and operational mode below the table in the Details frame.
Delete
Deletes the currently-selected entries from the color substitution table.
Delete All
Deletes all entries from the color substitution table. (As usual, you must
confirm the deletion.)
Open List
Opens a color substitution list that was previously saved to a disk file.
Save List
Saves the current color substitution table to a disk file.
Apply
Applies the color substitutions defined in the table to the image currently
opened in the HyperSnap workspace. Offers an immediate preview of the
result.

104
Click the Revert button if you do not like the result.
This function must be clicked BEFORE Done, if you want to keep color
changes.
Revert
When color substitutions are applied, use Revert to “go back”/restore the
image in the HyperSnap workspace to its original look.
Done
When clicked before clicking Apply, closes the Color Substitution dialog box
with NO color changes automatically applied to the image in the HyperSnap
workspace.
To keep color changes, click the Apply button first. HyperSnap keeps your
newly defined (or modified) color table for later use on this and other images.
It will also re-open in the same mode.
Old Color RGB values and picker
See and modify the "Old" color part of the substitution item(s) selected in the
table above. RGB = color components Red, Green, and Blue. Each can range
from 0 to 255.
Often it's easier to use the color picker tool (eyedropper) instead of using
numbers. Click the picker to select a color from anywhere on the screen, or
click it to choose a color from a color table.
New Color RGB values and picker
See and modify the "New" color part of the substitution item(s) selected in the
table above. RGB = color components Red, Green, and Blue. Each can range
from 0 to 255.
Often it's easier to use the color picker tool (eyedropper) instead of using
numbers. Click the eyedropper to select a color from anywhere on the screen,
or click to choose a color from a color table.
Replace and Swap options
Sets a "replace" or "swap" operation for the items selected in the color
substitution table, above.
Replace > is a one way operation.
Example: When executed, on white-to-blue, Replace will paint any white
pixel on your image blue with no other changes to the image.
Swap <> is a two way operation.
Example: Using white-and-blue, the program replaces white pixels with
blue, and blue pixels with white.

105
Color matching tolerance
Allows you to decide how closely the bitmap pixels of the new color value
must match the "old color" value.
Move the slider all the way to the left (0%) for an exact match. Only the
pixels with the exact specified values of Red, Green and Blue components
will be replaced.
Move the slider to right, selecting higher % values, and more and more
"close color" pixels will be replaced.
Experiment with different values by moving the slider multiple times, then
clicking the Apply button and observing the changes on the image.
Automatically apply…
Turn this on to automatically apply the defined color substitutions above to all
images you capture with HyperSnap.
Black/White
Converts the image to a monochromatic black and white image. You can adjust
the dark/light result by dragging a slider back and forth, or by typing the black
level value in the box.
Black level slider and edit field
Enter a value between 0 and 100, or move the slider left or right to adjust
how your image will be converted to black and white.
You can observe an instant preview of your altered image within the
HyperSnap window, and easily stop when you think the image looks as
desired.
Automatically apply…
Turn this on to automatically apply the black and white conversion defined
above to all images you capture with HyperSnap.
Halftone
Converts a color image to a black and white halftone image. This is similar to a
newspaper print of a photograph where they use a halftone "screen."
Grayscale
Converts a color image to shades of gray. (Provides up to 256 gray shades.)

106
Invert Colors
Reverses the colors in the image.
If your original image is a positive (a printed photograph) the result will look like
a camera negative.
If the original is a negative image (like a scan from a film strip), the result will
appear as if it were printed on photographic paper.
Invert Black and White
Reverse the black and white values of the image. This inversion only changes
areas that are either pure white or pure black. No other regions are affected
unless they contain spots of either color.
User Tools
Use this button if you want to configure and launch external programs for image
editing and other tasks.
The tools work with external programs that aid in image processing and can be
opened from this menu. The results can then be loaded back into HyperSnap. You
may configure the programs that appear under this button on the Tools tab of the
Customize dialog box, available on the “Setup” ribbon tab.
TextSnap™ Tab
This tab contains the special tools used to capture editable text from a variety of
programs and from the web. The benefit of using TextSnap, is to capture text “as
is”, with the same font, format, etc. as in the program or location from which you
capture it.
The tab is divided into two groups, shown by the group name labels at the bottom
of the tab: TextSnap and Settings. Click the image or name of the group below to
read more about it.

107
TextSnap Group
Settings Group
Limitations of TextSnap™
TextSnap™ will not capture text from certain types of programs. The following is
a list of those programs known NOT to allow text capture:
Adobe Acrobat and Acrobat Reader (PDF files). This is normally not a big
problem, since Adobe has its own methods for selecting text. Choose the
selection tool from Acrobat Reader toolbar, or right-click the text and select
"Allow Hand Tool to Select Text", and you can use the normal copy/paste.
Programs written in Java, or running in Java virtual machine.
Text that is embedded on previously bitmap images (JPEG, PNG, GIF, TIFF,
BMP etc.)
Many programs using advanced, accelerated graphics, e.g. games, Firefox v.5
and newer web browsers, when the use of accelerated graphics is turned on,
Google Chrome web browser etc.
TextSnap Group
Click the button image or name below to read more about each function:
Text from region
Under cursor
Auto-scroll region
Auto-scroll window

108
Text from Region
Ctrl+Shift+T - Captures text from a screen region as editable text, both
formatted (RTF) and plain text, or as tab-delimited tabular data. The text is
placed into the Windows clipboard, ready to be pasted in any text editor.
To capture text, use the same method as in capturing a region of the image.
After selecting the Hotkey combination above, click and hold the mouse.
Drag it diagonally to form a box over the text you want.
Click the mouse, and the text is captured.
Additional options for text capture are in the TextSnap™ tab of Capture Settings.
Under Cursor
Ctrl+Shift+U - Captures text from an object under the mouse cursor. (An object
is a window or a control, such as a button, selection box, menu etc.) After placing
the cursor above the text you want, use the Hotkey combination (Ctrl+Shift+U)
to capture the text.
Example: Capture the text of an entire pull-down or pop-up menu.
To give yourself time to move the cursor where needed before the actual capture,
set an additional delay for it in the TextSnap™ tab under Capture Settings.
Auto-scroll region
Select this function if the text you want to capture is not completely visible
onscreen and you must scroll down the page to capture it all.
(This is different from Scroll Page where you capture everything below the screen.
In this text scroll, you can capture an area inside a window, allowing you to avoid
unwanted parts, such as columns of advertising on web pages.
When the Region cross-hairs appear on screen, define a region as you would in
the usual Region capture, but add a second step.
Click one corner of the text capture, than move the mouse diagonally to
click another corner, creating an outline or block of the text you want.
Click the down pointing arrow of the vertical scroll-bar of that window to
scroll down past the bottom of the onscreen page and capture the text you
want.
HyperSnap will scroll down and capture the defined text to the end.
To stop scrolling early, press the Escape key on the keyboard; otherwise wait
until scrolling is complete.
This method of auto-scrolling can work well for pages that refuse to scroll and
capture with the “Auto-scroll window” method.

109
Auto-scroll window
Select this function if the text you want to capture is not completely visible
onscreen, and you must scroll down the page to capture it all. Auto-scroll
captures the text as an image of an entire page or document, and is especially
helpful for one that extends below the visible screen.
Click the mouse cursor inside the window at the point where you want to
start the text capture with scrolling.
Click once.
HyperSnap will start scrolling the window and capturing the text.
You can wait until scrolling is complete or press the Escape key to stop scrolling at
any time.
TextSnap™ Settings Group
This group contains the following controls and buttons:
Plain text Turns on plain text capture – text captured with this setting only contains only the
characters visible on the screen, without the specific font face, size of fonts,
colors etc.
Formatted RTF Turns on RTF formatted text capture, which includes font type and sizes, color
etc.
( Caution: Unchecking both these fields off will completely disable TextSnap.)
Tab-delimited data capture Disables the two choices above it. It can be used to capture data from tables,
allowing easy pasting into MS Excel or similar spreadsheet programs.

110
More Settings
Provides a shortcut to the TextSnap™ tab described in the Capture Settings dialog
box in the Capture tab. In this box you can set more/different options related to text
capture.
TextSnap Hotkeys
Click here to read more about TextSnap hotkeys configuration.
TextSnap™ Hotkeys...
This dialog box allows you to change the defaults of the HyperSnap system-wide
Hotkeys for the text capture functions.
If you have a conflict with other applications that require Hotkeys or if you decide
that these default keys are difficult to use or remember, use this box to change
the defaults to keystrokes you prefer.
To use Text Capture Hotkeys, be sure that “Enable Hotkeys” at the bottom of this
box is checked.
Quick Text Capture Mode
Enable quick text region capture by simultaneously pressing one or more of
the following keys and moving the mouse:
Shift
Control
Alt

111
Windows
Using this method can be faster and more convenient than using Hotkeys, as
it does not require moving your hand away from the mouse.
Abort if cross-hair is still visible…
Checking this option enables you to abort text capture by releasing the keys if
you are in the first stage of area selection, with the cross-hair cursor still
visible.
If this option is not enabled, you may still abort text capture by a right-click or
pressing the Escape key.
Require second mouse click…
Checking this option means that you have to click twice in the region to select
text. Click once for each of the opposite corners of the rectangle.
If not enabled, select text by pressing the primary mouse button, moving the
mouse and releasing the button (no second click required).
This setting is only used for text captures make while holding the one or more
of above keys shown above and moving the mouse. Captures using the
default Ctrl+Shift+T Hotkey combination always require two clicks.
Same combination + right click…
Checking this option lets you use a right (secondary) mouse click to instantly
capture a line of text at cursor location when using one or more of the above
keys shown above. This is helpful if capturing text from menu, which
disappears and won't let you capture text otherwise.
Other Hotkeys
To modify keyboard shortcuts and turn on/off their “Hotkey” status, click
“Customize Keyboard”.
Customize Keyboard
Enables customization of keyboard shortcuts and hotkeys, described under
“Customize” button of the “Setup” ribbon tab.
Enable Hotkeys
To use Hotkeys, be sure that the default, “Enable Hotkeys” is checked.
You may also toggle Hotkeys by selecting the Hotkeys dialog box in the
Capture tab.

112
Setup Tab
This tab contains the tools for configuring and customizing the operation of
HyperSnap 7 program.
The tab is divided into three groups, shown by the group name labels at the
bottom of the tab: View, Control, and Window.
Important! The tools in each group are described as shown vertically, from
top to bottom, starting at the left side of the group.
Click the image or group name below to read more:
View Group
Control Group
Window Group
View Group

113
Click below the graphics or name of each button to read more about the tool:
Full screen
Previous file
Next file
Thumbnails
Image tabs
Status bar
Toolbar
Draw tools
Menu
Backgr. (Image background and position inside HyperSnap window)
Skin
Icon
Full Screen
Provides a total-screen view of your image. If the image is larger than your
available desktop, scrollbars will appear on the bottom and right hand sides,
letting you see the entire image in preview mode.
Press Escape (or almost any other key) to cancel the full screen view. If canceled,
use the mouse cursor to scroll down and up, or left and right to view the entire
image.
Previous File
Loads the previous file from the directory you’re currently using into the
HyperSnap workspace. This enables you to go back to examine files within a
directory. This tool and the Next tool provide a "preview" function, where you can
quickly see files within small-to-large directories.
You can also use keystrokes for these functions, pressing Page Down to go
forward and Page Up to go back.
Next File
Loads the next file from the directory you’re currently using into the
HyperSnap workspace. This enables you to go back to examine files within a
directory.
This tool and the Previous tool provide a "preview" function, where you can
quickly see files within small-to-large directories.
You can also use keystrokes for these functions, pressing Page Down to go
forward and Page Up to go back.

114
Thumbnails
Toggle thumbnails on and off. Thumbnails are a small picture gallery of
captured images seen in the vertical panel, by default on the left side of the
HyperSnap workspace.
To hide Thumbnails, click the small pin tool next to the Close button in
the upper right. When hidden, you see only the Thumbnails tab on the left.
To open Thumbnails again, click the tab.
To briefly open Thumbnails, rest the cursor on the tab.
(See also the Thumbnails example and description in the What’s New section.)
Image tabs
Toggle image tabs on and off. If turned on, these tabs show image file names,
by default at the bottom if HyperSnap window, when two or more images are
loaded into HyperSnap simultaneously.
Status bar
Toggles the status bar on and off, as seen at the bottom of the HyperSnap
window. This bar provides information about the size and view of the current
image, so is visible by default. The bar can be toggled off and on again whenever
needed.
Watch the left side of the status bar at the bottom of HyperSnap window for
helpful messages.
Look to the right side of the status bar for the coordinate-based position of the
mouse cursor when it's held over an image. The bar changes to display the
overall size of the image if you move the mouse cursor beyond the image's
window borders.
During some drawing or selection functions, the status bar also shows the size of
a selected area or a drawn shape, such as a rectangle. All sizes and coordinates
are always displayed in pixels.
main_toolbar
Toolbar
Toggle the toolbar on and off to see icons for common functions within
HyperSnap. This bar, now turned off by default, is seen below the current ribbon
tab.
If toggled off, there is more room onscreen for the image. The bar can be toggled
on again whenever needed.

115
Draw Tools
Toggles on and off the drawing toolbar, seen by default at the far left side of
the HyperSnap window. The bar provides the same drawing tools now found in
the Edit tab, though the ribbon tab has more drawing options. Both the tab and
the drawing toolbar can be onscreen at the same time.
The bar can be toggled off and on again, as needed.
Menu
Toggles the HyperSnap menus on, to replace the ribbon tabs if you want to
use the previous version interface. Although the menu interface is still available,
the ribbon tabs contain more functions and tools and are more visual. To return
to the Ribbon, click the View Menu, then click Menu/Ribbon Toggle.
Backgr. (Background and Position)
This allows you to select the color and hatch pattern for the background in
the HyperSnap window. (Background is any area that is not the captured image.)
You can also position the image in the top left corner or centered within the
workspace to have more or less background.
Image Position - Top Left or Center
Select where HyperSnap should display an image when it is smaller than the
available workspace.
Background Hatch Style choices
Select the style of the HyperSnap workspace background for windows with
images. You'll see this background if the image is too small to fill the space, or
if the image has "transparent" areas. such as those in GIF files.
Different hatched backgrounds can help in previewing image transparency.
Example: Use a hatched background to avoid confusion when viewing at a
partially-transparent picture on a solid background.
Without this background, you might not be able to differentiate between the
window background showing through the image or parts of the image that are
the same color as the workspace.
Background and Hatch Color pickers
If you selected a hatch style above, click to select the color for your image
workspace background, and for the hatch lines drawn over it.

116
Skin
Use the down arrow to select the look (skin) of the HyperSnap window. You
can select from a variety of different styles, experiment with it to find the skin
that best matches your needs and taste.
Icon
Select the style of HyperSnap icon that displays in its title bar, Windows
taskbar, etc. This button offers three options: Classic, Modern, or a Custom one
that you select from the icon files available on your system.
Control Group
Click below the graphics or name of each button to read more about the tool:
Mouse keys
Voice control
Hot keys
Startup (program startup and tray icon options)
File types
Customize
Save CFG
Read CFG
FF Add-on (Firefox browser add-on)
Mouse Keys
Controls the mouse with the keyboard, toggling between mouse cursor control
and keyboard control.

117
This allows you to switch to the keyboard to control HyperSnap. Keyboard control
provides detailed, pixel-level accuracy when you're drawing, copying, cutting, or
pasting images within the HyperSnap window.
When enabled arrow, keys move the cursor by single pixels.
Tab hides or shows the mouse cursor (if it's blocking part of your document).
Enter mimics a primary mouse button click.
Click Enter once and HyperSnap acts as if you've depressed the mouse
button and wish to draw (or create bounding boxes, for example).
Click Enter again to simulate letting up on the button.
Click the primary mouse button to cancel mouse button simulation.
Voice
Click to activate or deactivate voice commands used with HyperSnap. The
Voice Command Interface (VCI) uses Microsoft's Speech API 5 (SAPI5)
programming interface. This interface is a standard component of Office XP and
Windows XP.
You may find a list of available voice commands in the “Voice command list”.
Hotkeys
Click this to show the same Screen Capture Hotkeys box shown and described
in the Capture tab.
If you disable hotkeys (by clearing this box or using a toolbar button), you'll have
to use the menu or mouse to execute captures.
If a hotkey conflicts with another program, such as one where you need to
capture screens, clearing this will let you capture the conflicting program with the
mouse or menu. You can then close the offending program and re-check this box,
making captures much easier.
If you run into conflicts with other programs on a regular basis, you can also
change the HyperSnap Hotkey assignments under the Capture and TextSnap
menu,
Startup
Click this to change how HyperSnap shows its icon (either on the task bar or
in the system tray area).
You can also set the program to start automatically with Windows, useful if you
do a lot of screen captures.

118
Auto-Start with Windows
Check this to have HyperSnap add itself to the list of programs that load when
Windows starts.
For all users of this computer option
Check this option to add HyperSnap to the auto-start list of all users of this
computer. With this box cleared, the auto-start option affects only your user
profile.
Usually, within Windows XP or 2000 you must be part of the Administrator
user group to change this option.
Always start minimized
Check this to have HyperSnap start in "iconic" mode rather than showing a
window. In addition, if program is set to display a tray icon rather than a
taskbar icon, this sets the program to load into the system tray only, still
ready for use.
Display system tray icon…
Check this to have HyperSnap display its icon in the Windows system tray.
(The system tray is where the clock is located on the taskbar.) This makes the
program less obtrusive, but always ready for use.
Remember, if you enable this, you'll need to click its system tray icon to bring
the program back. You may also right-click that icon for a menu of most often
used functions.
Do not exit when clicked on …
Check this to set HyperSnap to stay in the system tray when you click the
main window "close" button (the X in the upper right corner). If not, the
program will completely exit when you click this button.
This allows you to hide the main window by using the X without closing the
program. It's always ready for use in your system tray (the area by the clock
in the Windows task bar).
Number of most recent files on File menu
Use this to set the number of recently-used files will be shown on the right
side of in the HyperSnap File tab. These are the files that you recently opened
or saved with HyperSnap.
You must exit and restart HyperSnap program to activate this change.
Clear the recent files list…
Use this option to clear the “recent images” list under the File menu, either from
the files that where already deleted or moved elsewhere, or completely clear the
list from all files.

119
File Types
Click to register selected file types. When set, double-clicking any of these
files types opens HyperSnap directly for editing these files. This allows you to
quickly choose which files go directly to HyperSnap and which types are edited or
viewed by other graphics utilities.
Image file format selectors
Check here if you want to see images of the files types edited by HyperSnap when
you open them within Windows Explorer.
Customize
Click here to alter the appearance and function of the HyperSnap user
interface. These tools let you add or remove buttons on toolbars and customize
the menu and keyboard shortcuts. This dialog box contains several tabs – click
the tab name below to read more about each of them.
Commands tab
Toolbars tab
Tools tab
Menu tab
Keyboard tab
Tabs tab
Options tab
Commands tab
Categories Lists the default menus with toolbar buttons, commands, and menus that you
can add to a toolbar or menu. When you select an item in the list, toolbar
buttons, commands, or menus appear in the Commands box and can be
further customized from there.
Commands Displays a list of commands from the category you select in the Categories
box. To add a command to a toolbar, drag the item you want from the
Commands box onto a toolbar.

120
Toolbars tab
Toolbars Lists available toolbars.
To display a toolbar select the check box next to the toolbar's name.
To hide a toolbar, clear the check box.
Reset Clears any changes you made to the selected toolbar and restores the
toolbar's original default settings.
Reset All button Resets all toolbars to the original default settings.
Tools tab
You may configure what appears on the “Tools” menu here. The tools are external
programs that can be started from this menu. The programs can have optional
arguments, such as the current image file name to enable image processing by
other programs. The results can then be loaded back into HyperSnap.
New Creates a new tool on the “Menu contents” list. Type the tool name, which
may be anything related to the tool’s function, and press Enter.
Next you may define the “command” and optional arguments, as shown
below.
Delete Deletes the currently highlighted tool from the “Menu contents” list.
Move item up or down Moves the currently highlighted item on the “Menu contents” list up or down.
Menu Contents list Shows tool descriptions that appear on the “Tools” menu of HyperSnap.
Highlight any item here to edit the command, adding arguments and the initial
directory of the program that will run for this tool.
Click again, after highlighting it, to edit the description. You may also delete
the item or move it up/down on the list with the buttons described above.
Command field and the browse button Enter here the name of the program to run, or a document to open. It can
even be a web address starting with http://.
If a program or document, you may need to enter the full directory path name
with the file name, if the system does not know where to find it. (Example:
The program does not reside in one of the system “path” directories).

121
You can also click the browse button next to this field to find the program,
command or document file by browsing the disk folders.
Arguments field and the macro menu Enter here the optional arguments for the program specified in the
“Command” field.
If you specify a document file name or a web address in the “Command” field,
the arguments will be ignored. These arguments are usually file names to be
opened by a program, and sometimes additional “command line switches” that
modify the behavior of the program.
The button to the right of the arguments field displays a macro menu. Macros
are special texts that HyperSnap replaces before running the command with
pre-defined contents. Example: If the image was previously saved to a file,
the %path% macro text will be replaced with the full path and file name of the
current image opened in the HyperSnap window
There are 4 special “Temporary file” macro arguments. If you use one of them
in the “Arguments” field, HyperSnap will first save the current image to a
temporary file in the selected format, and will then run the specified command
with the name of this temporary file as an argument. This usually causes the
target program to open this image file.
The program can now process the image or you can edit this image in its own
window. When the target program terminates, HyperSnap checks to see if the
temporary file was modified in any way and, if so, loads it back.
Initial directory and the menu button As an option, use this function to indicate the directory where the program is
currently located.
Example: If you want to specify several file names in the “Arguments” field
that reside in the same directory (folder), you can simply enter the file names
in the “Arguments”, without repeating the full directory path each time.
The button to the right of this field offers a %folder% macro, which is
replaced by the full path of the directory where the current image is located.
You may also select the “Browse...” item here to open the standard Windows
“Browse for Folder” dialog box.
Menu tab (Does this need updating?)
Show Menus for: Lists available menus. At this time, the only available menu in HyperSnap is
the Default Menu. This may or may not change with later releases.
Reset Resets the selected menu to its original settings.

122
Menu animations selector Changes the way menus display when you click on a command. For example,
the Slide Menu animation causes the menus to display with a sliding motion as
if they were skidding across the workspace.
Menu shadows option Displays menus with shadows.
Keyboard tab
Categories Lists the default menus with toolbar buttons, commands, and menus that you
can add to a toolbar or menu. When you select an item in the list, toolbar
buttons, commands, or menus appear in the Commands box and can be
further customized from there.
Commands If you want to assign or remove a shortcut key assignment, click the
appropriate command.
If you don't see the item you want, click a different item in the Category or
Commands box.
Set Accelerator for Displays all available document templates. This option is currently not used in
HyperSnap, the only selection available is "Default".
Current Keys Displays the shortcut key assignments, if any, for the currently selected
command.
Press New Shortcut Key To set new shortcuts key(s), click inside this box. Then press the key or key
combination that you want to assign to the selected command. When finished,
click the Assign button.
Note: If the key combination you try to select is already used by another
command, Assign will not be available.
Assign Assigns the keyboard shortcut in the Press New Shortcut Key box to the
currently selected command or function.
Remove Removes the shortcut key combination defined in the Current Keys box.
Reset All Restores all shortcut key combinations to their default settings.

123
Tabs tab
You may modify here the appearance and position of image tabs, usually shown
when two or more images are loaded into HyperSnap simultaneously.
Image tabs position Choose this to change image tab position to either the top or the bottom of
the image area, or if you want the tabs completely hidden.
Tab style Choose here from several available tab styles. Select each one to see how it
looks and which you prefer.
Show close button on active tab If turned on, the X button to close the current image will appear on the
currently active tab.
If off, the same button is moved to the right side of the tabs row.
Colorful tabs Turn on this option to give each tab a different color.
Hide single tab If only one image is loaded into HyperSnap window, turn on this option to hide
the tabs for more image viewing area.
If you have two or more images opened, the tabs will reappear.
When closing a tab, activate its neighbor… Check this option if, when closing a tab, you want its immediate neighbor to
the right activated, instead of the last (rightmost) tab.
Example: You have tabs named Snap1, Snap2, Snap3, Snap4, and Snap5.
If this option is checked, Closing Snap2 tab will activate Snap3 tab.
If not checked, Snap5 tab would be activated.
Options tab
Show Screen Tips on toolbars
Displays on-screen descriptions of toolbar buttons when the pointer pauses on
them.
Show shortcut keys in Screen Tips When selected, displays the shortcut key in the ToolTip for a toolbar button (if
one is available).
Large Icons Increases the size of toolbar buttons to be easier to see.

124
Menus show recently used commands first When checked, shows basic and frequently-used commands on personalized
versions of the program's menus.
Clear this check box if you want to show all the commands on the menus
without usage tracking.
Show full menus after a short delay If enabled, shows all available commands on an open menu when you rest the
pointer on it. There is a brief delay before the entire menu is visible.
Reset my usage data When clicked, clears menu and toolbar usage data. This is data that is
automatically saved when you choose menu commands and toolbar buttons to
allow HyperSnap to display the most-used commands on the menus and hide
rarely-used commands.
Close button Closes Customize interface. All changes you've made will be automatically
saved.
Save CFG (Configuration)
Saves the current configuration to an external text file. This includes all
HyperSnap options and settings, except for menu and toolbar customizations.
These settings may be later restored with the "Read Configuration" function that
follows.
Read CFG (Configuration)
Reads the configuration settings from an external text file. This includes all
HyperSnap options and settings, except for menu and toolbar customizations.
These are settings that have been earlier saved with the "Save Configuration"
function above.
FF Add-on
Installs the HyperSnap Firefox version 4 and above Add-on to enable those
who use Mozilla Firefox as their browser to be able to use all the screen captures
available in HyperSnap. (This is especially needed for the auto-scroll options.)
Clicking this will automatically open Firefox with an add-on box to click to install.

125
Window Group
Cascade
Arrange open document windows so that they overlap, from top left towards
bottom right.
Tile
Arrange open document windows into a "tiled pattern" so that they cover all
available work space, but don't overlap each other.
Windows
Click here to read more.
Windows
Opens a dialog box that lets you manage currently opened document
windows. With this, you can manage large lists of open windows by assigning
them into groups.
Example: If you have eight windows open, but want to close four of them
scattered through the list.
Click on the Windows > Windows.
Select the windows you want to close. (Click and hold the Ctrl key to
select more than one at a time.)
Click the Close Window(s) button. Only the selected four will be closed,
leaving the other four files or captures available for editing.
You can use this process to switch to the checked window on a list by hitting
Activate (or "bring up" from an icon multiple windows). You can also use this to
Cascade only the selected windows, or perform any of the listed functions only on
the windows you wish to manage.
If you have many windows open and want to "clear the decks" to clean things up,
select all your open files, then click Minimize. They'll all be minimized within
HyperSnap's interface.
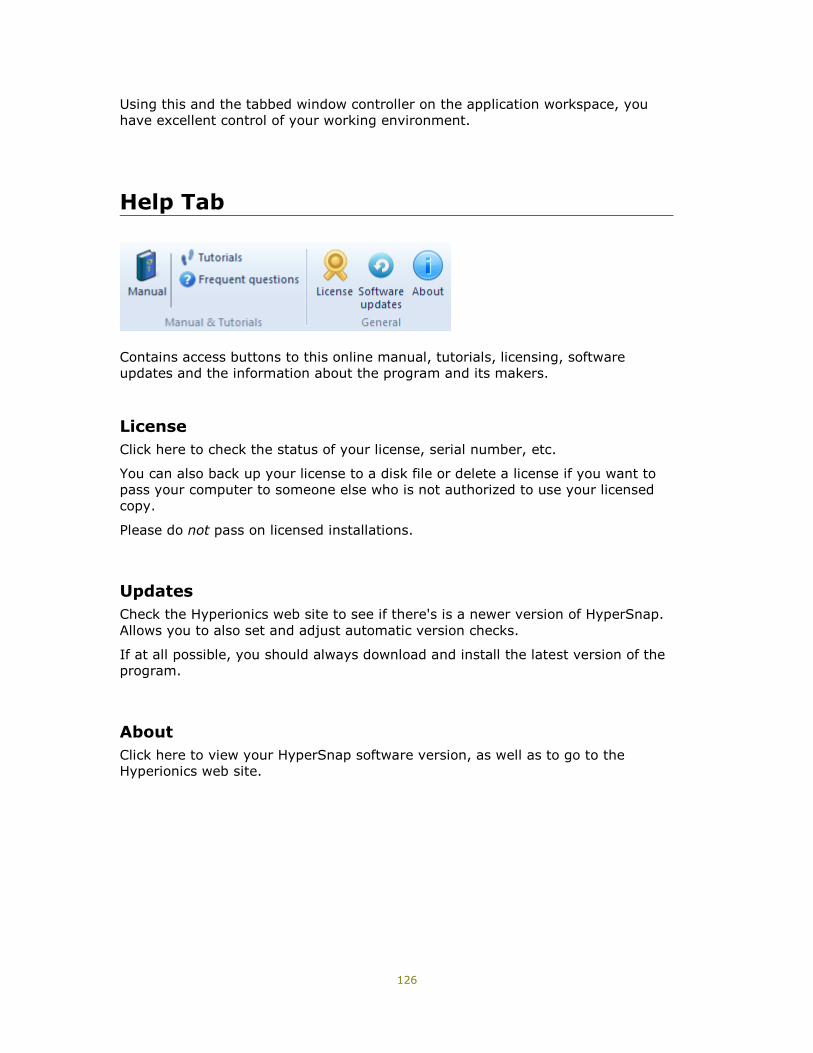
126
Using this and the tabbed window controller on the application workspace, you
have excellent control of your working environment.
Help Tab
Contains access buttons to this online manual, tutorials, licensing, software
updates and the information about the program and its makers.
License
Click here to check the status of your license, serial number, etc.
You can also back up your license to a disk file or delete a license if you want to
pass your computer to someone else who is not authorized to use your licensed
copy.
Please do not pass on licensed installations.
Updates
Check the Hyperionics web site to see if there's is a newer version of HyperSnap.
Allows you to also set and adjust automatic version checks.
If at all possible, you should always download and install the latest version of the
program.
About
Click here to view your HyperSnap software version, as well as to go to the
Hyperionics web site.

127
Quick Access Toolbar
By default located at the top - left of the Title bar, the Quick Access Toolbar holds
the tools used most often and placed where you can click them, regardless of the
tab you’re using below.
The default list shows the following tools from left to right. (Most are also
available as key combinations.)
Create a new image (Ctrl+N)
Open an existing document (Ctrl+O)
Save the active document with a new name (Ctrl+S)
Upload – opens a menu for several upload functions
Print the active document (Ctrl+P)
Copy the selections and put it on the clipboard (Ctrl+C)
Paste on the current image/insert clipboard contents on to the
image (Ctrl+V)
This includes a down arrow for selecting where to paste.
Undo the last action (Ctrl+Z)
Redo the previously undone action/the last “undo” (Ctrl+Y)
The Customize Quick Access Toolbar icon and menu. Use it to add
other tools to this toolbar or remove the default ones.
You can also place the toolbar below the ribbon or minimize the
ribbon (described in the Tab Bar Tools section).
Tab Bar Tools
These tools are at the right side of the ribbon tabs bar. From left to right, these
tools include:
Minimize the ribbon (Ctrl+F1)
Click this tool to minimize the ribbon, showing tabs only. When minimized,
only the ribbon tabs are visible, leaving more space to view images.

128
To use a ribbon tool when minimized, click the appropriate tab to show its
tools.
The ribbon will auto-hide after you click the needed tool OR when you click
outside the ribbon if nothing is selected.
Click the minimize tool again or press Ctrl+F1 keys again to restore the ribbon,
showing tabs and tools.
You can also right click (click the secondary mouse button) on any tab to
minimize/maximize the ribbon.
Help button
Offers quick access to this documentation.
Toggle zoom
Switches between 100% and Auto magnification.
Zoom
Sets the magnification (zoom) factor for viewing the
current image. Use the down arrow to see a list of percentages
to select for sizing the image.
Values above 100% enlarge the picture; values below reduce
the size.
You may also choose the Auto zoom option to center the
image and make it fit the workspace, or Fit which reduces or
expands an image to fill all available space within the
HyperSnap window.
Voice command list
You can use the voice commands listed here within HyperSnap. If any problems,
go to the Windows Control Panel and locate "Speech Recognition" or a similar
icon.
Click Configure Microphone... to adjust your volume levels and the other
settings of your microphone.

129
Then click the "Train" or "Train Profile..." button there, to train the speech
recognition engine to recognize your voice better.
Also try speaking more slowly and more clearly. Voice support is still a work in
progress, and computers still require speech commands be delivered a bit
more clearly and at a slower-speed than we humans do.
Be sure to use a high quality microphone. As with all current speech recognition
technology, this one requires a respectable pause between all commands.
If you have an updated, faster computer, you will usually be able to speak
commands faster. But if you have considerable background noise in your work
area, your speech commands will be disrupted, despite a fast computer.
To use voice commands in HyperSnap:
Say Capture or Snap, (add “the”, if desired), then say one of the following:
Full Screen
Desktop
Window
Active Window
Active Client
Region or Rectangle
Multi Region
Pan Region or Move Region or Pan Rectangle or Move Rectangle
Repeat
Drawing Tools Commands
Say Take or Get, (add “the”, if desired), then say one of the following:
Line
Pencil
Miscellaneous Commands
Microphone off
Activate or Restore (to restore and bring the HyperSnap window to the
front)
Minimize or Iconize (to send it to the system tray or task icon list)
Maximize
Help or What can I say? (displays brief help which has links to this file)
For users with physical limitations, speech technology offers new-found freedom
and will allow many to use our program for the first time with relative ease.

130
Menu Reference
Although the Ribbon interface is the primary interface in V.7, the previous Menu
interface is still available.
Change to/from Ribbon/Menu
To access the Menu interface from the Ribbon, click
Setup.
Then click the checkbox for Menu.
To return to the Ribbon interface, click the View
Menu.
Then click Menu/Ribbon Toggle.
Reference Definitions for Menus Virtually every menu item is now found in one of the ribbon tabs. To find a
definition for a menu item, first try a Help search for the same or a similar
name.
Contact and Support
For support, please first visit the Hyperionics Technology LLC web site and click
"Support" link below HyperSnap header.
Frequently Asked Questions (FAQ)
An FAQ list is posted on the Hyperionics website, as well as a moderated
http://hyperionics.com/?Page=forum2 where we will endeavor to answer your
questions as quickly as possible.

131
If you don’t find the answer to your question in the forum, please send an email
message to [email protected].
We appreciate and welcome any comments, enhancement requests, improvement
suggestions and bug reports that you may have. Please email them directly to
Credits
This manual/online help was updated to Version 7 by Carole Hall, MA Instructional
Technology. Carole worked in Silicon Valley for several decades, both as a
technical writer and trainer, and as a technical communication instructor at S.F.
Bay area universities. She is also a long-time HyperSnap user.
Currently a contract writer/editor and trainer, she offers these services through
her company, HallTech. Email her at [email protected] for contracting
information.
Many thanks to all HyperSnap users who helped with beta-testing of
version 7, suggesting new features and enhancements, often working to
develop better icons for the product and donating their time and
enthusiasm in countless other ways. You can still find their posts at
Hyperionics http://hyperionics.com/?Page=forum2, in the “HyperSnap
Feedback and Beta Tests” section – among them Tony “Simicro”, Nick
“aoz”, Don, Alexander, Thomas “the lesser admin”, Carole, and others.
Thank you, I could not make it without you!
Greg

132
Disclaimer Agreement
Software License Agreement for HyperSnap.
This is a legal agreement between you and Hyperionics Technologies, Inc.
covering your use of HyperSnap (the "Software"). Be sure to read the following
agreement before using the Software. BY USING THE SOFTWARE (REGARDLESS
IF YOU HAVE REGISTERED THE SOFTWARE OR NOT), YOU ARE AGREEING TO BE
BOUND BY THE TERMS OF THIS AGREEMENT. IF YOU DO NOT AGREE TO THE
TERMS OF THIS AGREEMENT, DO NOT USE THE SOFTWARE AND DESTROY ALL
COPIES IN YOUR POSSESSION.
The Software is owned by Hyperionics Technology, LLC and is protected by United
States copyright laws and international treaty provisions. Therefore, you must
treat the Software like any other copyrighted material (e.g., a book or musical
recording). Paying a single user license fee allows you the right to use one copy
of the Software at a time. You may not permit the software use by two or more
people at the same time. You may install it on two or more computers for your
own use only. Corporate customers with multi-user network licenses should
undertake a reasonable effort to make sure that the total number of concurrent
users within their organization does not exceed their license user limit. You may
not rent or lease the Software, nor may you modify, adapt, translate, reverse
engineer, decompile, or disassemble the Software. If you violate any part of this
agreement, your right to use this Software terminates automatically and you
must then destroy all copies of the Software in your possession.
The Software and its related documentation are provided "AS IS" and without
warranty of any kind and Hyperionics Technology expressly disclaims all other
warranties, expressed or implied, including, but not limited to, the implied
warranties of merchantability and fitness for a particular purpose. Under no
circumstances shall Hyperionics Technology be liable for any incidental, special, or
consequential damages that result from the use or inability to use the Software or
related documentation, even if Hyperionics Technology has been advised of the
possibility of such damages. In no event shall Hyperionics Technology' liability
exceed the license fee paid, if any.
This Agreement shall be governed by the laws of the Commonwealth of
Pennsylvania. If for any reason a court of competent jurisdiction finds any
provision of the Agreement, or portion thereof, to be unenforceable, that
provision of the Agreement shall be enforced to the maximum extent permissible
so as to effect the intent of the parties, and the remainder of this Agreement shall
continue in full force and effect.
The Software and documentation is provided with RESTRICTED RIGHTS. Use,
duplication, or disclosure by the Government is subject to restrictions as set forth
in subdivision (b)( 3)( ii) of the ASPR Rights in Technical Data and Computer
Software clause as 252. 227- 7013. Manufacturer is: Hyperionics Technology,
3146 Chestnut Drive, Murrysville, PA 15668, USA, [email protected].
Copyright (C) 1995-2011 by Hyperionics Technology, LLC. All rights reserved.
Hyperionics, HyperSnap, HyperSnap-DX, HyperCam and FileBox eXtender are
trademarks of Hyperionics Technology, LLC.