html5: best practices - amazon web servicesbrightsignbiz.s3.amazonaws.com/documents/html5 best...
TRANSCRIPT

HTML5: BEST PRACTICES
BrightAuthor Software Version: 4.0.0.x BrightSign Firmware Version: 5.0.x
BrightSign, LLC. 16795 Lark Ave., Suite 200 Los Gatos, CA 95032 | 408-852-9263 | www.brightsign.biz
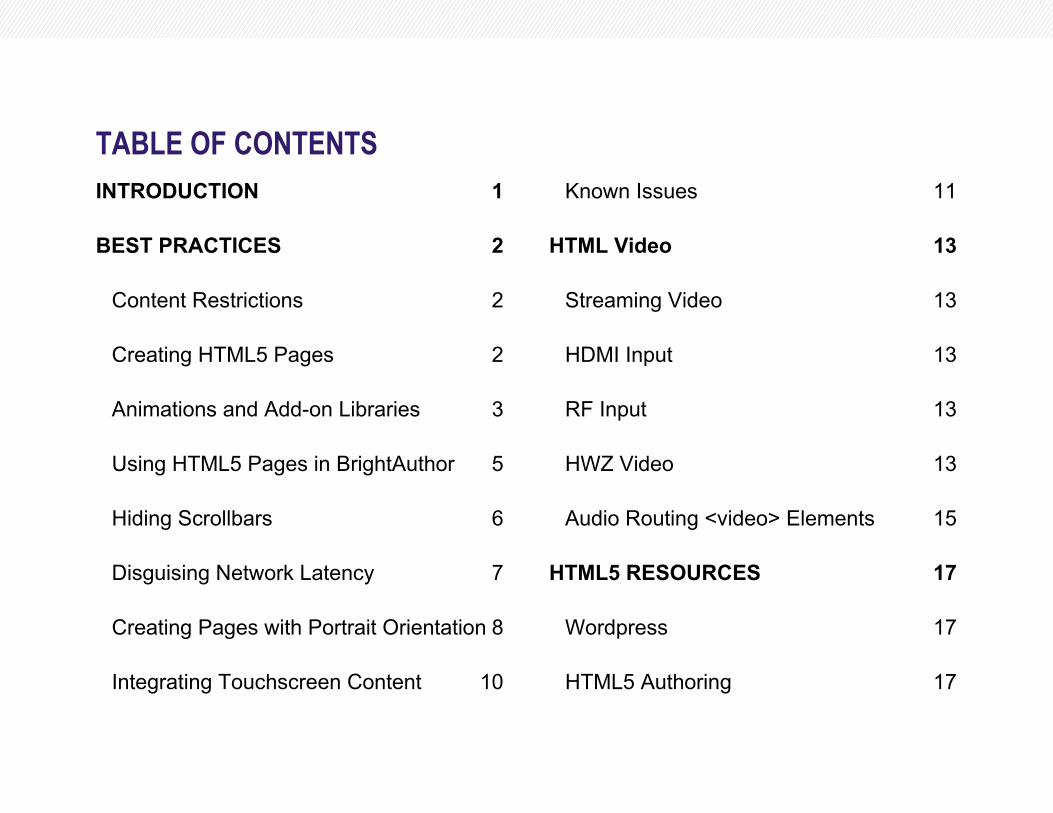
TABLE OF CONTENTSINTRODUCTION 1
BEST PRACTICES 2
Content Restrictions 2
Creating HTML5 Pages 2
Animations and Add-on Libraries 3
Using HTML5 Pages in BrightAuthor 5
Hiding Scrollbars 6
Disguising Network Latency 7
Creating Pages with Portrait Orientation 8
Integrating Touchscreen Content 10
Known Issues 11
HTML Video 13
Streaming Video 13
HDMI Input 13
RF Input 13
HWZ Video 13
Audio Routing <video> Elements 15
HTML5 RESOURCES 17
Wordpress 17
HTML5 Authoring 17
ADVANCED TECHNIQUES 18
Simple Webpage Script 18

1
INTRODUCTION The BrightSign 4K series of players allows you to publish content using HTML5. You can use a single, full-screen page of HTML5 content as a presentation, or you can display HTML5 within a BrightAuthor zone, along with other multimedia content. This feature greatly increases your creative options when using BrightSign players. These are not general-purpose instructions for writing HTML5 code or using HTML5 publishing software, but you can use this guide to get the most out of your HTML5 presentations and ensure that your HTML5 content works seamlessly with your BrightSign players.

2
BEST PRACTICES This section is intended for anyone who wants to use HTML5 content in BrightAuthor presentations; there is also an advanced section at the end of this guide for users who wish to write custom BrightScript code.
Content Restrictions The following list outlines content restrictions associated with HTML5 pages:
• A BrightSign 4K player is not intended for use as a general purpose web browser. It is best to think of BrightSign units as HTML5 players with interactive capabilities, not web-surfing tools.
• BrightSign players do not support Flash content. Any HTML5 pages that have embedded flash content will not display correctly. Most Flash authoring software, especially the Adobe Creative Suite, have tools that allow you to export flash content as HTML5.
• BrightSign players do not support the OpenGL API for JavaScript. • The functionality of streaming-video objects, such as YouTube and Vimeo, can be unreliable. However, you can
place streaming <video> elements into your HTML5 pages. • HTML pages can be displayed using 4K video modes (3840x2160 or 4096x2160), but players do not support a
native 4K HTML graphics plane: Pages must be specified as 1920x1080 (or 2048x1080); it will then be upscaled to 4K.
• The image size on HTML5 pages is limited to 1920x1080x32bpp. The player will fail to display pages that contain images that are larger than this restriction. If a 4K video mode is being used, the player will upscale the image accordingly.
Creating HTML5 Pages Follow these steps when creating HTML5 pages:
1. Make sure the HTML5 page has the same aspect ratio as your signage display. If you are using HTML5 content in a BrightAuthor zone that is smaller than the screen, fit the page to the same aspect ratio as the zone.
2. Use a master Div aligned to 0,0 when building an HTML page. This will ensure correct alignment.

3
3. When creating an HTML5 site, make sure that all webpage assets (image files, video files, etc.) are contained within the same folder on your local disk. This folder is a “site folder,” meaning that all assets in this folder and its subfolders will be used in the production of the webpage. If these assets are not in the folder, they will not display when the project is published.
4. You can test the layout and appearance of an HTML5 page locally by opening it with Google Chrome, which uses a similar browser-rendering engine to BrightSign players. If the webpage is drawing assets from multiple file or storage locations (for example, from local storage and a remote web server), use Safari to test the page instead.
5. If you want to publish graphics-intensive presentations (e.g. <video> elements or multiple transforms) using HTML5, we recommend using a Class 10 (10Mb/s) SD card.
Animations and Add-on Libraries This section outlines some general rules about support for animations and add-on libraries for the WebKit engine on BrightSign players.
Vector Animations The SVG protocol should be used to specify vector animations.
Bitmap Animations Bitmap animations display smoothly when they are 1/3 or less of a 1080p HTML canvas. Setting the canvas size to 720p allows for larger high-quality animations to occupy the screen.
CSS Transforms All CSS transforms should be specified as WebKit transforms. When performing a transform on a <div> or graphics element, we do not recommend specifying the transform in-line.

4
The following code shows an example of an effective CSS transform for a BrightSign player:
<style>
.flipme{
-webkit-animation-name:flipon;
-webkit-animation-fill-mode:forwards;
-webkit-animation-iteration-count:1;
-webkit-animation-duration:2s;
}
@-webkit-keyframes flipon
{
0% {-webkit-transform:rotateY(0deg);}
30% {-webkit-transform:rotateY(-90deg);}
100% {-webkit-transform: rotateY(360deg);}
}
</style>
Add-on Libraries The jQuery and Prototype libraries are supported on BrightSign players. As a general rule, any add-on libraries for animation will work if they use WebKit-based transformations. To determine whether a certain library is compatible, you can look at a non-minified version of the library to see if it uses WebKit-based transforms.
Push Technology The WebSocket protocol and long polling technique have been tested and proven to work on BrightSign players.

5
Using HTML5 Pages in BrightAuthor These are the general rules for using HTML5 content in BrightAuthor:
• You can have multiple HTML5 enabled zones in a BrightAuthor presentation. • HTML5 content can be inserted into a Video or Images zone or
an Images Zone. You cannot use HTML5 content in a Video Only zone.
• You cannot currently use background image scaling to fit zones of different sizes. The dimensions of the background/page must match the size of the zone in BrightAuthor.
• HTML5 content will show at the highest Z-level of graphics zones, meaning that an HTML5 zone will cover all other zones that contain images and text. This behavior does not extend to touch screen events.
• HTML5 content can be placed in front of or behind zones containing video content, depending on the Graphics plane z position setting of the zone containing the HTML content (configurable in the Edit > Layout tab). If the HTML5 page contains video and the Enable native video plane playback option is enabled in the HTML5 state, the HTML5 page will always display over other video zones.
• HTML5 content can originate from a remote server, a local server, or the local storage (SD card) of the player. Content can also be downloaded onto the local storage from the BrightSign Network.
• If your HTML5 content relies on assets from multiple locations, make sure to check the Enable external data box when creating or editing an HTML5 state.

6
• Exporting a presentation that contains multiple HTML5 pages also exports in full all asset folders associated with those pages. If your pages share common asset folders, the entire contents will be duplicated multiple times. This can become problematic if your asset folders contain large content files, so you may need to prune and/or rearrange asset folders that are duplicated after export.
Hiding Scrollbars It is often desirable to hide the scrollbars of a webpage when it is displayed as digital signage. You can add the following snippet to your CSS code to hide the scroll bars:
::-webkit-scrollbar {
width: 0px;
7
height: 0px;
background: black;}
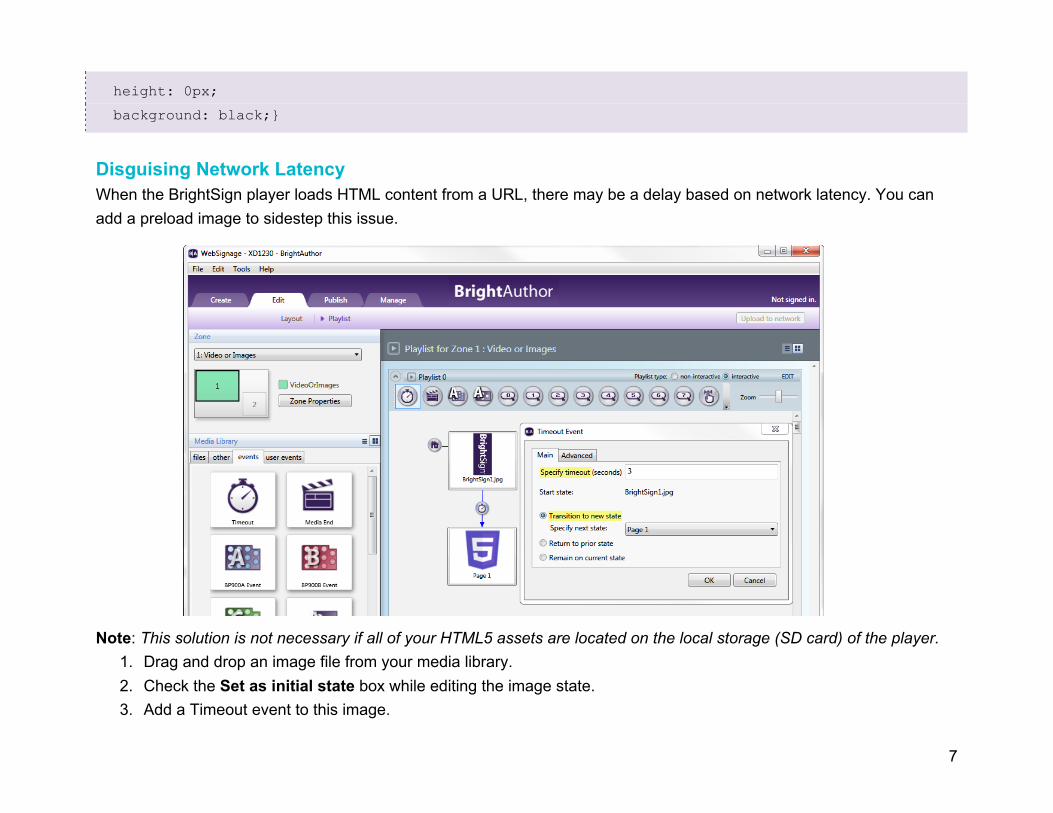
Disguising Network Latency When the BrightSign player loads HTML content from a URL, there may be a delay based on network latency. You can add a preload image to sidestep this issue.
Note: This solution is not necessary if all of your HTML5 assets are located on the local storage (SD card) of the player. 1. Drag and drop an image file from your media library. 2. Check the Set as initial state box while editing the image state. 3. Add a Timeout event to this image.
8
4. Specify the timeout for three seconds (or more if desired). 5. Set the Timeout event to transition to the HTML5 state.
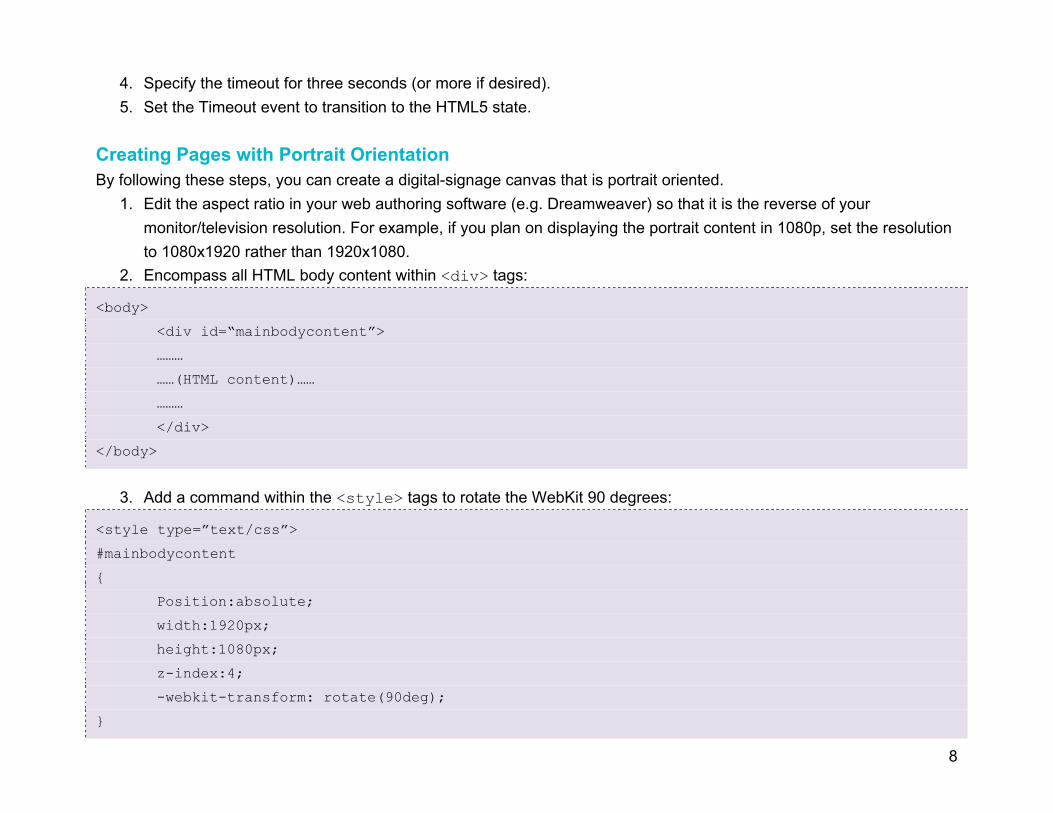
Creating Pages with Portrait Orientation By following these steps, you can create a digital-signage canvas that is portrait oriented.
1. Edit the aspect ratio in your web authoring software (e.g. Dreamweaver) so that it is the reverse of your monitor/television resolution. For example, if you plan on displaying the portrait content in 1080p, set the resolution to 1080x1920 rather than 1920x1080.
2. Encompass all HTML body content within <div> tags:
<body>
<div id=“mainbodycontent”>
………
……(HTML content)……
………
</div>
</body>
3. Add a command within the <style> tags to rotate the WebKit 90 degrees:
<style type=”text/css”>
#mainbodycontent
{
Position:absolute;
width:1920px;
height:1080px;
z-index:4;
-webkit-transform: rotate(90deg);
}

9
</style>
Note: If you specify any angle other 90 degrees (270, -90, etc.), video elements within the page will not display correctly. Also, make sure to align the div to top and left “0”. 4. Create a new presentation for your player in BrightAuthor. 5. Set the Monitor Orientation to Landscape. Click Create. Note: Setting the Monitor Orientation to Portrait in BrightAuthor versions 3.8.0.x or later may cause undesirable scaling in HTML pages. You should only attempt to use Portrait orientation with HTML if you are including Live Text in the presentation. We are currently working to resolve this issue. 6. When prompted to select a template, choose Full screen. 7. Add your HTML5 content to the playlist as described above.

10
Integrating Touchscreen Content You can enable touch-screen events for an HTML5 page by checking the Enable mouse and touch events box when creating an HTML5 state (see Using HTML5 Pages in BrightAuthor for more details). Note that touch events are received by both HTML5 pages and BrightAuthor Rectangular Touch events. Therefore, if you have a zone with an HTML5 page overlapping a zone containing a Rectangular Touch event, touching the area of overlap will send an event to both zones at the same time. This is the case even if one zone completely covers the other visually.
Creating an overlap as shown above may have unintended consequences.

11
Depending on the type of action triggered in each zone, touch-event overlap may cause crashing or other issues with presentation stability. Unless you are certain of the consequences, make sure that zones with touch-enabled HTML5 content and zones with Rectangular Touch events do not overlap.
Known Issues BrightSign’s HTML5 rendering engine is a constant work-in-progress. The following are known issues that we are working to resolve in future versions of player firmware:
• Assigning an HTML element the position: fixed property will not produce the desired results if the element has a z-index property specified as well: Scrolling the page upward will cause the element to increment downwards until it eventually disappears off the edge of the screen.
• The JavaScript toLocaleTimeString() call does not retrieve localized time formats (i.e. 24-hour vs. 12-hour clock): Instead, the hour/minute clock defaults to 24-hour time on the BrightSign player. The below code provides a workaround in JavaScript if you would like to display time using a 12-hour clock:
1. Create the following function:
function format12Hour(date)
{
var zero = '0';
hh = date.getHours();
mm = date.getMinutes();
ss = date.getSeconds()
if((hh % 12) == 0)
hh = 12;
else
hh %= 12;
Creating an overlap as shown above may cause unintended consequences.

12
// Pad zero values to 00
hh = (zero+hh).slice(-2);
mm = (zero+mm).slice(-2);
ss = (zero+ss).slice(-2);
return hh + ':' + mm + ':' + ss + ' ' + ((date.getHours() < 12) ? 'AM' :
'PM');
}
2. Optionally, if you would prefer not to display seconds information, you can replace the above “return” line with the following:
return hh + ':' + mm + ' ' + ((date.getHours() < 12) ? 'AM' : 'PM');
3. Implement the function in the HTML script as follows:
var dateString = (startJSDate.getMonth() + 1) + "/" +
startJSDate.getDate();
if (!startDateTime.isDateOnly()) {
dateString += " -- " + format12Hour(startJSDate);
}

13
HTML VIDEO You can use <video> elements to display HDMI input on the XD1230 or 4K1142 (or RF input on the XD1230). You can also use <video> elements to play streaming video (HLS, UDP, RTP, RTSP) and local video files.
Streaming Video Streaming video functions similar to any standard HTML page. The Load() and Play() methods should be called on the video element to ensure it plays; this is especially true if the same <video> element is used to display different content. Note that the pause/resume commands currently only work for HLS streams.
HDMI Input You must input the video source using the following URI: “tv:brightsign.biz/hdmi”. Note that you cannot substitute another host URL for “brightsign.biz”.
<video width="320" height="240" source src="tv:brightsign.biz/hdmi">
RF Input You must input the video source using the following URI: “tv:brightsign.biz/vc/n”, where “n” is the virtual channel number attained via channel scan. Note that you cannot substitute another host URL for “brightsign.biz”. Before initializing a <video> element with RF input, you must perform a channel scan to initialize the virtual channel database in the registry.
<video width="320" height="240" source src="tv:brightsign.biz/vc/23.1">
HWZ Video HTML <video> elements can take an “hwz” attribute, which can equal either “off” or “on”. For example:
<video src="example_movie.mp4" hwz="on">

14
The "hwz" attribute is disabled by default, so it must be enabled on individual <video> elements as shown above. However, if the Enable native video plane playback option is enabled in the BrightAuthor HTML5 state containing the page, the "hwz" attribute will be enabled on all video elements by default. When “hwz” is disabled, the video is rendered as a graphics element. If “hwz” is enabled, the video is rendered as a video element, ensuring the highest possible frame rate and video quality.
HWZ Limitations It is important to note the following limitations of the HWZ attribute:
• Videos that have “hwz” enabled are not compatible with all CSS transforms. We recommend testing a manipulated "hwz" video thoroughly before using it in a production environment.
• HTML5 presentations that are set to Portrait Mode will revert to back to landscape if “hwz” is enabled within any of the <video> elements. Therefore, portrait-oriented HTML5 presentations must have “hwz” disabled in order to display properly.
• If a <video> element utilizes a streaming source but lacks height/width attributes, then enabling the "hwz" attribute will force the video to be displayed at a 2:1 ratio. This will cause display issues such as letterboxing.
Z-Ordering HWZ Video In firmware versions 5.0.x and later, enabling the "hwz" attribute places the <video> element in front of all text and images. This is the case regardless of whether the graphics are part of the HTML page or part of another zone in BrightAuthor. If you want to customize the z-ordering of "hwz" a <video> element, you can specify one of the following:
• hwz="z-index:2": Places the video in front of all graphics, as well as a second video element. • hwz="z-index:1": Places the video in front of all graphics (the default setting). • hwz="z-index:0": Disables "hwz" mode completely. • hwz="z-index:-1": Places the video behind all graphics.
15
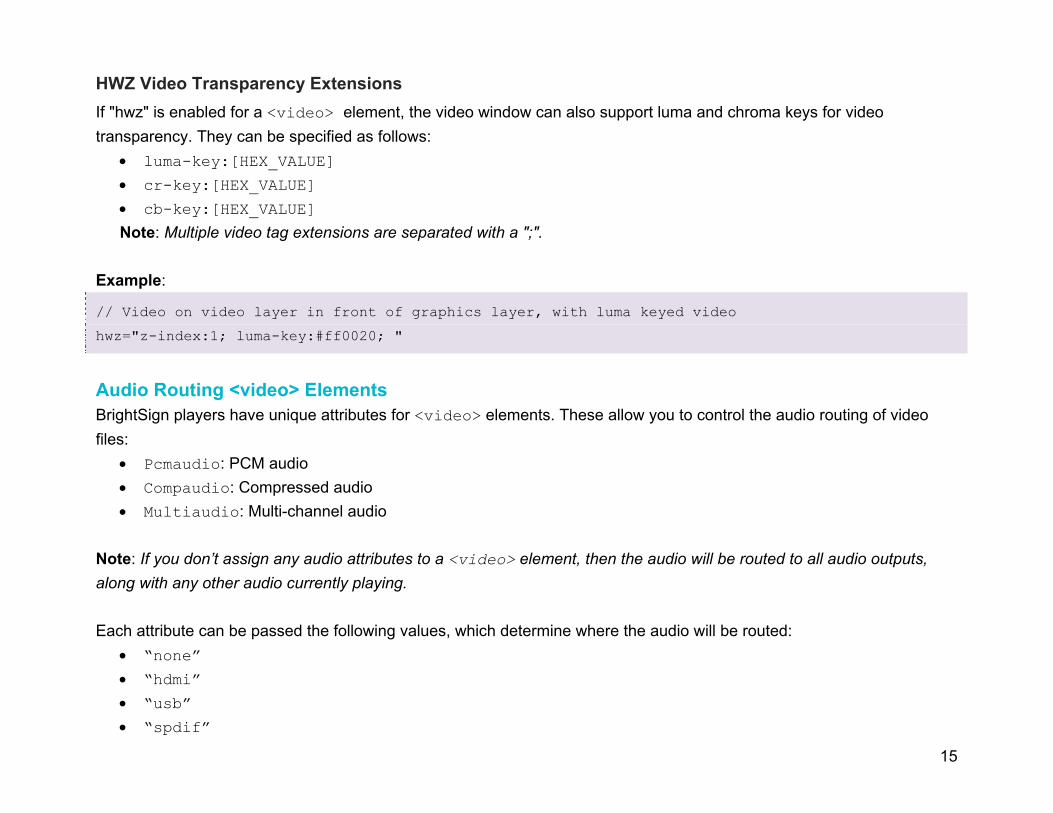
HWZ Video Transparency Extensions If "hwz" is enabled for a <video> element, the video window can also support luma and chroma keys for video transparency. They can be specified as follows:
• luma-key:[HEX_VALUE] • cr-key:[HEX_VALUE] • cb-key:[HEX_VALUE] Note: Multiple video tag extensions are separated with a ";".
Example:
// Video on video layer in front of graphics layer, with luma keyed video
hwz="z-index:1; luma-key:#ff0020; "
Audio Routing <video> Elements BrightSign players have unique attributes for <video> elements. These allow you to control the audio routing of video files:
• Pcmaudio: PCM audio • Compaudio: Compressed audio • Multiaudio: Multi-channel audio
Note: If you don’t assign any audio attributes to a <video> element, then the audio will be routed to all audio outputs, along with any other audio currently playing. Each attribute can be passed the following values, which determine where the audio will be routed:
• “none”
• “hdmi” • “usb” • “spdif”

16
• “Analog:N” (where N is the output) Example 1
<video src="example_movie.mp4" width="512" height="400" pcmaudio="hdmi" autoplay>
Your browser does not support the video tag.
</video>
Example 2
<video src="example_movie.mp4" width="512" height="400" compaudio="hdmi;usb"
autoplay>
Your browser does not support the video tag.
</video>
17
HTML5 RESOURCES There are a large number of online resources—including tutorials, samples, templates, and widgets—available to help you get started creating content with HTML5. The HTML5 standard offers huge advantages to web developers, including digital signage authors. The following websites are great places to learn how to create pages using HTML5:
• http://www.html5report.com • http://www.w3schools.com
Wordpress Wordpress is an excellent HTML5 resource that provides an intuitive approach to creating digital signage. Here are some of the benefits of using the Wordpress architecture:
• Wordpress offers advanced HTML5 support, with premade widgets ranging from weather to e-commerce. The system also supports advanced HTML5 options using CSS3 features. Here are sites that provide HTML5 widgets:
a. http://www.jqwidgets.com b. http://flexslider.woothemes.com
• You can either run Wordpress from the website or install a Wordpress instance on your own servers. • Wordpress has an ecosystem of template creators that offer sophisticated templates for a wide range of industries:
Template creators include the following: a. http://www.rockettheme.com/wordpress b. http://www.templatemonster.com c. http://graphpaperpress.com
HTML5 Authoring These are some of the common HTML5 authoring applications:
• Adobe CS Tools: Dreamweaver, Illustrator, InDesign, Photoshop • Aptana Studio • CoffeeCup Software

18
ADVANCED TECHNIQUES This section is intended for those who are familiar with scripting languages. See the BrightScript Reference Manual and BrightSign Object Reference Manual on the BrightSign Documentation page for more details.
Simple Webpage Script The simple script outlined below opens a webpage stored on a remote server. Save this script as an autorun.brs file, place it on an SD card, and publish it to the player. Alternatively, you can play an HTML page from the local storage without an autorun script by placing the index.html file into the root folder of the player storage. Notice that the script has a sleep(10000) line. This line delays loading the web URL, which is necessary to account for connection delays that may occur on your network. If you don’t use this script, the BrightSign player may not connect in time to load the page, resulting in a “cannot resolve host”, which indicates that the player does not have an Internet connection. In certain network configurations, especially when the player utilizes DHCP, you may need to increase the sleep amount (in milliseconds) to give the player more time to establish a connection.
Sub Main()
msgPort = CreateObject("roMessagePort")
r = CreateObject("roRectangle", 0, 0, 1920, 1080)
h = CreateObject("roHtmlWidget", r)
h.SetPort(msgPort)
h.SetURL("http://www.brightsign.biz")
h.SetURL("file:///testpage.html")
sleep(10000)

19
h.Show()
while true
msg = wait(0, msgPort)
print "type(msg)=";type(msg)
if type(msg) = "roHtmlWidgetEvent" then
eventData = msg.GetData()
if type(eventData) = "roAssociativeArray" and type(eventData.reason) = "roString"
then
print "reason = ";eventData.reason
if eventData.reason = "load-error" then
print "message = ";eventData.message
endif
endif
endif
end while
End Sub