hpopenvmscommoninternet …h41379.cifs)basedon samba installationandconfigurationguide ... palo...
TRANSCRIPT

HP OpenVMS Common InternetFile System (CIFS) Based onSambaInstallationandConfigurationGuide
December 2007
This document describes how to install and configure the HP OpenVMSCIFS software.
Operating System: OpenVMS Alpha Versions 8.2 and 8.3
OpenVMS Integrity servers Versions8.2-1, 8.3 and 8.3-1H1
Software Version: HP OpenVMS CIFS, Version 1.0(Based on Samba, Linux Version3.0.24)
Hewlett-Packard CompanyPalo Alto, California

© Copyright 2007 Hewlett-Packard Development Company, L.P.
Confidential computer software. Valid license from HP required for possession, use or copying.Consistent with FAR 12.211 and 12.212, Commercial Computer Software, Computer SoftwareDocumentation, and Technical Data for Commercial Items are licensed to the U.S. Governmentunder vendor’s standard commercial license.
The information contained herein is subject to change without notice. The only warranties for HPproducts and services are set forth in the express warranty statements accompanying such productsand services. Nothing herein should be construed as constituting an additional warranty. HP shallnot be liable for technical or editorial errors or omissions contained herein.
Microsoft, Windows, and Windows NT are U.S. registered trademarks of Microsoft Corporation.
Intel and Itanium are trademarks or registered trademarks of Intel Corporation or its subsidiariesin the United States and other countries.
UNIX is a registered trademark of The Open Group.
This document was prepared using DECdocument, Version 3.3-1B.

Contents
Preface . . . . . . . . . . . . . . . . . . . . . . . . . . . . . . . . . . . . . . . . . . . . . . . . . . . . . . . . . . . . vii
1 Preparing to Install HP OpenVMS CIFS Software
1.1 About HP OpenVMS CIFS Software Kit . . . . . . . . . . . . . . . . . . . . . . . . . . 1–11.2 About the Release Notes . . . . . . . . . . . . . . . . . . . . . . . . . . . . . . . . . . . . . . 1–11.2.1 How to Access the Release Notes Before Installation . . . . . . . . . . . . . . 1–11.2.2 How to Access the Release Notes After Installation . . . . . . . . . . . . . . . 1–21.2.3 How to Extract the CIFS Source After Installation . . . . . . . . . . . . . . . 1–21.3 Requirements for Installing HP OpenVMS CIFS Software . . . . . . . . . . . . 1–21.3.1 Software Requirements . . . . . . . . . . . . . . . . . . . . . . . . . . . . . . . . . . . . 1–21.4 Preinstallation Tasks . . . . . . . . . . . . . . . . . . . . . . . . . . . . . . . . . . . . . . . . . 1–31.4.1 Check the Network Hardware . . . . . . . . . . . . . . . . . . . . . . . . . . . . . . . 1–31.4.2 Log in to the System Account . . . . . . . . . . . . . . . . . . . . . . . . . . . . . . . 1–31.4.3 Check the Required Software . . . . . . . . . . . . . . . . . . . . . . . . . . . . . . . . 1–31.4.4 Read the Release Notes . . . . . . . . . . . . . . . . . . . . . . . . . . . . . . . . . . . . 1–41.4.5 Back Up the System . . . . . . . . . . . . . . . . . . . . . . . . . . . . . . . . . . . . . . 1–41.4.6 Check Disk Space . . . . . . . . . . . . . . . . . . . . . . . . . . . . . . . . . . . . . . . . . 1–41.4.7 Checking the TCP/IP Status . . . . . . . . . . . . . . . . . . . . . . . . . . . . . . . . 1–41.4.8 Check the OpenVMS Cluster Configuration . . . . . . . . . . . . . . . . . . . . . 1–4
2 Installing HP OpenVMS CIFS Software
2.1 Installation Procedure . . . . . . . . . . . . . . . . . . . . . . . . . . . . . . . . . . . . . . . . 2–12.1.1 Installing the Server . . . . . . . . . . . . . . . . . . . . . . . . . . . . . . . . . . . . . . 2–12.1.2 Installing on a VMScluster . . . . . . . . . . . . . . . . . . . . . . . . . . . . . . . . . 2–22.1.3 Postinstallation Tasks . . . . . . . . . . . . . . . . . . . . . . . . . . . . . . . . . . . . . 2–22.2 HP OpenVMS CIFS Software Installation Directories . . . . . . . . . . . . . . . . 2–32.3 Troubleshooting Installation Problems . . . . . . . . . . . . . . . . . . . . . . . . . . . . 2–42.3.1 Installing the HP OpenVMS CIFS Alpha Kit on an OpenVMS
Integrity Servers System . . . . . . . . . . . . . . . . . . . . . . . . . . . . . . . . . . . 2–42.3.2 Installing the HP OpenVMS CIFS Integrity Server Kit on an
OpenVMS Alpha System . . . . . . . . . . . . . . . . . . . . . . . . . . . . . . . . . . . 2–4
3 Configuring HP OpenVMS CIFS
3.1 SAMBA$CONFIG.COM . . . . . . . . . . . . . . . . . . . . . . . . . . . . . . . . . . . . . . . 3–13.1.1 Configuring in Cluster with Common CIFS Disk . . . . . . . . . . . . . . . . . 3–13.2 Winbind . . . . . . . . . . . . . . . . . . . . . . . . . . . . . . . . . . . . . . . . . . . . . . . . . . . 3–23.3 Samba Web Administration Tool (SWAT) . . . . . . . . . . . . . . . . . . . . . . . . . . 3–33.4 Configuration File Structure . . . . . . . . . . . . . . . . . . . . . . . . . . . . . . . . . . . 3–33.5 HP OpenVMS CIFS Configuration File . . . . . . . . . . . . . . . . . . . . . . . . . . . 3–4
iii

3.5.1 Section Description . . . . . . . . . . . . . . . . . . . . . . . . . . . . . . . . . . . . . . . 3–43.5.1.1 Special Sections . . . . . . . . . . . . . . . . . . . . . . . . . . . . . . . . . . . . . . . 3–43.5.1.2 Parameters . . . . . . . . . . . . . . . . . . . . . . . . . . . . . . . . . . . . . . . . . . 3–43.6 Verify the Configuration File . . . . . . . . . . . . . . . . . . . . . . . . . . . . . . . . . . . 3–53.7 Sample Configuration File (SMB.CONF) . . . . . . . . . . . . . . . . . . . . . . . . . . 3–53.8 Supported Backend . . . . . . . . . . . . . . . . . . . . . . . . . . . . . . . . . . . . . . . . . . 3–63.8.1 SMBPASSWD Backend . . . . . . . . . . . . . . . . . . . . . . . . . . . . . . . . . . . . 3–63.8.2 TDBSAM Database . . . . . . . . . . . . . . . . . . . . . . . . . . . . . . . . . . . . . . . 3–63.8.3 LDAPSAM Backend . . . . . . . . . . . . . . . . . . . . . . . . . . . . . . . . . . . . . . . 3–63.9 How to Configure a Printer . . . . . . . . . . . . . . . . . . . . . . . . . . . . . . . . . . . . 3–63.10 How to Configure SMB.CONF File in Cluster Environment . . . . . . . . . . . 3–133.11 How to Add a User . . . . . . . . . . . . . . . . . . . . . . . . . . . . . . . . . . . . . . . . . . . 3–133.12 How to Add a Share . . . . . . . . . . . . . . . . . . . . . . . . . . . . . . . . . . . . . . . . . . 3–143.12.1 How to Configure the SMB.CONF File Using the VFS Module . . . . . . 3–143.13 How to Map User Accounts . . . . . . . . . . . . . . . . . . . . . . . . . . . . . . . . . . . . 3–153.14 How to Configure LDAP . . . . . . . . . . . . . . . . . . . . . . . . . . . . . . . . . . . . . . . 3–163.15 Managing Groups in CIFS Member Server . . . . . . . . . . . . . . . . . . . . . . . . 3–173.16 Configuration Setting for International Character Set . . . . . . . . . . . . . . . . 3–183.17 Verifying the Client Connection . . . . . . . . . . . . . . . . . . . . . . . . . . . . . . . . . 3–193.18 Troubleshooting Configuration Problems . . . . . . . . . . . . . . . . . . . . . . . . . . 3–22
4 Starting and Stopping HP OpenVMS CIFS
4.1 Starting CIFS . . . . . . . . . . . . . . . . . . . . . . . . . . . . . . . . . . . . . . . . . . . . . . 4–14.1.1 How to Start CIFS Manually . . . . . . . . . . . . . . . . . . . . . . . . . . . . . . . . 4–14.1.2 How to Start CIFS Automatically . . . . . . . . . . . . . . . . . . . . . . . . . . . . 4–14.1.3 How to Start CIFS in an OpenVMS Cluster . . . . . . . . . . . . . . . . . . . . 4–24.2 Stopping CIFS . . . . . . . . . . . . . . . . . . . . . . . . . . . . . . . . . . . . . . . . . . . . . . 4–2
5 Uninstalling the HP OpenVMS CIFS Software
A Sample Installation and Removal Procedures
A.1 Sample Installation on OpenVMS Integrity server Systems . . . . . . . . . . . A–1A.2 Sample Removal Procedure on OpenVMS Integrity server Systems . . . . . A–2
Index
Tables
1–1 Preinstallation Checklist . . . . . . . . . . . . . . . . . . . . . . . . . . . . . . . . . . . 1–32–1 HP OpenVMS CIFS Software Installation Directories . . . . . . . . . . . . . 2–3
iv

Preface
This document describes how to install and configure HP OpenVMS CommonInternet File System (CIFS) software Version 1.0.
Intended AudienceThis document is intended for OpenVMS system administrators and networkadministrators.
Structure of this DocumentThis document contains the following chapters:
• Chapter 1 describes the requirements and procedures that you must completebefore installing CIFS.
• Chapter 2 describes the installation procedure and postinstallation tasks.
• Chapter 3 describes how to configure CIFS.
• Chapter 4 describes how to start and stop CIFS.
• Chapter 5 describes how to remove CIFS from your system.
• Appendix A provides sample installation and removal procedures for CIFS.
Related DocumentsThis document supplements the following:
HP OpenVMS CIFS Based on Samba Release Notes
Migrating HP Advanced Server for OpenVMS to HP OpenVMS CIFS Basedon Samba Migration Guide
For more information about Samba, see the following web address:
http://www.samba.org
AcronymsThe following table lists the acronyms used in this document:
Acronym Description
CIFS Common Internet File System
SMB Server Message Block
SMBD SMB Daemon
NMBD Name Server Daemon
vii

Acronym Description
TCP/IP Transmission Control Protocol/Internet Protocol
PCSI POLYCENTER Software Installation utility
UIC User Identification Code
Reader’s CommentsHP welcomes your comments on this manual. Please send comments to either ofthe following addresses:
Internet [email protected]
Postal Mail Hewlett-Packard CompanyOpenVMS Documentation, ZKO3-4/Y02110 Spit Brook Rd.Nashua, NH 03062-2698
ConventionsThe following conventions are used in this document:
Convention Meaning
Ctrl/x A sequence such as Ctrl/x indicates that you must holddown the key labeled Ctrl while you press another key ora pointing device button.
. . . A horizontal ellipsis in a figure or example indicates thefollowing possibilities:
• Additional optional arguments in a statement havebeen omitted.
• The preceding item or items can be repeated one ormore times.
• Additional parameters, values, or other informationcan be entered.
.
.
.
A vertical ellipsis indicates the omission of items froma code example or command format; the items areomitted because they are not important to the topicbeing described.
( ) In command format descriptions, parentheses indicatethat you must enclose multiple choices in parentheses.
[ ] In command format descriptions, brackets indicateoptional choices. You can choose one or more items orno items. Do not type the brackets on the command line.However, you must include the brackets in the syntaxfor OpenVMS directory specifications and for a substringspecification in an assignment statement.
{} In command format descriptions, braces indicate requiredchoices; you must choose at least one of the items listed.Do not type the braces on the command line.
viii

Convention Meaning
Example This typeface indicates code examples, commandexamples, and interactive screen displays. In text,this type also identifies URLs, UNIX commands andpathnames, PC-based commands and folders, and certainelements of the C programming language.
italic type Italic type indicates important information, complete titlesof manuals or variables. Variables include informationthat varies in system output (for example, Internal errornumber), in command lines (/PRODUCER=name), and incommand parameters in text (where dd represents thepredefined code for the device type).
UPPERCASE TYPE Uppercase indicates the name of a command, routine,file, file protection code, or the abbreviation of a systemprivilege.
- A hyphen at the end of a command format description,command line, or code line indicates that the command orstatement continues on the following line.
ix


1Preparing to Install HP OpenVMS CIFS
Software
This chapter describes the software requirements, how to prepare for installingCIFS, how to access the release notes and the preinstallation tasks for HPOpenVMS CIFS software.
1.1 About HP OpenVMS CIFS Software KitHP OpenVMS CIFS Version 1.0 software is a complete kit and comprises thefollowing:
Software
• Utility to run and monitor CIFS
• Daemon process binaries
• CIFS source files (.BCK)
• Migration Utility from HP Advanced Server for OpenVMS to HP OpenVMSCIFS (.BCK)
• SWAT related files (.BCK)
Documentation
• HP OpenVMS CIFS Based on Samba Installation and Configuration Guide
• HP OpenVMS CIFS Based on Samba Release Notes
• Migrating HP Advanced Server for OpenVMS to HP OpenVMS CIFS Basedon Samba Migration Guide
1.2 About the Release NotesThe HP OpenVMS CIFS Version 1.0 Release Notes document contains importantinformation that you must know before installing the product. HP recommendsthat you read the release notes before starting the installation.
1.2.1 How to Access the Release Notes Before InstallationTo extract the release notes before installation, follow these steps:
1. Load the installation kit on a drive.
2. Enter the following POLYCENTER Software Installation utility (PCSI)command, where file_name.txt is the name that you specify for thetext file, and directory-path specifies the disk and directory namefor the source drive that holds HP OpenVMS CIFS kit (for example,/SOURCE=SYS$DEVICE:[TEST1]):
Preparing to Install HP OpenVMS CIFS Software 1–1

Preparing to Install HP OpenVMS CIFS Software1.2 About the Release Notes
$ PRODUCT EXTRACT RELEASE_NOTES SAMBA/FILE=file_name.txt-_$ /SOURCE=directory-path
If the file name is not specified, the release notes are written to a filecalled DEFAULT.PCSI$RELEASE_NOTES in the current directory. If thedestination qualifier is not specified, PCSI extracts the release notes to thecurrent directory.
1.2.2 How to Access the Release Notes After InstallationAfter the installation completes, you can read the release notes or print the filefrom SYS$HELP:CIFS_REL_NOTES.TXT.
1.2.3 How to Extract the CIFS Source After InstallationTo extract the source files after the installation completes, enter the followingcommand:
$ PRODUCT EXTRACT FILE SAMBA_$ /SELECT= SAMBA$SRC.BCK/SOURCE=[TEST1]
The PCSI utility extracts the SAMBA$SRC.BCK file from the kit to the [TEST1]directory, which is the default directory.
Note
The CIFS source can be extracted during installation by using thesteps provided in the sample installation log. For more information,see Appendix A, Sample HP OpenVMS CIFS Installation and RemovalProcedures.
1.3 Requirements for Installing HP OpenVMS CIFS SoftwareThe following section describe the software requirements for installing the HPOpenVMS CIFS software.
1.3.1 Software RequirementsTo install HP OpenVMS CIFS software successfully, the following software mustbe installed and configured:
• OpenVMS Alpha Version 8.2 or 8.3
or
OpenVMS Integrity servers Version 8.2-1 or 8.3 or 8.3-1H1
• TCP/IP Services or MultiNet or TCPware - the transport software to supportthe network protocols used by other servers and network clients
Note
You must install the latest CRTL ECO kits before installing the HPOpenVMS CIFS kit. The latest CRTL ECO kits can be downloaded fromthe following web address: ftp://ftp.itrc.hp.com/openvms_patches
1–2 Preparing to Install HP OpenVMS CIFS Software

Preparing to Install HP OpenVMS CIFS Software1.4 Preinstallation Tasks
1.4 Preinstallation TasksTable 1-1 lists the preinstallation tasks you must complete before installing HPOpenVMS CIFS software on your system. In addition, for each task a pointer isgiven to the section that describes it.
Table 1–1 Preinstallation Checklist
Steps Task to perform... Described in...
1 Ensure that the network hardware is installed andconnected
Section 1.4.1
2 Log in to the system account (or another account that hasall privileges enabled to run the installation procedure)
Section 1.4.2
3 Ensure that the required software is installed Section 1.4.3
4 Read the release notes Section 1.4.4
5 Back up the system disks Section 1.4.5
6 Ensure that you have adequate disk space for installation Section 1.4.6
7 Ensure that TCP/IP is running Section 1.4.7
8 Check OpenVMS Cluster configuration Section 1.4.8
1.4.1 Check the Network HardwareHP OpenVMS CIFS software runs on OpenVMS Alpha or OpenVMS Integrityserver systems that meet the software requirements. The PC Local Area Network(LAN) requires the following:
• A supported network controller board in the server and in each client
• Cables to connect each client and server to the network
1.4.2 Log in to the System AccountBefore you install HP OpenVMS CIFS software, log in using the system accountor another account that has all the privileges enabled to run the installationprocedure.
To log in using the system account, follow these steps:
1. At the user name prompt, enter the following:
Username: SYSTEM
2. At the password prompt, enter the password to access the SYSTEM account.
1.4.3 Check the Required SoftwareHP OpenVMS CIFS software requires:
• OpenVMS Alpha operating system Version 8.2 or 8.3
or
OpenVMS Integrity servers operating system Version 8.2-1 or 8.3 or 8.3-1H1
• TCP/IP or MultiNet or TCPware transport for network communication
• Latest CRTL ECO kit must be installed.
Preparing to Install HP OpenVMS CIFS Software 1–3

Preparing to Install HP OpenVMS CIFS Software1.4 Preinstallation Tasks
1.4.4 Read the Release NotesEnsure that you have read the release notes before installing the CIFS software.For more information, see Section 1.2, About the Release Notes.
1.4.5 Back Up the SystemTo safeguard against the loss of valuable data, HP recommends that you backup all disks on your system (or at least the system disk) before you install anylayered product.
To do a system backup, use the OpenVMS BACKUP command. For moreinformation, see HP OpenVMS System Management Utilities Reference Manual.
1.4.6 Check Disk SpaceTo determine the number of disk blocks required for the installation, see HPOpenVMS CIFS Based on Samba Release Notes. To check the number of freeblocks on the system disk, enter the following command:
$ SHOW DEVICE SYS$SYSDEVICE
The OpenVMS system displays information about the system disk, including thenumber of free blocks. For example,
Device Device Error Volume Free Trans MntName Status Count Label Blocks Count Cnt
NEWTON$DKA0: Mounted 0 OS82 45747152 629 1
1.4.7 Checking the TCP/IP StatusVerify the TCP/IP status by entering the following command:
$ SYS$STARTUP:TCPIP$STARTUP.COM
1.4.8 Check the OpenVMS Cluster ConfigurationEnsure that all cluster members on which the HP OpenVMS CIFS software willrun are in the same TCP/IP subnet.
1–4 Preparing to Install HP OpenVMS CIFS Software

2Installing HP OpenVMS CIFS Software
This chapter describes how to install the HP OpenVMS CIFS software using thePCSI utility. You must follow the procedure outlined in this chapter if you areinstalling the HP OpenVMS CIFS server.
For information about the PCSI utility, see the HP OpenVMS System Manager’sManual.
Before you begin the installation procedure, ensure that you have completed thepreinstallation tasks listed in Section 1.4, Preinstallation Tasks.
2.1 Installation Procedure2.1.1 Installing the Server
When you have completed the recommended preinstallation tasks outlined inSection 1.4, Preinstallation Tasks, and have read the release notes, you are readyto install the HP OpenVMS CIFS software.
For more information on using the utility to install, manage, and remove softwareproducts on your system, see the HP OpenVMS System Manager’s Manual.
To install the HP OpenVMS CIFS software, follow these steps:
1. Log into the SYSTEM account or a privileged account.
2. Start the PCSI utility by entering the PRODUCT INSTALL command withthe directory path that is appropriate for your system as follows:
$ PRODUCT INSTALL <product-identifier>/DESTINATION =<directory-path>
where: <product-identifier> for the HP OpenVMS CIFS software kit isSAMBA and <directory-path> specifies the target disk and directoryname where HP OpenVMS CIFS software kit is installed. For example,/DESTINATION=SYS$SYSDEVICE:[000000]
If you do not specify the destination qualifier, the PCSI utility searches for thelocation defined by the logical name PCSI$DESTINATION. If not defined, theutility installs the HP OpenVMS CIFS software kit in the default directory,that is, SYS$SYSDEVICE:[VMS$COMMON].
Note
The installation procedure will create the [.SAMBA] directory, forexample, SYS$SYSDEVICE:[000000.SAMBA]
The installation of HP OpenVMS CIFS creates four OpenVMS useraccounts, namely SAMBA$NMBD, SAMBA$SMBD, SAMBA$TMPLT andSAMBA$GUEST. The UICs for these accounts are allocated dynamicallybased on the user input and availability in the SYSUAF database.
Installing HP OpenVMS CIFS Software 2–1

Installing HP OpenVMS CIFS Software2.1 Installation Procedure
It is assumed that all cluster nodes are sharing same SYSUAF and RightslistDatabase available on the node, where CIFS is installed.
Note
To stop the installation at any time, press Ctrl/Y. The installationprocedure does not delete any files that were created, then exits.
2.1.2 Installing on a VMSclusterOn a VMScluster, you must install CIFS software on the first node using the/DESTINATION qualifier. If all the nodes in the cluster, where CIFS will be runare installed with OpenVMS Version 8.3 and higher, provide a destination pathpointing to the common disk which is accessible to all the nodes.
If you are installing HP OpenVMS CIFS on a cluster that does not have acommon disk, you must install the CIFS software on each node separately andconfigure each node separately.
If you are installing HP OpenVMS CIFS on a cluster where one node is runningOpenVMS Version 8.3 or earlier and the other node(s) are running, OpenVMSVersion 8.3 and higher, you must install and configure CIFS software on eachnode separately. The destination path provided with the /DESTINATION qualifiermust be node specific.
Note
CIFS is supported in a cluster only on nodes where CIFS runs onOpenVMS Version 8.3 and higher.
2.1.3 Postinstallation TasksAfter the installation completes, follow these steps:
1. Check if the SAMBA$ROOT logical is set by entering the following command:
$ SH LOG SAMBA$ROOT"SAMBA$ROOT" = "NEWTON$DKA100:[SAMBA.]"
If you are installing CIFS on a cluster, this logical will be defined only on theNODE where CIFS is installed.
2. Execute the SAMBA$ROOT:[BIN]:SAMBA$CONFIG.COM commandprocedure. This command procedure will set TCP/IP services such as SMBDand SWAT and the logicals required by CIFS.
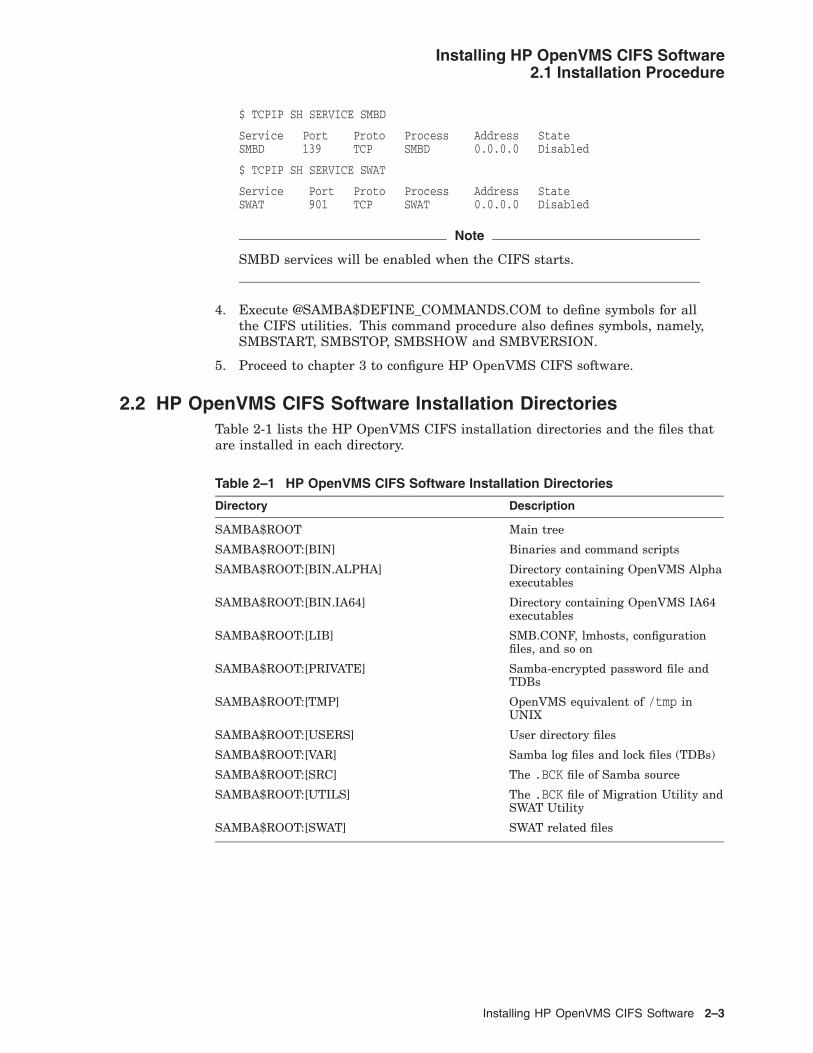
3. Check if the TCP/IP services such as SMBD and SWAT exist and also ensurethat SWAT service is enabled by entering the following commands:
2–2 Installing HP OpenVMS CIFS Software
Installing HP OpenVMS CIFS Software2.1 Installation Procedure
$ TCPIP SH SERVICE SMBD
Service Port Proto Process Address StateSMBD 139 TCP SMBD 0.0.0.0 Disabled
$ TCPIP SH SERVICE SWAT
Service Port Proto Process Address StateSWAT 901 TCP SWAT 0.0.0.0 Disabled
Note
SMBD services will be enabled when the CIFS starts.
4. Execute @SAMBA$DEFINE_COMMANDS.COM to define symbols for allthe CIFS utilities. This command procedure also defines symbols, namely,SMBSTART, SMBSTOP, SMBSHOW and SMBVERSION.
5. Proceed to chapter 3 to configure HP OpenVMS CIFS software.
2.2 HP OpenVMS CIFS Software Installation DirectoriesTable 2-1 lists the HP OpenVMS CIFS installation directories and the files thatare installed in each directory.
Table 2–1 HP OpenVMS CIFS Software Installation Directories
Directory Description
SAMBA$ROOT Main tree
SAMBA$ROOT:[BIN] Binaries and command scripts
SAMBA$ROOT:[BIN.ALPHA] Directory containing OpenVMS Alphaexecutables
SAMBA$ROOT:[BIN.IA64] Directory containing OpenVMS IA64executables
SAMBA$ROOT:[LIB] SMB.CONF, lmhosts, configurationfiles, and so on
SAMBA$ROOT:[PRIVATE] Samba-encrypted password file andTDBs
SAMBA$ROOT:[TMP] OpenVMS equivalent of /tmp inUNIX
SAMBA$ROOT:[USERS] User directory files
SAMBA$ROOT:[VAR] Samba log files and lock files (TDBs)
SAMBA$ROOT:[SRC] The .BCK file of Samba source
SAMBA$ROOT:[UTILS] The .BCK file of Migration Utility andSWAT Utility
SAMBA$ROOT:[SWAT] SWAT related files
Installing HP OpenVMS CIFS Software 2–3

Installing HP OpenVMS CIFS Software2.3 Troubleshooting Installation Problems
2.3 Troubleshooting Installation ProblemsThis section describes the troubleshooting of any installation problem thatyou might encounter when you install HP OpenVMS CIFS software in aninappropriate environment.
2.3.1 Installing the HP OpenVMS CIFS Alpha Kit on an OpenVMS IntegrityServers System
If you attempt to install the Alpha kit on an Integrity server system, the PCSIutility procedure displays the following error message and terminates theinstallation:
HP AXPVMS SAMBA Version 1.0 does not run on OpenVMS I64 systems.You can install this product on OpenVMS Alpha systems only.
2.3.2 Installing the HP OpenVMS CIFS Integrity Server Kit on an OpenVMSAlpha System
If you attempt to install the Integrity server kit on an Alpha system, the PCSIutility procedure displays the following error message and terminates theinstallation:
HP I64VMS SAMBA Version 1.0 does not run on OpenVMS Alpha systems.You can install this product on OpenVMS I64 systems only.
2–4 Installing HP OpenVMS CIFS Software

3Configuring HP OpenVMS CIFS
This chapter describes the structure of the configuration file (SMB.CONF),procedures to configure and modify users, disk shares, and provide securityprinting on the network.
3.1 SAMBA$CONFIG.COMAfter the installation completes, enter the following command on all the nodeswhere CIFS needs to run:
$ @SAMBA$ROOT:[BIN]SAMBA$CONFIG.COM
This command procedure sets TCP/IP services such as SMBD, SWAT, and thelogicals required by CIFS.
3.1.1 Configuring in Cluster with Common CIFS DiskIf you are configuring CIFS for the first time, SAMBA$ROOT logical is notdefined on other nodes of cluster. The System administrator has to execute theSAMBA$CONFIG.COM command procedure from a location that is accessible byall nodes where CIFS is installed.
For example,If CIFS has been installed on CLUSTER1$DKA0:[CIFS_INSTALL], then on othernode say CLUSTER2, system administrator need to run this command procedureCLUSTER1$DKA0:[CIFS_INSTALL.SAMBA.BIN]SAMBA$CONFIG.COM toconfigure CIFS on that node.
Or
Define SAMBA$ROOT logicals by pointing to the location where CIFS is installedand then run SAMBA$CONFIG.COM command procedure to setup the TCP/IPservices and other logicals.
For example,If CIFS is installed on CLUSTER1$DKA0:[SAMBA_INSTALL], then on othernode say CLUSTER2 you can define SAMBA$ROOT as shown:
$ DEFINE/SYSTEM/EXEC SAMBA$ROOT CLUSTER1$DKA0:[SAMBA_INSTALL.SAMBA.]/TRANS=CONCEAL
In mixed architecture cluster, you must enter the following command:
$ @SAMBA$ROOT:[BIN]SAMBA$MIXED_CLUSTER_SETUP.COM
Note
On a cluster, if you do not have common disk or if any of the CIFS nodesare running OpenVMS Version 8.3 and earlier, the configuration detailsmentioned in Section 3.1.1, Configuring in Cluster with Common CIFSDisk are not applicable.
Configuring HP OpenVMS CIFS 3–1

Configuring HP OpenVMS CIFS3.2 Winbind
3.2 WinbindWinbind is used for resolving names from the NT servers. The functionality ofWindbindd process is integrated with SMBD process. Hence you will not see aseperate Winbindd process when CIFS is started.
On CIFS, the following Winbind functionalities are included:
• Authentication of user credentials, but does not authenticate user credentialsvia Pluggable Authentication Modules (PAM)
• Identity resolution, but does not use Name Service Switch (NSS)
• Winbind maintains a database called winbind_idmap.tdb in which it storesthe UIDs, GIDs and NT SIDs mappings.
The Winbind idmapping is used only for users that do not have a local UIC andfor all the domain groups. It uses the UIDs and GIDs allocated from the "idmapuid" and "idmap gid" range specified in the SMB.CONF file in [global] section. TheseUIDs and GIDs are mapped to the NT SIDs. The UID allocated by Winbindd isused for generating UIC while creating the host user. The GID is used as "gidvalue" while creating resource identifiers that are mapped to domain groups.There must not be any UICs and GIDs in the range "idmap uid" and "idmap gid"range specified in the SMB.CONF file.
For example, assume that "idmap uid" range is "10000-300000" under the [global]section in SMB.CONF file. When a new user logs in and if there is no correspondinghost account, UID 10000 for this user ID is obtained from Winbind. Now, you cancreate a user CIFS$<hexadecimal value of UID> which is CIFS$2710 with a UICof [octadecimal value of UID, octadecimal value of UID] which is [23420, 23420].
Note
On OpenVMS, Windbind functionality does not support services such astelnet, FTP, OpenVMS user login, and so on.
To use Winbind functionality on OpenVMS, specify the following parameters inthe SMB.CONF file under the [global] section:
idmap uid = <range of UID values>idmap gid = <range of GID values>
Unlike in Samba, on the other platforms, only the following parameters related tothe Winbind are supported on CIFS:
• winbind separator = [\]
• idmap uid = 10000-30000
• idmap gid = 10000-30000
• winbind cache time = [300]
To disable Winbind functionality on CIFS, define the following logical:
3–2 Configuring HP OpenVMS CIFS

Configuring HP OpenVMS CIFS3.2 Winbind
$ DEFINE/SYSTEM WINBINDD_DONT_ENV 1
Note
Add the above-mentioned logical in SYS$STARTUP:SYLOGICALS.COMcommand procedure to be effective across system reboots.
Caution:
If you enable Winbind, the user and group mapping information will be storedin winbindd_idmap.tdb file. If you disable Windbind, the user and groupmapping information will be lost and the corresponding security for shares,files and folder for these users will not be valid.
In order to avoid problems, it is highly recommended to backup thewinbindd_idmap.tdb file periodically.
The wbinfo Utility
The wbinfo "-u" and wbinfo "-g" commands display the user and group names anddoes not display the corresponding UIDs and GIDs.
3.3 Samba Web Administration Tool (SWAT)SWAT is a web-based interface that can be used to configure CIFS from Windows.
To use this utility, you must restore the SAMBA$ROOT:[UTILS]SAMBA$SWAT_FILES.BCK file under SAMBA$ROOT:[SWAT...] directory by entering thefollowing command:
$ BACKUP SAMBA$ROOT:[UTILS]SAMBA$SWAT_FILES.BCK/SAVE -_$ SAMBA$ROOT:[*...]*.*;*/LOG
For more information about SWAT, see the following web address:
http://www.samba.org/samba/docs/man/Samba-HOWTO-Collection/SWAT.html
3.4 Configuration File StructureThe following is a sample configuration file structure:
[global]...[homes]...[<file/printer share-name>]...
The names within the square brackets delineate unique sections of the SMB.CONFfile; each section names the share (or service) to which the section refers. Forexample, the [homes] sections are unique disk shares; they contain options thatmap to specific directories on the CIFS server. All the sections defined in theSMB.CONF file, with the exception of the [global] section, are available as a disk orprinter share to clients connecting to the CIFS server.
Configuring HP OpenVMS CIFS 3–3

Configuring HP OpenVMS CIFS3.5 HP OpenVMS CIFS Configuration File
3.5 HP OpenVMS CIFS Configuration FileHP OpenVMS CIFS configuration file, called SMB.CONF by default, uses the sameformat as Windows .ini files. The SMB.CONF file is a plain-text file that you canedit using your preferred editing tool.
The SMB.CONF_TEMPLATE file is provided along with SMB.CONF in the HPOpenVMS CIFS software kit. The SMB.CONF file contains mandatory configurableparameters.
Note
The SMB.CONF file is a very important file. You must be cautious whileediting this file. For more information on Configuration, see the followingweb address:
http://www.samba.org
3.5.1 Section DescriptionEach section in the SMB.CONF file represents a share on the CIFS server. Thesection "global" is special because it contains settings that apply to the wholeCIFS server and not to one share in particular.
There are three special sections, [global], [homes] and [<file/printer share-name>],which are described under Special Sections.
3.5.1.1 Special Sections[global] section
Parameters in this section apply to the server as a whole or are defaults forsections, which do not specifically define certain items.
[homes] section
This section is included in the configuration file. Services connecting clients totheir home directories can be created on the fly by the server.
[<file/printer share-name>] section
This section is included in the configuration file and if the Printable parameter isset to YES, this share functions as a printer share. If the Printable parameter isset to NO, this share functions as a file or disk share.
3.5.1.2 ParametersParameters define the specific attributes of sections. Following are the two typesof parameters:
• Global Parameters - Parameter specific to the [global] section. For example,workgroup, security and so on.
• Service Parameters - Parameter specific to the service specific section. Theyare usable in all sections, for example, browsable.
3–4 Configuring HP OpenVMS CIFS

Configuring HP OpenVMS CIFS3.5 HP OpenVMS CIFS Configuration File
Note
For additional information on configuration (SMB.CONF), see the followingweb address:
http://www.samba.org/samba/docs/man/manpages-3/smb.conf.5.html
3.6 Verify the Configuration FileEnter the following command to verify whether the SMB.CONF file has all thesettings (i.e. PDC, WINS, etc.) that are required to run HP OpenVMS CIFS:
$ testparm
The testparm examines the SMB.CONF file for syntax errors and reports them, ifthey are found, along with a list of the services enabled on your system.
Note
Run the testparm utility whenever you modify the SMB.CONF file.
3.7 Sample Configuration File (SMB.CONF)[global]
server string = Samba %v running on %h (OpenVMS)security = userpassdb backend = tdbsamdomain master = yesguest account = SAMBA$GUESTdomain logons = Yeslog file = /samba$root/var/log.%mlog level = 0load printers = noprinting = OpenVMS
[homes]comment = Home Directoriesbrowsable = noread only = nocreate mode = 0750
[file/printer share-name]path = /var/tmpprintable = yesmin print space = 2000
[test1]browsable = yeswriteable = yespath = /DKA0/users/test1
Configuring HP OpenVMS CIFS 3–5

Configuring HP OpenVMS CIFS3.8 Supported Backend
3.8 Supported BackendThis section describes the supported backend that can be specified in theSMB.CONF file by setting the "passdb backend = <database>" parameter in the[global] section.
3.8.1 SMBPASSWD BackendThis backend enables you to store user name and passwords similar to UNIX(i.e. /etc/passwd). By default, it stores the information in the SMBPASSWD file.It contains the LanMan or NT password hashes, password change times, andaccount flags information. This is a primitive type password backend thathas several disadvantages that has been overcome by the tdbsam and ldapsampassword backends.
3.8.2 TDBSAM DatabaseThis backend enables you to store user and machine account in a TDB database.By default, it stores the information in SAMBA$ROOT:[PRIVATE]PASSDB.TDB.The contents of the TDB file can be viewed using the TDBDUMP or PDBEDIT utility.
3.8.3 LDAPSAM BackendThis backend enables you to store both POSIX (UNIX) and CIFS user andgroup account information in a single repository. For more information aboutLDAPSAM backend, see Section 3.14, How to Configure LDAP.
3.9 How to Configure a PrinterTo configure a printer, follow these steps:
Step 1: OpenVMS Print Queue Setup
a. DCPS Print Queues:
The DCPS print queues support Postscript printers. It can also support PCLprinting using postscript printers. If the printer has postscript drivers, theninstall DCPS on OpenVMS. To do so, you must edit DCPS$STARTUP.COM andadd the following lines as shown in the example:
$ @SYS$STARTUP:DCPS$EXECUTION_QUEUE -<print-queue-name> - ! P1 - Execution queue name"ip_rawtcp/<printer-ip-address>:9100" - ! P2 - Interconnect protocolDCPS_LIB - ! P3 - Logical name for libraries"DATA=<data-type>" - ! P4 - Default queue parameters"/SEPARATE=(NOBURST,NOFLAG,NOTRAIL)" - ! P5 - Default queue qualifiers""- ! P6 - Communication speed(serial- ! devices only)""- ! P7 - Device characteristics"" ! P8 - Verify on/off
1. Substitute P1 with an appropriate name to create the DCPS execution queuename.
2. The "ip_rawtcp" in P2 enables DCPS to support "Raw TCP" printing.
3. The P2 can be replaced with "IP_LPD/<printer-ip-address>" if you want touse DCPS IP_LPD printing. Samba VMS is also tested with DCPS IP_LPDprint queues. However, you must define the logical "DCPS$_<print-queue-name>_ PRODUCT_NAME", which is required for the printer driver when
3–6 Configuring HP OpenVMS CIFS

Configuring HP OpenVMS CIFS3.9 How to Configure a Printer
using DCPS IP_LPD printing. For example, define DCPS$_<print-queue-name>_PRODUCT_ NAME as "HP LaserJet 8150 Series PS", if you want touse 8150 PS driver.
"9100" is the raw TCP printer port.
4. Specify "DATA=POSTSCRIPT" when PS drivers are used for printing.
5. Specify "DATA=PCL" when PCL drivers are used for printing.
6. The DCPS queues are not used when the printer supports only the PCL.
b. TCPIP$TELNETSYM Print Queues:
The CIFS software on OpenVMS is bundled with a command procedure calledSAMBA$PRINT_QSETUP.COM. Using this command procedure, you can set upthe TCPIP$TELNETSYM Print Queues, as shown in the following example:
$ @SAMBA$ROOT:[BIN]SAMBA$PRINT_QSETUP.COMEnter unique number for print form: 3974The print queue name entered here should match with printer name in SMB.CONFEnter VMS print queue name: hhhEnter Ip address of printer: 16.138.22.23Enter printer port: 9100Enter print form name: xyx
The following logicals are used when testing the TCPIP$TELNETSYM Printqueues:
DEFINE/SYSTEM TCPIP$TELNETSYM_RAW_TCP 1DEFINE/SYSTEM TCPIP$TELNETSYM_SUPPRESS_FORMFEEDS 35
Note
The above-mentioned logicals are defined to overcome the junk charactersin the print output and must be de-assigned in case of DCPS printing.
c. LPD Print Queues:
Prerequisites:
The following are prerequisites for LPD print queues:
• Ensure HP TCP/IP Services for OpenVMS (or UCX) is running. For moreinformation, refer to the HP TCP/IP Services for OpenVMS Installation andConfiguration Manual.
• Ensure that LPD services are enabled. If not, enter the following command tostart the LPD services.
If you are running HP TCP/IP Services for OpenVMS Version 4.0 orearlier, enter the following command:
$ RUN SYS$SYSTEM:UCX$CONFIG.COM
If you are running HP TCP/IP Services for OpenVMS Version 5.0 or later,enter the following command:
$ RUN SYS$SYSTEM:TCPIP$CONFIG.COM
Configuring HP OpenVMS CIFS 3–7

Configuring HP OpenVMS CIFS3.9 How to Configure a Printer
• You must add a local host name for the remote print server with IP addressin TCP/IP local host database and use that has the remote system name for’rm’ parameter as explained in the section, LPD Print Queues Setup.
For example, to set up the print server as a local host in TCP/IP local hostdatabase:
DCLPROMPT> TCP/IPTCPIP> SET HOST TEST123/ADD=16.18.54.51/ALIAS="TEST123"TCPIP> SHOW HOST/LOCAL
LOCAL databaseHost address Host name127.0.0.1 LOCALHOST, localhost16.18.54.51 TEST123, test123
Note
Host name can be any name chosen.
LPD Print Queues Setup:
To setup the OpenVMS LPD print queue, run the UCX or TCPIP Printcapdatabase utility program to add a remoteprinter as shown in the example:
DCLPROMPT> RUN SYS$SYSTEM:TCPIP$LPRSETUP
TCPIP Printer Setup Program
Command < add delete view help exit >: addAdding printer entry, type ’?’ for help.
Enter printer name to add : LPDPRINTEREnter the FULL name of one of the following printer types:remote local : remoteEnter printer synonym: LPDPRINTEREnter printer synonym:Enter full file specification for spool directorySPOOLER DIRECTORY ’sd’ : [TCPIP$LPD_ROOT:[LPDPRINTER]] ?Set LPD PrintServer extensions flag ’ps’ [] ?Set remote system name ’rm’ [] ? TEST123Set remote system printer name ’rp’ [] ? TextSet printer error log file ’lf’ [/TCPIP$LPD_ROOT/000000/LPDPRINTER.LOG] ?Enter the name of the printcap symbol you wish to modify. Othervalid entry is :
’q’ to quit (no more changes)
The names of the printcap symbols are:
sd for the printer spool directorylf for the printer error log filelp for the name of the local printerps for the LPD PrintServer extensions flagrm for the name of the remote hostrp for the name of the remote printerfm for the printer form fieldpa for the /PASSALL flagnd for the /NODELETE flagcr for the cr flagsn for the setup NoLF flagp1-p8 for the /PARAMETER=(p1,...,p8) field
3–8 Configuring HP OpenVMS CIFS

Configuring HP OpenVMS CIFS3.9 How to Configure a Printer
Enter symbol name: q
Symbol type value------ ---- -----
Error log file : lf STR /TCPIP$LPD_ROOT/000000/LPDPRINTER.LOGPrinter Queue : lp STR LPDPRINTERPS extensions flag: ps STRRemote Host : rm STR TEST123Remote Printer : rp STR TextSpool Directory : sd STR /TCPIP$LPD_ROOT/LPDPRINTER
Are these the final values for printer LPDPRINTER ? [y] y
Adding comments to printcap file for new printer, type ’?’ for help.Do you want to add comments to the printcap file [n] ? : n
Do you want the queue to default to print flag pages [y] : n
Do you want this procedure to start the queue [y] : y
Creating execution queue: LPDPRINTERUpdating TCPIP$LPD_SYSTARTUP.COMUpdating TCPIP$LPD_SYSHUTDOWN.COM
************************************************** TCPIP$LPD_SYSTARTUP.COM, the printcap file ** and TCPIP$LPD_SYSHUTDOWN.COM ** have been updated for this printer ** ** Set up activity is complete for this printer **************************************************
Command < add delete view help exit >: exit
DCLPROMPT> Print/Queue=LPDPRINTER sys$manager:login.comJob LOGIN (queue LPDPRINTER, entry 36) started on LPDPRINTER
DCLPROMPT> Show QueueServer queue LPDPRINTER, busy, on MOLUSK::, mounted form DEFAULT
Entry Jobname Username Blocks Status----- ------- -------- ------ ------
36 LOGIN SYSTEM 7 Processing
Batch queue SYS$BATCH, stopped, on MOLUSK::Generic printer queue TCPIP$LPD_INServer queue TCPIP$LPD_IN_MOLUSK_1, idle, on MOLUSK::, mounted form DEFAULT
Step 2: Create Spool Directory
To create a spool directory, follow these steps:
• Create the spool directory by entering the following command:
$ CREATE/DIR SAMBA$ROOT:[VAR.SPOOL]
• Change the ownership of spool directory by entering the following command:
$ SET SECURITY/PROT=(W:REW)/ACL=(DEFAULT_PROTECTION,SYSTEM:RWED,OWNER:RWED)SAMBA$ROOT:[VAR]SPOOL.DIR
Configuring HP OpenVMS CIFS 3–9

Configuring HP OpenVMS CIFS3.9 How to Configure a Printer
Step 3: Setting Up Printer Without Using Printer Driver Uploading orDownloading
• Add the following parameters under [global] section in SMB.CONF file:
[global]admin users = test1load printers = no //Print cap file is not supported on Samba VMSprinting = OpenVMS //Only one printing style available on Samba VMSprint command = /DELETE //For DCPS print queuesprint command = /DELETE/PASSALL //For TCPIP-TELNET-SYM queuesuse client driver = yes
• To create a printer share-name on CIFS, add the following lines to SMB.CONFfile:
[<print-share-name>]Printer name = <print-share-name> //<print-share-name> is the VMS queue nameprintable = yespath = <spool directory path> //OpenVMS directory where print jobs
are created
For example,
[TEST4]Comment = This is test print share on Samba VMSprinter name = TEST4 //TEST4 is VMS print queue nameprintable = yespath = /samba$root/var/spool //samba$root:[var.spool] on OpenVMS
Once you have modified the SMB.CONF file, you can view the print share TEST4on the CIFS server from a client. Follow the procedures given below to create aprinter share and install the required driver files on the client:
1. Open the Printers and Faxes folder.
2. Right-click the printer you want to share, and then select the Connect option.
3. Select the printer and driver from the Print Driver Selection dialog box.
4. Click OK.
A new printer (named TEST4) now appears in your local printer folder.
Note
The printer name and print share-name must be same.
Step 4: Setting Up Printer Using Printer Driver Uploading orDownloading
This functionality installs the printer drivers into the [print$] share of the CIFSserver. All clients get the driver installed when they first connect to this printershare. CIFS on OpenVMS also supports the driver uploading and downloading,but with little manual intervention.
To add a new driver or printer to your CIFS server, one of the following twoconditions must hold true:
• The account used to connect to the CIFS server must have administratorprivileges.
• The account used to connect to the CIFS server must have"SetPrintOperatorPrivilege" privileges.
3–10 Configuring HP OpenVMS CIFS

Configuring HP OpenVMS CIFS3.9 How to Configure a Printer
For example, to set the "SetPrintOperatorPrivilege" privileges for "test1" user,enter the following command:
$ net rpc rights grant "test1" "SetPrintOperatorPrivilege" "-U" "test3%welcome""-I" "16.138.185.90"
Note
User account TEST3 now has administrator privileges on the CIFS server.
To set up the printer using driver uploading and downloading, follow these steps:
1. Add the following service parameters in the SMB.CONF file under the [global]section:
admin users = test1 //User with admin/SePrintOperatorPrivilegeload printers = noprinting = OpenVMSprint command = /DELETE //use the following print command
for DCPS queuesprint command = /DELETE/PASSALL //use the following print
command for TCPIPaddprinter command = OpenVMSaddprinter //Add print share in to SMB.CONFdeleteprinter command = OpenVMSdeleteprinter //Delete print share in to SMB.CONFuse client driver = no //Use driver upload and
downloading functionality
2. Add the following parameters under the [Print$] section:
[Print$]comment = Printer Download Areapath = /SAMBA$ROOT/PRINT/DRIVERSwrite list = test1guest ok = Yes;read only = yes
Step 5: Identifying Printer Driver Files
To identify the driver files, follow these steps:
1. Install the driver locally on a Windows client, and verify the driver file namesand paths it uses after they are installed.
Note
This procedure must be repeated for each client.
The following shows the procedure to identify files on windows x86_32platform:
2. Start -> Run, type regedt32 and select the following registry key:
"HKEY_LOCAL_MACHINE\SYSTEM\CurrentControlSet\Control\Print\Environments\WindowsNT x86\Drivers"
3. Under this key, select Version-3 and copy the Configuration File, Data File,Dependent Files, Driver and Help File to a temporary folder.For example, C:\windows\system32\spool\drivers\w32x86\3
To set up the environment for a driver on CIFS, follow these steps:
1. Create the W32X86.DIR directory under /samba$root/print/drivers.
Configuring HP OpenVMS CIFS 3–11

Configuring HP OpenVMS CIFS3.9 How to Configure a Printer
2. Copy the print driver files from client’s temporary folder to/samba$root/print/drivers/w32x86 on CIFS.
3. Create the 3.DIR directory under /samba$root/print/drivers/w32x86 becauseCIFS moves the driver files into 3.DIR after executing the Add Printer Wizardor rpcclient.
4. Create the /samba$root/var/spool directory on CIFS because the Add PrinterWizard or rpcclient creates the print share with path /samba$root/var/spool.
Copy the driver files using one of the following methods and update the necessaryTDB and SMB.CONF files:
• Running a GUI (Printer Properties and Add Printer Wizard on CIFS) fromany Windows NT or 2000 or XP client workstation.
• Using the CIFS command-line utility rpcclient with addprinter andadddriver subcommands on OpenVMS.
The GUI (APW) procedure is exactly the same as the one you are familiar within Windows (we assume that you are familiar with the printer driver installationprocedure on Windows NT). Ensure that your connection is set up as a user withadministrator privileges. The GUI enables you to select the printer name andprint share-name in addition to the vendor name and printer driver.
Note:
1. The printer name and print share-name must be the same.
2. Print queue name is the same as printer name or print share-name.
After you complete the installation, you can view the print share on CIFS VMS.Right-click and select Connect on the print share; the share is copied onto the PCclient along with the driver files.
If you have selected rpcclient command-line utility, then enter the command withaddprinter and adddriver options. After executing the rpcclient utility, you canview the print share on CIFS. Right-click and select Connect on the print share;the share is copied onto the PC client along with the driver files.
Below is the example to upload the printer driver using the rpcclient utility:
rpcclient "16.138.185.90" "-U" "test1%welcome" "-c" "adddriver Windows NTx86 HP LaserJet 5000 SeriesPCL:UNIDRV.DLL:HPLJ5000.GPD:UNIDRVUI.DLL:UNIDRV.HLP:PJL LanguageMonitor:NULL:PCL5ERES.DLL,UNIRES.DLL,HPCFONT.DLL,TTFSUB.GPD,hpcljx.hlp,STDNAMES.GPD3"
rpcclient "16.138.185.90" "-U" "test1%welcome" "-c" "addprinter UPDOWNUPDOWN HP LaserJet 5000 Series PCL UPDOWN"
The example uploads the driver "HP LaserJet 5000 Series PCL" and also createsthe print share UPDOWN on CIFS.
3–12 Configuring HP OpenVMS CIFS

Configuring HP OpenVMS CIFS3.10 How to Configure SMB.CONF File in Cluster Environment
3.10 How to Configure SMB.CONF File in Cluster EnvironmentTo configure an SMB.CONF file in a cluster environment, follow these steps:
1. Create SMB.CONF_"nodename" file in SAMBA$ROOT:[LIB] Directory, where"nodename" is CIFS server node name in the OpenVMS cluster.
For example, SMB.CONF_REYGON where REYGON is the server node inthe OpenVMS cluster. For every CIFS server node in the OpenVMS cluster aseparate SMB.CONF file with only node-specific information is maintained.
2. Configure a generic SMB.CONF file in SAMBA$ROOT:[LIB] directory, whichwill be common configuration file for all the server nodes in the cluster. Thecommon SMB.CONF file must contain cluster specific configuration option whichhas "include" option in it:
include:option specifies node-specific paths containing node-specific SMB.CONFs.For example: include = SAMBA$ROOT:[LIB]SMB.CONF_%h
Once you have set up CIFS server to run on all the nodes in the OpenVMScluster, they should be able to participate in the OpenVMS cluster, i.e., theycan be accessed using the cluster alias name.
3.11 How to Add a UserTo add a user on the host system and the CIFS database, follow these steps:
1. Verify whether the user exists on the host system. If not, add the user to thesystem. For more information about adding a user to the system, see the HPOpenVMS System Manager’s Manual.
2. Ensure that the user added to the host system has unique UIC and ADD_IDENTIFIER qualifiers, that the rights identifier matches with the username, and that the flag is set to NODISUSER.
Note
The default template, SAMBA$TMPLT, can be used to create a newOpenVMS user account for CIFS.
$ MC AUTHORIZEUAF> COPY SAMBA$TMPLT TEST1 /UIC=[500,500]/add_identifier
3. Verify whether the user exists on the CIFS database. If not, add the user tothe system by entering the following command:
$ PDBEDIT -A <USERNAME>
For example,
$ PDBEDIT -A TEST1
Note
Ensure that the user exists on the host system before adding the accountto the CIFS database.
Configuring HP OpenVMS CIFS 3–13

Configuring HP OpenVMS CIFS3.11 How to Add a User
4. Execute the SAMBA$GRANT_GIDUSERS.COM command procedure to grantthe identifiers CIFS$U_<username> to the users.
5. To change the password, enter the following command:
$ NET RPC PASSWORD <user> <oldpass> <newpass>--user <user>%<password>
Note
Alternatively, the user can change the password from the Windows client.
3.12 How to Add a ShareTo add a share, edit the SMB.CONF file and add the appropriate parameters underthe [share] section, depending on the file location and share name as shown inthe following example:
For example, to create the share "test1" with path SAMBA$ROOT:[TMP], add thefollowing lines in the SMB.CONF file:
[test1]comment = my test folderpath = /samba$root/tmpread only = Noguest ok = Yes
3.12.1 How to Configure the SMB.CONF File Using the VFS ModuleVTF, VAR, and Stream_LF features are supported using the VFS facility that isavailable on CIFS. The configuration for the same is specified at the share level.If you specify the VFS module, then it passes the registered file operation throughthe loaded VFS modules.
For more information on VFS modules, see the following web address:
http://www.samba.org/samba/docs/man/Samba-HOWTO-Collection/VFS.html
During installation, CIFS copies the required shareable modules to theSAMBA$ROOT:[LIB.VFS] directory. The important parameter is the vfs objectsparameter, where you can list one or more VFS modules by name.
For example, assuming you need VARVFC support on a specific share, you mustspecify VARVFC encoding before the file processing begins.
[ods2]comment = Share served by ODS2 diskpath = /dka0/ods2writeable = yesbrowseable = yesvfs objects = varvfc
Note
The modules are used in the order in which they are specified.
3–14 Configuring HP OpenVMS CIFS

Configuring HP OpenVMS CIFS3.12 How to Add a Share
By default, if you need only Stream_LF files to be created on a specific share, addthe following parameter under the [share] section in the SMB.CONF file:
[share]vfs objects = streamlf
If you need Stream_LF encoding, add the following parameter under the [share]section in the SMB.CONF file:
[share]vfs objects = streamlf
Note
Run the testparm utility whenever you modify the SMB.CONF file. Ensurethat all the VFS shareables are present in the SAMBA$ROOT:[LIB.VFS]directory.
VTF module converts file names on Windows to VTF-7 Unicode file names onODS-5 disk. To use VTF-7 format file names, add the following lines in theSMB.CONF file:
[share]vfs objects = vtf
Note
The Japanese OpenVMS supports only Japanese/VTF-7 file names onODS-5 disk.
3.13 How to Map User AccountsDue to a restriction in the OpenVMS SYSUAF, CIFS does not support useraccounts with more than 12 characters. However, this can be overcome bymodifying the "username map" service parameter under the [global] section inthe SMB.CONF file.
For example, to create the user account "domainuser1", follow these steps:
1. Edit the [global] section in the SMB.CONF file, as follows:
[global]username map = /samba$root/lib/username.map
2. List the entry in the username.map file, as follows:
hostuser1= <domain-name>\domainuser1
where: hostuser1 is the user on the host system and domainuser1 is the userin the domain.
Configuring HP OpenVMS CIFS 3–15

Configuring HP OpenVMS CIFS3.14 How to Configure LDAP
3.14 How to Configure LDAPBefore configuring LDAP as CIFS password backend, ensure that systemadministrator must have knowledge in setting up the Directory Information Tree(DIT).
HP OpenVMS Enterprise Directory has been updated with Samba Schema file tosupport LDAP backend for CIFS on OpenVMS. This is based on the assumptionthat HP OpenVMS Enterprise Directory acts as LDAP backend for CIFS onOpenVMS.
For more information about configuring LDAP, see the HP OpenVMS EnterpriseDirectory Management.
To configure LDAP as the CIFS password backend, follow these steps:
1. Install and configure HP OpenVMS Enterprise Directory.
2. Invoke Network Control Language (NCL) from a privileged account, andenter the following command to create CIFS specific naming contexts:
$ MC NCLNCL> CREATE DSA NAMING CONTEXT "/SAMBADOMAIN=<SAMBA_DOMAIN_NAME>"
where: /SAMBADOMAIN is part of the DIT structure that is created underLDAP (X500) tree. SAMBA_DOMAIN_NAME is the domain name specifiedin the DIT structure and also defined in the SAMBA.SC Schema file.
3. Invoke DXIM, and enter the following command to create CIFS specificdirectory entries:
$ DXIM /I=CDXIM> CREATE "/sambaDomain =<SAMBA_DOMAIN_NAME>" ATTRIBUTES -_DXIM>objectClass=(sambaDomain),sambaDomainName="<SAMBA_DOMAIN_NAME>",sambaSID=<SID_VALUE>
where: /sambaDomain is part of the DIT structure that is created underLDAP (X500) tree. SAMBA_DOMAIN_NAME is the domain name specifiedin the DIT structure and the following sambaDomain, sambaDomainNameand sambaSID are defined in the SAMBA.SC Schema file.
Note
You can obtain the SAMBASID value using the NET RPC command. Todo so, enter the following command:
$ NET RPC GETSID "-S" <SERVER_NAME>
For example,
$ NET RPC GETSID "-S" NEWTONStoring SID S-1-5-21-785286677-1050922829-3057065622-39453684 forDomain NEWTON.DOM in secrets.tdb
4. Create an LDAP admin dn in the LDAP server and use the required relativedistinguished name (RDN) that is available in the X500 DIT. ConfigureSMB.CONF file by adding the parameter "ldap admin dn" with this RDN in the[global] section.
For example,
LDAP ADMIN DN = SAMBADOMAINNAME=NEWTON.DOM,DC=MY-DOMAIN,DC=COM
3–16 Configuring HP OpenVMS CIFS

Configuring HP OpenVMS CIFS3.14 How to Configure LDAP
5. Add the following parameters under the [global] section in the SMB.CONF file:
[global]passdb backend = ldapsam:ldap: //<name or IP address of the node where LDAP
server is running>ldap admin dn = <admin-dn-specified-in step 4>ldap passwd sync = YES
Note
The LDAP admin RDN is used by CIFS to retrieve user accountinformation from LDAP server. The LDAP admin RDN is used inconjunction with the admin RDN password stored in the followingdirectory SAMBA$ROOT:[PRIVATE]SECRETS.TDB files.
6. Enter the following command to set the password for LDAP admin dn:
$ SMBPASSWD -W "<PASSWORD>"
7. Manage CIFS users using PDBEDIT utility command. For more informationabout managing or adding a user, see Section 3.11, How to Add a User.
8. Start the CIFS server.
3.15 Managing Groups in CIFS Member ServerThis section describes how to set up groups in a CIFS server that is configured asmember server in the active directory domain.
For example, assume that you are running the CIFS server on a node called"PIANO" that is configured as a member server in an active directory domaincalled "CIFSDOM".
1. To execute any of the net commands that involves CIFS server managementtasks, ensure that you have a privileged CIFS user account. To create aprivileged CIFS user account, follow these steps:
a. Create ’CIFSADMIN’ as the OpenVMS account, and grant full privilegesto this account.
b. Create a CIFS account by entering the following commands:
$ @SAMBA$ROOT:[BIN]SAMBA$DEFINE_COMMANDS.COM$ PDBEDIT -A CIFSADMIN
2. In the SMB.CONF file, add "admin users = cifsadmin" under the [global] sectionand restart the CIFS server.
3. On the PDC emulator of the active directory domain "CIFSDOM", create anaccount ’CIFSADMIN’. You can either create a privileged domain account or anormal user account.
4. To add a local group on the member server PIANO, follow these steps:
a. Add the resource identifier CIFSUSERS in the SYSUAF database byentering the following command:
$ MC AUTHORIZE ADD/IDENTIFIER/ATTRIBUTE=RESOURCE CIFSUSERS
Configuring HP OpenVMS CIFS 3–17

Configuring HP OpenVMS CIFS3.15 Managing Groups in CIFS Member Server
b. Map the member server local group and host group by entering thefollowing command:
$ NET GROUPMAP ADD NTGROUP=CIFSUSERS UNIXGROUP=CIFSUSERS -_$TYPE="L" "-W" PIANO "-S" PIANO "-U" CIFSADMIN%"PWD OF CIFSADMIN"
5. To list the groups in local member server on the node PIANO, enter thefollowing command:
$ NET RPC GROUP LIST "-W" PIANO "-S" PIANO "-U" CIFSADMIN%"PWD OF CIFSADMIN"
6. To add the local member server user or group to the group CIFSUSERS, enterthe following command:
$ NET RPC GROUP ADDMEM CIFSUSERS CATHY "-W" PIANO "-S" PIANO -_$ "-U" CIFSADMIN%"PWD OF CIFSADMIN"
7. To list the group members of CIFSUSERS, enter the following command:
$ NET RPC GROUP MEMBERS CIFSUSERS "-W" PIANO "-S" PIANO -_$ "-U" CIFSADMIN%"PWD OF CIFSADMIN"
8. To add a domain user or group to a local group CIFSUSERS, enter thefollowing command:
$ NET RPC GROUP ADDMEM CIFSUSERS CIFSDOM\CINDY "-W" PIANO -_$ "-S" PIANO "-U" CIFSADMIN%"PWD OF CIFSADMIN"
9. To delete a group from the local group CIFSUSERS, enter the followingcommand:
$ NET RPC GROUP DELMEM CIFSUSERS CIFSDOM\CINDY "-W" PIANO -_$ "-S" PIANO "-U" CIFSADMIN%"PWD OF CIFSADMIN"
10. To delete the local group CIFSUSERS, enter the following command:
$ NET RPC GROUP DELETE CIFSUSERS "-W" PIANO "-S" PIANO -_$ "-U" CIFSADMIN%"PWD OF CIFSADMIN"
Note
If you enable Winbind, it will automatically map the domain groups toVMS resource identifiers by using the "idmap gid" range specified inthe SMB.CONF file. For more information on how group mappings areautomatically created by winbind, see Section 3.2, Winbind.
3.16 Configuration Setting for International Character SetCIFS on OpenVMS supports ISO-8859-1 and UTF-8 character set for file names.The European characters are supported in ISO-8859-1 and other characters aresupported in UTF-8.
For ASCII or Latin-1 character set support, configure SMB.CONF file and add thefollowing line to the [global] section:
[global]unix charset = ISO-8859-1
3–18 Configuring HP OpenVMS CIFS

Configuring HP OpenVMS CIFS3.16 Configuration Setting for International Character Set
For Japanese or Chinese character set support, configure SMB.CONF file and addthe following line to the [global] section:
[global]dos charset = <user local codepage>unix charset = UTF-8vfs objects = vtf
Note
See the Limitations section in the HP OpenVMS CIFS Based on SambaRelease Notes for using the VTF module.
where: <user local codepage> is Windows codepage of the user. The value"CP850" is the default Windows codepage for English. For Japanese Windows,the value is "SJIS" or "CP932".
By default, the SMB.CONF file will have the following configuration settings forcharacter set support:
[global]dos charset = CP850unix charset = UTF-8
Note
The character set applies only to the characters in the file names and notthe contents of the files.
3.17 Verifying the Client ConnectionAfter installation and configuration, follow these steps to verify whether users areable to connect from a client successfully:
1. Start the NMBD process by entering the following command:
$ @SYS$STARTUP:SAMBA$STARTUP.COM
2. From the client, verify whether it has registered the name query request.Enter the following command from the command prompt:
C:\ NBTSTAT -A <IP ADDRESS/MACHINE NAME>This gives the registered NetBIOS names of the server
For example,
Configuring HP OpenVMS CIFS 3–19

Configuring HP OpenVMS CIFS3.17 Verifying the Client Connection
C:\ NBTSTAT A 16.148.18.31Local Area Connection:Node IpAddress: [16.38.47.15] Scope Id: []
NetBIOS Remote Machine Name Table
Name Type Status------------------------------------------NEWTON <00> UNIQUE RegisteredNEWTON <03> UNIQUE RegisteredNEWTON <20> UNIQUE RegisteredLANGROUP <00> GROUP RegisteredLANGROUP <1C> UNIQUE RegisteredLANGROUP <1E> GROUP Registered
MAC Address = 00-00-00-00-00-00
3. Ensure that "name of the services startup command file" points to theappropriate startup command procedure for the SMBD startup. To verify,enter the following command:
$ TCPIP SHOW SERVICE SMBD/FULL
For example,
$ TCPIP SHOW SERVICE SMBD/FULL
Service: SMBDState: Enabled
Port: 139 Protocol: TCP,UDP Address: 0.0.0.0Inactivity: 0 User_name: SAMBA$SMBD Process: SMBDLimit: 100 Active: 1 Peak: 1
File: SAMBA$ROOT:[BIN]SAMBA$SMBD_STARTUP.COMFlags: ListenSocket Opts: None
Receive: 0 Send: 0Log Opts: Acpt Actv Dactv Conn Error Exit Logi Logo Mdfy RjctTimO AddrFile: SAMBA$ROOT:[VAR]SAMBA$SMBD_STARTUP.LOG
SecurityReject msg: not definedAccept host: 0.0.0.0Accept netw: 0.0.0.0
Note
Ensure that all the settings and log files are accessible.
4. Connect from a client by entering the following address at the RUN prompt.
\\<ip-address-of-CIFS-server>/name of the server>
3–20 Configuring HP OpenVMS CIFS

Configuring HP OpenVMS CIFS3.17 Verifying the Client Connection
a. The "Enter Network Password" screen is displayed.
Enter the domain\user name in the ’User Name’ field and the password inthe ’Password’ field.
Configuring HP OpenVMS CIFS 3–21

Configuring HP OpenVMS CIFS3.17 Verifying the Client Connection
b. Click OK. A list of shared folders and files are displayed.
3.18 Troubleshooting Configuration Problems
• CIFS Utilities
testparm
testparm is a program to test the contents of SMB.CONF file. Whenever youmodify the SMB.CONF file you need to run the testparm utility.
$ testparm
SWAT
SWAT is a web-based interface that can be used to configure CIFS fromWindows. In addition, it provides online help for each configurationparameter. For more information, see Section 3.3, Samba WebAdministration Tool (SWAT).
• Logs
NMBD log files will be generated after startup. The log.nmbd files arestored in SAMBA$ROOT:[VAR].
SMBD log files will be generated for each client that utilizes the CIFSserver. By default, these log files are stored in SAMBA$ROOT:[VAR].
3–22 Configuring HP OpenVMS CIFS

Configuring HP OpenVMS CIFS3.18 Troubleshooting Configuration Problems
Note
• Log files will be generated based on the settings available inthe SMB.CONF file.
• Log contents are dependent on the log levels specified in theSMB.CONF file.
Edit the SMB.CONF file and add the following line under the [global] sectionto generate logs:
[global]Log level = <0-10> //specify the log level depending
on the amount of informationyou require
Max log size = <size> //0 indicates infiniteLog file = <path-of-the-log-file>
Note
You can also generate logs for a particular component such as NMBD,SMBD, etc. For example, log level = NMBD:10 to get only NMBD loglevel 10.
Run the executable in d10 to generate logs in verbose mode.
For example, to run SMBD process in verbose mode, follow these steps:
1. Define SMBD as foreign command:
$ SMBD :== $SAMBA$ROOT:[BIN.<architecture>]SAMBA$SMBD.EXE
2. Execute the following command:
$ SMBD -i -d10
• When you run the executables in the "-l" interactive mode, all the debugmessages will be displayed on the screen and you can also know whereexactly SMBD process is hanging or aborting.
• SAMBA_ROOT:[BIN]SAMBA$GATHER_INFO.COM - This is the Commandprocedure gathers information and creates a backup save set file for reportingproblems.
• Ethreal, Netmon, etc. can be used to capture the network traces between theclient and server.
• System Dump Analyzer can be used to set the process and analyze theprocess details.
• On OpenVMS Alpha Version 8.2 and OpenVMS Integrity servers Version8.2-1 define the following logical:
$ DEFINE/SYSTEM SAMBA$VMS_FCNTL 1
This logical is required as FCNTL byte range locking feature is not availableon OpenVMS Alpha Version 8.2 and OpenVMS Integrity servers Version8.2-1.
Configuring HP OpenVMS CIFS 3–23


4Starting and Stopping HP OpenVMS CIFS
This chapter describes how to start and stop HP OpenVMS CIFS.
4.1 Starting CIFSThis section describes the following methods to start CIFS:
• Manually from the command line
• Automatically each time you reboot
4.1.1 How to Start CIFS ManuallyTo start CIFS manually, enter the following command:
$ @SYS$STARTUP:SAMBA$STARTUP.COM
Note
On a cluster with different system disks, copy theSYS$STARTUP:SAMBA$STARTUP.COM command procedure to theSYS$COMMON:[SYS$STARTUP] directory manually from a node whereCIFS is installed.
The CIFS starts, and a message similar to the following is displayed:
Creating NMBD Process%RUN-S-PROC_ID, identification of created process is 0000255C
4.1.2 How to Start CIFS AutomaticallyTo ensure that the CIFS starts automatically each time youboot the OpenVMS system, edit the site-specific startup file,SYS$STARTUP:SYSTARTUP_VMS.COM. Add the CIFS startup command tobelow all lines that start network transports. For example,
$ @SYS$STARTUP:TCPIP$STARTUP.COM...
$ @SYS$STARTUP:SAMBA$STARTUP.COM
Starting and Stopping HP OpenVMS CIFS 4–1

Starting and Stopping HP OpenVMS CIFS4.1 Starting CIFS
Note
To ensure that the logicals persist across reboots and that CIFS startsautomatically when the system reboots, the system administratormust include @SYS$STARTUP:SAMBA$DEFINE_ROOT.COM inSYS$STARTUP:SYSTARTUP_VMS.COM before starting CIFS.
On a cluster with different system disks, copy theSYS$STARTUP:SAMBA$DEFINE_ROOT.COM command procedureto the SYS$COMMON:[SYS$STARTUP] directory manually from a nodewhere CIFS is installed.
4.1.3 How to Start CIFS in an OpenVMS ClusterIf you have installed and configured CIFS on multiple nodes of the sameOpenVMS Cluster, HP recommends that you use the SYSMAN utility to startCIFS manually and simultaneously on all cluster members.
To start CIFS on all cluster nodes at the same time, ensure that you are logged into the SYSTEM account on one of the member nodes, and then run SYSMAN:
Enter this command... To...
$ RUN SYS$SYSTEM:SYSMAN Start the SYSMAN utility.
SYSMAN> SET ENVIRONMENT/NODE=(node1,node2,...)
Define the OpenVMS Cluster members onwhich to start the server. For example,SYSMAN> SETENVIRONMENT/NODE=(SPEEDY,SPIN,SPAN)
SYSMAN> DO @SYS$STARTUP:SAMBA$STARTUP.COM
Start the CIFS on all the nodes you definedin the previous command.
SYSMAN> EXIT Exit the SYSMAN utility.
4.2 Stopping CIFSTo stop the CIFS manually, enter the following command:
$ @SYS$STARTUP:SAMBA$SHUTDOWN.COM
Note
On a cluster with different system disks, copy theSYS$STARTUP:SAMBA$SHUTDOWN.COM command procedure tothe SYS$COMMON:[SYS$STARTUP] directory manually from a nodewhere CIFS is installed.
4–2 Starting and Stopping HP OpenVMS CIFS

5Uninstalling the HP OpenVMS CIFS Software
This chapter describes how to remove HP OpenVMS CIFS software from yoursystem.
To remove CIFS configuration on a particular node in a cluster, enter thefollowing command:
$ @SAMBA$ROOT:[BIN]SAMBA$REMOVE_CONFIG.COM
This command procedure deassigns all the CIFS logicals defined on this node andalso removes the TCPIP services such as, SMBD and SWAT that are set duringconfiguration.
To uninstall the HP OpenVMS CIFS software, follow these steps:
1. Ensure that you are logged in using the privileged account.
2. Stop the NMBD and all client SMBD processes by entering the followingcommand:
$ @SYS$STARTUP:SAMBA$SHUTDOWN.COM
3. Verify that you have removed SAMBA$CONFIG.COM on the other nodes in acluster.
4. Enter the following command:
$ PRODUCT REMOVE SAMBA
The removal command procedure performs the following operation:
• Prompts you if all the CIFS Server TDB files and the SMB.CONF file have to beretained on the system.
Entering NO at the prompt deletes the TDB files, and the SMB.CONF fileand CIFS related logicals are deassigned.
Entering YES at the prompt retains the TDB files, and the SMB.CONF file iscopied to a backup directory under SAMBA$ROOT. The CIFS logicals willnot be deassigned.
Removes all the HP OpenVMS CIFS accounts created duringinstallation.
Uninstalling the HP OpenVMS CIFS Software 5–1


ASample Installation and Removal Procedures
This appendix provides sample procedures for installing and removing HPOpenVMS CIFS software.
A.1 Sample Installation on OpenVMS Integrity server Systems$ PRODUCT INSTALL SAMBA
The following product has been selected:HP I64VMS SAMBA V1.0 Layered Product
Do you want to continue? [YES]
Configuration phase starting ...
You will be asked to choose options, if any, for eachselected product and for any products that may beinstalled to satisfy software dependency requirements.
HP I64VMS SAMBA V1.0: HP CIFS for OpenVMS I64 V8.2-1,V8.3 and V8.3-1H1.
Do you want the defaults for all options? [YES] YES
Do you want to review the options? [NO] YES
HP I64VMS SAMBA V1.0: HP CIFS for OpenVMS I64 V8.2-1,V8.3 and V8.3-1H1.Do you want to download the Source files? : NODo you want to download the Migration Utility? : NO
Are you satisfied with these options? [YES] NO
Do you want to change any options? [YES] YES
If you say YES, the BCK file of the source fileswill be copied to SAMBA$ROOT:[SRC] location.
Do you want to download the Source files? [NO] YES
If you say YES, the BCK file of the Migration Utilitywill be copied to SAMBA$ROOT:[UTILS] location.
Do you want to download the Migration Utility? [NO] YES
Do you want to review the options? [NO]
Execution phase starting ...
The following product will be installed to destination:HP I64VMS SAMBA V1.0 DISK$I6483VMS:[VMS$COMMON.]
Portion done: 0%...20%...30%...60%...70%...90%
User Accounts and User Identification Codes (UICs)--------------------------------------------------
The HP CIFS for OpenVMS installation creates fourOpenVMS accounts: SAMBA$SMBD, SAMBA$NMBD, SAMBA$GUEST andSAMBA$TMPLT. The default UIC group number for allthese new accounts depends on the following:
Sample Installation and Removal Procedures A–1

Sample Installation and Removal ProceduresA.1 Sample Installation on OpenVMS Integrity server Systems
o If you are installing the product for the first time, thedefault is the first unused UIC group number, startingwith 360.
o If any of these account already exists, then the defaultUIC group number will not be used to change the UIC ofany existing accounts.
For more information about UIC group numbers, see theOpenVMS System Manager’s Manual.
Enter UIC group number for default accountsGroup: [360]Creating CIFS User Accounts ...
User Accounts Creation Completed Successsfully ....
The release notes for HP CIFS on OpenVMS,CIFS_REL_NOTES.TXT is available at SYS$COMMON:[SYSHLP]
To Configure HP CIFS, execute "$ @SAMBA$ROOT:[BIN]SAMBA$CONFIG.COM"
...100%
The following product has been installed:HP I64VMS SAMBA V1.0 Layered Product
$
A.2 Sample Removal Procedure on OpenVMS Integrity serverSystems
$ PRODUCT REMOVE SAMBA
The following product has been selected:HP I64VMS SAMBA V1.0 Layered Product
Do you want to continue? [YES] YES
The following product will be removed from destination:HP I64VMS SAMBA V1.0 DISK$I6483VMS:[VMS$COMMON.]
Portion done: 0%...10%...20%[ SAMBA shutdown being executed ]
[ Disabling TCPIP services SMBD ... ][ Terminating client SMBD_* processes... ][ Finished terminating client SMBD_* processes ]
[ Trying to terminate server-level NMBD process... ][ Finished NMBD process termination ]
[ SAMBA shutdown complete ]!!!! WARNING !!!!
This procedure will remove all Samba configuration files.Do you want to save them instead? [Yes] : Yes
Specify the location where you want to copy configuration filesBy Default they will be copied to [SAMBA$ROOT:[BACKUP]]::
Configuration files are copied to "SAMBA$ROOT:[BACKUP]" directory.
This procedure will also remove CIFS Release notes available at SYS$HELP.Do you want to save them instead? [Yes] : No...30%...40%...50%...60%...70%...80%...90%...100%
The following product has been removed:HP I64VMS SAMBA V1.0 Layered Product
$
A–2 Sample Installation and Removal Procedures

Index
AAdd
share, 3–14Add User
host system and CIFS database, 3–13
BBackend
tdbsam, 3–6BACKUP command, 1–4
CCharacter set, 3–18Checking
OpenVMS Cluster Configuration, 1–4TCP/IP status, 1–4
CIFS sourceextract, 1–2
Cluster environmentconfiguring SMB.CONF file, 3–13
ConfigureLDAP, 3–16
Configuring printercopying driver files
GUI, 3–12rpcclient command-line utility, 3–12
creating spool directory, 3–9driver uploading or downloading, 3–10identifying printer driver, 3–11OpenVMS print queues setup, 3–6
Configuring SMB.CONF filein cluster environment, 3–13using VFS module, 3–14
DData loss
preventing, 1–4DCPS print queues, 3–6Disk space
determining, 1–4
HHardware requirements, 1–3
IIdentifying printer driver files, 3–11Installation Directories, 2–3Installation procedure
on a VMScluster, 2–2sample installation, A–1sample removal, A–2starting, 2–1what it does, 2–1
Installation requirementshardware, 1–3software, 1–2, 1–3
LLDAP, 3–16LPD print queues, 3–7
MManaging groups, 3–17
member server, 3–17Member Server, 3–17
MAP user accounts, 3–15
OOpenVMS Clusters
starting server in, 4–2OpenVMS print queue setup, 3–6
PPostinstallation tasks, 2–2Preinstallation tasks
checklist, 1–3
Index–1

RReboot
starting CIFS automatically during, 4–1Release notes, 1–1
printing, 1–1
SSample installation, A–1Sample removal, A–2SMB.CONF
File structure, 3–3Sample configuration file, 3–5section description, 3–4
parameters, 3–4special sections, 3–4
template file, 3–4verify, 3–5
Software requirements, 1–2, 1–3Starting
CIFS, 4–1Startup
automatic, 4–1in OpenVMS Clusters, 4–2manual, 4–1
StoppingCIFS, 4–2
SWAT, 3–3SYSTEM account
logging in to, 1–3System backup, 1–4
TTCPIP$TELNETSYM print queues, 3–7
VVerifying the client connection, 3–19VFS module
configuring SMB.CONF file, 3–14
Index–2