hpe networknodemanagerispi...
TRANSCRIPT

HPE Network Node Manager iSPIPerformance for Metrics SoftwareSoftware Version: 10.21for the Windows® and Linux® operating systems
Deployment Reference
Document Release Date: November 2016Software Release Date: November 2016

Legal Notices
WarrantyThe only warranties for Hewlett Packard Enterprise products and services are set forth in the express warrantystatements accompanying such products and services. Nothing herein should be construed as constituting anadditional warranty. HPE shall not be liable for technical or editorial errors or omissions contained herein.
The information contained herein is subject to change without notice.
Restricted Rights LegendConfidential computer software. Valid license from HPE required for possession, use or copying. Consistent withFAR 12.211 and 12.212, Commercial Computer Software, Computer Software Documentation, and Technical Datafor Commercial Items are licensed to the U.S. Government under vendor's standard commercial license.
Oracle Technology — Notice of Restricted Rights
Programs delivered subject to the DOD FAR Supplement are 'commercial computer software' and use, duplication,and disclosure of the programs, including documentation, shall be subject to the licensing restrictions set forth inthe applicable Oracle license agreement. Otherwise, programs delivered subject to the Federal AcquisitionRegulations are 'restricted computer software' and use, duplication, and disclosure of the programs, includingdocumentation, shall be subject to the restrictions in FAR 52.227-19, Commercial Computer Software-RestrictedRights (June 1987). Oracle America, Inc., 500 Oracle Parkway, Redwood City, CA 94065.
For the full Oracle license text, see the license-agreements directory on the NNMi product DVD.
Copyright Notice© Copyright 2013-2016 Hewlett Packard Enterprise Development LP
Trademark NoticesAdobe® is a trademark of Adobe Systems Incorporated.
Linux® is the registered trademark of Linus Torvalds in the U.S. and other countries.
Microsoft® and Windows® are U.S. registered trademarks of Microsoft Corporation.
UNIX® is a registered trademark of The Open Group.
AcknowledgementsThis product includes libjpeg library. This software is copyright (C) 1991-1998, Thomas G. Lane.
The Graphics Interchange Format(c) is the Copyright property of CompuServe Incorporated. GIF(sm) is a ServiceMark property of CompuServe Incorporated.
This product includes libxml2 library. Copyright (C) 1998-2003 Daniel Veillard. All Rights Reserved.
This product includes libxp library. Copyright © 2001,2003 Keith Packard.
Documentation UpdatesThe title page of this document contains the following identifying information:
l Software Version number, which indicates the software version.l Document Release Date, which changes each time the document is updated.l Software Release Date, which indicates the release date of this version of the software.
To check for recent updates or to verify that you are using the most recent edition of a document, go to:https://softwaresupport.hpe.com/group/softwaresupport/search-result?keyword=.
Deployment Reference
HPE Network NodeManager iSPI Performance for Metrics Software (10.21) Page 2 of 129

This site requires an HP Passport account. If you do not have one, click the Create an account button on the HPPassport Sign in page.
SupportVisit the HPE Software Support web site at: https://softwaresupport.hpe.com
This web site provides contact information and details about the products, services, and support that HPE Softwareoffers.
HPE Software Support provides customer self-solve capabilities. It provides a fast and efficient way to accessinteractive technical support tools needed to manage your business. As a valued support customer, you can benefitby using the support web site to:
l Search for knowledge documents of interestl Submit and track support cases and enhancement requestsl Download software patchesl Manage support contractsl Look up HPE support contactsl Review information about available servicesl Enter into discussions with other software customersl Research and register for software training
Most of the support areas require that you register as an HP Passport user and sign in. Many also require a supportcontract. To register for an HP Passport ID, go to https://softwaresupport.hpe.com and click Register.
To find more information about access levels, go to:https://softwaresupport.hpe.com/web/softwaresupport/access-levels
Deployment Reference
HPE Network NodeManager iSPI Performance for Metrics Software (10.21) Page 3 of 129

ContentsOverview 7
System Configuration 8
Part I: Installation Models 9Introduction to Different InstallationModels 10
Support for NNMi Application Failover 10Achieving Scale Through Distribution 11Roles 11Guidelines for Deploying NPS in a Distributed Environment 13
Part II: Preinstallation Planning and Creating a Distributed Deployment 15Creating a Distributed Environment 16
Identify Systems 16Installing NPS 16
Prerequisites 16General Prerequisites 16Port Availability 17Requirements on Linux 18Enable Access Control List on Systems with Mounted File Systems (Only on Linux) 20Prerequisites for Installing onMulti-homed Systems 21Prerequisites for ConfiguringMultiple DB Servers 21
Enabling NNMi toWork with NPS 22Installing NPS on Each System in the Environment 27
Assign Roles 30Additional Configuration for Multiple DB Servers 35
Create the Controller Node 35Create a Secondary Node 37Configure the UiBi Server 38
Install iSPIs and Extension Packs 39Install iSPIs and Custom Poller Extension Packs in an Environment with a Single ETL Server39Install iSPIs and Custom Poller Extension Packs in an Environment with Multiple ETLServers 40Configuring Additional DB Servers 45
Switching from a Standalone Environment 49Creating a Separate ETL Server 50
Record the Details of Your Existing NPS Environment 50Disable the ETL Server Role on the Original NPS System 51Install a New instance of NPS 52Enable the ETL Server Role on the New NPS System 52Run the nnmenableperspi.ovpl Script 54
Creating a Separate DB Server 54Record the details of your existing NPS environment 54
Deployment Reference
HPE Network NodeManager iSPI Performance for Metrics Software (10.21) Page 4 of 129
Take a Backup of the Database 55Install a New Instance of NPS 56Restore the Database on the New System 56Enable Only the DB Server Role on the New System 56Disable the DB Server Role on the Original System 57Reconcile the DB Server FQDN onOther Servers 57
Creating a Separate UiBi Server 59Record the Details of Your Existing NPS Environment 59Take a Backup of Files and the Content Store 60Install a New Instance of NPS. 61Enable Only the UiBi Server Role on the New NPS System 61Disable the UiBi Server Role on the Original NPS System 64Reconcile the UiBi Server FQDN onOther Servers 65Run the nnmenableperfspi.ovpl Script 66
Modifying Data Retention Settings 67
Part III: Upgrading an Existing Distributed Deployment of NPS 69Upgrade NPS 69Re-configure the DB Server Role 71Additional Configuration Task on the UiBi Server 72Re-configure the ETL Server Role 73Upgrade All iSPIs 73Post-Upgrade Steps 74
Part IV: Installing Patches in a Distributed Deployment of NPS 81Installing a Patch to a Distributed Deployment of NPS 81
Configuration Task on the ETL Server 81Additional Configuration Steps 82
Uninstalling a Patch from aDistributed Deployment of NPS 83
Part V: Additional Configuration for Using NFS 85
Part VI: NPS in a Global Network Management Environment 87Architecture 87Licensing Requirement 88GNMwith NPS in a Linux Environment 88GNMwith NPS in aWindows Environment 90Notes and Limitations 94
Part VII: Installing NPS Patches in High-Availability Clusters 96Installing a Patch on NPS in HA Cluster 96Uninstalling an NPS Patch from HA Clusters 99
Part VIII: Maintaining NPS 104Modifying the FQDN of the NPS System 105Modifying the Default Communication Port 105Maintaining the NPS Database 107
Changing the Default Database Password 107Checking the Database Health 107
Deployment Reference
HPE Network NodeManager iSPI Performance for Metrics Software (10.21) Page 5 of 129

Back Up and Restore 108Incremental Backup 109Backing Up and Restoring on the Same System 110Restoring a BackupMade on a Previous Product Version 110Restoring a BackupMade on a Different System with Different Installation Directories 112Restoring a BackupWhen Additional Files Were Added to Extend the Database 113Post-Restore Steps onWindows 113
Recreating the NPS Database 113Tuning NPS 116
Tuning the Business Intelligence Server 116Monitoring the Performance of the Business Intelligence Server 116Best Practices 117Configuring Business Intelligence Server Settings 117Resolving Problems with Jobs and Report Scheduling 119
Tuning the NPS Database 120Log Files 122
Part IX: Using Certificate Authority 123
Part X: Troubleshooting 127
Send Documentation Feedback 129
Deployment Reference
HPE Network NodeManager iSPI Performance for Metrics Software (10.21) Page 6 of 129

OverviewThis document describes the system design considerations involved in building andmaintaining the NetworkPerformance Server (NPS) component of your network monitoring solution. This document provides detailedguidelines on how to set up a distributed deployment of NPS, how to configure different components of NPSfor optimal performance, and how tomaintain the environment. This document supplements the InteractiveInstallation Guide and the Support Matrix.
The latest version of this document is available here.
This document includes the following information:
l "Introduction to Different InstallationModels" on page 10. Provides an introduction to the concept ofdistributed NPS deployment.
l "Creating a Distributed Environment" on page 16. Provides instructions to create a new distributeddeployment of NPS.
l "Switching from a Standalone Environment" on page 49. Describes how tomigrate a standalone NPSsystem to a distributed environment.
l "Maintaining the NPS Database" on page 107. Describes how to back up, restore, and recreate the NPSdatabase.
l "Tuning the Business Intelligence Server" on page 116. Describes how to fine-tune different settings of theBusiness Intelligence Server for optimal performance.
Deployment ReferenceOverview
HPE Network NodeManager iSPI Performance for Metrics Software (10.21) Page 7 of 129
System ConfigurationThis section lists important system configuration requirements for the NPS system.
Configure the Open Files Limit (Linux Only)
NPS requires that the open files limit of the NPS system (Linux) be set to at least 8192.
To set this limit, follow these steps:
Log on to the system as root.
1. Open the following file with a text editor:
/etc/security/limits.conf
2. Check that the value of the nofile parameter (against both the hard and soft types) is higher than 8192.If a lower value is set, change the value to at least 8192.For example:
* soft nofile 8192
* hard nofile 8192
3. Save the file.4. Restart NPS by running the following commands:
a. stopALL.ovplb. startALL.ovpl
Deployment ReferenceSystem Configuration
HPE Network NodeManager iSPI Performance for Metrics Software (10.21) Page 8 of 129

HPE Network NodeManager iSPI Performance for Metrics Software (10.21) Page 9 of 129
Part I: Installation ModelsWhile deploying NPS, you can use one of the three available deployment architecture. The size of yourmonitoring environment is an important factor in deciding the right deployment architecture. This section of thedocument provides information about each deployment architecture.

Introduction to Different Installation ModelsSingle-Server Model
You can install NPS on the NNMi management server when you plan tomonitor a small or medium-sizedenvironment. The procedure to install NPS (and the NNM iSPI Performance for Metrics) on the NNMimanagement server involves running the NNM iSPI Performance for Metrics on the NNMi managementserver. See theNNM iSPI Performance for Metrics Support Matrix for information about the sizes ofenvironments that are supported by this same-server installationmodel where NPS co-exists with NNMi onthe same server.
Dedicated Server Model
To achieve greater performance and scale, you can install NPS (and the NNM iSPI Performance for Metrics)on a standalone, dedicated server. Installing NPS in this model involves running the nnmenableperfspi.ovplscript on the NNMi management server and running the NNM iSPI Performance for Metrics installer on adedicated server. You can opt for this installationmodel when you want to monitor a large or very largeenvironment.
Distributed Deployment of NPS
You can deploy NPS across a number of systems to take advantage of more computing resources andachieve greater scale. The distributed deployment of NPS enables you to distribute the computing loadacross multiple systems and designate each system to perform a specific operation determined by the roleassigned to the system and provides a way to get past resource constraints on a single server. Distributedenvironments are best-suited to large scale network monitoring with high scale needs in the area of scheduledreport generation, real-time analytics, or custom collection reporting.
Support for NNMi Application FailoverApplication Failover for NNMi ensures redundancy. Failover allows a secondary NNMi server to take overimmediately after the failure of a primary NNMi server. Failover relies on jboss clustering technology, ongoingfile system synchronization, and a Java keystore file that must be copied from NNM to NPS. For details, seetheHPE Network NodeManager iSPI Performance for Metrics Installation Guide.
NPS supports NNMi Application Failover, which is transparent to users. Aside from an interruption in servicelasting about 15minutes while failover is in progress, users are not aware that a failover took place, and theadministrator is not required to perform any special tasks related to failover.
The ability of NPS to support Application Failover depends on files it retrieves from the primary server in thecluster. NPS retrieves these files during startup. As soon as NPS has the files, it begins monitoring the statusof the primary server by checking for status changes every 5minutes. If NPS detects a status change, thefollowing events take place automatically:
l NPS determines which server is the new primary server.l NPS redirects data collection to a shared directory on the new primary server.l NPS begins collecting data (metrics and topology files) from the new primary server in the cluster.
Note: After failing over to the standby server, all reportlet dashboards and bookmark links will stopworking. Youmust regenerate all reportlet dashboards and bookmark links after failover.
HPE Network NodeManager iSPI Performance for Metrics Software (10.21) Page 10 of 129
Immediately after failover, NPS users are able to link from NPS to NNMi views on the new primary server,just as they could before failover.
Achieving Scale Through DistributionServer resources include CPU, memory, and disk I/O. When any one of these resources is fully consumed,you experience performance limitations that can prevent NPS from processing and loading the incoming datafast enough. The following behaviors indicate that NPS is unable to process the data optimally with theavailable resources:
You can address these problems, to a point, by adjusting how the server memory and CPU resources areallocated with the help of different tuning parameters provided by NPS. See "Tuning the Business IntelligenceServer" on page 116 and "Tuning the NPS Database" on page 120 for more information. If you continue toexperience resource bottleneck after tuning NPS, consider spreading NPS processes across multiple serversby creating a distributed deployment of NPS.
You can plan to create a distributed deployment of NPS if you observe the following:
l One ormore Extension Packs routinely fail to complete loading within its polling interval (usually 5minutes). To assess this, launch the ETL Performance by ExtPk Report View (from theSelf Monitoring >Quicklaunch Diagnostic Reportsmenu in the navigation pane in the NPS console). Monitor the value ofthe Process Time (secs) (avg)metric for each Extension Packs. If the value exceeds 300 seconds foran Extension Pack, you can consider creating a distributed deployment with a dedicated server with theExtract, Transform, and Load Server (ETL Server) role.
l After launching the NPS console, the navigation pane appears empty for several seconds. In this case,you can consider creating a distributed deployment with a dedicated server with the User Interface andBusiness Intelligence Server (UiBi Server).
l If scheduled reports often fail to complete, consider configuring a separate server with the UiBi Server role.
RolesYou can assign one, two, or all three of the following roles to an NPS system in a distributed deployment:
l Database Server: The Database Server (DB Server) role is responsible for creating and hosting the NPSdatabase and running database queries. The NNM iSPI Performance for Metrics installs Sybase IQ oneach NPS system. When you assign the DB Server role to a system, NPS starts the Sybase IQ databaseon the system and creates a shared directory.In a distributed deployment, you can assign the DB Server role to one or more systems.
Note: You can plan to configuremultiple DB Servers if you have a very large environment with highusage of interactive (not scheduled) reports.
Multiple DB Servers are supported only in a Linux environment. Also, youmust configure a sharedstorage system with raw disks with the help of the Storage Area Network (SAN) infrastructure whilecreatingmultiple DB Servers.As a best practice, if you need to configuremultiple DB Servers, always start with two servers. Later,based on the performance of the solution, you can addmore DB Servers to the environment.
l User Interface and Business Intelligence Server: The User Interface and Business Intelligence Server
Deployment Reference
HPE Network NodeManager iSPI Performance for Metrics Software (10.21) Page 11 of 129

(UiBi Server) role is responsible for rendering the available data into reports with the help of templatesprovided with Extension Packs. When you assign the UiBi Server role to a system, NPS starts the BIserver and creates a shared directory.You can assign the UiBi Server role to only one system.
l Extract, Transform, and Load Server: The Extract, Transform, and Load Server (ETL Server role) isresponsible for performing Extract, Transform, and Load (ETL) operations for the collectedmetrics.You can assign the ETL Server role to as many systems as you like. However, each Extension Pack mustbe enabled on only one ETL Server.Distributed Deployment of NPS with a Single ETL Server
When you configuremultiple ETL Servers, youmust allocate specific Extension Packs to be processed byeach ETL Server. In other words, youmust identify which Extension Packs are going to be processed bywhich ETL Server.Distributed Deployment of NPS with Two ETL Servers
Deployment Reference
HPE Network NodeManager iSPI Performance for Metrics Software (10.21) Page 12 of 129

Distributed Deployment of NPS with TwoDB Servers with Shared Storage
Guidelines for Deploying NPS in a DistributedEnvironmentYou can configure NPS in a distributed environment from day one of your operation by installing NPS onmultiple systems and assigning specific roles to each NPS system. This configuration is recommended forvery large scale environment. For more information about the scale of the environment where the distributeddeployment of NPS could be an ideal solution, see theSupport Matrix.
To create a distributed environment in phases, follow these guidelines:
l All NPS systems in the distributed deployment must run on the same operating system.l All NPS systems in the distributed deployment must have the same time zone configuration.l While creating a distributed deployment, use the following sequence while configuring server roles:
Deployment Reference
HPE Network NodeManager iSPI Performance for Metrics Software (10.21) Page 13 of 129

a. Configure the DB Server role.b. Configure the UiBi Server role.c. Configure the ETL Server role.
Deployment Reference
HPE Network NodeManager iSPI Performance for Metrics Software (10.21) Page 14 of 129

HPE Network NodeManager iSPI Performance for Metrics Software (10.21) Page 15 of 129
Part II: Preinstallation Planning andCreating a Distributed DeploymentThis section of the document provides step-by-step instructions to plan and create a distributed deployment ofNPS. You can alsomigrate your standalone NPS installation to a distributed environment by following theinstructions provided in this section.
Note: The information in thePreinstallation Planning and Creating a Distributed Deployment sectionprovides instructions to create a distributed environment with NPS 10.20. You can apply the NPS 10.21patch after the procedure is complete. For patch installation instructions, see "Installing Patches in aDistributed Deployment of NPS" on page 81.
Creating a Distributed EnvironmentNote: The information in theCreating a Distributed Deployment section provides instructions to create adistributed environment with NPS 10.20. You can apply the NPS 10.21 patch after the procedure iscomplete. For patch installation instructions, see "Installing Patches in a Distributed Deployment ofNPS" on page 81.
At the time of installation, the NNM iSPI Performance for Metrics installer automatically assigns all threeroles to the NPS system. If you want to deploy NPS in a distributed environment, youmust install NPS oneach system in the distributed environment, and then run the configureNpsServer.ovpl script on eachsystem to assign roles.
To create a distributed environment, follow these steps:
1. "Identify Systems".2. "Installing NPS".3. "Assign Roles" on page 30
Identify SystemsIdentify the systems on which you want to install NPS. Make sure all systems meet the hardware andsoftware requirements listed in theHPE Network NodeManager iSPI Performance for Metrics SoftwareSupport Matrix and the Prerequisites section in theHPE Network NodeManager iSPI Performance forMetrics Software Installation Guide.
Note: All systems must run with the same operating system.
Installing NPSWith the help of theHPE Network NodeManager iSPI Performance for Metrics Software 10.20media, installNPS on each system. Follow the instructions in this section.
After the installation of the version 10.20 is complete, apply the NNM iSPI Performance for Metrics 10.21patch.
PrerequisitesBefore you begin, make sure that the following prerequisites aremet:
General PrerequisitesPrimary Domain Name System (DNS) suffix
HPE Network NodeManager iSPI Performance for Metrics Software (10.21) Page 16 of 129

The system where you plan to install NPS must have a primary DNS suffix configured. The systemmust bereachable on the network using the fully-qualified domain name (FQDN).
The NNMi management server and the NPS systems must have the same domain name.
Verify that the NPS systems and NNMi management server are in the sameDNS domain; for example,mycompany.com. Membership in different subdomains is allowed, but the parent domainmust be the same.For example, the following systems can be used as the NNMi management server and the NPS systems:
l nnm.mycompany.com
l nps.reporting.mycompany.com
Automatic operating system updates
Disable the automatic update feature of the operating system to prevent automatic installation of operatingsystem fixes and enhancements while you install NPS. You can enable the feature after successfulinstallation of NPS.
Network
It is recommended that you install NPS on a system with Gigabit Ethernet LAN interfaces.
The network interface card (NIC) on each system should have at least 1 Gbps link speed.
Tip: If you plan to store large volumes of data in the NPS database, you can choose SAN disks for theNPS system. However, if you plan to use a single SAN disk for NPS and a few other applications, youmight observe poor NPS performance due to inference from other applications.
Use a benchmark tool to assess the performance of the disk prior to installing NPS.
On Linux, use a benchmark tool (like bonnie++) to assess the performance of the disk prior to installingNPS. On high-performing I/O systems, bonnie++ should have a total run time of 1minute 10 seconds orless.
Port AvailabilityThe following ports must be available on each system in the distributed deployment of NPS:
Port Type Purpose Configuration
9300 TCP Default HTTP port – used forWebUI andBI Web Services
After installation, you can change this port byusing configureWebAccess.ovpl.
9305 TCP Default Secure HTTPS port (SSL) – usedforWebUI and BI Web Services
After installation, you can change this port byusing configureWebAccess.ovpl.
9301 TCP Sybase ASE Change not supported
9302 TCP Sybase IQ Agent service Change not supported
9303 TCP Sybase IQ–the NPS database Change not supported
9306 TCP Database SQLRewrite Proxy–the NPSdatabase
Change not supported
Deployment Reference
HPE Network NodeManager iSPI Performance for Metrics Software (10.21) Page 17 of 129
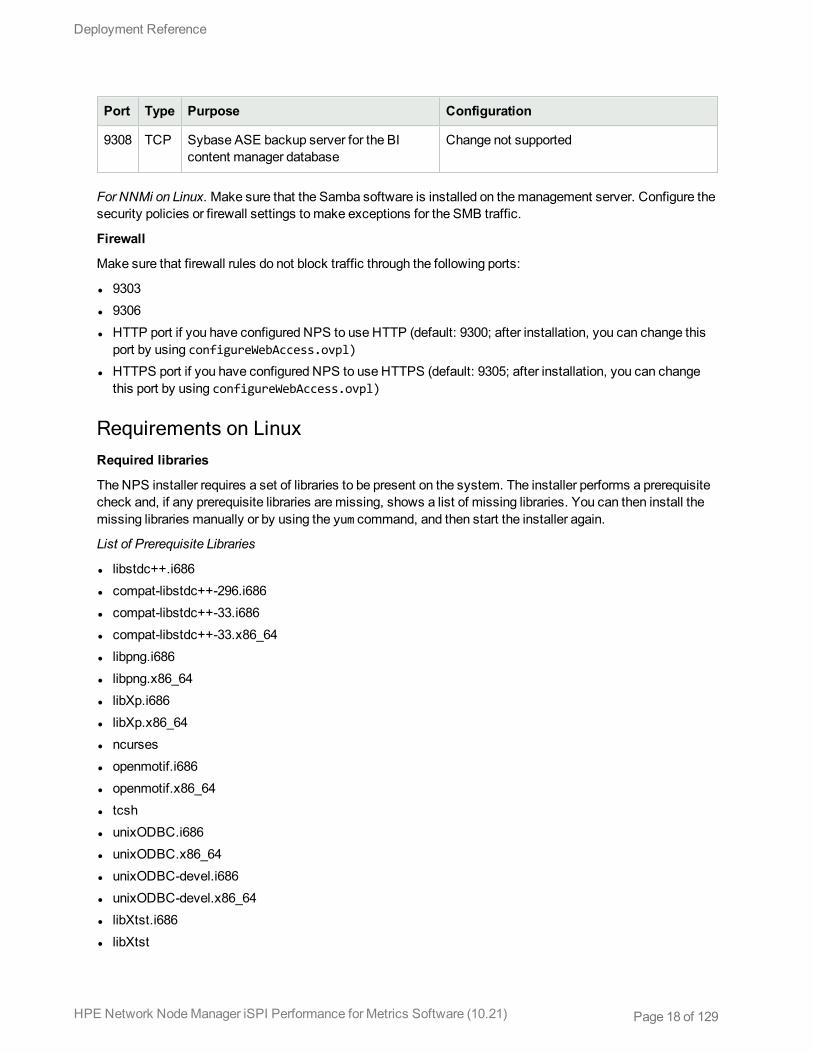
Port Type Purpose Configuration
9308 TCP Sybase ASE backup server for the BIcontent manager database
Change not supported
For NNMi on Linux.Make sure that the Samba software is installed on themanagement server. Configure thesecurity policies or firewall settings tomake exceptions for the SMB traffic.
Firewall
Make sure that firewall rules do not block traffic through the following ports:
l 9303l 9306l HTTP port if you have configured NPS to use HTTP (default: 9300; after installation, you can change thisport by using configureWebAccess.ovpl)
l HTTPS port if you have configured NPS to use HTTPS (default: 9305; after installation, you can changethis port by using configureWebAccess.ovpl)
Requirements on LinuxRequired libraries
The NPS installer requires a set of libraries to be present on the system. The installer performs a prerequisitecheck and, if any prerequisite libraries aremissing, shows a list of missing libraries. You can then install themissing libraries manually or by using the yum command, and then start the installer again.
List of Prerequisite Libraries
l libstdc++.i686l compat-libstdc++-296.i686l compat-libstdc++-33.i686l compat-libstdc++-33.x86_64l libpng.i686l libpng.x86_64l libXp.i686l libXp.x86_64l ncursesl openmotif.i686l openmotif.x86_64l tcshl unixODBC.i686l unixODBC.x86_64l unixODBC-devel.i686l unixODBC-devel.x86_64l libXtst.i686l libXtst
Deployment Reference
HPE Network NodeManager iSPI Performance for Metrics Software (10.21) Page 18 of 129

l libXi.i686l libXil libaiol nspr.i686l nspr.x86_64l nss.i686l nss.x86_64You can install NNM iSPI Performance for Metrics10.21 on RedHat Enterprise Linux 7.x. However, youmustinstall the NNM iSPI Performance for Metrics 10.21 patch after installing the NNM iSPI Performance forMetrics10.21 on RedHat Enterprise Linux 7.x and creating the distributed deployment of NPS (see "InstallingPatches in a Distributed Deployment of NPS" on page 81). The NNM iSPI Performance for Metrics10.21cannot function on RedHat Enterprise Linux 7.x without the 10.21 patch.
Installing the NNM iSPI Performance for Metrics10.21 on RedHat Enterprise Linux 7.x requires the followingadditional libraries:
l compat-libstdc++-296.i686l motifl motif.i686l openmotif.i686l openmotif.x86_64
Tip: Install themotif libraries before installing the openmotif libraries.
If the yum commands for installing the compat-libstdc++-296.i686, openmotif.i686, and openmotif.x86_64library fail, download the library files on the NPS system, and then install by running the rpm -icommands with the --nodeps --force options.
For example:
rpm -i compat-libstdc++-296-2.96-146.1.i686.rpm --nodeps --force
rpm -i openmotif-2.3.3-8.el6.x86_64.rpm --nodeps –force
rpm -i openmotif-2.3.3-8.el6.i686.rpm --nodeps --force
IPv4 address in the hosts file
The hosts file (in the /etc directory) must include at least one IPv4 address for localhost.
Time zone
Youmust set the time zone to UTC or to a geographic time zone using /usr/bin/system-config-date.
All systems in the distributed deployment of NPS must be in the same time zone.
Set the Maximum Number of Open Files
Youmust set themaximum number of open files to at least 8192.
To set this limit, follow these steps:
1. Log on to the system as root.2. Open the following file with a text editor:
Deployment Reference
HPE Network NodeManager iSPI Performance for Metrics Software (10.21) Page 19 of 129

/etc/security/limits.conf
3. Check that the value of the nofile parameter (against both the hard and soft types) is higher than8192.If a lower value is set, change the value to at least 8192.For example:
* soft nofile 8192
* hard nofile 8192
4. Save the file.Installing on ext4 File Systems
If you plan to install NPS on an ext4 file system, disable the journaling feature to enhance performance. Tocheck that journaling is enabled, run the following command:
tune2fs -l /<device> | grep "Filesystem features"
In this instance, <device> is the name of the file system onwhich you plan to install NPS.
If the output of the command shows has_journal, the journaling feature is enabled.
To disable journaling, follow these steps:
1. Make sure that the file system is unmounted or mounted as read only.2. Run the following command:
tune2fs -O ^has_journal /<device>
Enable Access Control List on Systems with Mounted File Systems(Only on Linux)Youmust perform this additional step if the /var/opt directory exists on amounted file system on one ofthese systems:
l NNMi management serverl The system where you want to configure the DB Serverl The system where you want to configure the UiBi Server
Follow these steps on each of the above systems if the /var/opt directory exists on amounted drive:
1. Open the /etc/fstab file with a text editor.2. Find the line that starts with the following:
<file_system> <mount_point>
<file_system> is the /var/opt directory (either /var or /var/opt)3. In the line, add acl to the list of options.4. Save the file.5. Run the following command to remount /var/opt:
mount -o remount /var/optOrmount -o remount /var
Deployment Reference
HPE Network NodeManager iSPI Performance for Metrics Software (10.21) Page 20 of 129

Prerequisites for Installing on Multi-homed SystemsWhile installing NPS on a system with multiple IP addresses, make sure that one of the IP addresses ispresent in the hosts file. Follow these steps:
1. Log on to the system where you are going to install NPS.2. Go to the following directory:
OnWindows
C:\Windows\System32\drivers\etc
On Linux
/etc
3. Open the hosts file with a text editor.4. Add one of the IP addresses and the FQDN of the system in a new line.5. Save the file.
Prerequisites for Configuring Multiple DB Servers
Note: You can plan to configuremultiple DB Servers if you have a very large environment with highusage of interactive (not scheduled) reports.
Multiple DB Servers are supported only in a Linux environment. Also, youmust configure a sharedstorage system with raw disks with the help of the Storage Area Network (SAN) infrastructure whilecreatingmultiple DB Servers.
As a best practice, if you need to configuremultiple DB Servers, always start with two servers. Later,based on the performance of the solution, you can addmore DB Servers to the environment.
Modify the perfspi.cfg File
1. Log on to one of the DB Servers in the deployment.2. Open the following file with a text editor:
/var/opt/OV/database/perfspi.cfg
3. Change the line -n perfspi to -n <hostname>perfspi.In this instance, <hostname> is the hostname of the local system.
4. Save the file.5. Repeat these steps on all the DB Servers in the environment.
Configure Storage Resources
A distributed deployment of NPS with multiple DB Servers require a raw storage system. Before configuringthe DB Server roles, make sure to complete the storage configuration.
To configure the storage resources:
Deployment Reference
HPE Network NodeManager iSPI Performance for Metrics Software (10.21) Page 21 of 129

1. Make sure that all the servers used in this distributed deployment of NPS use themultipath I/Oconfiguration.
2. Create at least the following VDisks for the deployment:l One VDisk for the entire distributed environment (you can label it as SYSTEM).
l One VDisk for each DB Server in the distributed environment to host temporary data (you can labelthem as TEMP1, TEMP2, and so on).
l At least one VDisk to store the tables and columns of the NPS database (you can label it as USER_MAIN1)
3. Note down theWWID of each VDisk.
Enabling NNMi to Work with NPSYoumust run a set of scripts on the NNMi management server to enable NNMi to work with the distributeddeployment of NPS.
These scripts perform the following tasks:
l Adding a new menu item (NNM iSPI Performance) in the Actions menu of the NNMi consolel Enabling the evaluation license of the NNM iSPI Performance for Metrics on the NNMi management serverl Creating a shared directory on the NNMi management server where NNMi can store the performance datacollected from themanaged network (NPS collects the data from this shared directory)
l Creating a user on the NNMi management server with write privilege to the newly created shared directoryTo enable NNMi to work with NPS, follow these steps:
Note: If NNMi is installed in a high-availability or Application Failover cluster, follow these steps on eachnode in the cluster.
When NNMi is installed on Linux
1. Log on to the NNMi management server as root.2. If the /var/opt directory on the NNMi management server is on amounted file system, youmust
perform the following additional steps:a. Open the /etc/fstab file with a text editor.b. Find the line that starts with the following:
<file_system> <mount_point>
<file_system> is the /var/opt directory (either /var or /var/opt)c. In the line, add acl to the list of options.d. Save the file.e. Run the following command to remount /var/opt:
mount -o remount /var/optOrmount -o remount /var
3. Go to the following directory:
Deployment Reference
HPE Network NodeManager iSPI Performance for Metrics Software (10.21) Page 22 of 129
/opt/OV/bin
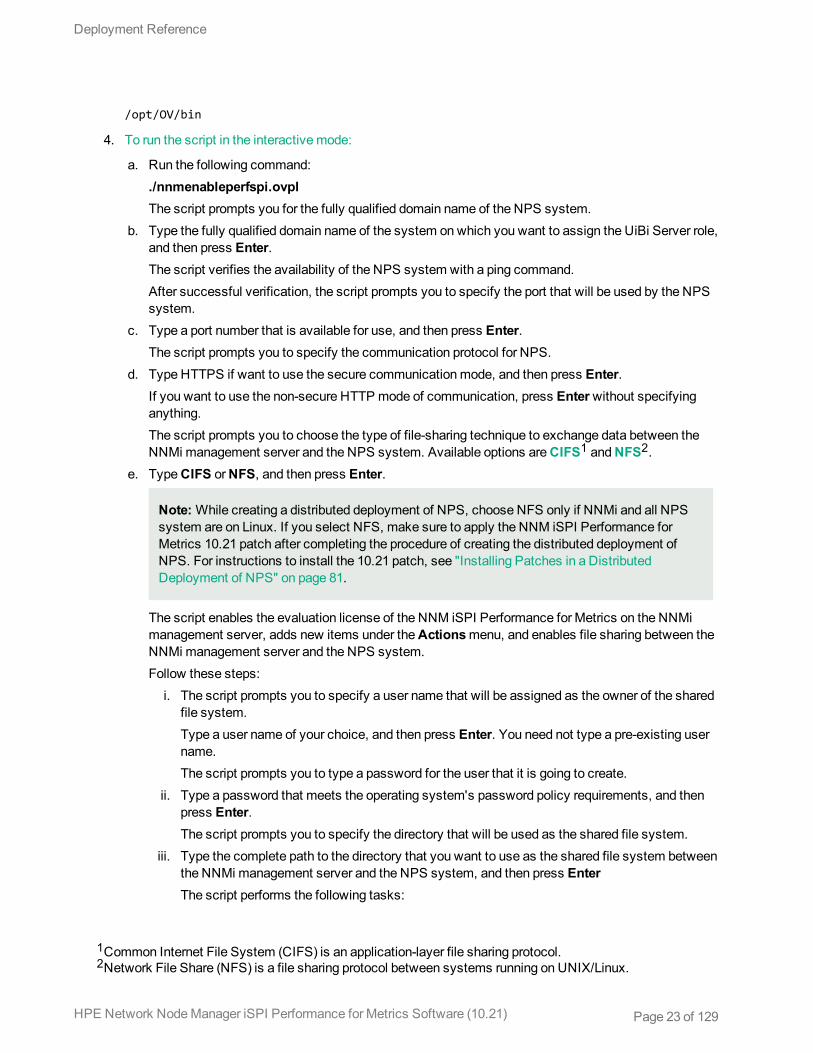
4. To run the script in the interactivemode:
a. Run the following command:./nnmenableperfspi.ovplThe script prompts you for the fully qualified domain name of the NPS system.
b. Type the fully qualified domain name of the system onwhich you want to assign the UiBi Server role,and then press Enter.The script verifies the availability of the NPS system with a ping command.After successful verification, the script prompts you to specify the port that will be used by the NPSsystem.
c. Type a port number that is available for use, and then press Enter.The script prompts you to specify the communication protocol for NPS.
d. Type HTTPS if want to use the secure communicationmode, and then press Enter.If you want to use the non-secure HTTP mode of communication, press Enterwithout specifyinganything.The script prompts you to choose the type of file-sharing technique to exchange data between theNNMi management server and the NPS system. Available options areCIFS1 andNFS2.
e. TypeCIFS orNFS, and then press Enter.
Note:While creating a distributed deployment of NPS, choose NFS only if NNMi and all NPSsystem are on Linux. If you select NFS, make sure to apply the NNM iSPI Performance forMetrics 10.21 patch after completing the procedure of creating the distributed deployment ofNPS. For instructions to install the 10.21 patch, see "Installing Patches in a DistributedDeployment of NPS" on page 81.
The script enables the evaluation license of the NNM iSPI Performance for Metrics on the NNMimanagement server, adds new items under theActionsmenu, and enables file sharing between theNNMi management server and the NPS system.Follow these steps:i. The script prompts you to specify a user name that will be assigned as the owner of the shared
file system.Type a user name of your choice, and then press Enter. You need not type a pre-existing username.The script prompts you to type a password for the user that it is going to create.
ii. Type a password that meets the operating system's password policy requirements, and thenpress Enter.The script prompts you to specify the directory that will be used as the shared file system.
iii. Type the complete path to the directory that you want to use as the shared file system betweenthe NNMi management server and the NPS system, and then press EnterThe script performs the following tasks:
1Common Internet File System (CIFS) is an application-layer file sharing protocol.2Network File Share (NFS) is a file sharing protocol between systems running on UNIX/Linux.
Deployment Reference
HPE Network NodeManager iSPI Performance for Metrics Software (10.21) Page 23 of 129

l Enables the evaluation license of the NNM iSPI Performance for Metrics on the NNMimanagement server
l Adds menu items under the Actions menu in the NNMi console to launch the NPS consolel Creates the shared file systeml Creates a user (if necessary) that can access the newly created shared file system
5. To run the script in the non-interactive (silent) mode:
a. In a text editor, add the following content:
spiHost=
spiPort=
spiProtocol=
shareType=
userName=
password=
shareName=
sharedDir=
b. Specify a value for each parameter:
Parameter Description
spiHost Type the fully qualified domain name of the system onwhich you want to assign theUiBi Server role.
spiPort Type the port that will be used by the NPS system. Type a port number that isavailable for use.
spiProtocol Type HTTPS if want to use the secure communicationmode.Type HTTP if you want to use the non-securemode of communication.
shareType Type CIFS.
userName Type a user name of your choice. You need not type a pre-existing user name. Thisuser name that will be assigned as the owner of the shared file system.
password Type the password of the above user. The passwordmust meet the operatingsystem's password policy requirements.
shareName Type a name of your choice for the shared file system.
sharedDir Specify the directory that will be used as the shared file system.Type the complete path to the directory that you want to use as the shared filesystem between the NNMi management server and the NPS system.
c. Save the file on the NNMi management server.d. Run the following command:
./nnmenableperfspi.ovpl -f <configFile>
Deployment Reference
HPE Network NodeManager iSPI Performance for Metrics Software (10.21) Page 24 of 129

In this instance, <configFile> is the name of the configuration file (with complete path to the file).The script performs the following tasks:o Enables the evaluation license of the NNM iSPI Performance for Metrics on the NNMi
management servero Adds menu items under the Actions menu in the NNMi console to launch the NPS consoleo Creates the shared file systemo Creates a user (if necessary) that can access the newly created shared file system
When NNMi is Installed on Windows
1. Log on to the NNMi management server as Administrator.2. Go to the following directory:
%nnminstalldir%\bin
3. To run the script in the interactivemode:
a. Run the following command:nnmenableperfspi.ovplThe script prompts you for the fully qualified domain name of the NPS system.
b. Type the fully qualified domain name of the system onwhich you want to assign the UiBi Server role,and then press Enter.The script verifies the availability of the NPS system with a ping command.After successful verification, the script prompts you to specify the port that will be used by the NPSsystem.
c. Type a port number that is available for use, and then press Enter.The script prompts you to specify the communication protocol for NPS.
d. Type HTTPS if want to use the secure communicationmode, and then press Enter.If you want to use the non-secure HTTP mode of communication, press Enterwithout specifyinganything.The script prompts you to choose the type of file-sharing technique to exchange data between theNNMi management server and the NPS system.
e. When you use aWindows NNMi management server, youmust choose only theCIFS1 protocol forfile sharing.Type CIFS, and then press Enter.The script prompts you to specify a user name that will be assigned as the owner of the shared filesystem.
f. Type a user name of your choice, and then press Enter. You need not type a pre-existing user name.
Tip: If you specify a user name that does not already exists, the script creates a new local user(and not aWindows domain user).
You can specify a pre-existingWindows domain user.
1Common Internet File System (CIFS) is an application-layer file sharing protocol.
Deployment Reference
HPE Network NodeManager iSPI Performance for Metrics Software (10.21) Page 25 of 129

Always use the following format while specifying a pre-existing domain user name:<domain>\<user_name>In this instance, <domain>is the domain name and <user_name> is the user name.
The script prompts you to specify a password of the user that it is going to create.g. Type a password that meets the operating system's password policy requirements, and then press
Enter.The script prompts you to specify the directory that will be used as the shared file system.
h. Type the complete path to the directory that you want to use as the shared file system between theNNMi management server and the NPS system, and then press Enter.The script performs the following tasks:o Enables the evaluation license of the NNM iSPI Performance for Metrics on the NNMi
management servero Adds menu items under the Actions menu in the NNMi console to launch the NPS consoleo Creates the shared file systemo Creates a user (if necessary) that can access the newly created shared file system
4. To run the script in the non-interactive (silent) mode:
a. In a text editor, add the following content:
spiHost=
spiPort=
spiProtocol=
shareType=
userName=
password=
shareName=
sharedDir=
b. Specify a value for each parameter:
Parameter Description
spiHost Type the fully qualified domain name of the system onwhich you want to assign theUiBi Server role.
spiPort Type the port that will be used by the NPS system. Type a port number that isavailable for use.
spiProtocol Type the communication protocol for NPS.Type HTTPS if want to use the secure communicationmode. Type HTTP if youwant to use the non-securemode of communication.
shareType Type CIFS.
Deployment Reference
HPE Network NodeManager iSPI Performance for Metrics Software (10.21) Page 26 of 129

Parameter Description
WhenNNMi is installed onWindows, you can use only theCIFS1 protocol.
userName Type a user name of your choice, and then press Enter. You need not type a pre-existing user name.
Tip: If you specify a user name that does not already exists, the script createsa new local user (and not aWindows domain user).
You can specify a pre-existingWindows domain user.Always use the following format while specifying a pre-existing domain username:<domain>\<user_name>In this instance, <domain>is the domain name and <user_name> is the username.
password Type the password of the above user.
shareName Type a name of your choice for the shared file system.
sharedDir Specify the directory that will be used as the shared file system.Type the complete path to the directory that you want to use as the shared filesystem between the NNMi management server and the NPS system.
c. Save the file on the NNMi management server.d. Run the following command:
nnmenableperfspi.ovpl -f <configFile>In this instance, <configFile> is the name of the configuration file (with complete path to the file).
Installing NPS on Each System in the EnvironmentTo install NPS on each system., follow these steps:
1. Insert the NNM iSPI Performance for Metrics installationmedia into the DVD drive.2. Use the cd command to change to themedia directory.3. From themedia root, run the setup file:
OnWindows, double-click the setup.exe file.On Linux, run the following command:./setup.binThe installation wizard opens.Select the language of the wizard, and then click OK.If the application requirement check warnings dialog box opens, review the warningmessages, takeappropriate action, and the click Continue.
1Common Internet File System (CIFS) is an application-layer file sharing protocol.
Deployment Reference
HPE Network NodeManager iSPI Performance for Metrics Software (10.21) Page 27 of 129
4. On the Introduction page, click Next. The License Agreement page opens.5. Select I accept the terms, and click Next. The Select Features page opens.6. Clear the NNM iSPI Performance for Metrics–ExtensionPacks check box.
Note: Youmust clear the check box at this step. After installation and configuration, you canactivate the NNM iSPI Performance for Metrics Extension Packs with the help of themetricsExtensionPacks.ovpl script.
7. Click Next.OnWindows only. The Choose the Installation Directory page opens. If you want to install NPS in a non-default directory (or drive), make appropriate selections, and then click Next.The installer program initiates the system-checking process and verifies that system requirements aremet.
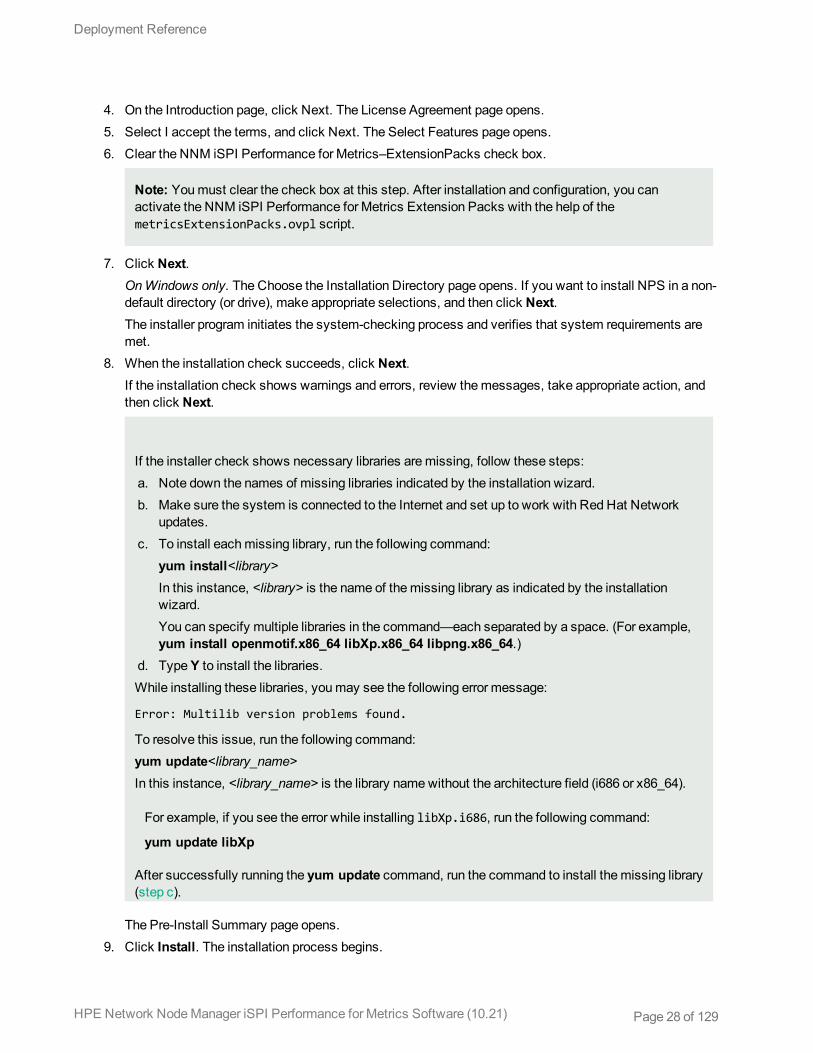
8. When the installation check succeeds, click Next.If the installation check shows warnings and errors, review themessages, take appropriate action, andthen click Next.
If the installer check shows necessary libraries aremissing, follow these steps:a. Note down the names of missing libraries indicated by the installation wizard.b. Make sure the system is connected to the Internet and set up to work with Red Hat Network
updates.c. To install eachmissing library, run the following command:
yum install<library>In this instance, <library> is the name of themissing library as indicated by the installationwizard.You can specify multiple libraries in the command—each separated by a space. (For example,yum install openmotif.x86_64 libXp.x86_64 libpng.x86_64.)
d. TypeY to install the libraries.While installing these libraries, youmay see the following error message:
Error: Multilib version problems found.
To resolve this issue, run the following command:yum update<library_name>In this instance, <library_name> is the library namewithout the architecture field (i686 or x86_64).
For example, if you see the error while installing libXp.i686, run the following command:
yum update libXp
After successfully running the yum update command, run the command to install themissing library(step c).
The Pre-Install Summary page opens.9. Click Install. The installation process begins.
Deployment Reference
HPE Network NodeManager iSPI Performance for Metrics Software (10.21) Page 28 of 129

Toward the end of the installation process, the HPE NNM iSPI Performance Configuration windowopens.Do the following:a. Select the Remote CIFS Share Access option, and then specify the share name, account name, and
password. Use the same details that you provided while running the nnmenableperfspi.ovplscript.
Tip: You can find the network share and user account details specified during the last run of thennmenableperfspi.ovpl file in the following file on the NNMi management server:
(The file does not store the password.)On Linux:
/var/opt/OV/log/nnmenableperfspi.txt
OnWindows:
%nnmdatadir%\log\nnmenableperfspi.txt
Do not modify the data retention period values. Do not click Start under Service Status.b. Click Apply.c. Click Exit.
Additional Configuration for NNMi in Application Failover
If NNMi is installed in an application failover cluster, place the cluster.keystore file on each role byfollowing these steps:
1. On the NNMi management server, copy the cluster.keystore file from the following directory:l For NNMi onWindows:
%NnmDataDir%\shared\nnm\conf\nnmcluster
l For NNMi on Linux:/var/opt/OV/shared/nnm/conf/nnmcluster
2. On each server in the distributed deployment, place the cluster.keystore file in the following directory:l OnWindows: %npsdatadir%\nnmappfailover\keystore
l On Linux: /var/opt/OV/NNMPerformanceSPI/nnmappfailover/keystore
Also, update the nms-cluster.properties file by following these steps:
1. Log on to the active NNMi management server.2. Go to the following directory:
l Windows: %NnmDataDir%\shared\nnm\conf\props
l Linux: /var/opt/OV/shared/nnm/conf/props
3. Set the com.hp.ov.nms.cluster.getActiveMethod property to https if you want to configure NNMiand NPS to use only HTTPS; set the property to http if you want to configure NNMi and NPS to useHTTP.
4. Save the file.
Deployment Reference
HPE Network NodeManager iSPI Performance for Metrics Software (10.21) Page 29 of 129

5. Restart NNMi by running the following commands:l OnWindows:
i. %nnminstalldir%\bin\ovstop -cii. %nnminstalldir%\bin\ovstart -c
l On Linux:i. /opt/OV/bin/ovstop -cii. /opt/OV/bin/ovstart -c
Assign RolesYou can assign roles to an NPS system by configuring the serverRoleConfig.cfg file first, and then runningthe configureNpsServer.ovpl command.
Note: Once role assignment is complete, you cannot configure an NPS system in a distributeddeployment to assume a different role.
In this configuration step, you need to specify the details of the network share and user account specifiedwhile running the nnmenableperfspi.ovpl script. As a best practice, youmust always securely notedown share and user account details that are specified while running the nnmenableperfspi.ovpl script.
You can find the network share and user account details specified during the last run of thennmenableperfspi.ovpl file in the following file on the NNMi management server:
(The file does not store the password.)
On Linux:
/var/opt/OV/log/nnmenableperfspi.txt
OnWindows:
%nnmdatadir%\log\nnmenableperfspi.txt
The NPS installer places the serverRoleConfig.cfg file in the following directory:
l OnWindows: %NPSInstallDir%\configl On Linux: $NPSInstallDir/configTo configure the serverRoleConfig.cfg file, follow these steps:
1. Log on to the NPS system.2. Open the serverRoleConfig.cfg file with a text editor.3. Make only the following changes to the file:
Deployment Reference
HPE Network NodeManager iSPI Performance for Metrics Software (10.21) Page 30 of 129

l To configure only the DB Server role, set the following properties to the values shown here:
Property Value
Role.Etl 0
Role.UiBi 0
Role.DB 1
l To configure only the UiBi Server role, set the following properties to the values shown here:
Property Value
Role.Etl 0
Role.Db 0
Role.UiBi 1
UiBi.DbServer.Hostname Type the FQDN of the DB Server.If you want to configuremultiple DB Servers, specify the FQDN ofthe Controller.
UiBi.NnmServer.Hostname Type the FQDN of the NNMi management server.
UiBi.NnmServer.Share.Name Type the name of the network share created on the NNMimanagement server while running the nnmenableperfspi.ovplscript.
UiBi.NnmServer.Share.User Type the name of the user account specified while running thennmenableperfspi.ovpl script.
UiBi.NnmServer.Share.Pass Type the password of the above user account.
l To configure only the ETL Server role, set the following properties to the values shown here:
Property Value
Role.ETL 1
Role.Db 0
Role.UiBi 0
Etl.DbServer.Hostname Type the FQDN of the DB Server.If you want to configuremultiple DB Servers, specify theFQDN of the Controller.
Etl.UiBiServer.Hostname Type the FQDN of the UiBi Server.
Etl.NnmServer.Hostname Type the FQDN of the NNMi management server.
Deployment Reference
HPE Network NodeManager iSPI Performance for Metrics Software (10.21) Page 31 of 129
Property Value
Etl.RuntimeConfig.PRSPI_DISABLE_ EXTENSIONPACK_AUTOINSTALL
0
Note: If you want to configuremultiple ETL Servers,make sure, at a given point, this value is set to 0 onlyon one ETL Server.
Etl.RuntimeConfig.PRSPI_DISABLE_CUSTOMCOLLECTION_AUTOINSTALL
0
Note: If you want to configuremultiple ETL Servers,make sure, at a given point, this value is set to 0 onlyon one ETL Server.
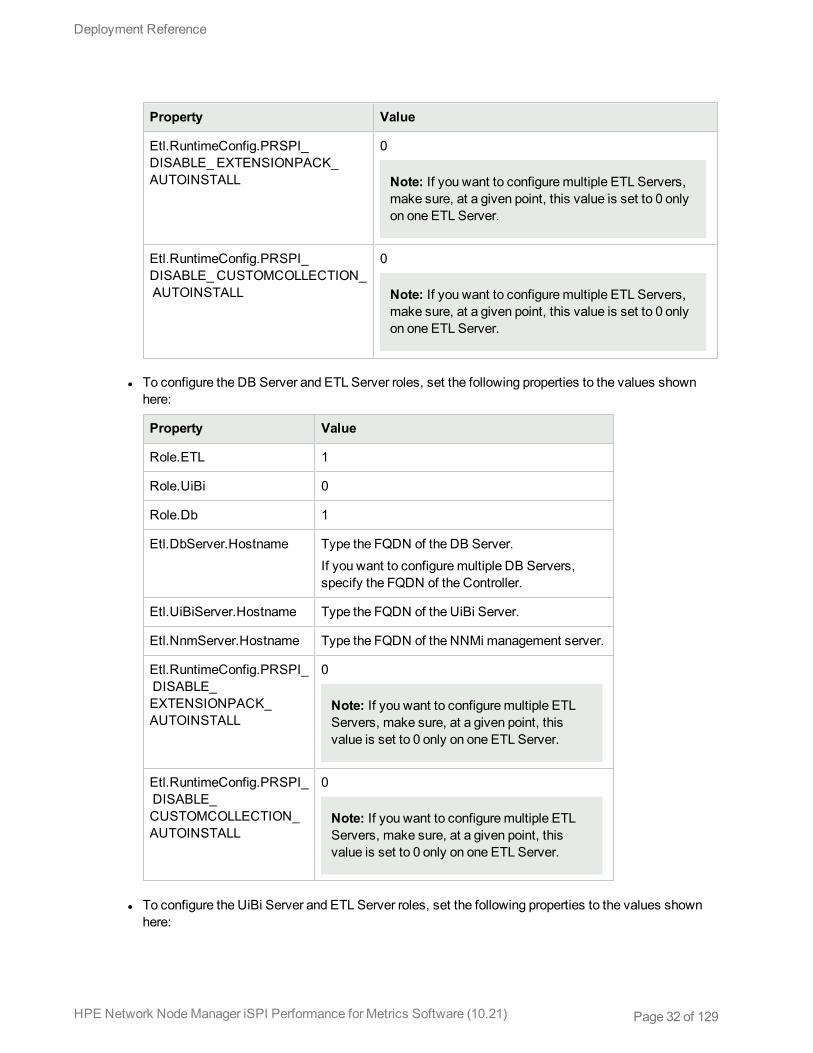
l To configure the DB Server and ETL Server roles, set the following properties to the values shownhere:
Property Value
Role.ETL 1
Role.UiBi 0
Role.Db 1
Etl.DbServer.Hostname Type the FQDN of the DB Server.If you want to configuremultiple DB Servers,specify the FQDN of the Controller.
Etl.UiBiServer.Hostname Type the FQDN of the UiBi Server.
Etl.NnmServer.Hostname Type the FQDN of the NNMi management server.
Etl.RuntimeConfig.PRSPI_DISABLE_EXTENSIONPACK_AUTOINSTALL
0
Note: If you want to configuremultiple ETLServers, make sure, at a given point, thisvalue is set to 0 only on one ETL Server.
Etl.RuntimeConfig.PRSPI_DISABLE_CUSTOMCOLLECTION_AUTOINSTALL
0
Note: If you want to configuremultiple ETLServers, make sure, at a given point, thisvalue is set to 0 only on one ETL Server.
l To configure the UiBi Server and ETL Server roles, set the following properties to the values shownhere:
Deployment Reference
HPE Network NodeManager iSPI Performance for Metrics Software (10.21) Page 32 of 129

Property Value
Role.ETL 1
Role.UiBi 1
Role.Db 0
Etl.DbServer.Hostname Type the FQDN of the DB Server.If you want to configuremultiple DB Servers, specify theFQDN of the Controller.
Etl.NnmServer.Hostname Type the FQDN of the NNMi management server.
Etl.NnmServer.Share.Name Type the name of the network share created on the NNMimanagement server while running thennmenableperfspi.ovpl script.
Etl.NnmServer.Share.User Type the name of the user account specified while runningthe nnmenableperfspi.ovpl script.
Etl.NnmServer.Share.Pass Type the password of the above user account.
UiBi.DbServer.Hostname Type the FQDN of the DB Server.If you want to configuremultiple DB Servers, specify theFQDN of the Controller.
UiBi.NnmServer.Hostname Type the FQDN of the NNMi management server.
UiBi.NnmServer.Share.Name Type the name of the network share created on the NNMimanagement server while running thennmenableperfspi.ovpl script.
UiBi.NnmServer.Share.User Type the name of the user account specified while runningthe nnmenableperfspi.ovpl script.
UiBi.NnmServer.Share.Pass Type the password of the above user account.
Etl.RuntimeConfig.PRSPI_DISABLE_ EXTENSIONPACK_AUTOINSTALL
0
Note: If you want to configuremultiple ETL Servers,make sure, at a given point, this value is set to 0 onlyon one ETL Server.
Etl.RuntimeConfig.PRSPI_DISABLE_CUSTOMCOLLECTION_AUTOINSTALL
0
Note: If you want to configuremultiple ETL Servers,make sure, at a given point, this value is set to 0 onlyon one ETL Server.
l To configure only the DB Server and UiBi Server roles, set the following properties to the values
Deployment Reference
HPE Network NodeManager iSPI Performance for Metrics Software (10.21) Page 33 of 129

shown here:
Property Value
Role.ETL 0
Role.UiBi 1
Role.Db 1
Etl.DbServer.Hostname Type the FQDN of the DB Server.If you want to configuremultiple DB Servers, specify the FQDN ofthe Controller.
Etl.UiBiServer.Hostname Type the FQDN of the UiBi Server.
UiBi.DbServer.Hostname Type the FQDN of the DB Server.
UiBi.NnmServer.Hostname Type the FQDN of the NNMi management server.
UiBi.NnmServer.Share.Name Type the name of the network share created on the NNMimanagement server while running the nnmenableperfspi.ovplscript.
UiBi.NnmServer.Share.User Type the name of the user account specified while running thennmenableperfspi.ovpl script.
UiBi.NnmServer.Share.Pass Type the password of the above user account.
4. Save the file.
Tip: Always retain a backup of this file.
5. Drop the database from NPS systems where the DB Server role will not be present.a. Identify the systems where you are not going to enable the DB Server role. You can do this by
inspecting the contents of the serverRoleConfig.cfg file that you havemodified on each system.If the Role.Db parameter is set to 0 in the serverRoleConfig.cfg file, the system will not have theDB Server role activated after this procedure is complete.
b. Log on as root or administrator to the systems where the DB Server role will not be present, andthen run the following command:initializeNPS.ovpl -a DropPerfSPIDB
Caution: Running this command on an incorrect NPS system (that is, the system where theDB Server role. is going to remain active) will lead to data loss.
6. Log on as root or administrator to each NPS system, and then run the following command:
Note: Run this command on NPS system in the following order:
Deployment Reference
HPE Network NodeManager iSPI Performance for Metrics Software (10.21) Page 34 of 129

a. The DB Serverb. The UiBi Serverc. The ETL Servers
configureNpsServer.ovpl -f <config_file>In this instance, <config_file> is the name (with the full path) of the configuration file.
Tip: As a best practice, take a backup of the serverRoleConfig.cfg file that you configured foruse with the configureNpsServer.ovpl script.
Additional Configuration for Multiple DB Servers
Note: You can plan to configuremultiple DB Servers if you have a very large environment with highusage of interactive (not scheduled) reports.
Multiple DB Servers are supported only in a Linux environment. Also, youmust configure a sharedstorage system with raw disks with the help of the Storage Area Network (SAN) infrastructure whilecreatingmultiple DB Servers.
As a best practice, if you need to configuremultiple DB Servers, always start with two servers. Later,based on the performance of the solution, you can addmore DB Servers to the environment.
Themultiple DB Server configuration requires creating a Controller node and at least one Secondary node.Make sure that all the requirements listed in "Prerequisites for ConfiguringMultiple DB Servers" on page 21aremet.
HPE recommends that you create only one Secondary node in the beginning. If you continue to seeperformance problems, you can create additional Secondary nodes.
Create the Controller NodeTo create a Controller node:
Note: Do not createmore than one Controller node.
1. Log on to a DB Server as root.2. Create a new directory by running the following command:
mkdir /opt/OV/db_setup3. Copy setup scripts from the NNM iSPI Performance for Metrics media to the newly created directory:
cd /opt/OV/db_setupcp <NPS_Installer_Root>/packages/misc/multiplex/* . dos2unix *.shchmod a+r *.sh
4. Create initial devices:
Deployment Reference
HPE Network NodeManager iSPI Performance for Metrics Software (10.21) Page 35 of 129
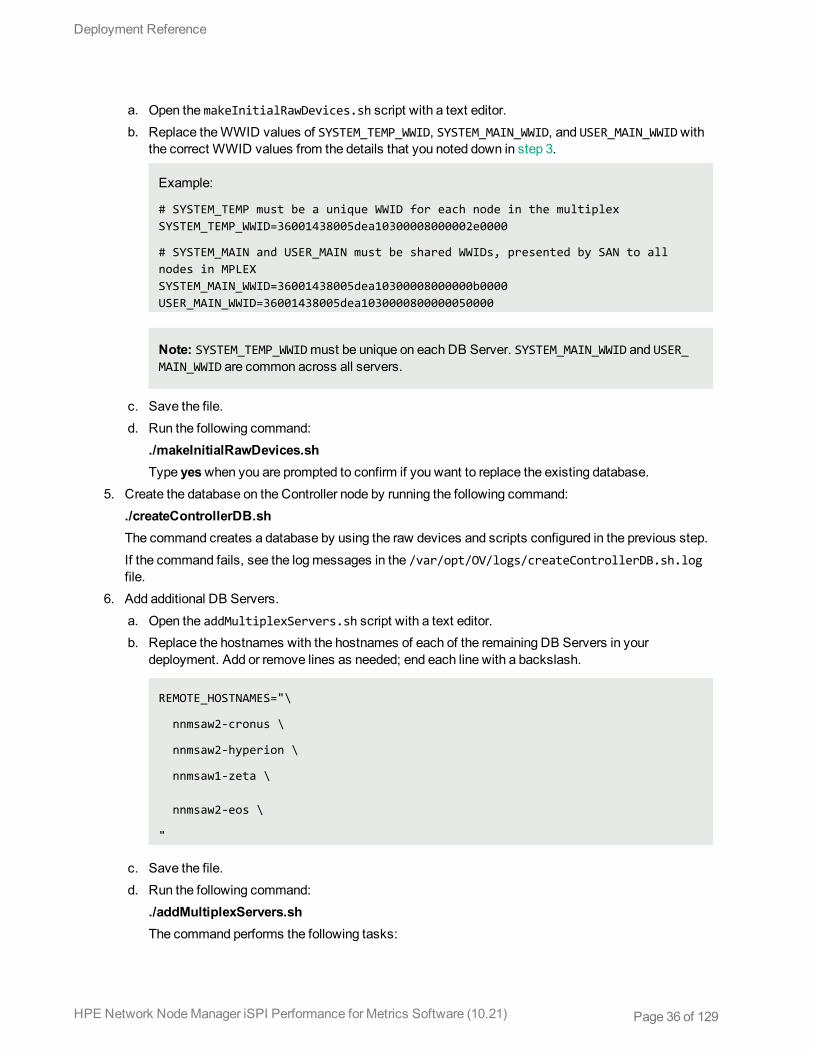
a. Open the makeInitialRawDevices.sh script with a text editor.b. Replace theWWID values of SYSTEM_TEMP_WWID, SYSTEM_MAIN_WWID, and USER_MAIN_WWIDwith
the correct WWID values from the details that you noted down in step 3.
Example:
# SYSTEM_TEMP must be a unique WWID for each node in the multiplexSYSTEM_TEMP_WWID=36001438005dea10300008000002e0000
# SYSTEM_MAIN and USER_MAIN must be shared WWIDs, presented by SAN to allnodes in MPLEXSYSTEM_MAIN_WWID=36001438005dea10300008000000b0000USER_MAIN_WWID=36001438005dea1030000800000050000
Note: SYSTEM_TEMP_WWIDmust be unique on each DB Server. SYSTEM_MAIN_WWID and USER_MAIN_WWID are common across all servers.
c. Save the file.d. Run the following command:
./makeInitialRawDevices.shType yeswhen you are prompted to confirm if you want to replace the existing database.
5. Create the database on the Controller node by running the following command:./createControllerDB.shThe command creates a database by using the raw devices and scripts configured in the previous step.
If the command fails, see the logmessages in the /var/opt/OV/logs/createControllerDB.sh.logfile.
6. Add additional DB Servers.a. Open the addMultiplexServers.sh script with a text editor.b. Replace the hostnames with the hostnames of each of the remaining DB Servers in your
deployment. Add or remove lines as needed; end each line with a backslash.
REMOTE_HOSTNAMES="\
nnmsaw2-cronus \
nnmsaw2-hyperion \
nnmsaw1-zeta \
nnmsaw2-eos \
"
c. Save the file.d. Run the following command:
./addMultiplexServers.shThe command performs the following tasks:
Deployment Reference
HPE Network NodeManager iSPI Performance for Metrics Software (10.21) Page 36 of 129

o Initializes this server as the Controller nodeo Authorizes each additional server as the Secondary node
7. Run the following command:resetSPI.ovpl
8. Make sure that the database is up and running. Check the status of the database by running the followingcommand:statusDB.ovpl
Create a Secondary NodeTo create a Secondary node:
1. Open the setupSecondaryNode.sh script with a text editor.2. Set the CONTROLLER_HOSTNAME property to the hostname of this Controller node.
For example, if the hostname of the Controller node configured in the above procedure is nnmsaw2-lapetos, set the property to:
CONTROLLER_HOSTNAME=nnmsaw2-lapetos
3. Save the file.
Note: Do not run the setupSecondaryNode.sh script on the Controller node. This script will becopied over to the Secondary nodes.
4. Log on as root to the node that was identified as the Secondary node.5. Create a new directory by running the following command:
mkdir /opt/OV/db_setup6. Copy the following setup scripts from the /opt/OV/db_setup directory on the Controller node to the
newly created directory on this Secondary node:
makeInitialRawDevices.sh
setupSecondaryNode.sh
7. Create initial devices:a. Open the makeInitialRawDevices.sh script with a text editor.b. Replace the SYSTEM_TEMPWWID values with the correct WWID values from the details that you
noted down in step 3.The content of the file may look like this:
# SYSTEM_TEMP must be a unique WWID for each node in the multiplexSYSTEM_TEMP_WWID=36001438005dea10300008000002e0000
# SYSTEM_MAIN and USER_MAIN must be shared WWIDs, presented by SAN to all nodesin MPLEXSYSTEM_MAIN_WWID=36001438005dea10300008000000b0000USER_MAIN_WWID=36001438005dea1030000800000050000
Note: SYSTEM_TEMP_WWIDmust be unique on each DB Server. SYSTEM_MAIN_WWID is common
Deployment Reference
HPE Network NodeManager iSPI Performance for Metrics Software (10.21) Page 37 of 129

across all servers.
c. Save the file.d. Run the following command:
./makeInitialRawDevices.shType yeswhen you are prompted to confirm if you want to replace the existing database.
8. Create the Secondary database by running the following command:./setupSecondaryNode.sh
9. Verify that the Secondary server is created successfully.l Run the following command to check the status of the database:statusDB
l Run the following command:dbisql -c "DSN=PerfspiDSN" "sp_iqmpxvalidate"The output should list:
No errors detected
Configure the UiBi ServerConfigure the UiBi Server to connect to the Secondary node:
1. Log on to the UiBi Server.2. Run the following command:
iqdsn -y -w <secondary_hostname>DSN -c "UID=DBA;PWD= HP_IQ;AutoPreCommit=N;CommLinks=tcpip{port=9306;host=<secondary_hostname>;DOBROADCAST=NONE;VERIFY=NO}"In this instance, <secondary_hostname> is the host name of the Secondary node (only host name, notFQDN).For example:iqdsn -y -w NPSDBServer2DSN -c "UID=DBA;PWD= HP_IQ;AutoPreCommit=N;CommLinks=tcpip{port=9306;host=NPSDBServer2;DOBROADCAST=NONE;VERIFY=NO}"where the host name of the Secondary node is NPSDBServer2.
Note: If the host name of the Secondary node contains the hyphen (-) characters, follow thesesteps:
a. Open the following file on the UiBi Server:
/var/opt/OV/NNMPerformanceSPI/database/perfspi.cfg
b. Go below the following line:
#startup parameters for PerfSPIDB database
Deployment Reference
HPE Network NodeManager iSPI Performance for Metrics Software (10.21) Page 38 of 129

c. In the line underneath, replace the hyphen (-) character in the Secondary host namewith theunderscore (_) character.
d. Save the file.
3. Run the following command:dbping –d –c “DSN=<seondary_hostname>DSN”In this instance, <secondary_hostname> is the host name of the Secondary node (only host name, notFQDN).For example:dbping –d –c “DSN=NPSDVServer2DSN”where the host name of the Secondary node is NPSDBServer2.The output of the command should display the followingmessage:
Ping database successful.
If the command fails, check that the Linux firewall is not blocking communication.4. Open the following file with a text editor:
/var/opt/OV/NNMPerformanceSPI/rconfig/NNMPerformanceSPI.cfg
5. Set the PRSPI_DB_DSN parameter to <seondary_hostname>DSN.In this instance, <secondary_hostname> is the host name of the Secondary node (only host name, notFQDN).
6. Save the file.
Install iSPIs and Extension PacksInstall iSPIs and custom poller Extension Packs only after assigning roles to all systems in the distributeddeployment of NPS. If you install iSPIs and custom poller Extension Packs before configuring roles for NPSsystems, duplicate instances of Extension Packs will be installed in your environment.
Install iSPIs and Custom Poller Extension Packs in anEnvironment with a Single ETL ServerBefore you install any iSPIs, follow these steps:
1. Make sure that the Etl.RuntimeConfig.PRSPI_DISABLE_EXTENSIONPACK_AUTOINSTALL property is setto 0 in the serverRoleConfig.cfg file on the ETL Server.
2. Make sure that the Etl.RuntimeConfig.PRSPI_DISABLE_CUSTOMCOLLECTION_AUTOINSTALL property isset to 0 in the serverRoleConfig.cfg file on the ETL Server.
Tip: Changes in the serverRoleConfig.cfg file take effect only after you run theconfigureNpsServer.ovpl -f <config_file> command on the system.
3. If you want to use the NNM iSPI Performance for Metrics Extension Packs, youmust install the NNM
Deployment Reference
HPE Network NodeManager iSPI Performance for Metrics Software (10.21) Page 39 of 129

iSPI Performance for Metrics on the ETL Server by running the following command:OnWindows:%npsinstalldir%\bin\metricsExtensionPacks.ovpl installOn Linux:/opt/OV/NNMPerformanceSPI/bin/metricsExtensionPacks.ovpl installAdditionally, log on to the UiBi Server, and then run the following command to install the Path HealthExtension Pack:OnWindows:%npsinstalldir%\bin\installPathHealth.ovplOn Linux:/opt/OV/NNMPerformanceSPI/bin/installPathHealth.ovpl
4. Install the iSPI by following the instructions in the iSPI documentation.5. Install the custom poller Extension Packs by following the instructions in the NPS Online Help.6. After installation, restart the NPS processes by running the following commands on each NPS system in
the environment:stopALL.ovplstartALL.ovpl
Install iSPIs and Custom Poller Extension Packs in anEnvironment with Multiple ETL ServersThe benefit of assigning the ETL Server role onmultiple systems is you can distribute the load of processingmultiple Extension Packs across a series of servers. The Etl.RuntimeConfig.PRSPI_DISABLE_EXTENSIONPACK_AUTOINSTALL and Etl.RuntimeConfig.PRSPI_DISABLE_CUSTOMCOLLECTION_AUTOINSTALLproperties help you distribute this load.
The iSPI Extension Packs are automatically transferred to the ETL Server whereEtl.RuntimeConfig.PRSPI_DISABLE_EXTENSIONPACK_AUTOINSTALL is set to 0. Similarly, the custom pollerExtension Packs are automatically transferred to the ETL Server where Etl.RuntimeConfig.PRSPI_DISABLE_CUSTOMCOLLECTION_AUTOINSTALL is set to 0.
To distribute the load across multiple ETL Servers, follow this work-flow:
For iSPI Extension Packs
Deployment Reference
HPE Network NodeManager iSPI Performance for Metrics Software (10.21) Page 40 of 129

1. Identify the ETL Server on which you want to install first set of iSPI Extension Packs.
2. Make sure that Etl.RuntimeConfig.PRSPI_DISABLE_EXTENSIONPACK_AUTOINSTALL is set to 0 in theserverRoleConfig.cfg file on the identified ETL Server.Etl.RuntimeConfig.PRSPI_DISABLE_EXTENSIONPACK_AUTOINSTALLmust be set to 1 in theserverRoleConfig.cfg file on all other ETL Servers.
3. Install the first set of iSPIs by following the iSPI documentation. After the iSPI installation is complete,the Extension Packs are automatically transferred and installed on the identified ETL Server.
4. Run the about.ovpl command on the ETL Server to verify that Extension Packs are installed correctly.If you see that an Extension Pack, which you did not originally plan to install on this server, has beeninstalled inadvertently, you can disable that Extension Pack on this server by running the followingcommand:disableExtensionPackEtl.ovpl -p <Extension_Pack>In this instance, <Extension_Pack> is the name of the Extension Pack displayed by the about.ovplcommand.
Note: You can enable an Extension Pack by running the following command:
Deployment Reference
HPE Network NodeManager iSPI Performance for Metrics Software (10.21) Page 41 of 129

enableExtensionPackEtl.ovpl -p <Extension_Pack>
5. Identify the ETL Server on which you want to install the second set of iSPI Extension Packs.
6. Make sure that Etl.RuntimeConfig.PRSPI_DISABLE_EXTENSIONPACK_AUTOINSTALL is set to 0 in theserverRoleConfig.cfg file on the identified ETL Server.Etl.RuntimeConfig.PRSPI_DISABLE_EXTENSIONPACK_AUTOINSTALLmust be set to 1 in theserverRoleConfig.cfg file on all other ETL Servers.
7. Install the second set of iSPIs by following the iSPI documentation. After the iSPI installation iscomplete, the Extension Packs are automatically transferred and installed on the identified ETL Server.
8. Run the about.ovpl command on the ETL Server to verify that Extension Packs are installed correctly.
Deployment Reference
HPE Network NodeManager iSPI Performance for Metrics Software (10.21) Page 42 of 129

If you see that an Extension Pack, which you did not originally plan to install on this server, has beeninstalled inadvertently, you can disable that Extension Pack on this server by running the followingcommand:disableExtensionPackEtl.ovpl -p <Extension_Pack>In this instance, <Extension_Pack> is the name of the Extension Pack displayed by the about.ovplcommand.
Note: You can enable an Extension Pack by running the following command:
enableExtensionPackEtl.ovpl -p <Extension_Pack>
For Custom Poller Extension Packs
1. Identify the ETL Server on which you want to install first set of custom poller Extension Packs.
2. Make sure that Etl.RuntimeConfig.PRSPI_DISABLE_CUSTOMCOLLECTION_AUTOINSTALL is set to 0 inthe serverRoleConfig.cfg file on the identified ETL Server.Etl.RuntimeConfig.PRSPI_DISABLE_CUSTOMCOLLECTION_AUTOINSTALLmust be set to 1 in theserverRoleConfig.cfg file on all other ETL Servers.
Deployment Reference
HPE Network NodeManager iSPI Performance for Metrics Software (10.21) Page 43 of 129

3. Install the first set of custom poller Extension Packs by following the NPS Online Help.4. Run the about.ovpl command on the ETL Server to verify that Extension Packs are installed correctly.
If you see that an Extension Pack, which you did not originally plan to install on this server, has beeninstalled inadvertently, you can disable that Extension Pack on this server by running the followingcommand:disableExtensionPackEtl.ovpl -p <Extension_Pack>In this instance, <Extension_Pack> is the name of the Extension Pack displayed by the about.ovplcommand.
Note: You can enable an Extension Pack by running the following command:
enableExtensionPackEtl.ovpl -p <Extension_Pack>
5. Identify the ETL Server on which you want to install the second set of custom poller Extension Packs.
6. Make sure that Etl.RuntimeConfig.PRSPI_DISABLE_CUSTOMCOLLECTION_AUTOINSTALL is set to 0 in
Deployment Reference
HPE Network NodeManager iSPI Performance for Metrics Software (10.21) Page 44 of 129

the serverRoleConfig.cfg file on the identified ETL Server.Etl.RuntimeConfig.PRSPI_DISABLE_CUSTOMCOLLECTION_AUTOINSTALLmust be set to 1 in theserverRoleConfig.cfg file on all other ETL Servers.
7. Install the second set of custom poller Extension Packs by following the NPS Online Help.8. Run the about.ovpl command on the ETL Server to verify that Extension Packs are installed correctly.
If you see that an Extension Pack, which you did not originally plan to install on this server, has beeninstalled inadvertently, you can disable that Extension Pack on this server by running the followingcommand:disableExtensionPackEtl.ovpl -p <Extension_Pack>In this instance, <Extension_Pack> is the name of the Extension Pack displayed by the about.ovplcommand.
Note: You can enable an Extension Pack by running the following command:
enableExtensionPackEtl.ovpl -p <Extension_Pack>
9. After installation, restart the NPS processes by running the following commands on each NPS system inthe environment:stopALL.ovplstartALL.ovpl
Configuring Additional DB ServersThis section provides instructions to introduce additional DB Servers to a distributed deployment of NPS withmultiple DB Servers. After creating a distributed deployment of NPS with two DB Servers, if you continue tosee performance problems, plan to add another DB Server to the environment and configure the new DBServer to operate as a Secondary node. You can distribute the processing load of Extension Packs betweenthe two Secondary nodes.
Note: Follow the steps in this section only if you have created a distributed deployment of NPS with aController DB Server and at least one Secondary DB Server. Do not follow the steps if you have notalready created a distributed deployment of NPS with at least two DB Servers.
Create a New Secondary DB Server
1. Install NPS on a new system and configure the DB Server role.2. Follow the instructions in the "Assign Roles" on page 30 to configure the DB Server role.3. Log on to the new DB Server, and then configure the DB Server to operate as a Secondary node.
To create a Secondary node:a. Open the setupSecondaryNode.sh script with a text editor.b. Set the CONTROLLER_HOSTNAME property to the hostname of this Controller node.
For example, if the hostname of the Controller node configured in the above procedure is nnmsaw2-lapetos, set the property to:
CONTROLLER_HOSTNAME=nnmsaw2-lapetos
Deployment Reference
HPE Network NodeManager iSPI Performance for Metrics Software (10.21) Page 45 of 129

c. Save the file.
Note: Do not run the setupSecondaryNode.sh script on the Controller node. This script will becopied over to the Secondary nodes.
d. Log on as root to the node that was identified as the Secondary node.e. Create a new directory by running the following command:
mkdir /opt/OV/db_setupf. Copy the following setup scripts from the /opt/OV/db_setup directory on the Controller node to the
newly created directory on this Secondary node:
makeInitialRawDevices.sh
setupSecondaryNode.sh
g. Create initial devices:i. Open the makeInitialRawDevices.sh script with a text editor.ii. Replace the SYSTEM_TEMPWWID values with the correct WWID values from the details
that you noted down in step 3.The content of the file may look like this:
# SYSTEM_TEMP must be a unique WWID for each node in the multiplexSYSTEM_TEMP_WWID=36001438005dea10300008000002e0000
# SYSTEM_MAIN and USER_MAIN must be shared WWIDs, presented by SAN to allnodes in MPLEXSYSTEM_MAIN_WWID=36001438005dea10300008000000b0000USER_MAIN_WWID=36001438005dea1030000800000050000
Note: SYSTEM_TEMP_WWIDmust be unique on each DB Server. SYSTEM_MAIN_WWID iscommon across all servers.
iii. Save the file.iv. Run the following command:
./makeInitialRawDevices.shType yeswhen you are prompted to confirm if you want to replace the existing database.
h. Create the Secondary database by running the following command:./setupSecondaryNode.sh
i. Verify that the Secondary server is created successfully.o Run the following command to check the status of the database:
statusDBo Run the following command:
dbisql -c "DSN=PerfspiDSN" "sp_iqmpxvalidate"The output should list:
No errors detected
Deployment Reference
HPE Network NodeManager iSPI Performance for Metrics Software (10.21) Page 46 of 129

Configure Extension Packs to Connect to the New Secondary Node
This procedure enables you to transfer the processing loads of a subset of Extension Packs to the newSecondary node.
1. Open the NPS console.2. Click BI Server > Administrator Log On. The HPE NNM iSPI Performance BI Server Administration
page opens.3. Go to the Configuration tab.
4. Click an Extension Pack.
5. Click theSet Properties action.6. Go to the Connections tab.
Deployment Reference
HPE Network NodeManager iSPI Performance for Metrics Software (10.21) Page 47 of 129

7. Click theEdit button.
The Edit the Connection String page opens.
8. Type the DSN of the newly configured SecondaryDB Server in the ODBC Data Source box.
Tip: The DSN of the SecondaryDB Server is of the following format:
<hostname>DSNIn this instance, <hostname> is the host name of the new Secondary node (only host name, notFQDN).
9. Click OK.10. Repeat step 4 through step 9 for all the Extension Packs that you want to configure with the new
Secondary node.
Deployment Reference
HPE Network NodeManager iSPI Performance for Metrics Software (10.21) Page 48 of 129

Switching from a Standalone EnvironmentNote: You cannot directly upgrade an NPS 9.20 or 9.10 standalone environment to an NPS 10.21distributed deployment. Youmust first upgrade to NPS 10.21, and then follow the steps in this chapter toswitch to a distributed environment. For instructions to upgrade NPS 9.10 or 9.20 to 10.21, see theNNMiSPI Performance for Metrics Interactive Installation Guide.
You can also start your operation with only one NPS system, and gradually expand into a distributeddeployment by installing additional servers and spreading the load across them. If you observe performancedegradation in your single-NPS environment due to resource bottleneck (CPU, memory, or disk I/O), you canconsider building a distributed NPS environment. To create a distributed environment in phases, follow theseguidelines:
1. Split out the ETL Server to a separate server.Install NPS on a new, dedicated system, and then assign the ETL Server role to the new system. On theoriginal NPS system, configure only the DB Server and UiBi Server roles.
2. Split out the UiBi Server or DB Server to a separate server.If you continue to experience resource bottleneck on the original NPS system, disable one of the existingroles (the UiBi Server or DB Server role) on the original system, install NPS on a third system, and thenassign the UiBi Server or DB Server role to the new system.
3. Split out the ETL Server role to multiple servers.If you experience resource bottleneck on the new NPS system where you configured the ETL Serverrole,install NPS on yet another new system, and then assign the ETL Server role to the new system.This configuration helps you distribute the ETL processing load across two different servers.
Note:While usingmultiple systems with the ETL Server role, youmust enable a unique set ofExtension Packs on each ETL server.
l If you continue to experience performance issues on systems with the ETL Server role, install NPS onadditional systems and assign only the ETL Server role to those systems. You cannot configure the UiBiServer or DB Server onmultiple systems.
l Before you start migrating to a distributed deployment, always take complete backup of the existing NPSinstallation.
Note: This is a precautionary step. Although you need to back up the content store and databaseseparately, taking a complete backup will help prevent loss of data in the event of disruptive systemfailure during the process of migration.
Run the following command to take a complete backup of NPS:backup.ovpl -b <dir>In this instance, <dir> is the local directory where you want to store the backup file.
The command creates a single .tar.gz file.
HPE Network NodeManager iSPI Performance for Metrics Software (10.21) Page 49 of 129

Creating a Separate ETL ServerYou can segregate out the ETL Server role by installing NPS onto a separate system and configuring the ETLServer role on that system.
To create a separate ETL Server, follow these steps:
1. "Record the Details of Your Existing NPS Environment" below2. "Disable the ETL Server Role on the Original NPS System" on the next page3. "Install a New instance of NPS" on page 52\4. " Enable the ETL Server Role on the New NPS System" on page 525. "Run the nnmenableperspi.ovpl Script" on page 54
Record the Details of Your Existing NPS EnvironmentIt is important to note down the details of your current NPS setup. Youmay migrate the ETL Server from astandalone, single-server NPS, or from an already created distributed deployment with the ETL Server co-existing with another server role on a single system.
Fill out the following table with the details of your existing environment.
Details of your existing NPS environment
Standalone Distributed deployment
FQDN of the NPS system FQDN of DB Server
FQDN of UiBi Server
FQDN of the NNMi managementserver
FQDNof existing ETL Server
FQDN of the NNMi managementserver
Also, correctly note down the share and user details that were specified while running thennmenableperfspi.ovpl script. you can find these details specified during the last run of thennmenableperfspi.ovpl file in the following directory on the NNMi management server:
(The file does not store the password.)
On Linux:
/var/opt/OV/log/nnmenableperfspi.txt
OnWindows:
%nnmdatadir%\log\nnmenableperfspi.txt
Fill out the following table with the details:
NNMi details
NNMi share name
Deployment Reference
HPE Network NodeManager iSPI Performance for Metrics Software (10.21) Page 50 of 129

NNMi share user name
NNMi share user password
Disable the ETL Server Role on the Original NPS System1. Run the following command on the original NPS system to take a backup of archived files:
Note: Since you are going tomigrate the ETL Server role onto a different system, youmust take abackup of all files. This backup will later be restored on the new system.
Tip: Before you begin, make sure sufficient disk space exists on the NPS system to run the backupprocedure and store the backed-up data. Determine the size of the configuration and archived datafiles by measuring size of the following directory:
OnWindows
%npsdatadir%\NNMPerformance
On Linux
/var/opt/OV/NNMPerformance
backup.ovpl -b <dir_file> -fIn this instance, <dir_file> is the local directory where you want to store the backup file. The commandcreates a backup file in the <dir_file> directory, which is a .tar.gz file.
2. Stop all NPS processes on the original NPS server:stopALL.ovpl
3. Configure the serverRoleConfig.cfg file to disable the ETL Server role on the original NPS system.The following table lists the parameters that must bemodified to disable the ETL Server role:
Tip: The serverRoleConfig.cfg file is located in the following directory:
l OnWindows:%NPSInstallDir%\config
l On Linux:$NPSInstallDir/config
Take a copy of the default serverRoleConfig.cfg file to a different directory andmodify the copiedfile.
Property Value Description
Role.ETL 0 Make sure this value is set to 0.
4. Run the following command to check that the configuration file is correctly updated:configureNpsServer.ovpl –f <config_file> -m validate –o <outputFile>Check that the contents of <outputFile> is error free.
Deployment Reference
HPE Network NodeManager iSPI Performance for Metrics Software (10.21) Page 51 of 129
Note: If you see any errors, review the contents of the serverRoleConfig.cfg file, and then run thecommand again.
5. Run the following command on the NPS system to disable the ETL Server role:configureNpsServer.ovpl -f <config_file>The ETL Server role is now disabled on this system.
6. Check that only the DB Server and UiBi Server roles are enabled by running the about.ovpl command.7. Restart all processes by running the following command:
startALL.ovpl
Install a New instance of NPSInstall a new instance of NPS on a new system. While installing, choose to install the NNM iSPI Performancefor Metrics Extension Packs. Do not start the ETL process on this system at the end of the installation.
As a result of the installation, a new NPS system is created where all roles are enabled.
Enable the ETL Server Role on the NewNPS System1. Log on to the newly created NPS system.2. Run the following command on this new NPS system to restore all backed-up files (that were backed up
in step 2):restore.ovpl -b <backup_file>
3. Drop all database tables on this system by running the following command:
Caution: Make sure you run this command on the right system (that is, the new system where youinstalled NPS). Running this command on an incorrect NPS system will lead to data loss.
initializeNPS.ovpl -a DropPerfSPIDB4. Configure the serverRoleConfig.cfg file to assign the ETL Server role to this NPS system:
Tip: The serverRoleConfig.cfg file is located in the following directory:
l OnWindows:%NPSInstallDir%\config
l On Linux:$NPSInstallDir/config
Take a copy of the default serverRoleConfig.cfg file to a different directory andmodify the copiedfile.
Property Value Description
Role.ETL 1 Make sure this property is set to1.
Deployment Reference
HPE Network NodeManager iSPI Performance for Metrics Software (10.21) Page 52 of 129
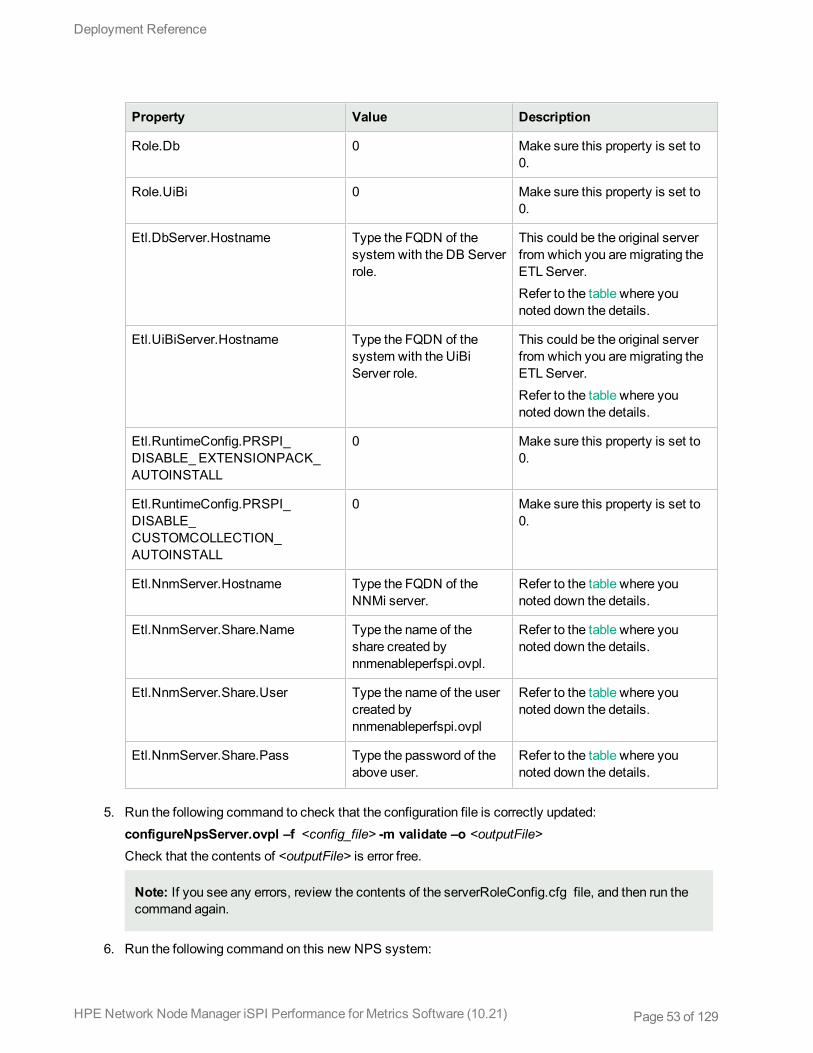
Property Value Description
Role.Db 0 Make sure this property is set to0.
Role.UiBi 0 Make sure this property is set to0.
Etl.DbServer.Hostname Type the FQDN of thesystem with the DB Serverrole.
This could be the original serverfrom which you aremigrating theETL Server.Refer to the table where younoted down the details.
Etl.UiBiServer.Hostname Type the FQDN of thesystem with the UiBiServer role.
This could be the original serverfrom which you aremigrating theETL Server.Refer to the table where younoted down the details.
Etl.RuntimeConfig.PRSPI_DISABLE_ EXTENSIONPACK_AUTOINSTALL
0 Make sure this property is set to0.
Etl.RuntimeConfig.PRSPI_DISABLE_CUSTOMCOLLECTION_AUTOINSTALL
0 Make sure this property is set to0.
Etl.NnmServer.Hostname Type the FQDN of theNNMi server.
Refer to the table where younoted down the details.
Etl.NnmServer.Share.Name Type the name of theshare created bynnmenableperfspi.ovpl.
Refer to the table where younoted down the details.
Etl.NnmServer.Share.User Type the name of the usercreated bynnmenableperfspi.ovpl
Refer to the table where younoted down the details.
Etl.NnmServer.Share.Pass Type the password of theabove user.
Refer to the table where younoted down the details.
5. Run the following command to check that the configuration file is correctly updated:configureNpsServer.ovpl –f <config_file> -m validate –o <outputFile>Check that the contents of <outputFile> is error free.
Note: If you see any errors, review the contents of the serverRoleConfig.cfg file, and then run thecommand again.
6. Run the following command on this new NPS system:
Deployment Reference
HPE Network NodeManager iSPI Performance for Metrics Software (10.21) Page 53 of 129

configureNpsServer.ovpl -f <config_file>The ETL Server role is now enabled on this system.
7. Check that only the ETL Server is enabled by running the about.ovpl command.8. Start all processes by running the following command:
startALL.ovpl
Run the nnmenableperspi.ovpl Script
Note: If the original NPS system was configured to use the CIFS share (and not the NFS share), skipthis section.
After moving the ETL Server role to a new system, youmust run the nnmenableperfspi.ovpl script onceagain on the NNMi management server and youmust select the CIFS share this time. Using an NFS sharewith the distributed deployment of NPS is not supported.
Creating a Separate DB ServerYou can segregate out the DB Server role by installing NPS onto a separate system and configuring the DBServer role on that system.
To create this setup, follow these steps:
1. "Record the details of your existing NPS environment" below2. "Take a Backup of the Database " on the next page3. "Install a New Instance of NPS" on page 564. "Enable Only the DB Server Role on the New System" on page 565. "Disable the DB Server Role on the Original System" on page 576. " Reconcile the DB Server FQDN onOther Servers" on page 57
Record the details of your existing NPS environmentIt is important to note down the details of your current NPS setup. Youmay migrate the DB Server from astandalone, single-server NPS, or from an already created distributed deployment with the DB Server co-existing with another server role on a single system.
Fill out the following table with the details of your existing environment.
Details of your existing NPS environment
Standalone Distributed deployment
FQDN of the NPS system FQDN of DB Server
FQDN of UiBi Server
FQDN of the NNMi managementserver
FQDN of existing ETL Server
Deployment Reference
HPE Network NodeManager iSPI Performance for Metrics Software (10.21) Page 54 of 129

FQDN of the NNMi managementserver
In this configuration step, you need to specify the details of the network share and user account specifiedwhile running the nnmenableperfspi.ovpl script. As a best practice, youmust always securely note downshare and user account details that are specified while running the nnmenableperfspi.ovpl script.
You can find the network share and user account details specified during the last run of thennmenableperfspi.ovpl file in the following file on the NNMi management server:
(The file does not store the password.)
On Linux:
/var/opt/OV/log/nnmenableperfspi.txt
OnWindows:
%nnmdatadir%\log\nnmenableperfspi.txt
Fill out the following table with the details:
NNMi details
NNMi share name
NNMi share user name
NNMi share user password
Take a Backup of the Database1. Run the following command on the original NPS system to take a database backup:
Note: Since you are going tomigrate the DB Server role onto a different system, youmust take abackup of the entire database. This backup will later be restored on the new system.
Tip: Before you begin, make sure sufficient disk space exists on the NPS system to run the backupprocedure and store the backed-up data. Determine the size of the NPS database by running thefollowing command:
dbsize.ovpl -q
backup.ovpl -b<dir_db> -dIn this instance, <dir_db> is the local directory where you want to store the backup file. The commandcreates a backup file (with the .tar.gz extension) in the <dir_db> directory.
2. Stop all NPS processes on the original NPS server where the DB Server role is currently enabled:stopALL.ovpl
Deployment Reference
HPE Network NodeManager iSPI Performance for Metrics Software (10.21) Page 55 of 129

Install a New Instance of NPSInstall a new instance of NPS on a new system. While installing, do not choose to install the NNM iSPIPerformance for Metrics Extension Packs. Do not start the ETL process on this system at the end of theinstallation.
As a result of the installation, a new NPS system is created where all roles are enabled.
Restore the Database on the New SystemRun the following command on this new NPS system to restore all backed-up database files (that werebacked up in step 1):
restore.ovpl -b <backup_db>
In this instance, <backup_db> is the backed-up database file.
Enable Only the DB Server Role on the New System1. Log on to the newly created NPS system.2. Configure the serverRoleConfig.cfg file to enable the DB Server role to this NPS system. The
following table lists the properties that must bemodified to enable the DB Server role:
Tip: The serverRoleConfig.cfg file is located in the following directory:
l OnWindows:%NPSInstallDir%\config
l On Linux:$NPSInstallDir/config
Take a copy of the default serverRoleConfig.cfg file to a different directory andmodify the copiedfile.
Property Value
Role.ETL 0
Role.Db 1
Role.UiBi 0
3. Run the following command to check that the configuration file is correctly updated:configureNpsServer.ovpl –f <config_file> -m validate –o <outputFile>Check that the contents of <outputFile> is error free.
Note: If you see any errors, review the contents of the serverRoleConfig.cfg file, and then run thecommand again.
4. Run the following command on this new NPS system:configureNpsServer.ovpl -f <config_file>
Deployment Reference
HPE Network NodeManager iSPI Performance for Metrics Software (10.21) Page 56 of 129

The DB Server role is now enabled on this system.5. Check that only the DB Server role is enabled by running the about.ovpl command.
Disable the DB Server Role on the Original System1. Drop all databases on the original NPS system by running the following command:
initializeNPS.ovpl -a DropPerfSPIDB2. Configure the serverRoleConfig.cfg file to disable the DB Server role on the original NPS system. The
following table lists the properties that must bemodified to disable the DB Server role:
Tip: The serverRoleConfig.cfg file is located in the following directory:
l OnWindows:%NPSInstallDir%\config
l On Linux:$NPSInstallDir/config
Take a copy of the default serverRoleConfig.cfg file to a different directory andmodify the copiedfile.
Property Value Description
Role.Db 0 Make sure this property is set to 0.
All properties that end withDbServer.Hostname
FQDN of thenew DB Server.
Type the FQDN of the new NPS system where youwill be configuring the DB Server role.
3. Run the following command to check that the configuration file is correctly updated:configureNpsServer.ovpl –f <config_file> -m validate –o <outputFile>In this instance, <config_file> is the complete path (including the file name) to theserverRoleConfig.cfg file that you edited.Check that the contents of <outputFile> is error free.
Note: If you see any errors, review the contents of the serverRoleConfig.cfg file, and then run thecommand again.
4. Run the following command on the NPS system to disable the DB Server role:configureNpsServer.ovpl -f <config_file>The DB Server role is now disabled on this system.
5. Check that only the DB Server role is completely disabled by running the about.ovpl command.6. Restart all processes by running the following command:
startALL.ovpl
Reconcile the DB Server FQDN on Other ServersOnly if you started off with an existing distributed deployment.
Deployment Reference
HPE Network NodeManager iSPI Performance for Metrics Software (10.21) Page 57 of 129

If you performed this procedure in an existing distributed deployment, youmust configure all other servers inthe deployment to communicate with the new DB Server.
For example, if your original setup consisted of a single system with the DB Server and UiBi Server roles anda single system for the UiBi Server, youmust configure the ETL Server now to communicate with the new DBServer.
Follow these steps:
1. Log on to the system as root or administrator.2. Configure the serverRoleConfig.cfg file to specify the FQDN of the new DB Server.
Tip: The serverRoleConfig.cfg file is located in the following directory:
l OnWindows:%NPSInstallDir%\config
l On Linux:$NPSInstallDir/config
Take a copy of the default serverRoleConfig.cfg file to a different directory andmodify the copiedfile.
Property Value Description
Role.Db 0 Make sure this property is set to 0. Thissetting ensures the DB Server is not enabledon this system.
Role.UiBi and Role.ETL 1 or 0 Make sure to correctly set these propertiesdepending on the role of the system.
All properties that endwithDbServer.Hostname
FQDN of thenew DBServer.
Type the FQDN of the new NPS systemwhere you will be configuring the DB Serverrole.
All properties that endwithnnmserver.hostname
FQDN of theNNMimanagementserver
Type the FQDN of the NNMi managementserver.
All properties that endwithNnmServer.Share.Name
The NNMishare name
Type the NNMi share name that wasconfigured while running thennmenableperfspi.ovpl script. Follow thedetails noted down in the worksheet.
All properties that endwithNnmServer.Share.User
The NNMishare username
Type the NNMi share user name that wasconfigured while running thennmenableperfspi.ovpl script. Follow thedetails noted down in the worksheet.
All properties that endwith
The NNMishare user
Type the NNMi share user password that wasconfigured while running the
Deployment Reference
HPE Network NodeManager iSPI Performance for Metrics Software (10.21) Page 58 of 129

Property Value Description
NnmServer.Share.Pass password nnmenableperfspi.ovpl script. Follow thedetails noted down in the worksheet.
Look for the properties that end with Dbserver.hostname and set those properties to the new FQDN ofthe DB Server.
3. Run the following command to check that the configuration file is correctly updated:configureNpsServer.ovpl –f <config_file> -m validate –o <outputFile>
In this instance, is the complete path (including the file name) to the serverRoleConfig.cfg file that youedited.Check that the contents of <outputFile> is error free.
Note: If you see any errors, review the contents of the serverRoleConfig.cfg file, and then run thecommand again.
4. Run the following command:configureNpsServer.ovpl -f <config_file>.
5. Restart all processes by running the following command:startALL.ovpl
Creating a Separate UiBi ServerYou can segregate out the UiBi Server role by installing NPS onto a separate system and configuring the UiBiServer role on that system.
To create this setup, follow these steps:
1. "Record the Details of Your Existing NPS Environment" below2. "Take a Backup of Files and the Content Store" on the next page3. "Install a New Instance of NPS." on page 614. "Enable Only the UiBi Server Role on the New NPS System" on page 615. " Disable the UiBi Server Role on the Original NPS System" on page 646. "Reconcile the UiBi Server FQDN onOther Servers" on page 657. "Run the nnmenableperfspi.ovpl Script" on page 66
Record the Details of Your Existing NPS EnvironmentIt is important to note down the details of your current NPS setup. Youmay migrate the DB Server from astandalone, single-server NPS, or from an already created distributed deployment with the DB Server co-existing with another server role on a single system.
Fill out the following table with the details of your existing environment.
Details of your existing NPS environment
Deployment Reference
HPE Network NodeManager iSPI Performance for Metrics Software (10.21) Page 59 of 129

Standalone Distributed deployment
FQDN of the NPS system FQDN of DB Server
FQDN of UiBi Server
FQDN of the NNMi managementserver
FQDN of existing ETL Server
FQDN of the NNMi managementserver
Tip: In this configuration step, you need to specify the details of the network share and user accountspecified while running the nnmenableperfspi.ovpl script. As a best practice, youmust alwayssecurely note down share and user account details that are specified while running thennmenableperfspi.ovpl script.
You can find the network share and user account details specified during the last run of thennmenableperfspi.ovpl file in the following file on the NNMi management server:
(The file does not store the password.)
On Linux:
/var/opt/OV/log/nnmenableperfspi.txt
OnWindows:
%nnmdatadir%\log\nnmenableperfspi.txt
Fill out the following table with the details:
NNMi details
NNMi share name
NNMi share user name
NNMi share user password
Take a Backup of Files and the Content StoreCreating a new UiBi Server server requires you to transfer all the necessary data from the old system to thenew system. This is achieved by taking a backup of all files and the content store on the original NPS systemand restoring the backed-up data to the newly configured UiBi Server server. Therefore, before you begin themigration of the UiBi Server role, youmust take a backup.
1. Run the following command on the original NPS system to take a backup of archived data files:
Note: Since you are going tomigrate the UiBi Server role onto a different system, youmust take abackup of all files. This backup will later be restored on the new system.
Deployment Reference
HPE Network NodeManager iSPI Performance for Metrics Software (10.21) Page 60 of 129

Tip: Before you begin, make sure sufficient disk space exists on the NPS system to run the backupprocedure and store the backed-up data. Determine the size of the configuration and archived datafiles by measuring size of the following directory:
OnWindows
%npsdatadir%\NNMPerformance
On Linux
/var/opt/OV/NNMPerformance
backup.ovpl -b <dir_file> -fIn this instance, <dir_file> is the local directory where you want to store the backup file.
2. Run the following command on the original NPS system to take a content store backup:
Note: Since you are going tomigrate the UiBi Server role onto a different system, youmust take abackup of the content store. This backup will later be restored on the new system.
Tip: Before you begin, make sure sufficient disk space exists on the NPS system to run the backupprocedure and store the backed-up data. Determine the size of the NPS content store by running thefollowing command:
cssize.ovpl -q
backup.ovpl -b <dir_cs>-cIn this instance, <dir_cs> is the local directory where you want to store the backup file.
Install a New Instance of NPS.Install a new instance of NPS on a new system. While installing, do not choose to install the NNM iSPIPerformance for Metrics Extension Packs. Do not start the ETL process on this system at the end of theinstallation.
Enable Only the UiBi Server Role on the NewNPS System1. Log on to the newly created NPS system.2. Run the following command on this new NPS system to restore all backed-up files (that were backed up
in step 1):restore.ovpl -b <backup_file>In this instance, <backup_file> is the backed-up NPS files.
3. Run the following command on this new NPS system to restore the content store (that were backed up instep 2):restore.ovpl-b<backup_cs>In this instance, <backup_cs> is the backed-up NPS content store.
4. Drop all database tables on this system by running the following command:
Deployment Reference
HPE Network NodeManager iSPI Performance for Metrics Software (10.21) Page 61 of 129

Caution: Make sure you run this command on the right system (that is, the new system where youinstalled NPS). Running this command on an incorrect NPS system will lead to data loss.
initializeNPS.ovpl -a DropPerfSPIDB5. Configure the serverRoleConfig.cfg file to enable the UiBi Server role to this NPS system. The
following table lists the properties that must bemodified to enable the UiBi Server role:
Tip: The serverRoleConfig.cfg file is located in the following directory:
l OnWindows:%NPSInstallDir%\config
l On Linux:$NPSInstallDir/config
Take a copy of the default serverRoleConfig.cfg file to a different directory andmodify the copiedfile.
Property Value Description
Role.ETL 0 Make sure this property is setto 0. This setting ensures theETL Server is not enabled onthis system.
Role.Db 0 Make sure this property is setto 0. This setting ensures theDB Server is not enabled onthis system.
Role.UiBi 1 Make sure this property is setto 1.
UiBi.Share.User The share user name. NNMi share user name thatwas configured while runningthe nnmenableperfspi.ovplscript. Follow the details noteddown in the worksheet.Do not modify if you are usingthe default share user.
UiBi.Share.Pass The share user password NNMi share user passwordthat was configured whilerunning thennmenableperfspi.ovplscript. Follow the details noteddown in the worksheet.Do not modify if you are usingthe default share user.
Deployment Reference
HPE Network NodeManager iSPI Performance for Metrics Software (10.21) Page 62 of 129
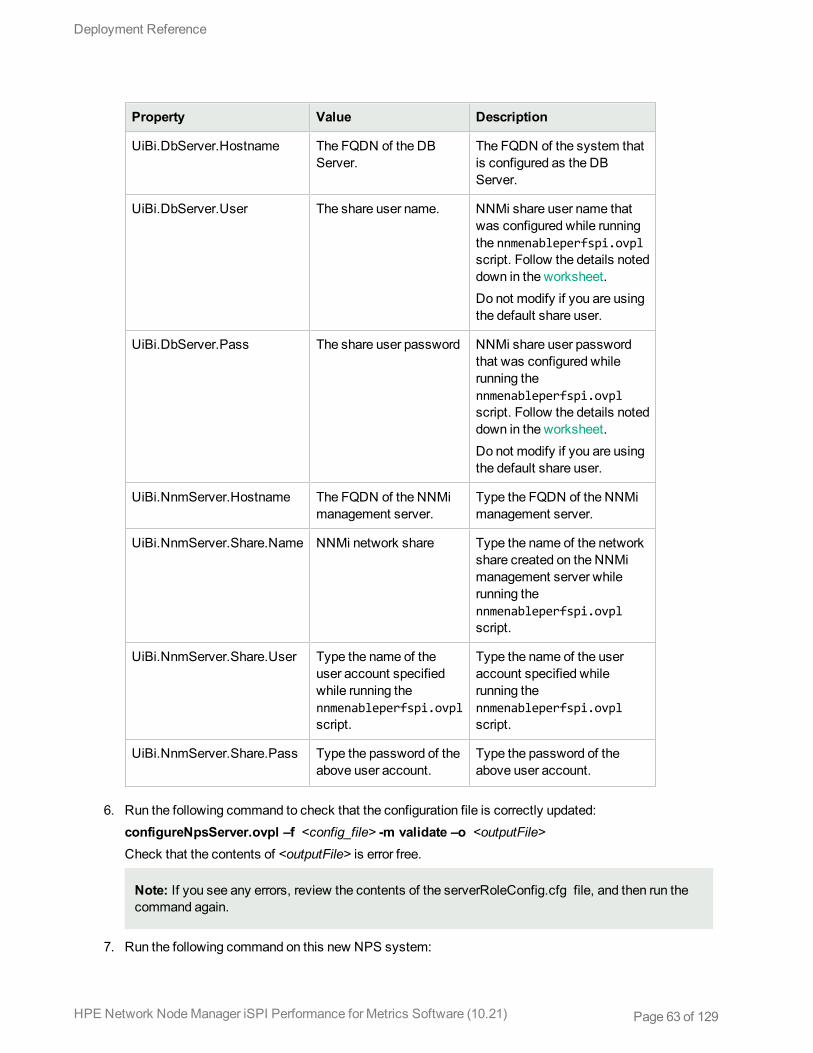
Property Value Description
UiBi.DbServer.Hostname The FQDN of the DBServer.
The FQDN of the system thatis configured as the DBServer.
UiBi.DbServer.User The share user name. NNMi share user name thatwas configured while runningthe nnmenableperfspi.ovplscript. Follow the details noteddown in the worksheet.Do not modify if you are usingthe default share user.
UiBi.DbServer.Pass The share user password NNMi share user passwordthat was configured whilerunning thennmenableperfspi.ovplscript. Follow the details noteddown in the worksheet.Do not modify if you are usingthe default share user.
UiBi.NnmServer.Hostname The FQDN of the NNMimanagement server.
Type the FQDN of the NNMimanagement server.
UiBi.NnmServer.Share.Name NNMi network share Type the name of the networkshare created on the NNMimanagement server whilerunning thennmenableperfspi.ovplscript.
UiBi.NnmServer.Share.User Type the name of theuser account specifiedwhile running thennmenableperfspi.ovplscript.
Type the name of the useraccount specified whilerunning thennmenableperfspi.ovplscript.
UiBi.NnmServer.Share.Pass Type the password of theabove user account.
Type the password of theabove user account.
6. Run the following command to check that the configuration file is correctly updated:configureNpsServer.ovpl –f <config_file> -m validate –o <outputFile>Check that the contents of <outputFile> is error free.
Note: If you see any errors, review the contents of the serverRoleConfig.cfg file, and then run thecommand again.
7. Run the following command on this new NPS system:
Deployment Reference
HPE Network NodeManager iSPI Performance for Metrics Software (10.21) Page 63 of 129

configureNpsServer.ovpl -f <config_file>The UiBi Server role is now enabled on this system.
8. Check that only the UiBi Server role is enabled by running the about.ovpl command.
Tip: You can delete the edited serverRoleConfig.cfg file at this point.
9. Restart all processes by running the following command:startALL.ovpl
Disable the UiBi Server Role on the Original NPS SystemAt this point, youmust go back to the original NPS system and disable the UiBi Server role.
1. Stop all NPS processes on the original NPS system:stopALL.ovpl
2. Configure the serverRoleConfig.cfg file to disable the UiBi Server role on the original NPS system.The following table lists the properties that must bemodified to disable the UiBi Server role:
Tip: The serverRoleConfig.cfg file is located in the following directory:
l OnWindows:%NPSInstallDir%\config
l On Linux:$NPSInstallDir/config
Take a copy of the default serverRoleConfig.cfg file to a different directory andmodify the copiedfile.
Property Value Description
Role.UiBi 0 Make sure this property is set to 0.
All properties that endwithUiBiServer.Hostname
FQDN of thenew UiBiServer.
Type the FQDN of the new NPS system where you haveconfigured the UiBi Server role.
All properties that endwithnnmserver.hostname
FQDN of theNNMimanagementserver
Type the FQDN of the NNMi management server.
All properties that endwithNnmServer.Share.Name
The NNMishare name
Type the NNMi share name that was configured whilerunning the nnmenableperfspi.ovpl script. Follow thedetails noted down in the worksheet.
All properties that endwithNnmServer.Share.User
The NNMishare username
Type the NNMi share user name that was configured whilerunning the nnmenableperfspi.ovpl script. Follow thedetails noted down in the worksheet.
All properties that end The NNMi Type the NNMi share user password that was configured
Deployment Reference
HPE Network NodeManager iSPI Performance for Metrics Software (10.21) Page 64 of 129

Property Value Description
withNnmServer.Share.Pass
share userpassword
while running the nnmenableperfspi.ovpl script. Followthe details noted down in the worksheet.
3. Run the following command to check that the configuration file is correctly updated:configureNpsServer.ovpl –f <config_file> -m validate –o <outputFile>
In this instance, is the complete path (including the file name) to the serverRoleConfig.cfg file that youedited.Check that the contents of <outputFile> is error free.
Note: If you see any errors, review the contents of the serverRoleConfig.cfg file, and then run thecommand again.
4. Run the following command on the original NPS system to disable the UiBi Server role:configureNpsServer.ovpl -f <config_file>The UiBi Server role is now disabled on this system.
5. Check that only the UiBi Serverrole is completely disabled by running the about.ovpl command.
Tip: You can delete the edited serverRoleConfig.cfg file at this point.
6. Restart all processes by running the following command:startALL.ovpl
Reconcile the UiBi Server FQDN on Other ServersOnly if you started off with an existing distributed deployment.
If you performed this procedure in an existing distributed deployment, youmust configure all other servers inthe deployment to communicate with the new UiBi Server. For example, if your original setup consisted of asingle system with the DB Server and UiBi Server roles and a single system for the ETL Server, youmustconfigure the ETL Server now to communicate with the new UiBi Server.
Follow these steps:
1. Log on to the system as root or administrator.2. Configure the serverRoleConfig.cfg file to specify the FQDN of the new DB Server.
Tip: The serverRoleConfig.cfg file is located in the following directory:
l OnWindows:%NPSInstallDir%\config
l On Linux:$NPSInstallDir/config
Take a copy of the default serverRoleConfig.cfg file to a different directory andmodify the copiedfile.
Deployment Reference
HPE Network NodeManager iSPI Performance for Metrics Software (10.21) Page 65 of 129

Look for the properties that end with UiBiserver.hostname and set those properties to the new FQDNof the DB Server.
3. Run the following command to check that the configuration file is correctly updated:configureNpsServer.ovpl –f <config_file> -m validate –o <outputFile>
In this instance, is the complete path (including the file name) to the serverRoleConfig.cfg file that youedited.Check that the contents of <outputFile> is error free.
Note: If you see any errors, review the contents of the serverRoleConfig.cfg file, and then run thecommand again.
4. Run the following command:configureNpsServer.ovpl -f <config_file>.
5. Restart all processes by running the following command:startALL.ovpl
Run the nnmenableperfspi.ovpl ScriptAfter moving the UiBi Server role to a new system, youmust run the nnmenableperfspi.ovpl script onceagain on the NNMi management server and youmust provide the FQDN of the new UiBi Server this time.
Deployment Reference
HPE Network NodeManager iSPI Performance for Metrics Software (10.21) Page 66 of 129

Modifying Data Retention SettingsBy default, NPS is installed with the following settings:
l Daily data retention period: 800 daysl Hourly data retention period: 70 daysl Raw/detailed data retention period: 14 daysIf you want to modify the data retention settings in a distributed deployment of NPS, follow these steps:
1. Decide the new retention periods. The retention period of the raw datamust be smaller than the retentionperiod of the hourly data; the retention period of the hourly data againmust be smaller than that of thedaily data.
2. Decide if themodified retention periods will apply to all Extension Packs or just to a subset of ExtensionPacks installed in the environment.
3. Tomodify the retention periods of all Extension Packs on a system with the ETL Server role:a. Log on to the ETL Server as administrator or root.b. Launch the NNM iSPI Performance Configuration window.
OnWindowsClick Start > All Programs > HP > NNM iSPI Performance > Configuration Utility.On LinuxRun the following command:/opt/OV/NNMPerformanceSPI/bin/runConfigurationGUI.ovpl
c. Specify the changes in data retention settings, and then click Apply. The change is applied to all theExtension Packs that are installed (and enabled) on the system.
d. If you have created an environment with multiple ETL Servers and want to change the data retentionsettings on the other ETL Servers, perform similar steps (step a through step c) on them.
4. To configure different retention periods for different Extension Packs on an ETL Server:a. Log on to the ETL Server as administrator or root.b. Go to the following directory:
OnWindows
%npsdatadir%\NNMPerformanceSPI\rconfig\<Extension_Pack_Name>On Linux
/var/opt/OV/NNMPerformanceSPI/rconfig/<Extension_Pack_Name>
Tip: To find out the names of installed Extension Packs, run the following command:
about.ovpl
c. Locate the customConfig.cfg file in this directory.d. Create an empty userConfig.cfg file, and then transfer all the parameters that are available in the
customConfig.cfg file to the userConfig.cfg file.e. In the userConfig.cfgfile, change the values of the following properties tomodify the data retention
periods:
HPE Network NodeManager iSPI Performance for Metrics Software (10.21) Page 67 of 129

o PRSPI_DataRetention_Raw (for raw data)o PRSPI_DataRetention_Hour (for hourly data)o PRSPI_DataRetention_Day (for daily data)
f. Save the userConfig.cfg file.g. Restart the ETL process for the changes to take effect by running the following commands:
o stopETL.ovplo startETL.ovpl
Deployment Reference
HPE Network NodeManager iSPI Performance for Metrics Software (10.21) Page 68 of 129

HPE Network NodeManager iSPI Performance for Metrics Software (10.21) Page 69 of 129
Part III: Upgrading an ExistingDistributed Deployment of NPSNote: The information in theUpgrading an Existing Distributed Deployment of NPS section providesinstructions to upgrade NPS from an older version (10.00 or 10.10) to the version 10.20. You can applythe NPS 10.21 patch after the upgrade procedure is complete. For patch installation instructions, see"Installing Patches in a Distributed Deployment of NPS" on page 81.
You can upgrade an existing distributed deployment of NPS to the current version.
Tip: If possible, take a backup of all the copies of the serverRoleConfig.cfg files that you used whileassigning server roles.
To upgrade a distributed deployment of NPS, perform these tasks:
1. Task 1: "Upgrade NPS" below2. Task 2: "Re-configure the DB Server Role" on page 713. Task 3: "Additional Configuration Task on the UiBi Server" on page 724. Task 4: "Upgrade All iSPIs" on page 735. Task 5: "Post-Upgrade Steps" on page 74
Upgrade NPS1. Stop NPS services on the UiBi Server by running the following command:
stopALL.ovpl2. Stop NPS services on the ETL Servers by running the following command:
stopALL.ovpl3. Stop NPS services on the DB Server by running the following command:
stopALL.ovpl4. Upgrade NPS to the current version on each system by following these steps:
Note:While upgrading NPS, follow this sequence:
a. Upgrade the DB Server.b. Upgrade the UiBi Server.c. Upgrade the ETL Server.Do not start upgrading the UiBi Server until the DB Server is completely upgraded; do not startupgrading the ETL Servers until the UiBi Server is completely upgraded.

HPE Network NodeManager iSPI Performance for Metrics Software (10.21) Page 70 of 129
a. Extract the contents of the NNM iSPI Performance for Metrics media.b. Use the cd command to change to themedia directory.c. From themedia root, run the setup file (setup.exe forWindows; setup.bin for Linux).
The installation wizard opens.
Note: For Linux Only. If you are performing these steps from a remote server by using anXServer, and if the DISPLAY variable is not set correctly, the followingmessagemay appear:
Choose locale....
------------------------
1- Deutsch
->2- English
3- Espanol
4- Francais
CHOOSE LOCALE BY NUMBER:
If you see this message, do not continue with the installation. Stop the installation by pressingCtrl+C, make sure that the DISPLAY variable is set correctly, and then run the setup file again.
Select the language of the wizard, and then click OK.If the application requirement check warnings dialog box opens, review the warningmessages, takeappropriate action, and then click Continue.
d. On the Introduction page, click Next. The License Agreement page opens.e. Select I accept the terms, and click Next.f. When the upgrade check succeeds, click Next.
If the upgrade check shows warnings and errors, review themessages, take appropriate actions,and then click Next.
Tip: For Linux only. If the installer check shows necessary libraries aremissing, click here.
To install missing libraries on the system, follow these steps:i. Note down the names of missing libraries indicated by the installation wizard.ii. Make sure the system is connected to the Internet and set up to work with Red Hat or
SUSE package repositories.iii. To install eachmissing library, run the following command:
OnRedHat Enterprise Linuxyum install<library>
Tip: You can specify multiple libraries in the command—each separated by a space.(For example, yum install openmotif.x86_64 libXp.x86_64 libpng.x86_64.)
OnSUSE Linux Enterprise Serverzypper install <library>

HPE Network NodeManager iSPI Performance for Metrics Software (10.21) Page 71 of 129
In this instance, <library> is the name of themissing library as indicated by the installationwizard.
iv. TypeY to install the libraries.
The Pre-Upgrade Summary page opens.g. Make sure that the NNM iSPI Performance for Metrics–ExtensionPacks check box is not selected.h. Click Upgrade. The upgrade process begins.
Toward the end of the upgrade process, the HPE NNM iSPI Performance Configuration windowopens.On the DB Server and UiBi Server, click Exit.
Note: On the DB Server and UiBi Server, do not change any settings. Do not click Start.
After the upgrade procedure is complete, you cannot configure an NPS system in a distributeddeployment to assume a different role.
On the ETL Server, make sure that the correct share path is specified, make sure that CIFS isselected as the sharingmode, and then click Apply if you had tomake any changes; otherwise,click Exit.
Re-configure the DB Server Role1. Log on to the DB Server as root or administrator.2. Do one of the following:
l Retrieve the copy of the serverRoleConfig.cfg file that was used to configure the server role on thissystem.
Tip: If you are unable to retrieve the copy of the serverRoleConfig.cfg file that was usedbefore, follow the alternative procedure.
l Alternatively, create a new copy of the serverRoleConfig.cfg file:Create a new serverRoleConfig.cfg file by following the instructions in the "Assign Roles" on page30 section.
3. Configure the DB Server role again by running the following command:configureNpsServer.ovpl -f<config_file>In this instance, <config_file> is the name (with the full path) of the configuration file.

HPE Network NodeManager iSPI Performance for Metrics Software (10.21) Page 72 of 129
Additional Configuration Task on the UiBiServer1. Log on to the UiBi Server as root or administrator.2. Do one of the following:
l Reconfigure the serverRoleConfig.cfg file:i. Retrieve the copy of the serverRoleConfig.cfg file that was used to configure the server role
on this system.
Tip: If you are unable to retrieve the copy of the serverRoleConfig.cfg file that was usedbefore, follow the alternative procedure.
ii. Add the following properties:
UiBi.NnmServer.Hostname =
UiBi.NnmServer.Share.Name =
UiBi.NnmServer.Share.User =
UiBi.NnmServer.Share.Pass =
iii. Set the newly added properties to the following values:
Property Value
UiBi.NnmServer.Hostname Type the FQDN of the NNMi management server.
UiBi.NnmServer.Share.Name Type the name of the network share created on the NNMimanagement server while running thennmenableperfspi.ovpl script.
UiBi.NnmServer.Share.User Type the name of the user account specified while runningthe nnmenableperfspi.ovpl script.
UiBi.NnmServer.Share.Pass Type the password of the above user account.
iv. Save the file.
l Alternatively, create a new copy of the serverRoleConfig.cfg file:Create a new serverRoleConfig.cfg file by following the instructions in the "Assign Roles" on page30 section.
3. Configure the UiBi Server role again by running the following command:configureNpsServer.ovpl -f <config_file>In this instance, <config_file> is the name (with the full path) of the configuration file.

HPE Network NodeManager iSPI Performance for Metrics Software (10.21) Page 73 of 129
Re-configure the ETL Server Role1. Log on to the ETL Server as root or administrator.2. Do one of the following:
l Retrieve the copy of the serverRoleConfig.cfg file that was used to configure the server role on thissystem.
Tip: If you are unable to retrieve the copy of the serverRoleConfig.cfg file that was usedbefore, follow the alternative procedure.
l Alternatively, create a new copy of the serverRoleConfig.cfg file:Create a new serverRoleConfig.cfg file by following the instructions in the "Assign Roles" on page30 section.
3. Configure the ETL Server role again by running the following command:configureNpsServer.ovpl -f <config_file>In this instance, <config_file> is the name (with the full path) of the configuration file.
Upgrade All iSPIsUpgrade all other iSPIs to 10.21. Follow the information in the iSPI documentation.
If you are using the NNM iSPI Performance for Metrics Extension Packs, do one of the following:
l In a single-ETL Server deployment, log on to the ETL Server as root or administrator, and then run thefollowing commands:OnWindows:a. %npsinstalldir%\bin\metricsExtensionPacks.ovpl installb. %npsinstalldir%\bin\installPathHealth.ovplOn Linux:a. /opt/OV/NNMPerformanceSPI/bin/metricsExtensionPacks.ovpl installb. /opt/OV/NNMPerformanceSPI/bin/installPathHealth.ovpl
l In amulti-ETL Server deployment, log on (as root or administrator) to the ETL Server where the NNM iSPIPerformance for Metrics Extension Packs were originally installed, and then run the following command:OnWindows:a. %npsinstalldir%\bin\metricsExtensionPacks.ovpl installb. %npsinstalldir%\bin\installPathHealth.ovplOn Linux:a. /opt/OV/NNMPerformanceSPI/bin/metricsExtensionPacks.ovpl installb. /opt/OV/NNMPerformanceSPI/bin/installPathHealth.ovpl

HPE Network NodeManager iSPI Performance for Metrics Software (10.21) Page 74 of 129
Post-Upgrade Steps1. Run the nnmenableperfspi.ovpl script on the NNMi management server.
Tip: To provide the same configuration details that existed prior to upgrading NPS to the currentversion, see the contents of the following file:
(The file does not store the password.)On Linux:
/var/opt/OV/log/nnmenableperfspi.txt
OnWindows:
%nnmdatadir%\log\nnmenableperfspi.txt
When NNMi is installed on Linuxa. Log on to the NNMi management server as root.b. If the /var/opt directory on the NNMi management server is on amounted file system, youmust
perform the following additional steps:i. Open the /etc/fstab file with a text editor.ii. Find the line that starts with the following:
<file_system> <mount_point>
<file_system> is the /var/opt directory (either /var or /var/opt)iii. In the line, add acl to the list of options.iv. Save the file.v. Run the following command to remount /var/opt:
mount -o remount /var/optOrmount -o remount /var
c. Go to the following directory:
/opt/OV/bin
d. To run the script in the interactivemode:
i. Run the following command:./nnmenableperfspi.ovplThe script prompts you for the fully qualified domain name of the NPS system.
ii. Type the fully qualified domain name of the system onwhich you want to assign the UiBiServer role, and then press Enter.The script verifies the availability of the NPS system with a ping command.After successful verification, the script prompts you to specify the port that will be used by theNPS system.
iii. Type a port number that is available for use, and then press Enter.

HPE Network NodeManager iSPI Performance for Metrics Software (10.21) Page 75 of 129
The script prompts you to specify the communication protocol for NPS.iv. Type HTTPS if want to use the secure communicationmode, and then press Enter.
If you want to use the non-secure HTTP mode of communication, press Enterwithoutspecifying anything.The script prompts you to choose the type of file-sharing technique to exchange data betweenthe NNMi management server and the NPS system. Available options areCIFS1 andNFS2.
v. TypeCIFS orNFS, and then press Enter.
Note:While creating a distributed deployment of NPS, choose NFS only if NNMi and allNPS system are on Linux. If you select NFS, make sure to apply the NNM iSPIPerformance for Metrics 10.21 patch after completing the procedure of creating thedistributed deployment of NPS. For instructions to install the 10.21 patch, see "InstallingPatches in a Distributed Deployment of NPS" on page 81.
The script enables the evaluation license of the NNM iSPI Performance for Metrics on theNNMi management server, adds new items under theActionsmenu, and enables file sharingbetween the NNMi management server and the NPS system.Follow these steps:A. The script prompts you to specify a user name that will be assigned as the owner of the
shared file system.Type a user name of your choice, and then press Enter. You need not type a pre-existinguser name.The script prompts you to type a password for the user that it is going to create.
B. Type a password that meets the operating system's password policy requirements, andthen press Enter.The script prompts you to specify the directory that will be used as the shared file system.
C. Type the complete path to the directory that you want to use as the shared file systembetween the NNMi management server and the NPS system, and then press EnterThe script performs the following tasks:l Enables the evaluation license of the NNM iSPI Performance for Metrics on the NNMimanagement server
l Adds menu items under the Actions menu in the NNMi console to launch the NPSconsole
l Creates the shared file systeml Creates a user (if necessary) that can access the newly created shared file system
e. To run the script in the non-interactive (silent) mode:
i. In a text editor, add the following content:
spiHost=
spiPort=
1Common Internet File System (CIFS) is an application-layer file sharing protocol.2Network File Share (NFS) is a file sharing protocol between systems running on UNIX/Linux.
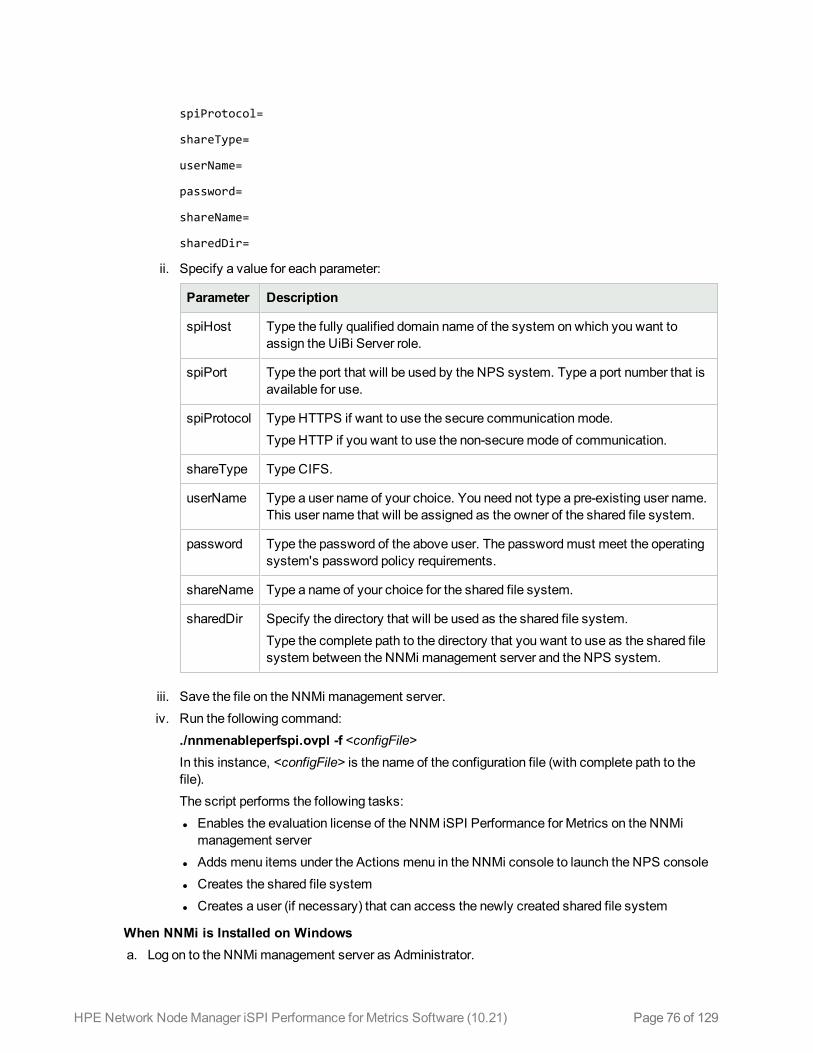
HPE Network NodeManager iSPI Performance for Metrics Software (10.21) Page 76 of 129
spiProtocol=
shareType=
userName=
password=
shareName=
sharedDir=
ii. Specify a value for each parameter:
Parameter Description
spiHost Type the fully qualified domain name of the system onwhich you want toassign the UiBi Server role.
spiPort Type the port that will be used by the NPS system. Type a port number that isavailable for use.
spiProtocol Type HTTPS if want to use the secure communicationmode.Type HTTP if you want to use the non-securemode of communication.
shareType Type CIFS.
userName Type a user name of your choice. You need not type a pre-existing user name.This user name that will be assigned as the owner of the shared file system.
password Type the password of the above user. The passwordmust meet the operatingsystem's password policy requirements.
shareName Type a name of your choice for the shared file system.
sharedDir Specify the directory that will be used as the shared file system.Type the complete path to the directory that you want to use as the shared filesystem between the NNMi management server and the NPS system.
iii. Save the file on the NNMi management server.iv. Run the following command:
./nnmenableperfspi.ovpl -f <configFile>In this instance, <configFile> is the name of the configuration file (with complete path to thefile).The script performs the following tasks:l Enables the evaluation license of the NNM iSPI Performance for Metrics on the NNMimanagement server
l Adds menu items under the Actions menu in the NNMi console to launch the NPS consolel Creates the shared file systeml Creates a user (if necessary) that can access the newly created shared file system
When NNMi is Installed on Windowsa. Log on to the NNMi management server as Administrator.

HPE Network NodeManager iSPI Performance for Metrics Software (10.21) Page 77 of 129
b. Go to the following directory:
%nnminstalldir%\bin
c. To run the script in the interactivemode:
i. Run the following command:nnmenableperfspi.ovplThe script prompts you for the fully qualified domain name of the NPS system.
ii. Type the fully qualified domain name of the system onwhich you want to assign the UiBiServer role, and then press Enter.The script verifies the availability of the NPS system with a ping command.After successful verification, the script prompts you to specify the port that will be used by theNPS system.
iii. Type a port number that is available for use, and then press Enter.The script prompts you to specify the communication protocol for NPS.
iv. Type HTTPS if want to use the secure communicationmode, and then press Enter.If you want to use the non-secure HTTP mode of communication, press Enterwithoutspecifying anything.The script prompts you to choose the type of file-sharing technique to exchange data betweenthe NNMi management server and the NPS system.
v. When you use aWindows NNMi management server, youmust choose only theCIFS1protocol for file sharing.Type CIFS, and then press Enter.The script prompts you to specify a user name that will be assigned as the owner of the sharedfile system.
vi. Type a user name of your choice, and then press Enter. You need not type a pre-existing username.
Tip: If you specify a user name that does not already exists, the script creates a new localuser (and not aWindows domain user).
You can specify a pre-existingWindows domain user.Always use the following format while specifying a pre-existing domain user name:<domain>\<user_name>In this instance, <domain>is the domain name and <user_name> is the user name.
The script prompts you to specify a password of the user that it is going to create.vii. Type a password that meets the operating system's password policy requirements, and then
press Enter.The script prompts you to specify the directory that will be used as the shared file system.
viii. Type the complete path to the directory that you want to use as the shared file system betweenthe NNMi management server and the NPS system, and then press Enter.
1Common Internet File System (CIFS) is an application-layer file sharing protocol.

HPE Network NodeManager iSPI Performance for Metrics Software (10.21) Page 78 of 129
The script performs the following tasks:l Enables the evaluation license of the NNM iSPI Performance for Metrics on the NNMimanagement server
l Adds menu items under the Actions menu in the NNMi console to launch the NPS consolel Creates the shared file systeml Creates a user (if necessary) that can access the newly created shared file system
d. To run the script in the non-interactive (silent) mode:
i. In a text editor, add the following content:
spiHost=
spiPort=
spiProtocol=
shareType=
userName=
password=
shareName=
sharedDir=
ii. Specify a value for each parameter:
Parameter Description
spiHost Type the fully qualified domain name of the system onwhich you want toassign the UiBi Server role.
spiPort Type the port that will be used by the NPS system. Type a port number that isavailable for use.
spiProtocol Type the communication protocol for NPS.Type HTTPS if want to use the secure communicationmode. Type HTTP ifyou want to use the non-securemode of communication.
shareType Type CIFS.When NNMi is installed onWindows, you can use only theCIFS1 protocol.
userName Type a user name of your choice, and then press Enter. You need not type apre-existing user name.
Tip: If you specify a user name that does not already exists, the scriptcreates a new local user (and not aWindows domain user).
You can specify a pre-existingWindows domain user.
1Common Internet File System (CIFS) is an application-layer file sharing protocol.

HPE Network NodeManager iSPI Performance for Metrics Software (10.21) Page 79 of 129
Parameter Description
Always use the following format while specifying a pre-existing domainuser name:<domain>\<user_name>In this instance, <domain>is the domain name and <user_name> is theuser name.
password Type the password of the above user.
shareName Type a name of your choice for the shared file system.
sharedDir Specify the directory that will be used as the shared file system.Type the complete path to the directory that you want to use as the shared filesystem between the NNMi management server and the NPS system.
iii. Save the file on the NNMi management server.iv. Run the following command:
nnmenableperfspi.ovpl -f <configFile>In this instance, <configFile> is the name of the configuration file (with complete path to thefile).
2. Log on to the DB Server, and then run the following commands:a. stopALL.ovplb. startALL.ovpl
3. Log on to the UiBi Server, and then run the following commands:a. stopALL.ovplb. startALL.ovpl
4. Log on to each ETL Server, and then follow these steps:
Note: In an environment with multiple ETL Servers, perform this step on each system where theETL Server role is enabled.
a. Run the following command to change the default SDK password:OnWindows:%ovinstalldir%\NNMPerformanceSPI\bin\changeSdkUserPwd.ovpl -unpssdkuser -p <password>On Linux: /opt/OV/NNMPerformanceSPI/bin/changeSdkUserPwd.ovpl -u npssdkuser -p<password>In this instance, <password> is a password of your choice.
Note: In an environment with multiple ETL Servers, youmust set the identical password oneach ETL Server.
b. Run the following commands to restart NPS:

HPE Network NodeManager iSPI Performance for Metrics Software (10.21) Page 80 of 129
i. stopALL.ovplii. startALL.ovpl

HPE Network NodeManager iSPI Performance for Metrics Software (10.21) Page 81 of 129
Part IV: Installing Patches in aDistributed Deployment of NPSThis section of the document provides step-by-step instructions to apply a patch on NPS in a distributedenvironment.
Installing a Patch to a Distributed Deploymentof NPSTip: As a precaution, take a backup of NPS data on all the servers and all the copies of theserverRoleConfig.cfg files that you used while assigning server roles.
1. Stop NPS services on the UiBi Server by running the following command:stopALL.ovpl
2. Stop NPS services on the ETL Servers by running the following command:stopALL.ovpl
3. Stop NPS services on the DB Server by running the following command:stopALL.ovpl
4. Apply the patch to NPS using the instructions provided with the patch. Follow the patch installation stepsgiven in the patch document, and ensure that the patch is installed successfully.
Note: Apply the patch in the following sequence:
a. DB Serverb. UiBi Serverc. ETL ServerDo not apply patch to the UiBi Server until the patch is applied to DB Server; do not apply patch tothe ETL Servers until the patch is applied to the UiBi Server.
Configuration Task on the ETL Server1. Log on to the ETL Server as root or administrator.2. Do one of the following:
l Retrieve the copy of the serverRoleConfig.cfg file that was used to configure the server role on thissystem.

HPE Network NodeManager iSPI Performance for Metrics Software (10.21) Page 82 of 129
Tip: If you are unable to retrieve the copy of the serverRoleConfig.cfg file that was usedbefore, follow the alternative procedure.
l Alternatively, create a new copy of the serverRoleConfig.cfg file by following the instructions in the"Assign Roles" on page 30 section.
3. Configure the ETL Server role again by running the following command:configureNpsServer.ovpl -f <config_file>In this instance, <config_file> is the name (with the full path) of the configuration file.
Additional Configuration Steps1. Run the nnmenableperfspi.ovpl script on the NNMi management server by following the instructions
in the "Enabling NNMi toWork with NPS" on page 22 section.
Tip: To provide the same configuration details that existed prior to applying the patch, see thecontents of the following file:
(The file does not store the password.)On Linux:
/var/opt/OV/log/nnmenableperfspi.txt
OnWindows:
%nnmdatadir%\log\nnmenableperfspi.txt
2. Log on to the DB Server, and then run the following commands:a. stopALL.ovplb. startALL.ovpl
3. Log on to the UiBi Server, and then run the following commands:a. stopALL.ovplb. startALL.ovpl
4. Log on to each ETL Server, and then run the following commands:
Note: In an environment with multiple ETL Servers, perform this step on each system where theETL Server role is enabled.
a. stopALL.ovplb. startALL.ovpl

HPE Network NodeManager iSPI Performance for Metrics Software (10.21) Page 83 of 129
Uninstalling a Patch from a DistributedDeployment of NPSNote: Read the patch readme file to determine if the patch can be uninstalled.
To uninstall a patch from a distributed deployment of NPS, follow these steps:
1. Stop NPS services on the UiBi Server by running the following command:stopALL.ovpl
2. Stop NPS services on the ETL Servers by running the following command:stopALL.ovpl
3. Stop NPS services on the DB Server by running the following command:stopALL.ovpl
4. Uninstall the patch on NPS using the instructions provided with the patch. Follow the patch uninstallationsteps given in the patch readme and ensure that the patch is uninstalled successfully.
Note: Uninstall the patch in the following sequence:
a. ETL Serverb. UiBi Serverc. DB Server

HPE Network NodeManager iSPI Performance for Metrics Software (10.21) Page 84 of 129
Deployment ReferencePart IV: Installing Patches in a Distributed Deployment of NPS

HPE Network NodeManager iSPI Performance for Metrics Software (10.21) Page 85 of 129
Part V: Additional Configuration for UsingNFSNote: This section is relevant only if you plan to use Linux and had chosen the NFS share when you ranthe nnmenableperfspi.ovpl script. Skip this section if you useWindows.
If you chose to use the NFS share while running the nnmenableperfspi.ovpl script, youmust performadditional tasks listed in this section tomanually export the data share.
1. Log on to the NNMi management server.2. Open the /etc/exports file with a text editor.3. Locate the following line:
/var/opt/OV/shared/perfSpi/datafiles <UiBi Server FQDN> (rw,sync,no_root_squash)In this instance, <UiBi Server FQDN> is the FQDN of the UiBi Server.
4. Youmust create a similar statement for each ETL Server in the environment. That is, youmust add thefollowing statement for each ETL Server:
/var/opt/OV/shared/perfSpi/datafiles <ETL Server FQDN> (rw,sync,no_root_squash)In this instance, <ETL Server FQDN> is the FQDN of an ETL Server.In amulti-ETL environment, youmust add a statement for each ETL Server. For example, in anenvironment with three ETL Servers, youmust add three such statements in the exports file.
5. Save the file.6. Run the following command:
/usr/sbin/exportfs –a7. Follow these steps on the DB Server:
a. Open the $NPSInstallDir/config/serverRoleConfig.cfg file.b. Locate the following section:
#Db config section
c. Add the following lines in the section:
Db.Share.Protocol = NFS
Db.Share.Etls =<etlserver>In this instance, <etlserver> is the FQDN of the ETL Server. In amulti-ETL environment, provide acomma-separated list of FQDNs of all ETL Servers.
d. Save the file.8. Follow these steps on the UiBi Server:
a. Open the $NPSInstallDir/config/serverRoleConfig.cfg file.b. Locate the following section:
#UiBi config section

HPE Network NodeManager iSPI Performance for Metrics Software (10.21) Page 86 of 129
c. Add the following lines in the section:
UiBi.Share.Protocol = NFS
UiBi.Share.Etls =<etlserver>In this instance, <etlserver> is the FQDN of the ETL Server. In amulti-ETL environment, provide acomma-separated list of FQDNs of all ETL Servers.
d. Save the file.9. Follow these steps on the ETL Server:
a. Open the $NPSInstallDir/config/serverRoleConfig.cfg file.b. Locate the following section:
#Db config section
c. Add the following line in this section:
Etl.Share.Protocol = NFS
d. Save the file.10. Log on as root to each NPS system, and then run the following command:
Note: Run this command on NPS system in the following order:
a. The DB Serverb. The UiBi Serverc. The ETL Servers
./configureNpsServer.ovpl -f $NPSInstallDir/config/serverRoleConfig.cfg
Tip: As a best practice, take a backup of the serverRoleConfig.cfg file that you configured for usewith the configureNpsServer.ovpl script.

HPE Network NodeManager iSPI Performance for Metrics Software (10.21) Page 87 of 129
Part VI: NPS in a Global NetworkManagement EnvironmentThis section covers the steps to allow a configuration with NNMi in a Global Network Management (GNM)environment along with a single instance of NPS attached to the Global NNMi management server (GlobalManager). With this setup, NPS is not required at the regional NNMi management servers (RegionalManagers). Instead, you need to do the following after installing NPS:
1. Install an NNMi Premiun or Ultimate license on each Regional Manager.2. Install an NNMi Premiun or Ultimate license on theGlobal Manager.A limitation of using this solution is that you cannot launch the NPS console (Actions > Reporting - ReportMenu) and the Performance Troubleshooting console from Regional Managers.
This section assumes a working knowledge of the basic architecture of NNMi and the NNM iSPI Performancefor Metrics/NPS solution.
Note: You cannot use baseline reports in this deployment.
ArchitectureHere is a simplistic picture of the architecture that will be covered in this document. This can be expanded tomore than two Regional Managers.
GNM Deployment with NPS

HPE Network NodeManager iSPI Performance for Metrics Software (10.21) Page 88 of 129
In this document, we only use two Regional Managers, oneGlobal Manager, and one NPS system, but youcan expand this deployment to multiple Regional Managers.
Licensing RequirementYoumust install the Premium or Ultimate licenses on the regional andGlobal Managers. The installation oflicenses enables Performance polling on the Regional Manager.
For example, if you have three Regional Managers, youmust obtain four Premium or Ultimate license keys(three for Regional Managers; one for the Global Manager).
GNM with NPS in a Linux EnvironmentTo install NPS in aGNM environment, follow these steps:
1. Complete the GNM configuration between two NNMi servers. The details of this process are describedin theHPE Network NodeManager i Software Deployment Reference.
2. Go to the Global Manager and run the nnmenableperfspi.ovpl script. Select NFS and complete allconfiguration steps. This script, at the end of its run, shows a path in the command line console. Notedown this path.
3. Install the NNM iSPI Performance for Metrics on a separate, dedicated system. Near the end of theinstallation, the installer opens the HPE NNMi iSPI Performance Configuration window and you areprompted to specify the shared path to the Global Manager.
4. In the HPE NNMi iSPI Performance Configuration window, type the shared path in the Path box asdisplayed by the nnmenableperfspi.ovpl script (that is, the path that you noted down in a previousstep).
5. Click Start to start the services.6. Optional. You can perform a status poll of a router from theGlobal Manager. You will notice that the
Global Manager does not do any performance polling yet because performance polling is not enabled onRegional Managers. Performance polling is enabled and licensed on theGlobal Manager.

HPE Network NodeManager iSPI Performance for Metrics Software (10.21) Page 89 of 129
7. Install the NNMi Ultimate or Premium license on each Regional Manager by using the nnmlicense.ovplcommand, but do not run the nnmenableperfspi.ovpl script.
8. On theGlobal Manager, install an NNMi Ultimate or Premium license.9. Optional. Now if you run the status poll of an object from theGlobal Manager, you will see that the object
is polled for performance data.
Note: After some time, you will see several .csv.gz files accumulating in the

HPE Network NodeManager iSPI Performance for Metrics Software (10.21) Page 90 of 129
/var/opt/OV/shared/perfSpi/datafiles/metric/final directory on each Regional Manager. Thesefiles are generated by the Regional Manager’s state poller. You can delete these files at any time.This buildup of files will cause a warning eventually on the Reional Manager. Note that NNMi will not putmore than 1GB (by default) of files into this directory.However, NNMi may show the following error messages in the System Information window:
The Performance SPI Custom Poller Bus Adapter has status Minor because the file spacelimit (10 megabytes) has been reached and no additional data can be written.
The Performance SPI Bus Adapter has status Minor because the file space limit (10megabytes) has been reached and no additional data can be written.
You can control the accumulation of the .csv.gz files by reducing themaximum size of the storage ofthese files. You can also configure NNMi to suppress alerting of this issue (that is, the buildup of the.csv.gz files into the nps_baselinestate directory).
To control the buildup of the .csv.gz files, edit the/var/opt/OV/shared/perfSpi/conf/nmsAdapter.conf file on each Regional Manager by changing themaxFileSpaceMB property to a smaller number like 10.For example:
maxFileSpaceMB:10
Restart NNMi (by running ovstop and ovstart) after making this change.
To suppress alerting of the buildup of the .csv.gz files, edit the/var/opt/OV/shared/nnm/conf/props/nms-topology.properties file on each Regional Manager byadding the following lines:
#Suppress warnings about Max Space on regional NNMi
com.hp.ov.nms.health.SUPPRESSED_CONCLUSIONS=PerformanceSpiBusAdapterIsMaxFileSpace
Restart NNMi (by running ovstop and ovstart) after making this change.
GNM with NPS in a Windows EnvironmentNote: For this setup, use only Windows NNMi management server.
To install NPS in aGNM environment, follow these steps:
1. Complete the GNM configuration between two NNMi management servers. The details of this processare described in theHPE Network NodeManager i Software Deployment Reference.
2. Go to the Global Manager and run the nnmenableperfspi.ovpl script. The script shows the followingquestion:
What username would you like for the new local account ? Or press [return] if youwant to use an existing local or domain account.
3. Type a user name of your choice (for example, localact), and then press Enter. The following questionappears:
Type a password for the user:

HPE Network NodeManager iSPI Performance for Metrics Software (10.21) Page 91 of 129
4. Type a password of your choice, and then press Enter. The following question appears:
Retype the password to confirm:
5. Type the password again, and then press Enter. The string of messages appears in the console, whichincludes the followingmessage:
set <Path to iSPI Performance datafile folder> to: \\<NPS_FQDN>\PerfSpi
In this instance, <NPS_FQDN> is the FQDN of the NPS system. Note down the user name andpassword provided in this step.
6. Install the NNM iSPI Performance for Metrics on a separate, dedicated system.Near the end of the installation, the installer opens the HPE NNMi iSPI Performance Configurationwindow and you are prompted to enter the shared path to the Global Manager.
7. Type the following path in the Path box:\\<NPS_FQDN>\PerfSpi
8. Type the account name and password that you noted down above"GNMwith NPS in aWindowsEnvironment" on the previous page.
9. Then click Apply. It will run a configuration test at this point. You should see a success window asshown below.

HPE Network NodeManager iSPI Performance for Metrics Software (10.21) Page 92 of 129
10. Now click Start to start the services.
11. Optional. You can perform a status poll of a router from theGlobal Manager. You will notice that theGlobal Manager does not do any performance polling yet because performance polling is not enabled onRegional Managers. Performance polling is enabled and licensed on theGlobal Manager.

HPE Network NodeManager iSPI Performance for Metrics Software (10.21) Page 93 of 129
12. Install the NNMi Ultimate or Premium license on each Regional Manager by using the nnmlicense.ovplcommand, but do not run the nnmenableperfspi.ovpl script.
13. On theGlobal Manager, install an NNMi Ultimate or Premium license.14. Optional. Now if you run the status poll of an object from theGlobal Manager, you will see that the object
is polled for performance data.
Note: After some time, you will see several .csv.gz files accumulating in the%NNMDataDir%\shared\perfSpi\datafiles\metric\final directory on each Regional Manager.
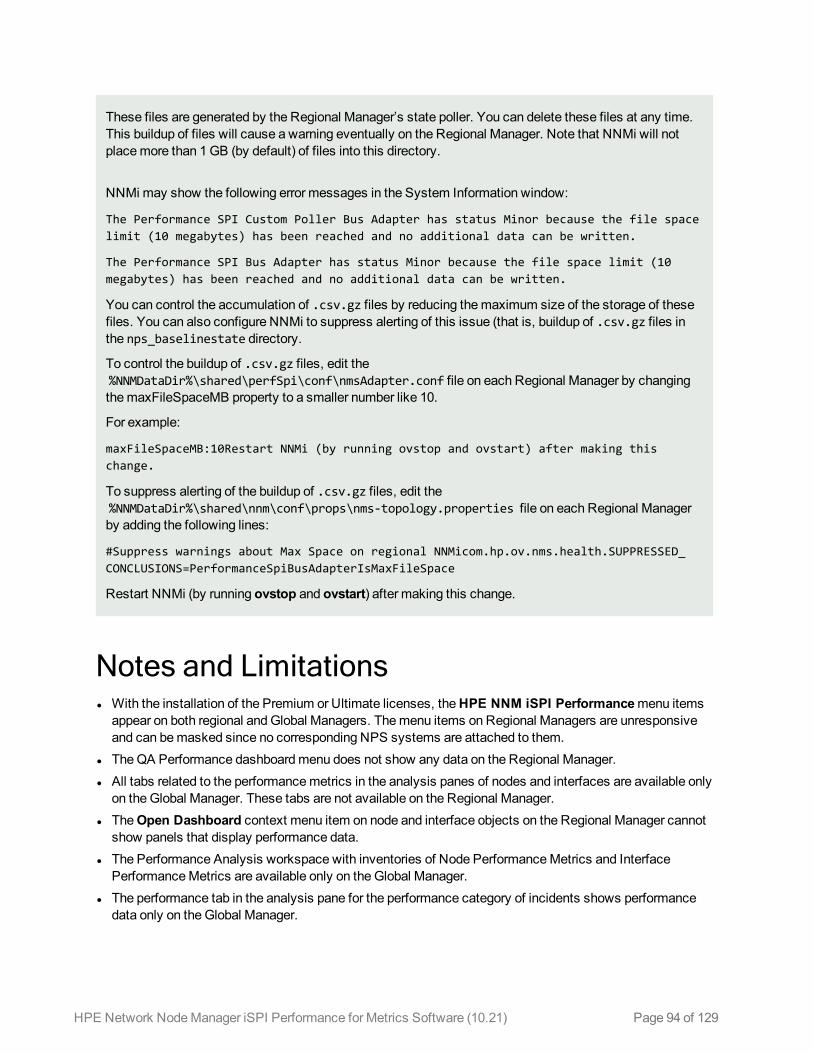
HPE Network NodeManager iSPI Performance for Metrics Software (10.21) Page 94 of 129
These files are generated by the Regional Manager’s state poller. You can delete these files at any time.This buildup of files will cause a warning eventually on the Regional Manager. Note that NNMi will notplacemore than 1GB (by default) of files into this directory.
NNMi may show the following error messages in the System Information window:
The Performance SPI Custom Poller Bus Adapter has status Minor because the file spacelimit (10 megabytes) has been reached and no additional data can be written.
The Performance SPI Bus Adapter has status Minor because the file space limit (10megabytes) has been reached and no additional data can be written.
You can control the accumulation of .csv.gz files by reducing themaximum size of the storage of thesefiles. You can also configure NNMi to suppress alerting of this issue (that is, buildup of .csv.gz files inthe nps_baselinestate directory.
To control the buildup of .csv.gz files, edit the%NNMDataDir%\shared\perfSpi\conf\nmsAdapter.conf file on each Regional Manager by changingthemaxFileSpaceMB property to a smaller number like 10.
For example:
maxFileSpaceMB:10Restart NNMi (by running ovstop and ovstart) after making thischange.
To suppress alerting of the buildup of .csv.gz files, edit the%NNMDataDir%\shared\nnm\conf\props\nms-topology.properties file on each Regional Managerby adding the following lines:
#Suppress warnings about Max Space on regional NNMicom.hp.ov.nms.health.SUPPRESSED_CONCLUSIONS=PerformanceSpiBusAdapterIsMaxFileSpace
Restart NNMi (by running ovstop and ovstart) after making this change.
Notes and Limitationsl With the installation of the Premium or Ultimate licenses, theHPE NNM iSPI Performancemenu itemsappear on both regional andGlobal Managers. Themenu items on Regional Managers are unresponsiveand can bemasked since no corresponding NPS systems are attached to them.
l TheQA Performance dashboardmenu does not show any data on the Regional Manager.l All tabs related to the performancemetrics in the analysis panes of nodes and interfaces are available onlyon the Global Manager. These tabs are not available on the Regional Manager.
l TheOpen Dashboard context menu item on node and interface objects on the Regional Manager cannotshow panels that display performance data.
l The Performance Analysis workspace with inventories of Node PerformanceMetrics and InterfacePerformanceMetrics are available only on the Global Manager.
l The performance tab in the analysis pane for the performance category of incidents shows performancedata only on the Global Manager.

HPE Network NodeManager iSPI Performance for Metrics Software (10.21) Page 95 of 129
l Real-time performance data is unavailable when the connectivity between regional andGlobal Managers isdisrupted. However, with the restoration of the connectivity, the performance data becomes available formonitoring.

HPE Network NodeManager iSPI Performance for Metrics Software (10.21) Page 96 of 129
Part VII: Installing NPS Patches in High-Availability ClustersThis section of the document provides step-by-step instructions to install a patch on NPS in a high-availability(HA) cluster. This chapter also provides you with steps to uninstall a patch on NPS in a HA cluster.
Installing a Patch on NPS in HA ClusterNote:Patchmust be first applied on all the passive nodes.
Installing a Patch on the Passive Node
1. Before applying the patch on each passive node, temporarily move the HA cluster to maintenancemode.Tomove a node in a HA cluster to maintenancemode, create the following files on each passive NPSserver:On Linux:l /var/opt/OV/hacluster/<resource_group>/maintenance
l /var/opt/OV/hacluster/<rsource_group>/maint_NNM
OnWindows:l %NPSDataDir%/../hacluster/<resource_group>/maintenance
l %NPSDataDir%/../hacluster/<rsource_group>/maint_NNM
2. On each passive node in the cluster, log on with the administrative privileges and temporarily remove thenode from the HA cluster.On Linux:Before unconfiguring, check the following:a. Go to the following directory:
/var/opt/OV
b. Check if NNMPerformanceSPI_HA_Backupdir is a link.If it is a link, remove it andmove NNMPerformanceSPI_HA_Backupdir.<timestamp>, which is aphysical directory, to NNMPerformanceSPI_HA_Backupdir.If it is not a link, do not change anything.
To unconfigure, run the following command:On Linux:/opt/OV/misc/nnm/ha/nnmhaunconfigure.ovpl PerfSPIHA <resource_group> (for a dedicated NPSsetup)

HPE Network NodeManager iSPI Performance for Metrics Software (10.21) Page 97 of 129
/opt/OV/misc/nnm/ha/nnmhaunconfigure.ovpl NNM –addon PerfSPIHA (for a co-located NPSsetup)
Note: For a co-located setup, make sure that the /opt/OV/misc/nnm/ha/nnmhaclusterinfo.ovpl -config NNM -get NNM_ADD_ON_PRODUCTS command does not list a passive node.
OnWindows:l %NPSInstallDir%/../misc/nnm/ha/nnmhaunconfigure.ovpl PerfSPIHA <resource_group> (fora dedicated NPS setup)
l %NnmInstallDir%/misc/nnm/ha/nnmhaunconfigure.ovpl NNM –addon PerfSPIHA (for a co-located NPS setup)
Note: For a co-located setup, make sure that the%NnmInstallDir%/misc/nnm/ha/nnmhaclusterinfo.ovpl -config NNM -get NNM_ADD_ON_PRODUCTS command does not list a passive node.
3. Install the NPS Patch. Follow the patch installation steps given in the patch document, and ensure thatthe patch is installed successfully.
Caution:Do not configure HA back on this node until the patch is applied on the active node.
4. Run the following command to stop the processes that were started during the patch install (in a newshell):On Linux:/opt/OV/NNMPerformanceSPI/bin/stopALL.ovplOnWindows:%NPSInstallDir%/bin/stopALL.ovpl
Installing a Patch on the Active Node
1. Before applying the patch on the active node, temporarily move the HA cluster to maintenancemode. HAcluster on a node can bemoved tomaintenancemode by creating the following files on the active NPSserver:On Linux:l /var/opt/OV/hacluster/<resource_group>/maintenance
l /var/opt/OV/hacluster/<rsource_group>/maint_NNM
OnWindows:l %NPSDataDir%/../hacluster/<resource_group>/maintenance
l %NPSDataDir%/../hacluster/<rsource_group>/maint_NNM
2. Install the NPS Patch. Follow the patch installation steps given in the patch document, and ensure thatthe patch is installed successfully.

HPE Network NodeManager iSPI Performance for Metrics Software (10.21) Page 98 of 129
Caution:Do not unconfigure HA on the active node at this point.
3. After the installation is done, stop all the NPS processes by running the following command:On Linux:/opt/OV/NNMPerformanceSPI/bin/stopALL.ovplOnWindows:%NPSInstallDir%/bin/stopALL.ovpl
4. Open a new shell and run the following command to start all the processes:On Linux:/opt/OV/NNMPerformanceSPI/bin/startALL.ovplOnWindows:%NPSInstallDir%/bin/startALL.ovpl
5. On Linux only. Set themount point using the following command in the active node:/opt/OV/misc/nnm/ha/nnmhaclusterinfo.ovpl -config PerfSPIHA –set <mount-point>
6. Re-enable perfspi integration by running the following script on the NNMi system:On Linux:$NnmInstallDir/bin/nnmenableperfspi.ovplOnWindows:%NnmInstallDir%/bin/nnmenableperfspi.ovpl
Note: Formore information, see the “"Enabling NNMi toWork with NPS" on page 22” topic. Providethe virtual FQDN of the NPS HA setup when prompted for the NPS host name.
Reconfiguring the Passive Nodes Back in HA Cluster
1. On each passive node, run the following command to reconfigure HA:On Linux:l /opt/OV/misc/nnm/ha/nnmhaconfigure.ovpl PerfSPIHA (for dedicated setup)
l /opt/OV/misc/nnm/ha/nnmhaconfigure.ovpl NNM –addon PerfSPIHA (for co-locatedsetup)
Note: For a co-located setup, make sure that the /opt/OV/misc/nnm/ha/nnmhaclusterinfo.ovpl -config NNM -get NNM_ADD_ON_PRODUCTS command does not list a passive node.
OnWindows:l %NPSInstallDir%/../misc/nnm/ha/nnmhaconfigure.ovpl PerfSPIHA (for dedicated setup)
l %NnmInstallDir%/misc/nnm/ha/nnmhaconfigure.ovpl NNM –addon PerfSPIHA (for co-locatedsetup)

HPE Network NodeManager iSPI Performance for Metrics Software (10.21) Page 99 of 129
Note: For a co-located setup, make sure that the%NnmInstallDir%/misc/nnm/ha/nnmhaclusterinfo.ovpl -config NNM -get NNM_ADD_ON_PRODUCTS command does not list a passive node.
2. Remove the passive nodes out of maintenancemode. HA cluster node can bemoved out ofmaintenancemode by deleting the following files on all the passive NPS nodes:On Linux:l /var/opt/OV/hacluster/<resource_group>/maintenance
l /var/opt/OV/hacluster/<rsource_group>/maint_NNM
OnWindows:l %NPSDataDir%/../hacluster/<resource_group>/maintenance
l %NPSDataDir%/../hacluster/<rsource_group>/maint_NNM
3. Remove the active node out of maintenancemode. HA cluster node can bemoved out of maintenancemode by deleting the following files on the active NPS system:On Linux:l /var/opt/OV/hacluster/<resource_group>/maintenance
l /var/opt/OV/hacluster/<rsource_group>/maint_NNM
OnWindows:l %NPSDataDir%/../hacluster/<resource_group>/maintenance
l %NPSDataDir%/../hacluster/<rsource_group>/maint_NNM
Uninstalling an NPS Patch from HA ClustersNote:Patchmust be first uninstalled on all the passive nodes. Read the patch readme file to determine ifthe patch can be uninstalled.
Uninstalling a Patch on the Passive Node
1. Before uninstalling the patch on each passive node, temporarily move the HA cluster to maintenancemode. HA cluster on a node can bemoved tomaintenancemode by creating the following files on eachpassive NPS server:On Linux:l /var/opt/OV/hacluster/<resource_group>/maintenance
l /var/opt/OV/hacluster/<rsource_group>/maint_NNM
OnWindows:

HPE Network NodeManager iSPI Performance for Metrics Software (10.21) Page 100 of 129
l %NPSDataDir%/../hacluster/<resource_group>/maintenance
l %NPSDataDir%/../hacluster/<rsource_group>/maint_NNM
2. On each passive node in the cluster, log on with the administrative privileges and temporarily remove thenode from the HA cluster by running the following command:On Linux:l /opt/OV/misc/nnm/ha/nnmhaunconfigure.ovpl PerfSPIHA <resource_group>(for a dedicatedNPS setup)
l /opt/OV/misc/nnm/ha/nnmhaunconfigure.ovpl NNM –addon PerfSPIHA (for a co-located NPSsetup)
Note: For a co-located setup, make sure that the /opt/OV/misc/nnm/ha/nnmhaclusterinfo.ovpl -config NNM -get NNM_ADD_ON_PRODUCTS command does not list a passive node.
OnWindows:l %NPSInstallDir%/../misc/nnm/ha/nnmhaunconfigure.ovpl PerfSPIHA <resource_group> (fora dedicated NPS setup)
l %NnmInstallDir%/misc/nnm/ha/nnmhaunconfigure.ovpl NNM –addon PerfSPIHA (for a co-located NPS setup)
Note: For a co-located setup, make sure that the%NnmInstallDir%/misc/nnm/ha/nnmhaclusterinfo.ovpl -config NNM -get NNM_ADD_ON_PRODUCTS command does not list a passive node.
3. Uninstall the NPS patch. Follow the patch uninstallation steps given in the patch document, and ensurethat the patch is uninstalled successfully.
Caution:Do not reconfigure HA back on this node until the patch on the active node is uninstalled.
4. Run the following command to stop the processes that were started during the patch uninstall (in a newshell):On Linux:/opt/OV/NNMPerformanceSPI/bin/stopALL.ovplOnWindows:%NPSInstallDir%/bin/stopALL.ovpl
Uninstalling a Patch on the Active Node
1. Before uninstalling the patch on the active node, temporarily move the HA cluster to maintenancemode.HA cluster on a node can bemoved tomaintenancemode by creating the following files on active NPSserver:On Linux:

HPE Network NodeManager iSPI Performance for Metrics Software (10.21) Page 101 of 129
l /var/opt/OV/hacluster/<resource_group>/maintenance
l /var/opt/OV/hacluster/<rsource_group>/maint_NNM
OnWindows:l %NPSDataDir%/../hacluster/<resource_group>/maintenance
l %NPSDataDir%/../hacluster/<rsource_group>/maint_NNM
2. Uninstall the NPS Patch. Follow the patch uninstallation steps given in the patch document file, andensure that the patch is uninstalled successfully.
Caution:Do not unconfigure HA on the active node at this point.
3. After the patch is uninstalled, stop all the NPS processes by running the following command:On Linux:/opt/OV/NNMPerformanceSPI/bin/stopALL.ovplOnWindows:%NPSInstallDir%/bin/stopALL.ovpl
4. Open a new shell and run the following command to start all the processes:On Linux:/opt/OV/NNMPerformanceSPI/bin/startALL.ovplOnWindows:%NPSInstallDir%/bin/startALL.ovpl
5. Re-enable perfspi integration by running the following script on the NNMi system:On Linux:$NnmInstallDir/bin/nnmenableperfspi.ovplOnWindows:%NnmInstallDir%/bin/nnmenableperfspi.ovpl
Note: Formore information, see the “"Enabling NNMi toWork with NPS" on page 22” topic. Providethe virtual FQDN of the NPS HA setup when prompted for the NPS host name.
Reconfiguring the Passive Nodes Back in HA Cluster
1. On each passive node, run the following command to reconfigure HA:On Linux:l /opt/OV/misc/nnm/ha/nnmhaconfigure.ovpl PerfSPIHA (for dedicated setup)
l /opt/OV/misc/nnm/ha/nnmhaconfigure.ovpl NNM –addon PerfSPIHA (for co-located setup)
Note: For a co-located setup, make sure that the /opt/OV/misc/nnm/ha/nnmhaclusterinfo.ovpl -config NNM -get NNM_ADD_ON_PRODUCTS command does not list a passive node.
OnWindows:

HPE Network NodeManager iSPI Performance for Metrics Software (10.21) Page 102 of 129
l %NPSInstallDir%/../misc/nnm/ha/nnmhaconfigure.ovpl PerfSPIHA (for dedicated setup)
l %NnmInstallDir%/misc/nnm/ha/nnmhaconfigure.ovpl NNM –addon PerfSPIHA (for co-locatedsetup)
Note: For a co-located setup, make sure that the%NnmInstallDir%/misc/nnm/ha/nnmhaclusterinfo.ovpl -config NNM -get NNM_ADD_ON_PRODUCTS command does not show a passive node in this list.
2. Remove the passive nodes out of maintenancemode. HA cluster node can bemoved out ofmaintenancemode by deleting the following files on all the passive NPS nodes:On Linux:l /var/opt/OV/hacluster/<resource_group>/maintenance
l /var/opt/OV/hacluster/<rsource_group>/maint_NNM
OnWindows:l %NPSDataDir%/../hacluster/<resource_group>/maintenance
l %NPSDataDir%/../hacluster/<rsource_group>/maint_NNM
3. Remove the active node out of maintenancemode. HA cluster node can bemoved out of maintenancemode by deleting the following files on the active NPS server:On Linux:l /var/opt/OV/hacluster/<resource_group>/maintenance
l /var/opt/OV/hacluster/<rsource_group>/maint_NNM
OnWindows:l %NPSDataDir%/../hacluster/<resource_group>/maintenance
l %NPSDataDir%/../hacluster/<rsource_group>/maint_NNM

HPE Network NodeManager iSPI Performance for Metrics Software (10.21) Page 103 of 129
Deployment ReferencePart VII: Installing NPS Patches in High-Availability Clusters

HPE Network NodeManager iSPI Performance for Metrics Software (10.21) Page 104 of 129
Part VIII: Maintaining NPSAfter installing and configuring NPS, youmight want to make changes to your environment like changing theIP address or hostname of the NPS system or the NNMi management server. Youmight want to free up portsused by NPS and configure non-default ports for NPS. This chapter provides you with steps tomake thesechanges after NPS is completely installed and configured.

Modifying the FQDN of the NPS SystemIf you change the FQDN of the NPS system, youmust perform the following steps before using NPS:W
1. Log on to the NNMi management server as root or administrator.2. In a co-located setup.
If NPS co-exists with NNMi, youmust run the nnmsetofficialfqdn.ovpl command.a. Go to %nnminstalldir%\bin onWindows and /opt/OV/bin on Linux.b. Run the nnmsetofficialfqdn.ovpl script.c. Go to %nnminstalldir%\NNMPerformanceSPI\bin onWindows and
/opt/OV/NNMPerformanceSPI/bin on Linux.d. Run the configureServerID.ovpl script.e. Go to %nnminstalldir%\bin onWindows and /opt/OV/bin on Linux.f. Run the nnmenableperfspi.ovpl script.
The following prompt appears:
Do you wish to use the prior selections as defaults? (Y/N):
i. TypeY, and then press Enter.ii. Press Enter for all prompts.
3. In a dedicated NPS setup.If NPS is installed on a dedicated server, follow these steps:a. On the NNMi management server, run the nnmdisableperfspi.ovpl script.
The nnmdisableperfspi.ovpl script is available in the%nnminstalldir%\bin directory onWindowsand /opt/OV/bin directory on Linux.
b. Linux only. If NPS is installed on Linux, run the following command on the NPS system to unmountthe shared drive that was created to facilitate data exchange between NPS and NNMi.umount /<share_name>In this instance, <share_name> is the name of the share created while installing NPS.
c. On the NPS system, run the configureServerID.ovpl script.The configureServerID.ovpl script is available in the%npsinstalldir%\bin directory onWindowsand /opt/OV/NNMPerformanceSPI/bin directory on Linux.
d. On the NNMi management server, run the nnmenableperfspi.ovpl script.The nnmenableperfspi.ovpl script is available in the%nnminstalldir%\bin directory onWindowsand /opt/OV/bin directory on Linux.
Modifying the Default Communication PortBy default, NPS uses the port 9300 (for HTTP) or 9305 (for HTTPS) for communication via a web browser.After NPS is installed and configured, you canmodify the NPS configuration to change the NPScommunication port.
To change the communication port:
HPE Network NodeManager iSPI Performance for Metrics Software (10.21) Page 105 of 129

Note:WhenNPS is installed in a high availability cluster, perform this task on the active server first, failover to the other server, and then perform the task again on the server that is currently active.
In a distributed deployment of NPS, perform this task on the UiBi Server.
1. Log on to the NPS system as root or administrator.2. If NPS is configured for HTTP communication, run the following command:
configureWebAccess.ovpl -newport <port_number>If NPS is configured for HTTPS communication, run the following command:configureWebAccess.ovpl -newport <port_number> -sslIn this instance, <port_number> is the new communication port number.
Deployment Reference
HPE Network NodeManager iSPI Performance for Metrics Software (10.21) Page 106 of 129

Maintaining the NPS DatabaseThe NPS database store a large amount of data that is gathered from different sources (like NNMi and iSPIs)and enables NPS to compute aggregates from a large number of data points. The database can keep dailyaggregated data for up to 800 days, hourly aggregated data for up to 400 days, and raw/detailed data for up to400 days.
With scripts and utilities available with NPS, you canmonitor the health and performance of the database andperform maintenance tasks like checking the health of the database, deleting and recreating the database,and so on.
Changing the Default Database PasswordThe NPS installer installs the NPS database with a default password.
To change the default database password, log on to the NPS system as root or administrator, and then runthe following command:
changeDBpwd.ovpl <new_password>
In this instance, <new_password> is the password of your choice.
Note: In a distributed deployment of NPS, youmust run the above command on each NPS system in thefollowing order:
1. DB Server2. UiBi Server3. ETL Server
Checking the Database HealthThe dbsize.ovpl utility enables you to check the health of the NPS database.
To use the dbsize.ovpl utility to check the health of the NPS database, follow these steps:
1. Log on to the NPS system as root or administrator. In a distributed deployment of NPS, log on to the DBServer as root or administrator.
2. Open a command line console, and then run one of the following commands:
Command Description
dbsize.ovpl -q The command output displays the usage summary of differentdbspaces within the database. (NPS creates the followingdbspaces within the database: IQ_SYSTEM_MAIN, IQ_SYSTEM_TEMP, and USER_MAIN).
dbsize.ovpl -s The command output displays the size of different fact tables
HPE Network NodeManager iSPI Performance for Metrics Software (10.21) Page 107 of 129

Command Description
for each Extension Pack.
statusDB.ovpl The command output displays the status of the NPS database.
Back Up and RestoreNPS provides command-line tools that back up and restore all NPS data.
To back up the NPS data:
Tip: Before you begin, make sure sufficient disk space exists on the NPS system to run the backupprocedure and store the backed-up data. Determine the size of the NPS database, content store, andconfiguration and archived data files.
To determine the size of the NPS database, run the following command:
dbsize.ovpl -q
To determine the size of the content store, run the following command:
cssize.ovpl -q
To determine the total size of all configuration and archived data files, measure the size of the followingdirectory:
OnWindows
%npsdatadir%
On Linux
/var/opt/OV/NNMPerformanceSPI
1. Log on to the NPS system with the same account used to install NPS.2. Run the following command:
backup.ovpl -b <dir> [-c] [-d] [-f]
In this instance, <dir> is the location where you want to place the backed-up data. Do not use environmentvariables with this option.
Options
l Use the -c option to back up the content store.l Use the -d option to back up the database.l Use the -f option to back up all NPS configuration and archived data files.l Use the -t option to suppress creating a single compressed archive (tar.gz) file. This option leaves thedirectory as is on the file system, and greatly speeds up the backup process.
Youmust specify a valid directory location as an argument of the -b option. If you do not specify any otheroptions, the backup script will back up the content store and the database.
The duration of the backup process depends on the size of the database. Before you start the backupprocess, verify the amount of disk space used by the data you want to back up, andmake sure the system
Deployment Reference
HPE Network NodeManager iSPI Performance for Metrics Software (10.21) Page 108 of 129

has enough free disk space. Although the script produces compressed output, the backup process requiressufficient temporary disk space.
For command details, see backup.ovpl
To restore NPS data:
1. Log in to the NPS system with the same account used to install NPS.2. Run the following command:
restore.ovpl [-h] [-b <file>] [-l] [-r DBFILE=>NEW_PATH_TO_DBFILE.iq[,DBFILE=>NEW_PATH_TO_DBFILE.iq]]
In this instance:
-h displays this text
-b <file> specifies backup file
-l lists file content without restoring
-r DBFILE=>NEW_PATH_TO_DBFILE.iq[,DBFILE=>NEW_PATH_TO_DBFILE.iq]
allows one or more database file to be restored to the specified(non-default) location
The restore operation overwrites all preceding NPS data.
When the restore is complete, the ETL service will not be running. Youmust restart the service to resume theprocessing of new data. To start ETL, run the startETL.ovpl, startALL.ovpl command, or use the Start buttonon the Configuration Utility.
If you change the password of the database after a backup operation, youmust change it again after restoringthe backed-up database.
Incremental BackupA comprehensive backup strategy is essential for disaster recovery. Although full backups are simple toimplement and easy to execute when restoration is required, they can slow down processes that are running,take a long time to complete, and require large (sometimes excessively large) amounts of storage.
Incremental backups, however, can balance speed, resource conflicts, and required storage against ease ofrestoration.
The purpose of a backup is to provide a recovery point. Different systems have different requirements forrecovery points. A backup strategy that offers daily recovery points can be implemented through a weeklyschedule of full backups combined with incremental daily backups on all other days.
For additional security, each backup should be stored on removablemedia andmade secure. This should alsoinclude creating several generations of media.
To implement a backup strategy that incorporates four generational copies:
1. Run a full backup.ovpl backup on a weekly basis.Use no backup flags (that is, c, d, or f) so that the database, the content store, and the file system arebacked up.Here is an example:
Deployment Reference
HPE Network NodeManager iSPI Performance for Metrics Software (10.21) Page 109 of 129

l Linux:
$NPSInstallDir/bin/backup.ovpl -b /var/backup/full
l Windows:
%NPSInstallDir%\bin\backup.ovpl -b E:\backup\full
2. Copy the backed up data to one of four versions of backup tapes.Backup tapes should be kept off site. Alternatively, they can be created directly usingWAN links to copydata.
3. Run an incremental backup on a daily basis.Use no backup flags (c, d, or f) , so that the database, the content store, and the file system are backedup.Use the optional –i flag to perform an incremental backup.Here is an example:l Linux
$NPSInstallDir/bin/backup.ovpl -b /var/backup/incremental -i
l Windows
%NPSInstallDir%\bin\backup.ovpl -b E:\backup\incremental -i
Only changes since the last backup (full or incremental) are saved.4. Copy the backed up data to one of four backup tapes.
Append the data. Do not overwrite existing backed up data.If restoration is required:
l Restore from the desired full backup. See the reference page or man page for restore.ovpl.l Restore (in sequential order) each incremental backup from oldest to most recent.
Note:When restoring an incremental backup that includes the content store, youmust restore eachbackup in turn without starting the BI Server. If you start the BI Server, it will write to the content storedatabase and prohibit restoring from any further incremental backups.
If you do write to the content store database before restoring an incremental backup, youmust return tothe full backup and start the restoration process again.
Backing Up and Restoring on the Same SystemIf the backup is restored on the same system with the same installation directories and product version as thebackup, the entire contents of data directory will be restored, including all configuration files, archived datafiles, the database, and the content store.
Restoring a Backup Made on a Previous Product VersionBackups made on earlier product versions can be restored with some limitations.
Deployment Reference
HPE Network NodeManager iSPI Performance for Metrics Software (10.21) Page 110 of 129
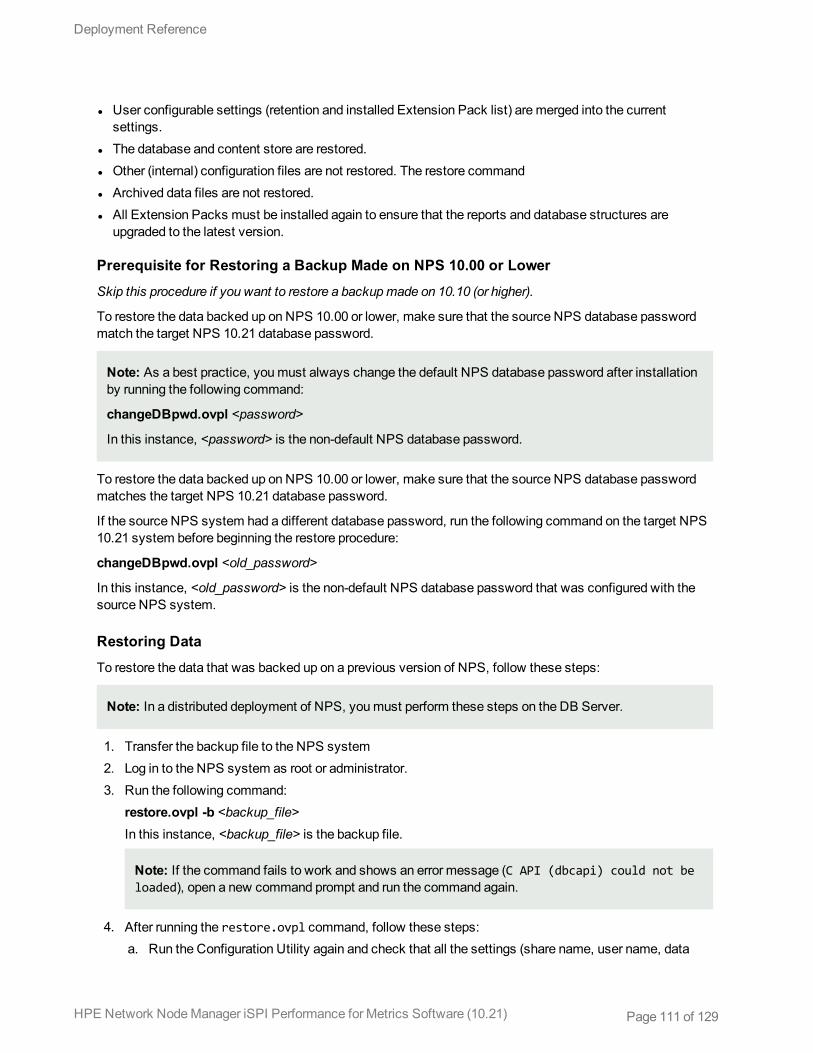
l User configurable settings (retention and installed Extension Pack list) aremerged into the currentsettings.
l The database and content store are restored.l Other (internal) configuration files are not restored. The restore commandl Archived data files are not restored.l All Extension Packs must be installed again to ensure that the reports and database structures areupgraded to the latest version.
Prerequisite for Restoring a Backup Made on NPS 10.00 or Lower
Skip this procedure if you want to restore a backupmade on 10.10 (or higher).
To restore the data backed up on NPS 10.00 or lower, make sure that the source NPS database passwordmatch the target NPS 10.21 database password.
Note: As a best practice, youmust always change the default NPS database password after installationby running the following command:
changeDBpwd.ovpl <password>
In this instance, <password> is the non-default NPS database password.
To restore the data backed up on NPS 10.00 or lower, make sure that the source NPS database passwordmatches the target NPS 10.21 database password.
If the source NPS system had a different database password, run the following command on the target NPS10.21 system before beginning the restore procedure:
changeDBpwd.ovpl <old_password>
In this instance, <old_password> is the non-default NPS database password that was configured with thesource NPS system.
Restoring Data
To restore the data that was backed up on a previous version of NPS, follow these steps:
Note: In a distributed deployment of NPS, youmust perform these steps on the DB Server.
1. Transfer the backup file to the NPS system2. Log in to the NPS system as root or administrator.3. Run the following command:
restore.ovpl -b <backup_file>In this instance, <backup_file> is the backup file.
Note: If the command fails to work and shows an error message (C API (dbcapi) could not beloaded), open a new command prompt and run the command again.
4. After running the restore.ovpl command, follow these steps:a. Run the Configuration Utility again and check that all the settings (share name, user name, data
Deployment Reference
HPE Network NodeManager iSPI Performance for Metrics Software (10.21) Page 111 of 129

retention periods, and so on) are correct.To open the Configuration Utility, run the following command:runConfigurationGUI.ovpl
b. Run the following command to configure the communication protocol and port:configureWebAccess.ovpl -newport <port_number> [-ssl]In this instance, <port_number> is the communication port that you have chosen while running thennmenableperfspi.ovpl command. Use the -ssl parameter only if you want to use the HTTPScommunication.
c. Run the following commands:i. initializeNPS.ovpl -a StartBIServerii. initializeNPS.ovpl -a SetupCSRolesAndSecurityiii. initializeNPS.ovpl -a ConfigBIAccessiv. initializeNPS.ovpl -a RestartBIServerv. startDB.ovplvi. addSdkUser.ovpl -u npssdkuservii. changeSdkUserPwd.ovpl -u npssdkuser -p HP_NPS
d. Run the following command to complete the upgrade of each Extension Pack:installExtensionPack.ovpl -x -e <Extension_Pack>.tar.gzIn this instance, <Extension_Pack> is the name of the Extension Pack bundle.
Note: To view the names of Extension Pack bundles, run the following command:
about.ovpl
e. Run the following command if the Path Health Extension Pack was in use with the previous versionof NPS:installPathHealth.ovpl -e Path_Health.tar.gz
f. Run the following command if you created security groups in NNMi:installUgSg.ovpl -e ugsg.tar.gz
g. Run the following command if Custom Poller Extension Packs were in use with the previous versionof NPS:initializeNPS.ovpl -a InitializeCustomCollections
Restoring a Backup Made on a Different System with DifferentInstallation DirectoriesBackups made on a different system with different installation directories can be restored with somelimitations.
l User configurable settings (retention and installed Extension Pack list) aremerged into the currentsettings.
l Other (internal) configuration files are not restored.l Archived data files are not restored.
Deployment Reference
HPE Network NodeManager iSPI Performance for Metrics Software (10.21) Page 112 of 129

l The database and content store are restored.l All Extension Packs must be installed again to ensure that the reports and database structures areupgraded to the latest version.
l Youmight have to rerun the nnmenableperfspi.ovpl script and Configuration Utility.
Restoring a Backup When Additional FilesWere Added toExtend the DatabaseIf the dbsize.ovpl utility was used to extend a database by adding additional files to the DBSPACE, thebackup will attempt to restore these files to the same directory as the standard database files.
To relocate database files during a restore:
The -r option enables you to identify one or more DBFile names and corresponding OS path or file namelocations where each should be restored.
When dbsize.ovpl is used to add files, the DBFile names used will look like perfspi_USER_MAIN_<timestamp>. You can use the -l option to determine the files to be included in your backup (for backupsmade on 9.20 and later).
You can specify a different OS path or file namewhen restoring by using the -r option; for example,restore.ovpl -b backup.20111027135608.tar.gz -r "perfspi_USER_MAIN_3466235673656=>C:/newlocation/perfspi_USER_MAIN_3466235673656.iq".
If you backed up the content store using the standard backup utility provided in earlier releases, you will not beable to restore them in the current release. The current database backup format is incompatible with earlierreleases.
Post-Restore Steps on WindowsSkip this section if NPS is installed on Linux.
After restoring the NPS data on a new system, youmust run the following commands on the NPS system:
Note: Run the commands by logging in as the user that was configured while running thennmenableperfspi.ovpl command.
l addSdkUser.ovpl -u <user_name>l changeSdkUserPwd.ovpl -u <user_name> -p <password>In this instance, <user_name> is a user name of your choice and <password> is a password that you need tochoose for <user_name>.
If you do not run the above commands, you will not be able to use the Performance Analysis inventory viewand the Interface Health and Component Health dashboards in the NNMi console.
Recreating the NPS DatabaseYou can recreate your Sybase IQ database and start over with the installation default size of 2.5 GB. Thisfeature can be useful if your existing database has grown too large, or if you want to lower your retentionsettings. Lowering the retention settings will maintain the smaller size of the database for a longer period of
Deployment Reference
HPE Network NodeManager iSPI Performance for Metrics Software (10.21) Page 113 of 129

time. The resetNPS.ovpl utility enables you to delete and recreate the NPS database.When the NPSdatabase becomes irrecoverably corrupt, you can delete and recreate the database.
Modifying Default Settings
Note: If you do not want to modify any settings of the NPS database, skip this section and go toRecreate the Database.
1. Open the databaseSetup.cfg file from the following directory:l OnWindows:%NPSInstallDir%\config
l On Linux:$NPSInstallDir/config
2. Make the following changes:l Cache settings:
o To allocate a specific volume to themain cache, specify a value in MB for the Db.Cfg.Iqmcproperty.
For example, to allocate 12GB for themain cache, specify Db.Cfg.Iqmc=12288.o To allocate a specific volume to the temporary cache, specify a value in MB for the Db.Cfg.Iqtc
property.
For example, to allocate 12GB for the temporary cache, specify Db.Cfg.Iqtc=12288.
l Dbspace settings:o Number of Dbspace files:
By default, NPS creates 20 Dbspace files. You can configure NPS to createmore Dbspace filesby appending additional Db.DbFile lines under the line Db.DbFile.020.For example:
Db.DbFile.021=default
Db.DbFile.022=default.o Dbspace location:
If you want to store the Dbspace files in a non-default location in a non-default file, you can specifythe location by replacing defaultwith the complete path to the file.For example:
Db.DbFile.021=C:\Data\user_main_021.iq
Note: File namemust have the extension iq.
3. Save the file.Recreate the Database
1. Log on to the NPS system as root or administrator. In a distributed deployment of NPS, log on to the DBServer as root or administrator.
2. Take a backup of the NPS database. For more information, see "To back up the NPS data:" on page 1083. Open a command line console, and then run the following command:
resetSPI.ovpl
Deployment Reference
HPE Network NodeManager iSPI Performance for Metrics Software (10.21) Page 114 of 129

4. Select the option 2.This option deletes the database, creates a new database, and then restores the archived data.After processing, deleting, and recreating the database, the command shows the followingmessage:
Do you want to start the ETL service now? (Y/N)
5. TypeN,and then press Enter. The followingmessage appears:
Hit Enter key to exit...
6. Press Enter.7. Run the resetSPI.ovpl command again.8. Select the option 5.
This option deletes the database (along with the archived data), and then creates a new database.After processing, deleting, and recreating the database, the command shows the followingmessage:
Hit Enter key to exit...
9. Press Enter.10. Start the ETL process:
startETL.ovpl
Deployment Reference
HPE Network NodeManager iSPI Performance for Metrics Software (10.21) Page 115 of 129

Tuning NPSThis chapter describes how to fine-tune different settings for an optimal performance of NPS in a largeenvironment.
Tuning the Business Intelligence ServerThe Business Intelligence Server enables you to generate insightful, web-based reports from the data in thedatabase. The performance of the Business Intelligence Server depends on the number of scheduled reportsand jobs, number of users trying to launch reports concurrently, and the underlying hardware. You can adjustthe values of certain configuration parameters to resolve degrading performance of the Business IntelligenceServer (or problems with launching reports) in a very large scale environment. This chapter providesguidelines for adjusting the configuration parameters to address performance issues.
Common symptoms of performance problems with the Business Intelligence Server are:
l Report takes a very long time to appear; theSelect a delivery method prompt remains visible for a verylong time.
l The NPS console shows a blank page instead of the reportl Error messages appear in the Cognos.log file (available in %npsdatadir%\logs onWindows, in
/var/opt/NNMPerformanceSPI/logs on Linux)
Tip: In a distributed deployment of NPS, the UiBi Server hosts the Business Intelligence Servercomponent.
Monitoring the Performance of the Business IntelligenceServerYou canmonitor the performance of the Business Intelligence Server with the help of performancemonitoringtools provided by the operating system.
OnWindows, you can use theWindows task manager and any Windows I/O benchmarking tools.
On Linux, you can use the iostat and top commands.
You can also detect performance problems with the help of the BI Portal. Follow these steps:
1. Log on to the NNMi console as administrator.2. Click Actions > NNM iSPI Performance > Reporting - Report Menu. The NPS console opens.
HPE Network NodeManager iSPI Performance for Metrics Software (10.21) Page 116 of 129

3. In the NPS console, click theBI Serverworkspace in the navigation pane.4. Click Administration. The BI Server Administration page opens.5. In the BI Server Administration page, select Interactive activities in the Filter section, and then click
Apply.The right pane displays the number of reports that are currently running.6. Select Background activities in the Filter section, and then click Apply.The right pane displays the
following details:l Number of reports that are running in the background (Executing)
l Number of reports that are waiting to be run (Waiting)
l Number of pending reports (Pending)
l Number of suspended reports (Suspended)
Toomany pending and waiting reports lead to poor performance of the Business Intelligence Server.
You can also check the Cognos.log file (available in %npsdatadir%\logs onWindows, in/var/opt/NNMPerformanceSPI/logs on Linux) for errors. The following error messages in the Cognos.logfile indicate performance problems:
l http-9300-55 caf 2047 1 Audit.dispatcher.caf Request Failure SecureErrorId: <date>-<time>.646-#44 Original Error: DPR-ERR-2002 Unable to execute the request becausethere were no connections to the process available within the configured time limit
This error indicates that the system has toomany reports currently in progress.To avoid this error, follow the steps in the Configuring Business Intelligence Server Settings section.
l -567911568 QOS 5000 1 Audit.RTUsage.QOS <message code="-232" severity="error"title="QE-DEF-0459 CCLException" type="general">RQP-DEF-0177 An error occurred whileperforming operation 'sqlScrollBulkFetch' status='-232'. UDA-SQL-0107
This error indicates that NPS received an error from the underlying database.To avoid this error, limit the number of very large-scale reports over long time periods with very finegranularity.
Best Practicesl For frequently used reports, use Report Views. See theUsing Report Views section inOnline Help.l You can also schedule frequently used reports. Do not schedule high-frequency schedules for reports thatare viewed rarely.
l Reports that run with very long time ranges tend to be slow and put greater load onto the database.Consider using reports with short time ranges whenever possible.
l Reports that run with very fine time grains require excess resources from NPS while creating chart imagesor HTML table structures with drillthrough links. Consider using fewer reports that run with very fine timegrains to speed up report runs and reduce the load.
Configuring Business Intelligence Server SettingsYou can adjust the values of certain configuration parameters to resolve some performance problems. Thechanges outlined below enable the Business Intelligence Server to process more interactive report requests in
Deployment Reference
HPE Network NodeManager iSPI Performance for Metrics Software (10.21) Page 117 of 129

parallel. This will place a larger load on the database server, but may be appropriate for a distributeddeployment of NPS with multiple users all requesting reports simultaneously.
1. Log on to the NNMi console as administrator.2. Click Actions > NNM iSPI Performance > Reporting - Report Menu. The NPS console opens.3. In the NPS console, click theBI Serverworkspace in the navigation pane.4. Click Administration. The BI Server Administration page opens.5. In the BI Server Administration page, go to the Configuration tab.6. In the left pane, click Dispatchers and Services.7. Click the dispatcher on the Configuration page.
Tip: Youmay seemultiple dispatchers on this page if you used the configureWebAccess.ovplcommand to change the default communication port of NPS. On the Configuration page, eachdispatcher appears in the following format:
<hostname>:<port>/p2pdIn this instance, <hostname> is the hostname of the NPS system; <port> is the communication portfor NPS.When you seemultiple dispatchers, choose the active dispatcher that runs with the current NPSport.
8. Modify the BatchReportService parameters by following these steps:a. In the list of services, locate BatchReportService.
b. Against BatchReportService, click .c. Go to the Settings tab.d. You canmodify the following properties:
Property DefaultSuggestedMaximum Value
Number of high affinity connections for the batch report serviceduring non-peak period
2 2
Number of low affinity connections for the batch report serviceduring non-peak period
4 10
Maximum number of processes for the batch report serviceduring non-peak period
2 10
Number of high affinity connections for the batch report serviceduring peak period
2 2
Number of low affinity connections for the batch service during 4 10
Deployment Reference
HPE Network NodeManager iSPI Performance for Metrics Software (10.21) Page 118 of 129

Property DefaultSuggestedMaximum Value
peak period
Maximum number of processes for the batch report serviceduring peak period
2 10
9. Modify the ReportService parameters by following these steps:a. In the list of services, locate ReportService.
Tip: If you are unable to locate ReportService, click Next Page.
b. Against ReportService, click .c. Go to the Settings tab.d. You canmodify the following properties:
Property DefaultSuggested MaximumValue
Number of high affinity connections for the report serviceduring non-peak period
2 10
Number of low affinity connections for the report service duringnon-peak period
8 10
Maximum number of processes for the report service duringnon-peak period
2 10
Number of high affinity connections for the report serviceduring peak period
2 10
Number of low affinity connections for the report service duringpeak period
8 10
Maximum number of processes for the report service duringpeak period
2 10
10. Click OK. Changes take effect immediately.
Resolving Problems with Jobs and Report SchedulingTo resolve problems with jobs and report scheduling, modify the max online engines parameter. I f you seeproblems like scheduled reports failing to run or configured jobs not appearing in the navigation panel, follow
Deployment Reference
HPE Network NodeManager iSPI Performance for Metrics Software (10.21) Page 119 of 129

these steps:
1. Log on to the NPS system (the UiBi Server in case of a distributed deployment of NPS).2. Open the following file with a text editor:
OnWindows:
%npsinstalldir%\nonOV\sybasease\ASE-15_0\ASECONTENTSERVER.cfg
On Linux:
/opt/OV/nonOV/sybasease/ASE-15_0/ASECONTENTSERVER.cfg
3. Set the value of the max online engines property to an integer (recommended value is 2 for astandalone NPS; set it to a value higher than 2 in a distributed deployment of NPS).
4. If you see the error message CM-SYS-5025 Content Manager cannot update an object in theCognos.log file (available in %npsdatadir%\logs onWindows, in /var/opt/NNMPerformanceSPI/logson Linux), set the procedure cache size property to a higher value.
5. Run the following commands:stopCS.ovplstartCS.ovpl
Tuning the NPS DatabaseThe NPS database stores the data used for building reports. The performance of the database depends on thedatabase configuration, volume of data stored in the database, the number of scheduled reports and jobs,number of users trying to launch reports concurrently, and the underlying hardware.
In a very large scale environment, you can adjust the values of certain configuration parameters to resolvedegrading performance. This chapter provides guidelines for adjusting the configuration parameters toaddress performance issues.
You can configure the perfspi.cfg file to modify the NPS database to use non-default values for themainand temporary cache of the database.
To change the default cache size, follow these steps:
1. Log on to the NPS system as root or administrator. In a distributed deployment of NPS, log on to the DBServer as root or administrator.
2. Go to the following directory:OnWindows:
%npsdatadir%\database
On Linux:
$NPSDataDir/database
3. Open the perfspi.cfg file with a text editor.4. Specify the temporary cache size (in MB) against the -iqtc property.5. Specify themain cache size (in MB) against the -iqmc property.6. Save the file.7. Run the following commands to restart the database:
Deployment Reference
HPE Network NodeManager iSPI Performance for Metrics Software (10.21) Page 120 of 129

a. stopDB.ovplb. startDB.ovpl
Deployment Reference
HPE Network NodeManager iSPI Performance for Metrics Software (10.21) Page 121 of 129

Log FilesNPS creates the following log files in the logs directory:
Note: The log directory is located in:
OnWindows
%npsdatadir%\NNMPerformanceSPI
On Linux
/var/opt/OV/NNMPerformanceSPI/
File Name Description
prspi.log Contains all operational details of NPS.
perfspi.srv.log Contains all operational details of the Sybase IQ database used by NPS. This file cangrow up to 512MB.
perfspi.iqmsg Sybase IQmessages file. This file can grow up to 512MB.
dbproxy.log Records all database queries triggered by NPS.
perfspiUI.log Log file created and updated by the Business Intelligence Server and content store.
Log Files
HPE Network NodeManager iSPI Performance for Metrics Software (10.21) Page 122 of 129

HPE Network NodeManager iSPI Performance for Metrics Software (10.21) Page 123 of 129
Part IX: Using Certificate AuthorityNPS 10.21 enables you to use certificates signed by a third-party certificate authority (CA). By using a third-party certificate authority, you can ensure secure communication between the NPS system and the browserused to access different parts of the NPS console.
To configure NPS to use a third-party CA:
1. Enable the HTTPS Mode2. Generate the Third-Party CA Certificate3. Import the Third-Party CA Certificate
Task 1: Enable the HTTPS Mode
If you select the HTTPS mode of communication while running the nnmenableperfspi.ovpl script on theNNMi management server, NPS starts running in the HTTPS mode after the installation is complete. In thatcase, you need not perform this task.
If did not select the HTTPS mode of communication while running the nnmenableperfspi.ovpl script, followthese steps:
Note: In a distributed deployment of NPS, perform this task on the UiBi Server.
1. Log on to the NPS system as administrator or root.2. Run the following command:
l OnWindows:%ovinstalldir%\NNMPerformanceSPI\bin\configureWebAccess.ovpl -newport<port_number> -ssl
l On Linux: /opt/OV/NNMPerformanceSPI/bin/configureWebAccess.ovpl -newport <port_number> -ssl
In this instance, <port_number> is the port on which you want to run the NPS Business IntelligenceServer.
3. Restart the Business Intelligence Server by running the following commands:OnWindows:a. %ovinstalldir%\NNMPerformanceSPI\bin\stopBI.ovplb. %ovinstalldir%\NNMPerformanceSPI\bin\startBI.ovplOn Linux:a. /opt/OV/NNMPerformanceSPI/bin/stopBI.ovplb. /opt/OV/NNMPerformanceSPI/bin/startBI.ovpl
Task 2: Generate the Third-Party CA Certificate
To generate the third-party CA certificate, follow these steps:

HPE Network NodeManager iSPI Performance for Metrics Software (10.21) Page 124 of 129
Note: In a distributed deployment of NPS, perform this task on the UiBi Server.
1. Log on to the NPS system as administrator or root.2. Run the following command:
l OnWindows:%ovinstalldir%\NNMPerformanceSPI\bin\runBIConfigGUI.ovpl
l On Linux:/opt/OV/NNMPerformanceSPI/bin/runBIConfigGUI.ovpl
The HPE NNM iSPI Performance BI Configuration window opens.3. In the Explorer pane, click Security > Cryptography > Cognos.4. In the right pane, under the Signing Key Settings section, change the Signing key store password.
Note down this new password.5. In the right pane, under the Encryption Key Settings section, change the Encryption key store password.
Note down this new password.6. Close the HPE NNM iSPI Performance BI Configuration window.7. Go to the following directory:
l OnWindows:%ovinstalldir%\nonOV\conos\bi\configuration
l On Linux: /opt/OV/nonOV/cognos/bi/configuration
8. Take a backup of the following files and directories:
l cogstartup.xml
l encryptkeypair/
l signkeypair/
9. Set the JAVA_HOME environment variable to the following directory:l OnWindows: %ovinstalldir%\nonOV\jdk\hpsw
l On Linux: /opt/OV/nonOV/jdk/hpsw
10. Go to the following directory:l OnWindows:%ovinstalldir%\nonOV\conos\bi\bin
l On Linux: /opt/OV/nonOV/cognos/bi/bin
11. Run the following commands:l OnWindows:
o ThirdPartyCertificateTool.bat -c -s -d "CN=<NPS_FQDN>,O=<org name>,C=<Country>" -rsignRequest.csr -D ../configuration/signkeypair -p <password_sign>
o ThirdPartyCertificateTool.bat -c -e -d "CN=<NPS_FQDN>,O=<org name>,C=<Country>" -rencryptRequest.csr -D ../configuration/encryptkeypair -p <password_encrypt>

HPE Network NodeManager iSPI Performance for Metrics Software (10.21) Page 125 of 129
l On Linux:o ./ThirdPartyCertificateTool.sh -c -s -d "CN=<NPS_FQDN>,O=<org name>,C=<Country>" -r
signRequest.csr -D ../configuration/signkeypair -p <password_sign>o ./ThirdPartyCertificateTool.sh -c -e -d "CN=<NPS_FQDN>,O=<org name>,C=<Country>" -r
encryptRequest.csr -D ../configuration/encryptkeypair -p <password_encrypt>
In this instance, <password_sign> is the password that you assigned in step 4; <password_encrypt> isthe password that you assigned in step 5; <NPS_FQDN> is the fully qualified domain name of the NPSsystem.
The above commands create the signRequest.csr and encryptRequest.csr files. Use these .csrfiles to obtain corresponding signRequest.cer and encryptRequest.cer files and the root certificate(ca.cer) from the third-party signing authority.
Task 3: Import the Third-Party CA Certificate
To import the third-party CA certificate into the Business Intelligence Server of NPS, follow these steps:
Note: In a distributed deployment of NPS, perform this task on the UiBi Server.
1. Log on to the NPS system as administrator or root.2. Go to the following directory:
l OnWindows:%ovinstalldir%\nonOV\conos\bi\bin
l On Linux:/opt/OV/nonOV/cognos/bi/bin
3. Place the signRequest.cer, encryptRequest.cer, and ca.cer files (created in the previous task) inthis directory.
4. Rename the signRequest.cerand encryptRequest.cer files to signCertificate.cer andencryptCertificate.cer.
5. Run the following commands:l OnWindows:
o ThirdPartyCertificateTool.bat -i -s -r signCertificate.cer -D ../configuration/signkeypair -p<password_sign> -t ca.cer
o ThirdPartyCertificateTool.bat -i -e -r encryptCertificate.cer -D../configuration/encryptkeypair -p <password_encrypt> -t ca.cer
o ThirdPartyCertificateTool.bat -i -T -r ca.cer -D ../configuration/signkeypair -p <password_ca>
l On Linux:o ./ThirdPartyCertificateTool.sh -i -s -r signCertificate.cer -D ../configuration/signkeypair -p
<password_sign> -t ca.cero ./ThirdPartyCertificateTool.sh -i -e -r encryptCertificate.cer -D
../configuration/encryptkeypair -p <password_encrypt> -t ca.cero ./ThirdPartyCertificateTool.sh -i -T -r ca.cer -D ../configuration/signkeypair -p
NoPassWordSet

HPE Network NodeManager iSPI Performance for Metrics Software (10.21) Page 126 of 129
In this instance, <password_sign> is the password that you assigned in step 4; <password_encrypt> isthe password that you assigned in step 5.
6. Go to the following directory:l OnWindows:%ovinstalldir%\nonOV\conos\bi\configuration
l On Linux:/opt/OV/nonOV/cognos/bi/configuration
7. Undo the JAVA_HOME variable configuration that was set in step 9.8. Open the cogstartup.xml file with a text editor andmake sure that the crn:parameter element
contains the following content:
<crn:parameter name="thirdPartyCA">
<crn:value xsi:type="xsd:boolean">true</crn:value>
</crn:parameter>
9. Restart the Business Intelligence Server by running the following commands:OnWindows:a. %ovinstalldir%\NNMPerformanceSPI\bin\stopBI.ovplb. %ovinstalldir%\NNMPerformanceSPI\bin\startBI.ovplOn Linux:a. /opt/OV/NNMPerformanceSPI/bin/stopBI.ovplb. /opt/OV/NNMPerformanceSPI/bin/startBI.ovpl

HPE Network NodeManager iSPI Performance for Metrics Software (10.21) Page 127 of 129
Part X: Troubleshootingl Problem: Installation of the Cross Domain Extension Pack fails in a distributed deployment of NPS. Thefollowing error message appears in the installation log file:
WARN: Failed command system("<Install_Dir>/nonOV/perl/a/bin/perl" -I"<Install_Dir>/NNMPerformanceSPI/lib/perllibs/lib" "<Install_Dir>/NNMPerformanceSPI/bin/mkCrossDomainExtensionPack.ovpl"): 3
Solution:Install the Cross Domain Extension Pack manually with the help of the following command:mkCrossDomainExtensionPack.ovpl.To double the temporary dbspace, follow these steps:a. Log on to the NPS system that has the DB Server role assigned.b. Run the following command:
dbsize.ovpl -d IQ_SYSTEM_TEMPl Problem:When you try to launch a report,the following error message appears in the reports pane of theNPS console:
An error occurred while performing operation 'sqlScrollBulkFetch' status = '232'.
Cause: If the temporary dbspace of the Sybase IQ database runs out of space, this error messageappears.Solution: Increase the temporary dbspace.To double the temporary dbspace, follow these steps:a. Log on to the NPS system that has the DB Server role assigned.b. Run the following command:
dbsize.ovpl -d IQ_SYSTEM_TEMPl Problem:When you try to launch a report,the following error message appears in the reports pane of theNPS console:
Unable to execute the request because there were no connections to the processavailable within the configured time limit.
Cause: If the actual number of concurrent users exceeds themaximum number of users specified in theperfspi.cfg file, this error appears.Solution: Increase themaximum number of users in the perfspi.cfg file.Follow these steps:a. Log on to the NPS system that has the DB Server role assigned.b. Go to the following directory:
OnWindows
%NPSDataDir%\NNMPerformanceSPI/database
On Linux
/var/opt/OV/NNMPerformanceSPI/database

HPE Network NodeManager iSPI Performance for Metrics Software (10.21) Page 128 of 129
c. Open the perfspi.cfg file with a text editor.d. Change the value of the -gm parameter from 100 to 200.e. Restart the database processes:
i. stopDB.ovplii. startDB.ovpl

Send Documentation FeedbackIf you have comments about this document, you can contact the documentation team by email. If an emailclient is configured on this system, click the link above and an email window opens with the followinginformation in the subject line:
Feedback on Deployment Reference (Network Node Manager iSPI Performance for Metrics Software10.21)
Just add your feedback to the email and click send.
If no email client is available, copy the information above to a new message in a webmail client, and sendyour feedback to [email protected].
We appreciate your feedback!
HPE Network NodeManager iSPI Performance for Metrics Software (10.21) Page 129 of 129