hpe msr1000 msr2000 msr3000 msr4000- cmw710-r0415 … · 3 21. lisp nsr 22.pppoe client support for...
TRANSCRIPT

HPE MSR1000_MSR2000_MSR3000_MSR4000-CMW710-R0415 Release Notes
The information in this document is subject to change without notice. © Copyright 2013, 2017 Hewlett Packard Enterprise Development LP

i
Contents
Version information ···········································································1
Version number ··························································································································· 1 Version history ···························································································································· 2 Hardware and software compatibility matrix ······················································································ 7 Upgrading restrictions and guidelines······························································································· 9
Hardware feature updates ··································································9
CMW710-R0415 ·························································································································· 9 CMW710-R0413 ·························································································································· 9 CMW710-R0304 ·························································································································· 9 CMW710-E0302P06 ····················································································································· 9 CMW710-E0102 ························································································································ 10
Software feature and command updates ············································· 10
MIB updates ·················································································· 11
Operation changes ········································································· 19
Restrictions and cautions ································································· 19
Open problems and workarounds ······················································ 20
List of resolved problems ································································· 20
Resolved problems in CMW710-R0415 ·························································································· 20 Resolved problems in CMW710-R0413 ·························································································· 23 Resolved problems in CMW710-R0411 ·························································································· 27 Resolved problems in CMW710-R0304 ·························································································· 29 Resolved problems in CMW710-E0302P06 ····················································································· 30 Resolved problems in CMW710-E0102 ·························································································· 31 Resolved problems in CMW710-E0006P02 ····················································································· 31
Support and other resources····························································· 32
Accessing Hewlett Packard Enterprise Support················································································ 32 Documents ······························································································································· 32
Related documents ·············································································································· 32 Documentation feedback ······································································································ 34
Appendix A Feature list ··································································· 35
Hardware features ······················································································································ 35 Software features ······················································································································· 42
Appendix B Upgrading software ························································ 46
Software types ·························································································································· 46 Upgrade methods ······················································································································ 46 Preparing for the upgrade ············································································································ 47 Centralized devices upgrading from the CLI ···················································································· 48
Saving the running configuration and verifying the storage space ················································· 48 Downloading the image file to the router ·················································································· 48 Specifying the startup image file ····························································································· 49 Rebooting and completing the upgrade ··················································································· 50
Distributed devices upgrading from the CLI ····················································································· 51 Display the slot number of the active MPU ··············································································· 51 Save the current configuration and verify the storge space ·························································· 51 Download the image file to the router ······················································································ 52 Specifying the startup image file ····························································································· 52

ii
Reboot and completing the upgrade ······················································································· 54 Distributed devices ISSU ············································································································· 55
Disabling the standby MPU auto-update function ······································································· 56 Saving the running configuration and verifying the storage space ················································· 56 Downloading the upgrade image file to the router ······································································ 57 Upgrading the standby MPU ·································································································· 57 Upgrading the active MPU ···································································································· 59
Upgrading from the BootWare menu ······························································································ 61 Accessing the BootWare menu ······························································································ 61 Using TFTP/FTP to upgrade software through an Ethernet port ··················································· 63 Using XMODEM to upgrade software through the console port ···················································· 66
Managing files from the BootWare menu ························································································ 70 Displaying all files ················································································································ 71 Changing the type of a system software image ········································································· 71 Deleting files ······················································································································ 72
Handling software upgrade failures ································································································ 73
Appendix C Handling console login password loss ································ 73
Disabling password recovery capability ·························································································· 73 Handling console login password loss ···························································································· 74
Examining the password recovery capability setting ··································································· 75 Using the Skip Current System Configuration option ·································································· 76 Using the Skip Authentication for Console Login option ······························································ 77 Using the Restore to Factory Default Configuration option··························································· 77

iii
List of Tables
Table 1 Version history .................................................................................................................................................................... 2
Table 2 HPE product device numbers matrix ......................................................................................................................... 7
Table 3 Hardware and software compatibility matrix ......................................................................................................... 8
Table 4 MIB updates ...................................................................................................................................................................... 11
Table 5 MSR1000 specifications ................................................................................................................................................ 35
Table 6 MSR2000/MSR2000 TAA specifications ................................................................................................................. 35
Table 7 MSR3000/MSR3000 TAA specifications ................................................................................................................. 36
Table 8 MSR4000 specifications ................................................................................................................................................ 37
Table 9 MSR4000/MSR4000 TAA MPU Specification ........................................................................................................ 37
Table 10 MSR4000 SPU Specification ..................................................................................................................................... 37
Table 11 MSR2004-24 AC power module specifications ................................................................................................. 38
Table 12 MSR2004-48 DC power module specifications ................................................................................................ 38
Table 13 MSR3044/MSR3064/MSR4060/MSR4080 AC power module specifications ........................................ 38
Table 14 MSR3044/MSR3064/MSR4060/MSR4080 DC power module specifications ........................................ 38
Table 15 MSR3044/MSR3064/MSR4060/MSR4080 PoE power module specifications ...................................... 38
Table 16 MSR series routes Module List ................................................................................................................................ 38
Table 17 Sierra Modem Module and Host/card compatibility matrix........................................................................ 42
Table 18 MSR Series routers software features ................................................................................................................... 42
Table 19 Storage media ................................................................................................................................................................ 47
Table 20 BootWare menu options ............................................................................................................................................ 62
Table 21 Ethernet submenu options ....................................................................................................................................... 63
Table 22 Network parameter fields and shortcut keys ..................................................................................................... 64
Table 23 Serial submenu options ............................................................................................................................................. 66
Table 24 File Control submenu options ................................................................................................................................. 71
Table 25 BootWare options and password recovery capability compatibility matrix .......................................... 73

1
This document describes the features, restrictions and guidelines, open problems, and workarounds for version R0415. Before you use this version in a live network, back up the configuration and test the version to avoid software upgrade affecting your live network.
Use this document in conjunction with HPE MSR1000_MSR2000_MSR3000_MSR4000-CMW710-R0415 Release Notes (Software Feature Changes) and the documents listed in “Related documents”
Version information
Version number
HPE Comware Software, Version 7.1.064, Release 0415
Please see the example below generated by the display version command:
<HPE> display version
HPE Comware Software, Version 7.1.064, Release 0415
Copyright (c) 2010-2017 Hewlett Packard Enterprise Development LP
HPE MSR1002-4 uptime is 0 weeks, 0 days, 0 hours, 4 minutes
Last reboot reason : User reboot
Boot image: flash:/msr100x-cmw710-boot-r0415.bin
Boot image version: 7.1.064P32, Release 0415
Compiled Jan 13 2017 16:00:00
System image: flash:/msr100x-cmw710-system-r0415.bin
System image version: 7.1.064, Release 0415
Compiled Jan 13 2017 16:00:00
Feature image(s) list:
flash:/msr100x-cmw710-security-r0415.bin, version: 7.1.064
Compiled Jan 13 2017 16:00:00
flash:/msr100x-cmw710-voice-r0415.bin, version: 7.1.064
Compiled Jan 13 2017 16:00:00
flash:/msr100x-cmw710-data-r0415.bin, version: 7.1.064
Compiled Jan 13 2017 16:00:00
CPU ID: 0x8
1G bytes DDR3 SDRAM Memory
2M bytes Flash Memory
PCB Version: 2.0
CPLD Version: 1.0
Basic BootWare Version: 2.50
Extended BootWare Version: 2.50
[SLOT 0]AUX (Hardware)2.0, (Driver)1.0, (CPLD)1.0
[SLOT 0]GE0/0 (Hardware)2.0, (Driver)1.0, (CPLD)1.0
[SLOT 0]4GSW (Hardware)2.0, (Driver)1.0, (CPLD)1.0
[SLOT 0]SFP0/5 (Hardware)2.0, (Driver)1.0, (CPLD)1.0
[SLOT 0]SERIAL0/0 (Hardware)2.0, (Driver)1.0, (CPLD)1.0
[SLOT 0]CELLULAR0/0 (Hardware)2.0, (Driver)1.0, (CPLD)1.0

2
Version history
Table 1 Version history
Version
number Last version
Release
date
Release
type Remarks
CMW710-R0415 CMW710-R0413
2017-02-15
Release version
MSR1000_2000_3000_4000 series, including MSR1003-8S
Fixes bugs.
CMW710-R0413 CMW710-R0411
2016-12-01
Release version
MSR1000_2000_3000_4000 series, including MSR1003-8S
New feature:
1. IP forwarding last hop holding
Modified feature:
1. Temporary user role authorization
Fixes bugs.
CMW710-R0411 CMW710-R0410
2016-09-19
Release version
MSR1000_2000_3000_4000 series, including MSR1003-8S
Fixes bugs
CMW710-R0410 CMW710-R0304
2016-08-29
Release version
MSR1000_2000_3000_4000 series, including MSR1003-8S
New feature:
1. Support of multicast for ADVPN
2. Application layer state filtering
3. SIP keepalive
4. Multicast fast forwarding
5. SSL support for POS terminal access
6.Attack defense policy application to a security zone
7.AAA support for IKE extended authentication
8.Percentage-based CAR
9. Logging OSPF router ID conflict events
10. AFT
11. Configuring enhanced CC authentication in FIPS mode
12. Support of AAA for NETCONF
13.Mobile IP tunnel interface settings
14.LISP
15. LISP tunnel entries and dynamic mobility
16. Support of IPv6 multicast routing for VPN instances
17. IPv4/IPv6 PIM NSR
18. IGMP/MLD NSR
19. IPv4/IPv6 PIM passive mode
20.LISP virtual machine multi-hop mobility and DDT

3
21. LISP NSR
22.PPPoE client support for IPv6
23. Frame-Relay-related functions
24.DPI engine and content filtering
25.IPS
26.NBAR
27. URL filtering
28.Local portal Web server
29 Support of portal for NETCONF
30. Newly-added MIB objects
31. Performing a loopback test
32.IPS, ACG, and SSL VPN licenses
33. Support of NQA for NETCONF
34..Configuring CWMP to support VPN
35. Transceiver module source alarm
36. VLAN interface performance optimization
37. POSA
38. Specifying a backup processing slot for an interface
39.Configuring the ISDN leased line
40. NAT support for multicast source address in PIM join/prune packets
41. GDOI GM group anti-replay window
42. SIP compatibility
43. Voice VLAN
44. L2TP-based EAD
45. Configuring device poweroff alarming
46. BFD for an aggregation group
47.4G modem IMSI/SN binding authentication
48. Media Stream Control (MSC) logging
49. IMSI/SN binding authentication
50. Specifying a band for a 4G modem
51. Using tunnel interfaces as OpenFlow ports
52. NETCONF support for ACL filtering
53. WAAS
54. Support for the MKI field in SRTP or SRTCP packets
55. SIP domain name
56. E&M logging
57. Setting the RTC version
58. Setting the maximum size of advertisement files

4
59. Support of IRF for NETCONF
60. Support of VCF for NETCONF
61. Support of SNMP for NETCONF
62. Support of file system for NETCONF
63. Support of PoE for NETCONF
64. Support of RMON for NETCONF
65. Support of policy-based routing for NETCONF
66. Support of BGP for NETCONF
67. Support of OSPF for NETCONF
68. Support of ping for NETCONF
69. Support of tracert for NETCONF
70. Support of L2VPN for NETCONF
71. SIP support for VRF
72.IKEv2
73. Specifying an IKEv2 profile for an IPsec policy
74.Bidirectional BFD control detection for RIP
75.OSPF router ID autoconfiguration
76. Layer 2 Ethernet link aggregation
77. Setting the cable impedance for WAN interfaces
78.Associating a static route with a track entry
79. VLAN tag processing rule for incoming traffic
80. IP-based portal-free rule
81. Portal redirect packet statistics
82. GDVPN
83. OpenFlow instance
84. Enabling the Extended Sequence Number (ESN) feature for an IPsec transform set
85.Enabling Traffic Flow Confidentiality (TFC) padding for an IPsec policy
86. SIP session refresh
Modified feature
1.License restrictions for POS terminal access
2. Displaying and maintaining Frame Relay
3. Displaying track entry infomration
4. User profile
5. Tunnel interface support for IPsec and VXLAN tunnel modes
6. PKI certificate auto-renewal
7. Configuring the PKI entity DN
8. ADVPN

5
9.Telnet redirect
10. DHCP snooping performance optimization
11. OSPF performance optimization
12. POS terminal access
13. License
14.IP performance optimization
15. AAA
16. Configuring a cellular interface for a 3G/4G modem
17. QoS on VXLAN tunnel interfaces
18. Option 60 encapsulation in DHCP replies
19.MPLS QoS support for matching the EXP field
20. MPLS QoS support for marking the EXP field
21. Automatic configuration
22. User profile
23. Default size of the TCP receive and send buffer
24. Obtaining fan and power module vendor information
25.Support for per-packet load sharing
26. Default user role
27. Debugging
28. SSH username
29. IS-IS hello packet sending interval
30. MP-group interface numbering
31. Setting the global link-aggregation load-sharing mode
32.802.1X redirect URL
33. Displaying information about NTP servers from the reference source to the primary NTP server
34. Saving, rolling back, and loading the configuration
35. Displaying information about SSH users
36. SIP trusted nodes
37. IPsec ESP encryption algorithms
38. IPsec ESP authentication algorithms
39.IPsec AH authentication algorithms
40. Specifying an encryption algorithm for an IKE proposal
41. Specifying an authentication algorithm for an IKE proposal
42. Generating asymmetric key pairs
43. Specifying an ECDSA key pair for

6
certificate request
44. Setting the electrical impedance
45. POS access statistics, SNMP notifications for POS access, and NII
46. QoS MIB
47. Enabling PFS for an IPsec transform set
Removed feature:
1. Tiny proxy
2. Displaying switching fabric channel usage
CMW710-R0304 CMW710-E0302P06
2015-06-29
Release version
Support MSR1000_2000_3000_4000 series, added MSR1003-8S
New feature:
1. Setting the RTC version
2. Setting the maximum size of advertisement files
3. IRF
4. Frame Relay
5. EVI
6. VPLS
7. Multicast VPN support for inter-AS option B
Modified feature:
1. 802.1X redirect URL
2. Displaying information about NTP servers from the reference source to the primary NTP server
3. Saving, rolling back, and loading the configuration
4. Displaying information about SSH users
Removed feature
1. Displaying fabric utilization
Fixes bugs
CMW710-E0302P06
CMW710-E0102
2015-04-13
ESS version
Support MSR1000_2000_3000_4000 series
New feature:
1. Object policies
2. IPHC
3. Support of PPPoE server for IPv6
4. QSIG tunneling over SIP-T
5. Playout delay
6. BGP L2VPN support for NSR
7. BGP support for dynamic peers
8. ARP PnP
9. Support of Syslog for DNS and support of customlog&userlog for IPv6 hosts
10. QoS soft forwarding
11. Filtering by application layer

7
protocol status
12. ADVPN support for multicast forwarding
13. MPLS LDP support for IPv6
14. Port security
15. Customizable IVR
16. SRST
17. NEMO
18. Support of MFR and FR for L2VPN, FR QoS, and FR compression and fragmentation
19. Support for LLDP on CPOS interfaces
20. SMS-based automatic configuration
21. ARP attack protection
22. SIP support for VRF
Fixes bugs
CMW710-E0102 CMW710-E0006P02
2013-08-10
ESS version
Support MSR2000_3000_4000 series
New feature:
1. Portal authentication
2. MSDP
3. IPsec MIB and IKE MIB
4. PoE
5. CoPP software forwarding feature
6. Configuring MPLS LDP FRR
7. Enhanced routing features
8. Python
9. ATM
10. DHCP MIB
Fixes bugs.
CMW710-E0006P02
CMW710-E0006
2013-04-23
ESS version
Only support MSR3000_4000 series, not support MSR2000 series
Fixes bugs.
CMW710-E0006 First release 2013-01-28
ESS version None
Hardware and software compatibility matrix
CAUTION:
To avoid an upgrade failure, use Table 3 to verify the hardware and software compatibility before performing an upgrade.
Table 2 HPE product device numbers matrix
Product code HPE Product name
JG402A HPE MSR4080 Router Chassis
JG403A HPE MSR4060 Router Chassis

8
JG404A HPE MSR3064 Router
JG405A HPE MSR3044 Router
JG406A HPE MSR3024 AC Router
JG407A HPE MSR3024 DC Router
JG408A HPE MSR3024 PoE Router
JG409A HPE MSR3012 AC Router
JG410A HPE MSR3012 DC Router
JG411A HPE MSR2003 AC Router
JG412A HPE MSR4000 MPU-100 Main Processing Unit
JG413A HPE MSR4000 SPU-100 Service Processing Unit
JG414A HPE MSR4000 SPU-200 Service Processing Unit
JG670A HPE MSR4000 SPU-300 Service Processing Unit
JG875A HPE MSR1002-4 AC Router
JH060A HPE MSR1003-8S AC Router
JG861A HPE MSR3024 TAA-compliant AC Router
JG734A HPE MSR2004-24 AC Router
JG735A HPE MSR2004-48 Router
JG866A HPE MSR2003 TAA-compliant AC Router
JG869A HPE MSR4000 TAA-compliant MPU-100 Engine
JG409B HPE MSR3012 AC Router
Table 3 Hardware and software compatibility matrix
Item Specifications
Product family
MSR1000_MSR2000_MSR3000_MSR4000
Boot ROM version
MSR1002-4_MSR1003-8S: 250 or higher
MSR2003_MSR2004-24_MSR2004-48: 160 or higher
MSR3012_MSR3024_MSR3044_MSR3064: 160 or higher
MSR4060_MSR4080: MPU-100: 161 or higher
SPU-100/200: 140 or higher
Host software
Hardware software MD5 Check Sum File size
MSR1002-4_MSR1003-8S
MSR100X-CMW710-R0415.IPE
9aed070d0b80246f02bebcd8bc6113bc
55,840,768bytes
MSR2003_MSR2004-24_MSR2004-48
MSR2000-CMW710-R0415.IPE
714d8b218e10e0869840b136c1667a40
58,778,624bytes
MSR3012_MSR3024_MSR3044_MSR3064
MSR3000-CMW710-R0415.IPE
f7d410ac98373edf7c49736cd2c26b26
66,043,904bytes
MSR4060_MSR4080
MSR4000-CMW710-R0415.IPE
7501878fe07ff1259e86d968dcade58f
72,593,408bytes

9
iMC version
iMC BIMS 7.2 (E0402P02)
iMC EAD 7.2 (E0407)
iMC TAM 7.2 (E0407)
iMC UAM 7.2 (E0407)
iMC MVM 7.2 (E0402P02)
iMC NTA 7.2 (E0402P02)
iMC PLAT 7.2 (E0403P04)
iMC QoSM 7.2 (E0403H01)
iMC RAM 7.2 (E0402)
iMC SHM 7.2 (E0402l01)
iMC UBA 7.2 (E0401p03)
iMC VFM 7.2 (E0402H02)
iNode version
iNode PC 7.2 (E0407)
Cards version
Cards Name Software Version CPLD or FPGA version
SIC-3G-HSPA 280 or higher 200 or higher
SIC-3G-CDMA 280 or higher 200 or higher
Upgrading restrictions and guidelines
1. After the software is upgraded from a version earlier than E0302P06 to E0302P06 or a later version, the unit of the VRRP preemption delay is changed from seconds to centiseconds.
Hardware feature updates
CMW710-R0415
None
CMW710-R0413
Add new hardware:
1-port Clear Channel E3/T3 HMIM Module(JH449A)
CMW710-R0304
Add new router:
HPE MSR1003-8S AC Router
CMW710-E0302P06
Add new hardware:
8-port E1 / CE1 / T1 / CT1 / PRI HMIM Module (JH169A)

10
4-port E1 / CE1 / T1 / CT1 / PRI HMIM Module (JH170A)
2-port E1 / CE1 / T1 / CT1 / PRI HMIM Module (JH171A)
8-port E1 / Fractional E1 / T1 / Fractional T1 HMIM Module (JH172A)
4-port E1 / Fractional E1 / T1 / Fractional T1 HMIM Module (JH173A)
2-port E1 / Fractional E1 / T1 / Fractional T1 HMIM Module (JH174A)
8-port 100BASE-FX/1000BASE-X / 4-port 1000BASE-T (Combo) L2/L3 HMIM Module (JH238A)
CMW710-E0102
Add new hardware:
4-port 10/100 Mbps Ethernet L2 switching module-PoE card(SIC-4FSW-POE)
1-port ADSL over POTS SIC interface module (SIC-1ADSL)
1 port E1/CE1/PRI SIC interface module(SIC-1EPRI-V3)
9-port 10/100 Mbps Ethernet L2 switching module -PoE card (DSIC-9FSW-POE)
1-port 8-wire G.SHDSL (RJ45) DSIC Module
2-port 1000BASE-X HMIM Module (HMIM-2GEF)
4-port 1000BASE-X HMIM Module (HMIM-4GEF)
8-port 1000BASE-X HMIM Module (HMIM-8GEF)
24-port Gig-T Switch HMIM Module (HMIM-24GSW)
24-port Gig-T PoE Switch HMIM Module (HMIM-24GSW-POE)
1-port OC-3 / STM-1 CPOS HMIM Module (HMM-1CPOS)
2-port OC-3 / STM-1 CPOS HMIM Module (HMIM-2CPOS)
1-port OC-3c / STM-1c ATM SFP HMIM Module (HMIM-ATMOC3)
1-port dual-pair G.SHDSL interface module (MIM-1SHL-4W)(need to config HMIM-Adapter)
SPU-300 service module
MSR3012-DC
MSR3024-DC
MSR3024-POE
300W DCPower(PSR300-12D2)
Support USB modem E303c and E3131
Software feature and command updates
For more information about the software feature and command update history, see HPE MSR1000_MSR2000_MSR3000_MSR4000-CMW710-R0415 Release Notes (Software Feature Changes).

11
MIB updates
Table 4 MIB updates
Item MIB file Module Description
CMW710-R0415
New None None None
Modified None None None
CMW710-R0304
New None None None
Modified hh3c-transceiver-info.mib HH3C-TRANSCEIVER-INFO-MIB
Modified description of hh3cTransceiverCurTXPower and hh3cTransceiverCurRXPower
CMW710-E0302P06
New
hh3c-stack.mib HH3C-STACK-MIB Added HH3C-STACK-MIB
rfc5060-pim-std.mib PIM-STD-MIB Added PIM-STD-MIB
rfc5240-pim-bsr.mib PIM-BSR-MIB Added PIM-BSR-MIB
hh3c-qinqv2.mib HH3C-QINQV2-MIB Added
HH3C-QINQV2-MIB
rfc3019-ipv6-mld.mibs IPV6-MLD-MIB Added IPV6-MLD-MIB
hh3c-nqa.mib HH3C-NQA-MIB Added HH3C-NQA-MIB
hh3c-posa.mib HH3C-POSA-MIB Added HH3C-POSA-MIB
rfc1473-ppp-ip.mib PPP-IP-NCP-MIB Added PPP-IP-NCP-MIB
rfc1471-ppp-lcp.mib PPP-LCP-MIB Added PPP-LCP-MIB
hh3c-mp-v2.mib HH3C-MP-V2-MIB Added HH3C-MP-V2-MIB
hh3c-mplsext.mib HH3C-MPLSEXT-MIB Added HH3C-MPLSEXT-MIB
hh3c-mplste.mib HH3C-MPLSTE-MIB Added H3C-MPLSTE-MIB
rfc6445-mpls-frr-facility-std.mib
MPLS-FRR-FACILITY-STD-MIB
Added MPLS-FRR-FACILITY-STD-MIB
rfc6445-mpls-frr-general-std.mib
MPLS-FRR-GENERAL-STD-MIB
Added MPLS-FRR-GENERAL-STD-MIB
rfc3812-mpls-te-std.mib MPLS-TE-STD-MIB Added MPLS-TE-STD-MIB
rfc3970-te.mib TE-MIB Added TE-MIB
hh3c-transceiver-info.mib HH3C-TRANSCEIVER-INFO-MIB
Added HH3C-TRANSCEIVER-INFO-MIB
rfc5519-mgmd-std.mib MGMD-STD-MIB Added MGMD-STD-MIB
rfc4560-disman-traceroute.m DISMAN-TRACEROUTE- Added

12
ib MIB DISMAN-TRACEROUTE-MIB
rfc2925-disman-ping.mib DISMAN-PING-MIB Added DISMAN-PING-MIB
rfc5603-pw-enet-std.mib PW-ENET-STD-MIB Added PW-ENET-STD-MIB
rfc5601-pw-std.mib PW-STD-MIB Added PW-STD-MIB
hh3c-snmp-ext.mib HH3C-SNMP-EXT-MIB Added HH3C-SNMP-EXT-MIB
hh3c-posa.mib HH3C-POSA-MIB Added HH3C-POSA-MIB
hh3c-bfd-std.mib HH3C-BFD-STD-MIB Added HH3C-BFD-STD-MIB
hh3c-ppp-over-sonet.mib HH3C-PPP-OVER-SONET-MIB
Added HH3C-PPP-OVER-SONET-MIB
rfc3815-mpls-ldp-std.mib MPLS-LDP-STD-MIB Added MPLS-LDP-STD-MIB
rfc4382-mpls-l3vpn-std.mib MPLS-L3VPN-STD-MIB Added MPLS-L3VPN-STD-MIB
hh3c-license.mib HH3C-LICENSE-MIB Added HH3C-LICENSE-MIB
hh3c-tunnel.mib HH3C-TUNNEL-MIB Added HH3C-TUNNEL-MIB
rfc5643-ospfv3.mib OSPFV3-MIB Added OSPFV3-MIB
rfc2981-disman-event.mib DISMAN-EVENT-MIB Added DISMAN-EVENT-MIB
hh3c-pvst.mib HH3C-PVST-MIB Added HH3C-PVST-MIB
hh3c-evi.mib HH3C-EVI-MIB Added HH3C-EVI-MIB
hh3c-l2vpn.mib HH3C-L2VPN-MIB Added HH3C-L2VPN-MIB
Modified
rfc4444-isis.mib ISIS-MIB
Modified description of
isisSysLevelMinLSPGenInt
rfc1213.mib RFC1213-MIB
Modified description of sysDescr and sysObjectID; Modified TAA description of sysObjectID;
Modified index of ipv6InterfaceTable; Modified description of sysContact and sysLocation;
Modified Access of ipAddressStorageType.
rfc4444-isis.mib ISIS-MIB
Modified description of
isisRouterID, isisSysLevelTEEnabled, isisNextCircIndex, isisCirc3WayEnabled, isisCircExtendedCircID,
isisISAdj3WayState 和
isisISAdjNbrExtendedCircID
rfc2465-ipv6.mib IPV6-MIB Modified description of
ipv6IfDescr
hh3c-splat-mstp.mib HH3C-LswMSTP-MIB Modified description of

13
hh3cdot1sStpForceVersion
rfc2933-igmp-std.mib IGMP-STD-MIB Modified description and
PDS of IGMP-STD-MIB
rfc2863-if.mib IF-MIB
Updated the rfc2863-if.mib from rfc2233-if.mib
hh3c-dns.mib HH3C-DNS-MIB Modified description of HH3C-DNS-MIB
hh3c-domain.mib H3C-DOMAIN-MIB Modified description of HH3C-DOMAIN-MIB
hh3c-sys-man.mib HH3C-SYS-MAN-MIB Modified example of hh3cSysBtmLoadTable
hh3c-config-man.mib HH3C-CONFIG-MAN-MIB
Modified description of hh3cCfgLogTerminalUser and hh3cCfgLogCmdSrcAddress
rfc2933-igmp-std.mib IGMP-STD-MIB
Modified description of igmpInterfaceQueryMaxResponseTime, igmpInterfaceRobustness, igmpInterfaceLastMembQueryIntvl, mldInterfaceQueryMaxResponseDelay, mldInterfaceRobustness, mldInterfaceLastListenQueryIntvl;
Modified PDS of igmpCacheAddress, igmpCacheIfIndex, igmpCacheSelf, mldCacheAddress, mldCacheIfIndex, mldCacheSelf
rfc2925-disman-ping.mib DISMAN-PING-MIB
Modified description of pingCtlIfIndex;
Added pingProbeFailed, pingTestFailed, pingTestCompleted, hh3cNqaProbeTimeOverThreshold, hh3cNqaJitterRTTOverThreshold, hh3cNqaProbeFailure, hh3cNqaJitterPacketLoss, hh3cNqaJitterSDOverThreshold, hh3cNqaJitterDSOverThreshold, hh3cNqaICPIFOverThreshold, hh3cNqaMOSOverThreshold
rfc4133-entity.mib ENTITY-MIB Modified description of entPhysicalAlias, entPhysicalAssetID

14
hh3c-if-ext.mib HH3C-IF-EXT-MIB Modified description of HH3C-IF-EXT-MIB
hh3c-config-man.mib HH3C-CONFIG-MAN-MIB Modified description of HH3C-CONFIG-MAN-MIB
hh3c-trng2.mib HH3C-TRNG2-MIB Modified description of HH3C-TRNG2-MIB
rfc2925-disman-ping.mib DISMAN-PING-MIB Modified description of pingCtlTable
hh3c-ntp.mib HH3C-NTP-MIB Modified description of hh3cNTPSystemMIB
hh3c-entrelation.mib HH3C-ENTRELATION-MIB Modified description of hh3cEntRelationTable
hh3c-entity-ext.mib HH3C-ENTITY-EXT-MIB
Added hh3cEntityExtCpuUsageRecoverThreshold, hh3cEntityExtMemSizeRev, hh3cEntityExtCpuUsageIn1Minute, hh3cEntityExtCpuUsageIn5Minutes,
hh3cEntityExtVoltageTable;
Modified description and relationship of hh3cEntityExtTemperatureThreshold,
Modified description of hh3cEntityExtTemperature.
hh3c-ssh.mib HH3C-SSH-MIB Added hh3cSTelnetServerEnable, hh3cSCPServerEnable
hh3c-lsw-dev-adm.mib HH3C-LSW-DEV-ADM-MIB
Added hh3cLswSlotMemRev, hh3cLswSlotPhyMemRev, hh3cLswSlotRunTime and hh3cLswSlotMemUsedRev
hh3c-lsw-dev-adm.mib HH3C-LSW-DEV-ADM-MIB
Added hh3cLswCpuTable
hh3c-3gmodem.mib HH3C-3GMODEM-MIB Added hh3cLteInfoTable
hh3c-trap.mib HH3C-TRAP-MIB Modified description of hh3cTrapConfigSwitch
rfc2863-if.mib IF-MIB Modified description of ifOutQLen
hh3c-ip-address.mib HH3C-IP-ADDRESS-MIB Added hh3cIpAddrFirstTrapTime
fc1471-ppp-lcp.mib PPP-LCP-MIB Modified description of pppLinkStatusBadFCSs
ieee8023-lag.mib IEEE8023-LAG-MIB Modified title of IEEE8023-LAG-MIB
hh3c-lag.mib HH3C-LAG-MIB Modified title of

15
HH3C-LAG-MIB
hh3c-domain.mib HH3C-DOMAIN-MIB Modified description of hh3cDomainDefault and hh3cDomainName
hh3c-if-ext.mib HH3C-IF-EXT-MIB Added hh3cIfOperStatus and hh3cIfDownTimes
rfc5603-pw-enet-std.mib PW-ENET-STD-MIB Modified pwEnetTable
rfc5602-pw-mpls-std.mib PW-MPLS-STD-MIB Modified the module of PW-MPLS-STD-MIB
rfc5603-pw-enet-std.mib PW-ENET-STD-MIB Modified the table of PW-ENET-STD-MIB
table hh3cPosParamTable HH3C-PPP-OVER-SONET-MIB
Only support POS interfaces
hh3c-acl.mib HH3C-ACL-MIB
Modified hh3cAclNumberGroupTable, hh3cPfilterApplyTable, hh3cPfilterAclGroupRunInfoTable, hh3cPfilterStatisticSumTable and added the hh3cAclNamedGroupTable, hh3cAclIPAclNamedBscTable, hh3cAclIPAclNamedAdvTable, hh3cAclNamedMACTable, hh3cAclIntervalTable hh3cAclNamedUserTable, hh3cPfilter2ApplyTable, hh3cPfilter2, hh3cPfilter2AclGroupRunInfoTable, hh3cPfilter2AclRuleRunInfoTable, hh3cPfilter2StatisticSumTable,
hh3cAclNamedGroupTable
hh3c-stack.mib HH3C-STACK-MIB Modified description of hh3cStackTopology
rfc2819-rmon.mib RMON-MIB Modified description of default value in RMON-MIB
rfc4502-rmon.mib RMON2-MIB Modified description of default value in RMON2-MIB
lldp-ext-dot1-v2.mib LLDP-EXT-DOT1-V2-MIB
Removed lldpXdot1dcbxConfigETSConfigurationTable
lldpXdot1dcbxConfigETSRecommendationTable
lldpXdot1dcbxConfigPFCTable
lldpXdot1dcbxConfigApplicationPriorityTable
lldpXdot1dcbxLocETSBasicConfigurationTable
lldpXdot1dcbxLocETSConPr

16
iorityAssignmentTable
lldpXdot1dcbxLocETSConTrafficClassBandwidthTable
lldpXdot1dcbxLocETSConTrafficSelectionAlgorithmTable
lldpXdot1dcbxLocETSRecoTrafficClassBandwidthTable
lldpXdot1dcbxLocETSRecoTrafficSelectionAlgorithmTable
lldpXdot1dcbxLocPFCBasicTable
lldpXdot1dcbxLocPFCEnableTable
lldpXdot1dcbxLocApplicationPriorityAppTable
lldpXdot1dcbxRemETSBasicConfigurationTable
lldpXdot1dcbxRemETSConPriorityAssignmentTable
lldpXdot1dcbxRemETSConTrafficClassBandwidthTable
lldpXdot1dcbxRemETSConTrafficSelectionAlgorithmTable
lldpXdot1dcbxRemETSRecoTrafficClassBandwidthTable
lldpXdot1dcbxRemETSRecoTrafficSelectionAlgorithmTable
lldpXdot1dcbxRemPFCBasicTable
lldpXdot1dcbxRemPFCEnableTable
lldpXdot1dcbxRemApplicationPriorityAppTable
lldpXdot1dcbxAdminETSBasicConfigurationTable
lldpXdot1dcbxAdminETSConPriorityAssignmentTable
lldpXdot1dcbxAdminETSConTrafficClassBandwidthTable
lldpXdot1dcbxAdminETSConTrafficSelectionAlgorithmTable
lldpXdot1dcbxAdminETSRecoTrafficClassBandwidthTable
lldpXdot1dcbxAdminETSRecoTrafficSelectionAlgorithmTable

17
lldpXdot1dcbxAdminPFCBasicTable
lldpXdot1dcbxAdminPFCEnableTable
lldpXdot1dcbxAdminApplicationPriorityAppTable
CMW710-E0102
New
rfc5060-pim-std.mib PIM-STD-MIB Added PIM-STD-MIB
rfc5240-pim-bsr.mib PIM-BSR-MIB Added PIM-BSR-MIB
hh3c-qinqv2.mib HH3C-QINQV2-MIB Added HH3C-QINQV2-MIB
rfc3019-ipv6-mld.mibs IPV6-MLD-MIB Added IPV6-MLD-MIB
hh3c-lsw-dev-adm.mib HH3C-LSW-DEV-ADM-MIB
Added hh3cLswSlotMemRev, hh3cLswSlotPhyMemRev, hh3cLswSlotRunTime and hh3cLswSlotMemUsedRev
hh3c-nqa.mib HH3C-NQA-MIB Added HH3C-NQA-MIB
hh3c-posa.mib HH3C-POSA-MIB Added HH3C-POSA-MIB
Modified
rfc4444-isis.mib ISIS-MIB Modified description of isisSysLevelMinLSPGenInt
hh3c-entity-ext.mib HH3C-ENTITY-EXT-MIB
Modified description and relationship of hh3cEntityExtTemperatureThreshold
rfc1213.mib RFC1213-MIB Modified description of sysDescr and sysObjectID
rfc4444-isis.mib ISIS-MIB
Modified description of isisRouterID, isisSysLevelTEEnabled, isisNextCircIndex, isisCirc3WayEnabled, isisCircExtendedCircID, isisISAdj3WayState and isisISAdjNbrExtendedCircID
rfc2465-ipv6.mib IPV6-MIB Modified description of ipv6IfDescr
hh3c-splat-mstp.mib HH3C-LswMSTP-MIB Modified description of hh3cdot1sStpForceVersion
rfc2933-igmp-std.mib IGMP-STD-MIB Modified description and PDS of nodes in IGMP-STD-MIB
rfc4133-entity.mib ENTITY-MIB Modified description and PDS of entPhysicalAlias and entPhysicalAssetID
hh3c-posa.mib HH3C-POSA-MIB Modified description of hh3cPosaFcmIdleTimeout
rfc2863-if.mib IF-MIB Updated the rfc2863-if.mib from rfc2233-if.mib
CMW710-E0102
New hh3c-ike-monitor.mib HH3C-IKE-MONITOR-MIB Added

18
HH3C-IKE-MONITOR-MIB
hh3c-ike-monitor.mib HH3C-IPSEC-MONITOR-V2-MIB
Added HH3C-IPSEC-MONITOR-V2-MIB
lldp-v2.mib LLDP-V2-MIB Added LLDP-V2-MIB
lldp-ext-dot1-v2.mib LLDP-EXT-DOT1-V2-MIB Added LLDP-EXT-DOT1-V2-MIB
lldp-ext-dot3-v2.mib LLDP-EXT-DOT3-V2-MIB Added LLDP-EXT-DOT3-V2-MIB
rfc2620-radius-acc-client.mib RADIUS-ACC-CLIENT-MIB
Added RADIUS-ACC-CLIENT-MIB
rfc2618-radius-auth-client.mib
RADIUS-AUTH-CLIENT-MIB
Added RADIUS-AUTH-CLIENT-MIB
hh3c-domain.mib HH3C-DOMAIN-MIB Added HH3C-DOMAIN-MIB
hh3c-domain.mib HH3C-DOMAIN-MIB Added HH3C-DOMAIN-MIB
hh3c-user.mib HH3C-USER-MIB Added HH3C-USER-MIB
hh3c-qos-capability.mib HH3C-QOS-CAPABILITY-MIB
Added HH3C-QOS-CAPABILITY-MIB
rfc3621-power-ethernet.mib POWER-ETHERNET-MIB Added POWER-ETHERNET-MIB
hh3c-power-eth-ext.mib HH3C-POWER-ETH-EXT-MIB
Added HH3C-POWER-ETH-EXT-MIB
rfc3814-mpls-ftn-std.mib MPLS-FTN-STD-MIB Added MPLS-FTN-STD-MIB
hh3c-dhcp4.mib HH3C-DHCP4-MIB Added HH3C-DHCP4-MIB
hh3c-dhcp-snoop2.mib HH3C-DHCP-SNOOP2-MIB
Added HH3C-DHCP-SNOOP2-MIB
rfc2662-adsl-line.mib ADSL-LINE-MIB Added ADSL-LINE-MIB
rfc2819-rmon.mib RMON-MIB Added RMON-MIB
rfc4502-rmon.mib RMON2-MIB Added RMON2-MIB
hh3c-rmon-ext2.mib HH3C-RMON-EXT2-MIB Added HH3C-RMON-EXT2-MIB
rfc5132-ipmcast.mib IPMCAST-MIB Added IPMCAST-MIB
Modified
hh3c-common-system.mib HH3C-COMMON-SYSTEM-MIB
Modified HH3C-COMMON-SYSTEM-MIB to V2.4
hh3c-splat-inf.mib HH3C-LswINF-MIB Modified HH3C-LswINF-MIB to V3.4
hh3c-infocenter.mib HH3C-INFO-CENTER-MIB
Added hh3cICLogbufferContTable in HH3C-INFO-CENTER-MIB
hh3c-lsw-dev-adm.mib HH3C-LSW-DEV-ADM-MIB
Added hh3cLswSlotPktBufFree, hh3cLswSlotPktBufInit, hh3cLswSlotPktBufMin and

19
hh3cLswSlotPktBufMiss in hh3cLswSlotTable
rfc2465-ipv6.mib IPV6-MIB Added ipv6RouteNumber, ipv6DiscardedRoutes and ipv6RouteTable
rfc2096-ip-forward.mib IP-FORWARD-MIB
Added inetCidrRouteNumber, inetCidrRouteDiscards and inetCidrRouteTable
hh3c-config-man.mib HH3C-CONFIG-MAN-MIB Modified the description of hh3cCfgRunModifiedLast
hh3c-cbqos2.mib HH3C-CBQOS2-MIB
Modified the description of hh3cCBQoSPolicyClassNextIndex and hh3cCBQoSPolicyClassCfgInfoTable,and deleted hh3cCBQoSRedirectCfgInfoTable and hh3cCBQoSMirrorIfCfgInfoTable
rfc3415-snmp-vacm.mib NMP-VIEW-BASED-ACM-MIB
Modified the description of vacmContextName
rfc1213.mib RFC1213-MIB Modified the description of ipNetToMediaIfIndex
rfc3415-snmp-vacm.mib SNMP-VIEW-BASED-ACM-MIB
Modified the description of vacmContextName
rfc2233-if.mib IF-MIB Modified the description of ifAlias
hh3c-common-system.mib HH3C-COMMON-SYSTEM-MIB
Modified the description of hh3cSysStatisticPeriod, hh3cSysSamplePeriod, hh3cSysTrapResendPeriod, hh3cSysTrapCollectionPeriod, hh3cSysSnmpPort, hh3cSysSnmpTrapPort, hh3cSysNetID, hh3cSysLastSampleTime.And Modified the PDS of hh3cSysNetID
rfc1213.mib RFC1213-MIB Modified the description of sysDescr and sysObjectID
Operation changes
None
Restrictions and cautions
1. HPE’s FXS not supporting call transfers from an analog phone to Lync Server.
2. The mGRE and Suite B features are not available in the current software version R04XX.

20
Open problems and workarounds
201607130472
Symptom: Some voice settings are lost on a distributed MSR4000 router after a software upgrade or configuration restoration by using .cfg files.
Condition: This symptom might occur if a software upgrade is performed or configuration is restored by using .cfg files on a distributed MSR4000 router.
Workaround: Do not use .cfg files for configuration restoration. After a software upgrade, perform a configuration rollback and save the configuration.
201608110569
Symptom: The system executes commands issued through TR-069 from user view instead of from system view. As a result, command execution fails.
Condition: This symptom might occur if the system executes commands issued through TR-069.
Workaround: Add the system-view command to the beginning of the issued commands.
List of resolved problems
Resolved problems in CMW710-R0415
201611250396
Symptom: When a card that uses OSCCA algorithms is forwarding a large amount of traffic, encrypted traffic is interrupted.
Condition: This symptom might occur if a card that uses OSCCA algorithms is forwarding a large amount of traffic.
201612010463
Symptom: LLDP and DHCP packets cannot trigger MAC authentication on a Layer 2 interface.
Condition: None.
201611090369
Symptom: The actual error packet count of an interface is inconsistent with the value in the MIB.
Condition: None.
201611080068
Symptom: Two interfaces of an HMIM-8GEF or HMIM-8GEE card cannot forward 64-byte long packets at wire speed.
Condition: None.
201612270562
Symptom: The actual E1 timeslot usage for an HMIM-E1POS card is inconsistent with the value in the MIB.
Condition: None.
201610120612
Symptom: A Layer 2 aggregate interface fails to forward unicast traffic when certain conditions exist.

21
Condition: This symptom might occur if the following conditions exist:
The Layer 2 aggregate interface is forwarding dense unicast, multicast, and broadcast traffic.
The card that hosts members of the aggregation group is rebooted.
201612230066
Symptom: The upper limit of APs cannot be increased for the MSR3000 series routers.
Condition: None.
201612010089
Symptom: A PC cannot access the public network through the router when certain conditions exist.
Condition: This symptom might occur if the following conditions exist:
NAT is configured on the interface connected to the public network.
Packets forwarded by the router are fragmented.
201607230333
Symptom: In certain conditions, users cannot come online when the router acts as an LNS.
Condition: This symptom might occur if the following conditions exist:
A large number of users request network access.
Low network quality causes significant packet loss. As a result, the LAC constantly sends retransmission requests to the router, and the router repeatedly responds to the requests.
201612130014
Symptom: When TACACS authentication is enabled, an SSH user must input the password twice to log in to the router.
Condition: This symptom might occur if TACACS authentication is enabled for SSH login.
201611090044
Symptom: An MSR4000 router cannot establish BGP neighbor relationships after an active/standby MPU switchover.
Condition: This symptom might occur if an active/standby MPU switchover occurs on an MSR4000 router.
201610240441
Symptom: In a hub-spoke ADVPN with multiple domains, traffic is forwarded through wrong tunnels and some services are interrupted.
Condition: This symptom might occur if the VAM server has multiple domains, and each domain uses a dedicated tunnel.
201609090290
Symptom: Memory leak occurs when an NMS reads BGP peer information from the MIB.
Condition: This symptom might occur if BGP is configured on the router, and an NMS reads BGP peer information from the MIB.
201611180292
Symptom: On an IRF fabric, PBR settings on interfaces are lost after the master is rebooted.
Condition: This symptom might occur if the master of an IRF fabric is rebooted.
201612080627
Symptom: When acting as an LNS, the router cannot establish tunnels to LAC clients in certain conditions.

22
Condition: This symptom might occur if frequent login and logout of a large number of L2TP users cause memory leaks on the router.
201611130042
Symptom: BFD cannot work correctly on VLAN interfaces when certain operations are performed.
Condition: This symptom might occur if the following operations are performed:
a. Enable BFD for some VLAN interfaces on the router.
b. Remove the IP addresses for the VLAN interfaces that are not enabled with BFD, and reconfigure IP addresses for them.
201610250612
Symptom: The router reboots unexpectedly for low memory when traffic is constantly sent at wire speed to a Layer 3 aggregate interface.
Condition: This symptom might occur if traffic is constantly sent at wire speed to a Layer 3 aggregate interface.
201611170075
Symptom: After the router is rebooted, voice settings are lost and the voice process becomes abnormal. As a result, HMIM-16FXS cards on the router cannot make calls.
Condition: This symptom might occur if the following conditions exist:
All available slots of the router are installed with HMIM-16FXS cards.
The router is rebooted.
201609230644
Symptom: Layer 3 subinterfaces cannot be deleted after certain operations are performed.
Condition: This symptom might occur if the following operations are performed:
a. Configure a large number of Layer 3 subinterfaces.
b. Batch configure the shutdown and undo vlan-type commands on some Layer 3 subinterfaces.
201610280218
Symptom: When a Windows 10 terminal is used to manage the router, the description command does not support certain characters.
Condition: None.
201610280206
Symptom: The router stops responding when certain conditions exist.
Condition: This symptom might occur if password control is enabled, and a large number of users frequently log in to or log out of the router.
201612260239
Symptom: In certain conditions, portal users cannot pass authentication when the router acts as the portal access device.
Condition: This symptom might occur if the following conditions exist:
The router uses RADIUS for authentication and accounting.
A large number of users access the network through the router.
201612260225
Symptom: The number of BFD sessions cannot reach the specification.
Condition: None.

23
201612260176
Symptom: In certain conditions, the console port of the master in an IRF fabric is inaccessible.
Condition: This symptom might occur if users frequently log in and log out through the console port of the IRF master.
201612260253
Symptom: Errors occur when the MPLS L3VPN-enabled router sends default routes of VPN instances to PE neighbors.
Condition: This symptom might occur if the MPLS L3VPN-enabled router sends default routes of VPN instances to PE neighbors.
Resolved problems in CMW710-R0413
201607220244
Symptom: The system displays a configuration success message when an IP address that is being used by a loopback interface is assigned to a GigabitEthernet interface through TR-069.
Condition: This symptom might occur if an IP address that is being used by a loopback interface is assigned to a GigabitEthernet interface through TR-069.
201608190045
Symptom: Profile 3 of a VZW or Sprint modem cannot be modified.
Condition: This symptom might occur if Profile 3 of a VZW or Sprint modem is modified.
201608250319
Symptom: Modem pass-through fails when certain conditions exist.
Condition: This symptom might occur if the router sends an INVITE request to the peer and receives the following messages in sequence.
183 response with SDP.
180 response without SDP.
200 OK message without SDP.
Re-INVITE request for modem pass-through (500 ms after the 200 OK message is received).
201611110619
Symptom: Long forwarding delay occurs when certain conditions exist.
Condition: This symptom might occur if the following conditions exist:
The router uses an SIC-3G-CDMA card installed with an EM660 module.
The router reboots the SIC-3G-CDMA card repeatedly because no SIM card is installed.
201609200420
Symptom: The router reboots unexpectedly when FPGA upgrade is performed for an HMIM-8E1T1 card.
Condition: This symptom might occur if FPGA upgrade is performed for an HMIM-8E1T1 card.
201611110593
Symptom: An SIC-4FSW card cannot communicate with a peer when certain conditions exist.
Condition: This symptom might occur if the following conditions exist:
After negotiation, the duplex mode of the peer-facing interface is set to half duplex on the SIC-4FSW card.

24
The router forwards traffic through VLAN interfaces.
201611110596
Symptom: The forwarding speed of a Layer 2 interface decreases after mirroring is configured on the interface.
Condition: This symptom might occur if mirroring is configured on a Layer 2 interface.
201611130027
Symptom: Execution of the dm-port open command fails on interfaces of an SIC-3G/4G card.
Condition: None.
201611110625
Symptom: Two interfaces of an HMIM-8GEF card cannot forward 64-byte packets at wire speed.
Condition: None.
201611140158
Symptom: CVE-2009-3238
Condition: The get_random_int function in drivers/char/random.c in the Linux kernel before 2.6.30 produces insufficiently random numbers, which allows attackers to predict the return value, and possibly defeat protection mechanisms based on randomization, via vectors that leverage the function's tendency to "return the same value over and over again for long stretches of time."
201611110614
Symptom: The CLI stops responding when port security configuration is modified.
Condition: This symptom might occur if the following conditions exist:
a. LLDP, 802.1X authentication, and port security are enabled on a Layer 2 interface, and the intrusion protection action is set to shut down the interface upon authentication failure.
b. The interface is shut down when a Cisco IP phone fails authentication.
c. Port security configuration is modified at the CLI.
201611140163
Symptom: The MSR router cannot use IS-IS to obtain routes from a Cisco NX9000 device.
Condition: None.
201611140150
Symptom: CVE-2016-1409
Condition: The Neighbor Discovery (ND) protocol implementation in the IPv6 stack in Cisco IOS XE 2.1 through 3.17S, IOS XR 2.0.0 through 5.3.2, and NX-OS allows remote attackers to cause a denial of service (packet-processing outage) via crafted ND messages, aka Bug ID CSCuz66542, as exploited in the wild in May 2016.
201611140096
Symptom: IPsec operates incorrectly when the router uses IKE aggressive mode with NAT traversal to communicate with a WatchGuard device.
Condition: This symptom might occur if the router uses IKE aggressive mode with NAT traversal to communicate with a WatchGuard device.
201611110663
Symptom: IPsec operates incorrectly when an MSR router works with a Comware 5 router.
Condition: This symptom might occur if the following conditions exist:

25
The Comware 5 router uses an IPsec policy template.
The MSR router initiates a connection to the Comware 5 router.
The MSR router needs to encrypt multiple flows, but no IPsec SA exists. As a result, IKE negotiation fails for SA inconsistency, and traffic forwarding fails.
201611140100
Symptom: Long forwarding delay occurs on a QoS-enabled interface.
Condition: This symptom might occur if the following conditions exist:
QoS policy nesting is configured on the interface.
GTS is configured in the parent policy for rate limiting, and the CBS is larger than 3000 bytes.
201611140087
Symptom: An MSR router cannot communicate with a strongSwan device through IKEv2.
Condition: None.
201611140085
Symptom: The router uses an incorrect IP priority value when adding GRE encapsulation to MPLS tunneled packets.
Condition: This symptom might occur if GRE encapsulation is added to MPLS tunneled packets.
201611110657
Symptom: Memory usage keeps increasing after the TCP MSS is modified for a GRE tunnel interface.
Condition: This symptom might occur if the following conditions exist:
a. The TCP MSS is modified for a GRE tunnel interface.
b. The GRE tunnel constantly forwards fragmented packets.
201611140084
Symptom: Telnet or SSH login to the router fails when an IPv6 address is used.
Condition: This symptom might occur if the Telnet or SSH client is not directly connected to the router, and the tcp syn-cookie enable command is executed on the router.
201611140259
Symptom: All L2TP users might go offline unexpectedly when the router acts as an LNS.
Condition: This symptom might occur if the L2TP tunnel is deleted mistakenly when an L2TP user uses an incorrect username or password for authentication.
201611140165
Symptom: When password control is enabled and a user logs in to the router after multiple failures, the router does not display login failure information.
Condition: This symptom might occur if password control is enabled.
201611110626
Symptom: When a PVST-enabled VLAN is deleted, state of interfaces becomes incorrect in other PVST-enabled VLANs.
Condition: This symptom might occur if a PVST-enabled VLAN is deleted.
201611140169
Symptom: Hosts cannot access some websites when the router acts as a NAT gateway.

26
Condition: This symptom might occur if the following conditions exist:
NAT hairpin is configured on the internal network-side interface.
Outbound dynamic NAT is configured on both the internal network-side interface and the external network-side interface.
201611140094
Symptom: CVE-2016-8858
Condition: A remote user can send specially crafted data during the key exchange process to trigger a flaw in kex_input_kexinit() and consume excessive memory on the target system. This can be exploited to consume up to 384 MB per connection.
201611130022
Symptom: ADVPN registration fails when certain conditions exist.
Condition: This symptom might occur if the following conditions exist:
Multiple ADVPN domains are configured on the VAM server, and each domain has a dedicated ADVPN tunnel.
The router acts as a hub. When setting up a tunnel with a spoke, the router selects a wrong tunnel.
201611140104
Symptom: The router reboots unexpectedly when a ping operation is performed through a Layer 3 aggregate interface.
Condition: This symptom might occur if the following conditions exist:
a. CBQ is applied to a Layer 3 aggregate interface, and the gts percent command is executed in traffic behavior view for CBQ.
b. The router pings the peer through the Layer 3 aggregate interface.
201611140181
Symptom: The MPU operates incorrectly during traffic forwarding when certain conditions exist.
Condition: This symptom might occur if the following conditions exist:
Multicast VPN is configured.
A Layer 3 aggregate interface is connected to the private network.
201611140167
Symptom: Traffic forwarding fails when POPGO forwarding is enabled for MPLS L3VPN.
Condition: This symptom might occur if POPGO forwarding is enabled for MPLS L3VPN.
201611110642
Symptom: The router might reboot unexpectedly when NetStream, PBR, and ACL settings are repeatedly configured and deleted through NETCONF.
Condition: This symptom might occur if NetStream, PBR, and ACL settings are repeatedly configured and deleted through NETCONF.
201611140097
Symptom: The router reboots unexpectedly after certain operations.
Condition: This symptom might occur if the following operations are performed:
a. Change the link type of a port from Layer 2 to Layer 3 on an SIC-4GSW card.
b. When the port is forwarding Layer 3 traffic, change its link type to Layer 2, and create a VLAN interface.

27
201611140175
Symptom: MPLS L3VPN traffic forwarding fails on an IRF fabric after a master/subordinate switchover.
Condition: This symptom might occur if the following conditions exist:
Direct routes and OSPF routes are imported to VPN instances.
An IRF master/subordinate switchover occurs.
201611110649
Symptom: The router operates incorrectly when EAD assistant and free IP are configured.
Condition: This symptom might occur if EAD assistant and free IP are configured.
201611160600
Symptom: An IRF subordinate member reboots unexpectedly when a multidevice Layer 2 aggregate interface is deleted.
Condition: This symptom might occur if the following conditions exist on the IRF fabric:
a. Port isolation is enabled on the multidevice Layer 2 aggregate interface.
b. The Layer 2 aggregate interface is deleted.
201611250648
Symptom: The EAD assistant feature cannot operate correctly. Specifically, if only free IPs are configured but no redirect URL is configured, unauthenticated users cannot access webpages on the free IPs. If both free IPs and the redirect URL are configured, unauthenticated users are redirected to the redirect URL, but the URL keeps being refreshed and cannot be opened.
Condition: None.
Resolved problems in CMW710-R0411
201609120130
Symptom: The extra "broadcasts" and "multicasts" fields appear in the incoming traffic statistics for an E1-F interface on an MSR router.
Condition: This symptom occurs if detailed information for an E1-F interface is displayed by using the display interface command.
201609130134
Symptom(1): CVE-2016-4953
Condition(1): An attacker who knows the origin timestamp and can send a spoofed packet containing a CRYPTO-NAK to an ephemeral peer target before any other response is sent can demobilize that association.
Symptom(2): CVE-2016-4954
Condition(2): An attacker who is able to spoof packets with correct origin timestamps from enough servers before the expected response packets arrive at the target machine can affect some peer variables and, for example, cause a false leap indication to be set.
Symptom(3): CVE-2016-4956
Condition(3): The fix for NtpBug2978 does not cover broadcast associations, so broadcast clients can be triggered to flip into interleave mode.
201609130162
Symptom: An MSR router reboots unexpectedly because of memory exhaustion.

28
Condition: This symptom might occur if the router is enabled with SNMP and SNMP notifications and a user Telnets to the router by using a username longer than 253 bytes.
201609130133
Symptom: An dual-MPU MSR4000 router cannot deploy QoS queuing configuration after an active/standby switchover.
Condition: This symptom occurs if an active/standby switchover occurs on the router.
201609130139
Symptom(1): CVE-2015-8138.
Condition(1): To distinguish legitimate peer responses from forgeries, a client attempts to verify a response packet by ensuring that the origin timestamp in the packet matches the origin timestamp it transmitted in its last request. A logic error exists that allows packets with an origin timestamp of zero to bypass this check whenever there is not an outstanding request to the server.
Symptom(2): CVE-2015-7979.
Condition(2): An off-path attacker can send broadcast packets with bad authentication (wrong key, mismatched key, incorrect MAC, etc) to broadcast clients. It is observed that the broadcast client tears down the association with the broadcast server upon receiving just one bad packet.
Symptom(3): CVE-2015-7974.
Condition(3): Symmetric key encryption uses a shared trusted key. The reported title for this issue was "Missing key check allows impersonation between authenticated peers" and the report claimed "A key specified only for one server should only work to authenticate that server, other trusted keys should be refused." Except there has never been any correlation between this trusted key and server v. clients machines and there has never been any way to specify a key only for one server. We have treated this as an enhancement request, and ntp-4.2.8p6 includes other checks and tests to strengthen clients against attacks coming from broadcast servers.
Symptom(4): CVE-2015-7973.
Condition(4): If an NTP network is configured for broadcast operations, then either a man-in-the-middle attacker or a malicious participant that has the same trusted keys as the victim can replay time packets.
201609130438
Symptom: BFD MAD does not take effect in an IRF system.
Condition: This symptom occurs if two IRF fabrics configured with BFD MAD are connected and they exchange BFD MAD packets.
201609130143
Symptom(1): CVE-2016-1550
Condition(1): Packet authentication tests have been performed using memcmp() or possibly bcmp(), and it is potentially possible for a local or perhaps LAN-based attacker to send a packet with an authentication payload and indirectly observe how much of the digest has matched.
Symptom(2): CVE-2016-1551
Condition(2): While the majority OSes implement martian packet filtering in their network stack, at least regarding 127.0.0.0/8, a rare few will allow packets claiming to be from 127.0.0.0/8 that arrive over physical network. On these OSes, if ntpd is configured to use a reference clock an attacker can inject packets over the network that look like they are coming from that reference clock.
Symptom(3): CVE-2016-2519
Condition(3): ntpq and ntpdc can be used to store and retrieve information in ntpd. It is possible to store a data value that is larger than the size of the buffer that the ctl_getitem() function of

29
ntpd uses to report the return value. If the length of the requested data value returned by ctl_getitem() is too large, the value NULL is returned instead. There are 2 cases where the return value from ctl_getitem() was not directly checked to make sure it's not NULL, but there are subsequent INSIST() checks that make sure the return value is not NULL. There are no data values ordinarily stored in ntpd that would exceed this buffer length. But if one has permission to store values and one stores a value that is "too large", then ntpd will abort if an attempt is made to read that oversized value.
Symptom(4): CVE-2016-1547
Condition(4): For ntp-4 versions up to but not including ntp-4.2.8p7, an off-path attacker can cause a preemptable client association to be demobilized by sending a crypto NAK packet to a victim client with a spoofed source address of an existing associated peer. This is true even if authentication is enabled.
Furthermore, if the attacker keeps sending crypto NAK packets, for example one every second, the victim never has a chance to reestablish the association and synchronize time with that legitimate server.
For ntp-4.2.8 thru ntp-4.2.8p6 there is less risk because more stringent checks are performed on incoming packets, but there are still ways to exploit this vulnerability in versions before ntp-4.2.8p7.
Symptom(5): CVE-2016-1548
Condition(5): It is possible to change the time of an ntpd client or deny service to an ntpd client by forcing it to change from basic client/server mode to interleaved symmetric mode. An attacker can spoof a packet from a legitimate ntpd server with an origin timestamp that matches the peer->dst timestamp recorded for that server. After making this switch, the client will reject all future legitimate server responses. It is possible to force the victim client to move time after the mode has been changed. Ntpq gives no indication that the mode has been switched.
Symptom(6): CVE-2015-7704
Condition(6): The fix for NtpBug2901 in ntp-4.2.8p4 went too far, breaking peer associations.
Resolved problems in CMW710-R0304
201504210231
Symptom: CVE-2015-1799
Condition: Authentication doesn't protect symmetric associations against DoS attacks.
201504230275
Symptom: A router replies with a re-INVITE message with the Referred-By header field after receiving a REFER request without the Referred-By header field from a Lync server.
Condition: This symptom occurs when a Lync server sends a REFER request without the Referred-By header field to the router.
201504230289
Symptom: A called phone rings once before going on-hook.
Condition: This symptom occurs if the following conditions exist:
The calling router and called router use different codecs.
The called router connects to the called phone through a VE interface.
201505110326
Symptom: NATed packets fail to be forwarded after the original route becomes unavailable.
Condition: This symptom might occur if the interface used as the backup outgoing interface is not configured with NAT.

30
201505150401
Symptom: A router configured with IPsec fails to be authenticated by a Comware-V5-based peer device.
Condition: This symptom might occur if the router is configured with an IKE-based IPsec policy and the PFS feature is enabled for the IPsec policy.
Resolved problems in CMW710-E0302P06
201411280347
Symptom: When the MTU of a physical interface is configured greater than 1500 bytes, the interface still uses 1492 as the MTU.
Condition: This symptom occurs when the MTU of the physical interface bound to PPPoE is not 1500.
Workaround: For TPC application, modify the TCP MSS on the dialer or VT interface to avoid improper packet fragmentation.
201502020298
Symptom: On an IRF fabric formed by MSR4000 routers and configured with multichassis Layer 3 aggregation, after a master/subordinate switchover, all users that log in through Selected interfaces on the rebooted router are logged out.
Condition: This symptom occurs when the IRF fabric formed by MSR4000 routers acts as the PPPoE server and the multichassis Layer 3 aggregate interface is used to respond to PPPoE login request.
Workaround: None.
201502100609
Symptom: In an FR L2VPN with one end as an FR network and the other end as an Ethernet link, CEs cannot communicate.
Condition: This symptom occurs when one end of the FR L2VPN is an FR network and the other end is an Ethernet link.
Workaround: None.
201501290181
Symptom: When a L2VPN cross-connect is bound to a Layer 3 aggregate interface, receiving LACPDUs times out, and the aggregation group member ports flap frequently.
Condition: This symptom occurs when the L2VPN cross-connect is bound to a Layer 3 aggregate interface.
Workaround: None.
201501080118
Symptom: The VAM process reboots repeatedly.
Condition: This symptom occurs when the hub device also acts as the VAM server.
Workaround: Use a separate device as the VAM server.
201411140486
Symptom: Ping packets are lost on an eight-wire G.SHDSL.BIS EFM interface of the MSR router after the interface is shut down and then brought up.
Condition: This symptom might occur if the EFM interface is connected to a Cisco device.
31
201502150313
Symptom: Packet loss occurs on an interface that is configured with both policy nesting and CBQ.
Condition: This symptom might occur if the interface has been forwarding traffic at near wire rate for a long time.
201502030476
Symptom: The MSR router forwards some packets out of their incoming interface after an active/standby link switchover.
Condition: This symptom might occur if the active/standby link switchover occurs when the router is forwarding a large amount of traffic.
201502270045
Symptom: The serial communication protocol goes down and LCP packets are lost on a serial interface when it is processing bidirectional traffic during the T1 delay test.
Condition: This symptom might occur if the qos qmtoken 1 command is executed on the interface.
201503090250
Symptom: The MSR router does not update the media channel after it receives a re-INVITE message with only the c field updated.
Condition: This symptom might occur if the MSR router receives a re-INVITE message with only the c field updated.
201503160098
Symptom: CAR does not support the bandwidth percentage method.
Condition: This symptom might occur if CAR is configured by using the bandwidth percentage method.
201407180184
Symptom: A local PBR policy does not take effect when no other services are configured.
Condition: This symptom might occur if only a local PBR policy is configured on the router.
Resolved problems in CMW710-E0102
RTV7D000933
Symptom: The fragments can’t be filtered by ACL.
Condition: The fragments can’t be filtered by ACL when using fragment in the rule.
RTV7D000932
Symptom: The statuses of the router in the VRRP group are both Master when using MD5 authentication mode.
Condition: Using MD5 authentication mode.
Resolved problems in CMW710-E0006P02
CM13040119
Symptom: The devices testing failed for manufacture.
Condition: Test for manufacturing devices.

32
Support and other resources
Accessing Hewlett Packard Enterprise Support
For live assistance, go to the Contact Hewlett Packard Enterprise Worldwide website:
www.hpe.com/assistance
To access documentation and support services, go to the Hewlett Packard Enterprise Support Center website:
www.hpe.com/support/hpesc
Information to collect:
Technical support registration number (if applicable).
Product name, model or version, and serial number.
Operating system name and version.
Firmware version.
Error messages.
Product-specific reports and logs.
Add-on products or components.
Third-party products or components.
Documents
To find related documents, see the Hewlett Packard Enterprise Support Center website at http://www.hpe.com/support/hpesc.
Enter your product name or number and click Go. If necessary, select your product from the resulting list.
For a complete list of acronyms and their definitions, see HPE FlexNetwork technology acronyms.
Related documents
The following documents provide related information:
HPE FlexNetwork MSR2000 Routers Installation Guide
HPE FlexNetwork MSR3000 Routers Installation Guide
HPE FlexNetwork MSR4000 Routers Installation Guide
HPE FlexNetwork MSR2000 Routers Quick Start
HPE FlexNetwork MSR3000 Routers Quick Start
HPE FlexNetwork MSR4000 Routers Quick Start
HPE FlexNetwork MSR Router Series Interface Module Guide
HPE FlexNetwork MSR2000/3000/4000 Routers Compliance and Safety Manual
About the HPE FlexNetwork MSR Router Series Command References(V7)
HPE FlexNetwork MSR Router Series ACL and QoS Command Reference(V7)
HPE FlexNetwork MSR Router Series EVI Command Reference(V7)
HPE FlexNetwork MSR Router Series Fundamentals Command Reference(V7)

33
HPE FlexNetwork MSR Router Series High Availability Command Reference(V7)
HPE FlexNetwork MSR Router Series Interface Command Reference(V7)
HPE FlexNetwork MSR Router Series IP Multicast Command Reference(V7)
HPE FlexNetwork MSR Router Series Layer 2 - LAN Switching Command Reference(V7)
HPE FlexNetwork MSR Router Series Layer 2 - WAN Access Command Reference(V7)
HPE FlexNetwork MSR Router Series Layer 3 - IP Routing Command Reference(V7)
HPE FlexNetwork MSR Router Series Layer 3 - IP Services Command Reference(V7)
HPE FlexNetwork MSR Router Series MPLS Command Reference(V7)
HPE FlexNetwork MSR Router Series NEMO Command Reference(V7)
HPE FlexNetwork MSR Router Series Network Management and Monitoring Command Reference(V7)
HPE FlexNetwork MSR Router Series OAA Command Reference(V7)
HPE FlexNetwork MSR Router Series OpenFlow Command Reference(V7)
HPE FlexNetwork MSR Router Series Probe Command Reference(V7)
HPE FlexNetwork MSR Router Series Security Command Reference(V7)
HPE FlexNetwork MSR Router Series Virtual Technologies Command Reference(V7)
HPE FlexNetwork MSR Router Series Voice Command Reference(V7)
HPE FlexNetwork MSR Router Series WLAN Command Reference(V7)
About the HPE FlexNetwork MSR Router Series Configuration Guides(V7)
HPE FlexNetwork MSR Router Series ACL and QoS Configuration Guide(V7)
HPE FlexNetwork MSR Router Series EVI Configuration Guide(V7)
HPE FlexNetwork MSR Router Series Fundamentals Configuration Guide(V7)
HPE FlexNetwork MSR Router Series High Availability Configuration Guide(V7)
HPE FlexNetwork MSR Router Series Interface Configuration Guide(V7)
HPE FlexNetwork MSR Router Series IP Multicast Configuration Guide(V7)
HPE FlexNetwork MSR Router Series Layer 2 - LAN Switching Configuration Guide(V7)
HPE FlexNetwork MSR Router Series Layer 2 - WAN Access Configuration Guide(V7)
HPE FlexNetwork MSR Router Series Layer 3 - IP Routing Configuration Guide(V7)
HPE FlexNetwork MSR Router Series Layer 3 - IP Services Configuration Guide(V7)
HPE FlexNetwork MSR Router Series MPLS Configuration Guide(V7)
HPE FlexNetwork MSR Router Series NEMO Configuration Guide(V7)
HPE FlexNetwork MSR Router Series Network Management and Monitoring Configuration Guide(V7)
HPE FlexNetwork MSR Router Series OAA Configuration Guide(V7)
HPE FlexNetwork MSR Router Series OpenFlow Configuration Guide(V7)
HPE FlexNetwork MSR Router Series Probe Configuration Guide(V7)
HPE FlexNetwork MSR Router Series Security Configuration Guide(V7)
HPE FlexNetwork MSR Router Series Virtual Technologies Configuration Guide(V7)
HPE FlexNetwork MSR Router Series Voice Configuration Guide(V7)
HPE FlexNetwork MSR Router Series WLAN Configuration Guide(V7)

34
Documentation feedback
Hewlett Packard Enterprise is committed to providing documentation that meets your needs. To help us improve the documentation, send any errors, suggestions, or comments to Documentation Feedback ([email protected]). When submitting your feedback, include the document title, part number, edition, and publication date located on the front cover of the document. For online help content, include the product name, product version, help edition, and publication date located on the legal notices page.

35
Appendix A Feature list
Hardware features
Table 5 MSR1000 specifications
Item MSR1002-4 MSR1003-8S
Console/AUX port 1 1
USB port 1 1
Gigabit Ethernet port 5 10
SFP port 1 N/A
Asynchronous/synchronous serial interface
1 N/A
Memory 1 GB DDR3 1 GB DDR3
Flash 256 MB 256 MB
SIC/DSIC slot 2 SIC slot (1 DSIC slot) 3 SIC slots (1 DSIC slot)
Dimensions (H × W × D)
(excluding rubber feet and mounting brackets)
44.2 × 360 × 300 mm (1.74 × 14.17 × 11.81 in)
44.2 × 360 × 300 mm (1.74 × 14.17 × 11.81 in)
AC power supply Rated voltage range: 90 VAC to 264 VAC @ 50 Hz/60 Hz
Rated voltage range: 90 VAC to 264 VAC @ 50 Hz/60 Hz
Rated power for AC power supply 30 W 30 W
Operating temperature 0°C to 45°C (32°F to 113°F) 0°C to 45°C (32°F to 113°F)
Relative humidity
(noncondensing) 5% to 90% 5% to 90%
Table 6 MSR2000/MSR2000 TAA specifications
Item MSR2003/MSR2003T
AA MSR2004-24 MSR2004-48
Console/AUX port 1 1 1
USB console port 1 - -
USB port 1 1 1
GE WAN port 2
GE LAN port - 3 3
SFP port - 1 -
Memory 1GB DDR3 1GB DDR3 1GB DDR3
Flash/CF 256MB Flash 256MB CF 256MB CF
SIC/DSIC slot
3 SIC slots
(Slots 1 and 2 can be used for a DSIC interface module by removing the slot divider.)
4 SIC slots 4 SIC slots

36
Dimensions (H × W × D)
(excluding rubber feet and mounting brackets)
360mm×305.3mm×44.2mm
440mm×363.5mm×44.2 440mm×403.5mm×44.2
AC power supply Rated voltage range: 100 VAC to 240 VAC @ 50 Hz/60 Hz
DC power supply - - Rated voltage range:
-48V d.c.~-60V d.c
Maximum power for AC/DC power supply
54W 54W 150W
Operating temperature 0 ~ 45℃
Relative humidity
(noncondensing) 5% to 90%
Table 7 MSR3000/MSR3000 TAA specifications
Item MSR3012 MSR3024/MSR
3024 TAA MSR3044 MSR3064
CON/AUX ports 1
USB console ports 1
USB ports 2
Gigabit Ethernet ports 3
SIC/DSIC slots 2 SIC slots 4 SIC slots/2 DSIC slots
HMIM slots 1 2 4 6
VPM slots 1 1 2 2
Memory DDR3
1 GB/2 GB
DDR3
2 GB (default)
4 GB (maximum)
DDR3
2 GB (default)
4 GB (maximum)
CF card memory (inside)
256 MB (default)
CF card memory (outside)
- 4 GB (maximum)
CF card slot 0 1
Dimensions (H × W × D) (excluding rubber feet and mounting brackets)
44.2 × 440 × 484.3 mm
44.2 × 440 × 484.3 mm
88.1 × 440 × 480 mm
130.5 × 440 × 480 mm
AC power supply Rated voltage range: 100 VAC to 240 VAC @ 50 Hz/60 Hz
DC power supply Rated voltage range: –48 VDC to –60 VDC
Maximum power for AC/DC power supply
125 W 125 W 300 W 300 W
Maximum power for PoE power supply
- 275 W 750 W 750 W
Maximum power for each PoE port
15.4 W

37
RPS power supply 800 W -
Power pluggable and buckup
- Dule power
Operating temperature 0°C to 45°C (32°F to 113°F)
Relative humidity
(noncondensing) 5% to 90%
Table 8 MSR4000 specifications
Item MSR4060 MSR4080
MPU slot 2
SPU slot 1
HMIM slot 6 8
Dimensions (H × W × D), excluding rubber feet and mounting brackets
175.1 × 440 × 480 mm 219.5 × 440 × 480 mm
Power pluggable and buckup
N+1 N+1
Operating temperature 0°C to 45°C (32°F to 113°F)
Operating humidity (noncondensing)
5% to 90%
Table 9 MSR4000/MSR4000 TAA MPU Specification
Item Specification
Console port 1
AUX port 1
GE management port 1
USB console port 1
USB port 1
Memory 2 GB DDR3 (default)
4 GB DDR3 (maximum)
CF card 512 MB (default)
4 GB (maximum)
CF card slot 1
Flash 8 MB
Table 10 MSR4000 SPU Specification
Item SPU-100 SPU-200&SPU-300
USB port 2
VPM slot 2

38
Combo 4
SFP+ port 0 1
Applicable router model MSR4060/MSR4080
Applicable MPU MPU-100
Table 11 MSR2004-24 AC power module specifications
Item Specification
Rated input voltage range 100 VAC to 240 VAC @ 50 Hz or 60 Hz
Rated power 150 W
Table 12 MSR2004-48 DC power module specifications
Item Specification
Rated input voltage range –48 VDC to –60 VDC
Rated power 150 W
Table 13 MSR3044/MSR3064/MSR4060/MSR4080 AC power module specifications
Item Specification
Model PSR300-12A1
Rated input voltage range 100 VAC to 240 VAC @ 50 Hz or 60 Hz
Max power 300 W
Table 14 MSR3044/MSR3064/MSR4060/MSR4080 DC power module specifications
Item Specification
Model PSR300-12D2
Rated input voltage range –48 VDC to –60 VDC
Max power 300 W
Table 15 MSR3044/MSR3064/MSR4060/MSR4080 PoE power module specifications
Item Specification
Model PSR750-A
Rated input voltage range 100 VAC to 240 VAC @ 50 Hz or 60 Hz
Max power 750 W
Table 16 MSR series routes Module List
Module Description
SIC Ethernet interface modules:
4-port 10/100 Mbps Ethernet L2 switching module (RJ45) (SIC-4FSW)

39
1-port 10/100 Mbps Ethernet electrical SIC interface module (RJ45) (SIC-1FEA)
1-port 100 Mbps Ethernet electrical SIC interface module-SIC-1FEF
4-port 10/100 Mbps Ethernet L2 switching module-PoE card(SIC-4FSW-POE)
1-port 10/100/1000BASE-T(RJ45) and 100BASE-FX/1000BASE-X(SFP,Combo)Ethernet SIC module(RT-SIC-1GEC-V2(JG738A))
4-port 10/100/1000BASE-T Ethernet L2 switching electrical SIC interface module(RT-SIC-4GSW(JG739A))
4-port 10/100/1000BASE-T Ethernet L2 switching electrical SIC interface module-PoE(RT-SIC-4GSWP(JG740A))
4-port 100BASE-FX/1000BASE-X(SFP) Ethernet L2/L3 SIC Module-RT-SIC-4GSWF
WAN interface modules:
1-port enhanced synchronous/asynchronous serial SIC interface module (SIC-1SAE)
1-port fractional E1 SIC interface module (SIC-1E1-F-V3)
1-port E1/CE1/PRI SIC interface module (SIC-1EPRI)
1-port analog modem SIC interface module (SIC-1AM)
8-port asynchronous serial interface card (SIC-8AS)
16-port asynchronous serial interface card (SIC-16AS)
1-port ISDN BRI S/T interface card (SIC-1BS)
2-port fractional E1 interface module (SIC-2E1-F)
3G access module ( RT-SIC-3G-HSPA)
CDMA 2000 1x RTT/1x EV-DO Rev.0/1x EV-DO Rev.A 3G access module ( RT-SIC-3G-CDMA)
1-port ADSL over POTS SIC interface module (SIC-1ADSL)
1 port E1/CE1/PRI SIC interface module(SIC-1EPRI-V3)
4G LTE Verizon SIC module(RT-SIC-4G-LTE-V(JG742A))
4G LTE AT&T SIC module(SIC-4G-LTE-A(JG743A))
4G LTE Global SIC module(RT-SIC-4G-LTE-G(JG744A))
2-port enhanced synchronous/asynchronous serial SIC interface module(RT-SIC-2SAE(JG736A))
4-port enhanced synchronous/asynchronous serial SIC interface module(RT-SIC-4SAE(JG737A))
HPE MSR 4GLTE SIC Mod for CDMA/WCDMA (JG742B)
HPE MSR 4G LTE SIC Mod for ATT (JG743B)
HPE MSR 4GLTE SIC Mod for Global (JG744B)
HPE MSR HSPA+/WCDMA SIC Module (JG929A)
Voice interface modules:
1-port voice module subscriber circuit SIC interface module (SIC-1FXS)
2-port voice module subscriber circuit SIC interface module (SIC-2FXS)
1-port voice module FXO SIC interface module (SIC-1FXO)
2-port voice module FXO SIC interface module (SIC-2FXO)
1-channel E1 voice SIC interface module (SIC-1VE1)
1-channel T1 voice SIC interface module (SIC-1VT1)
1-port ISDN BRI S/T voice interface card (SIC-1BSV)
2-port ISDN BRI S/T voice interface card (SIC-2BSV)
2-port voice subscriber circuit & 1-port voice AT0 analog trunk interface card-SIC-2FXS1FXO
1-port E1 / T1 Voice SIC Module(JH240A)
DSIC
9-port 10/100 Mbps Ethernet L2 switching module (RJ45) (DSIC-9FSW)
4-port voice subscriber circuit & 1-port voice AT0 analog trunk interface card (DSIC-4FXS1FXO)
9-port 10/100 Mbps Ethernet L2 switching module -PoE card (DSIC-9FSW-POE)

40
1-port 8-wire G.SHDSL (RJ45) DSIC Module
HMIM
Ethernet interface modules:
2-port 10M/100/1000M Ethernet electrical HMIM interface module (RJ45) (HMIM-2GEE)
4-port 10M/100/1000M Ethernet electrical HMIM interface module (RJ45) (HMIM-4GEE)
8-port 10M/100/1000M Ethernet electrical HMIM interface module (RJ45) (HMIM-8GEE)
2-port 1000BASE-X HMIM Module (HMIM-2GEF)
4-port 1000BASE-X HMIM Module (HMIM-4GEF)
8-port 1000BASE-X HMIM Module (HMIM-8GEF)
24-port Gig-T Switch HMIM Module (HMIM-24GSW)
24-port Gig-T PoE Switch HMIM Module (HMIM-24GSW-POE)
8-port 10/100/1000BASE-T(RJ45)+2-port100BASE-FX/1000BASE-X(SFP,Combo) Ethernet L2 switching HMIM module(RT-HMIM-8GSW(JG741A))
8-port 100BASE-FX/1000BASE-X / 4-port 1000BASE-T (Combo) L2/L3 HMIM Module (JH238A)
WAN interface modules:
2 port CE1/PRI interface module (HMIM-2E1)
4 port CE1/PRI interface module (HMIM-4E1)
8 port CE1/PRI interface module (HMIM-8E1)
4-port fractional E1 interface module (HMIM-4E1-F)
8-port fractional E1 interface module (HMIM-8E1-F)
2 port CT1/PRI interface module (HMIM-2T1)
8 port CT1/PRI interface module (HMIM-8T1)
4-port fractional T1 interface module HMIM-4T1-F)
8-port fractional T1 interface module HMIM-8T1-F)
1-port T3/CT3 compatible interface module (HMIM-1CT3)
1-port T3/CT3 compatible interface module (HMIM-1CE3)
2 channel enhanced synchronous/asynchronous interface module (HMIM-2SAE)
4 channel enhanced synchronous/asynchronous interface module (HMIM-4SAE)
8 channel enhanced synchronous/asynchronous interface module (HMIM-8SAE)
8 port asynchronous serial interface panel (RJ45) (HMIM-8ASE)
16 port asynchronous serial interface panel (RJ45) (HMIM-16ASE)
1-port OC-3 / STM-1 CPOS HMIM Module (HMM-1CPOS)
2-port OC-3 / STM-1 CPOS HMIM Module (HMIM-2CPOS)
1-port OC-3c / STM-1c ATM SFP HMIM Module (HMIM-ATMOC3)
8-port E1 / CE1 / T1 / CT1 / PRI HMIM Module (JH169A)
4-port E1 / CE1 / T1 / CT1 / PRI HMIM Module (JH170A)
2-port E1 / CE1 / T1 / CT1 / PRI HMIM Module (JH171A)
8-port E1 / Fractional E1 / T1 / Fractional T1 HMIM Module (JH172A)
4-port E1 / Fractional E1 / T1 / Fractional T1 HMIM Module (JH173A)
2-port E1 / Fractional E1 / T1 / Fractional T1 HMIM Module (JH174A)
1-port Clear Channel E3/T3 HMIM Module(JH449A)
Voice interface modules:
16-port voice module subscriber circuit interface board(HMIM-16FXS)
1 channel E1 voice HMIM interface module (HMIM-1VE1)
2 channel E1 voice HMIM interface module (HMIM-2VE1)
1 channel T1 voice HMIM interface module (HMIM-1VT1)
2 channel T1 voice HMIM interface module (HMIM-2VT1)
4-port voice module subscriber circuit interface board (HMIM-4FXS)
4-port voice module FXO interface module (HMIM-4FXO)

41
4 channel voice processing board E&M trunk interface module (HMIM-4EM)
VPM
128-channel voice processing module (RT-VPM2-128)
256-channel voice processing module (RT-VPM2-256)
512-channel voice processing module (RT-VPM2-512)
HMIM Adapter
0.5U MIM to HMIM adapter (HMIM Adapter)
1U MIM to HMIM adapter (HMIM Adapter-H)
MIM(need to config the HMIM-Adapter)
Ethernet interface modules:
1-port 10M100M Ethernet electrical MIM interface module (RJ45) (MIM-1FE)
2-port 10M/100M Ethernet electrical MIM interface module (RJ45) (MIM-2FE)
4-port 10M/100M Ethernet electrical MIM interface module (RJ45) (MIM-4FE)
1-port 1000M Ethernet electrical MIM interface module (RJ45) (MIM-1GBE)
2-port 1000M Ethernet electrical MIM interface module (RJ45) (MIM-2GBE)
1-port 1000M Ethernet electrical MIM interface module (RJ45) (MIM-1GEF)
2-port 1000M Ethernet electrical MIM interface module (RJ45) (MIM-2GEF)
WAN interface modules:
2 channel enhanced synchronous/asynchronous interface module (MIM-2SAE)
4 channel enhanced synchronous/asynchronous interface module (MIM-4SAE)
8 channel enhanced synchronous/asynchronous interface module (MIM-8SAE)
8 port asynchronous serial interface panel (RJ45) (MIM-8ASE)
16 port asynchronous serial interface panel (RJ45) (MIM-16ASE)
1 port CE1/PRI interface module (MIM-1E1)
2 port CE1/PRI interface module (MIM-2E1)
4 port CE1/PRI interface module (MIM-4E1)
8 port E1 interface module (75ohm) (MIM-8E1 (75))
1-port fractional E1 interface module (MIM-1E1-F)
2-port fractional E1 interface module (MIM-2E1-F)
4-port fractional E1 interface module (MIM-4E1-F)
8 port E1 interface module (75ohm) (MIM-8E1 (75)-F)
2 port CT1/PRI interface module (MIM-2T1)
8 port T1 interface module (MIM-8T1)
2-port fractional T1 interface module MIM-2T1-F)
4-port fractional T1 interface module MIM-4T1-F)
8-port fractional T1 interface module MIM-8T1-F)
1-port T3/CT3 compatible interface module (MIM-1CT3-V2)
1-port T3/CT3 compatible interface module (MIM-1CE3-V2)
1-port SDH/SONET interface module (MIM-1POS-V2)
1-port dual-pair G.SHDSL interface module (MIM-1SHL-4W)
HPE MSR OAP MIM Module with VMware vSphere (JG532A)
Voice interface modules:
1 channel E1 voice MIM interface module (MIM-1VE1)
1 channel T1 voice MIM interface module (MIM-1VT1)
2 channel E1 voice MIM interface module (MIM-2VE1)
2 channel T1 voice MIM interface module (MIM-2VT1)
4-port voice module subscriber circuit interface board (MIM-4FXS)
2-port voice module FXO interface module (MIM-2FXO)
4-port voice module FXO interface module (MIM-4FXO)
8-port voice module FXS-FXO interface module (MIM-8FXS-8FXO)
4 channel voice processing board E&M trunk interface module (MIM-4EM)

42
4-port ISDN BRI S/T voice interface card (MIM-4BSV)
16-port voice module subscriber circuit interface board (MIM-16FXS)
Table 17 Sierra Modem Module and Host/card compatibility matrix
HPE description Product code Module name
HPE MSR 4G LTE SIC Mod for Verizon JG742A Sierra-MC7750
HPE MSR 4G LTE SIC Mod for ATT JG743A Sierra-MC7700
HPE MSR 4G LTE SIC Mod for Global JG744A Sierra-MC7710
CAUTION:
The support and restriction of modules on HPE FlexNetwork MSR Routers Interface Configuration Guide(V7), Appendix Purchase Guide.
Software features
Table 18 MSR Series routers software features
Category Features
LAN protocol:
ARP (proxy ARP, free ARP, authorization ARP)
Ethernet_II
Ethernet_SNAP
VLAN (PORT-BASED VLAN/MAC-BASED VLAN/VLAN-BASED PORT ISOLATE/VLAN VPN)
802.3x
LACP(802.3ad)
802.1p
802.1Q
802.1x
QinQ
RSTP(802.1w)
MSTP(802.1s)
GVRP
PORT MUTILCAST suppression
EVI
WAN protocols:
PPP
PPPoE Client
DCC, Dialer Watch
ISDN
Modem
3G Modem
FR
IP services
Fast forwarding (unicast/multicast)
TCP
UDP

43
IP Option
IP unnumber
Policy routing (unicast/multicast)
Non-IP services: Netstream
IP application
Ping and Trace
DHCP Server
DHCP Client
DNS client
DNS Static
NQA
IP Accounting
NTP
Telnet
TFTP Client
FTP Client
FTP Server
IP route
Static routing management
Dynamic routing protocols:
RIP
OSPF
BGP
IS-IS
Multicast routing protocols:
IGMP
PIM-DM
PIM-SM
MBGP
MSDP
Routing policy
MPLS
LDP
LSPM
MPLS TE
MPLS FW
MPLS/BGP VPN
VPLS
IPv6
IPv6 basic functions
IPv6 ND
IPv6 PMTU
IPv6 FIB
IPv6 ACL
IPv6 transition technologies
NAT-PT
IPv6 tunneling
6PE, 6VPE
IPv6 routing
IPv6 static routing management
Multicast routing protocols:

44
MLD
PIM-DM
PIM-SM
PIM-SSM
AAA
Local authentication
Radius
HWTacacs
LDAP
Firewall
ASPF
ACL
FILTER
Security
Port security
IPSec
PORTAL
L2TP
NAT/NAPT
PKI
RSA
SSH V1.5/2.0
URPF
GRE
Reliability
VRRP
Backup center
BFD
IRF
L2 QoS
LR
Flow-base QOS Policy
Port-Based Mirroring
Packet Remarking
Priority Mapping
Port Trust Mode
Port Priority
Flow Filter
FlowControl
ACL
Traffic supervision CAR (Committed Access Rate)
LR (Line Rate)
Congestion management
FIFO, PQ, CQ, WFQ, CBQ, RTPQ
Congestion avoidance
WRED/RED
Traffic shaping GTS (Generic Traffic Shaping)
Other QOS technologies
MPLS QOS
cRTP/IPHC
Sub-interface QOS

45
Voice Interfaces
FXS
FXO
E&M
E1VI/T1VI
BSV
Voice Signaling R2
DSS1
SIP SIP
SIP Operation
Codec
G.711A law
G.711U law
G.723R53
G.723R63
G.729a
G.729R8
G.729bR8
Media Process RTP
Network management
SNMP V1/V2c/V3
MIB
SYSLOG
RMON
NETCONF
Local management
Command line management
License management
File system management
Auto-configure
Dual Image
User access management
Console interface login
AUX interface login
TTY interface login
Telnet (VTY) login
SSH login
FTP login
XMODEM

46
Appendix B Upgrading software This section describes how to upgrade system software while the router is operating normally or when the router cannot correctly start up.
Software types
The following software types are available:
Boot ROM image—A .bin file that comprises a basic section and an extended section. The basic section is the minimum code that bootstraps the system. The extended section enables hardware initialization and provides system management menus. You can use these menus to load application software and the startup configuration file or manage files when the device cannot correctly start up.
Comware image—Includes the following image subcategories:
Boot image—A .bin file that contains the Linux operating system kernel. It provides process management, memory management, file system management, and the emergency shell.
System image—A .bin file that contains the minimum feature modules required for device
operation and some basic features, including device management, interface management, configuration management, and routing. To have advanced features, you must purchase feature packages.
Feature package—Includes a set of advanced software features. Users purchase feature packages as needed.
Patch packages—Irregularly released packages for fixing bugs without rebooting the device. A patch package does not add new features or functions.
Comware software images that have been loaded are called "current software images." Comware images specified to load at the next startup are called "startup software images."
Boot ROM image, boot image, and system image are required for the system to work. These images might be released separately or as a whole in one .ipe package file. If an .ipe file is used, the system automatically decompresses the file, loads the .bin boot and system images and sets them as startup software images.
Upgrade methods
You can upgrade system software by using one of the following methods:
Upgrade method Remarks
Centralized devices upgrading from the CLI
You must reboot the router to complete the upgrade.
This method can interrupt ongoing network services.
Distributed devices upgrading from the CLI
You must reboot the router to complete the upgrade.
This method can interrupt ongoing network services.
Distributed devices ISSU This method upgrades the router with the least amount of downtime.
Managing files from the BootWare menu Use this method when the router cannot
correctly start up.

47
Preparing for the upgrade
Before you upgrade system software, complete the following tasks:
Set up the upgrade environment as shown in Table 20.
Configure routes to make sure that the router and the file server can reach each other.
Run a TFTP or FTP server on the file server.
Log in to the CLI of the router through the console port.
Copy the upgrade file to the file server and correctly set the working directory on the
TFTP or FTP server.
Make sure the upgrade has minimal impact on the network services. During the
upgrade, the router cannot provide any services.
IMPORTANT:
In the BootWare menu, if you choose to download files over Ethernet, the Ethernet port must be GE0 on an MSR2003, MSR2004-24, MSR2004-48, MSR3012, MSR3024, MSR3044, and MSR3064 router, and must be M-GE0 on an MSR4060 and MSR4080 router.
Table 19 Storage media
Model Storage medium Path Router Types
MSR2003 Flash flash:/ Centralized devices
MSR2004-24 Flash flash:/ Centralized devices
MSR2004-48 Flash flash:/ Centralized devices
MSR3012 CF card cfa0:/ Centralized devices
MSR3024 CF card cfa0:/ Centralized devices
MSR3044 CF card cfa0:/ Centralized devices
MSR3064 CF card cfa0:/ Centralized devices
MSR4060 CF card cfa0:/ Centralized devices
MSR4080 CF card cfa0:/ Distributed devices
Figure 1 Set up the upgrade environment

48
Centralized devices upgrading from the CLI
You can use the TFTP or FTP commands on the router to access the TFTP or FTP server to back up or download files.
Saving the running configuration and verifying the storage space
1. Save the running configuration
<HPE>save
The current configuration will be written to the device. Are you sure? [Y/N]:y
Please input the file name(*.cfg)[flash:/startup.cfg]
(To leave the existing filename unchanged, press the enter key):
Validating file. Please wait...
Configuration is saved to device successfully.
<HPE>
2. Identify the system software image and configuration file names and verify that the flash has sufficient space for the new system software image.
<HPE>dir
Directory of flash:
0 drw- - Aug 15 2012 12:03:13 diagfile
1 -rw- 84 Aug 15 2012 12:17:59 ifindex.dat
2 drw- - Aug 15 2012 12:03:14 license
3 drw- - Aug 15 2012 12:03:13 logfile
4 -rw- 11418624 Dec 15 2011 09:00:00 msr2000-cmw710-boot-a0005.bin
5 -rw- 1006592 Dec 15 2011 09:00:00 msr2000-cmw710-data-a0005.bin
6 -rw- 10240 Dec 15 2011 09:00:00 msr2000-cmw710-security-a0005.bin
7 -rw- 24067072 Dec 15 2011 09:00:00 msr2000-cmw710-system-a0005.bin
8 -rw- 1180672 Dec 15 2011 09:00:00 msr2000-cmw710-voice-a0005.bin
9 drw- - Aug 15 2012 12:03:13 seclog
10 -rw- 1632 Aug 15 2012 12:18:00 startup.cfg
11 -rw- 25992 Aug 15 2012 12:18:00 startup.mdb
262144 KB total (223992 KB free)
<HPE>
Downloading the image file to the router
Using TFTP
Download the system software image file, for example, msr2000.ipe to the flash on the router.
<HPE>tftp 192.168.1.100 get msr2000.ipe
% Total % Received % Xferd Average Speed Time Time Time Current
Dload Upload Total Spent Left Speed
100 35.9M 100 35.9M 0 0 559k 0 0:01:05 0:01:05 --:--:-- 546k
<HPE>

49
Using FTP
1. From FTP client view, download the system software image file (for example, msr2000.ipe) to the CF card on the router.
ftp> get msr2000.ipe
msr2000.ipe already exists. Overwrite it? [Y/N]:y
227 Entering passive mode (192,168,1,100,5,20)
125 Using existing data connection
226 Closing data connection; File transfer successful.
37691392 bytes received in 17.7 seconds (2.03 Mbyte/s)
[ftp]
2. Return to user view.
[ftp]quit
221 Service closing control connection
<HPE>
Specifying the startup image file
1. Specify the msr2000.ipe file as the main image file at the next reboot.
<HPE>boot-loader file flash:/msr2000.ipe main
Images in IPE:
msr2000-cmw710-boot-a0005.bin
msr2000-cmw710-system-a0005.bin
msr2000-cmw710-security-a0005.bin
msr2000-cmw710-voice-a0005.bin
msr2000-cmw710-data-a0005.bin
This command will set the main startup software images. Continue? [Y/N]:y
Add images to the device.
Successfully copied flash:/msr2000-cmw710-boot-a0005.bin to
flash:/msr2000-cmw710-boot-a0005.bin.
Successfully copied flash:/msr2000-cmw710-system-a0005.bin to
flash:/msr2000-cmw710-system-a0005.bin.
Successfully copied flash:/msr2000-cmw710-security-a0005.bin to
flash:/msr2000-cmw710-security-a0005.bin.
Successfully copied flash:/msr2000-cmw710-voice-a0005.bin to
flash:/msr2000-cmw710-voice-a0005.bin.
Successfully copied flash:/msr2000-cmw710-data-a0005.bin to
flash:/msr2000-cmw710-data-a0005.bin.
The images that have passed all examinations will be used as the main startup software
images at the next reboot on the device.
<HPE>
2. Verify that the file has been loaded.

50
<HPE> display boot-loader
Software images on the device:
Current software images:
flash:/msr2000-cmw710-boot-a0004.bin
flash:/msr2000-cmw710-system-a0004.bin
flash:/msr2000-cmw710-security-a0004.bin
flash:/msr2000-cmw710-voice-a0004.bin
flash:/msr2000-cmw710-data-a0004.bin
Main startup software images:
flash:/msr2000-cmw710-boot-a0005.bin
flash:/msr2000-cmw710-system-a0005.bin
flash:/msr2000-cmw710-security-a0005.bin
flash:/msr2000-cmw710-voice-a0005.bin
flash:/msr2000-cmw710-data-a0005.bin
Backup startup software images:
None
<HPE>
Rebooting and completing the upgrade
1. Reboot the router.
<HPE>reboot
Start to check configuration with next startup configuration file, please
wait.........DONE!
This command will reboot the device. Continue? [Y/N]:y
Now rebooting, please wait...
<HPE>
System is starting...
2. After the reboot is complete, verify that the system software image is correct.
<HPE> display version
HPE Comware Software, Version 7.1.042, Release 000702
Copyright (c) 2010-2013 Hewlett-Packard Development Company, L.P.
HPE MSR2003 uptime is 0 weeks, 0 days, 13 hours, 23 minutes Last
reboot reason : User reboot
Boot image: flash:/msr2000-cmw710-boot-a0005.bin
Boot image version: 7.1.040, Alpha 0005
System image: flash:/msr2000-cmw710-system-a0005.bin
System image version: 7.1.040, Alpha 0005
CPU ID: 0x1
1G bytes DDR3 SDRAM Memory
2M bytes Flash Memory
PCB Version: 3.0
CPLD Version: 1.0
Basic BootWare Version: 1.04
Extended BootWare Version: 1.04
[SLOT 0]AUX (Hardware)3.0 (Driver)1.0, (Cpld)1.0
[SLOT 0]GE0/0 (Hardware)3.0 (Driver)1.0, (Cpld)1.0
[SLOT 0]GE0/1 (Hardware)3.0 (Driver)1.0, (Cpld)1.0

51
[SLOT 0]CELLULAR0/0 (Hardware)3.0 (Driver)1.0, (Cpld)1.0
<HPE>
Distributed devices upgrading from the CLI
You can use the TFTP or FTP commands on the router to access the TFTP or FTP server to back up or download files.
Display the slot number of the active MPU
Perform the display device command in any view to display the slot number of the active MPU. By default, the standby MPU will automatically synchronize the image files from active MPU.
<HPE>display device
Slot No. Board Type Status Primary SubSlots
-----------------------------------------------------------------------------
0 MPU-100 Normal Master 0
1 MPU-100 Normal Standby 0
2 SPU-100 Normal N/A 10
<HPE>
Save the current configuration and verify the storge space
1. Perform the save command in any view to save the current configuration.
<HPE>save
The current configuration will be written to the device. Are you sure? [Y/N]:y
Please input the file name(*.cfg)[cfa0:/startup.cfg]
(To leave the existing filename unchanged, press the enter key):
Validating file. Please wait...
Configuration is saved to device successfully.
<HPE>
2. Perform the dir command in user view to identify the system software image and configuration file names and verify that the CF card has sufficient space for the new system software image.
<HPE>dir
Directory of cfa0:
0 drw- - Jan 07 2013 14:02:12 diagfile
1 -rw- 307 Jan 22 2013 17:02:02 ifindex.dat
2 drw- - Jan 07 2013 14:02:12 license
3 drw- - Jan 22 2013 13:42:00 logfile
4 -rw- 21412864 Jan 22 2013 16:49:00 MSR4000-cmw710-boot-r0005p01.bin
5 -rw- 1123328 Jan 22 2013 16:50:30 MSR4000-cmw710-data-r0005p01.bin
6 -rw- 11264 Jan 22 2013 16:50:26 MSR4000-cmw710-security-r0005p01.bin
7 -rw- 45056000 Jan 22 2013 16:49:34 MSR4000-cmw710-system-r0005p01.bin
8 -rw- 2746368 Jan 22 2013 16:50:26 MSR4000-cmw710-voice-r0005p01.bin
9 drw- - Jan 07 2013 14:02:12 seclog
10 -rw- 2166 Jan 22 2013 17:02:02 startup.cfg
11 -rw- 34425 Jan 22 2013 17:02:02 startup.mdb
507492 KB total (438688 KB free)

52
<HPE>
Download the image file to the router
Using TFTP
Perform the tftp get command in user view to download the system software image file, for example, msr4000.ipe to the CF card on the router.
<HPE>tftp 192.168.1.100 get msr4000.ipe
% Total % Received % Xferd Average Speed Time Time Time Current
Dload Upload Total Spent Left Speed
45 67.0M 45 30.4M 0 0 792k 0 0:01:26 0:00:39 0:00:47 844k
100 67.0M 100 67.0M 0 0 772k 0 0:01:28 0:01:28 --:--:-- 745k
<HPE>
Using FTP
1. Perform the get command in FTP client view to download the system software image file msr4000.ipe to the CF card on the router.
ftp> get msr4000.ipe
msr4000.ipe already exists. Overwrite it? [Y/N]:y
227 Entering passive mode (192,168,1,100,5,20)
125 Using existing data connection
226 Closing data connection; File transfer successful.
37691392 bytes received in 17.7 seconds (2.03 Mbyte/s)
[ftp]
2. Perform the quit command in FTP client view to return to user view.
[ftp]quit
221 Service closing control connection
<HPE>
Copy the image file to CF card root directory of the standby MPU
<HPE> copy msr4000.ipe slot1#cfa0:/
Copy cfa0:/msr4000.ipe to slot1#cfa0:/msr4000.ipe?[Y/N]:y
Copying file cfa0:/msr4000.ipe to slot1#cfa0:/ msr4000.ipe...Done.
Specifying the startup image file
1. Perform the boot-loader command in user view to d specify the msr4000.ipe file as the main image file for the active MPU on slot 0 at the next reboot.
<HPE>boot-loader file flash:/msr4000.ipe slot 0 main
Images in IPE:
msr4000-cmw710-boot-a0005.bin
msr4000-cmw710-system-a0005.bin
msr4000-cmw710-security-a0005.bin
msr4000-cmw710-voice-a0005.bin
msr4000-cmw710-data-a0005.bin
This command will set the main startup software images. Continue? [Y/N]:y
Add images to the device.
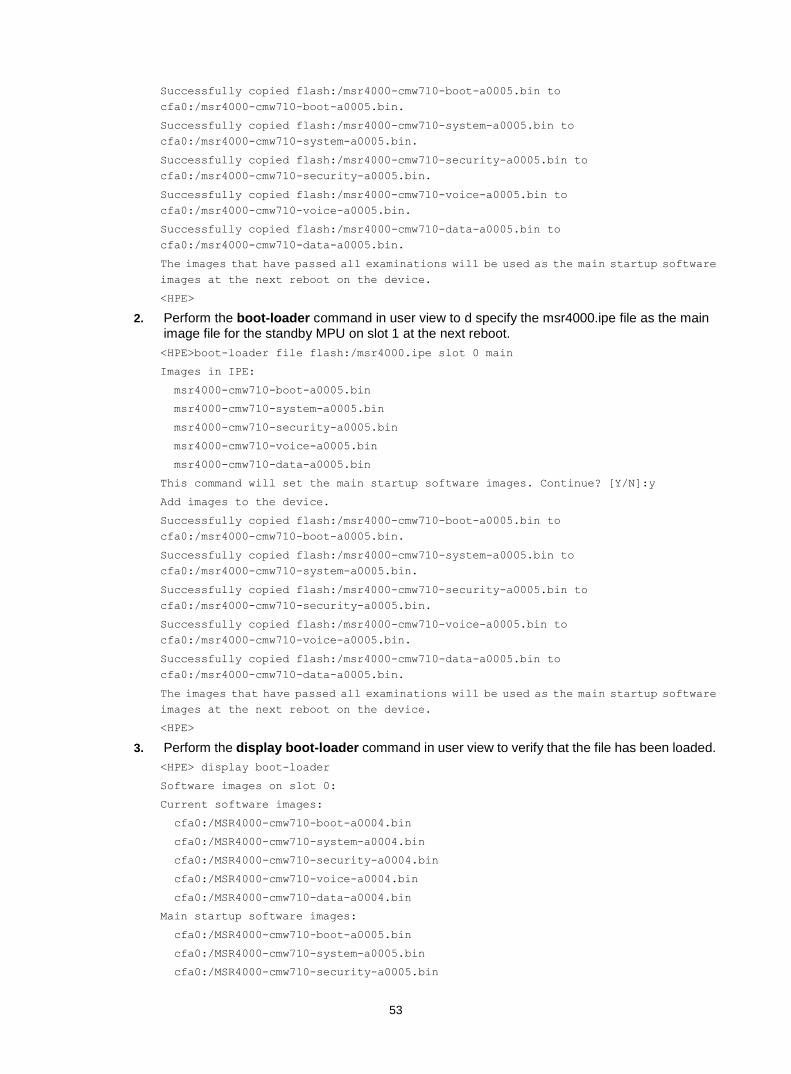
53
Successfully copied flash:/msr4000-cmw710-boot-a0005.bin to
cfa0:/msr4000-cmw710-boot-a0005.bin.
Successfully copied flash:/msr4000-cmw710-system-a0005.bin to
cfa0:/msr4000-cmw710-system-a0005.bin.
Successfully copied flash:/msr4000-cmw710-security-a0005.bin to
cfa0:/msr4000-cmw710-security-a0005.bin.
Successfully copied flash:/msr4000-cmw710-voice-a0005.bin to
cfa0:/msr4000-cmw710-voice-a0005.bin.
Successfully copied flash:/msr4000-cmw710-data-a0005.bin to
cfa0:/msr4000-cmw710-data-a0005.bin.
The images that have passed all examinations will be used as the main startup software
images at the next reboot on the device.
<HPE>
2. Perform the boot-loader command in user view to d specify the msr4000.ipe file as the main image file for the standby MPU on slot 1 at the next reboot.
<HPE>boot-loader file flash:/msr4000.ipe slot 0 main
Images in IPE:
msr4000-cmw710-boot-a0005.bin
msr4000-cmw710-system-a0005.bin
msr4000-cmw710-security-a0005.bin
msr4000-cmw710-voice-a0005.bin
msr4000-cmw710-data-a0005.bin
This command will set the main startup software images. Continue? [Y/N]:y
Add images to the device.
Successfully copied flash:/msr4000-cmw710-boot-a0005.bin to
cfa0:/msr4000-cmw710-boot-a0005.bin.
Successfully copied flash:/msr4000-cmw710-system-a0005.bin to
cfa0:/msr4000-cmw710-system-a0005.bin.
Successfully copied flash:/msr4000-cmw710-security-a0005.bin to
cfa0:/msr4000-cmw710-security-a0005.bin.
Successfully copied flash:/msr4000-cmw710-voice-a0005.bin to
cfa0:/msr4000-cmw710-voice-a0005.bin.
Successfully copied flash:/msr4000-cmw710-data-a0005.bin to
cfa0:/msr4000-cmw710-data-a0005.bin.
The images that have passed all examinations will be used as the main startup software
images at the next reboot on the device.
<HPE>
3. Perform the display boot-loader command in user view to verify that the file has been loaded.
<HPE> display boot-loader
Software images on slot 0:
Current software images:
cfa0:/MSR4000-cmw710-boot-a0004.bin
cfa0:/MSR4000-cmw710-system-a0004.bin
cfa0:/MSR4000-cmw710-security-a0004.bin
cfa0:/MSR4000-cmw710-voice-a0004.bin
cfa0:/MSR4000-cmw710-data-a0004.bin
Main startup software images:
cfa0:/MSR4000-cmw710-boot-a0005.bin
cfa0:/MSR4000-cmw710-system-a0005.bin
cfa0:/MSR4000-cmw710-security-a0005.bin

54
cfa0:/MSR4000-cmw710-voice-a0005.bin
cfa0:/MSR4000-cmw710-data-a0005.bin
Backup startup software images:
None
Software images on slot 1:
Current software images:
cfa0:/MSR4000-cmw710-boot-r0005p01.bin
cfa0:/MSR4000-cmw710-system-r0005p01.bin
cfa0:/MSR4000-cmw710-security-r0005p01.bin
cfa0:/MSR4000-cmw710-voice-r0005p01.bin
cfa0:/MSR4000-cmw710-data-r0005p01.bin
Main startup software images:
cfa0:/MSR4000-cmw710-boot-r0005p01.bin
cfa0:/MSR4000-cmw710-system-r0005p01.bin
cfa0:/MSR4000-cmw710-security-r0005p01.bin
cfa0:/MSR4000-cmw710-voice-r0005p01.bin
cfa0:/MSR4000-cmw710-data-r0005p01.bin
Backup startup software images:
None
Reboot and completing the upgrade
1. Perform the reboot command in user view to reboot the router.
<HPE>reboot
Start to check configuration with next startup configuration file, please
wait.........DONE!
This command will reboot the device. Continue? [Y/N]:y
Now rebooting, please wait...
<HPE>
System is starting..
2. After the reboot is complete, perform the display version command to verify that the system software image is correct.
<HPE> display version
HPE Comware Software, Version 7.1.042, Release 000702
Copyright (c) 2010-2013 Hewlett-Packard Development Company, L.P.
HPE MSR4060 uptime is 0 weeks, 0 days, 11 hours, 49 minutes
Last reboot reason : Power on
Boot image: cfa0:/MSR4000-cmw710-boot-a0005.bin
Boot image version: 7.1.040, Alpha 0005
System image: cfa0:/MSR4000-cmw710-system-a0005.bin
System image version: 7.1.040, Alpha 0005
Feature image(s) list:
cfa0:/MSR4000-cmw710-security-a0005.bin, version: 7.1.040
cfa0:/MSR4000-cmw710-voice-a0005.bin, version: 7.1.040
cfa0:/MSR4000-cmw710-data-a0005.bin, version: 7.1.040
Slot 0: MPU-100 uptime is 0 week, 0 day, 1 hour, 20 minutes
Last reboot reason : Power on
CPU ID: 0x3

55
2G bytes DDR3 SDRAM Memory
8M bytes Flash Memory
PCB Version: 2.0
CPLD Version: 1.0
Basic BootWare Version: 1.04
Extended BootWare Version: 1.04
[SUBSLOT 0]CON (Hardware)2.0 (Driver)1.0, (Cpld)1.0
[SUBSLOT 0]AUX (Hardware)2.0 (Driver)1.0, (Cpld)1.0
[SUBSLOT 0]MGE0 (Hardware)2.0 (Driver)1.0, (Cpld)1.0
Slot 1: MPU-100 uptime is 0 week, 0 day, 1 hour, 8 minutes
Last reboot reason : User reboot
CPU ID: 0x3
2G bytes DDR3 SDRAM Memory
8M bytes Flash Memory
PCB Version: 2.0
CPLD Version: 1.0
Basic BootWare Version: 1.05
Extended BootWare Version: 1.05
[SUBSLOT 0]CON (Hardware)2.0 (Driver)1.0, (Cpld)1.0
[SUBSLOT 0]AUX (Hardware)2.0 (Driver)1.0, (Cpld)1.0
[SUBSLOT 0]MGE0 (Hardware)2.0 (Driver)1.0, (Cpld)1.0
Slot 2: SPU-100 uptime is 0 week, 0 day, 1 hour, 19 minutes
Last reboot reason : Power on
CPU ID: 0x5
2G bytes DDR3 SDRAM Memory
8M bytes Flash Memory
PCB Version: 2.0
CPLD Version: 1.0
Basic BootWare Version: 1.02
Extended BootWare Version: 1.02
[SUBSLOT 0]GE2/0/0 (Hardware)2.0 (Driver)1.0, (Cpld)1.0
[SUBSLOT 0]GE2/0/1 (Hardware)2.0 (Driver)1.0, (Cpld)1.0
[SUBSLOT 0]GE2/0/2 (Hardware)2.0 (Driver)1.0, (Cpld)1.0
[SUBSLOT 0]GE2/0/3 (Hardware)2.0 (Driver)1.0, (Cpld)1.0
[SUBSLOT 0]CELLULAR2/0/0 (Hardware)2.0 (Driver)1.0, (Cpld)1.0
[SUBSLOT 0]CELLULAR2/0/1 (Hardware)2.0 (Driver)1.0, (Cpld)1.0
[SUBSLOT 1]HMIM-4SAE (Hardware)3.0 (Driver)1.0, (Cpld)4.0
Distributed devices ISSU
The In-Service Software Upgrade (ISSU) function enables software upgrade with the least amount of downtime.
To implement ISSU of a distributed device, use these guidelines:
Make sure the device has two MPUs.
Upgrade the standby MPU is upgraded first to form a new forwarding plane and a new control plane.

56
Upgrade the active MPU after the standby MPU operates correctly. The standby MPU will synchronize data and configuration from the active MPU and take over the forwarding and control functions.
Disabling the standby MPU auto-update function
When you upgrade the active MPU of a dual-MPU distributed device, the standby MPU auto-update function automatically upgrades the standby MPU by default. To use ISSU, you must disable the function.
To disable the standby MPU auto-update function:
1. View the roles of the MPUs.
<HPE>display device
Slot No. Board Type Status Primary SubSlots
-----------------------------------------------------------------------------
0 MPU-100 Normal Master 0
1 MPU-100 Normal Standby 0
2 SPU-100 Normal N/A 10
<HPE>
The output shows that the MPU in slot 0 is the active MPU.
2. Disable the standby MPU auto-update function.
<HPE>system-view
[Sysname]version check ignore
[Sysname]undo version auto-update enable
Saving the running configuration and verifying the storage space
1. Save the running configuration.
<HPE>save
The current configuration will be written to the device. Are you sure? [Y/N]:y
Please input the file name(*.cfg)[cfa0:/startup.cfg]
(To leave the existing filename unchanged, press the enter key):
Validating file. Please wait...
Configuration is saved to device successfully.
<HPE>
2. Check the storage space.
<HPE>dir
Directory of cfa0:
0 drw- - Jan 07 2014 14:02:12 diagfile
1 -rw- 307 Jan 22 2014 17:02:02 ifindex.dat
2 drw- - Jan 07 2014 14:02:12 license
3 drw- - Jan 22 2014 13:42:00 logfile
4 -rw- 20050944 Jan 10 2014 09:06:48 msr4000-cmw710-boot-e010204.bin
5 -rw- 2001920 Jan 10 2014 09:08:28 msr4000-cmw710-data-e010204.bin
6 -rw- 11264 Jan 10 2014 09:08:18 msr4000-cmw710-security-e010204.bin
7 -rw- 61538304 Jan 10 2014 09:07:36 msr4000-cmw710-system-e010204.bin
8 -rw- 3232768 Jan 10 2014 09:08:22 msr4000-cmw710-voice-e010204.bin
9 drw- - Jan 07 2014 14:02:12 seclog

57
10 -rw- 2166 Jan 22 2014 17:02:02 startup.cfg
11 -rw- 34425 Jan 22 2014 17:02:02 startup.mdb
507492 KB total (438688 KB free)
<HPE>
The output shows the CF card has 438688 KB of free storage space. If the CF card of your device is not sufficient for the upgrade image, delete unused files.
Downloading the upgrade image file to the router
Using TFTP
Download the upgrade image file (for example, msr4000.ipe) to the CF card on the router.
<HPE>tftp 192.168.1.100 get msr4000.ipe
% Total % Received % Xferd Average Speed Time Time Time Current
Dload Upload Total Spent Left Speed
45 67.0M 45 30.4M 0 0 792k 0 0:01:26 0:00:39 0:00:47 844k
100 67.0M 100 67.0M 0 0 772k 0 0:01:28 0:01:28 --:--:-- 745k
<HPE>
Using FTP
1. From FTP client view, download the upgrade image file (for example, msr4000.ipe) to the CF card on the router.
ftp> get msr4000.ipe
msr4000.ipe already exists. Overwrite it? [Y/N]:y
227 Entering passive mode (192,168,1,100,5,20)
125 Using existing data connection
226 Closing data connection; File transfer successful.
37691392 bytes received in 17.7 seconds (2.03 Mbyte/s)
[ftp]
2. Return to user view.
[ftp]quit
221 Service closing control connection
<HPE>
Copying the image file to the root directory of the CF card on the standby MPU
<HPE> copy msr4000.ipe slot1#cfa0:/
Copy cfa0:/msr4000.ipe to slot1#cfa0:/msr4000.ipe?[Y/N]:y
Copying file cfa0:/msr4000.ipe to slot1#cfa0:/ msr4000.ipe...Done.
Upgrading the standby MPU
1. Specify the msr4000.ipe file as the main startup image file for the standby MPU.
<HPE>boot-loader file msr4000.ipe slot 1 main
Verifying the IPE file and the images......Done.
HPE MSR4060 images in IPE:
msr4000-cmw710-boot-e010305.bin
msr4000-cmw710-system-e010305.bin
msr4000-cmw710-security-e010305.bin

58
msr4000-cmw710-voice-e010305.bin
msr4000-cmw710-data-e010305.bin
This command will set the main startup software images. Continue? [Y/N]:y
Add images to slot 1.
Decompressing file msr4000-cmw710-boot-e010305.bin to
slot1#cfa0:/msr4000-cmw710-boo
t-e010305.bin...............Done.
Decompressing file msr4000-cmw710-system-e010305.bin to
slot1#cfa0:/msr4000-cmw710-s
ystem-e010305.bin...............................................Done.
Decompressing file msr4000-cmw710-security-e010305.bin to
slot1#cfa0:/msr4000-cmw710
-security-e010305.bin...Done.
Decompressing file msr4000-cmw710-voice-e010305.bin to
slot1#cfa0:/msr4000-cmw710-vo
ice-e010305.bin....Done.
Decompressing file msr4000-cmw710-data-e010305.bin to
slot1#cfa0:/msr4000-cmw710-dat
a-e010305.bin...Done.
The images that have passed all examinations will be used as the main startup so
ftware images at the next reboot on slot 1.
2. Reboot the standby MPU.
<HPE>reboot slot 1
This command will reboot the specified slot, Continue? [Y/N]:y
Now rebooting, please wait...
3. After the standby MPU starts up, verify the startup image files.
<HPE>display boot-loader
Software images on slot 0:
Current software images:
cfa0:/msr4000-cmw710-boot-e010204.bin
cfa0:/msr4000-cmw710-system-e010204.bin
cfa0:/msr4000-cmw710-security-e010204.bin
cfa0:/msr4000-cmw710-voice-e010204.bin
cfa0:/msr4000-cmw710-data-e010204.bin
Main startup software images:
cfa0:/msr4000-cmw710-boot-e010204.bin
cfa0:/msr4000-cmw710-system-e010204.bin
cfa0:/msr4000-cmw710-security-e010204.bin
cfa0:/msr4000-cmw710-voice-e010204.bin
cfa0:/msr4000-cmw710-data-e010204.bin
Backup startup software images:
cfa0:/msr4000-cmw710-boot-e010203.bin
cfa0:/msr4000-cmw710-system-e010203.bin
cfa0:/msr4000-cmw710-security-e010203.bin
cfa0:/msr4000-cmw710-voice-e010203.bin
cfa0:/msr4000-cmw710-data-e010203.bin
Software images on slot 1:
Current software images:
cfa0:/msr4000-cmw710-boot-e010305.bin

59
cfa0:/msr4000-cmw710-system-e010305.bin
cfa0:/msr4000-cmw710-security-e010305.bin
cfa0:/msr4000-cmw710-voice-e010305.bin
cfa0:/msr4000-cmw710-data-e010305.bin
Main startup software images:
cfa0:/msr4000-cmw710-boot-e010305.bin
cfa0:/msr4000-cmw710-system-e010305.bin
cfa0:/msr4000-cmw710-security-e010305.bin
cfa0:/msr4000-cmw710-voice-e010305.bin
cfa0:/msr4000-cmw710-data-e010305.bin
Backup startup software images:
cfa0:/msr4000-cmw710-boot-e010203.bin
cfa0:/msr4000-cmw710-system-e010203.bin
cfa0:/msr4000-cmw710-security-e010203.bin
cfa0:/msr4000-cmw710-voice-e010203.bin
cfa0:/msr4000-cmw710-data-e010203.bin
The output shows that the standby MPU is running the new images.
Upgrading the active MPU
1. Specify the msr4000.ipe file as the main startup image file for the active MPU.
<HPE>boot-loader file msr4000.ipe slot 0 main
Verifying the IPE file and the images......Done.
HPE MSR4060 images in IPE:
msr4000-cmw710-boot-e010305.bin
msr4000-cmw710-system-e010305.bin
msr4000-cmw710-security-e010305.bin
msr4000-cmw710-voice-e010305.bin
msr4000-cmw710-data-e010305.bin
This command will set the main startup software images. Continue? [Y/N]:y
Add images to slot 0.
Decompressing file msr4000-cmw710-boot-e010305.bin to
cfa0:/msr4000-cmw710-boot-e010
305.bin...............Done.
Decompressing file msr4000-cmw710-system-e010305.bin to
cfa0:/msr4000-cmw710-system-
e010305.bin..............................................Done.
Decompressing file msr4000-cmw710-security-e010305.bin to
cfa0:/msr4000-cmw710-secur
ity-e010305.bin...Done.
Decompressing file msr4000-cmw710-voice-e010305.bin to
cfa0:/msr4000-cmw710-voice-e0
10305.bin....Done.
Decompressing file msr4000-cmw710-data-e010305.bin to
cfa0:/msr4000-cmw710-data-e010
305.bin...Done.
The images that have passed all examinations will be used as the main startup so
ftware images at the next reboot on slot 0.
2. Reboot the active MPU.

60
<HPE>reboot slot 0
This command will reboot the specified slot, Continue? [Y/N]:y
Now rebooting, please wait...
The standby MPU takes over the forwarding and controlling functions before the active MPU reboots.
3. After the active MPU starts up, verify the startup image files.
<HPE>display boot-loader
Software images on slot 0:
Current software images:
cfa0:/msr4000-cmw710-boot-e010305.bin
cfa0:/msr4000-cmw710-system-e010305.bin
cfa0:/msr4000-cmw710-security-e010305.bin
cfa0:/msr4000-cmw710-voice-e010305.bin
cfa0:/msr4000-cmw710-data-e010305.bin
Main startup software images:
cfa0:/msr4000-cmw710-boot-e010305.bin
cfa0:/msr4000-cmw710-system-e010305.bin
cfa0:/msr4000-cmw710-security-e010305.bin
cfa0:/msr4000-cmw710-voice-e010305.bin
cfa0:/msr4000-cmw710-data-e010305.bin
Backup startup software images:
cfa0:/msr4000-cmw710-boot-e010203.bin
cfa0:/msr4000-cmw710-system-e010203.bin
cfa0:/msr4000-cmw710-security-e010203.bin
cfa0:/msr4000-cmw710-voice-e010203.bin
cfa0:/msr4000-cmw710-data-e010203.bin
Software images on slot 1:
Current software images:
cfa0:/msr4000-cmw710-boot-e010305.bin
cfa0:/msr4000-cmw710-system-e010305.bin
cfa0:/msr4000-cmw710-security-e010305.bin
cfa0:/msr4000-cmw710-voice-e010305.bin
cfa0:/msr4000-cmw710-data-e010305.bin
Main startup software images:
cfa0:/msr4000-cmw710-boot-e010305.bin
cfa0:/msr4000-cmw710-system-e010305.bin
cfa0:/msr4000-cmw710-security-e010305.bin
cfa0:/msr4000-cmw710-voice-e010305.bin
cfa0:/msr4000-cmw710-data-e010305.bin
Backup startup software images:
cfa0:/msr4000-cmw710-boot-e010203.bin
cfa0:/msr4000-cmw710-system-e010203.bin
cfa0:/msr4000-cmw710-security-e010203.bin
cfa0:/msr4000-cmw710-voice-e010203.bin
cfa0:/msr4000-cmw710-data-e010203.bin
4. Perform the display boot-loader command in user view to verify that the file has been loaded.
<HPE> display boot-loader
Software images on slot 0:

61
Current software images:
cfa0:/MSR4000-cmw710-boot-r0005p01.bin
cfa0:/MSR4000-cmw710-system-r0005p01.bin
cfa0:/MSR4000-cmw710-security-r0005p01.bin
cfa0:/MSR4000-cmw710-voice-r0005p01.bin
cfa0:/MSR4000-cmw710-data-r0005p01.bin
Main startup software images:
cfa0:/MSR4000-cmw710-boot-a0005.bin
cfa0:/MSR4000-cmw710-system-a0005.bin
cfa0:/MSR4000-cmw710-security-a0005.bin
cfa0:/MSR4000-cmw710-voice-a0005.bin
cfa0:/MSR4000-cmw710-data-a0005.bin
Backup startup software images:
None
Software images on slot 1:
Current software images:
cfa0:/MSR4000-cmw710-boot-r0005p01.bin
cfa0:/MSR4000-cmw710-system-r0005p01.bin
cfa0:/MSR4000-cmw710-security-r0005p01.bin
cfa0:/MSR4000-cmw710-voice-r0005p01.bin
cfa0:/MSR4000-cmw710-data-r0005p01.bin
Main startup software images:
cfa0:/MSR4000-cmw710-boot-r0005p01.bin
cfa0:/MSR4000-cmw710-system-r0005p01.bin
cfa0:/MSR4000-cmw710-security-r0005p01.bin
cfa0:/MSR4000-cmw710-voice-r0005p01.bin
cfa0:/MSR4000-cmw710-data-r0005p01.bin
Backup startup software images:
None
Upgrading from the BootWare menu
You can use the following methods to upgrade software from the BootWare menu:
Using TFTP/FTP to upgrade software through an Ethernet port
Using XMODEM to upgrade software through the console port
Accessing the BootWare menu
1. Power on the router (for example, an HPE MSR 2003 router), and you can see the following information:
System is starting...
Press Ctrl+D to access BASIC-BOOTWARE MENU...
Booting Normal Extended BootWare
The Extended BootWare is self-decompressing....Done.
****************************************************************************
* *
* HPE MSR2003 BootWare, Version 1.20 *

62
* *
****************************************************************************
Copyright (c) 2010-2013 Hewlett-Packard Development Company, L.P.
Compiled Date : Jun 22 2013
CPU ID : 0x1
Memory Type : DDR3 SDRAM
Memory Size : 1024MB
Flash Size : 2MB
Nand Flash size : 256MB
CPLD Version : 2.0
PCB Version : 3.0
BootWare Validating...
Press Ctrl+B to access EXTENDED-BOOTWARE MENU...
2. Press Ctrl + B to access the BootWare menu.
Password recovery capability is enabled.
Note: The current operating device is flash
Enter < Storage Device Operation > to select device.
===========================<EXTEND-BOOTWARE MENU>===========================
|<1> Boot System |
|<2> Enter Serial SubMenu |
|<3> Enter Ethernet SubMenu |
|<4> File Control |
|<5> Restore to Factory Default Configuration |
|<6> Skip Current System Configuration |
|<7> BootWare Operation Menu |
|<8> Skip authentication for console login |
|<9> Storage Device Operation |
|<0> Reboot |
============================================================================
Ctrl+Z: Access EXTENDED ASSISTANT MENU
Ctrl+F: Format File System
Enter your choice(0-9):
Table 20 BootWare menu options
Item Description
<1> Boot System Boot the system software image.
<2> Enter Serial SubMenu Access the Serial submenu (see Table 23 ) for upgrading system software through the console port or changing the serial port settings.
<3> Enter Ethernet SubMenu Access the Ethernet submenu (see Table 21) for upgrading system software through an Ethernet port or changing Ethernet settings.
<4> File Control Access the File Control submenu (see Table 24) to retrieve and manage the files stored on the router.

63
<5> Restore to Factory Default Configuration
Delete the next-startup configuration files and load the factory-default configuration.
<6> Skip Current System Configuration
Start the router with the factory default configuration. This is a one-time operation and does not take effect at the next reboot. You use this option when you forget the console login password.
<7> BootWare Operation Menu
Access the BootWare Operation menu for backing up, restoring, or upgrading BootWare. When you upgrade the system software image, BootWare is automatically upgraded. HPE does not recommend upgrading BootWare separately. This document does not cover using the BootWare Operation menu.
<8> Skip authentication for console login Clear all the authentication schemes on the console port.
<9> Storage Device Operation Access the Storage Device Operation menu to manage storage devices. Using this option is beyond this chapter.
<0> Reboot Restart the router.
Using TFTP/FTP to upgrade software through an Ethernet port
1. Enter 3 in the BootWare menu to access the Ethernet submenu.
===============================<File CONTROL>===============================
|Note:the operating device is flash |
|<1> Download Image Program To SDRAM And Run |
|<2> Update Main Image File |
|<3> Update Backup Image File |
|<4> Download Files(*.*) |
|<5> Modify Ethernet Parameter |
|<0> Exit To Main Menu |
============================================================================
Enter your choice(0-4):
Table 21 Ethernet submenu options
Item Description
<1> Download Application Program To SDRAM And Run
Download a system software image to the SDRAM and run the image.
<2> Update Main Image File Upgrade the main system software image.
<3> Update Backup Image File Upgrade the backup system software image.
<4> Download Files(*.*) Download a system software image to the Flash or CF card.
<5> Modify Ethernet Parameter Modify network settings.
<0> Exit To Main Menu Return to the BootWare menu.
2. Enter 5 to configure the network settings.
=========================<ETHERNET PARAMETER SET>=========================
|Note: '.' = Clear field. |
| '-' = Go to previous field. |

64
| Ctrl+D = Quit. |
==========================================================================
Protocol (FTP or TFTP) :ftp
Load File Name :msr2000.ipe
:
Target File Name :msr2000.ipe
:
Server IP Address :192.168.1.1
Local IP Address :192.168.1.100
Subnet Mask :255.255.255.0
Gateway IP Address :0.0.0.0
FTP User Name :user001
FTP User Password :********
Table 22 Network parameter fields and shortcut keys
Field Description
'.' = Clear field Press a dot (.) and then Enter to clear the setting for a field.
'-' = Go to previous field Press a hyphen (-) and then Enter to return to the previous field.
Ctrl+D = Quit Press Ctrl + D to exit the Ethernet Parameter Set menu.
Protocol (FTP or TFTP) Set the file transfer protocol to FTP or TFTP.
Load File Name Set the name of the file to be downloaded.
Target File Name Set a file name for saving the file on the router. By default, the target file name is the same as the source file name.
Server IP Address Set the IP address of the FTP or TFTP server. If a mask must be set, use a colon (:) to separate the mask length from the IP address. For example, 192.168.80.10:24.
Local IP Address Set the IP address of the router.
Subnet Mask Subnet Mask of the local IP address.
Gateway IP Address Set a gateway IP address if the router is on a different network than the server.
FTP User Name Set the username for accessing the FTP server. This username must be the same as configured on the FTP server. This field is not available for TFTP.
FTP User Password Set the password for accessing the FTP server. This password must be the same as configured on the FTP server. This field is not available for TFTP.
3. Select an option in the Ethernet submenu to upgrade a system software image. For
example, enter 2 to upgrade the main system software image.
Loading.....................................................................
............................................................................
............................................................................
.........................................Done.
37691392 bytes downloaded!
The file is exist,will you overwrite it? [Y/N]Y
Image file msr2000-cmw710-boot-a0005.bin is self-decompressing...
Saving file flash:/msr2000-cmw710-boot-a0005.bin .............................

65
......Done.
Image file msr2000-cmw710-system-a0005.bin is self-decompressing...
Saving file flash:/msr2000-cmw710-system-a0005.bin ...........................
.........................................Done.
Image file msr2000-cmw710-security-a0005.bin is self-decompressing...
Saving file flash:/msr2000-cmw710-security-a0005.bin Done.
Image file msr2000-cmw710-voice-a0005.bin is self-decompressing...
Saving file flash:/msr2000-cmw710-voice-a0005.bin ......Done.
Image file msr2000-cmw710-data-a0005.bin is self-decompressing...
Saving file flash:/msr2000-cmw710-data-a0005.bin ..Done.
==========================<Enter Ethernet SubMenu>==========================
|Note:the operating device is flash |
|<1> Download Image Program To SDRAM And Run |
|<2> Update Main Image File |
|<3> Update Backup Image File |
|<4> Download Files(*.*) |
|<5> Modify Ethernet Parameter |
|<0> Exit To Main Menu |
|<Ensure The Parameter Be Modified Before Downloading!> |
============================================================================
Enter your choice(0-4):
4. Enter 0 to return to the BootWare menu
===========================<EXTEND-BOOTWARE MENU>===========================
|<1> Boot System |
|<2> Enter Serial SubMenu |
|<3> Enter Ethernet SubMenu |
|<4> File Control |
|<5> Modify BootWare Password |
|<6> Skip Current System Configuration |
|<7> BootWare Operation Menu |
|<8> Skip authentication for console login |
|<9> Storage Device Operation |
|<0> Reboot |
============================================================================
Enter your choice(0-9):
5. 1 to boot the system.
Loading the main image files...
Loading file flash:/msr2000-cmw710-system-a0005.bin..........................
Done.
Loading file flash:/msr2000-cmw710-boot-a0005.bin..............Done.
Image file flash:/msr2000-cmw710-boot-a0005.bin is self-decompressing.........
.....Done.
System image is starting...
Line aux0 is available.

66
Press ENTER to get started.
Using XMODEM to upgrade software through the console port
1. Enter 2 in the BootWare menu to access the Serial submenu.
===========================<Enter Serial SubMenu>===========================
|Note:the operating device is flash |
|<1> Download Image Program To SDRAM And Run |
|<2> Update Main Image File |
|<3> Update Backup Image File |
|<4> Download Files(*.*) |
|<5> Modify Serial Interface Parameter |
|<0> Exit To Main Menu |
============================================================================
Enter your choice(0-4):
Table 23 Serial submenu options
Item Description
<1> Download Application Program To SDRAM And Run
Download an application to SDRAM through the serial port and run the program.
<2> Update Main Image File Upgrade the main system software image.
<3> Update Backup Image File Upgrade the backup system software image.
<4>Download Files(*.*) Download a system software image to the Flash or CF card.
<5> Modify Serial Interface Parameter Modify serial port parameters
<0> Exit To Main Menu Return to the BootWare menu.
2. Select an appropriate baud rate for the console port. For example, enter 5 to select 115200 bps.
===============================<BAUDRATE SET>===============================
|Note:'*'indicates the current baudrate |
| Change The HyperTerminal's Baudrate Accordingly |
|---------------------------<Baudrate Available>---------------------------|
|<1> 9600(Default)* |
|<2> 19200 |
|<3> 38400 |
|<4> 57600 |
|<5> 115200 |
|<0> Exit |
============================================================================
Enter your choice(0-5):
The following messages appear:
Baudrate has been changed to 115200 bps.
Please change the terminal's baudrate to 115200 bps, press ENTER when ready.

67
NOTE:
Typically the size of a .bin file is over 10 MB. Even at 115200 bps, the download takes about 30 minutes.
3. Select Call > Disconnect in the HyperTerminal window to disconnect the terminal from the router.
Figure 2 Disconnect the terminal connection
NOTE:
If the baud rate of the console port is 9600 bps, jump to step 9.
4. Select File > Properties, and in the Properties dialog box, click Configure.
Figure 3 Properties dialog box
5. Select 115200 from the Bits per second list and click OK.

68
Figure 4 Modify the baud rate
6. Select Call > Call to reestablish the connection.
Figure 5 Reestablish the connection
7. Press Enter.
The following menu appears:
The current baudrate is 115200 bps
===============================<BAUDRATE SET>===============================
|Note:'*'indicates the current baudrate |
| Change The HyperTerminal's Baudrate Accordingly |
|---------------------------<Baudrate Available>---------------------------|
|<1> 9600(Default) |
|<2> 19200 |
|<3> 38400 |
|<4> 57600 |
|<5> 115200* |
|<0> Exit |
============================================================================
Enter your choice(0-5):

69
8. Enter 0 to return to the Serial submenu.
===========================<Enter Serial SubMenu>===========================
|Note:the operating device is flash |
|<1> Download Image Program To SDRAM And Run |
|<2> Update Main Image File |
|<3> Update Backup Image File |
|<4> Download Files(*.*) |
|<5> Modify Serial Interface Parameter |
|<0> Exit To Main Menu |
============================================================================
Enter your choice(0-4):
9. Select an option from options 2 to 3 to upgrade a system software image. For example,
enter 2 to upgrade the main system software image.
Please Start To Transfer File, Press <Ctrl+C> To Exit.
Waiting ...CCCCC
10. Select Transfer > Send File in the HyperTerminal window.
Figure 6 Transfer menu
11. In the dialog box that appears, click Browse to select the source file, and select Xmodem from the Protocol list.
Figure 7 File transmission dialog box
12. Click Send. The following dialog box appears:

70
Figure 8 File transfer progress
13. When the Serial submenu appears after the file transfer is complete, enter 0 at the
prompt to return to the BootWare menu.
Download successfully!
37691392 bytes downloaded!
Input the File Name:main.bin
Updating File flash:/main.bin..............................................
.....................................................Done!
===========================<Enter Serial SubMenu>===========================
|Note:the operating device is flash |
|<1> Download Image Program To SDRAM And Run |
|<2> Update Main Image File |
|<3> Update Backup Image File |
|<4> Download Files(*.*) |
|<5> Modify Serial Interface Parameter |
|<0> Exit To Main Menu |
============================================================================
Enter your choice(0-4):
14. Enter 1 in the BootWare menu to boot the system.
15. If you are using a download rate other than 9600 bps, change the baud rate of the terminal to 9600 bps. If the baud rate has been set to 9600 bps, skip this step.
Managing files from the BootWare menu
To change the type of a system software image, retrieve files, or delete files, enter 4 in the BootWare menu.
The File Control submenu appears:
==============================<File CONTROL>==============================
|Note:the operating device is cfa0 |

71
|<1> Display All File(s) |
|<2> Set Image File type |
|<3> Set Bin File type |
|<4> Set Configuration File type |
|<5> Delete File |
|<6> Copy File |
|<0> Exit To Main Menu |
==========================================================================
Enter your choice(0-6):
Table 24 File Control submenu options
Item Description
<1> Display All File Display all files.
<2> Set Image File type Change the type of a system software image (.ipe).
<3> Set Bin File type Change the type of a system software image (.bin).
<4> Set Configuration File type Change the type of a configuration file.
<5> Delete File Delete files.
<6> Copy File Copy File
<0> Exit To Main Menu Return to the BootWare menu.
Displaying all files
To display all files, enter 1 in the File Control submenu:
Display all file(s) in flash:
'M' = MAIN 'B' = BACKUP 'N/A' = NOT ASSIGNED
============================================================================
|NO. Size(B) Time Type Name |
|1 37691392 Aug/16/2012 07:09:16 N/A flash:/msr2000.ipe |
|2 25992 Aug/15/2012 12:18:00 N/A flash:/startup.mdb |
|3 1632 Aug/15/2012 12:18:00 M flash:/startup.cfg |
|4 84 Aug/15/2012 12:17:59 N/A flash:/ifindex.dat |
|5 11029 Aug/15/2012 13:31:16 N/A flash:/logfile/logfile1.log |
|6 17 Aug/16/2012 07:47:24 N/A flash:/.pathfile |
|7 1006592 Aug/16/2012 07:44:16 M flash:/msr2000-cmw710-data-a0005.bin|
|8 815 Aug/15/2012 12:03:14 N/A flash:/license/DeviceID.did |
|9 1180672 Aug/16/2012 07:44:15 M flash:/msr2000-cmw710-voice-a0005. bin|
|10 10240 Aug/16/2012 07:44:15 M flash:/msr2000-cmw710-security-a0005.bin|
|11 24067072 Aug/16/2012 07:44:10 M flash:/msr2000-cmw710-system-a0005.bin|
|12 11418624 Aug/16/2012 07:44:05 M flash:/msr2000-cmw710-boot-a0005.bin|
============================================================================
Changing the type of a system software image
System software image file attributes include main (M), and backup (B). You can store only one main image, and one backup image on the router. A system software image can have any combination of the M, and B attributes. If the file attribute you are assigning has been assigned to an image, the

72
assignment removes the attribute from that image. The image is marked as N/A if it has only that attribute.
To change the type of a system software image:
1. Enter 2 in the File Control submenu.
'M' = MAIN 'B' = BACKUP 'N/A' = NOT ASSIGNED
============================================================================
|NO. Size(B) Time Type Name |
|1 37691392 Aug/16/2012 07:09:16 N/A flash:/msr2000.ipe |
|0 Exit |
============================================================================
Enter file No:1
2. Enter the number of the file you are working with, and press Enter.
Modify the file attribute:
==========================================================================
|<1> +Main |
|<2> +Backup |
|<0> Exit |
==========================================================================
Enter your choice(0-2):
3. Enter a number in the range of 1 to 4 to add or delete a file attribute for the file.
Set the file attribute success!
Deleting files
When storage space is insufficient, you can delete obsolete files to free up storage space.
To delete files:
1. Enter 5 in the File Control submenu.
Deleting the file in cfa0:
'M' = MAIN 'B' = BACKUP 'N/A' = NOT ASSIGNED
Deleting the file in flash:
'M' = MAIN 'B' = BACKUP 'N/A' = NOT ASSIGNED
============================================================================
|NO. Size(B) Time Type Name |
|1 37691392 Aug/16/2012 07:09:16 N/A flash:/msr2000.ipe |
|2 25992 Aug/15/2012 12:18:00 N/A flash:/startup.mdb |
|3 1632 Aug/15/2012 12:18:00 M flash:/startup.cfg |
|4 84 Aug/15/2012 12:17:59 N/A flash:/ifindex.dat |
|5 11029 Aug/15/2012 13:31:16 N/A flash:/logfile/logfile1.log |
|6 17 Aug/16/2012 07:47:24 N/A flash:/.pathfile |
|7 1006592 Aug/16/2012 07:44:16 M flash:/msr2000-cmw710-data-a0005.bin|
|8 815 Aug/15/2012 12:03:14 N/A flash:/license/DeviceID.did |
|9 1180672 Aug/16/2012 07:44:15 M flash:/msr2000-cmw710-voice-a0005. bin|
|10 10240 Aug/16/2012 07:44:15 M flash:/msr2000-cmw710-security-a0005.bin|
|11 24067072 Aug/16/2012 07:44:10 M flash:/msr2000-cmw710-system-a0005.bin|
|12 11418624 Aug/16/2012 07:44:05 M flash:/msr2000-cmw710-boot-a0005.bin|
0 Exit
Enter file No.:
2. Enter the number of the file to delete.

73
3. When the following prompt appears, enter Y.
The file you selected is flash:/msr2000-cmw710-security-a0005.bin,Delete it?
[Y/N]Y
Deleting...Done.
Handling software upgrade failures If a software upgrade fails, the system runs the old software version. To handle a software failure:
1. Check the physical ports for a loose or incorrect connection.
2. If you are using the console port for file transfer, check the HyperTerminal settings (including the baud rate and data bits) for any wrong setting.
3. Check the file transfer settings:
If XMODEM is used, you must set the same baud rate for the terminal as for the
console port.
If TFTP is used, you must enter the same server IP addresses, file name, and
working directory as set on the TFTP server.
If FTP is used, you must enter the same FTP server IP address, source file name,
working directory, and FTP username and password as set on the FTP server.
4. Check the FTP or TFTP server for any incorrect setting.
5. Check that the storage device has sufficient space for the upgrade file.
6. If the message “Something is wrong with the file” appears, check the file for file corruption.
Appendix C Handling console login password loss
Disabling password recovery capability
Password recovery capability controls console user access to the device configuration and SDRAM from BootWare menus.
If password recovery capability is enabled, a console user can access the device configuration without authentication to configure new passwords.
If password recovery capability is disabled, console users must restore the factory-default configuration before they can configure new passwords. Restoring the factory-default configuration deletes the next-startup configuration files.
To enhance system security, disable password recovery capability.
Table 25 summarizes options whose availability varies with the password recovery capability setting.
Table 25 BootWare options and password recovery capability compatibility matrix
BootWare menu
option
Password
recovery
enabled
Password
recovery
disabled
Tasks that can be performed
Download Image Program To SDRAM And Run
Yes No Load and run Comware software images in SDRAM.

74
Skip Authentication for Console Login
Yes No Enable console login without authentication.
Skip Current System Configuration
Yes No Load the factory-default configuration without deleting the next-startup configuration files.
Restore to Factory Default Configuration
No Yes Delete the next-startup configuration files and load the factory-default configuration.
To disable password recovery capability:
Step Command Remarks
1. Enter system view. system-view N/A
2. Disable password recovery capability.
undo password-recovery enable By default, password recovery capability is enabled.
When password recovery capability is disabled, you cannot downgrade the device software to a version that does not support the capability through the BootWare menus. You can do so at the CLI, but the BootWare menu password configured becomes effective again.
Handling console login password loss
CAUTION:
Handling console login password loss causes service outage.
The method for handling console login password loss depends on the password recovery capability setting (see Figure 9).
Figure 9 Handling console login password loss
Password recovery
capability enabled?
Yes No
Save the running configuration
Skip Authentication
for Console Login
Reboot the router
Configure new passwords
in system view
Console login password lost
Reboot the router to access
EXTENDED-BOOTWARE menu
Skip Current System
Configuration
Restore to Factory Default
Configuration

75
Examining the password recovery capability setting
1. Reboot the router.
System is starting...
Press Ctrl+D to access BASIC-BOOTWARE MENU...
Press Ctrl+T to start heavy memory test
Booting Normal Extended BootWare........
The Extended BootWare is self-decompressing....Done.
****************************************************************************
* *
* HPE MSR3000 BootWare, Version 1.20 *
* *
****************************************************************************
Copyright (c) 2010-2013 Hewlett-Packard Development Company, L.P.
Compiled Date : May 13 2013
CPU ID : 0x2
Memory Type : DDR3 SDRAM
Memory Size : 2048MB
BootWare Size : 1024KB
Flash Size : 8MB
cfa0 Size : 247MB
CPLD Version : 2.0
PCB Version : 2.0
BootWare Validating...
Press Ctrl+B to access EXTENDED-BOOTWARE MENU...
2. Press Ctrl + B within three seconds after the "Press Ctrl+B to access EXTENDED-BOOTWARE MENU..." prompt message appears.
3. Read the password recovery capability setting information displayed before the EXTEND-BOOTWARE menu.
Password recovery capability is enabled.
Note: The current operating device is cfa0
Enter < Storage Device Operation > to select device.
===========================<EXTEND-BOOTWARE MENU>===========================
|<1> Boot System |
|<2> Enter Serial SubMenu |
|<3> Enter Ethernet SubMenu |
|<4> File Control |
|<5> Restore to Factory Default Configuration |
|<6> Skip Current System Configuration |
|<7> BootWare Operation Menu |
|<8> Skip Authentication for Console Login |
|<9> Storage Device Operation |
|<0> Reboot |

76
============================================================================
Ctrl+Z: Access EXTEND ASSISTANT MENU
Ctrl+F: Format File System
Enter your choice(0-9):
Using the Skip Current System Configuration option
1. Reboot the router to access the EXTEND-BOOTWARE menu, and then enter 6.
The current mode is password recovery.
Note: The current operating device is cfa0
Enter < Storage Device Operation > to select device.
===========================<EXTEND-BOOTWARE MENU>===========================
|<1> Boot System |
|<2> Enter Serial SubMenu |
|<3> Enter Ethernet SubMenu |
|<4> File Control |
|<5> Restore to Factory Default Configuration |
|<6> Skip Current System Configuration |
|<7> BootWare Operation Menu |
|<8> Skip Authentication for Console Login |
|<9> Storage Device Operation |
|<0> Reboot |
============================================================================
Ctrl+Z: Access EXTEND ASSISTANT MENU
Ctrl+F: Format File System
Enter your choice(0-9): 6
After the configuration skipping flag is set successfully, the following message appears:
Flag Set Success.
2. When the EXTEND-BOOTWARE menu appears again, enter 1 to reboot the router.
The router starts up with the factory-default configuration without deleting the next-startup configuration files.
3. To use the configuration in a next-startup configuration file, load the file in system view.
<HPE> system-view
[HPE] configuration replace file cfa0:/startup.cfg
Current configuration will be lost, save current configuration? [Y/N]:n
Info: Now replacing the current configuration. Please wait...
Info: Succeeded in replacing current configuration with the file startup.cfg.
4. Configure a new console login authentication mode and a new console login password.
In the following example, the console login authentication mode is password and the authentication password is 123456. For security purposes, the password is always saved in
ciphertext, whether you specify the simple or cipher keyword for the set authentication
password command.
<HPE> system-view
[HPE] line aux 0
[HPE-line-aux0] authentication-mode password
[HPE-line-aux0] set authentication password simple 123456

77
Use the line aux 0 command on an MSR2000 or MSR 3000 routers. The console port and the
AUX port are the same physical port.
Use the line console 0 command on an MSR4000 routers. An MSR4000 router has a separate
console port.
5. To make the settings take effect after a reboot, save the running configuration to the next-startup configuration file.
[HPE-line-aux0] save
Using the Skip Authentication for Console Login option
1. Reboot the router to access the EXTEND-BOOTWARE menu, and then enter 8.
The current mode is password recovery.
Note: The current operating device is cfa0
Enter < Storage Device Operation > to select device.
===========================<EXTEND-BOOTWARE MENU>===========================
|<1> Boot System |
|<2> Enter Serial SubMenu |
|<3> Enter Ethernet SubMenu |
|<4> File Control |
|<5> Restore to Factory Default Configuration |
|<6> Skip Current System Configuration |
|<7> BootWare Operation Menu |
|<8> Skip Authentication for Console Login |
|<9> Storage Device Operation |
|<0> Reboot |
============================================================================
Ctrl+Z: Access EXTEND ASSISTANT MENU
Ctrl+F: Format File System
Enter your choice(0-9): 8
The router deletes the console login authentication configuration commands from the main next-startup configuration file. After the operation is completed, the following message appears:
Clear Image Password Success!
2. When the EXTEND-BOOTWARE menu appears again, enter 1 to reboot the router.
The router starts up with the main next-startup configuration file.
3. Configure a console login authentication mode and a new console login password. See "Configure a new console login authentication mode and a new console login password.Configure a new console login authentication mode and a new console login password."
4. To make the setting take effect after a reboot, save the running configuration to the next-startup configuration file.
[HPE-line-aux0] save
Using the Restore to Factory Default Configuration option
CAUTION:
Using the Restore to Factory Default Configuration option deletes both the main and backup next-configuration files.

78
1. Reboot the router to access the EXTEND-BOOTWARE menu, and enter 5.
The current mode is no password recovery.
Note: The current operating device is cfa0
Enter < Storage Device Operation > to select device.
===========================<EXTEND-BOOTWARE MENU>===========================
|<1> Boot System |
|<2> Enter Serial SubMenu |
|<3> Enter Ethernet SubMenu |
|<4> File Control |
|<5> Restore to Factory Default Configuration |
|<6> Skip Current System Configuration |
|<7> BootWare Operation Menu |
|<8> Skip Authentication for Console Login |
|<9> Storage Device Operation |
|<0> Reboot |
============================================================================
Ctrl+Z: Access EXTEND ASSISTANT MENU
Ctrl+F: Format File System
Enter your choice(0-9): 5
2. At the prompt for confirmation, enter Y.
The router deletes its main and backup next-startup configuration files and restores the factory-default configuration.
The current mode is no password recovery. The configuration files will be
deleted, and the system will start up with factory defaults, Are you sure to
continue?[Y/N]Y
Setting...Done.
3. When the EXTEND-BOOTWARE menu appears again, enter 1 to reboot the router.
The router starts up with the factory-default configuration.
4. Configure a new console login authentication mode and a new console login password. See "Configure a new console login authentication mode and a new console login password.Configure a new console login authentication mode and a new console login password.".
5. To make the settings take effect after a reboot, save the running configuration to the next-startup configuration file.
[HPE] save

1
HPE MSR1000_MSR2000_MSR3000_MSR4000-CMW710-R0415
Software Feature Changes
The information in this document is subject to change without notice. © Copyright [First Year] 2013, [Current Year] 2017Hewlett Packard Enterprise Development LP

i
Contents
Release 0415 ················································································ 15
Release 0413 ················································································ 15
New feature: IP forwarding last hop holding ········································· 15
Configuring last hop holding ········································································································· 15 Command reference ··················································································································· 15
ip last-hop hold ··················································································································· 15
Modified feature: Temporary user role authorization ······························ 16
Feature change description ·········································································································· 16 Command changes ···················································································································· 16
Modified command: super password ······················································································· 16
Release 0411 ················································································ 16
Release 0410 ················································································ 17
New feature: Support of multicast for ADVPN ······································· 20
Configuring support of multicast for ADVPN ···················································································· 20 Command reference ··················································································································· 20
New feature: Application layer state filtering ········································· 21
Configuring application layer state filtering ······················································································ 21 Command reference ··················································································································· 21
New feature: SIP keepalive ······························································ 21
Configuring SIP keepalive ············································································································ 21 Command reference ··················································································································· 22
New command: options-ping ································································································· 22 New command: voice-class sip options-ping ············································································· 22
New feature: Multicast fast forwarding ················································ 23
Configuring multicast fast forwarding ····························································································· 23 Command reference ··················································································································· 23
New command: display multicast fast-forwarding cache ······························································ 23 New command: reset multicast fast-forwarding cache ································································ 25 New command: display ipv6 multicast fast-forwarding cache ······················································· 26 New command: reset ipv6 multicast fast-forwarding cache ·························································· 28
New feature: SSL support for POS terminal access ······························· 29
Configuring an SSL policy for POS terminal access ··································································· 29 Command reference ··················································································································· 29
New command: posa terminal ssl-server-policy ········································································· 29 Modified command: posa terminal ·························································································· 30
New feature: Attack defense policy application to a security zone ············· 30
Applying an attack defense policy to a security zone ········································································· 30 Command reference ··················································································································· 30
New feature: AAA support for IKE extended authentication ····················· 31
Configuring IKE extended authentication ························································································ 31 Command reference ··················································································································· 31
New feature: Percentage-based CAR ················································· 31
Configuring percentage-based CAR ······························································································ 31 Command reference ··················································································································· 31

ii
New feature: Logging OSPF router ID conflict events ····························· 32
Logging OSPF router ID conflict events ·························································································· 32 Command reference ··················································································································· 32
New feature: AFT ··········································································· 32
Configuring AFT ························································································································ 32 Command reference ··················································································································· 32
New feature: Configuring enhanced CC authentication in FIPS mode ········ 33
Configuring enhanced CC authentication in FIPS mode ···································································· 33 Command reference ··················································································································· 33
New feature: Support of AAA for NETCONF ········································ 33
Configuring support of AAA for NETCONF ······················································································ 33 Command reference ··················································································································· 34
New feature: Mobile IP tunnel interface settings ···································· 34
Configuring the mobile IP tunnel interface settings ··········································································· 34 Command reference ··················································································································· 34
New feature: LISP ·········································································· 35
Configuring LISP ························································································································ 35 Command reference ··················································································································· 35
New feature: LISP tunnel entries and dynamic mobility ··························· 35
Configuring LISP tunnel entries and dynamic mobility ······································································· 35 Command reference ··················································································································· 35
New feature: Support of IPv6 multicast routing for VPN instances ············· 36
Enabling support of IP multicast routing for VPN instances ································································ 36 Command reference ··················································································································· 36
New feature: IPv4/IPv6 PIM NSR······················································· 36
Enabling IPv4/IPv6 PIM NSR ······································································································· 36 Command reference ··················································································································· 36
New feature: IGMP/MLD NSR ··························································· 36
Enabling IGMP/MLD NSR ············································································································ 36 Command reference ··················································································································· 37
New feature: IPv4/IPv6 PIM passive mode ·········································· 37
Enabling IPv4/IPv6 PIM passive mode ··························································································· 37 Command reference ··················································································································· 37
New feature: LISP virtual machine multi-hop mobility and DDT ················ 37
Configuring LISP virtual machine multi-hop mobility and DDT ····························································· 37 Command reference ··················································································································· 37
New feature: LISP NSR ··································································· 38
Configuring LISP NSR ················································································································ 38 Command reference ··················································································································· 38
New feature: PPPoE client support for IPv6 ········································· 38
Associating a dial rule with a dialup interface ··················································································· 38 Command reference ··················································································································· 38 Specifying an IPv6 prefix for an interface to automatically generate an IPv6 global unicast address ··········· 39 Command reference ··················································································································· 39
New feature: Frame-Relay-related functions ········································ 39
Configuring multilink Frame Relay ································································································· 39 Command reference ··················································································································· 39

iii
Configuring Frame Relay FRF.12 fragmentation ·············································································· 39 Command reference ··················································································································· 39 Configuring Frame Relay STAC compression ·················································································· 40 Command reference ··················································································································· 40 Configuring Frame Relay IPv6 address mapping ·············································································· 40 Command reference ··················································································································· 40 Enabling SNMP notifications for Frame Relay·················································································· 40 Command reference ··················································································································· 40 Setting the Frame Relay interface type ··························································································· 41 Command reference ··················································································································· 41 Configuring Frame Relay QoS ······································································································ 41 Command reference ··················································································································· 41
New feature: DPI engine and content filtering ······································· 41
Configuring the DPI engine and content filtering ··············································································· 41 Command reference ··················································································································· 41
New feature: IPS ············································································ 42
Configuring IPS ························································································································· 42 Command reference ··················································································································· 42
New feature: NBAR ········································································ 42
Configuring NBAR ······················································································································ 42 Command reference ··················································································································· 42
New feature: URL filtering ································································ 43
Configuring URL filtering ············································································································· 43 Command reference ··················································································································· 43
New feature: Local portal Web server ················································· 43
Configuring a local portal Web server····························································································· 43 Command reference ··················································································································· 43
New feature: Support of portal for NETCONF ······································· 44
New feature: Newly-added MIB objects ··············································· 44
New feature: Performing a loopback test ············································· 44
Performing a loopback test ·········································································································· 44 Command reference ··················································································································· 44
New command: loopback-test ································································································ 44
New feature: IPS, ACG, and SSL VPN licenses ···································· 44
New feature: Support of NQA for NETCONF ········································ 44
New feature: Configuring CWMP to support VPN ·································· 45
Configuring CWMP to support VPN ······························································································· 45 Command reference ··················································································································· 45
New feature: Transceiver module source alarm ···································· 45
Disabling transceiver module source alarm ····················································································· 45 Command reference ··················································································································· 45
transceiver phony-alarm-disable ····························································································· 45
New feature: VLAN interface performance optimization ·························· 45
New feature: POSA ········································································ 46
POSA terminal access configuration ······························································································ 46 POS terminal access command reference ······················································································ 46

iv
New feature: Specifying a backup processing slot for an interface ············ 46
Specifying a backup processing slot for an interface ········································································· 46 Command reference ··················································································································· 47
New feature: Configuring the ISDN leased line ····································· 47
Configuring the ISDN leased line ·································································································· 47 Command reference ··················································································································· 47
New feature: NAT support for multicast source address in PIM join/prune packets ························································································ 47
New feature: GDOI GM group anti-replay window ································· 48
Configuring the anti-replay window for a GDOI GM group ·································································· 48 Command reference ··················································································································· 48
client anti-replay window ······································································································· 48
New feature: SIP compatibility ·························································· 49
Configuring SIP compatibility ········································································································ 49 Command reference ··················································································································· 50
New command:sip-compatible ······························································································· 50
New feature: Voice VLAN ································································ 51
Configuring a voice VLAN ············································································································ 51 Configuring a port to operate in automatic voice VLAN assignment mode ······································ 51 Configuring a port to operate in manual voice VLAN assignment mode ········································· 52 Enabling LLDP for automatic IP phone discovery ······································································ 53 Configuring LLDP to advertise a voice VLAN ············································································ 53 Configuring CDP to advertise a voice VLAN ············································································· 53 Displaying and maintaining voice VLANs ················································································· 54
Command reference ··················································································································· 54
New feature: L2TP-based EAD ························································· 55
Enabling L2TP-based EAD ·········································································································· 55 Command reference ··················································································································· 55
ppp access-control enable ···································································································· 55 display ppp access-control interface ······················································································· 56
New feature: Configuring device poweroff alarming ······························· 57
Command reference ··················································································································· 57 dying-gasp host ·················································································································· 57 dying-gasp source ··············································································································· 58 display dying-gasp host ········································································································ 59
New feature: BFD for an aggregation group ········································· 61
Enabling BFD for an aggregation group ·························································································· 61 Command reference ··················································································································· 62
link-aggregation bfd ipv4 ······································································································· 62
New feature: 4G modem IMSI/SN binding authentication ························ 63
Command reference ··················································································································· 63 apn ··································································································································· 63 apn-profile·························································································································· 64 apn-profile apply ················································································································· 65 attach-format ······················································································································ 65 authentication-mode ············································································································ 66
New feature: Media Stream Control (MSC) logging ································ 67
Command reference ··················································································································· 67 New command: sip log enable ······························································································· 67

v
New feature: IMSI/SN binding authentication ········································ 68
Command reference ··················································································································· 68 ppp lcp imsi accept ·············································································································· 68 ppp lcp imsi request ············································································································· 69 ppp lcp imsi string················································································································ 69 ppp lcp sn accept ················································································································ 70 ppp lcp sn request ··············································································································· 70 ppp lcp sn string ·················································································································· 71 ppp user accept-format imsi-sn split ························································································ 71 ppp user attach-format imsi-sn split························································································· 72 ppp user replace ················································································································· 73
New feature: Specifying a band for a 4G modem ·································· 74
Command reference ··················································································································· 74 lte band ····························································································································· 74
New feature: Using tunnel interfaces as OpenFlow ports ························ 75
New feature: NETCONF support for ACL filtering ·································· 75
Command reference ··················································································································· 75 netconf soap http acl ············································································································ 75 netconf soap https acl ·········································································································· 76
New feature: WAAS ········································································ 77
Configuring WAAS ····················································································································· 77 Command reference ··················································································································· 77
New feature: Support for the MKI field in SRTP or SRTCP packets ··········· 77
Command reference ··················································································································· 77 New command: mki ············································································································· 77
New feature: SIP domain name ························································· 78
Command reference ··················································································································· 78 New command: sip-domain ··································································································· 78
New feature: E&M logging ································································ 79
Command reference ··················································································································· 79 New command: em log enable ······························································································· 79
New feature: Setting the RTC version ················································· 80
Setting the RTC version ·············································································································· 80 Command reference ··················································································································· 80
rta rtc version ····················································································································· 80

vi
New feature: Setting the maximum size of advertisement files ················· 81
New feature: Support of IRF for NETCONF ·········································· 81
New feature: Support of VCF for NETCONF ········································ 81
New feature: Support of SNMP for NETCONF ······································ 81
New feature: Support of file system for NETCONF ································ 82
New feature: Support of PoE for NETCONF ········································· 82
New feature: Support of RMON for NETCONF ····································· 82
New feature: Support of policy-based routing for NETCONF ···················· 82
New feature: Support of BGP for NETCONF ········································ 82
New feature: Support of OSPF for NETCONF ······································ 82
New feature: Support of ping for NETCONF ········································· 83
New feature: Support of tracert for NETCONF ······································ 83
New feature: Support of L2VPN for NETCONF ····································· 83
New feature: SIP support for VRF ······················································ 83
Configuring SIP support for VRF ··································································································· 83 Command reference ··················································································································· 83
New feature: IKEv2 ········································································· 83
Configuring IKEv2 ······················································································································ 83 Command reference ··················································································································· 84
New feature: Specifying an IKEv2 profile for an IPsec policy ···················· 84
Specifying an IKEv2 profile for an IPsec policy················································································· 84 Command reference ··················································································································· 84
New feature: Bidirectional BFD control detection for RIP ························· 84
Configuring bidirectional BFD control detection for RIP ····································································· 84 Command reference ··················································································································· 84
New feature: OSPF router ID autoconfiguration ···································· 85
Automatically obtaining an OSPF router ID ····················································································· 85 Command reference ··················································································································· 85
New feature: Layer 2 Ethernet link aggregation ····································· 85
Configuring Layer 2 aggregation groups ························································································· 85 Command reference ··················································································································· 85
New feature: Setting the cable impedance for WAN interfaces ················· 86
Setting the cable impedance for WAN interfaces ·············································································· 86 Command reference ··················································································································· 86
New feature: Associating a static route with a track entry ························ 86
Associating a static route with a track entry ····················································································· 86 Command reference ··················································································································· 86
New feature: VLAN tag processing rule for incoming traffic ····················· 87
Configuring the VLAN tag processing rule for incoming traffic ····························································· 87 Command reference ··················································································································· 87

vii
New feature: IP-based portal-free rule ················································ 87
Configuring an IP-based portal free-rule ························································································· 87 Command reference ··················································································································· 87
New feature: Portal redirect packet statistics ········································ 88
Displaying/maintaining portal redirect packet statistics ······································································ 88 Command reference ··················································································································· 88
New feature: GDVPN ······································································ 88
Configuring GDVPN ··················································································································· 88 Command reference ··················································································································· 88
New feature: OpenFlow instance ······················································· 88
Configuring the OpenFlow instance mode ······················································································· 88 Command reference ··················································································································· 89 Binding an OpenFlow instance to ports ·························································································· 89 Command reference ··················································································································· 89 Binding an port to an OpenFlow instance ························································································ 89 Command reference ··················································································································· 89
New feature: Enabling the Extended Sequence Number (ESN) feature for an IPsec transform set ········································································· 89
Enabling ESN for an IPsec transform set ························································································ 89 Command reference ··················································································································· 90
New feature: Enabling Traffic Flow Confidentiality (TFC) padding for an IPsec policy ··························································································· 90
Enabling TFC padding for an IPsec policy ······················································································· 90 Command reference ··················································································································· 90
New feature: SIP session refresh ······················································· 90
Enabling SIP session refresh········································································································ 90 Command reference ··················································································································· 90
New command: voice-class sip session refresh ········································································· 90
Modified feature: License restrictions for POS terminal access ················· 91
Feature change description ·········································································································· 91
Modified feature: Displaying and maintaining Frame Relay ······················ 92
Feature change description ·········································································································· 92 Command changes ···················································································································· 92
Modified command: display fr inarp-info ··················································································· 92 Modified command: display fr lmi-info ······················································································ 92 Modified command: display fr map-info ···················································································· 93 Modified command: display fr pvc-info ····················································································· 93
Modified feature: Displaying track entry infomration ······························· 93
Feature change description ·········································································································· 93 Command changes ···················································································································· 94
Modified command: display track ···························································································· 94
Modified feature: User profile ···························································· 94
Feature change description ·········································································································· 94
Modified feature: Tunnel interface support for IPsec and VXLAN tunnel modes ·································································································· 94
Feature change description ·········································································································· 94 Command changes ···················································································································· 94
Modified command: interface tunnel ························································································ 94

viii
Modified feature: PKI certificate auto-renewal ······································· 95
Feature change description ·········································································································· 95 Command changes ···················································································································· 95
Modified command: certificate request mode ············································································ 95 New command: display pki certificate renew-status ···································································· 96
Modified feature: Configuring the PKI entity DN ···································· 97
Feature change description ·········································································································· 97 Command changes ···················································································································· 97
New command: subject-dn ···································································································· 97
Modified feature: ADVPN ································································· 99
Feature change description ·········································································································· 99 Command changes ···················································································································· 99
New command: advpn group ································································································· 99 New command: advpn map group ························································································ 100
Modified feature: Telnet redirect ······················································ 101
Feature change description ········································································································ 101
Modified feature: DHCP snooping performance optimization ················· 101
Feature change description ········································································································ 101
Modified feature: OSPF performance optimization ······························· 101
Feature change description ········································································································ 101 Command changes ·················································································································· 101
Modified command: spf-schedule-interval ·············································································· 101 Modified command: transmit-pacing ······················································································ 102
Modified feature: POS terminal access ············································· 102
Feature change description ········································································································ 102 Command changes ·················································································································· 102
Modified command: posa auto-stop-service enable ·································································· 102
Modified feature: License ······························································· 103
Feature change description ········································································································ 103
Modified feature: IP performance optimization ···································· 103
Feature change description ········································································································ 103 Command changes ·················································································································· 103
New command: tcp mac-record enable ·················································································· 103 New command: tcp mac-record local ···················································································· 104
Modified feature: AAA ··································································· 105
Feature change description ········································································································ 105 Command changes ·················································································································· 105
New command: authorization ike ·························································································· 105
Modified feature: Configuring a cellular interface for a 3G/4G modem ······ 106
Feature change description ········································································································ 106 Command changes ·················································································································· 106
New command: rssi ··········································································································· 106
Modified feature: QoS on VXLAN tunnel interfaces ······························ 107
Feature change description ········································································································ 107 Command changes ·················································································································· 107
Modified feature: Option 60 encapsulation in DHCP replies ··················· 108
Feature change description ········································································································ 108

ix
Modified feature: MPLS QoS support for matching the EXP field ············ 108
Feature change description ········································································································ 108 Command changes ·················································································································· 108
New command: if-match second-mpls-exp ············································································· 108
Modified feature: MPLS QoS support for marking the EXP field ·············· 109
Feature change description ········································································································ 109 Command changes ·················································································································· 109
New command: remark second-mpls-exp ·············································································· 109
Modified feature: Automatic configuration ·········································· 110
Feature change description ········································································································ 110
Modified feature: User profile ·························································· 110
Feature change description ········································································································ 110 Command change ···················································································································· 110
Modified command: user-profile ··························································································· 110
Modified feature: Default size of the TCP receive and send buffer ·········· 111
Feature change description ········································································································ 111 Command changes ·················································································································· 111
Modified command: tcp window ··························································································· 111
Modified feature: Obtaining fan and power module vendor information ···· 111
Feature change description ········································································································ 111
Modified feature: Support for per-packet load sharing ·························· 111
Feature change description ········································································································ 111 Command changes ·················································································································· 112
Modified command: ip load-sharing mode ·············································································· 112
Modified feature: Default user role ··················································· 112
Feature change description ········································································································ 112 Command changes ·················································································································· 113
Modified command: role default-role enable ··········································································· 113
Modified feature: Debugging ··························································· 113
Feature change description ········································································································ 113 Command changes ·················································································································· 113
Modified command: debugging ···························································································· 113
Modified feature: SSH username ····················································· 114
Feature change description ········································································································ 114 Command changes ·················································································································· 114
Modified command: ssh user ······························································································· 114
Modified feature: IS-IS hello packet sending interval ···························· 115
Feature change description ········································································································ 115 Command changes ·················································································································· 115
Modified command: isis timer hello ······················································································· 115
Modified feature: MP-group interface numbering ································· 115
Modified feature: Setting the global link-aggregation load-sharing mode ·· 116
Feature change description ········································································································ 116 Command changes ·················································································································· 116
Modified command: link-aggregation global load-sharing mode ·················································· 116
Modified feature: 802.1X redirect URL ·············································· 116
Feature change description ········································································································ 116 Command changes ·················································································································· 117

x
Modified command: dot1x ead-assistant url ············································································ 117
Modified feature: Displaying information about NTP servers from the reference source to the primary NTP server ···················································· 117
Feature change description ········································································································ 117 Command changes ·················································································································· 117
Modified command: display ntp-service trace ·········································································· 117
Modified feature: Saving, rolling back, and loading the configuration ······· 118
Modified feature: Displaying information about SSH users ···················· 118
Feature change description ········································································································ 118 Command changes ·················································································································· 118
Modified command: display ssh user-information ····································································· 118
Modified feature: SIP trusted nodes·················································· 119
Configuring SIP trusted nodes ···································································································· 119 Command changes ·················································································································· 119
New command: display voice ip address trusted list ································································· 119 New command: ip address trusted authenticate ······································································ 120
Modified feature: IPsec ESP encryption algorithms ······························ 121
Feature change description ········································································································ 121 Command changes ·················································································································· 121
Modified feature: IPsec ESP authentication algorithms ························· 122
Feature change description ········································································································ 122 Command changes ·················································································································· 122
Modified feature: IPsec AH authentication algorithms ··························· 122
Feature change description ········································································································ 122 Command changes ·················································································································· 123
Modified feature: Specifying an encryption algorithm for an IKE proposal · 123
Feature change description ········································································································ 123 Command changes ·················································································································· 123
Modified feature: Specifying an authentication algorithm for an IKE proposal ································································································ 124
Feature change description ········································································································ 124 Command changes ·················································································································· 124
Modified feature: Generating asymmetric key pairs ······························ 124
Feature change description ········································································································ 124 Command changes ·················································································································· 124
Modified feature: Specifying an ECDSA key pair for certificate request ···· 125
Feature change description ········································································································ 125 Command changes ·················································································································· 125
Modified feature: Setting the electrical impedance ······························· 125
Feature change description ········································································································ 125 Command changes ·················································································································· 125
Modified feature: POS access statistics, SNMP notifications for POS access, and NII ······················································································· 126
Feature change description ········································································································ 126 Enabling SNMP notifications for POS access ········································································· 126 Configuring the alarm threshold for the low NII transaction success rate ······································ 126 POS terminal packet statistics based on E1POS interfaces ······················································· 126

xi
Displaying and maintaining terminal access············································································ 126 Command changes ·················································································································· 127
Modified command: snmp-agent trap enable posa ··································································· 127 New command: trade-exchanges ························································································· 127 New command: posa trade-falling-threshold ··········································································· 127 New command: posa e1-dial-falling-threshold ········································································· 127 New command: display posa statistics caller-id ······································································· 127 New command: display posa statistics caller-ip ······································································· 127 New command: display posa statistics nii ··············································································· 127 Modified command: reset posa statistics ················································································ 128
Modified feature: QoS MIB ····························································· 128
Feature change description ········································································································ 128
Modified feature: Enabling PFS for an IPsec transform set ···················· 128
Feature change description ········································································································ 128 Command changes ·················································································································· 128
Removed feature: Tiny proxy ·························································· 128
Feature change description ········································································································ 128 Removed command ················································································································· 129
http-proxy ························································································································ 129
Removed feature: Displaying switching fabric channel usage ················ 129
Feature change description ········································································································ 129 Removed command ················································································································· 129
display fabric utilization ······································································································· 129
Release 0304 ·············································································· 129
New feature: Setting the RTC version ··············································· 130
Configuring Setting the RTC version ···························································································· 130 Command reference ················································································································· 130
rta rtc version ··················································································································· 130
New feature: Setting the maximum size of advertisement files ··············· 131
Configuring the maximum size of advertisement files ······································································ 131 Command reference ················································································································· 131
New feature: IRF ·········································································· 132
Configuring IRF ······················································································································· 132 Command reference ················································································································· 132
New feature: Frame Relay ····························································· 132
Configuring Frame Relay ··········································································································· 132 Command reference ················································································································· 132
New feature: EVI ·········································································· 132
Configuring EVI ······················································································································· 132 Command reference ················································································································· 132
New feature: VPLS ······································································· 132
Configuring VPLS ···················································································································· 132 Command reference ················································································································· 133
New feature: Multicast VPN support for inter-AS option B ····················· 133
Configuring Multicast VPN support for inter-AS option B ·································································· 133 Command reference ················································································································· 133
Modified feature: 802.1X redirect URL ·············································· 133
Feature change description ········································································································ 133 Command changes ·················································································································· 133

xii
Modified command: dot1x ead-assistant url ············································································ 133
Modified feature: Displaying information about NTP servers from the reference source to the primary NTP server ···················································· 134
Feature change description ········································································································ 134 Command changes ·················································································································· 134
Modified command: display ntp-service trace ·········································································· 134
Modified feature: Saving, rolling back, and loading the configuration ······· 134
Feature change description ········································································································ 134 Command changes ·················································································································· 135
Modified feature: Displaying information about SSH users ···················· 135
Feature change description ········································································································ 135 Command changes ·················································································································· 135
Modified command: display ssh user-information ····································································· 135
Removed feature: Displaying fabric utilization ····································· 136
Feature change description ········································································································ 136 Removed command ················································································································· 136
display fabric utilization ······································································································· 136
ESS 0302P06 ·············································································· 136
New feature: Object policies ··························································· 137
Configuring Object policies ········································································································ 137 Command reference ················································································································· 137
New feature: IPHC ······································································· 137
Configuring IPHC ····················································································································· 137 Command reference ················································································································· 137
New feature: Support of PPPoE server for IPv6 ·································· 138
Configuring Support of PPPoE server for IPv6 ··············································································· 138 Command reference ················································································································· 138
New feature: QSIG tunneling over SIP-T ··········································· 138
Configuring QSIG tunneling over SIP-T ························································································ 138 Command reference ················································································································· 138
New feature: Playout delay ····························································· 138
Configuring Playout delay ·········································································································· 138 Command reference ················································································································· 139
New feature: BGP L2VPN support for NSR ········································ 139
Configuring BGP L2VPN support for NSR ····················································································· 139 Command reference ················································································································· 139
New feature: BGP support for dynamic peers ····································· 139
Configuring BGP support for dynamic peers ·················································································· 139 Command reference ················································································································· 139
New feature: ARP PnP ·································································· 140
Configuring ARP PnP ··············································································································· 140 Command reference ················································································································· 140
New feature: Support of Syslog for DNS and support of customlog&userlog for IPv6 hosts ·················································································· 140
Configuring Support of Syslog for DNS and support of customlog&userlog for IPv6 hosts ······················ 140 Command reference ················································································································· 140

xiii
New feature: QoS soft forwarding ···················································· 140
Configuring QoS soft forwarding ································································································· 140 Command reference ················································································································· 141
New feature: Filtering by application layer protocol status ····················· 141
Configuring Filtering by application layer protocol status ·································································· 141 Command reference ················································································································· 141
New feature: ADVPN support for multicast forwarding ·························· 142
Configuring ADVPN support for multicast forwarding ······································································ 142 Command reference ················································································································· 142
New feature: MPLS LDP support for IPv6 ·········································· 142
Configuring MPLS LDP support for IPv6 ······················································································· 142 Command reference ················································································································· 142
New feature: Port security ······························································ 142
Configuring Port security ··········································································································· 142 Command reference ················································································································· 143
New feature: Customizable IVR ······················································· 143
Configuring Customizable IVR ···································································································· 143 Command reference ················································································································· 143
New feature: SRST ······································································· 144
Configuring SRST ···················································································································· 144 Command reference ················································································································· 144
New feature: NEMO ······································································ 144
Configuring NEMO ··················································································································· 144 Command reference ················································································································· 144
New feature: Support of MFR and FR for L2VPN, FR QoS, and FR compression and fragmentation······················································· 145
Configuring Support of MFR and FR for L2VPN, FR QoS, and FR compression and fragmentation ········· 145 Command reference ················································································································· 145
New feature: Support for LLDP on CPOS interfaces ···························· 145
Configuring Support for LLDP on CPOS interfaces ········································································· 145 Command reference ················································································································· 145
New feature: SMS-based automatic configuration ······························· 146
Configuring SMS-based automatic configuration ············································································ 146 Command reference ················································································································· 146
New feature: ARP attack protection ·················································· 146
Configuring ARP attack protection ······························································································· 146 Command reference ················································································································· 146
New feature: SIP support for VRF ···················································· 146
Configuring SIP support for VRF ································································································· 146 Configuration guidelines ····································································································· 147 Configuration procedure ····································································································· 147
Command reference ················································································································· 147 vpn-instance ····················································································································· 147
ESS 0102 ··················································································· 148
New feature: Portal authentication ··················································· 148
Command reference ················································································································· 149

xiv
New feature: MSDP ······································································ 149
Configuring MSDP ··················································································································· 149 Command reference ················································································································· 150
New feature: IPsec MIB and IKE MIB ··············································· 150
New feature: PoE ········································································· 150
Configuring PoE ······················································································································ 150 Command reference ················································································································· 150
New feature: CoPP software forwarding feature ·································· 151
Configuring CoPP ···················································································································· 151 Command reference ················································································································· 151
control-plane ···················································································································· 151 control-plane management ·································································································· 152 qos apply policy (interface view, control plane view) ································································· 152
New feature: Configuring MPLS LDP FRR ········································· 153
Configuring MPLS LDP FRR ······································································································ 153 Command reference ················································································································· 154
igp sync delay ··················································································································· 154 igp sync delay on-restart ····································································································· 155 mpls ldp igp sync disable ···································································································· 156
New feature: Enhanced routing features ············································ 157
Configuring enhanced routing features ························································································· 157 Command reference ················································································································· 157
non-stop-routing ················································································································ 157 ip route-static fast-reroute auto ···························································································· 158 import-route (RIP view) ······································································································· 158 import-route (OSPF view) ··································································································· 160 import-route (IS-IS view) ····································································································· 162 import-route (BGP view) ····································································································· 163 import-route (RIPng view) ··································································································· 166 import-route (OSPFv3 view) ································································································ 167 ipv6 import-route (IPv6 IS-IS view)························································································ 168
New feature: Python ····································································· 170
Using Python··························································································································· 170 Command reference ················································································································· 170
New feature: ATM ········································································ 170
Configuring ATM ······················································································································ 170 Command reference ················································································································· 171
New feature: DHCP MIB ································································ 171
DHCP MIB ······························································································································ 171 Command reference ················································································································· 171
if-match ··························································································································· 171
ESS 0006P02 ·············································································· 173

15
Release 0415
None
Release 0413
This release has the following changes:
New feature: IP forwarding last hop holding
Modified feature: Temporary user role authorization
New feature: IP forwarding last hop holding
Configuring last hop holding
Step Command Remarks
3. Enter system view. system-view N/A
4. Enter Layer 3 Ethernet interface view or subinterface view.
interface interface-type interface-number
N/A
5. Enable last hop holding. ip last-hop hold By default, last hop holding is disabled.
Command reference
ip last-hop hold
Use ip last-hop hold to enable last hop holding.
Use undo ip last-hop hold to disable last hop holding.
Syntax
ip last-hop hold
undo ip last-hop hold
Default
Last hop holding is disabled.
Views
Layer 3 Ethernet interface view
Layer 3 Ethernet subinterface view

16
Predefined user roles
network-admin
Usage guidelines
Last hop holding implements symmetric routing. It tracks the last hop MAC address for the first outgoing IP packet of a connection, and it sends the return packets to the hop that transmits the request.
Lost hop holding is based on fast forwarding entries. If the MAC address of a last hop changes, this feature can function correctly only after the fast forwarding entry is updated for the MAC address.
Examples
# Enable the last hop holding feature.
<Sysname> system-view
[Sysname] interface gigabitethernet 1/0/1
[Sysname-GigabitEthernet1/0/1] ip last-hop hold
Modified feature: Temporary user role authorization
Feature change description
The security-audit user role was unavailable for temporary user role authorization.
Command changes
Modified command: super password
Syntax
In non-FIPS mode:
super password [ role role-name ] [ { hash | simple } string ]
undo super password [ role role-name ]
In FIPS mode:
super password [ role role-name ]
undo super password [ role role-name ]
Views
System view
Change description
The role-name argument cannot be security-audit. You can specify any existing user role in the system except security-audit and guest-manager for this argument.
Release 0411
None.

17
Release 0410
This release has the following changes:
New feature: Support of multicast for ADVPN
New feature: Application layer state filtering
New feature: SIP keepalive
New feature: Multicast fast forwarding
New feature: SSL support for POS terminal access
New feature: Attack defense policy application to a security zone
New feature: AAA support for IKE extended authentication
New feature: Percentage-based CAR
New feature: Logging OSPF router ID conflict events
New feature: AFT
New feature: Configuring enhanced CC authentication in FIPS mode
New feature: Support of AAA for NETCONF
New feature: Mobile IP tunnel interface settings
New feature: LISP
New feature: LISP tunnel entries and dynamic mobility
New feature: Support of IPv6 multicast routing for VPN instances
New feature: IPv4/IPv6 PIM NSR
New feature: IGMP/MLD NSR
New feature: IPv4/IPv6 PIM passive mode
New feature: LISP virtual machine multi-hop mobility and DDT
New feature: LISP NSR
New feature: PPPoE client support for IPv6
New feature: Frame-Relay-related functions
New feature: DPI engine and content filtering
New feature: IPS
New feature: NBAR
New feature: URL filtering
New feature: Local portal Web server
New feature: Support of portal for NETCONF
New feature: Newly-added MIB objects
New feature: Performing a loopback test
New feature: IPS, ACG, and SSL VPN licenses
New feature: Support of NQA for NETCONF
New feature: Configuring CWMP to support VPN
New feature: Transceiver module source alarm

18
New feature: VLAN interface performance optimization
New feature: POSA
New feature: Specifying a backup processing slot for an interface
New feature: Configuring the ISDN leased line
New feature: NAT support for multicast source address in PIM join/prune packets
New feature: GDOI GM group anti-replay window
New feature: SIP compatibility
New feature: Voice VLAN
New feature: L2TP-based EAD
New feature: Configuring device poweroff alarming
New feature: BFD for an aggregation group
New feature: 4G modem IMSI/SN binding authentication
New feature: Media Stream Control (MSC) logging
New feature: IMSI/SN binding authentication
New feature: Specifying a band for a 4G modem
New feature: Using tunnel interfaces as OpenFlow ports
New feature: NETCONF support for ACL filtering
New feature: WAAS
New feature: Support for the MKI field in SRTP or SRTCP packets
New feature: SIP domain name
New feature: E&M logging
New feature: Setting the RTC version
New feature: Setting the maximum size of advertisement files
New feature: Support of IRF for NETCONF
New feature: Support of VCF for NETCONF
New feature: Support of SNMP for NETCONF
New feature: Support of file system for NETCONF
New feature: Support of PoE for NETCONF
New feature: Support of RMON for NETCONF
New feature: Support of policy-based routing for NETCONF
New feature: Support of BGP for NETCONF
New feature: Support of OSPF for NETCONF
New feature: Support of ping for NETCONF
New feature: Support of tracert for NETCONFNew feature: Support of L2VPN for NETCONFNew feature: SIP support for VRF
New feature: IKEv2
New feature: Specifying an IKEv2 profile for an IPsec policy
New feature: Bidirectional BFD control detection for RIP
New feature: OSPF router ID autoconfiguration

19
New feature: Layer 2 Ethernet link aggregation
New feature: Setting the cable impedance for WAN interfaces
New feature: Associating a static route with a track entry
New feature: VLAN tag processing rule for incoming traffic
New feature: IP-based portal-free rule
New feature: Portal redirect packet statistics
New feature: GDVPN
New feature: OpenFlow instance
New feature: Enabling the Extended Sequence Number (ESN) feature for an IPsec transform set
New feature: Enabling Traffic Flow Confidentiality (TFC) padding for an IPsec policy
New feature: SIP session refresh
Modified feature: License restrictions for POS terminal access
Modified feature: Displaying and maintaining Frame Relay
Modified feature: Displaying track entry infomration
Modified feature: User profile
Modified feature: Tunnel interface support for IPsec and VXLAN tunnel modes
Modified feature: PKI certificate auto-renewal
Modified feature: Configuring the PKI entity DN
Modified feature: ADVPN
Modified feature: Telnet redirect
Modified feature: DHCP snooping performance optimization
Modified feature: OSPF performance optimization
Modified feature: POS terminal access
Modified feature: License
Modified feature: IP performance optimization
Modified feature: AAA
Modified feature: Configuring a cellular interface for a 3G/4G modem
Modified feature: QoS on VXLAN tunnel interfaces
Modified feature: Option 60 encapsulation in DHCP replies
Modified feature: MPLS QoS support for matching the EXP field
Modified feature: MPLS QoS support for marking the EXP field
Modified feature: Automatic configuration
Modified feature: User profile
Modified feature: Default size of the TCP receive and send buffer
Modified feature: Obtaining fan and power module vendor information
Modified feature: Support for per-packet load sharing
Modified feature: Default user role
Modified feature: Debugging
Modified feature: SSH username

20
Modified feature: IS-IS hello packet sending interval
Modified feature: MP-group interface numbering
Modified feature: Setting the global link-aggregation load-sharing mode
Modified feature: 802.1X redirect URL
Modified feature: Displaying information about NTP servers from the reference source to the primary NTP server
Modified feature: Saving, rolling back, and loading the configuration
Modified feature: Displaying information about SSH users
Modified feature: SIP trusted nodes
Modified feature: IPsec ESP encryption algorithms
Modified feature: IPsec ESP authentication algorithms
Modified feature: IPsec AH authentication algorithms
Modified feature: Specifying an encryption algorithm for an IKE proposal
Modified feature: Specifying an authentication algorithm for an IKE proposal
Modified feature: Generating asymmetric key pairs
Modified feature: Specifying an ECDSA key pair for certificate request
Modified feature: Setting the electrical impedance
Modified feature: POS access statistics, SNMP notifications for POS access, and NII
Modified feature: QoS MIB
Modified feature: Enabling PFS for an IPsec transform set
Removed feature: Tiny proxy
Removed feature: Displaying switching fabric channel usage
New feature: Support of multicast for ADVPN
Configuring support of multicast for ADVPN
For information about this feature, see IPv4/IPv6 PIM and IPv4/IPv6 multicast routing and forwarding in H3C MSR Router Series Comware 7 IP Multicast Configuration Guide.
Command reference
The following commands were added:
display ipv6 pim nbma-link.
display pim nbma-link.
ipv6 pim nbma-mode.
pim nbma-mode.
ADVPN multicast parameters were added to the following commands:
display ipv6 multicast forwarding df-info.

21
display ipv6 multicast forwarding-table.
display ipv6 multicast routing-table.
display ipv6 pim df-info.
display ipv6 pim routing-table.
display multicast forwarding df-info.
display multicast forwarding-table.
display multicast routing-table.
display pim df-info.
display pim routing-table.
For information about the commands, see IPv4/IPv6 PIM and IPv4/IPv6 multicast routing and forwarding commands in H3C MSR Router Series Comware 7 IP Multicast Command Reference.
New feature: Application layer state filtering
Configuring application layer state filtering
For information about this feature, see ASPF in H3C MSR Router Series Comware 7 Security Configuration Guide.
Command reference
The following keywords were added to the detect command:
dns.
http.
smtp.
action.
drop.
The fields that indicate application layer status were added to the output from the display aspf policy command.
For information about the commands, see ASPF in H3C MSR Router Series Comware 7 Security Command Reference.
New feature: SIP keepalive
Configuring SIP keepalive
You can configure in-dialog keepalive and out-of-dialog keepalive.

22
Command reference
New command: options-ping
Use options-ping to globally enable in-dialog keepalive.
Use undo options-ping to globally disable in-dialog keepalive.
Syntax
options-ping seconds
undo options-ping
Default
In-dialog keepalive is disabled globally.
View
SIP view
Predefined use roles
network-admin
Parameters
seconds: Specifies the global interval for sending OPTIONS messages during a session, in the range of 60 to 1200 seconds.
Usage guidelines
This command enables the device to periodically send OPTIONS messages at the specified interval to monitor the status of the remote SIP UA during a session. It does not take effect when the session refresh negotiation succeeds before a call is established.
If you disable this feature, the device does not send OPTIONS messages after a call is established.
Example
# Globally enable in-dialog keepalive and set the interval to 60 seconds for sending OPTIONS messages during a session.
<Sysname> system-view
[Sysname] voice-setup
[Sysname-voice] sip
[Sysname-voice-sip] options-ping 60
New command: voice-class sip options-ping
Use voice-class sip options-ping to enable in-dialog keepalive for a VoIP entity.
Use voice-class sip options-ping to disable in-dialog keepalive for a VoIP entity.
Syntax
voice-class sip options-ping { global | seconds }
undo voice-class sip options-ping
Default
A VoIP entity uses the global configuration for in-dialog keepalive.
Views
VoIP entity view

23
Predefined user roles
network-admin
Parameters
global: Applies the global configuration for in-dialog keepalive to the VoIP entity.
seconds: Specifies the interval for sending OPTIONS messages during a session, in the range of 60 to 1200 seconds.
Usage guidelines
For a VoIP entity, the entity-specific in-dialog keepalive interval takes priority over the global in-dialog keepalive interval set in SIP view.
Examples
# Enable in-dialog keepalive for VoIP entity 1 and set the interval to 60 seconds for sending OPTIONS messages during a session.
<Sysname> system-view
[Sysname] voice-setup
[Sysname-voice] dial-program
[Sysname-voice-dial] entity 1 voip
[Sysname-voice-dial-entity1] voice-class sip options-ping 60
# Apply the global configuration for in-dialog keepalive to VoIP entity 1.
<Sysname> system-view
[Sysname] voice-setup
[Sysname-voice] dial-program
[Sysname-voice-dial] entity 1 voip
[Sysname-voice-dial-entity1] voice-class sip options-ping global
New feature: Multicast fast forwarding
Configuring multicast fast forwarding
In this release, the router supports multicast fast forwarding.
Command reference
New command: display multicast fast-forwarding cache
Use display multicast fast-forwarding cache to display information about multicast fast forwarding entries.
Syntax
Centralized devices:
display multicast [ vpn-instance vpn-instance-name ] fast-forwarding cache [ source-address | group-address ] *
Distributed devices in standalone mode:Centralized IRF devices:
display multicast [ vpn-instance vpn-instance-name ] fast-forwarding cache [ source-address | group-address ] * [ slot slot-number ]

24
Distributed devices in IRF mode:
display multicast [ vpn-instance vpn-instance-name ] fast-forwarding cache [ source-address | group-address ] * [ chassis chassis-number slot slot-number ]
Views
Any view
Predefined user roles
network-admin
network-operator
Parameters
vpn-instance vpn-instance-name: Specifies an MPLS L3VPN instance by its name, a case-sensitive string of 1 to 31 characters. If you do not specify a VPN instance, this command displays multicast fast forwarding entries on the public network.
source-address: Specifies a multicast source address.
group-address: Specifies a multicast group address in the range of 224.0.1.0 to 239.255.255.255.
slot slot-number: Specifies a card by its slot number. If you do not specify a card, this command displays multicast fast forwarding entries for the MPU. (Distributed devices in standalone mode.)
slot slot-number: Specifies an IRF member device by its member ID. If you do not specify a member device, this command displays multicast fast forwarding entries for the master device. (Centralized IRF devices.)
chassis chassis-number slot slot-number: Specifies a card on an IRF member device. The chassis-number argument represents the member ID of the IRF member device. The slot-number argument represents the slot number of the card. If you do not specify a card, this command displays multicast fast forwarding entries for the global active MPU. (Distributed devices in IRF mode.)
Examples
# Display multicast fast forwarding entries on the public network.
<Sysname> display multicast fast-forwarding cache
Total 1 entries, 1 matched
(60.1.1.200, 225.0.0.2)
Status : Enabled
Source port: 2001 Destination port: 2002
Protocol : 2 Flag : 0x2
Incoming interface: GigabitEthernet1/0/3
List of 1 outgoing interfaces:
GigabitEthernet1/0/2
Status: Enabled Flag: 0x14
Table 1 Command output
Field Description
Total 1 entries, 1 matched Total number of (S, G) entries in the multicast fast forwarding table, and the total number of matching (S, G) entries.
(60.1.1.200, 225.0.0.2) (S, G) entry.
Protocol Protocol number.
Flag
Flag of the (S, G) entry or the outgoing interface in the entry.
This field displays one flag or the sum of multiple flags. In this example, the value 0x2 means that the entry has only one flag 0x2. The value 0x14 means that the interface has flags 0x4 and 0x10.

25
Field Description
The following flags are available for an entry:
0x1—The entry is created because of packets passed through
between cards.
0x2—The entry is added by multicast forwarding.
The following flags are available for an outgoing interface:
0x1—The interface is added to the entry because of packets
passed through between cards.
0x2—The interface is added to an existing entry.
0x4—The MAC address of the interface is needed for fast
forwarding.
0x8—The interface is an outgoing interface associated with the
incoming VLAN or super VLAN interface.
0x10—The interface is associated with the entry.
0x20—The interface is to be deleted.
Status Status of the (S, G) entry or the outgoing interface:
Enabled—Available.
Disabled—Unavailable.
Incoming interface Incoming interface of the (S, G) entry.
List of 1 outgoing interfaces Outgoing interface list of the (S, G) entry.
New command: reset multicast fast-forwarding cache
Use reset multicast fast-forwarding cache to clear multicast fast forwarding entries.
Syntax
Centralized devices:
reset multicast [ vpn-instance vpn-instance-name ] fast-forwarding cache { { source-address | group-address } * | all }
Distributed devices in standalone mode:Centralized IRF devices:
reset multicast [ vpn-instance vpn-instance-name ] fast-forwarding cache { { source-address | group-address } * | all } [ slot slot-number ]
Distributed devices in IRF mode:
reset multicast [ vpn-instance vpn-instance-name ] fast-forwarding cache { { source-address | group-address } * | all } [ chassis chassis-number slot slot-number ]
Views
User view
Predefined user roles
network-admin
Parameters
vpn-instance vpn-instance-name: Specifies an MPLS L3VPN instance by its name, a case-sensitive string of 1 to 31 characters. If you do not specify a VPN instance, this command clears multicast fast forwarding entries on the public network.
source-address: Specifies a multicast source address.
group-address: Specifies a multicast group address in the range of 224.0.1.0 to 239.255.255.255.
slot slot-number: Specifies a card by its slot number. If you do not specify a card, this command clears multicast fast forwarding entries for the MPU. (Distributed devices in standalone mode.)

26
slot slot-number: Specifies an IRF member device by its member ID. If you do not specify a member device, this command clears multicast fast forwarding entries for the master device. (Centralized IRF devices.)
chassis chassis-number slot slot-number: Specifies a card on an IRF member device. The chassis-number argument represents the member ID of the IRF member device. The slot-number argument represents the slot number of the card. If you do not specify a card, this command clears multicast fast forwarding entries for the global active MPU. (Distributed devices in IRF mode.)
Examples
# Clear all multicast fast forwarding entries on the public network.
<Sysname> reset multicast fast-forwarding cache all
# Clear the multicast fast forwarding entry for multicast source and group (20.0.0.2, 225.0.0.2) on the public network.
<Sysname> reset multicast fast-forwarding cache 20.0.0.2 225.0.0.2
New command: display ipv6 multicast fast-forwarding cache
Use display ipv6 multicast fast-forwarding cache to display information about IPv6 multicast fast forwarding entries.
Syntax
Centralized devices:
display ipv6 multicast [ vpn-instance vpn-instance-name ] fast-forwarding cache [ ipv6-source-address | ipv6-group-address ] *
Distributed devices in standalone mode:Centralized IRF devices:
display ipv6 multicast [ vpn-instance vpn-instance-name ] fast-forwarding cache [ ipv6-source-address | ipv6-group-address ] * [ slot slot-number ]
Distributed devices in IRF mode:
display ipv6 multicast [ vpn-instance vpn-instance-name ] fast-forwarding cache [ ipv6-source-address | ipv6-group-address ] * [ chassis chassis-number slot slot-number ]
Views
Any view
Predefined user roles
network-admin
network-operator
Parameters
vpn-instance vpn-instance-name: Specifies an MPLS L3VPN instance by its name, a case-sensitive string of 1 to 31 characters. If you do not specify a VPN instance, this command displays IPv6 multicast fast forwarding entries on the public network.
ipv6-source-address: Specifies an IPv6 multicast source address.
ipv6-group-address: Specifies an IPv6 multicast group address. The value range for this argument is FFxy::/16 (excluding FFx1::/16 and FFx2::/16), where "x" and "y" represent any hexadecimal numbers from 0 to F.
slot slot-number: Specifies a card by its slot number. If you do not specify a card, this command displays IPv6 multicast fast forwarding entries for the MPU. (Distributed devices in standalone mode.)

27
slot slot-number: Specifies an IRF member device by its member ID. If you do not specify a member device, this command displays IPv6 multicast fast forwarding entries for the master device. (Centralized IRF devices.)
chassis chassis-number slot slot-number: Specifies a card on an IRF member device. The chassis-number argument represents the member ID of the IRF member device. The slot-number argument represents the slot number of the card. If you do not specify a card, this command displays IPv6 multicast fast forwarding entries for the global active MPU. (Distributed devices in IRF mode.)
Examples
# Display IPv6 multicast fast forwarding entries on the public network.
<Sysname> display ipv6 multicast fast-forwarding cache
Total 1 entries, 1 matched
(FE1F:60::200, FF0E::1)
Status : Enabled
Source port: 2001 Destination port: 2002
Protocol : 2 Flag : 0x2
Incoming Interfacfe: GigabitEthernet1/0/3
List of 1 outgoing interfaces:
GigabitEthernet1/0/2
Status: Enabled Flag: 0x14
Table 2 Command output
Field Description
Total 1 entries, 1 matched Total number of (S, G) entries in the IPv6 multicast fast forwarding table, and the total number of matching (S, G) entries.
(FE1F:60::200, FF0E::1) (S, G) entry.
Protocol Protocol number.
Flag
Flag of the (S, G) entry or the outgoing interface in the entry.
This field displays one flag or the sum of multiple flags. In this example, the value 0x2 means that the entry has only one flag 0x2. The value 0x14 means that the interface has flags 0x4 and 0x10.
The following flags are available for an entry:
0x1—The entry is created because of packets passed through
between cards.
0x2—The entry is added by IPv6 multicast forwarding.
The following flags are available for an outgoing interface:
0x1—The interface is added to the entry because of packets
passed through between cards.
0x2—The interface is added to an existing entry.
0x4—The MAC address of the interface is needed for fast
forwarding.
0x8—The interface is an outgoing interface associated with the
incoming VLAN or super VLAN interface.
0x10—The interface is associated with the entry.
0x20—The interface is to be deleted.
Status Status of the (S, G) entry or the outgoing interface:
Enabled—Available.
Disabled—Unavailable.
Incoming interface Incoming interface of the (S, G) entry.

28
Field Description
List of 1 outgoing interfaces Outgoing interface list of the (S, G) entry.
New command: reset ipv6 multicast fast-forwarding cache
Use reset ipv6 multicast fast-forwarding cache to clear IPv6 multicast fast forwarding entries.
Syntax
Centralized devices:
reset ipv6 multicast [ vpn-instance vpn-instance-name ] fast-forwarding cache { { ipv6-source-address | ipv6-group-address } * | all }
Distributed devices in standalone mode:Centralized IRF devices:
reset ipv6 multicast [ vpn-instance vpn-instance-name ] fast-forwarding cache { { ipv6-source-address | ipv6-group-address } * | all } [ slot slot-number ]
Distributed devices in IRF mode:
reset ipv6 multicast [ vpn-instance vpn-instance-name ] fast-forwarding cache { { ipv6-source-address | ipv6-group-address } * | all } [ chassis chassis-number slot slot-number ]
Views
Any view
Predefined user roles
network-admin
Parameters
vpn-instance vpn-instance-name: Specifies an MPLS L3VPN instance by its name, a case-sensitive string of 1 to 31 characters. If you do not specify a VPN instance, this command clears IPv6 multicast fast forwarding entries on the public network.
ipv6-source-address: Specifies an IPv6 multicast source address.
ipv6-group-address: Specifies an IPv6 multicast group address. The value range for this argument is FFxy::/16 (excluding FFx1::/16 and FFx2::/16), where "x" and "y" represent any hexadecimal numbers from 0 to F.
slot slot-number: Specifies a card by its slot number. If you do not specify a card, this command clears IPv6 multicast fast forwarding entries for the MPU. (Distributed devices in standalone mode.)
slot slot-number: Specifies an IRF member device by its member ID. If you do not specify a member device, this command clears IPv6 multicast fast forwarding entries for the master device. (Centralized IRF devices.)
chassis chassis-number slot slot-number: Specifies a card on an IRF member device. The chassis-number argument represents the member ID of the IRF member device. The slot-number argument represents the slot number of the card. If you do not specify a card, this command clears IPv6 multicast fast forwarding entries for the global active MPU. (Distributed devices in IRF mode.)
Examples
# Clear all IPv6 multicast fast forwarding entries on the public network
<Sysname> reset ipv6 multicast fast-forwarding cache all
# Clear the IPv6 multicast fast forwarding entry for IPv6 multicast source and group (FE1F:20::2, FF0E::1) on the public network.
<Sysname> reset ipv6 multicast fast-forwarding cache fe1f:20::2 ff0e::1

29
New feature: SSL support for POS terminal access
Configuring an SSL policy for POS terminal access
Step Command Remarks
6. Enter system view. system-view N/A
7. Create a TCP access POS terminal template.
posa terminal terminal-id type tcp listen-port port [ idle-time time ] [ https | ssl ]
By default, no TCP access POS terminal templates exist.
8. Specify an SSL server policy for TCP-based POS terminal templates.
posa terminal ssl-server-policy policy-name
By default, no SSL server policy is specified for TCP-based POS terminal templates.
Execute this command if you specify the https or ssl keyword of the posa terminal command. The device uses the SSL server policy parameters to establish HTTPS or SSL connections with POS terminals.
Command reference
New command: posa terminal ssl-server-policy
Use posa terminal ssl-server-policy to specify an SSL server policy for TCP-based POS terminal templates.
User undo posa terminal ssl-server-policy to restore the default.
Syntax
posa terminal ssl-server-policy policy-name
undo posa terminal ssl-server-policy
Default
No SSL server policy is specified for TCP-based POS terminal templates.
Views
System view
Predefined user roles
network-admin
mdc-admin
Parameters
policy-name: Specifies an SSL server policy by its name, a case-insensitive string of 1 to 31 characters.

30
Usage guidelines
Execute this command if you specify the https or ssl keyword of the posa terminal command. The device uses the SSL server policy parameters to establish HTTPS or SSL connections with POS terminals.
Examples
# Specify SSL server policy policy1 for TCP-based POS terminal templates.
<Sysname> system-view
[Sysname] posa terminal ssl-server-policy policy1
Modified command: posa terminal
Old syntax
posa terminal terminal-id type tcp listen-port port [ idle-time time ]
Old syntax
posa terminal terminal-id type tcp listen-port port [ idle-time time ] [ https | ssl ]
Views
System view
Change description
The https and nii keywords were added. The router can use HTTPS or SSL connections to communicate with POS terminals.
New feature: Attack defense policy application to a security zone
Applying an attack defense policy to a security zone
To apply an attack defense policy to a security zone:
Step Command Remarks
9. Enter system view. system-view N/A
10. Enter security zone view. security-zone name Trust N/A
11. Apply an attack defense policy to the security zone.
attack-defense apply policy policy-number
By default, a security zone has no attack defense policy applied.
Command reference
The following commands were newly added:
attack-defense apply policy
blacklist enable
client-verify dns enable

31
client-verify http enable
client-verify tcp enable
display attack-defense flood statistics ip
display attack-defense flood statistics ipv6
display attack-defense scan attacker ip
display attack-defense scan attacker ipv6
display attack-defense scan attacker ipv6
display attack-defense scan victim ipv6
display attack-defense statistics security-zone
reset attack-defense statistics security-zone
For information about the commands, see attack defense commands in H3C MSR Router Series Comware 7 Security Command Reference.
New feature: AAA support for IKE extended authentication
Configuring IKE extended authentication
For information about this feature, see AAA configuration in H3C MSR Router Series Comware 7 Security Configuration Guide.
Command reference
The authentication ike command was newly added.
The ike keyword was added to the display local-user, undo local-user, service-type, and undo service-type commands.
For information about the commands, see AAA commands in H3C MSR Router Series Comware 7 Security Command Reference.
New feature: Percentage-based CAR
Configuring percentage-based CAR
For information about this feature, see QoS in H3C MSR Router Series Comware 7 ACL and QoS Configuration Guide.
Command reference
The percent car command was added.
For information about the command, see traffic behavior commands in H3C MSR Router Series Comware 7 ACL and QoS Command Reference.

32
New feature: Logging OSPF router ID
conflict events
Logging OSPF router ID conflict events
For information about this feature, see OSPF configuration in H3C MSR Router Series Comware 7
Layer 3—IP Routing Configuration Guide.
Command reference
The following commands were newly added:
database-filter peer (OSPF view)
ospf database-filter
ospf ttl-security
ttl-security
For information about the commands, see OSPF commands in H3C MSR Router Series Comware 7
Layer 3—IP Routing Command Reference.
New feature: AFT
Configuring AFT
For information about this feature, see AFT in H3C MSR Router Series Comware 7 Layer 3—IP
Services Configuration Guide.
Command reference
For information about the commands, see AFT commands in H3C MSR Router Series Comware 7
Layer 3—IP Services Command Reference.

33
New feature: Configuring enhanced CC
authentication in FIPS mode
Configuring enhanced CC authentication in FIPS mode
For information about this feature, see IPsec, SSH, SSL, and public key management in H3C MSR
Router Series Comware 7 Security Configuration Guide.
Command reference
The ecdsa keyword was added to the following commands:
scp.
scp ipv6.
sftp.
sftp ipv6.
ssh2.
ssh2 ipv6.
The dhe_rsa_aes_128_cbc_sha and dhe_rsa_aes_256_cbc_sha keywords were removed from
the ciphersuite command in FIPS mode.
The secp192r1 and secp256r1 keywords were added to the public-key local create command.
The public-key local export ecdsa command was added.
For more information about these commands, see IPsec, SSH, SSL, and public key management
commands in H3C MSR Router Series Comware 7 Security Command Reference.
New feature: Support of AAA for
NETCONF
Configuring support of AAA for NETCONF
For information about this feature, see AAA in H3C MSR Router Series Comware 7 Security
Configuration Guide.

34
Command reference
The radius session-control client command was newly added. The security-policy-server
command was deleted.
For information about the command, see AAA commands in H3C MSR Router Series Comware 7
Security Configuration Guide.
New feature: Mobile IP tunnel interface
settings
Configuring the mobile IP tunnel interface settings
Step Command Remarks
12. Enter system view. system-view N/A
13. Enable the mobile router feature and enter mobile router view.
ip mobile router By default, the mobile router feature is disabled.
14. Assign a home address to the mobile router.
address ip-address By default, the mobile router does not have any home addresses.
15. Specify the IP address of the home agent for the mobile router.
home-agent ip-address By default, no home agent is specified for the mobile router.
16. (Optional.) Set the MTU for the mobile IP tunnel interface.
tunnel mtu value By default, the MTU for the tunnel interface is 64000 bytes.
17. (Optional.) Set the DF bit to 0 for outgoing tunneled packets.
ip df-bit zero By default, the DF bit of outgoing tunneled packets is not set.
18. (Optional.) Apply an IPsec policy to the mobile IP tunnel interface.
ipsec policy policy-name By default, no IPsec policy is applied to the mobile IP tunnel interface.
19. (Optional.) Set the TCP MSS for the mobile IP tunnel interface.
tcp mss value By default, no TCP MSS is set.
Command reference
The following commands were added:
ip df-bit zero
ipsec policy
tcp mss
35
For information about the commands, see NEMO commands in H3C MSR Router Series Comware 7
NEMO Command Reference.
New feature: LISP
Configuring LISP
For information about this feature, see LISP configuration in H3C MSR Router Series Comware 7
LISP Configuration Guide.
Command reference
For information about the commands, see LISP commands in H3C MSR Router Series Comware 7
LISP Command Reference.
New feature: LISP tunnel entries and
dynamic mobility
Configuring LISP tunnel entries and dynamic
mobility
For information about this feature, see LISP configuration in H3C MSR Router Series Comware 7
LISP Configuration Guide.
Command reference
For information about the commands, see LISP commands in H3C MSR Router Series Comware 7
LISP Command Reference.

36
New feature: Support of IPv6 multicast
routing for VPN instances
Enabling support of IP multicast routing for VPN
instances
For information about this feature, see IPv6 multicast routing and forwarding in H3C MSR Router
Series Comware 7 IP Multicast Configuration Guide.
Command reference
The ipv6 multicast routing vpn-instance command was added.
For information about the command, see IPv6 multicast routing and forwarding commands in H3C
MSR Router Series Comware 7 IP Multicast Command Reference.
New feature: IPv4/IPv6 PIM NSR
Enabling IPv4/IPv6 PIM NSR
For information about this feature, see IPv4/IPv6 PIM in H3C MSR Router Series Comware 7 IP
Multicast Configuration Guide.
Command reference
The pim non-stop-routing and ipv6 pim non-stop-routing commands were added.
For information about the commands, see IPv4/IPv6 PIM commands in H3C MSR Router Series
Comware 7 IP Multicast Command Reference.
New feature: IGMP/MLD NSR
Enabling IGMP/MLD NSR
For information about this feature, see IGMP/MLD in H3C MSR Router Series Comware 7 IP
Multicast Configuration Guide.

37
Command reference
The igmp non-stop-routing and mld non-stop-routing commands were added.
For information about the commands, see IGMP/MLD commands in H3C MSR Router Series
Comware 7 IP Multicast Command Reference.
New feature: IPv4/IPv6 PIM passive mode
Enabling IPv4/IPv6 PIM passive mode
For information about this feature, see IPv4/IPv6 PIM in H3C MSR Router Series Comware 7 IP
Multicast Configuration Guide.
Command reference
The pim passive and ipv6 pim passive commands were added.
For information about the commands, see IPv4/IPv6 PIM commands in H3C MSR Router Series
Comware 7 IP Multicast Command Reference.
New feature: LISP virtual machine
multi-hop mobility and DDT
Configuring LISP virtual machine multi-hop
mobility and DDT
For information about this feature, see LISP configuration in H3C MSR Router Series Comware 7
LISP Configuration Guide.
Command reference
The eid-notify command was newly added.
For information about the command, see LISP commands in H3C MSR Router Series Comware 7
LISP Command Reference.

38
New feature: LISP NSR
Configuring LISP NSR
The display system internal lisp forwarding statistics command was added. You can use the
command to display the LISP thread statistics.
The display system internal lisp nsr no-cache command was added. You can use the command
to display the tentative entries created during the NSR active/standby switchover.
The display system internal lisp nsr status command was added. You can use the command to
display the LISP NSR status.
Command reference
The following commands were newly added:
display system internal lisp forwarding statistics
display system internal lisp nsr no-cache
display system internal lisp nsr status
For information about the commands, see LISP probe commands in H3C MSR Router Series
Comware 7 Probe Command Reference.
New feature: PPPoE client support for
IPv6
Associating a dial rule with a dialup interface
For information about this feature, see DDR in H3C MSR Router Series Comware 7 Layer 2—WAN
Access Configuration Guide.
Command reference
The ipv6 keyword is added to the dialer-group rule command. For information about this command,
see DDR commands in H3C MSR Router Series Comware 7 Layer 2—WAN Access Command
Reference.

39
Specifying an IPv6 prefix for an interface to
automatically generate an IPv6 global unicast
address
For information about this feature, see IPv6 basics in H3C MSR Router Series Comware 7 Layer
3—IP Services Configuration Guide.
Command reference
The ipv6 address command is added. For information about the command, see IPv6 basics
commands in H3C MSR Router Series Comware 7 Layer 3—IP Services Command Reference.
New feature: Frame-Relay-related functions
Configuring multilink Frame Relay
For information about this feature, see multilink Frame Relay in H3C MSR Router Series Comware 7
WAN Access Configuration Guide.
Command reference
For information about the commands, see multilink Frame Relay commands in H3C MSR Router
Series Comware 7 WAN Access Command Reference.
Configuring Frame Relay FRF.12 fragmentation
For information about this feature, see Frame Relay in H3C MSR Router Series Comware 7 WAN
Access Configuration Guide.
Command reference
The following commands were added:
display fr fragment.
fr fragment enable.
fr fragment size.

40
For information about the commands, see Frame Relay commands in H3C MSR Router Series
Comware 7 WAN Access Command Reference.
Configuring Frame Relay STAC compression
For information about this feature, see Frame Relay in H3C MSR Router Series Comware 7 WAN
Access Configuration Guide.
Command reference
The display fr compression stac and fr compression stac enable commands were added.
For information about the commands, see Frame Relay commands in H3C MSR Router Series
Comware 7 WAN Access Command Reference.
Configuring Frame Relay IPv6 address mapping
For information about this feature, see Frame Relay in H3C MSR Router Series Comware 7 WAN
Access Configuration Guide.
Command reference
The following commands were added:
display fr ipv6 map.
fr ipv6 ind.
fr map ipv6.
fr ipv6 ind holdtime.
fr ipv6 ind solicitation retrans-timer.
reset fr ipv6 ind.
For information about the commands, see Frame Relay commands in H3C MSR Router Series
Comware 7 WAN Access Command Reference.
Enabling SNMP notifications for Frame Relay
For information about this feature, see Frame Relay in H3C MSR Router Series Comware 7 WAN
Access Configuration Guide.
Command reference
The snmp-agent trap enable fr command was added.

41
For information about the command, see Frame Relay commands in H3C MSR Router Series
Comware 7 WAN Access Command Reference.
Setting the Frame Relay interface type
For information about this feature, see Frame Relay in H3C MSR Router Series Comware 7 WAN
Access Configuration Guide.
Command reference
The fr interface-type command was added.
For information about the command, see Frame Relay commands in H3C MSR Router Series
Comware 7 WAN Access Command Reference.
Configuring Frame Relay QoS
For information about this feature, see FR QoS in H3C MSR Router Series Comware 7 ACL and
QoS Configuration Guide.
Command reference
All commands were newly added.
For information about the commands, see FR QoS commands in H3C MSR Router Series Comware
7 ACL and QoS Command Reference.
New feature: DPI engine and content
filtering
Configuring the DPI engine and content filtering
For information about this feature, see DPI overview and DPI engine in H3C MSR Router Series
Comware 7 DPI Configuration Guide.
Command reference
For information about the commands, see DPI overview and DPI engine commands in H3C MSR
Router Series Comware 7 DPI Command Reference.

42
New feature: IPS
Configuring IPS
For information about this feature, see IPS configuration in H3C MSR Router Series Comware 7 DPI
Configuration Guide.
Command reference
For information about the commands, see IPS commands in H3C MSR Router Series Comware 7
DPI Command Reference.
New feature: NBAR
Configuring NBAR
For information about this feature, see APR in H3C MSR Router Series Comware 7 Security
Configuration Guide.
Command reference
The following new commands were added:
apr signature update.
Description.
Destination.
Direction.
Disable.
display app-group.
display application.
display apr signature information.
include app-group.
nbar application.
nbar protocol-discovery.
service-port.
signature.

43
source.
For information about the commands, see APR in H3C MSR Router Series Comware 7 Security
Command Reference.
New feature: URL filtering
Configuring URL filtering
For information about this feature, see URL filtering configuration in H3C MSR Router Series
Comware 7 DPI Configuration Guide.
Command reference
For information about the commands, see URL filtering commands in H3C MSR Router Series
Comware 7 DPI Command Reference.
New feature: Local portal Web server
Configuring a local portal Web server
For information about this feature, see portal in H3C MSR Router Series Comware 7 Security
Configuration Guide.
Command reference
The following commands were added:
portal local-web-server
default-logon-page
logon-page
tcp-port
The ssid keyword was added to the url-parameter param-name { apmac | original-url |
source-address | source-mac | ssid | value expression } command.
For information about the commands, see portal commands in H3C MSR Router Series Comware 7
Security Command Reference.

44
New feature: Support of portal for
NETCONF
Support for NETCONF was added to portal.
New feature: Newly-added MIB objects
Event MIB added support for the hh3cWirelessCardModemMode and
hh3cWirelessCardCurNetConn MIB objects.
New feature: Performing a loopback test
Performing a loopback test
For information about this feature, see WAN interface configuration in H3C MSR Router Series
Comware 7 Interface Configuration Guide.
Command reference
New command: loopback-test
For information about the command, see WAN interface commands in H3C MSR Router Series
Comware 7 Interface Command Reference.
New feature: IPS, ACG, and SSL VPN
licenses
This release added support for IPS, ACG and SSL VPN licenses.
New feature: Support of NQA for
NETCONF
Support for NETCONF was added to NQA.

45
New feature: Configuring CWMP to
support VPN
Configuring CWMP to support VPN
For information about this feature, see CWMP configuration in H3C MSR Router Series Comware 7
Network Management and Monitoring Configuration Guide.
Command reference
For information about the commands, see CWMP commands in H3C MSR Router Series Comware
7 Network Management and Monitoring Command Reference.
New feature: Transceiver module source
alarm
Disabling transceiver module source alarm
For information about this feature, see device management in H3C MSR Router Series Comware 7
Fundamentals Configuration Guide.
Command reference
transceiver phony-alarm-disable
For information about this command, see device management commands in H3C MSR Router
Series Comware 7 Fundamentals Command Reference.
New feature: VLAN interface performance
optimization
This software version optimized the following items:
VLAN functions used for sending data in the adaption layer.

46
Processing flow of the RAW functions for sending and receiving data for chips mv88ex, mvcpss,
and bcm5614x.
New feature: POSA
POSA terminal access configuration
For information about this feature, see POS terminal access in H3C MSR Router Series Comware 7
Terminal Access Configuration Guide.
POS terminal access command reference
The following commands were added:
reset posa statistics nii
display posa statistics nii
trade-exchanges
posa trade-falling-threshold
display posa statistics caller-id
posa e1-dial-falling-threshold
snmp-agent trap enable posa
display posa statistics caller-ip
For information about the commands, see POS terminal access commands in H3C MSR Router
Series Comware 7 Terminal Access Command Reference.
New feature: Specifying a backup
processing slot for an interface
Specifying a backup processing slot for an
interface
For information about this feature, see the configuration guides for the following modules:
PPP, L2TP, HDLC, and DDR in H3C MSR Router Series Layer 2—WAN Access Configuration
Guide.
Etherent link aggregation in H3C MSR Router Series Layer 2—LAN Switching Configuration
Guide.
47
MPLS proctection switching in H3C MSR Router Series MPLS Configuration Guide.
Command reference
The service standby command was added to support this feature.
For information about this command, see the command references for the following modules:
PPP, L2TP, HDLC, and DDR in H3C MSR Router Series Layer 2—WAN Access Command
Reference.
Etherent link aggregation in H3C MSR Router Series Layer 2—LAN Switching Command
Reference.
MPLS proctection switching in H3C MSR Router Series Command Reference.
New feature: Configuring the ISDN leased
line
Configuring the ISDN leased line
For information about this feature, see ISDN configuration in H3C MSR Router Series Comware 7
Layer 2—WAN Access Configuration Guide.
Command reference
Support for the isdn leased-line command was added.
For information about the command, see ISDN commands in H3C MSR Router Series Comware 7
Layer 2—WAN Access Command Reference.
New feature: NAT support for multicast
source address in PIM join/prune packets
This feature enables the device to act as a NAT gateway and perform NAT on the multicast source
address in PIM join or prune packets based on NAT mappings. Use this feature in a multicast
scenario where the multicast source resides on a private network, multicast receivers reside on
private networks, and PIM-SSM mode is used.

48
New feature: GDOI GM group anti-replay
window
Configuring the anti-replay window for a GDOI
GM group
Step Command Remarks
20. Enter system view. system-view N/A
21. Create a GDOI GM group and enter GDOI GM group view.
gdoi gm group [ ipv6 ] group-name
By default, no GDOI GM groups exist.
22. (Optional.) Set the anti-replay window size for the GDOI GM group.
client anti-replay window { sec seconds | msec milliseconds }
By default, the anti-replay window size is not set for a GDOI GM group.
Command reference
client anti-replay window
Use client anti-replay window to set the anti-replay window size for a GDOI GM group.
Use undo client anti-replay window to restore the default.
Syntax
client anti-replay window { sec seconds | msec milliseconds }
undo client anti-replay window
Default
The anti-replay window size is not set for a GDOI GM group.
Views
GDOI GM group view
Predefined user roles
network-admin
Parameters
sec seconds: Specifies the anti-replay window size in seconds in the range of 1 to 100.
msec milliseconds: Specifies the anti-replay window size in milliseconds in the range of 100 to
10000.

49
Usage guidelines
The anti-replay window size set in this command takes priority over the anti-replay window size
obtained from the KS. If you do not configure this command, the anti-replay window size obtained
from the KS is used.
This command must be used together with the Cisco IP-D3P feature.
Examples
# Set the anti-replay window size to 50 seconds for GDOI GM group group1.
<Sysname> system-view
[Sysname] gdoi gm group group1
[Sysname-gdoi-gm-group-group1] client anti-replay window sec 50
New feature: SIP compatibility
Configuring SIP compatibility
If a third-party device does not implement SIP in strict accordance with the RFC standard, you can
configure SIP compatibility for the router to interoperate with the third-party device.
With the sip-compatible t38 command configured, the router excludes :0 from the following SDP
parameters in the originated re-INVITE messages:
T38FaxTranscodingJBIG.
T38FaxTranscodingMMR.
T38FaxFillBitRemoval.
With the sip-compatible x-param command configured, the router adds SDP description
information (a=X-fax and a=X-modem) for fax pass-through and modem pass-through in the
originated re-INVITE messages.
To configure SIP compatibility:
Step Command Remarks
23. Enter system view. system-view N/A
24. Enter voice view. voice-setup N/A
25. Enter SIP view. sip N/A
26. Configure SIP compatibility. sip-compatible { t38 | x-param } By default, SIP compatibility is not configured.

50
Command reference
New command:sip-compatible
Use sip-compatible to configure SIP compatibility with a third-party device.
Use undo sip-compatible to restore the default.
Syntax
sip-compatible { t38 | x-param }
undo sip-compatible { t38 | x-param }
Default
SIP compatibility is not configured.
Views
SIP view
Predefined user roles
network-admin
Parameters
t38: Configures SIP compatibility for standard T.38 fax. With this keyword specified, the router
excludes :0 from the following SDP parameters in the originated re-INVITE messages:
T38FaxTranscodingJBIG.
T38FaxTranscodingMMR.
T38FaxFillBitRemoval.
This keyword is required when the router interoperates with a third-party softswitch device to
exchange T.38 fax messages.
x-param: Configures SIP compatibility for fax pass-through and modem pass-through. With this
keyword specified, the router adds SDP description information for fax pass-through and modem
pass-through to outgoing re-INVITE messages. This keyword is required when the router
interoperates with a third-party softswitch device to perform fax pass-through and modem
pass-through.
Usage guidelines
The t38 and x-param keywords can be both configured to interoperate with a third-party softswitch
device.
Examples
# Configure SIP compatibility for standard T.38 fax.
<Sysname> system-view
[Sysname] voice-setup
[Sysname-voice] sip

51
[Sysname-voice-sip] sip-compatible t38
New feature: Voice VLAN
Configuring a voice VLAN
Configuring a port to operate in automatic voice VLAN
assignment mode
Step Command Remarks
27. Enter system view. system-view N/A
28. (Optional.) Set the voice VLAN aging timer.
voice-vlan aging minutes By default, the aging timer of a voice VLAN is 1440 minutes.
29. (Optional.) Enable the voice VLAN security mode.
voice-vlan security enable By default, the voice VLAN security mode is enabled.
30. (Optional.) Add an OUI address for voice packet identification.
voice-vlan mac-address oui mask oui-mask [ description text ]
By default, system default OUI addresses exist.
31. Enter interface view.
Enter Layer 2 Ethernet interface view: interface interface-type
interface-number
Enter Layer 2 aggregate interface view: interface bridge-aggregation interface-number
Enter S-channel interface view: interface s-channel interface-number.channel-id
Enter S-channel aggregate interface view: interface schannel-aggregation
interface-number:channel-id
Enter Layer 2 RPR logical interface view: interface rpr-bridge interface-number
N/A
32. Set the link type of the port.
Set the port link type to trunk: port link-type trunk
Set the port link type to hybrid: port link-type hybrid
N/A
33. Configure the port to operate in automatic voice VLAN assignment mode.
voice-vlan mode auto By default, the automatic voice VLAN assignment mode is enabled.

52
Step Command Remarks
34. Enable the voice VLAN feature on the port.
voice-vlan vlan-id enable
By default, the voice VLAN feature is disabled on a port.
Before you execute this command, make sure the specified VLAN already exists.
Configuring a port to operate in manual voice VLAN
assignment mode
Step Command Remarks
35. Enter system view. system-view N/A
36. (Optional.) Enable the voice VLAN security mode.
voice-vlan security enable By default, the voice VLAN security mode is enabled.
37. (Optional.) Add an OUI address for voice packet identification.
voice-vlan mac-address oui mask oui-mask [ description text ]
By default, system default OUI addresses exist.
38. Enter interface view.
Enter Layer 2 Ethernet interface view: interface interface-type interface-number
Enter Layer 2 aggregate interface view: interface bridge-aggregation interface-number
Enter S-channel interface view: interface s-channel interface-number.channel-id
Enter S-channel aggregate interface view: interface schannel-aggregation
interface-number:channel-id
Enter Layer 2 RPR logical interface view: interface rpr-bridge interface-number
N/A
39. Configure the port to operate in manual voice VLAN assignment mode.
undo voice-vlan mode auto By default, a port operates in automatic voice VLAN assignment mode.
40. Set the link type of the port.
Set the port link type to access: port link-type access
Set the port link type to trunk: port link-type trunk
Set the port link type to hybrid: port link-type hybrid
By default, each port is an access port.

53
Step Command Remarks
41. Assign the access, trunk, or hybrid port to the voice VLAN.
For the access port: port access vlan vlan-id
For the trunk port: port trunk permit vlan { vlan-id-list | all }
For the hybrid port: port hybrid vlan vlan-id-list { tagged | untagged }
After you assign an access port to the voice VLAN, the voice VLAN becomes the PVID of the port.
42. (Optional.) Configure the voice VLAN as the PVID of the trunk or hybrid port.
For the trunk port: port trunk pvid vlan vlan-id
For the hybrid port: port hybrid pvid vlan vlan-id
This step is required for untagged incoming voice traffic and prohibited for tagged incoming voice traffic.
43. Enable the voice VLAN feature on the port.
voice-vlan vlan-id enable
By default, the voice VLAN feature is disabled on a port.
Before you execute this command, make sure the specified VLAN already exists.
Enabling LLDP for automatic IP phone discovery
Step Command Remarks
44. Enter system view. system-view N/A
45. Enable LLDP for automatic IP phone discovery.
voice-vlan track lldp By default, LLDP for automatic IP phone discovery is disabled.
Configuring LLDP to advertise a voice VLAN
For IP phones that support LLDP, the device advertises the voice VLAN information to the IP phones
through LLDP-MED TLVs.
To configure LLDP to advertise a voice VLAN:
Step Command Remarks
46. Enter system view. system-view N/A
47. Enter Layer 2 Ethernet interface view.
interface interface-type interface-number
N/A
48. Configure an advertised voice VLAN ID.
lldp tlv-enable med-tlv network-policy vlan-id
By default, no advertised voice VLAN ID is configured.
Configuring CDP to advertise a voice VLAN
If an IP phone supports CDP but does not support LLDP, it sends CDP packets to the device to
request the voice VLAN ID. If the IP phone does not receive the voice VLAN ID within a time period,

54
it sends out untagged voice packets. These untagged voice packets cannot be differentiated from
other types of packets.
You can configure CDP compatibility on the device to enable it to perform the following operations:
Receive and identify CDP packets from the IP phone.
Send CDP packets to the IP phone. The voice VLAN information is carried in the CDP packets.
After receiving the advertised VLAN information, the IP phone starts automatic voice VLAN
configuration. Packets from the IP phone will be transmitted in the dedicated voice VLAN.
To configure CDP to advertise a voice VLAN:
Step Command Remarks
49. Enter system view. system-view N/A
50. Enable CDP compatibility. lldp compliance cdp By default, CDP compatibility is disabled.
51. Enter Layer 2 Ethernet interface view.
interface interface-type interface-number
N/A
52. Configure CDP-compatible LLDP to operate in TxRx mode.
lldp compliance admin-status cdp txrx
By default, CDP-compatible LLDP operates in disable mode.
53. Configure an advertised voice VLAN ID.
cdp voice-vlan vlan-id By default, no advertised voice VLAN ID is configured.
Displaying and maintaining voice VLANs
Execute display commands in any view.
Task Command
Display the voice VLAN state. display voice-vlan state
Display OUI addresses on a device. display voice-vlan mac-address
Command reference
The following commands were added:
display voice-vlan mac-address.
display voice-vlan state.
voice-vlan aging.
voice-vlan enable.
voice-vlan mac-address.
voice-vlan mode auto.
voice-vlan security enable.

55
voice-vlan track lldp.
For more information about these commands, see H3C MSR Series Routers Layer 2—LAN
Switching Command Reference(V7).
New feature: L2TP-based EAD
Enabling L2TP-based EAD
EAD authenticates PPP users that pass the access authentication. PPP users that pass EAD
authentication can access network resources. PPP users that fail EAD authentication can only
access the resources in the quarantine areas.
EAD uses the following procedure:
1. The iNode client uses L2TP to access the LNS. After the client passes the PPP authentication,
the CAMS/IMC server assigns isolation ACLs to the LNS. The LNS uses the isolation ACLs to
filter incoming packets.
2. After the IPCP negotiation, the LNS sends the IP address of the CAMS/IMC server to the iNode
client. The server IP address is permitted by the isolation ACLs.
3. The CAMS/IMC sever authenticates the iNode client and performs security check for the iNode
client. If the iNode client passes security check, the CAMS/IMC server assigns security ACLs
for the iNode client to the LNS. The iNode client can access network resources.
To enable L2TP-based EAD:
Step Command Remarks
54. Enter system view. system-view N/A
55. Create a VT interface and enter its view
interface virtual-template virtual-template-number
N/A
56. Enable L2TP-based EAD. ppp access-control enable By default, L2TP-based EAD is disabled.
Command reference
ppp access-control enable
Use ppp access-control enable to enable L2TP-based EAD.
Use undo ppp access-control enable to disable L2TP-based EAD.
Syntax
ppp access-control enable

56
undo ppp access-control enable
Default
L2TP-based EAD is disabled.
Views
VT interface view
Predefined user roles
network-admin
Usage guidelines
This command does not apply to VA interfaces that already exist in the VT interface. It only applies to
newly created VA interfaces.
Different ACLs are required for different users if the VT interface is used as the access interface for
the LNS.
After L2TP-based EAD is enabled, the LNS transparently passes CAMS/IMC packets to the iNode
client to inform the client of EAD server information, such as the IP address.
Examples
# Enable L2TP-based EAD.
<Sysname> system-view
[Sysname] interface virtual-template 10
[Sysname-Virtual-Template10] ppp access-control enable
display ppp access-control interface
Use display ppp access-control interface to display access control information for VA interfaces
on a VT interface.
Syntax
display ppp access-control interface { interface-type interface-number | interface-name }
Views
Any view
Predefined user roles
network-admin
network-operator
Parameters
interface-type interface-number: Specifies an interface by its type and number.
interface-name: Specifies an interface by its name.
Examples
# Display access control information for VA interfaces on VT interface 2.

57
<Sysname> display ppp access-control interface virtual-template 2
Interface: Virtual-Template2:0
User Name: mike
In-bound Policy: acl 3000
Totally 0 packets, 0 bytes, 0% permitted,
Totally 0 packets, 0 bytes, 0% denied.
Interface: Virtual-Template2:1
User Name: tim
In-bound Policy: acl 3001
Totally 0 packets, 0 bytes, 0% permitted,
Totally 0 packets, 0 bytes, 0% denied.
Table 3 Command output
Field Description
Interface VA interface that the PPP user accesses.
User Name Username of the PPP user.
In-bound Policy Security ACLs for the PPP user.
Totally x packets, x bytes, x% permitted Total number, data rate, and pass percentage of permitted packets.
Totally x packets, x bytes, x% denied Total number, data rate, and reject percentage of denied packets.
New feature: Configuring device poweroff
alarming
This feature is available on an IPRAN device to detect a device poweroff event and issue a poweroff
alarm by sending SNMP notifications or log messages.
Command reference
dying-gasp host
Use dying-gasp host to configure poweroff alarm destination host settings.
Use undo dying-gasp host to remove poweroff alarm destination host settings.
Syntax
dying-gasp host { ip-address | ipv6 ipv6-address } [ vpn-instance vpn-instance-name ] snmp-trap
version { v1 | v2c } securityname security-string
dying-gasp host { ip-address | ipv6 ipv6-address } [ vpn-instance vpn-instance-name ] syslog

58
undo dying-gasp host { ip-address | ipv6 ipv6-address } [ vpn-instance vpn-instance-name ]
{ snmp-trap | syslog }
Default
No poweroff alarm destination host settings are configured.
Views
System view
Predefined user roles
network-admin
Parameters
ip-address: Specifies the IPv4 address of the destination host to which the device sends the poweroff
alarm.
ipv6 ipv6-address: Specifies the IPv6 address of the destination host to which the device sends the
poweroff alarm.
vpn-instance vpn-instance-name: Specifies the VPN instance to which the destination host belongs.
The vpn-instance-name argument is a case-sensitive string of 1 to 31 characters. If the destination
host belongs to the public network, do not specify this option.
snmp-trap: Uses an SNMP notification to send the poweroff alarm.
version: Specifies the SNMP version.
v1: Uses SNMPv1.
v2c: Uses SNMPv2c.
securityname security-string: Specifies an SNMPv1 or SNMPv2c community name, a string of 1 to
32 characters.
syslog: Uses a log message to send the poweroff alarm.
Usage guidelines
The device can send the poweroff alarm to multiple destination hosts at the same time. The
maximum number of destination hosts depends on the device model.
Examples
# Configure the device to send the poweroff alarm to the host at 1.1.1.1 by using an SNMPv1
notification. The community name is public.
<Sysname> system-view
[Sysname] dying-gasp host 1.1.1.1 snmp-trap version v1 securityname public
dying-gasp source
Use dying-gasp source to specify the source interface for sending the poweroff alarm.
Use undo dying-gasp source to restore the default.

59
Syntax
dying-gasp source interface-type { interface-number | interface-number.subnumber }
undo dying-gasp source
Default
No source interface is specified.
Views
System view
Predefined user roles
network-admin
Parameters
interface-type { interface-number | interface-number.subnumber }: Specifies a Layer 3 interface or
subinterface. The interface-type argument specifies the interface type. The interface-number
argument specifies the interface number. The subnumber argument specifies the subinterface
number and is in the range of 1 to 4094.
Usage guidelines
The device uses the IPv6 address or primary IPv4 address of the specified source interface as the
source address for outgoing poweroff alarm packets. The destination hosts use this address to
identify SNMP notifications or log messages received from the device.
If no IPv4 or IPv6 addresses are configured for the specified source interface, this command does
not take effect. For this command to take effect, assign an IPv4 or IPv6 address to the source
interface.
Examples
# Use the interface Loopback 1 as the source interface for sending the poweroff alarm.
<Sysname> system-view
[Sysname] dying-gasp source interface loopback1
display dying-gasp host
Use display dying-gasp host to display poweroff alarm destination host settings.
Syntax
display dying-gasp host
Views
Any view
Predefined user roles
network-admin
network-operator

60
Examples
# Display poweroff alarm destination host settings.
<sysname> display dying-gasp host
IPv4 address: 1.1.1.0
Message type: SNMP trap
Securityname: p1
Version: V1
IPv4 address: 1.1.1.1
Message type: Syslog
IPv6 address: 1::1
VPN instance: test
Message type: SNMP trap
Securityname: p1
Version: V1
IPv6 address: 1::1
VPN instance: test
Message type: Syslog
Table 4 Command output
Field Description
IPv4 address IPv4 address of the poweroff alarm destination host.
IPv6 address IPv6 address of the poweroff alarm destination host.
VPN instance VPN instance to which the poweroff alarm destination host belongs.
Message type
Message types that the poweroff alarm destination host supports:
SNMP Trap—SNMP notification.
Syslog—Log message.
Securityname SNMPv1 or SNMPv2c community name.
This field is displayed when the message type is SNMP Trap.
Version
SNMP version:
v1—SNMPv1.
v2c—SNMPv2c.
This field is displayed when the message type is SNMP Trap.

61
New feature: BFD for an aggregation
group
Enabling BFD for an aggregation group
BFD for Ethernet link aggregation can monitor member link status in an aggregation group. After you
enable BFD on an aggregate interface, each Selected port in the aggregation group establishes a
BFD session with its peer port. BFD operates differently depending on the aggregation mode.
BFD for static aggregation—When BFD detects a link failure, BFD notifies the Ethernet link
aggregation module that the peer port is unreachable. The local port is placed in Unselected
state. The BFD session between the local and peer ports remains, and the local port keeps
sending BFD packets. When the link is recovered, the local port receives BFD packets from the
peer port, and BFD notifies the Ethernet link aggregation module that the peer port is reachable.
The local port is placed in Selected state again. This mechanism ensures that the local and
peer ports of a static aggregate link have the same aggregation state.
BFD for dynamic aggregation—When BFD detects a link failure, BFD notifies the Ethernet
link aggregation module that the peer port is unreachable. BFD clears the session and stops
sending BFD packets. When the link is recovered and the local port is placed in Selected state
again, the local port establishes a new session with the peer port. BFD notifies the Ethernet link
aggregation module that the peer port is reachable. Because BFD provides fast failure
detection, the local and peer systems of a dynamic aggregate link can negotiate the
aggregation state of their member ports faster.
For more information about BFD, see H3C MSR Router Series Comware 7 High Availability
Configuration Guide.
Configuration restrictions and guidelines
When you enable BFD for an aggregation group, follow these restrictions and guidelines:
Make sure the source and destination IP addresses are consistent at the two ends of an
aggregate link. For example, if you execute link-aggregation bfd ipv4 source 1.1.1.1
destination 2.2.2.2 on the local end, execute link-aggregation bfd ipv4 source 2.2.2.2
destination 1.1.1.1 on the peer end. The source and destination IP addresses cannot be the
same.
The BFD parameters configured on an aggregate interface take effect on all BFD sessions in
the aggregation group. BFD sessions for link aggregation do not support the echo packet mode
and the Demand mode.
As a best practice, do not configure other protocols to collaborate with BFD on a BFD-enabled
aggregate interface.

62
Make sure the number of member ports in a BFD-enabled aggregation group is not larger than
the number of BFD sessions supported by the device. Otherwise, this command might cause
some Selected ports in the aggregation group to change to the Unselected state.
Configuration procedure
To enable BFD for an aggregation group:
Step Command Remarks
57. Enter system view. system-view N/A
58. Enter Layer 3 aggregate interface view.
interface route-aggregation interface-number
N/A
59. Enable BFD for the aggregation group.
link-aggregation bfd ipv4 source ip-address destination ip-address
By default, BFD is disabled for an aggregation group.
The source and destination IP addresses of BFD sessions must be unicast addresses excluding 0.0.0.0.
Command reference
link-aggregation bfd ipv4
Use link-aggregation bfd ipv4 to enable BFD for an aggregation group.
Use undo link-aggregation bfd to disable BFD for an aggregation group.
Syntax
link-aggregation bfd ipv4 source ip-address destination ip-address
undo link-aggregation bfd
Default
BFD is disabled for an aggregation group.
Views
Layer 3 aggregate interface view
Predefined user roles
network-admin
Parameters
source ip-address: Specifies the unicast source IP address of BFD sessions. The source IP address
cannot be 0.0.0.0.
destination ip-address: Specifies the unicast destination IP address of BFD sessions. The
destination IP address cannot be 0.0.0.0.

63
Usage guidelines
Make sure the source and destination IP addresses are consistent at the two ends of an aggregate
link. For example, if you execute link-aggregation bfd ipv4 source 1.1.1.1 destination 2.2.2.2 on
the local end, execute link-aggregation bfd ipv4 source 2.2.2.2 destination 1.1.1.1 on the peer
end. The source and destination IP addresses cannot be the same.
The BFD parameters configured on an aggregate interface take effect on all BFD sessions in the
aggregation group. BFD sessions for link aggregation do not support the echo packet mode and the
Demand mode. For more information about BFD, see H3C MSR Router Series Comware 7 High
Availability Configuration Guide.
As a best practice, do not configure other protocols to collaborate with BFD on a BFD-enabled
aggregate interface.
Make sure the number of member ports in a BFD-enabled aggregation group is not larger than the
number of BFD sessions supported by the device. Otherwise, this command might cause some
Selected ports in the aggregation group to change to the Unselected state.
Examples
# Enable BFD for Layer 3 aggregation group 1, and specify the source and destination IP addresses
as 1.1.1.1 and 2.2.2.2 for BFD sessions.
<Sysname> system-view
[Sysname] interface route-aggregation 1
[Sysname-Route-Aggregation1] link-aggregation bfd ipv4 source 1.1.1.1 destination 2.2.2.2
New feature: 4G modem IMSI/SN binding
authentication
This feature includes the IMSI/SN information in the 4G dial-up authentication information.
Command reference
apn
Use apn to create an access point name (APN).
Use undo apn to remove an APN.
Syntax
apn { dynamic | static apn }
undo apn
Default
No APN is configured.

64
Views
4G dial-up profile view
Predefined user roles
network-admin
Parameters
dynamic: Uses an APN automatically assigned by the service provider.
static apn: Specifies the APN provided by the service provider. It is a string of 1 to 100 characters.
Whether the string is case-sensitive varies by service providers.
Usage guidelines
You must specify an APN for a 4G dial-up profile.
Examples
# Specify the APN apn1 for the 4G dial-up profile test.
<Sysname> system-view
[Sysname] apn-profile test
[Sysname-apn-profile-test] apn static apn1
apn-profile
Use apn-profile to create a 4G dial-up profile.
Use undo apn-profile to remove a 4G dial-up profile.
Syntax
apn-profile profile-name
undo apn-profile profile-name
Default
No 4G dial-up profiles are configured.
Views
System view
Predefined user roles
network-admin
Parameters
profile-name: Specifies a 4G dial-up profile name.
Usage guidelines
A 4G dial-up profile takes effect only after you associate the profile with a 4G interface. To remove a
4G dial-up profile, you must first remove the association between the profile and the 4G interface.
Examples
# Create the 4G dial-up profile test.
<Sysname> system-view
65
[Sysname] apn-profile test
apn-profile apply
Use apn-profile apply to specify a 4G dial-up profile.
Use undo apn-profile apply to restore the default.
Syntax
apn-profile apply profile-name [ backup profile-name ]
undo apn-profile apply
Default
No 4G dial-up profiles are specified.
Views
Eth-channel interface view
Predefined user roles
network-admin
Parameters
profile-name: Specifies a primary 4G dial-up profile name.
backup profile-name: Specifies a backup 4G dial-up profile name.
Usage guidelines
After you specify a 4G dial-up profile for a 4G modem, the 4G modem uses the settings in the profile
to negotiate with the service provider's device.
The primary profile always has priority over the backup profile. For each dialup connection
establishment, the 4G modem uses the backup profile only when it has failed to dial up using the
primary profile.
This command takes effect only on dialup connections initiated after the command is configured. It
does not take effect on a dialup connection that has been established.
Examples
# Specify the primary 4G dial-up profile test and the backup 4G dial-up profile bktest for Eth-channel
interface 2/4/0:0.
<Sysname> system-view
[Sysname] interface eth-channel 2/4/0:0
[Sysname-Eth-channel2/4/0:0] apn-profile apply test backup bktest
attach-format
Use attach-format to set a separator for the authentication information to be sent.
Use undo attach-format to restore the default.

66
Syntax
attach-format imsi-sn split splitchart
undo attach-format imsi-sn split
Default
No separator is set for the authentication information to be sent.
Views
4G dial-up profile view
Predefined user roles
network-admin
Parameters
split splitchart: Specifies a separator. It can be a letter, a digit, or a sign such as a percent sign (%) or
a pound sign (#).
Usage guidelines
If IMSI/SN binding authentication is enabled, the IMSI/SN information is included in the
authentication information in addition to the username. You need to configure a separator to
separate different types of information. For example, if you specify the separator as #, the
authentication information will be sent in the following format: imsiinfo#sninfo#username.
Examples
# Configure the pound sign (#) as the separator for the authentication information to be sent.
<Sysname> system-view
[Sysname] apn-profile test
[Sysname-apn-profile-test] attach-format imsi-sn split #
authentication-mode
Use authentication-mode to specify an authentication mode for a 4G dial-up profile.
Use undo authentication-mode to restore the default.
Syntax
authentication-mode { pap | chap| pap-chap } user user-name password { cipher | simple } password
undo authentication-mode
Default
No authentication mode is configured for a 4G dial-up profile.
Views
4G dial-up profile view
Predefined user roles
network-admin

67
Parameters
chap: Specifies CHAP authentication.
pap: Specifies PAP authentication.
pap-chap: Specifies CHAP or PAP authentication.
user username: Specifies the username for authentication, a case-sensitive string of 1 to 32
characters.
cipher: Specifies a password in encrypted form.
simple: Specifies a password in plaintext form. For security purposes, the password specified in
plaintext form will be stored in encrypted form.
password: Specifies the password. Its plaintext form is a case-sensitive string of 1 to 32 characters.
Its encrypted form is a case-sensitive string of 1 to 73 characters
Examples
# Specify the CHAP authentication mode for the 4G dial-up profile test. Specify the CHAP
authentication username as user1 and the password as 123456.
<Sysname> system-view
[Sysname] apn-profile test
[Sysname-apn-profile-test] authentication-mode chap user user1 password simple 123456
New feature: Media Stream Control (MSC)
logging
This feature enables the router to generate MSC logs and send the logs to the information center.
Command reference
New command: sip log enable
Use sip log enable to enable Media Stream Control (MSC) logging.
Use undo sip log enable to disable MSC logging.
Syntax
sip log enable
undo sip log enable
Default
MSC logging is disabled.
Views
Voice view

68
Predefined user roles
network-admin
Usage guidelines
This command enables the router to generate MSC logs and send the logs to the information center.
The information center outputs the logs to a destination according to an output rule. For more
information about the information center, see Network Management and Monitoring Configuration
Guide.
MSC logging is used for auditing purposes.
Examples
# Enable MSC logging.
<Sysname> system-view
[Sysname] voice-setup
[Sysname-voice] sip log enable
New feature: IMSI/SN binding
authentication
This feature enables the device to include the IMSI/SN information in the LCP authentication
information.
Command reference
ppp lcp imsi accept
Use ppp lcp imsi accept to enable the client to accept the IMSI binding authentication requests
from the LNS.
Use undo ppp lcp imsi accept to restore the default.
Syntax
ppp lcp imsi accept
undo ppp lcp imsi accept
Default
The client declines the IMSI binding authentication requests from the LNS.
Views
Interface view
Predefined user roles
network-admin

69
Examples
# Enable the client to accept the IMSI binding authentication requests from the LNS.
<Sysname> system-view
[Sysname] interface virtual-template 1
[Sysname-Virtual-Template1] ppp lcp imsi accept
ppp lcp imsi request
Use ppp lcp imsi request to enable the LNS to initiate IMSI binding authentication requests.
Use undo ppp lcp imsi request to restore the default.
Syntax
ppp lcp imsi request
undo ppp lcp imsi request
Default
The LNS does not initiate IMSI binding authentication requests.
Views
Interface view
Predefined user roles
network-admin
Examples
# Enable the LNS to initiate IMSI binding authentication requests.
<Sysname> system-view
[Sysname] interface virtual-template 1
[Sysname-Virtual-Template1] ppp lcp imsi request
ppp lcp imsi string
Use ppp lcp imsi string imsi-info to configure the IMSI information on the client.
Use undo ppp lcp imsi string to delete the IMSI information on the client.
Syntax
ppp lcp imsi string imsi-info
undo ppp lcp imsi string
Default
The client automatically obtains the IMSI information from its SIM card.
Views
Interface view
Predefined user roles
network-admin

70
Parameters
imsi-info: Specifies the IMSI information, a case-sensitive string of 1 to 31 characters.
Examples
# Configure the IMSI information as imsi1.
<Sysname> system-view
[Sysname] interface virtual-template 1
[Sysname-Virtual-Template1] ppp lcp imsi string imsi1
ppp lcp sn accept
Use ppp lcp sn accept to enable the client to accept the SN binding authentication requests from
the LNS.
Use undo ppp lcp sn accept to restore the default.
Syntax
ppp lcp sn accept
undo ppp lcp sn accept
Default
The client declines the SN binding authentication requests from the LNS.
Views
Interface view
Predefined user roles
network-admin
Examples
# Enable the client to accept the SN binding authentication requests from the LNS.
<Sysname> system-view
[Sysname] interface virtual-template 1
[Sysname-Virtual-Template1] ppp lcp sn accept
ppp lcp sn request
Use ppp lcp sn request to enable the LNS to initiate SN binding authentication requests.
Use undo ppp lcp sn request to restore the default.
Syntax
ppp lcp sn request
undo ppp lcp sn request
Default
The LNS does not initiate SN binding authentication requests.

71
Views
Interface view
Predefined user roles
network-admin
Examples
# Enable the LNS to initiate SN binding authentication requests.
<Sysname> system-view
[Sysname] interface virtual-template 1
[Sysname-Virtual-Template1] ppp lcp imsi request
ppp lcp sn string
Use ppp lcp sn string sn-info to configure the SN information on the client.
Use undo ppp lcp sn string to delete the SN information on the client.
Syntax
ppp lcp sn string sn-info
undo ppp lcp sn string
Default
The client automatically obtains the SN information from its SIM card.
Views
Interface view
Predefined user roles
network-admin
Parameters
sn-info: Specifies the SN information, a case-sensitive string of 1 to 31 characters.
Examples
# Configure the SN information as sn1.
<Sysname> system-view
[Sysname] interface virtual-template 1
[Sysname-Virtual-Template1] ppp lcp sn string sn1
ppp user accept-format imsi-sn split
Use ppp user accept-format imsi-sn split splitchart to configure the separator for the received
authentication information.
Use undo ppp user accept-format to restore the default.

72
Syntax
ppp user accept-format imsi-sn split splitchart
undo ppp user accept-format
Default
No separator is configured for the received authentication information.
Views
Interface view
Predefined user roles
network-admin
Parameters
splitchart: Specifies the separator. The separator contains one character, and it can be a letter, a digit,
or any sign other than the at sign (@), slash (/), and backslash (\).
Usage guidelines
By default, the authentication information contains only the client username. If you include the IMSI
or SN information in the authentication information, you need to configure the separator to separate
different types of information.
If no IMSI/SN information is received from the peer during the authentication process, the IMSI/SN
information split from the received authentication information is used.
Examples
# Configure the pound sign (#) as the separator for the authentication information.
<Sysname> system-view
[Sysname] interface virtual-template 1
[Sysname-Virtual-Template1] ppp user accept-format imsi-sn split #
ppp user attach-format imsi-sn split
Use ppp user attach-format imsi-sn split splitchart to configure the separator for the sent
authentication information.
Use undo ppp user attach-format to restore the default.
Syntax
ppp user attach-format imsi-sn split splitchart
undo ppp user attach-format
Default
No separator is configured for the sent authentication information.
Views
Interface view

73
Predefined user roles
network-admin
Parameters
splitchart: Specifies the separator. The separator contains one character, and it can be a letter, a digit,
or any sign other than the at sign (@), slash (/), and backslash (\).
Usage guidelines
By default, the authentication information contains only the client username. If you include the IMSI
or SN information in the authentication information, you need to configure the separator to separate
different types of information.
Examples
# Configure the pound sign (#) as the separator for the sent authentication information.
<Sysname> system-view
[Sysname] interface virtual-template 1
[Sysname-Virtual-Template1] ppp user attach-format imsi-sn split #
ppp user replace
Use ppp user replace to replace the client username with the IMSI or SN information for
authentication.
Use undo ppp user replace to restore the default.
Syntax
ppp user replace { imsi | sn }
undo ppp user replace
Default
The client username is used for authentication.
Views
Interface view
Predefined user roles
network-admin
Examples
# Replace the client username with the IMSI information for authentication.
<Sysname> system-view
[Sysname] interface virtual-template 1
[Sysname-Virtual-Template1] ppp user replace imsi

74
New feature: Specifying a band for a 4G
modem
You can specify a band for a 4G modem.
Command reference
lte band
Use ite band to specify a band for a 4G modem.
Use undo lte band to restore the default.
Syntax
lte band band-number
undo lte band
Default
The default setting varies by 4G modem model.
Views
Cellular interface view
Predefined user roles
network-admin
Parameters
band-number: Specifies a band for a 4G modem. The available bands vary by modem model.
Usage guidelines
This command is supported only on the following 4G modems:
Sierra MC7354 and MC7304.
Long Sung U8300C, U8300W, and U8300.
WNC DM11-2.
Examples
# Specify band 3 for Cellular 1/0.
<Sysname> system-view
[Sysname] controller cellular 1/0
[Sysname-Controller-Cellular1/0]lte band 3

75
New feature: Using tunnel interfaces as
OpenFlow ports
The MSR 2600 routers support using tunnel interfaces as OpenFlow ports.
New feature: NETCONF support for ACL
filtering
Support of NETCONF for ACL filtering was added.
Command reference
netconf soap http acl
Use netconf soap http acl to apply an ACL to NETCONF over SOAP over HTTP traffic.
Use undo netconf soap http acl to restore the default.
Syntax
netconf soap http acl { acl-number | name acl-name }
undo netconf soap http acl
Default
No ACL is applied to NETCONF over SOAP over HTTP traffic.
Views
System view
Predefined user roles
network-admin
Parameters
acl-number: Specifies an ACL by its number in the range of 2000 to 2999.
name acl-name: Specifies an ACL by its name. The acl-name argument is a case-insensitive string
of 1 to 63 characters. It must start with an English letter. To avoid confusion, it cannot be all. The
specified ACL must be an existing IPv4 basic ACL.
Usage guidelines
This command is not available in FIPS mode.
Only NETCONF clients permitted by the ACL can access the device through SOAP over HTTP.

76
If you execute this command multiple times, the most recent configuration takes effect.
Examples
# Use ACL 2001 to allow only NETCONF clients in subnet 10.10.0.0/16 to access the device through
SOAP over HTTP.
<Sysname> system-view
[Sysname] acl basic 2001
[Sysname-acl-ipv4-basic-2001] rule permit source 10.10.0.0 0.0.255.255
[Sysname-acl-ipv4-basic-2001] quit
[Sysname] netconf soap http acl 2001
netconf soap https acl
Use netconf soap https acl to apply an ACL to NETCONF over SOAP over HTTPS traffic.
Use undo netconf soap https acl to restore the default.
Syntax
netconf soap https acl { acl-number | name acl-name }
undo netconf soap https acl
Default
No ACL is applied to NETCONF over SOAP over HTTPS traffic.
Views
System view
Predefined user roles
network-admin
Parameters
acl-number: Specifies an ACL by its number in the range of 2000 to 2999.
name acl-name: Specifies an ACL by its name. The acl-name argument is a case-insensitive string
of 1 to 63 characters. It must start with an English letter. To avoid confusion, it cannot be all. The
specified ACL must be an existing IPv4 basic ACL.
Usage guidelines
Only NETCONF clients permitted by the ACL can access the device through SOAP over HTTPS.
If you execute this command multiple times, the most recent configuration takes effect.
Examples
# Use ACL 2001 to allow only NETCONF clients in subnet 10.10.0.0/16 to access the device through
SOAP over HTTPS.
<Sysname> system-view
[Sysname] acl basic 2001
[Sysname-acl-ipv4-basic-2001] rule permit source 10.10.0.0 0.0.255.255
[Sysname-acl-ipv4-basic-2001] quit

77
[Sysname] netconf soap https acl 2001
New feature: WAAS
Configuring WAAS
This release added support for the Wide Area Application Services (WAAS) feature in the DATA
image on the following router series:
MSR 800.
MSR 2600.
MSR 3600.
MSR 5600.
Command reference
All commands were newly added.
For more information about the commands, see WAAS commands in H3C MSR Router Series
Comware 7 Layer 3—IP Services Command Reference.
New feature: Support for the MKI field in
SRTP or SRTCP packets
This feature enables the router to add the MKI field to outgoing SRTP or SRTCP packets. You can
set the length of the MKI field.
Command reference
New command: mki
Use mki to add the MKI field to outgoing SRTP or SRTCP packets and set the length of the MKI field.
Use undo mki to restore the default.
Syntax
mki mki-length
undo mki

78
Default
Outgoing SRTP or SRTCP packets do not carry the MKI field.
Views
SIP view
Predefined user roles
network-admin
Parameters
mki-length: Specifies the length of the MKI field, in the range of 1 to 128 bytes.
Usage guidelines
This command takes effect only when SRTP is the media stream protocol for SIP calls. To specify
SRTP as the medial stream protocol for SIP calls, use the srtp command.
Examples
# Add the MKI field to outgoing SRTP or SRTCP packets and set the length of the MKI field to 1 bit.
<Sysname> system-view
[Sysname] voice-setup
[Sysname-voice] sip
[Sysname-voice-sip] mki 1
New feature: SIP domain name
This feature enables the router to populate the CONTACT header field of outgoing SIP packets with
the router's SIP domain name.
Command reference
New command: sip-domain
Use sip-domain to populate the CONTACT header field of outgoing SIP packets with the router's
SIP domain name.
Use undo sip-domain to restore the default.
Syntax
sip-domain domain-name
undo sip-domain
Default
The router populates the CONTACT header field of an outgoing SIP packet with the IP address of the
outgoing interface.

79
Views
SIP view
Predefined user roles
network-admin
Parameters
domain-name: Specifies the SIP domain name, a case-insensitive string of 1 to 31 characters. Valid
characters are letters, digits, underscore (_), hyphen (-), and dot (.).
Examples
# Populate the CONTACT header field of outgoing SIP packets with the SIP domain name abc.com.
<Sysname> system-view
[Sysname] voice-setup
[Sysname-voice] sip
[Sysname-voice-sip] sip-domain abc.com
New feature: E&M logging
This feature enables the router to generate E&M logs.
Command reference
New command: em log enable
Use em log enable to enable E&M logging.
Use undo em log enable to disable E&M logging.
Syntax
em log enable
undo em log enable
Default
E&M logging is disabled.
Views
Voice view
Predefined user roles
network-admin
Usage guidelines
This command enables the router to generate E&M logs.

80
Examples
# Enable E&M logging.
<Sysname> system-view
[Sysname] voice-setup
[Sysname-voice] em log enable
New feature: Setting the RTC version
Setting the RTC version
The RTC protocol has the following versions: Version 3 and Version 5. Comware V3-based routers
support only Version 3. Comware V5- or Comware V7-based routers support both Version 3 and
Version 5.
To set the RTC version:
Step Command Remarks
60. Enter system view. system-view N/A
61. Configure the RTC version. rta rtc version { v3 | v5 } By default, the router uses Version 5.
Command reference
rta rtc version
Use rta rtc version to set the RTC version.
Use undo rta rtc version to o restore the default.
Syntax
rta rtc version { v3 | v5 }
undo rta rtc version
Default
The router uses RTC Version 5.
Views
System view
Predefined user roles
network-admin
Parameters
V3: Sets the RTC version to Version 3.
81
V5: Sets the RTC version to Version 5.
Usage guidelines
Comware V5/V7-based routers support both RTC Version 3 and Version 5. Comware V3-based
routers support only RTC Version 3.
For a Comware V5/V7-based router to communicate with a Comware V3-based, set the RTC version
to Version 3 on the Comware V5/V7-based router.
For Comware V5/V7-based routers to communicate each other, set the RTC version on the routers
to the same version.
Examples
# Set the RTC version to Version 3.
<Sysname> system-view
[Sysname] rta rtc version v3
New feature: Setting the maximum size of
advertisement files
You can set the maximum size of advertisement files sent to wireless clients to 10 MB when the
clients access the wireless network.
New feature: Support of IRF for NETCONF
Support for NETCONF was added to IRF.
New feature: Support of VCF for
NETCONF
Support for NETCONF was added to VCF.
New feature: Support of SNMP for
NETCONF
Support for NETCONF was added to SNMP.

82
New feature: Support of file system for
NETCONF
Support for NETCONF was added to file system.
New feature: Support of PoE for NETCONF
Support for NETCONF was added to PoE.
New feature: Support of RMON for
NETCONF
Support for NETCONF was added to RMON.
New feature: Support of policy-based
routing for NETCONF
Support for NETCONF was added to policy-based routing.
New feature: Support of BGP for
NETCONF
Support for NETCONF was added to BGP.
New feature: Support of OSPF for
NETCONF
Support for NETCONF was added to OSPF.

83
New feature: Support of ping for
NETCONF
Support for NETCONF was added to ping.
New feature: Support of tracert for
NETCONF
Support for NETCONF was added to tracert.
New feature: Support of L2VPN for
NETCONF
Support for NETCONF was added to L2VPN.
New feature: SIP support for VRF
Configuring SIP support for VRF
For information about this feature, see SIP configuration in H3C MSR Router Series Comware 7
Voice Configuration Guide.
Command reference
The vpn-instance command was added.
For information about the command, see SIP commands in H3C MSR Router Series Comware 7
Voice Command Reference.
New feature: IKEv2
Configuring IKEv2
For information about this feature, see IPsec configuration in H3C MSR Router Series Comware 7
Security Configuration Guide.

84
Command reference
For information about the commands, see IPsec commands in H3C MSR Router Series Comware 7
Command Reference.
New feature: Specifying an IKEv2 profile
for an IPsec policy
Specifying an IKEv2 profile for an IPsec policy
For information about this feature, see IPsec configuration in H3C MSR Router Series Comware 7
Security Configuration Guide.
Command reference
The ikev2-profile command was added.
For information about the command, see IPsec commands in H3C MSR Router Series Comware 7
Security Command Reference.
New feature: Bidirectional BFD control
detection for RIP
Configuring bidirectional BFD control detection for
RIP
For information about this feature, see RIP configuration in H3C MSR Router Series Comware 7
Layer 3—IP Routing Configuration Guide.
Command reference
The bfd all-interfaces enable, rip bfd, and rip primary-path-detect bfd commands were newly
added.
For information about the commands, see RIP commands in H3C MSR Router Series Comware 7
Layer 3—IP Routing Command Reference.

85
New feature: OSPF router ID
autoconfiguration
Automatically obtaining an OSPF router ID
For information about this feature, see OSPF configuration in H3C MSR Router Series Comware 7
Layer 3—IP Routing Configuration Guide.
Command reference
The display system internal ospf event-log router-id command was newly added and the
auto-select keyword was added to the ospf command.
For information about the commands, see OSPF commands in H3C MSR Router Series Comware 7
Layer 3—IP Routing Command Reference and OSPF probe commands in H3C MSR Router Series
Comware 7 Probe Command Reference.
New feature: Layer 2 Ethernet link
aggregation
Configuring Layer 2 aggregation groups
For information about this feature, see Ethernet link aggregation configuration in H3C MSR Router
Series Comware 7 Layer 2—LAN Switching Configuration Guide.
Command reference
For information about the commands, see Ethernet link aggregation commands in H3C MSR Router
Series Comware 7 Layer 2—LAN Switching Command Reference.

86
New feature: Setting the cable impedance
for WAN interfaces
Setting the cable impedance for WAN interfaces
For information about this feature, see WAN interface configuration in H3C MSR Router Series
Comware 7 Interface Configuration Guide.
Command reference
The cable type and fe1 cable-type commands were added.
For information about the commands, see WAN interface commands in H3C MSR Router Series
Comware 7 Interface Configuration Guide.
New feature: Associating a static route
with a track entry
Associating a static route with a track entry
For information about this feature, see static routing configuration in H3C MSR Router Series
Comware 7 Layer 3—IP Routing Configuration Guide.
Command reference
The track keyword was added to the ip route-static command.
For information about the command, see static routing commands in H3C MSR Router Series
Comware 7 Layer 3—IP Routing Command Reference.

87
New feature: VLAN tag processing rule for
incoming traffic
Configuring the VLAN tag processing rule for
incoming traffic
For information about this feature, see H3C MSR Router Series Comware 7 VXLAN Configuration
Guide.
Command reference
The l2vpn rewrite inbound tag command was added. For information about this command, see
H3C MSR Router Series Comware 7 VXLAN Command Reference.
New feature: IP-based portal-free rule
Configuring an IP-based portal free-rule
For information about this feature, see portal authentication configuration in H3C MSR Router Series
Comware 7 Security Configuration Guide.
Command reference
The portal free-rule command was added.
For information about the command, see portal commands in H3C MSR Router Series Comware 7
Security Command Reference.

88
New feature: Portal redirect packet
statistics
Displaying/maintaining portal redirect packet
statistics
For information about this feature, see portal authentication configuration in H3C MSR Router Series
Comware 7 Security Configuration Guide.
Command reference
The display portal redirect statistics and reset portal redirect statistics commands were added.
For information about the commands, see portal commands in H3C MSR Router Series Comware 7
Security Command Reference.
New feature: GDVPN
Configuring GDVPN
For information about this feature, see group domain VPN configuration in H3C MSR Router Series
Comware 7 Security Configuration Guide.
Command reference
For information about the commands, see group domain VPN commands in H3C MSR Router
Series Comware 7 Security Configuration Guide.
New feature: OpenFlow instance
Configuring the OpenFlow instance mode
For information about this feature, see OpenFlow in H3C MSR Router Series Comware 7 OpenFlow
Configuration Guide.

89
Command reference
The port keyword was added to the classification command.
For information about the command, see OpenFlow commands in H3C MSR Router Series
Comware 7 OpenFlow Command Reference.
Binding an OpenFlow instance to ports
For information about this feature, see OpenFlow in H3C MSR Router Series Comware 7 OpenFlow
Configuration Guide.
Command reference
The port command was added.
For information about the command, see OpenFlow commands in H3C MSR Router Series
Comware 7 OpenFlow Command Reference.
Binding an port to an OpenFlow instance
For information about this feature, see OpenFlow in H3C MSR Router Series Comware 7 OpenFlow
Configuration Guide.
Command reference
The openflow-instance command was added.
For information about the command, see OpenFlow commands in H3C MSR Router Series
Comware 7 OpenFlow Command Reference.
New feature: Enabling the Extended
Sequence Number (ESN) feature for an
IPsec transform set
Enabling ESN for an IPsec transform set
For information about this feature, see IPsec configuration in H3C MSR Router Series Comware 7
Security Configuration Guide.

90
Command reference
The esn enable command was added.
For information about the command, see IPsec commands in H3C MSR Router Series Comware 7
Security Command Reference.
New feature: Enabling Traffic Flow
Confidentiality (TFC) padding for an IPsec
policy
Enabling TFC padding for an IPsec policy
For information about this feature, see IPsec configuration in H3C MSR Router Series Comware 7
Security Configuration Guide.
Command reference
The tfc enable command was added.
For information about the command, see IPsec commands in H3C MSR Router Series Comware 7
Security Command Reference.
New feature: SIP session refresh
Enabling SIP session refresh
In this release, you can enable SIP session refresh for a VoIP voice entity.
Command reference
New command: voice-class sip session refresh
Use voice-class sip session refresh to enable SIP session refresh for a VoIP entity.
Use undo voice-class sip session refresh to disable SIP session refresh for a VoIP entity.
91
Syntax
voice-class sip session refresh [ global ]
undo voice-class sip session refresh
Default
A VoIP entity uses the global configuration for SIP session refresh.
Views
VoIP entity view
Predefined user roles
network-admin
Parameters
global: Applies the global configuration for SIP session refresh to the VoIP entity.
Usage guidelines
The configuration for SIP session refresh in VoIP entity view takes priority over that in SIP view.
Examples
# Enable SIP session refresh for VoIP entity 1.
<Sysname> system-view
[Sysname] voice-setup
[Sysname-voice] dial-program
[Sysname-voice-dial] entity 1 voip
[Sysname-voice-dial-entity1] voice-class sip session refresh
# Apply the global configuration for SIP session refresh to VoIP entity 1.
<Sysname> system-view
[Sysname] voice-setup
[Sysname-voice] dial-program
[Sysname-voice-dial] entity 1 voip
[Sysname-voice-dial-entity1] voice-class sip session refresh global
Modified feature: License restrictions for
POS terminal access
Feature change description
You can install licenses to increase the concurrent transaction threshold for each TCP connection
supported by the device. If the device does not support the licenses, or no licenses are installed, the
threshold varies by device model.

92
Modified feature: Displaying and
maintaining Frame Relay
Feature change description
The -info part was removed from the syntax of the following commands:
display fr inarp-info.
display fr lmi-info.
display fr map-info.
display fr pvc-info.
Command changes
Modified command: display fr inarp-info
Old syntax
display fr inarp-info [ interface interface-type interface-number ]
New syntax
display fr inarp [ interface interface-type interface-number ]
Views
Any view
Command change description
The command syntax was changed from display fr inarp-info to display fr inarp.
Modified command: display fr lmi-info
Old syntax
display fr lmi-info [ interface interface-type interface-number ]
New syntax
display fr lmi [ interface interface-type interface-number ]
Views
Any view
Command change description
The command syntax was changed from display fr lmi-info to display fr lmi.

93
Modified command: display fr map-info
Old syntax
display fr map-info [ interface interface-type interface-number ]
New syntax
display fr map [ interface interface-type interface-number ]
Views
Any view
Command change description
The command syntax was changed from display fr map-info to display fr map.
Modified command: display fr pvc-info
Old syntax
display fr pvc-info [ interface interface-type interface-number ] [ dlci dlci-number ]
New syntax
display fr pvc [ interface interface-type interface-number ] [ dlci dlci-number ]
Views
Any view
Command change description
The command syntax was changed from display fr pvc-info to display fr pvc.
Modified feature: Displaying track entry
infomration
Feature change description
The following fields were added to the output of the display track command:
IP route.
VPN instance name.
Protocol.
Nexthop interface.

94
Command changes
Modified command: display track
Syntax
display track { track-entry-number | all }
Views
Any view
Change description
The following fields were added to the command output:
IP route.
VPN instance name.
Protocol.
Nexthop interface.
Modified feature: User profile
Feature change description
This release added support for QoS policy configuration in user profile view.
Modified feature: Tunnel interface support
for IPsec and VXLAN tunnel modes
Feature change description
This release added support for the IPsec tunnel mode and VXLAN tunnel mode on a tunnel interface.
Command changes
Modified command: interface tunnel
Old syntax
interface tunnel number [ mode { advpn { gre | udp } [ ipv6 ] | ds-lite-aftr | evi | gre [ ipv6 ] |
ipv4-ipv4 | ipv6 | ipv6-ipv4 [ 6to4 | auto-tunnel | isatap ] | mpls-te | nve } ]

95
New syntax
interface tunnel number [ mode { advpn { gre | udp } [ ipv6 ] | ds-lite-aftr | evi | gre [ ipv6 ] | ipsec
[ ipv6 ] | ipv4-ipv4 | ipv6 | ipv6-ipv4 [ 6to4 | auto-tunnel | isatap ] | mpls-te | nve |vxlan } ]
Views
System view
Change description
The following parameters were added to the command:
mode ipsec: Specifies the IPv4 IPsec tunnel mode.
mode ipsec ipv6: Specifies the IPv6 IPsec tunnel mode.
mode vxlan: Specifies the VXLAN tunnel mode.
Modified feature: PKI certificate
auto-renewal
Feature change description
Support for certificate auto-renewal was added to PKI.
Command changes
Modified command: certificate request mode
Old syntax
certificate request mode { auto [ password { cipher | simple } string ] | manual }
New syntax
certificate request mode { auto [ password { cipher | simple } string | renew-before-expire days
[ reuse-public-key ] [ auto-append common-name ] ] * | manual }
Views
PKI domain view
Change description
The following keywords were added to the command:
renew-before-expire days: Configures the system to automatically request a new certificate
the specified number of days before the current certificate expires. The value range for the days
argument is 0 to 365. Value 0 indicates that the request for a new certificate is made when the
old certificate expires, which might cause service interruptions.

96
reuse-public-key: Reuses the key pair in the old certificate for the new certificate. If you do not
specify this keyword, the system generates a new key pair for the new certificate. The old key
pair is replaced with the new one when the new certificate is received from the CA.
auto-append common-name: Automatically appends random data to the common name of
the PKI entity for the new certificate. If you do not specify this keyword, the common name of
the PKI entity will be unchanged in the new certificate.
New command: display pki certificate renew-status
Use display pki certificate renew-status to display the certificate renewal status for a PKI domain.
Syntax
display pki certificate renew-status [ domain domain-name ]
Views
Any view
Predefined user roles
network-admin
network-operator
Parameters
domain-name: Specifies a PKI domain by its name, a case-insensitive string of 1 to 31 characters.
The domain name cannot contain the special characters listed in 错误!未找到引用源。. If you do not
specify a domain name, this command displays the certificate renewal status for all PKI domains.
Table 5 Special characters
Character name Symbol Character name Symbol
Tilde ~ Dot .
Asterisk * Left angle bracket <
Backslash \ Right angle bracket >
Vertical bar | Quotation marks "
Colon : Apostrophe '
Examples
# Display the certificate renewal status for all PKI domains.
<Sysname> display pki certificate renew-status
Domain name: domain1
Renew time: 03:12:05 2015/12/07
Renew public key:
Key type: RSA
Time when key pair created: 15:40:48 2015/05/12
Key code:
30819F300D06092A864886F70D010101050003818D0030818902818100DAA4AAFEFE04C2C9
667269BB8226E26331E30F41A8FF922C7338208097E84332610632B49F75DABF6D871B80CE

97
C1BA2B75020077C74745C933E2F390DC0B39D35B88283D700A163BB309B19F8F87216A44AB
FBF6A3D64DEB33E5CEBF2BCF26296778A26A84F4F4C5DBF8B656ACFA62CD96863474899BC1
2DA4C04EF5AE0835090203010001
The command output indicates that the reuse-public-key keyword was not configured for PKI
domain domain1 and a new key pair was created for the new certificate.
# Display the certificate renewal status for PKI domain domain1.
<Sysname> display pki certificate renew-status domain1
Domain name: domain1
Renew time: 03:12:05 2013/12/07
Renew public key:
Key type: RSA
Time when key pair created: 15:40:48 2013/05/12
Key code:
30819F300D06092A864886F70D010101050003818D0030818902818100DAA4AAFEFE04C2C9
667269BB8226E26331E30F41A8FF922C7338208097E84332610632B49F75DABF6D871B80CE
C1BA2B75020077C74745C933E2F390DC0B39D35B88283D700A163BB309B19F8F87216A44AB
FBF6A3D64DEB33E5CEBF2BCF26296778A26A84F4F4C5DBF8B656ACFA62CD96863474899BC1
2DA4C04EF5AE0835090203010001
Table 6 Command output
Field Description
Renew time Time when a new certificate will be requested.
Renew public key Information about the new key pair created for the certificate.
Key type Key pair type, which can be RSA, DSA, or ECDSA.
Time when key pair created Time when the key pair was created.
Key code Public key data.
Modified feature: Configuring the PKI
entity DN
Feature change description
Support for the subject-dn command was added to PKI. You can use the command to configure the
full subject DN string. Each attribute can be specified multiple times with different values.
Command changes
New command: subject-dn
Use subject-dn to configure the DN for a PKI entity.

98
Use undo subject-dn to restore the default.
Syntax
subject-dn dn-string
undo subject-dn
Default
No DN is configured for a PKI entity.
Views
PKI entity view
Default command level
network-admin
Parameters
dn-string: Specifies the DN for the PKI entity, a case-insensitive string of 1 to 255 characters.
Usage guidelines
The subject DN string is a sequence of attribute=value pairs separated by commas. Each attribute
can be specified multiple times with different values. Supported DN attributes are:
CN—Common-name.
C—Country code.
L—Locality.
O—Organization.
OU—Organization unit.
ST—State or province.
After this command is configured, the following commands do not take effect:
common-name
country
locality
organization
organization-unit
state
If you configure this command multiple times, the most recent configuration takes effect.
Examples
# Configure the DN for PKI entity en.
<Sysname> system-view
[Sysname] pki entity en
[Sysname-pki-entity-en] subject-dn
CN=test,C=CN,O=abc,OU=rdtest,OU=rstest,ST=countryA,L=pukras

99
Modified feature: ADVPN
Feature change description
In this release, you can configure ADVPN group names and ADVPN group-to-QoS policy mappings.
Command changes
New command: advpn group
Use advpn group to configure an ADVPN group name.
Use undo advpn group to restore the default.
Syntax
advpn group group-name
undo advpn group
Default
No ADVPN group name is configured.
Views
Tunnel interface view
Predefined user roles
network-admin
Parameters
group-name: Specifies the ADVPN group name. The group name is a case-insensitive string of 1 to
63 characters that can include only letters, digits, and dots (.).
Usage guidelines
This command must be configured on the tunnel interface of a spoke. The spoke sends the ADVPN
group name in a hub-spoke tunnel establishment request to a hub. The hub looks for an ADVPN
group-to-QoS policy mapping that matches the ADVPN group name. If a matching mapping is found,
the hub applies the QoS policy in the mapping to the hub-spoke tunnel. If no match is found, the hub
does not apply a QoS policy to the hub-spoke tunnel.
If you modify the ADVPN group name after the tunnel is established, the spoke will inform the hub of
the modification. The hub will look for an ADVPN group-to-QoS policy mapping that matches the new
ADVPN group name and apply the QoS policy in the new mapping.
As a best practice, do not configure an ADVPN group name and apply a QoS policy on the same
tunnel interface.

100
Examples
# Configure aaa as the ADVPN group name.
<Sysname> system-view
[Sysname] interface tunnel1 mode advpn gre
[Sysname-Tunnel1] advpn group aaa
New command: advpn map group
Use advpn map group to configure a mapping between an ADVPN group and a QoS policy.
Use undo advpn map group to delete a mapping between an ADVPN group and a QoS policy.
Syntax
advpn map group group-name qos-policy policy-name outbound
undo advpn map group group-name
Default
No ADVPN group-to-QoS policy mappings are configured.
Views
Tunnel interface view
Predefined user roles
network-admin
Parameters
group-name: Specifies the ADVPN group name. The group name is a case-insensitive string of 1 to
63 characters that can include only letters, digits, and dots (.).
qos-policy policy-name: Specifies the QoS policy name, a case-sensitive string of 1 to 31
characters.
outbound: Applies the QoS policy to the outbound direction.
Usage guidelines
This command must be configured on the tunnel interface of a hub. After receiving a hub-spoke
tunnel establishment request from a spoke, the hub looks for an ADVPN group-to-QoS policy
mapping that matches the ADVPN group name carried in the request. If a matching mapping is found,
the hub applies the QoS policy in the mapping to the hub-spoke tunnel.
You can configure multiple ADVPN group-to-QoS policy mappings on a tunnel interface.
You can map multiple ADVPN groups to a QoS policy. You can map an ADVPN group to only one
QoS policy.
As a best practice, do not configure an ADVPN group-to-QoS policy mapping and apply a QoS policy
on the same tunnel interface.
Examples
# Configure a mapping between ADVPN group aaa and QoS policy bbb on Tunnel1.

101
<Sysname> system-view
[Sysname] interface Tunnel1 mode advpn gre
[Sysname-Tunnel1] advpn map group aaa qos-policy bbb outbound
Modified feature: Telnet redirect
Feature change description
In this release, a Telnet redirect user is authenticated by using the authentication settings for the TTY
line. The device displays only Telnet redirect authentication information and the authentication result.
It does not display the copyright statement.
Support for Telnet redirect authentication was removed from MSR56 routers.
Modified feature: DHCP snooping
performance optimization
Feature change description
On a Layer 3 physical interface without subinterface, link aggregation, or snooping configured, the
dhcp snooping enable command was optimized to cause only a slight impact on receiving
non-DHCP packets. If you configure other services on the interface, the performance varies with the
services you configure.
Modified feature: OSPF performance
optimization
Feature change description
You can set a fixed OSPF SPF calculation interval in the range of 0 to 10000 milliseconds.
The value range for the LSU packet sending interval was changed to 0 to 1000 milliseconds.
Command changes
Modified command: spf-schedule-interval
Old syntax
spf-schedule-interval { maximum-interval [ minimum-interval [ incremental-interval ] ] }
102
New syntax
spf-schedule-interval { maximum-interval [ minimum-interval [ incremental-interval ] ] | millisecond
interval }
Views
OSPF view
Change description
The millisecond interval argument was added to the command. You can specify this argument to set
a fixed OSPF SPF calculation interval in the range of 0 to 10000 milliseconds.
Modified command: transmit-pacing
Syntax
transmit-pacing interval interval count count
Views
OSPF view
Change description
Before modification: The value range for the interval argument was 10 to 1000 milliseconds.
After modification: The value range for the interval argument is 0 to 1000 milliseconds.
Modified feature: POS terminal access
Feature change description
The posa auto-stop-service enable command added the function of setting the access interfaces
for all E1POS terminal templates to reply with busy tones when all FEPs are unreachable.
Command changes
Modified command: posa auto-stop-service enable
Syntax
posa auto-stop-service enable
Views
System view
Change description
Before modification, this command enables automatic shutdown of the listening ports for TCP-based
POS terminal templates when all FEPs that correspond to TCP-based POS application templates

103
are unreachable. When any of the FEPs becomes reachable, the router automatically opens the
listening ports for all TCP-based POS terminal templates.
After modification, this command enables the router to automatically perform the following
operations when all FEPs that correspond to TCP-based POS application templates are
unreachable:
Shuts down the listening ports for all TCP-based POS terminal templates.
Sets the access interfaces for all E1POS terminal templates to reply with busy tones.
When any of the FEPs becomes reachable, the router automatically performs the following
operations:
Opens the listening ports for all TCP-based POS terminal templates.
Disables busy tone for all E1POS terminal templates.
Modified feature: License
Feature change description
The device uses high encryption algorithms by default and does not require a license.
Modified feature: IP performance
optimization
Feature change description
The device supports recording MAC addresses in TCP packets. You can also configure the device to
record the MAC address of the local device in TCP packets.
Command changes
New command: tcp mac-record enable
Use tcp mac-record enable to enable MAC address recording in TCP packets.
Use undo tcp mac-record enable to disable MAC address recording in TCP packets.
Syntax
tcp mac-record enable
undo tcp mac-record enable

104
Default
MAC address recording in TCP packets is disabled.
Views
Interface view
Default command level
network-admin
Usage guidelines
This feature records the MAC address of the packet originator in a TCP option. When an attack
occurs, the administrator can quickly locate the attack source according to the recorded MAC
addresses.
Examples
# Enable MAC address recording in TCP packets on GigabitEthernet 1/0/1.
<Sysname> system-view
[Sysname] interface GigabitEthernet 0/1
[Sysname-GigabitEthernet0/1] tcp mac-record enable
New command: tcp mac-record local
Use tcp mac-record local to record the MAC address of the local device in TCP packets.
Use undo tcp mac-record local to restore the default.
Syntax
tcp mac-record local mac-address
undo tcp mac-record local
Default
The destination MAC address is recorded.
Views
System view
Default command level
network-admin
Parameters
mac-address: Specifies the MAC address of the local device. The MAC address cannot be all 0s,
broadcast MAC address, or multicast MAC address.
Usage guidelines
To make this command take effect, you must enable MAC address recording in TCP packets by
using the tcp mac-record enable command.
Examples
# Record the MAC address of the local device 0605-0403-0201 in TCP packets.

105
<Sysname> system-view
[Sysname] tcp mac-record local 0605-0403-0201
Modified feature: AAA
Feature change description
Starting from this software version, you can configure the authorization method for IKE extended
authentication.
Command changes
New command: authorization ike
Use authorization ike to configure the authorization method for IKE extended authentication.
Use undo authorization ike to restore the default.
Syntax
In non-FIPS mode:
authorization ike { local [ none ] | none | radius-scheme radius-scheme-name [ local ] [ none ] }
undo authorization ike
In FIPS mode:
authorization ike { local | radius-scheme radius-scheme-name [ local ] }
undo authorization ike
Default
The default authorization method for the ISP domain is used for IKE extended authentication.
Views
ISP domain view
Predefined user roles
network-admin
Parameters
local: Performs local authorization.
none: Does not perform authorization.
radius-scheme radius-scheme-name: Specifies a RADIUS scheme by its name, a case-insensitive
string of 1 to 32 characters.
Examples
# In ISP domain test, perform local authorization for IKE extended authentication.

106
<Sysname> system-view
[Sysname] domain test
[Sysname-isp-test] authorization ike local
# In ISP domain test, use RADIUS scheme rd as the primary authorization method and local
authorization as the backup authorization method for IKE extended authentication.
<Sysname> system-view
[Sysname] domain test
[Sysname-isp-test] authorization ike radius-scheme rd local
Modified feature: Configuring a cellular
interface for a 3G/4G modem
Feature change description
In this release, you can set the RSSI thresholds for a 3G/4G modem.
Command changes
New command: rssi
Use rssi to set the RSSI thresholds for a 3G/4G modem.
Use undo rssi to restore the default.
Syntax
rssi { 1xrtt | evdo | gsm | lte } { low lowthreshold | medium mediumthreshold } *
undo rssi { 1xrtt | evdo | gsm | lte } [ low | medium ]
Default
The lower and upper thresholds for a 3G/4G modem are –150 dBm and 0 dBm, respectively.
Views
Cellular interface view
Predefined user roles
network-admin
Parameters
1xrtt: Specifies the 1xRTT mode.
evdo: Specifies the EVDO mode.
gsm: Specifies the GSM mode.
lte: Specifies the LTE mode.

107
low lowthreshold: Specifies the lower RSSI threshold value in the range of 0 to 150, which represent
a lower RSSI threshold in the range of –150 dBm to 0 dBm. The value of lowthreshold cannot be
smaller than the value of mediumthreshold because the system automatically adds a negative sign
to the RSSI thresholds.
medium mediumthreshold: Specifies the upper RSSI threshold value in the range of 0 to 150, which
represent an upper RSSI threshold in the range of –150 dBm to 0 dBm.
Usage guidelines
The device performs the following operations based on the actual RSSI of the 3G/4G modem:
Sends a trap that indicates high RSSI when the RSSI exceeds the upper threshold.
Sends a trap that indicates normal RSSI when the RSSI is between the lower threshold and
upper threshold (included).
Sends a trap that indicates low RSSI when the RSSI drops to or below the lower threshold.
Sends a trap that indicates low RSSI every 10 minutes when the RSSI remains equal to or
smaller than the lower threshold.
To view the RSSI change information for a 3G/4G modem, use the display cellular command.
Examples
# Set the lower threshold for a 3G/4G modem in GSM mode to –110 dBm.
<Sysname> system-view
[Sysname] interface cellular 0/0
[Sysname-Cellular0/0] rssi gsm low 110
Modified feature: QoS on VXLAN tunnel
interfaces
Feature change description
This software version added support for QoS in the outbound direction of VXLAN tunnel interfaces.
Command changes
None.

108
Modified feature: Option 60 encapsulation
in DHCP replies
Feature change description
Disabling Option 60 encapsulation in DHCP replies.
Modified feature: MPLS QoS support for
matching the EXP field
Feature change description
In this release, MPLS QoS supports matching the EXP fields in both the topmost (first) MPLS label
and the second MPLS label.
Command changes
New command: if-match second-mpls-exp
Use if-match second-mpls-exp to define a criterion to match the EXP field in the second MPLS
label.
Use undo if-match second-mpls-exp to delete the match criterion.
Syntax
if-match [ not ] second-mpls-exp exp-value&<1-8>
undo if-match [ not ] second-mpls-exp exp-value&<1-8>
Default
No criterion is defined to match the EXP field in the second MPLS label.
Views
Traffic class view
Predefined user roles
network-admin
Parameters
not: Matches packets not conforming to the specified criterion.
exp-value&<1-8>: Specifies a space-separated list of up to eight EXP values. The value range for
the exp-value argument is 0 to 7. If the same MPLS EXP value is specified multiple times, the system

109
considers them as one. If a packet matches one of the defined MPLS EXP values, it matches the
if-match clause.
Examples
# Define a criterion to match packets with EXP value 3 or 4 in the second MPLS label.
<Sysname> system-view
[Sysname] traffic classifier database
[Sysname-classifier-database] if-match second-mpls-exp 3 4
Modified feature: MPLS QoS support for
marking the EXP field
Feature change description
In this release, MPLS QoS supports marking the EXP fields in both the topmost (first) MPLS label
and the second MPLS label.
Command changes
New command: remark second-mpls-exp
Use remark second-mpls-exp to configure an EXP value marking action for the second MPLS label
in a traffic behavior.
Use undo remark second-mpls-exp to delete the action.
Syntax
remark second-mpls-exp second-mpls-exp-value
undo remark second-mpls-exp second-mpls-exp-value
Default
No EXP value marking action for the second MPLS label is configured in a traffic behavior.
Views
Traffic behavior view
Predefined user roles
network-admin
Parameters
second-mpls-exp-value: Specifies an EXP value for the second MPLS label, in the range of 0 to 7.
Examples
# Define a traffic behavior to mark packets with EXP value 3 for the second MPLS label.
<Sysname> system-view

110
[Sysname] traffic behavior b1
[Sysname-behavior-b1] remark second-mpls-exp 3
Modified feature: Automatic configuration
Feature change description
A limit was added to the number of automatic attempts. After the limit is reached, the automatic
configuration process ends.
If you set the limit to 0, only one automatic configuration attempt is allowed.
Modified feature: User profile
Feature change description
In this release, the user profile name supports using dots (.).
Command change
Modified command: user-profile
Syntax
user-profile profile-name
undo user-profile profile-name
Views
System view
Change description
Before modification: The user profile name is a case-sensitive string of 1 to 31 characters. Valid
characters are letters, digits, and underscores (_), and the name must start with an English letter.
After modification: The user profile name is a case-sensitive string of 1 to 31 characters. Valid
characters are letters, digits, underscores (_), and dots (.), and the name must start with an English
letter.

111
Modified feature: Default size of the TCP
receive and send buffer
Feature change description
The default value for the TCP receive and send buffer size was changed to 63 KB.
Command changes
Modified command: tcp window
Syntax
tcp window window-size
undo tcp window
Views
System view
Change description
Before modification: The default value for the window-size argument was 64 KB.
After modification: The default value for the window-size argument is 63 KB.
Modified feature: Obtaining fan and power
module vendor information
Feature change description
Support was added for you to obtain fan and power module vendor information through MIB.
Modified feature: Support for per-packet
load sharing
Feature change description
The per-packet keyword was added to the ip load-sharing mode command to support per-packet
load sharing.

112
Command changes
Modified command: ip load-sharing mode
Old syntax
Centralized devices:
ip load-sharing mode per-flow [ dest-ip | dest-port | ip-pro | src-ip | src-port ] * ]
Centralized IRF devices–Distributed devices–In standalone mode:
ip load-sharing mode per-flow [ dest-ip | dest-port | ip-pro | src-ip | src-port ] * ] [ slot
slot-number ]
Distributed devices–In IRF mode:
ip load-sharing mode per-flow [ dest-ip | dest-port | ip-pro | src-ip | src-port ] * ] [ chassis
chassis-number slot slot-number ]
New syntax
Centralized devices:
ip load-sharing mode { per-flow [ [ dest-ip | dest-port | ip-pro | src-ip | src-port ] * ] | per-packet }
Centralized IRF devices–Distributed devices–In standalone mode:
ip load-sharing mode { per-flow [ dest-ip | dest-port | ip-pro | src-ip | src-port ] * ] | per-packet }
Distributed devices–In IRF mode:
ip load-sharing mode { per-flow [ dest-ip | dest-port | ip-pro | src-ip | src-port ] * ] | per-packet }
Views
System view
Change description
The per-packet keyword was added to the ip load-sharing mode command to support per-packet
load sharing.
Modified feature: Default user role
Feature change description
The default user role can be changed. The role-name argument was added to the role default-role
enable command for specifying a user role as the default user role.

113
Command changes
Modified command: role default-role enable
Old syntax
role default-role enable
undo role default-role enable
New syntax
role default-role enable [ role-name ]
undo role default-role enable
Views
System view
Change description
Before modification: The default user role is network-operator.
After modification: The role-name argument was added to specify any user role that exists in the
system as the default user role. The argument is a case-sensitive string of 1 to 63 characters. If you
do not specify this argument, the default user role is network-operator.
Modified feature: Debugging
Feature change description
The all keyword and the timeout time option were removed from the debugging command. You can
no longer use the debugging all command to enable debugging for all modules or specify the
timeout time for the debugging all command.
Command changes
Modified command: debugging
Old syntax
debugging { all [ timeout time ] | module-name [ option ] }
undo debugging { all | module-name [ option ] }
New syntax
debugging module-name [ option ]
undo debugging module-name [ option ]

114
Views
User view
Change description
The following parameters were removed from the debugging command:
all: Enables debugging for all modules.
timeout time: Specifies the timeout time for the debugging all command. The system automatically
executes the undo debugging all command after the timeout time. The time argument is in the
range of 1 to 1440 minutes. If you do not specify a timeout time, you must manually execute the
undo debugging all command to disable debugging for all modules.
Modified feature: SSH username
Feature change description
In this release, an SSH username cannot be a, al, all, or include the following characters:
\ | / : * ? < >
The at sign (@) can only be used in the username format pureusername@domain when the
username contains an ISP domain name.
Command changes
Modified command: ssh user
Syntax
In non-FIPS mode:
ssh user username service-type { all | netconf | scp | sftp | stelnet } authentication-type
{ password | { any | password-publickey | publickey } assign { pki-domain domain-name |
publickey keyname } }
undo ssh user username
In FIPS mode:
ssh user username service-type { all | netconf | scp | sftp | stelnet } authentication-type
{ password | password-publickey assign { pki-domain domain-name | publickey keyname } }
undo ssh user username
Views
System view

115
Change description
Before modification: The username argument is a case-insensitive string of 1 to 80 characters. If the
username contains an ISP domain name, use the format pureusername@domain.
After modification: The username argument is a case-insensitive string of 1 to 80 characters,
excluding a, al, all, and the following characters:
\ | / : * ? < >
The at sign (@) can only be used in the username format pureusername@domain when the
username contains an ISP domain name. The pure username can contain 1 to 55 characters and the
domain name can contain 1 to 24 characters. The whole username cannot exceed 80 characters.
Modified feature: IS-IS hello packet
sending interval
Feature change description
The value range of the interval for sending hello packets was changed to 1 to 255 seconds.
Command changes
Modified command: isis timer hello
Syntax
isis timer hello seconds [ level-1 | level-2 ]
undo isis timer hello [ level-1 | level-2 ]
Views
Interface view
Change description
The value range for the seconds argument was changed to 1 to 255 seconds.
Modified feature: MP-group interface
numbering
In this release, the numbering for MP-group interfaces is changed.

116
Modified feature: Setting the global
link-aggregation load-sharing mode
Feature change description
The bandwidth-usage keyword was added to the link-aggregation global load-sharing mode
command. You can set the global load sharing mode to load share traffic based on bandwidth usage.
Command changes
Modified command: link-aggregation global load-sharing mode
Old syntax
link-aggregation global load-sharing mode { destination-ip | destination-mac |
destination-port | mpls-label1 | source-ip | source-mac | source-port } *
undo link-aggregation global load-sharing mode
New syntax
link-aggregation global load-sharing mode { bandwidth-usage | destination-ip |
destination-mac | destination-port | mpls-label1 | source-ip | source-mac | source-port } *
undo link-aggregation global load-sharing mode
Views
System view
Change description
The bandwidth-usage keyword was added. You can specify this keyword to set the global load
sharing mode to load share traffic based on bandwidth usage.
Modified feature: 802.1X redirect URL
Feature change description
The value range for the url-string argument was changed to 1 to 256 characters for the dot1x
ead-assistant url command.

117
Command changes
Modified command: dot1x ead-assistant url
Syntax
dot1x ead-assistant url url-string
Views
System view
Change description
Before modification: The value range for the url-string argument is 1 to 64 characters.
After modification: The value range for the url-string argument is 1 to 256 characters.
Modified feature: Displaying information
about NTP servers from the reference
source to the primary NTP server
Feature change description
You can specify a source interface for tracing NTP servers from the reference source to the primary
NTP server.
Command changes
Modified command: display ntp-service trace
Old syntax
display ntp-service trace
New syntax
display ntp-service trace [ source interface-type interface-number ]
Views
Any view
Change description
The source interface-type interface-number option was added to the display ntp-service trace
command.

118
Modified feature: Saving, rolling back, and
loading the configuration
The following configuration guidelines were added when you use NETCONF to save, roll back, or
load the configuration:
The save, rollback, and load operations supplement NETCONF requests. Performing the
operations might consume a lot of system resources.
Do not perform the save, rollback, or load operation when another user is performing the
operation. If multiple users simultaneously perform the save, rollback, or load operation, the
result returned to each user might be inconsistent with the user request.
Modified feature: Displaying information
about SSH users
Feature change description
In this release, the display ssh user-information command does not display the public key name
for an SSH user that uses password authentication.
Command changes
Modified command: display ssh user-information
Syntax
display ssh user-information [ username ]
Views
Any view
Change description
Before modification: The User-public-key-name field in the command output displays null for an
SSH user that uses password authentication.
After modification: The User-public-key-name field in the command output is blank for an SSH user
that uses password authentication.

119
Modified feature: SIP trusted nodes
Configuring SIP trusted nodes
In this release, you can enable the trusted node feature by using the ip address trusted
authenticate command. You also can display information about SIP trusted nodes by using the
display voice ip address trusted list command.
Command changes
The display voice ip address trusted list and ip address trusted authenticate commands were
added.
New command: display voice ip address trusted list
Use display voice ip address trusted list to display information about trusted nodes.
Syntax
display voice ip address trusted list
Views
Any view
Predefined user roles
network-admin
network-operator
Usage guidelines
This command displays trusted nodes in the trusted node list and call destination IP addresses.
Examples
# Display information about trusted nodes.
<Sysname> display voice ip address trusted list
IP address trusted authentication: Enabled
VoIP entity IP addresses:
Entity tag State SIP IP address
---------- ----- --------------
20 Up 192.168.4.110
53232 Down 192.168.4.210
55555 Up 192.168.4.210
9613 Up 192.168.4.125
IP address trusted list:
192.168.4.0 255.255.255.0

120
192.168.5.120 255.255.255.255
Table 7 Command output
Field Description
IP address trusted authentication
Whether IP address trusted authentication is enabled:
Enabled.
Disabled.
VoIP entity IP addresses Trusted IP addresses for VoIP entities.
Entity tag Tag of a VoIP entity.
State
Status of a VoIP entity:
Up.
Down.
SIP IP address Call destination IP address of a VoIP entity.
IP address trusted list List of trusted nodes.
New command: ip address trusted authenticate
Use ip address trusted authenticate to enable IP address trusted authentication.
Use undo ip address trusted authenticate to disable IP address trusted authentication.
Syntax
ip address trusted authenticate
undo ip address trusted authenticate
Default
IP address trusted authentication is disabled. All nodes are regarded as trusted, and the device
accepts calls from any nodes.
Views
SIP view
Predefined user roles
network-admin
Usage guidelines
After you enable this feature, the device accepts calls only from trusted nodes.
For calls to be successfully established, configure the proxy server, registrars, the DNS server, and
the MWI server as trusted nodes.
Examples
# Enable IP address trusted authentication.
<Sysname> system-view
[Sysname] voice-setup
[Sysname-voice] sip
[Sysname-voice-sip] ip address trusted authenticate

121
Modified feature: IPsec ESP encryption
algorithms
Feature change description
Support for the following IPsec ESP encryption algorithms was added in high encryption mode:
AES algorithm in CTR mode.
Camellia algorithm in CBC mode.
GMAC algorithm.
GCM algorithm.
SM1 algorithm in CBC mode.
SM4 algorithm.
For information about this feature, see IPsec configuration in H3C MSR Router Series Comware 7
Security Configuration Guide.
Command changes
The following arguments were added to the esp encryption-algorithm command:
aes-ctr-128.
aes-ctr-192.
aes-ctr-256.
camellia-cbc-128.
camellia-cbc-192.
camellia-cbc-256.
gmac-128.
gmac-192.
gmac-256.
gcm-128.
gcm-192.
gcm-256.
sm1-cbc-128.
sm1-cbc-192.
sm1-cbc-256.
sm4-cbc.
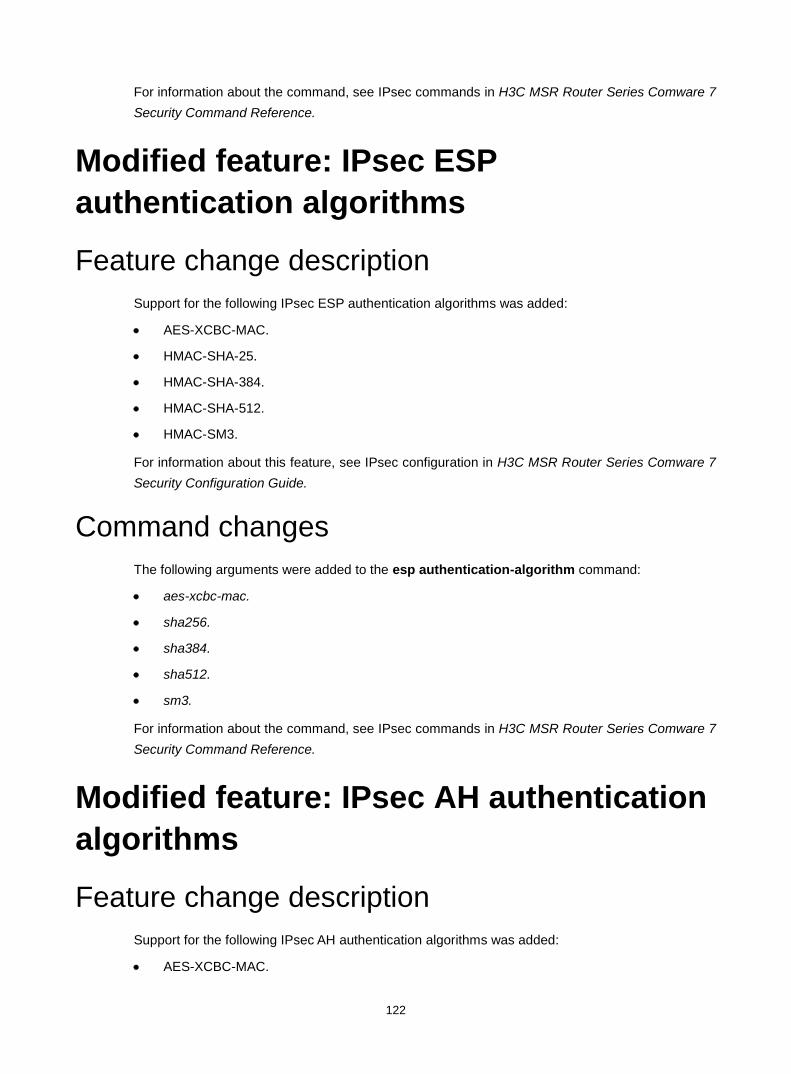
122
For information about the command, see IPsec commands in H3C MSR Router Series Comware 7
Security Command Reference.
Modified feature: IPsec ESP
authentication algorithms
Feature change description
Support for the following IPsec ESP authentication algorithms was added:
AES-XCBC-MAC.
HMAC-SHA-25.
HMAC-SHA-384.
HMAC-SHA-512.
HMAC-SM3.
For information about this feature, see IPsec configuration in H3C MSR Router Series Comware 7
Security Configuration Guide.
Command changes
The following arguments were added to the esp authentication-algorithm command:
aes-xcbc-mac.
sha256.
sha384.
sha512.
sm3.
For information about the command, see IPsec commands in H3C MSR Router Series Comware 7
Security Command Reference.
Modified feature: IPsec AH authentication
algorithms
Feature change description
Support for the following IPsec AH authentication algorithms was added:
AES-XCBC-MAC.

123
HMAC-SHA-256.
HMAC-SHA-384.
HMAC-SHA-512.
HMAC-SM3.
For information about this feature, see IPsec configuration in H3C MSR Router Series Comware 7
Security Configuration Guide.
Command changes
The following arguments were added to the ah authentication-algorithm command:
aes-xcbc-mac.
sha256.
sha384.
sha512.
sm3.
For more information about the command, see IPsec commands in H3C MSR Router Series
Comware 7 Security Command Reference.
Modified feature: Specifying an encryption
algorithm for an IKE proposal
Feature change description
In this release, you can specify the following encryption algorithms for an IKE proposal:
sm1-cbc-128.
sm1-cbc-192.
sm1-cbc-256.
For information about this feature, see IPsec configuration in H3C MSR Router Series Comware 7
Security Configuration Guide.
Command changes
The following keywords were added to the encryption-algorithm command:
sm1-cbc-128.
sm1-cbc-192.
sm1-cbc-256.

124
For information about the command, see IPsec commands in H3C MSR Router Series Comware 7
Security Command Reference.
Modified feature: Specifying an
authentication algorithm for an IKE
proposal
Feature change description
In this release, you can specify the sm3 authentication algorithm for an IKE proposal.
For information about this feature, see IPsec configuration in H3C MSR Router Series Comware 7
Security Configuration Guide.
Command changes
The sm3 argument was added to the authentication-algorithm command.
For information about the command, see IPsec commands in H3C MSR Router Series Comware 7
Security Command Reference.
Modified feature: Generating asymmetric
key pairs
Feature change description
In this release, you can generate ECDSA key pairs by using the secp384r1 elliptic curve.
For information about this feature, see public key management in H3C MSR Router Series Comware
7 Security Configuration Guide.
Command changes
The secp384r1 keyword was added to the public-key local create command.
For information about the command, see public key management commands in H3C MSR Router
Series Comware 7 Command Reference.

125
Modified feature: Specifying an ECDSA
key pair for certificate request
Feature change description
In this release, you can specify an ECDSA key pair with a specific key length for certificate request.
Supported key lengths are:
192 bits.
256 bits.
384 bits.
For information about this feature, see PKI in H3C MSR Router Series Comware 7 Security
Configuration Guide.
Command changes
The following keywords were added to the public-key ecdsa name command:
secp192r1.
secp256r1.
secp384r1.
For information about the command, see PKI commands in H3C MSR Router Series Comware 7
Command Reference.
Modified feature: Setting the electrical
impedance
Feature change description
In this release, the electrical impedance value of South Africa was added to the impedance
command.
For information about this feature, see voice interface configuration in H3C MSR Router Series
Comware 7 Voice Configuration Guide.
Command changes
The value south-africa was added to the country-name argument of the impedance command.
126
For information about the command, see voice interface commands in H3C MSR Router Series
Comware 7 Voice Command Reference.
Modified feature: POS access statistics,
SNMP notifications for POS access, and
NII
Feature change description
Enabling SNMP notifications for POS access
For information about this feature, see POS terminal access in H3C MSR Router Series Comware 7
Terminal Access Configuration Guide.
Configuring the alarm threshold for the low NII
transaction success rate
For information about this feature, see POS terminal access in H3C MSR Router Series Comware 7
Terminal Access Configuration Guide.
POS terminal packet statistics based on E1POS
interfaces
For information about this feature, see POS terminal access in H3C MSR Router Series Comware 7
Terminal Access Configuration Guide.
Displaying and maintaining terminal access
For information about this feature, see POS terminal access in H3C MSR Router Series Comware 7
Terminal Access Configuration Guide.

127
Command changes
Modified command: snmp-agent trap enable posa
The e1-dial-falling, fcm-trade-abnomal, and trade-success-falling keywords were added.
For information about the command, see POS terminal access commands in H3C MSR Router
Series Comware 7 Terminal Access Command Reference.
New command: trade-exchanges
For information about the command, see POS terminal access commands in H3C MSR Router
Series Comware 7 Terminal Access Command Reference.
New command: posa trade-falling-threshold
For information about the command, see POS terminal access commands in H3C MSR Router
Series Comware 7 Terminal Access Command Reference.
New command: posa e1-dial-falling-threshold
For information about the command, see POS terminal access commands in H3C MSR Router
Series Comware 7 Terminal Access Command Reference.
New command: display posa statistics caller-id
For information about the command, see POS terminal access commands in H3C MSR Router
Series Comware 7 Terminal Access Command Reference.
New command: display posa statistics caller-ip
For information about the command, see POS terminal access commands in H3C MSR Router
Series Comware 7 Terminal Access Command Reference.
New command: display posa statistics nii
For information about the command, see POS terminal access commands in H3C MSR Router
Series Comware 7 Terminal Access Command Reference.

128
Modified command: reset posa statistics
The nii [ nii-id ] option was added.
For information about the command, see POS terminal access commands in H3C MSR Router
Series Comware 7 Terminal Access Command Reference.
Modified feature: QoS MIB
Feature change description
In this release, QoS MIB information changed.
Modified feature: Enabling PFS for an
IPsec transform set
Feature change description
In this release, you can enable PFS using 256-bit or 384-bit ECP Diffie-Hellman group for an IPsec
transform set.
For information about this feature, see IPsec configuration in H3C MSR Router Series Comware 7
Security Configuration Guide.
Command changes
The dh-group19 and dh-group20 keywords were added to the pfs command.
For information about the command, see IPsec commands in H3C MSR Router Series Comware 7
Security Command Reference.
Removed feature: Tiny proxy
Feature change description
The tiny proxy feature was removed.

129
Removed command
http-proxy
Syntax
http-proxy
undo http-proxy
Views
System view
Removed feature: Displaying switching
fabric channel usage
Feature change description
Support for displaying switching fabric channel usage on interface cards was removed.
Removed command
display fabric utilization
Syntax
In standalone mode:
display fabric utilization [ slot slot-number ]
In IRF mode:
display fabric utilization [ chassis chassis-number slot slot-number ]
Views
Any view
Release 0304
This release has the following changes:
New feature: Setting the RTC version
New feature: Setting the maximum size of advertisement files
New feature: IRF

130
New feature: Frame Relay
New feature: EVI
New feature: VPLS
New feature: Multicast VPN support for inter-AS option B
Modified feature: 802.1X redirect URL
Modified feature: Displaying information about NTP servers from the reference source to the primary
NTP server
Modified feature: Saving, rolling back, and loading the configuration
Modified feature: Displaying information about SSH users
Removed feature: Displaying fabric utilization
New feature: Setting the RTC version
Configuring Setting the RTC version
The RTC protocol has the following versions: Version 3 and Version 5. Comware V3-based routers
support only Version 3. Comware V5- or Comware V7-based routers support both Version 3 and
Version 5.
To set the RTC version:
Step Command Remarks
62. Enter system view. system-view N/A
63. Configure the RTC version. rta rtc version { v3 | v5 } By default, the router uses Version 5.
Command reference
rta rtc version
Use rta rtc version to set the RTC version.
Use undo rta rtc version to o restore the default.
Syntax
rta rtc version { v3 | v5 }
undo rta rtc version

131
Default
The router uses RTC Version 5.
Views
System view
Predefined user roles
network-admin
Parameters
V3: Sets the RTC version to Version 3.
V5: Sets the RTC version to Version 5.
Usage guidelines
Comware V5/V7-based routers support both RTC Version 3 and Version 5. Comware V3-based
routers support only RTC Version 3.
For a Comware V5/V7-based router to communicate with a Comware V3-based, set the RTC version
to Version 3 on the Comware V5/V7-based router.
For Comware V5/V7-based routers to communicate each other, set the RTC version on the routers
to the same version.
Examples
# Set the RTC version to Version 3.
<Sysname> system-view
[Sysname] rta rtc version v3
New feature: Setting the maximum size of
advertisement files
Configuring the maximum size of advertisement
files
You can set the maximum size of advertisement files sent to wireless clients to 10 MB when the
clients access the wireless network.
Command reference
None

132
New feature: IRF
Configuring IRF
See HP MSR Router Series Virtual Technologies Configuration Guide (V7).
Command reference
See HPE FlexNetwork MSR Router Virtual Technologies Command Reference(V7).
New feature: Frame Relay
Configuring Frame Relay
See HPE FlexNetwork MSR Routers Layer 2 - WAN Configuration Guide(V7).
Command reference
See HPE FlexNetwork MSR Routers Layer 2 - WAN Command Reference(V7).
New feature: EVI
Configuring EVI
See HPE FlexNetwork MSR Router EVI Configuration Guide (V7).
Command reference
See HPE FlexNetwork MSR Router EVI Command Reference(V7).
New feature: VPLS
Configuring VPLS
See HPE FlexNetwork MSR Routers MPLS Configuration Guide(V7).

133
Command reference
See HPE FlexNetwork MSR Routers MPLS Command Reference(V7).
New feature: Multicast VPN support for
inter-AS option B
Configuring Multicast VPN support for inter-AS
option B
See HPE FlexNetwork MSR Routers IP Multicast Configuration Guide(V7).
Command reference
See HPE FlexNetwork MSR Routers IP Multicast Command Reference(V7).
Modified feature: 802.1X redirect URL
Feature change description
The value range for the url-string argument was changed to 1 to 256 characters for the dot1x
ead-assistant url command.
Command changes
Modified command: dot1x ead-assistant url
Syntax
dot1x ead-assistant url url-string
Views
System view
Change description
Before modification: The value range for the url-string argument is 1 to 64 characters.
After modification: The value range for the url-string argument is 1 to 256 characters.

134
Modified feature: Displaying information
about NTP servers from the reference
source to the primary NTP server
Feature change description
The source interface-type interface-number option was added to the display ntp-service trace
command.
Command changes
Modified command: display ntp-service trace
Old syntax
dot1x ead-assistant url url-string
New syntax
display ntp-service trace [ source interface-type interface-number ]
Views
Any view
Change description
The source interface-type interface-number option was added to the display ntp-service trace
command.
Modified feature: Saving, rolling back, and
loading the configuration
Feature change description
The following configuration guidelines were added when you use NETCONF to save, roll back, or
load the configuration:
The save, rollback, and load operations supplement NETCONF requests. Performing the
operations might consume a lot of system resources.

135
Multiple users are allowed to simultaneously perform the save, rollback, or load operation, but
the result returned to each user might be inconsistent with the user request. Do not perform the
save, rollback, or load operation when a lot of users are performing the operation.
Command changes
None
Modified feature: Displaying information
about SSH users
Feature change description
In this release, the display ssh user-information command does not display the public key name
for an SSH user that uses password authentication.
Command changes
Modified command: display ssh user-information
Syntax
display ssh user-information [ username ]
Views
Any view
Change description
Before modification: The User-public-key-name field in the command output displays null for an
SSH user that uses password authentication.
After modification: The User-public-key-name field in the command output is blank for an SSH user
that uses password authentication.

136
Removed feature: Displaying fabric
utilization
Feature change description
The device does not support displaying switching fabric channel usage on interface cards.
Removed command
display fabric utilization
Syntax
In standalone mode:
display fabric utilization [ slot slot-number ]
In IRF mode:
display fabric utilization [ chassis chassis-number slot slot-number ]
Views
Any view
ESS 0302P06
This release has the following changes:
New feature: Object policies
New feature: IPHC
New feature: Support of PPPoE server for IPv6
New feature: QSIG tunneling over SIP-T
New feature: Playout delay
New feature: BGP L2VPN support for NSR
New feature: BGP support for dynamic peers
New feature: ARP PnP
New feature: Support of Syslog for DNS and support of customlog&userlog for IPv6 hosts
New feature: QoS soft forwarding

137
New feature: Filtering by application layer protocol status
New feature: ADVPN support for multicast forwarding
New feature: MPLS LDP support for IPv6
New feature: Port security
New feature: Customizable IVR
New feature: SRST
New feature: NEMO
New feature: Support of MFR and FR for L2VPN, FR QoS, and FR compression and fragmentation
New feature: Support for LLDP on CPOS interfaces
New feature: SMS-based automatic configuration
New feature: ARP attack protection
New feature: SIP support for VRF
New feature: Object policies
Configuring Object policies
A zone pair has a source security zone and a destination security zone. ASPF uses zone pairs to
identify the data flows to be examined. ASPF examines only received first data packets.
Command reference
See HPE FlexNetwork MSR Configuration Guides(V7) and HPE FlexNetwork MSR Command
References(V7).
New feature: IPHC
Configuring IPHC
The device supports PPP IPHC and frame relay IPHC.
Command reference
See HPE FlexNetwork MSR Configuration Guides(V7) and HPE FlexNetwork MSR Command
References(V7).

138
New feature: Support of PPPoE server for
IPv6
Configuring Support of PPPoE server for IPv6
On IPv6 networks, PPP negotiates only the IPv6 interface identifier instead of the IPv6 address and
IPv6 DNS server address during IPv6CP negotiation.
Command reference
See HPE FlexNetwork MSR Configuration Guides(V7) and HPE FlexNetwork MSR Command
References(V7).
New feature: QSIG tunneling over SIP-T
Configuring QSIG tunneling over SIP-T
QSIG tunneling over SIP-T tunnels QSIG messages across a SIP network by encapsulating them in
SIP message bodies. This feature enables ISDN networks to communicate over a SIP network.
Command reference
See HPE FlexNetwork MSR Configuration Guides(V7) and HPE FlexNetwork MSR Command
References(V7).
New feature: Playout delay
Configuring Playout delay
By buffering incoming voice packets with different delay times for a period of time (playout delay
time), the receiver can smoothly play out the voice packets to the codec. By configuring playout delay,
you can prevent delay variation (jitter) from affecting voice quality.

139
Command reference
See HPE FlexNetwork MSR Configuration Guides(V7) and HPE FlexNetwork MSR Command
References(V7).
New feature: BGP L2VPN support for NSR
Configuring BGP L2VPN support for NSR
The active BGP process backs up BGP peers and routing information to the standby BGP process
only when BGP NSR is enabled.
Command reference
See HPE FlexNetwork MSR Configuration Guides(V7) and HPE FlexNetwork MSR Command
References(V7).
New feature: BGP support for dynamic
peers
Configuring BGP support for dynamic peers
The dynamic BGP peer feature enables BGP to establish dynamic BGP peer relationships with
devices in a network. BGP accepts connection requests from the network. After a device in the
network initiates a connection request, BGP establishes a dynamic peer relationship with the device.
Command reference
See HPE FlexNetwork MSR Configuration Guides(V7) and HPE FlexNetwork MSR Command
References(V7).

140
New feature: ARP PnP
Configuring ARP PnP
The ARP plug and play (PnP) feature allows end users to access the gateway without changing their
IP addresses on subnets different from the subnet where the gateway resides.
Command reference
See HPE FlexNetwork MSR Configuration Guides(V7) and HPE FlexNetwork MSR Command
References(V7).
New feature: Support of Syslog for DNS
and support of customlog&userlog for
IPv6 hosts
Configuring Support of Syslog for DNS and
support of customlog&userlog for IPv6 hosts
The two flow log export destinations (information center and log host) are mutually exclusive. Only
one export destination can be used at a time. If you configure both export destinations, the flow logs
are exported to the information center and are not exported to the log host.
Command reference
See HPE FlexNetwork MSR Configuration Guides(V7) and HPE FlexNetwork MSR Command
References(V7).
New feature: QoS soft forwarding
Configuring QoS soft forwarding
Configuring PQ: You can define a set of assignment rules in a PQ list and then apply the PQ list
to an interface or PVC.

141
Configuring CQ: You can configure a CQ list that contains up to 16 queues. The CQ list
specifies the following information:
The queue where a packet is placed in.
The maximum length of each queue.
The number of bytes sent from the queue during a cycle of round robin scheduling.
Configuring RTPQ.
Configuring packet information pre-extraction: To process the original IP packets with QoS on
the physical interface for a tunnel interface, configure packet information pre-extraction on the
tunnel interface.
Command reference
See HPE FlexNetwork MSR Configuration Guides(V7) and HPE FlexNetwork MSR Command
References(V7).
New feature: Filtering by application layer
protocol status
Configuring Filtering by application layer protocol
status
ASPF inspection supports protocol status validity check for application protocols of DNS, FTP, H323,
HTTP, SCCP, SIP, and SMTP. ASPF drops packets with invalid protocol status.
Command reference
See HPE FlexNetwork MSR Configuration Guides(V7) and HPE FlexNetwork MSR Command
References(V7).

142
New feature: ADVPN support for multicast
forwarding
Configuring ADVPN support for multicast
forwarding
After NBMA mode is enabled on an ADVPN tunnel interface, the interface forwards multicast data
only to spokes that need the data.
Command reference
See HPE FlexNetwork MSR Configuration Guides(V7) and HPE FlexNetwork MSR Command
References(V7).
New feature: MPLS LDP support for IPv6
Configuring MPLS LDP support for IPv6
LDP can operate on a pure IPv4 or IPv6 network or a network where IPv4 and IPv6 coexist. LDP
operates similarly on IPv4 and IPv6 networks.
Command reference
See HPE FlexNetwork MSR Configuration Guides(V7) and HPE FlexNetwork MSR Command
References(V7).
New feature: Port security
Configuring Port security
MAC move—This feature allows 802.1X or MAC authenticated users to move from a port to
another port on the device. The authentication session is deleted from the first port, and the
users are reauthenticated on the new port.
SNMP notifications for port security—This feature allows the port security module to
generate SNMP notifications to report important events.

143
MAC authentication delay—When both 802.1X authentication and MAC authentication are
enabled on a port, you can delay MAC authentication so that 802.1X authentication is
preferentially triggered. If no 802.1X authentication is triggered or 802.1X authentication fails
within the delay period, the port continues to process MAC authentication.
VLAN assignment—Both the 802.1X and MAC authentication features support VLAN
assignment for users.
ACL assignment—Both the 802.1X and MAC authentication features support ACL assignment
for users. You can specify an authorization ACL for a user to control the user's access to
network resources. After the user passes authentication, the authentication server (local or
remote) assigns the authorization ACL to the access port of the user. The ACL will filter traffic for
this user.
802.1X EAD assistant—This feature allows unauthenticated 802.1X users to access the free
IP. The feature also enables the device to redirect a user who is seeking to access the network
to a specific URL on the free IP. For example, you can use this feature to redirect the user to the
EAD client software download page.
802.1X SmartOn—This feature was developed to support the NEC 802.1X client. The device
performs SmartOn authentication before 802.1X authentication. If a user fails SmartOn
authentication, the device stops 802.1X authentication for the user.
Command reference
See HPE FlexNetwork MSR Configuration Guides(V7) and HPE FlexNetwork MSR Command
References(V7).
New feature: Customizable IVR
Configuring Customizable IVR
Interactive voice response (IVR) is extensively used in voice communications. The IVR system
enables you to customize interactive operations and humanize other services. If a subscriber dials
an IVR access number, the IVR system plays the prerecorded voice prompts to direct the subscriber
about how to proceed.
Command reference
See HPE FlexNetwork MSR Configuration Guides(V7) and HPE FlexNetwork MSR Command
References(V7).

144
New feature: SRST
Configuring SRST
SRST provides call handling for a branch office when the branch office loses connectivity to the
central voice server or the WAN connection is down. An SRST router in the branch office takes over
to manage calls to ensure that local phones can make and receive calls. When the WAN connection
is restored, call handling reverts back to the central voice server.
Command reference
See HPE FlexNetwork MSR Configuration Guides(V7) and HPE FlexNetwork MSR Command
References(V7).
New feature: NEMO
Configuring NEMO
As an extension of MIP, network mobility (NEMO) enables a node to retain the same IP address and
maintain application connectivity when the node travels across networks. It allows
location-independent routing of IP datagrams on the Internet. A mobile router is a router that
operates as a mobile node connecting the mobile network and the home agent.
Command reference
See HPE FlexNetwork MSR Configuration Guides(V7) and HPE FlexNetwork MSR Command
References(V7).

145
New feature: Support of MFR and FR for
L2VPN, FR QoS, and FR compression and
fragmentation
Configuring Support of MFR and FR for L2VPN,
FR QoS, and FR compression and fragmentation
Frame Relay supports MPLS L2VPN and can then communicate with other networks through MPLS
L2VPN. As a result, Layer 2 data can be transparently transmitted between Frame Relay networks
through an MPLS or IP network.
When FRTS is disabled, only FR interface queues are in effect. The predefined FR PVC queues take
effect only when FRTS is enabled.
The Frame Relay compression feature can compress Frame Relay packets to save bandwidth,
reduce the network load, and improve the transmission efficiency for data in the Frame Relay
network. The Frame Relay fragmentation feature can divide a large Frame Relay packet into several
small packets, so that large packets can be transmitted over a low-speed link with a low delay.
Command reference
See HPE FlexNetwork MSR Configuration Guides(V7) and HPE FlexNetwork MSR Command
References(V7).
New feature: Support for LLDP on CPOS
interfaces
Configuring Support for LLDP on CPOS interfaces
LLDP is supported on CPOS interfaces.
Command reference
See HPE FlexNetwork MSR Configuration Guides(V7) and HPE FlexNetwork MSR Command
References(V7).

146
New feature: SMS-based automatic
configuration
Configuring SMS-based automatic configuration
Support for SMS-based automatic configuration. With SMS-based automatic configuration, the
device can connect to an IMC server over a 3G or 4G network to obtain a configuration file.
To initiate SMS-based automatic configuration process, the administrator can use a cell phone or the
IMC server to send a short message to the device. The IMC server sends short messages to devices
through an SMS gateway. This feature can be used when the devices to be configured are widely
distributed and there are 3G or 4G networks available for wireless communication.
Command reference
See HPE FlexNetwork MSR Configuration Guides(V7) and HPE FlexNetwork MSR Command
References(V7).
New feature: ARP attack protection
Configuring ARP attack protection
None
Command reference
See HPE FlexNetwork MSR Configuration Guides(V7) and HPE FlexNetwork MSR Command
References(V7).
New feature: SIP support for VRF
Configuring SIP support for VRF
This feature enables a PE device to provide SIP services for a VPN instance. To enable this feature,
you can associate the VPN instance with SIP on the PE device. The PE device uses the interface
bound to the VPN instance as the source for sending SIP signaling and media streams.

147
Configuration guidelines
When you enable SIP support for VRF, follow these guidelines:
You cannot associate a VPN instance with SIP or remove the association when a SIP service
such as calling, registration, subscription, or the keepalive function is being used.
The VPN instance to associate with SIP must be already created.
Configuration procedure
To enable SIP support for VRF:
Step Command Remarks
Enter system view. system-view N/A
Create a VPN instance. ip vpn-instance vpn-instance-name
By default, no VPN instance exists.
Enter voice view. voice-setup N/A
Enter SIP view. sip N/A
Associate a VPN instance with SIP.
vpn-instance vpn-instance-name By default, no VPN instance is associated with SIP.
Command reference
vpn-instance
Use vpn-instance to associate a VPN instance with SIP.
Use undo vpn-instance to remove the association.
Syntax
vpn-instance vpn-instance-name
undo vpn-instance
Default
No VPN instance is associated with SIP.
Views
SIP view
Predefined user roles
network-admin

148
Parameters
vpn-instance-name: Specifies a VPN instance by its name, a case-sensitive string of 1 to 31
characters.
Usage guidelines
The VPN instance to associate with SIP must be already created.
You cannot associate a VPN instance or remove the association when a SIP service is being used.
Examples
# Associate the VPN instance vpn-voice with SIP.
<Sysname> system-view
[Sysname] voice-setup
[Sysname-voice] sip
[Sysname-voice-sip] vpn-instance vpn-voice
Related commands
ip binding vpn-instance (MPLS Command Reference)
ip vpn-instance (MPLS Command Reference)
ESS 0102
This release has the following changes:
New feature: Portal authentication
New feature: MSDP
New feature: IPsec MIB and IKE MIB
New feature: PoE
New feature: CoPP software forwarding feature
New feature: Configuring MPLS LDP FRR
New feature: Enhanced routing features
New feature: Python
New feature: ATM
New feature: DHCP MIB
New feature: Portal authentication
Portal authentication controls user access to the Internet. Portal authenticates a user by the
username and password the user enters on a portal authentication page. Therefore, portal
authentication is also known as Web authentication. When portal authentication is deployed on a
network, an access device redirects unauthenticated users to the website provided by a portal Web

149
server. The users can access the resources provided by the website. If the users want to access the
Internet, they must pass authentication on the website.
Portal authentication is classified into the following types:
Active authentication—Users visit the authentication website provided by the portal Web
server and enter their username and password for authentication.
Forced authentication—Users visit other websites and are redirected to the portal
authentication website for authentication.
Portal authentication flexibly imposes access control on the access layer and vital data entries. It has
the following advantages:
Replaces client software with convenient authentication pages.
Provides ISPs with diversified management choices and extended functions. For example, the
ISPs can place advertisements, provide community services, and publish information on the
authentication page.
Supports multiple authentication modes. For example, re-DHCP authentication implements a
flexible address assigning scheme and saves public IP addresses. Cross-subnet authentication
can authenticate users reside in subnets different from the access device.
The device support portal 2.0 and portal 3.0.
Command reference
See HPE FlexNetwork MSR Command References(V7).
New feature: MSDP
Configuring MSDP
MSDP is an inter-domain multicast solution that addresses the interconnection of PIM-SM domains.
It discovers multicast source information in other PIM-SM domains.
In the basic PIM-SM mode, a multicast source registers only with the RP in the local PIM-SM domain,
and the multicast source information in each domain is isolated. As a result, both of the following
occur:
The RP obtains the source information only within the local domain.
A multicast distribution tree is built only within the local domain to deliver multicast data locally.
MSDP enables the RPs of different PIM-SM domains to share their multicast source information. The
local RP can then join the SPT rooted at the multicast source across the PIM-SM domains. This
allows multicast data to be transmitted among different domains.

150
With MSDP peer relationships established between appropriate routers in the network, the RPs of
different PIM-SM domains are interconnected with one another. These MSDP peers exchange
source active (SA) messages, so that the multicast source information is shared among these
domains.
For more information about configuring MSDP, see "MSDP Configuration Guide" in HPE
FlexNetwork MSR Configuration Guides(V7).
Command reference
See HPE FlexNetwork MSR Command References(V7).
New feature: IPsec MIB and IKE MIB
IPsec-Monitor-MIB (HH3C-IPSEC-MONITOR-V2-MIB) monitors IPsec tunnels. NMS can use this
MIB to obtain IPsec tunnel information, including algorithms, gateway addresses, and tunnel
statistics. Except the trap function, all nodes of this MIB are read only.
Ike-Monitor-MIB (HH3C-IKE-MONITOR-MIB) monitors IKE tunnels. NMS can use this MIB to obtain
IKE tunnel information.
For more information, see the MIB companion document.
New feature: PoE
Configuring PoE
IEEE 802.3af-compliant power over Ethernet (PoE) enables a power sourcing equipment (PSE) to
supply power to powered devices (PDs) through Ethernet interfaces over twisted pair cables.
Examples of PDs include IP telephones, wireless APs, portable chargers, card readers, Web
cameras, and data collectors. A PD can also use a different power source from the PSE at the same
time for power redundancy.
For more information about configuring PoE, see "PoE Configuration Guide" in HPE FlexNetwork
MSR Configuration Guides(V7).
Command reference
See HPE FlexNetwork MSR Command References(V7).

151
New feature: CoPP software forwarding
feature
Configuring CoPP
If the rate of packets sent to the control plane exceeds the processing capabilities of the control
plane (for example, when the device is suffering DoS attacks), the normal packets sent to the control
plane cannot be promptly processed, thus affecting the normal operation of protocols.
To protect the management interface against DoS attacks, which will cause service interruption, you
must perform traffic policing for the management interface.
CoPP allows you to perform traffic policing for the control plane or management interface control
plane. By default, the predefined QoS parameters are configured for packets of each protocol sent to
the control plane. Also, you can apply a user-defined QoS policy to the control plane to filter and
rate-limit the packets sent to the control plane. This makes sure the control plane can correctly
receive, transmit, and process packets.
Command reference
control-plane
Use control-plane to enter control plane view.
Syntax
MSR2000 / MSR3000:
control-plane
MSR4000:
control-plane slot slot-number
Views
System view
Predefined user roles
network-admin
Examples
# (MSR2000 / MSR3000.) Enter control plane view.
<Sysname> system-view
[Sysname] control-plane
[Sysname-cp]

152
# (MSR4000.) Enter control plane view of the card in slot 3.
<Sysname> system-view
[Sysname] control-plane slot 3
[Sysname-cp-slot3]
control-plane management
Figure 1 Figure 2 IMPORTANT:
Figure 3 A QoS policy applied to the management interface control plane takes effect on the packets sent from the management interface to the control plane.
Use control-plane management to enter management interface control plane view.
Syntax
control-plane management
Views
System view
Predefined user roles
network-admin
Examples
# Enter management interface control plane view.
<Sysname> system-view
[Sysname] control-plane management
[Sysname-cp-management]
qos apply policy (interface view, control plane view)
Figure 4 Figure 5 IMPORTANT:
Figure 6 A QoS policy applied to the management interface control plane takes effect on the packets sent from the management interface to the control plane.
Use qos apply policy to apply a QoS policy to an interface, a control plane.
Use undo qos apply policy to remove a QoS policy from an interface, a control plane.
Syntax
qos apply policy policy-name { inbound | outbound }
undo qos apply policy policy-name { inbound | outbound }
Default
No QoS policy is applied to an interface, a control plane, or a management interface control plane.

153
Views
Interface view, control plane view
Predefined user roles
network-admin
Parameters
policy-name: Specifies a QoS policy by its name, a case-sensitive string of 1 to 31 characters.
inbound: Applies the QoS policy to the incoming traffic of an interface, a control plane, or a
management interface control plane.
outbound: Applies the QoS policy to the outgoing traffic of an interface.
Usage guidelines
To successfully apply a QoS policy to an interface, make sure the total bandwidth assigned to AF and
EF queues in the QoS policy is smaller than the available bandwidth of the interface. If you modify
the available bandwidth of the interface to a value smaller the total bandwidth for AF and EF queues,
the applied QoS policy is removed. For a QoS policy to be applied in the inbound direction, the
referenced traffic behaviors cannot be configured with any of the commands queue af, queue ef,
queue wfq, and gts.
When you apply a QoS policy to an interface, follow these guidelines:
You can apply a QoS policy configured with various QoS actions (such as remark, car, gts,
queue af, queue ef, queue wfq, and wred) to common physical interfaces.
An inbound QoS policy cannot contain a GTS action or any of these queuing actions queue ef,
queue af, or queue wfq.
Examples
# Apply the QoS policy named USER1 to the outgoing traffic of GigabitEthernet 0/1.
<Sysname> system-view
[Sysname] interface gigabitethernet 0/1
[Sysname-GigabitEthernet0/1] qos apply policy USER1 outbound
New feature: Configuring MPLS LDP FRR
Configuring MPLS LDP FRR
A link or router failure on a path can cause packet loss until LDP completes LSP establishment on the
new path. LDP FRR enables fast rerouting to minimize the failover time. LDP FRR bases on IP FRR
and is enabled automatically after IP FRR is enabled.

154
Figure 7 Network diagram for LDP FRR
In Figure 1, configure IP FRR on LSR A by using IGP to calculate or specify a backup next hop. LDP
creates a primary LSP and a backup LSP according to the primary route and the backup route
calculated by IGP. When the primary LSP operates correctly, it forwards the MPLS packets. When
the primary LSP fails, LDP directs packets to the backup LSP.
When packets are forwarded through the backup LSP, IGP calculates the optimal path based on the
new network topology. When IGP route convergence occurs, LDP establishes a new LSP according
to the optimal path. If a new LSP is not established after IGP route convergence, traffic forwarding
might be interrupted. Therefore, HPE recommends that you enable LDP IGP synchronization to work
with LDP FRR to reduce the traffic interruption time.
Command reference
igp sync delay
Use igp sync delay to configure the delay for LDP to notify IGP of the LDP convergence completion.
Use undo igp sync delay to restore the default.
Syntax
igp sync delay time
undo igp sync delay
Default
LDP immediately notifies IGP of the LDP convergence completion.
Views
LDP view
Predefined user roles
network-admin
Parameters
time: Specifies the notification delay in the range of 5 to 300 seconds.
LSR A
LSR C
LSR B
Primary LSP
Bac
kup
LSP B
ackup LSP

155
Usage guidelines
LDP convergence on a link is completed when the followings occur:
The local device establishes an LDP session to at least one peer, and the LDP session is
already in Operation state.
The local device has distributed the label mappings to at least one peer.
MPLS traffic forwarding might be interrupted in one of the following scenarios:
When the peer uses the Ordered label distribution control mode, the local device needs to wait
for a label mapping from its downstream LSR after the LDP session goes into Operation state.
If LDP immediately notifies IGP of the LDP convergence completion when the label mapping
from downstream is not received, MPLS traffic forwarding might be interrupted.
When a large number of label mappings are distributed from downstream, if LDP immediately
notifies IGP of the LDP convergence completion, label advertisement might not be finished, and
MPLS traffic forwarding is interrupted.
In these scenarios, you must use this command to configure the notification delay. When LDP
convergence on a link is completed, LDP waits a delay time to notify IGP of the LDP convergence
completion to reduce the traffic interruption time.
Examples
# Configure the notification delay as 30 seconds.
<Sysname> system-view
[Sysname] mpls ldp
[Sysname-ldp] igp sync delay 30
Related commands
igp sync delay on-restart
mpls ldp igp sync disable
mpls ldp sync (IS-IS view)
mpls ldp sync (OSPF view/OSPF area view)
igp sync delay on-restart
Use igp sync delay on-restart to configure the maximum delay for LDP to notify IGP of the LDP IGP
synchronization status after an LDP restart or an active/standby switchover occurs.
Use undo igp sync delay on-restart to restore the default.
Syntax
igp sync delay on-restart time
undo igp sync delay on-restart
Default
The maximum notification delay is 90 seconds.

156
Views
LDP view
Predefined user roles
network-admin
Parameters
time: Specifies the maximum notification delay in the range of 60 to 600 seconds.
Usage guidelines
After LDP restarts or an active/standby switchover occurs, LDP convergence begins after a period of
time. If LDP immediately notifies IGP of all the current LDP IGP synchronization status, and updates
the status after LDP convergence, IGP might frequently process the status, and the cost might
increase.
The notification delay mechanism for an LDP restart or an active/standby switchover provides a
notification delay of LDP process levels. When LDP restarts or an active/standby switchover occurs,
this mechanism enables LDP to wait a period of time till LDP recovers to the status before the restart
or switchover, and then notify IGP of the LDP IGP synchronization status in bulk. If LDP does not
recover to the status before the restart or switchover when the maximum delay set by this command
expires, LDP immediately notifies IGP of the LDP IGP synchronization status in bulk.
Examples
# Configure the maximum notification delay as 300 seconds.
<Sysname> system-view
[Sysname] mpls ldp
[Sysname-ldp] igp sync delay on-restart 300
Related commands
igp sync delay
mpls ldp igp sync disable
mpls ldp sync (IS-IS view)
mpls ldp sync (OSPF view/OSPF area view)
mpls ldp igp sync disable
Use mpls ldp igp sync disable to disable LDP IGP synchronization on an interface.
Use undo mpls ldp igp sync disable to restore the default.
Syntax
mpls ldp igp sync disable
undo mpls ldp igp sync disable
Default
LDP IGP synchronization is enabled on an interface.

157
Views
Interface view
Predefined user roles
network-admin
Usage guidelines
After you enable LDP IGP synchronization for IGP, for example, an OSPF area or an IS-IS process,
LDP IGP synchronization is enabled on the OSPF interfaces and IS-IS interfaces. To disable LDP
IGP synchronization on an interface, execute the mpls ldp igp sync disable command on that
interface.
Examples
# Enable LDP IGP synchronization on GigabitEthernet 0/1.
<Sysname> System-view
[Sysname] interface gigabitethernet 0/1
[Sysname-GigabitEthernet0/1] mpls ldp igp sync disable
Related commands
mpls ldp sync (IS-IS view)
mpls ldp sync (OSPF view/OSPF area view)
New feature: Enhanced routing features
Configuring enhanced routing features
This release supports RIB NSR, IPv4 static route FRR, direct route redistribution, and RFC4382 MIB
(MPLS-L3VPN-STD-MIB).
Command reference
non-stop-routing
Use non-stop-routing to enable RIB NSR to back up routing information.
Use undo non-stop-routing to restore the default.
Syntax
non-stop-routing
undo non-stop-routing
Default
RIB NSR is disabled.

158
Views
RIB IPv4 address family view, RIB IPv6 address family view
Predefined user roles
network-admin
Examples
# Enable NSR for the RIB IPv4 address family.
<Sysname> system-view
[Sysname] rib
[Sysname-rib] address-family ipv4
[Sysname-rib-ipv4] non-stop-routing
ip route-static fast-reroute auto
Use ip route-static fast-reroute auto to configure static route FRR to automatically select a backup
next hop.
Use undo ip route-static fast-reroute auto to disable static route FRR.
Syntax
ip route-static fast-reroute auto
undo ip route-static fast-reroute auto
Default
Static route FRR is disabled.
Views
System view
Predefined user roles
network-admin
Examples
# Configure static route FRR to automatically select a backup next hop.
<Sysname> system-view
[Sysname] ip route-static fast-reroute auto
import-route (RIP view)
Use import-route to enable route redistribution from another routing protocol.
Use undo import-route to disable route redistribution.
Syntax
import-route protocol [ process-id | all-processes | allow-ibgp ] [ allow-direct | cost cost |
route-policy route-policy-name | tag tag ] *

159
undo import-route protocol [ process-id | all-processes ]
Default
RIP does not redistribute routes from any other routing protocol.
Views
RIP view
Predefined user roles
network-admin
Parameters
protocol: Specifies a routing protocol from which RIP redistributes routes. It can be bgp, direct, isis,
ospf, rip, or static.
process-id: Specifies a process by its ID in the range of 1 to 65535. The default is 1. This argument is
available only when the protocol is isis, rip, or ospf.
all-processes: Enables route redistribution from all the processes of the specified protocol. This
keyword takes effect only when the protocol is rip, ospf, or isis.
allow-ibgp: Allows redistribution of IBGP routes. This keyword is available when the protocol
argument is set to bgp.
allow-direct: Redistributes the networks of the local interfaces enabled with the specified routing
protocol. By default, the networks of the local interfaces are not redistributed. If you specify both the
allow-direct keyword and the route-policy route-policy-name option, make sure the if-match rule
defined in the routing policy does not conflict with the allow-direct keyword. For example, if you
specify the allow-direct keyword, do not configure the if-match route-type rule for the routing policy.
Otherwise, the allow-direct keyword does not take effect.
cost cost: Specifies a cost for redistributed routes, in the range of 0 to 16. The default cost is 0.
route-policy route-policy-name: Specifies a routing policy by its name, a case-sensitive string of 1 to
63 characters.
tag tag: Specifies a tag for marking redistributed routes, in the range of 0 to 65535. The default is 0.
Usage guidelines
The import-route bgp command redistributes only EBGP routes. The import-route bgp allow-ibgp
command additionally redistributes IBGP routes and might cause routing loops. Therefore, use it
with caution.
This command redistributes only active routes. To view route state information, use the display ip
routing-table protocol command.
The undo import-route protocol all-processes command removes only the configuration made by
the import-route protocol all-processes command, instead of the configuration made by the
import-route protocol process-id command.
Examples
# Redistribute static routes into RIP, and set the cost for redistributed routes to 4.

160
<Sysname> system-view
[Sysname] rip 1
[Sysname-rip-1] import-route static cost 4
Related commands
default cost
import-route (OSPF view)
Use import-route to redistribute AS-external routes from another routing protocol.
Use undo import-route to disable route redistribution from another routing protocol.
Syntax
import-route protocol [ process-id | all-processes | allow-ibgp ] [ allow-direct | cost cost |
nssa-only | route-policy route-policy-name | tag tag | type type ] *
undo import-route protocol [ process-id | all-processes ]
Default
OSPF does not redistribute AS-external routes from any other routing protocol.
Views
OSPF view
Predefined user roles
network-admin
Parameters
protocol: Redistributes routes from the specified protocol, which can be bgp, direct, isis, ospf, rip,
or static.
process-id: Specifies a process by its ID in the range of 1 to 65535. The default is 1. It is available
only when the protocol is rip, ospf, or isis.
all-processes: Redistributes routes from all the processes of the specified routing protocol. This
keyword takes effect only when the protocol is rip, ospf, or isis.
allow-ibgp: Redistributes IBGP routes. It is available only when the protocol is bgp.
allow-direct: Redistributes the networks of the local interfaces enabled with the specified routing
protocol. By default, the networks of the local interfaces are not redistributed. If you specify both the
allow-direct keyword and the route-policy route-policy-name option, make sure the if-match rule
defined in the routing policy does not conflict with the allow-direct keyword. For example, if you
specify the allow-direct keyword, do not configure the if-match route-type rule for the routing policy.
Otherwise, the allow-direct keyword does not take effect.
cost cost: Specifies a route cost in the range of 0 to 16777214. The default is 1.
nssa-only: Limits the route advertisement to the NSSA area by setting the P-bit of Type-7 LSAs to 0.
By default, the P-bit of Type-7 LSAs is set to 1. If the router acts as both an ASBR and an ABR and

161
FULL state neighbors exist in the backbone area, the P-bit of Type-7 LSAs originated by the router is
set to 0. This keyword applies to NSSA routers.
route-policy route-policy-name: Specifies a routing policy to filter redistributed routes. The
route-policy-name argument is a case-sensitive string of 1 to 63 characters.
tag tag: Specifies a tag for marking external LSAs, in the range of 0 to 4294967295. The default is 1.
type type: Specifies a cost type, 1 or 2. The default is 2.
Usage guidelines
This command redistributes routes destined for other ASs from another protocol. AS external routes
include the following types:
Type-1 external route
Type-2 external route
A Type-1 external route has high reliability. Its cost is comparable with the cost of OSPF internal
routes. The cost from an OSPF router to a Type-1 external route's destination equals the cost from
the router to the ASBR plus the cost from the ASBR to the external route's destination.
A Type-2 external route has low credibility. OSPF considers the cost from the ASBR to the
destination of a Type-2 external route is much bigger than the cost from the ASBR to an OSPF
internal router. The cost from an internal router to a Type-2 external route's destination equals the
cost from the ASBR to the Type-2 external route's destination.
The import-route command cannot redistribute default external routes.
The import-route bgp command redistributes only EBGP routes. Because the import-route bgp
allow-ibgp command redistributes both EBGP and IBGP routes and might cause routing loops, use
it with caution.
Only active routes can be redistributed. To view information about active routes, use the display ip
routing-table protocol command.
The undo import-route protocol all-processes command removes only the configuration made by
the import-route protocol all-processes command, instead of the configuration made by the
import-route protocol process-id command.
The import-route nssa-only command redistributes AS-external routes in Type-7 LSAs only into
the NSSA area.
Examples
# Redistribute routes from RIP process 40 and specify the type, tag, and cost as 2, 33, and 50 for
redistributed routes.
<Sysname> system-view
[Sysname] ospf 100
[Sysname-ospf-100] import-route rip 40 type 2 tag 33 cost 50
Related commands
default-route-advertise (OSPF view)
162
import-route (IS-IS view)
Use import-route to redistribute routes from another routing protocol or another IS-IS process.
Use undo import-route to remove the redistribution.
Syntax
import-route protocol [ process-id | all-processes | allow-ibgp ] [ allow-direct | cost cost |
cost-type { external | internal } | [ level-1 | level-1-2 | level-2 ] | route-policy route-policy-name |
tag tag ] *
undo import-route protocol [ process-id | all-processes ]
Default
No route redistribution is configured.
Views
IS-IS view
Predefined user roles
network-admin
Parameters
protocol: Redistributes routes from a routing protocol, which can be BGP, direct, IS-IS, OSPF, RIP, or
static.
process-id: Specifies a process by its ID in the range of 1 to 65535. It is available only when the
protocol is isis, ospf, or rip.
all-processes: Redistributes routes from all the processes of the specified routing protocol. This
keyword takes effect only when the protocol is rip, ospf, or isis.
allow-ibgp: Allows redistribution of IBGP routes. It is available when the protocol is BGP.
allow-direct: Redistributes the networks of the local interfaces enabled with the specified routing
protocol. By default, the networks of the local interfaces are not redistributed. If you specify both the
allow-direct keyword and the route-policy route-policy-name option, make sure the if-match rule
defined in the routing policy does not conflict with the allow-direct keyword. For example, if you
specify the allow-direct keyword, do not configure the if-match route-type rule for the routing policy.
Otherwise, the allow-direct keyword does not take effect.
cost: Specifies a cost for redistributed routes, which is in the range of 0 to 4261412864.
For the styles of narrow, narrow-compatible, and compatible, the cost is in the range of 0 to
63.
For the styles of wide and wide-compatible, the cost is in the range of 0 to 4261412864.
cost-type { external | internal }: Specifies the cost type. The internal type indicates internal routes,
and the external type indicates external routes. If external is specified, the cost of a redistributed
route is added by 64 to make internal routes take priority over external routes. The type is external

163
by default. The keywords are available only when the cost type is narrow, narrow-compatible, or
compatible.
level-1: Redistributes routes into the Level-1 routing table.
level-1-2: Redistributes routes into both Level-1 and Level-2 routing tables.
level-2: Redistributes routes into the Level-2 routing table. If no level is specified, the routes are
redistributed into the Level-2 routing table by default.
route-policy route-policy-name: Redistributes only routes matching the specified routing policy. The
route-policy-name argument is a case-sensitive string of 1 to 63 characters.
tag tag: Specifies a tag value for marking redistributed routes, in the range of 1 to 4294967295.
Usage guidelines
IS-IS takes all the redistributed routes as external routes to destinations outside the IS-IS routing
domain.
The effective cost depends on the cost style. For the styles of narrow, narrow-compatible, and
compatible, the cost is in the range of 0 to 63. If the cost is more than 63, 63 is used. For the style of
wide or wide-compatible, the configured value is the effective value.
This import-route command cannot redistribute default routes. The command redistributes only
active routes. To display route state information, use the display ip routing-table protocol
command.
The import-route bgp command redistributes only EBGP routes.
The import-route bgp allow-ibgp command redistributes both EBGP and IBGP routes. Because
this command might cause routing loops, use it with caution.
The undo import-route protocol all-processes command removes only the configuration made by
the import-route protocol all-processes command, instead of the configuration made by the
import-route protocol process-id command.
Examples
# Redistribute static routes into IS-IS, and set the cost for redistributed routes to 15.
<Sysname> system-view
[Sysname] isis 1
[Sysname-isis-1] import-route static cost 15
Related commands
import-route limit
import-route (BGP view)
Use import-route to enable BGP to redistribute routes from an IGP protocol.
Use undo import-route to disable route redistribution from an IGP protocol.

164
Syntax
In BGP IPv4 unicast address family view/BGP-VPN IPv4 unicast address family view:
import-route protocol [ { process-id | all-processes } [ allow-direct | med med-value | route-policy
route-policy-name ] * ]
undo import-route protocol [ process-id | all-processes ]
In BGP IPv6 unicast address family view/BGP-VPN IPv6 unicast address family view:
import-route protocol [ process-id [ allow-direct | med med-value | route-policy
route-policy-name ] * ]
undo import-route protocol [ process-id ]
Default
BGP does not redistribute IGP routes.
Views
BGP IPv4 unicast address family view, BGP-VPN IPv4 unicast address family view, BGP IPv6
unicast address family view, BGP-VPN IPv6 unicast address family view
Predefined user roles
network-admin
Parameters
protocol: Redistributes routes from a specified IGP protocol. In BGP IPv4 unicast address family
view/BGP-VPN IPv4 unicast address family view, it can be direct, isis, ospf, rip, or static. In BGP
IPv6 unicast address family view/BGP-VPN IPv6 unicast address family view, it can be direct, isisv6,
ospfv3, ripng, or static.
process-id: Specifies a process by its ID in the range of 1 to 65535. The default is 1. In BGP IPv4
unicast address family view/BGP-VPN IPv4 unicast address family view, it is available only when the
protocol is isis, ospf, or rip. In BGP IPv6 unicast address family view/BGP-VPN IPv6 unicast
address family view, it is available only when the protocol is isisv6, ospfv3, or ripng.
all-processes: Redistributes routes from all the processes of the specified IGP protocol. This
keyword takes effect only when the protocol is isis, ospf, or rip.
allow-direct: Redistributes the networks of the local interfaces enabled with the specified routing
protocol. By default, the networks of the local interfaces are not redistributed. If you specify both the
allow-direct keyword and the route-policy route-policy-name option, make sure the if-match rule
defined in the routing policy does not conflict with the allow-direct keyword. For example, if you
specify the allow-direct keyword, do not configure the if-match route-type rule for the routing policy.
Otherwise, the allow-direct keyword does not take effect.
med med-value: Specifies a MED value for redistributed routes, in the range of 0 to 4294967295. If
no MED is specified, the metric of a redistributed route is used as its MED.
route-policy route-policy-name: Specifies a routing policy by its name, a case-sensitive string of 1 to
63 characters, to filter redistributed routes or set route attributes for redistributed routes.

165
Usage guidelines
The import-route command cannot redistribute default IGP routes. To redistribute default IGP
routes, use the default-route imported command together with the import-route command.
Only active routes can be redistributed. You can use the display ip routing-table protocol or
display ipv6 routing-table protocol command to view route state information.
The ORIGIN attribute of routes redistributed by the import-route command is INCOMPLETE.
Examples
# In BGP IPv4 unicast address family view, redistribute routes from RIP process 1, and set the MED
value for redistributed routes to 100.
<Sysname> system-view
[Sysname] bgp 100
[Sysname-bgp] address-family ipv4 unicast
[Sysname-bgp-ipv4] import-route rip 1 med 100
# In BGP-VPN IPv4 unicast address family view, redistribute routes from RIP process 1, and
reference a routing policy imprt to exclude route 1.1.1.0/24 from route redistribution.
<Sysname> system-view
[Sysname] ip prefix-list imprt deny 1.1.1.0 24
[Sysname] ip prefix-list imprt permit 0.0.0.0 0 less-equal 32
[Sysname] route-policy imprt permit node 0
[Sysname-route-policy-imprt-0] if-match ip address prefix-list imprt
[Sysname-route-policy-imprt-0] quit
[Sysname] bgp 100
[Sysname-bgp] ip vpn-instance vpn1
[Sysname-bgp-vpn1] address-family ipv4 unicast
[Sysname-bgp-ipv4-vpn1] import-route rip 1 route-policy imprt
# In BGP IPv6 unicast address family view, redistribute routes from RIP process 1.
<Sysname> system-view
[Sysname] bgp 100
[Sysname-bgp] address-family ipv6 unicast
[Sysname-bgp-ipv6] import-route ripng
# In BGP-VPN IPv6 unicast address family view, redistribute routes from RIP process 1.
<Sysname> system-view
[Sysname] bgp 100
[Sysname-bgp] ip vpn-instance vpn1
[Sysname-bgp-vpn1] address-family ipv6 unicast
[Sysname-bgp-ipv6-vpn1] import-route ripng
Related commands
display ip routing-table protocol
display ipv6 routing-table protocol

166
import-route (RIPng view)
Use import-route to redistribute routes from another routing protocol.
Use undo import-route to disable route redistribution.
Syntax
import-route protocol [ process-id ] [ allow-ibgp ] [ allow-direct | cost cost | route-policy
route-policy-name ] *
undo import-route protocol [ process-id ]
Default
RIPng does not redistribute routes from another routing protocol.
Views
RIPng view
Predefined user roles
network-admin
Parameters
protocol: Specifies a routing protocol from which RIPng redistributes routes. It can be bgp4+, direct,
isisv6, ospfv3, ripng, or static.
process-id: Specifies a process by its ID in the range of 1 to 65535. The default is 1. This argument is
available only when the protocol is isisv6, ospfv3, or ripng.
allow-ibgp: Allows redistribution of IBGP routes. This keyword is available when the protocol
argument is set to bgp4+.
allow-direct: Redistributes the networks of the local interfaces enabled with the specified routing
protocol. By default, the networks of the local interfaces are not redistributed. If you specify both the
allow-direct keyword and the route-policy route-policy-name option, make sure the if-match rule
defined in the routing policy does not conflict with the allow-direct keyword. For example, if you
specify the allow-direct keyword, do not configure the if-match route-type rule for the routing policy.
Otherwise, the allow-direct keyword does not take effect.
cost cost: Specifies a metric for redistributed routes, in the range of 0 to 16. The default metric is 0.
route-policy route-policy-name: Specifies a routing policy by its name, a case-sensitive string of 1 to
63 characters.
Usage guidelines
The import-route bgp4+ command redistributes only EBGP routes. The import-route bgp4+
allow-ibgp command redistributes both EBGP and IBGP routes.
Examples
# Redistribute routes from IPv6 IS-IS process 7 into RIPng and set the metric for redistributed routes
to 7.

167
<Sysname> system-view
[Sysname] ripng 100
[Sysname-ripng-100] import-route isisv6 7 cost 7
import-route (OSPFv3 view)
Use import-route to redistribute routes.
Use undo import-route to disable route redistribution.
Syntax
import-route protocol [ process-id | all-processes | allow-ibgp ] [ allow-direct | cost cost |
nssa-only | route-policy route-policy-name | tag tag | type type ] *
undo import-route protocol [ process-id | all-processes ]
Default
OSPFv3 route redistribution is disabled.
Views
OSPFv3 view
Predefined user roles
network-admin
Parameters
protocol: Redistributes routes from the specified routing protocol, which can be bgp4+, direct,
isisv6, ospfv3, ripng, or static.
process-id: Specifies the process ID of a routing protocol, in the range of 1 to 65536. It defaults to 1.
This argument takes effect only when the protocol is isisv6, ospfv3, or ripng.
all-processes: Redistributes routes from all the processes of the specified routing protocol. This
keyword takes effect only when the protocol is ripng, ospfv3, or isisv6.
allow-ibgp: Redistributes IBGP routes. It is available only when the protocol is bgp4+.
allow-direct: Redistributes the networks of the local interfaces enabled with the specified routing
protocol. By default, the networks of the local interfaces are not redistributed. If you specify both the
allow-direct keyword and the route-policy route-policy-name option, make sure the if-match rule
defined in the routing policy does not conflict with the allow-direct keyword. For example, if you
specify the allow-direct keyword, do not configure the if-match route-type rule for the routing policy.
Otherwise, the allow-direct keyword does not take effect.
cost cost: Specifies a cost for redistributed routes, in the range of 1 to 16777214. The default is 1.
nssa-only: Limits the route advertisement to the NSSA area by setting the P-bit of Type-7 LSAs to 0.
By default, the P-bit of Type-7 LSAs is set to 1. If the router acts as both an ASBR and an ABR and
FULL state neighbors exist in the backbone area, the P-bit of Type-7 LSAs originated by the router is
set to 0. This keyword applies to NSSA routers.

168
route-policy route-policy-name: Specifies a routing policy to filter redistributed routes. The
route-policy-name argument is a case-sensitive string of 1 to 63 characters.
tag tag: Specifies a tag for marking external LSAs, in the range of 0 to 4294967295. If this option is
not specified, no tag is contained in advertised LSAs by default.
type type: Specifies the type for redistributed routes, 1 or 2. The default is 2.
Usage guidelines
An external route is a route to a destination outside the OSPFv3 AS. External routes types are as
follows:
A Type-1 external route has high reliability. Its cost is comparable with the cost of OSPFv3
internal routes. The cost from an OSPFv3 router to a Type-1 external route's destination equals
the cost from the router to the ASBR plus the cost from the ASBR to the external route's
destination.
A Type-2 external route has low credibility, so OSPFv3 considers the cost from the ASBR to a
Type-2 external route is much bigger than the cost from the ASBR to an OSPFv3 internal router.
The cost from an internal router to a Type-2 external route's destination equals the cost from the
ASBR to the Type-2 external route's destination.
The import-route command cannot redistribute default routes.
The import-route bgp4+ command redistributes only EBGP routes. The import-route bgp4+
allow-ibgp command redistributes both EBGP and IBGP routes, and might cause routing loops.
Therefore, use it with caution.
The import-route nssa-only command redistributes AS-external routes in Type-7 LSAs only into
the NSSA area.
Examples
# Configure OSPFv3 process 1 to redistribute routes from RIPng and specify the type as type 2 and
cost as 50.
<Sysname> system-view
[Sysname] ospfv3
[Sysname-ospfv3-1] import-route ripng 10 type 2 cost 50
# Configure OSPFv3 process 100 to redistribute the routes discovered by OSPFv3 process 160.
<Sysname> system-view
[Sysname] ospfv3 100
[Sysname-ospfv3-100] import-route ospfv3 160
ipv6 import-route (IPv6 IS-IS view)
Use ipv6 import-route to enable IPv6 IS-IS to redistribute routes from another routing protocol.
Use undo ipv6 import-route to disable route redistribution.

169
Syntax
ipv6 import-route protocol [ process-id ] [ allow-ibgp ] [ allow-direct | cost cost | [ level-1 |
level-1-2 | level-2 ] | route-policy route-policy-name| tag tag ] *
undo ipv6 import-route protocol [ process-id ]
Default
IPv6 does not redistribute routes from any other routing protocol.
Views
IS-IS view
Predefined user roles
network-admin
Parameters
protocol: Redistributes routes from the specified routing protocol, which can be direct, static, ripng,
isisv6, bgp4+, or ospfv3.
process-id: Specifies a process by its ID in the range of 1 to 65535. It is available only when the
protocol is ripng, isisv6, or ospfv3.
allow-direct: Redistributes the networks of the local interfaces enabled with the specified routing
protocol. By default, the networks of the local interfaces are not redistributed. If you specify both the
allow-direct keyword and the route-policy route-policy-name option, make sure the if-match rule
defined in the routing policy does not conflict with the allow-direct keyword. For example, if you
specify the allow-direct keyword, do not configure the if-match route-type rule for the routing policy.
Otherwise, the allow-direct keyword does not take effect.
cost cost: Specifies a cost for redistributed routes, in the range of 0 to 4261412864.
level-1: Redistributes routes into the Level-1 routing table.
level-1-2: Redistributes routes into Level-1 and Level-2 routing tables.
level-2: Redistributes routes into the Level-2 routing table.
route-policy route-policy-name: Specifies a routing policy by its name, a case-sensitive string of 1 to
63 characters, to filter redistributed routes.
tag tag: Specifies an administrative tag for marking redistributed routes, in the range of 1 to
4294967295.
allow-ibgp: Allows redistribution of IBGP routes. This keyword is available only when the protocol is
bgp4+.
Usage guidelines
IPv6 IS-IS considers redistributed routes as AS-external routes.
You can specify a cost and a level for redistributed routes.

170
The import-route bgp4+ command redistributes only EBGP routes. The import-route bgp4+
allow-ibgp command redistributes both EBGP and IBGP routes, and might cause routing loops.
Therefore, use it with caution.
Examples
# Configure IPv6 IS-IS to redistribute static routes and set the cost for redistributed routes to 15.
<Sysname> system-view
[Sysname] isis 1
[Sysname-isis-1] ipv6 import-route static cost 15
New feature: Python
Using Python
Python is an easy to learn, powerful programming language. It has efficient high-level data structures
and a simple but effective approach to object-oriented programming. Python's elegant syntax and
dynamic typing, together with its interpreted nature, make it an ideal language for scripting and rapid
application development in many areas on most platforms.
Comware V7 provides a built-in Python interpreter that supports the following items:
Python 2.7 commands.
Python 2.7 standard API.
Comware V7 extended API.
Python scripts. You can use a Python script to configure the system automatically.
To use Python 2.7 commands and the APIs, you must enter the Python shell.
Command reference
See HPE FlexNetwork MSR Command References(V7).
New feature: ATM
Configuring ATM
Asynchronous Transfer Mode (ATM) is a technology based on packet transmission mode while
incorporating the high-speed of circuit transmission mode. ATM was adopted as the transmission
and switching mode for broadband ISDN by the ITU-T in June 1992. Due to its flexibility and support
for multimedia services, ATM is regarded as core broadband technology.

171
As defined by the ITU-T, data is encapsulated in cells in ATM. Each ATM cell is 53 bytes in length, of
which the first five bytes contain cell header information and the last 48 bytes contain payload. The
major function of the cell header is to identify virtual connection. In addition, it can be used to carry
limited flow control, congestion control, and error control information.
Command reference
See HPE FlexNetwork MSR Command References(V7).
New feature: DHCP MIB
DHCP MIB
The MIB supports HH3C-DHCP4-MIB and HH3C-DHCP-SNOOP2-MIB. For more information about
MIB nodes, see the MIB companion document.
Command reference
if-match
Use if-match to configure a match rule for a DHCP user class.
Use undo if-match to remove the match rule for a DHCP user class.
Syntax
if-match rule rule-number option option-code [ hex hex-string [ mask mask | offset offset length
length ] ]
undo if-match rule rule-number
Syntax
No match rule is configured for the DHCP user class.
Views
DHCP user class view
Predefined user roles
network-admin
Parameters
rule rule-number: Assigns the match rule an ID in the range of 1 to 16. A smaller ID represents a
higher match priority.
option option-code: Matches a DHCP option by a number in the range of 1 to 254.

172
hex hex-string: Matches the specified string in the option, which must be a hex string of even
numbers in the range of 2 to 256. If you do not specify the hex-string argument, the DHCP server
only checks whether the specified option exists in the received packets.
mask mask: Specifies the mask used to match the option content. The mask argument is a hex
string of even numbers in the range of 2 to 256. The length of mask must be the same as that of
hex-string.
offset offset: Specifies the offset to match the option, in the range of 0 to 254 bytes. If you do not
specify the offset argument, the server matches the entire option with the rule.
length length: Matches the specified length of the option, in the range of 1 to 128 bytes. The
specified length must be the same as the hex-string length.
Usage guidelines
You can configure multiple match rules for a DHCP user class. Each match rule is uniquely identified
by a rule ID. Different match rules can include the same option code, but they cannot have the exact
same matching criteria.
The DHCP server matches DHCP requests against the match rules. A DHCP client matches a DHCP
user class when its request matches one of the specified match rules.
The match operation follows these guidelines:
If only the option-code argument is specified in the rule, packets containing the option match the
rule.
If only the option-code and hex-string arguments are specified in the rule, packets that have the
specified hex string in the specified option match the rule.
If the option-code, hex-string, offset and length arguments are specified in the rule, packets
match the rule as long as their content from offset+1 bit to offset+length bit in the specified
option is the same as the specified hex string.
If the option-code, hex-string, and mask arguments are specified in the rule, the DHCP server
ANDs the content from the first bit to the mask-1 bit in the specified option with the mask, and
then compares the result with the result of the AND operation between hex-string and mask. If
the two results are the same, the received packet matches the rule.
Examples
# Configure match rule 1 to match DHCP requests that contain Option 82 for DHCP user class
contain-option82.
<Sysname> system-view
[Sysname] dhcp class contain-option82
[Sysname-dhcp-class-contain-option82] if-match rule 1 option 82
# Configure match rule 2 to match DHCP requests that contain Option 82 whose first three bytes is
0x13ae92 for DHCP user class exam.
<Sysname> system-view
[Sysname] dhcp class exam
[Sysname-dhcp-class-exam] if-match rule 2 option 82 hex 13ae92 offset 0 length 3

173
# Configure match rule 3 to match DHCP requests that contain Option 82 whose highest bit of the
fourth byte is 1 for DHCP user class exam.
<Sysname> system-view
[Sysname] dhcp class exam
[Sysname-dhcp-class-exam] if-match rule 3 option 82 hex 00000080 mask 00000080
Related commands
dhcp class
ESS 0006P02
None