how to use dtm for windows vista system logo testing: a step-by-step...
TRANSCRIPT
How to Use DTM for Windows Vista System Logo Testing: A Step-by-Step Guide
September 27, 2007
Abstract
This paper provides information about how to use the Windows Logo Kit to perform system logo testing for Windows Vista® . It contains guidelines for new users to set up, configure, test, submit, and diagnose tests by using Device Test Manager (DTM). It applies to Windows Logo Kit version 1.0.c.
This information applies for the following operating systems: Windows Vista Windows Server® 2003
Note This document will not be maintained in the future. For complete and ongoing coverage, refer to the installation instructions (Install.htm) in the root of the Windows Logo Kit (WLK) DVD and the help documentation available within DTM Studio.
Contents
Installing DTM Controller......................................................................................................... 3 Installing the DTM Tests ......................................................................................................... 6 Installing DTM Studio .............................................................................................................. 9 Installing DTM Client ............................................................................................................. 11 Testing Systems ................................................................................................................... 14 Understanding the Test Logs ................................................................................................ 25 Submitting Error Logs ........................................................................................................... 28
How to Use DTM for Windows Vista System Logo Testing: A Step-by-Step Guide - 2
September 27, 2007 © 2007 Microsoft Corporation. All rights reserved.
Disclaimer
This is a preliminary document and may be changed substantially prior to final commercial release of the software described herein. The information contained in this document represents the current view of Microsoft Corporation on the issues discussed as of the date of publication. Because Microsoft must respond to changing market conditions, it should not be interpreted to be a commitment on the part of Microsoft, and Microsoft cannot guarantee the accuracy of any information presented after the date of publication. This White Paper is for informational purposes only. MICROSOFT MAKES NO WARRANTIES, EXPRESS, IMPLIED OR STATUTORY, AS TO THE INFORMATION IN THIS DOCUMENT. Complying with all applicable copyright laws is the responsibility of the user. Without limiting the rights under copyright, no part of this document may be reproduced, stored in or introduced into a retrieval system, or transmitted in any form or by any means (electronic, mechanical, photocopying, recording, or otherwise), or for any purpose, without the express written permission of Microsoft Corporation. Microsoft may have patents, patent applications, trademarks, copyrights, or other intellectual property rights covering subject matter in this document. Except as expressly provided in any written license agreement from Microsoft, the furnishing of this document does not give you any license to these patents, trademarks, copyrights, or other intellectual property. Unless otherwise noted, the example companies, organizations, products, domain names, e-mail addresses, logos, people, places and events depicted herein are fictitious, and no association with any real company, organization, product, domain name, email address, logo, person, place or event is intended or should be inferred. © 2007 Microsoft Corporation. All rights reserved. Microsoft, BitLocker, Windows, Windows Server, and Windows Vista are either registered trademarks or trademarks of Microsoft Corporation in the United States and/or other countries. The names of actual companies and products mentioned herein may be the trademarks of their respective owners.
How to Use DTM for Windows Vista System Logo Testing: A Step-by-Step Guide - 3
September 27, 2007 © 2007 Microsoft Corporation. All rights reserved.
Installing DTM Controller
You can install Device Test Manager (DTM) Controller only on a computer that is running Windows Server® 2003 with Service Pack 1 (SP1) or Service Pack 2 (SP2).
Note The screenshots in this document may appear different between different releases of the Windows Logo Kit (WLK) and DTM.
To install DTM Controller
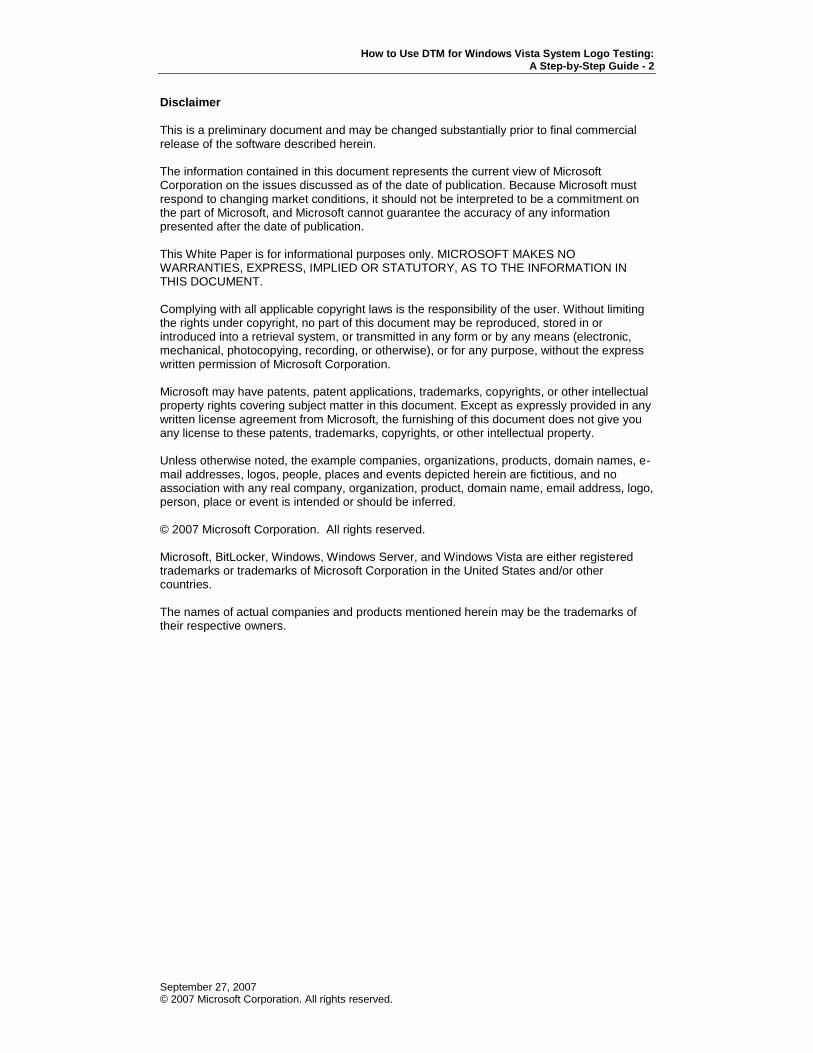
1. To start Autorun, insert the WLK DVD into your DVD drive. If Autorun is disabled, you must manually start Installer.exe. You can click the button to install DTM Controller only if you are running Windows Server 2003 with SP1 or SP2.
The Microsoft Windows Logo Kit Installer dialog box appears.
If you do not have Microsoft .NET Framework 2.0 and the SQL Desktop Engine currently installed, install them from the Windows Logo Kit Prerequisite Setup Packages section before you proceed to install DTM Controller.

How to Use DTM for Windows Vista System Logo Testing: A Step-by-Step Guide - 4
September 27, 2007 © 2007 Microsoft Corporation. All rights reserved.
2. In the Windows Logo Kit Setup Package section, click the Install button next to Driver Test Manager (DTM) Controller.
Note If you plan to do system testing, make sure that you install only .NET Framework 2.0, SQL Desktop Engine, DTM Controller, and DTM Tests on the computer.
The Microsoft DTM Setup wizard appears.
3. Click Next.
The End-User License Agreement page appears.

How to Use DTM for Windows Vista System Logo Testing: A Step-by-Step Guide - 5
September 27, 2007 © 2007 Microsoft Corporation. All rights reserved.
4. Read the EULA, click I accept the terms in the License Agreement, and then click Next.
The Custom Setup page appears.
5. Click Next.
The Ready to Install page appears.
How to Use DTM for Windows Vista System Logo Testing: A Step-by-Step Guide - 6
September 27, 2007 © 2007 Microsoft Corporation. All rights reserved.
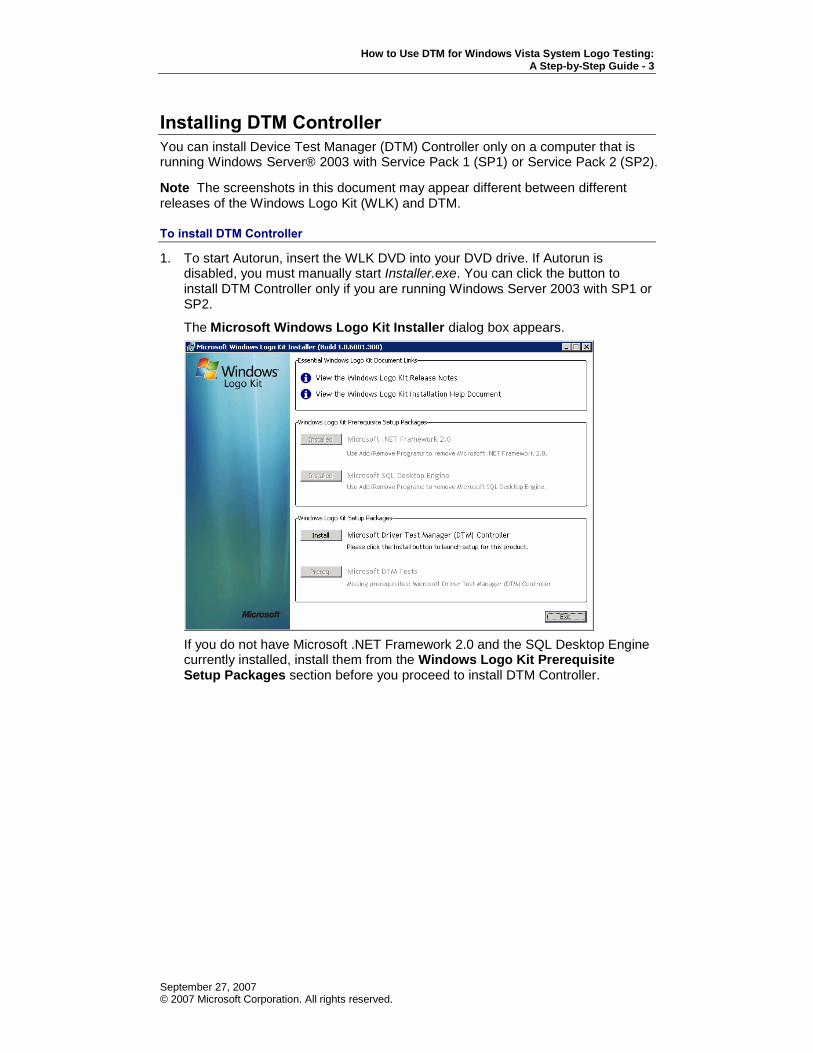
6. To begin installing DTM Controller, click Install.
Note This process can take a while. It may appear at times that the progress bar stops, but this is normal. During installation, you might see the following page for 20 or more minutes.
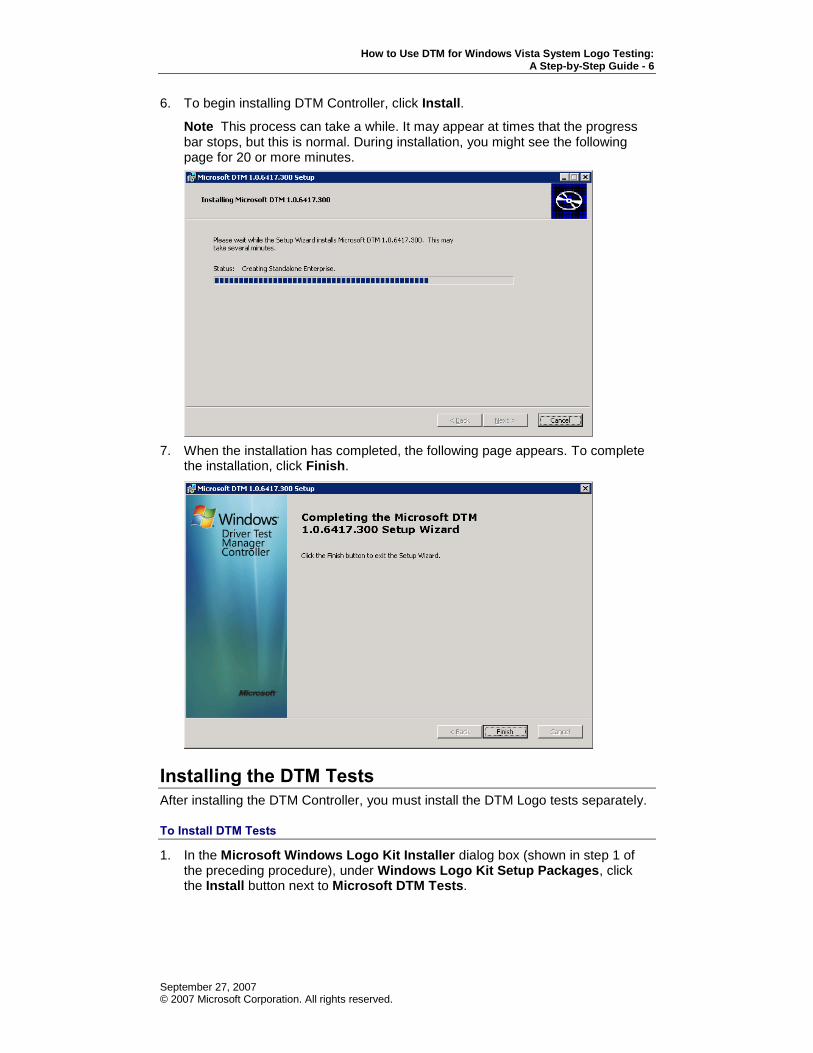
7. When the installation has completed, the following page appears. To complete the installation, click Finish.
Installing the DTM Tests
After installing the DTM Controller, you must install the DTM Logo tests separately.
To Install DTM Tests
1. In the Microsoft Windows Logo Kit Installer dialog box (shown in step 1 of the preceding procedure), under Windows Logo Kit Setup Packages, click the Install button next to Microsoft DTM Tests.
How to Use DTM for Windows Vista System Logo Testing: A Step-by-Step Guide - 7
September 27, 2007 © 2007 Microsoft Corporation. All rights reserved.
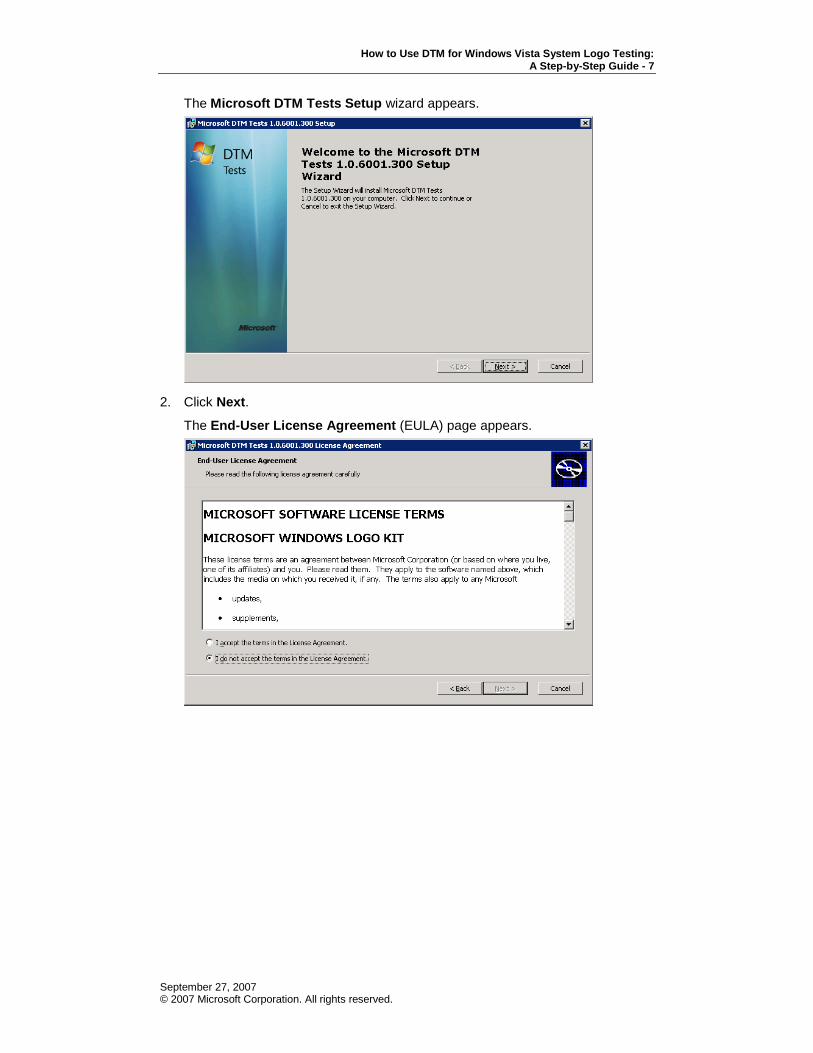
The Microsoft DTM Tests Setup wizard appears.
2. Click Next.
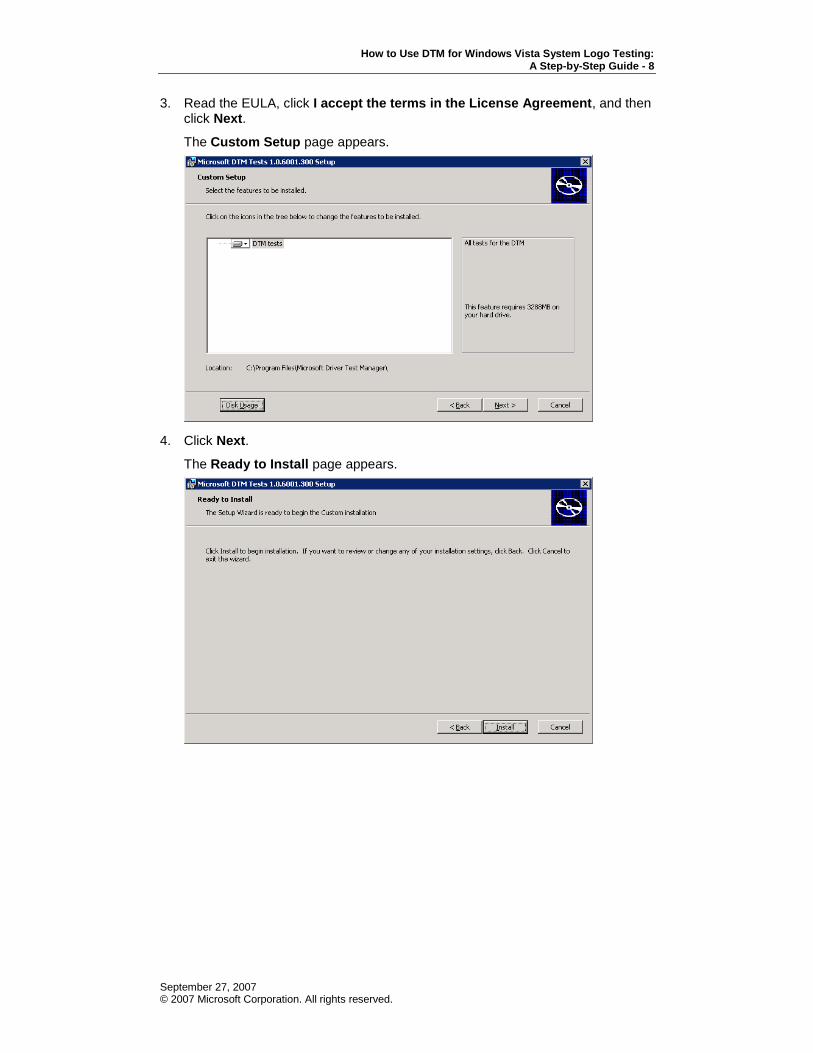
The End-User License Agreement (EULA) page appears.
How to Use DTM for Windows Vista System Logo Testing: A Step-by-Step Guide - 8
September 27, 2007 © 2007 Microsoft Corporation. All rights reserved.
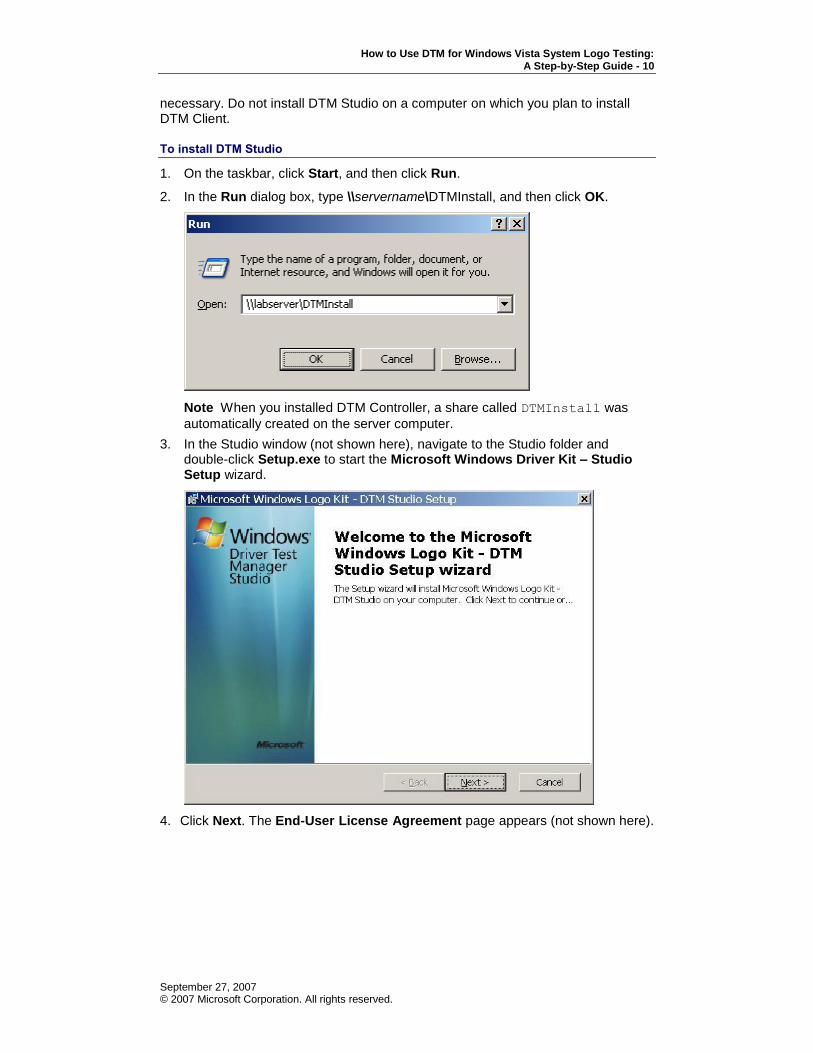
3. Read the EULA, click I accept the terms in the License Agreement, and then click Next.
The Custom Setup page appears.
4. Click Next.
The Ready to Install page appears.

How to Use DTM for Windows Vista System Logo Testing: A Step-by-Step Guide - 9
September 27, 2007 © 2007 Microsoft Corporation. All rights reserved.
5. To begin installing Microsoft DTM Tests, click Install.
Note This process can take a while. It may appear at times that the progress bar stops, but this is normal. During installation, you might see the following page for 20 or more minutes.
6. When the installation has completed, the following page appears. To complete the installation, click Finish.
7. As appropriate, go to the WHDC Web site to download and install the latest Quick Fix Engineering (QFE) updates. Do not simply download the latest QFEs; install them only if they are needed.
Installing DTM Studio
You can choose to install DTM Studio on the same computer on which you installed DTM Controller or to another computer that is in the same network as the controller. We recommend that you install DTM Studio on the same computer on which you installed DTM Controller. It is a good idea to make sure that the system under test is close to the server so that you can intervene with the manual tests when
How to Use DTM for Windows Vista System Logo Testing: A Step-by-Step Guide - 10
September 27, 2007 © 2007 Microsoft Corporation. All rights reserved.
necessary. Do not install DTM Studio on a computer on which you plan to install DTM Client.
To install DTM Studio
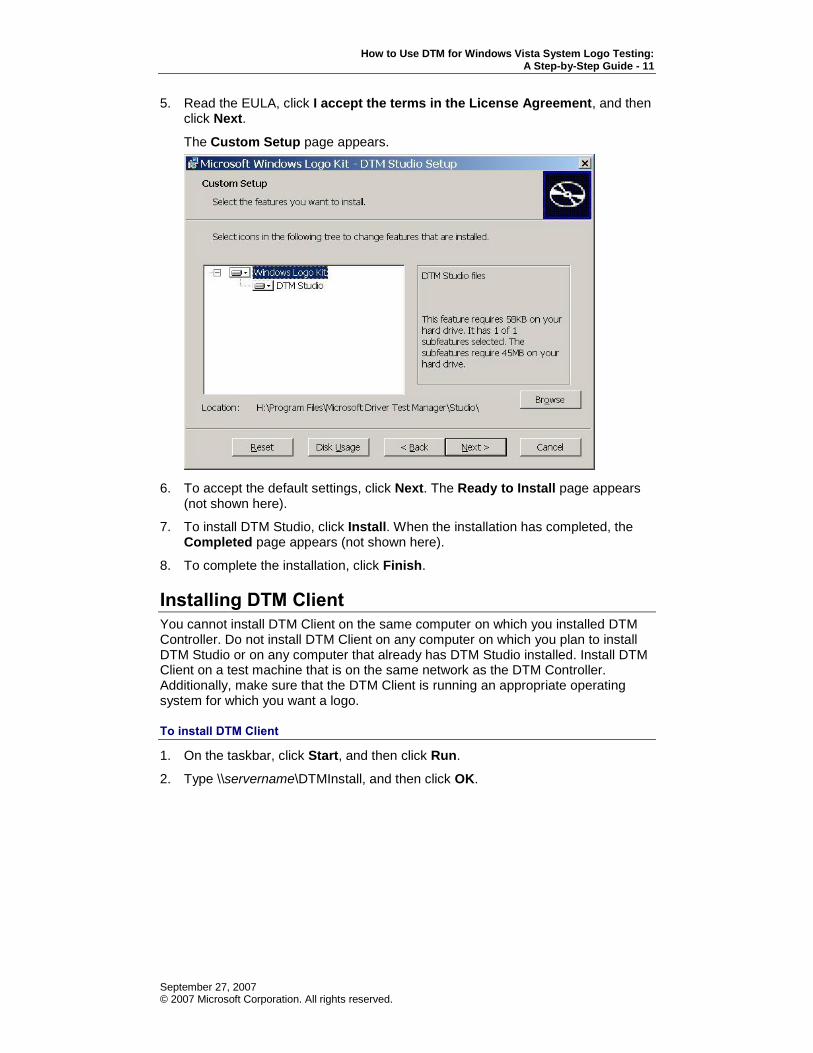
1. On the taskbar, click Start, and then click Run.
2. In the Run dialog box, type \\servername\DTMInstall, and then click OK.
Note When you installed DTM Controller, a share called DTMInstall was
automatically created on the server computer.
3. In the Studio window (not shown here), navigate to the Studio folder and double-click Setup.exe to start the Microsoft Windows Driver Kit – Studio Setup wizard.
4. Click Next. The End-User License Agreement page appears (not shown here).
How to Use DTM for Windows Vista System Logo Testing: A Step-by-Step Guide - 11
September 27, 2007 © 2007 Microsoft Corporation. All rights reserved.
5. Read the EULA, click I accept the terms in the License Agreement, and then click Next.
The Custom Setup page appears.
6. To accept the default settings, click Next. The Ready to Install page appears (not shown here).
7. To install DTM Studio, click Install. When the installation has completed, the Completed page appears (not shown here).
8. To complete the installation, click Finish.
Installing DTM Client
You cannot install DTM Client on the same computer on which you installed DTM Controller. Do not install DTM Client on any computer on which you plan to install DTM Studio or on any computer that already has DTM Studio installed. Install DTM Client on a test machine that is on the same network as the DTM Controller. Additionally, make sure that the DTM Client is running an appropriate operating system for which you want a logo.
To install DTM Client
1. On the taskbar, click Start, and then click Run.
2. Type \\servername\DTMInstall, and then click OK.

How to Use DTM for Windows Vista System Logo Testing: A Step-by-Step Guide - 12
September 27, 2007 © 2007 Microsoft Corporation. All rights reserved.
3. In the Client window (not shown here), navigate to the Client folder and double-click Setup.exe.
The following message appears.
4. Click Run. The Microsoft Windows Driver Kit – Client Setup wizard appears (not shown here).
5. On the Welcome page (not shown here), click Next.
The End-User License Agreement page appears.

How to Use DTM for Windows Vista System Logo Testing: A Step-by-Step Guide - 13
September 27, 2007 © 2007 Microsoft Corporation. All rights reserved.
6. Read the EULA, click I accept the terms in the License Agreement, and then click Next.
The Internet Connection Firewall Agreement page appears.
7. Click Yes I will allow a port to be opened, and then click Next.
8. On the Custom Setup page, click Next to accept the default installation.
The Drive Selection page appears.
Note Do not select Default Drive if the client is a dual-boot computer or if you intend to use the same computer to test multiple versions of Windows. In that case, place the Jobs working folder on a separate partition and preserve that folder through the different Windows boots and installations.

How to Use DTM for Windows Vista System Logo Testing: A Step-by-Step Guide - 14
September 27, 2007 © 2007 Microsoft Corporation. All rights reserved.
9. Make sure that Use Default Drive is selected, and click Next. The Ready to Install page appears (not shown here).
10. To install DTM Client, click Install.
11. When the installation is complete, the Completed page appears. To complete the installation, click Finish.
Testing Systems
1. On the desktop of the computer on which you installed DTM Studio, double-click the shortcut to DTM Studio.
The Windows DTM Studio start page appears.

How to Use DTM for Windows Vista System Logo Testing: A Step-by-Step Guide - 15
September 27, 2007 © 2007 Microsoft Corporation. All rights reserved.
2. On the Explorer menu, click Job Monitor.
The Job Monitor explorer
3. In the Machine Pool tab on the left side, right-click the $ symbol, and then click Add Machine Pool.
Note We recommend as a best practice that you use the model name of the system that you are testing as the name of the pool that you are adding as part of this step.
Note After you have installed DTM Client software on your test clients, the controller automatically detects new test clients and adds them to the Default Pool. You cannot test from the Default Pool. Instead, you must manually create a test machine pool, as described in this step. After you have created the test machine pool, you can drag and drop the systems in the Default Pool to the new test pool that you created. At that point, you can schedule those machines to run tests.
After DTM Client has been installed on a test machine, it can take 5 to 20 minutes for DTM Controller to automatically detect its presence. You can manually refresh the list of machines in the Job Monitor by clicking View and then Refresh, or by pressing F5.
4. Type a name for the machine pool, select a Job Delivery Agent, and then click OK. Your machine pool is now listed in the Machine Pool pane on the left, under the $ symbol.
5. Right-click the machine pool that you just created, and then click Properties.
Systems in your
machine pool
Job execution
status pane
Machine pools

How to Use DTM for Windows Vista System Logo Testing: A Step-by-Step Guide - 16
September 27, 2007 © 2007 Microsoft Corporation. All rights reserved.
6. On the MCU Policy tab, under Available dimensions, scroll down and click WDK\ConfigureSystem, click Add, and then click OK.
7. You will now return to the Job Monitor explorer. You must drag and drop the machine that you want to test from the Default Pool into the new test machine pool that you just created. The status of the machine will be set to Manual.

How to Use DTM for Windows Vista System Logo Testing: A Step-by-Step Guide - 17
September 27, 2007 © 2007 Microsoft Corporation. All rights reserved.
8. Right-click the test machine, point to Change Status, and then click Reset. The status of the machine under test changes to Ready. When the test machine is ready, the MCU policy that you applied from the Available dimensions dialog box (in step 6) begins to initialize the machine with the MCU.
9. Wait for the initialization to complete before you proceed. If you are prompted by the test machine for credentials for the DTMLLUAdminUser account, type Testpassword,1.
Now you can log on to the Winqual Web site and download the latest filter updates. However, the best time to download filter updates is after all the tests have been completed and you are ready to check the results.
Note You must be a registered user of the Winqual Web site to download filter updates.
10. On the Explorer menu, click Device Console.
The Device Console explorer
11. In the upper-right corner of the screen, click the Submission arrow, and then click New Submission.
Important Do not click any of the option buttons (for example, Device, Machine, or Driver) in the View By area. Although they are functional, they do
not apply to the logo program.

How to Use DTM for Windows Vista System Logo Testing: A Step-by-Step Guide - 18
September 27, 2007 © 2007 Microsoft Corporation. All rights reserved.
The following dialog box appears.
12. Click the operating system that is installed on the client system for which you want to obtain a logo, and then click Next. The Create New Submission wizard appears.
13. Click System Submission, and then click Next.
How to Use DTM for Windows Vista System Logo Testing: A Step-by-Step Guide - 19
September 27, 2007 © 2007 Microsoft Corporation. All rights reserved.
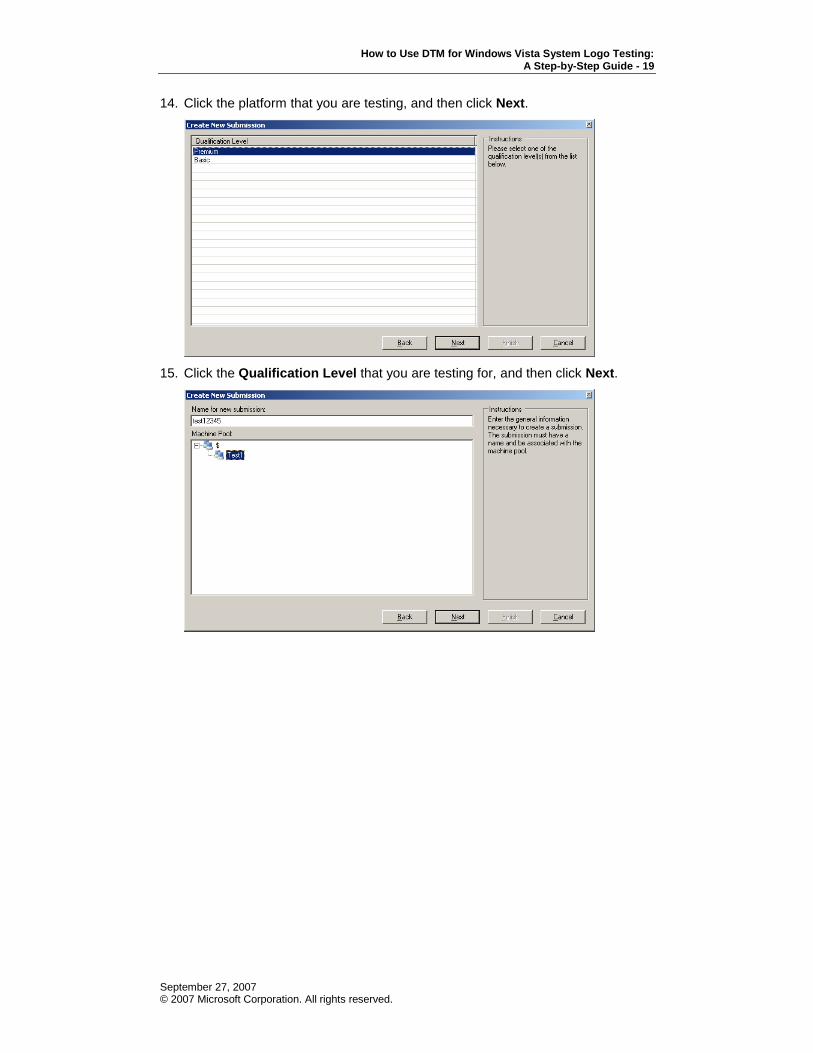
14. Click the platform that you are testing, and then click Next.
15. Click the Qualification Level that you are testing for, and then click Next.
How to Use DTM for Windows Vista System Logo Testing: A Step-by-Step Guide - 20
September 27, 2007 © 2007 Microsoft Corporation. All rights reserved.
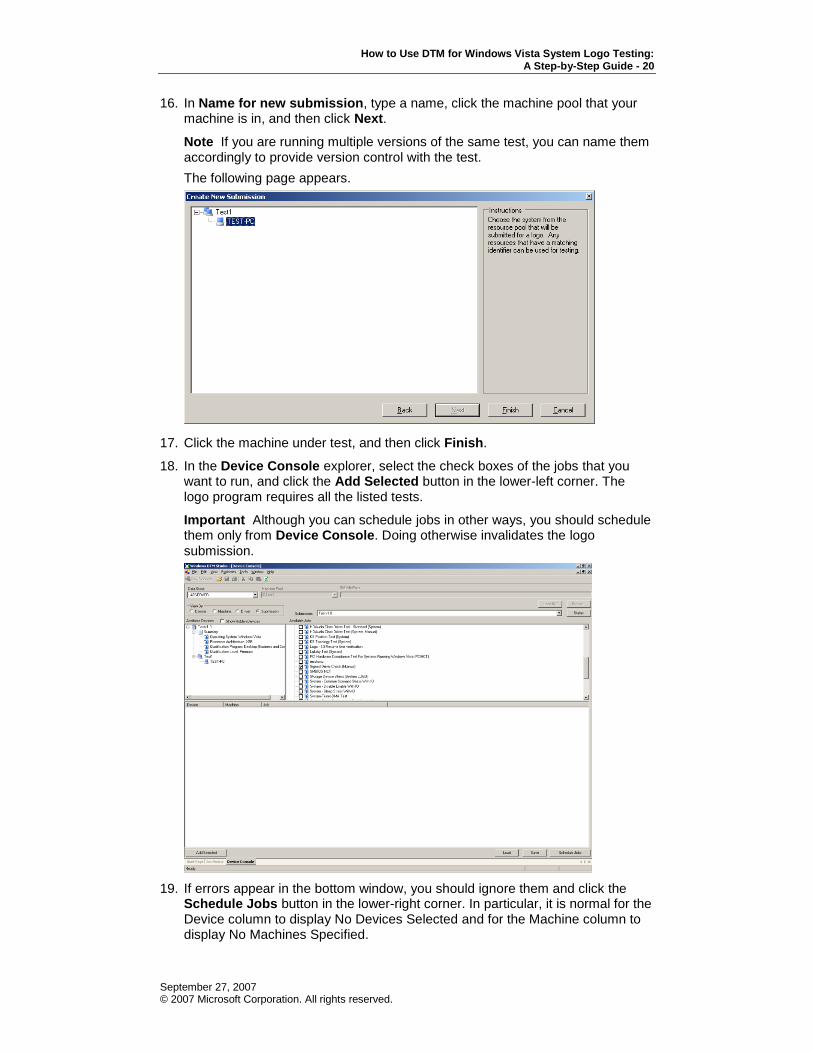
16. In Name for new submission, type a name, click the machine pool that your machine is in, and then click Next.
Note If you are running multiple versions of the same test, you can name them accordingly to provide version control with the test.
The following page appears.
17. Click the machine under test, and then click Finish.
18. In the Device Console explorer, select the check boxes of the jobs that you want to run, and click the Add Selected button in the lower-left corner. The logo program requires all the listed tests.
Important Although you can schedule jobs in other ways, you should schedule them only from Device Console. Doing otherwise invalidates the logo
submission.
19. If errors appear in the bottom window, you should ignore them and click the Schedule Jobs button in the lower-right corner. In particular, it is normal for the Device column to display No Devices Selected and for the Machine column to display No Machines Specified.

How to Use DTM for Windows Vista System Logo Testing: A Step-by-Step Guide - 21
September 27, 2007 © 2007 Microsoft Corporation. All rights reserved.
20. Schedule the jobs in the following order.
Job name Type Approximate duration
Signed Driver Check (Manual)
Needs some manual intervention. Keep your PCI vendor ID nearby because it will be requested early in the test.
10 minutes
SMBIOS HCT Automated 10 minutes
Resstomp Automated 20 minutes
Logo - S3 Resume Time Verification
Automated 8 minutes
PCI Hardware Compliance Test for Systems running Windows Vista® (PCIHCT)
Automated 10 minutes
System – Common Scenario Stress With I/O
Automated 3 hours. This test can be run simultaneously with other system tests.
System – Sleep Stress with I/O
Automated 40 minutes. This test can be run simultaneously with other system tests.
System – Disable Enable with I/O
Automated 10 minutes. This test can be run simultaneously with other system tests.
Graphics Bus Transfer Automated 15 minutes
GUIMAN GDI w-poly clip (gmvideo6b) (32-bit)
Automated 5 minutes
DirectDraw Tests (32-Bit) Automated 3 minutes
Driver Scenario (32-Bit) Automated 10 minutes
UAA Test – Windows Vista (System)
Automated 15 minutes
Lullaby Test (System) Automated 45 minutes
KS Position Test Automated 5 minutes
KS Topology Test (System) Automated 5 minutes
HDAudio Class Driver Test – Premium (System)
Automated 4 minutes
HDAudio Class Driver Test – Standard (System)
Automated 3 minutes
HDAudio Class Driver Fidelity Test – Premium (System)
Automated. You must follow the To add a second machine as an AP host
procedure described after this table.
5 minutes
HDAudio Class Driver Fidelity Test – Standard (System)
Automated. You must follow the To add a second machine as an AP host
procedure described after this table.
5 minutes
HDAudio Class Driver Test (System, Manual)
Needs manual intervention. 4 minutes
Fidelity Test Automated. You must follow the To add a second machine as an AP host
procedure described after this table.
5 minutes
How to Use DTM for Windows Vista System Logo Testing: A Step-by-Step Guide - 22
September 27, 2007 © 2007 Microsoft Corporation. All rights reserved.
To add a second machine as an AP host
1. Install DTM Client on an additional computer as described in the Installing DTM Client section earlier in this document. This computer must be running Windows XP SP2.
2. In the Job Monitor explorer, drag and drop the newly added computer from the Default Pool into the new test machine pool that you created manually.
3. Right-click the additional computer, point to Change Status, and then click Reset. You will then see the status of the machine under test change to Ready. When the test machine is ready, the MCU policy that you applied from the Available dimensions (in step 6 of the Testing Systems section) begins to initialize the machine with the MCU.
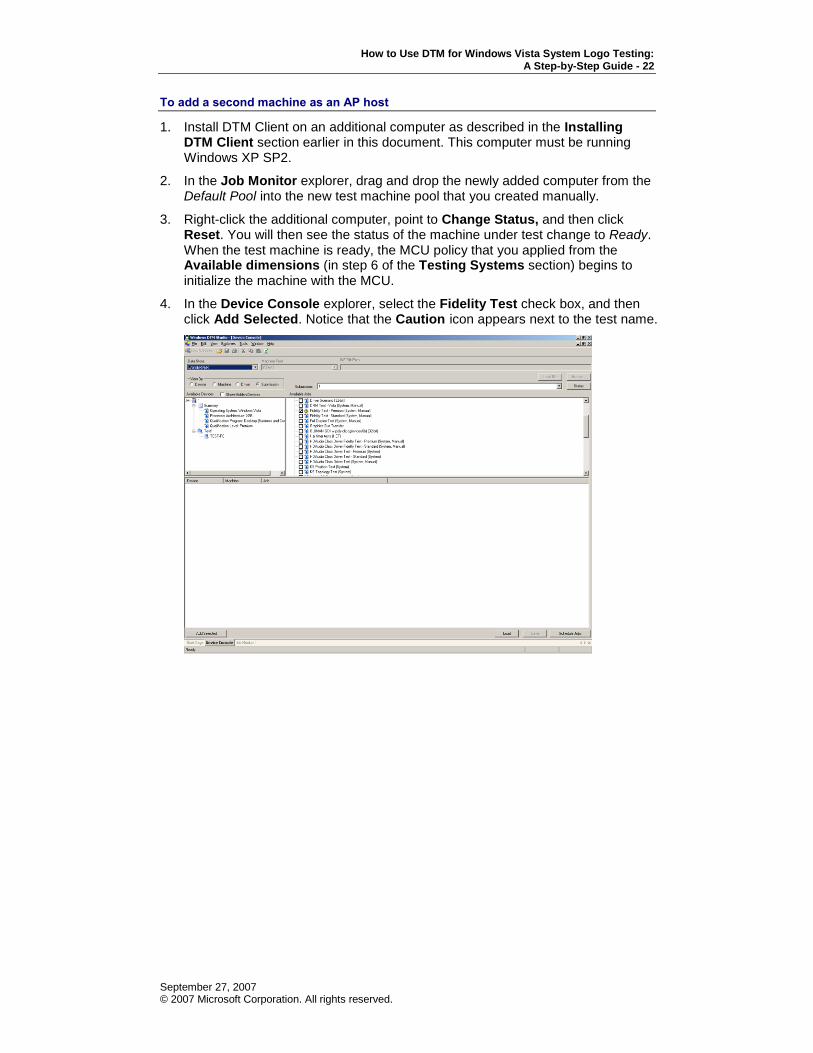
4. In the Device Console explorer, select the Fidelity Test check box, and then click Add Selected. Notice that the Caution icon appears next to the test name.

How to Use DTM for Windows Vista System Logo Testing: A Step-by-Step Guide - 23
September 27, 2007 © 2007 Microsoft Corporation. All rights reserved.
5. Click Schedule Jobs in the lower-right corner. When the Fidelity Test runs, the following dialog box appears within DTM Studio.
6. In the Run Modes area, make sure that Run Test Locally is selected, and then expand the machine pool in the Run Test Locally area.
7. Click the second machine in the pool, and then click Save.
8. In the Device Console, select the tests that you want to run, and click Schedule Jobs.
Job name Type Approximate duration
Fidelity Test This is an automated test; however, you must follow the preceding steps to add the second machine as an AP Host.
15 minutes
HAL Timer Tests (HCT)
Automated 8 minutes
Aero Acceptance Test
Automated 4 minutes
WLP RGB Rasterization (32-Bit)
Automated 15 minutes
Storage (Automated)
Automated You must add a blank disc into your optical drive. (This test takes approxi-mately 12 hours.)
USB Host Controller Compliance (Automated)
Automated 2 minutes
USB Self-Powered Hub (Automated)
Automated 2 minutes
System – USB Test Manual. You need at least two open USB 2 minutes

How to Use DTM for Windows Vista System Logo Testing: A Step-by-Step Guide - 24
September 27, 2007 © 2007 Microsoft Corporation. All rights reserved.
Job name Type Approximate duration
(Manual) ports at the beginning of the test, and then the system will ask you to insert two USB devices (UFDs are recommended).
Cardbus Bridge Register Assertions (System Logo)
Automated 2 minutes
System-Tuner-Performance Test (Manual)
Automated 2 minutes
System-Tuner-DMA Test
Automated 2 minutes
BitLocker™ Drive Encryption BIOS Interface Logo Test
Automated 5 minutes
BitLocker Drive Encryption USB BIOS Logo Test
Automated 5 minutes
WDDM System Check
Automated 2 minutes
WDDM Coherency Automated 2 minutes
Full Duplex Test (System and Manual)
Automated 1 hour, 35 minutes
Core Stress Test (Automated)
Automated 6 hours
Note This is not an all-inclusive list of the tests that appear in Device Console;
however, the main tests are described in the table.
After the tests have completed, you can create a compressed package (CPK) to send to Microsoft with your submission.
To create a CPK
1. Download and apply the latest filters. This ensures that the CPK Log Viewer shows the test results with the latest filters applied.
2. In Device Console, click the Status button.

How to Use DTM for Windows Vista System Logo Testing: A Step-by-Step Guide - 25
September 27, 2007 © 2007 Microsoft Corporation. All rights reserved.
3. In Device Console, right-click the name of your machine under test, and then click Create Submission Package.
4. When you are prompted to save the package, type a name for it, and then click Save. Depending on the volume of tests that were executed, it might take a few minutes to compile the CPK.
To review a CPK
Download and install the DTM Log Viewer for WHQL.
To submit your passing test sequence to Microsoft
Go to the Winqual Web site and then scroll to Windows Logo Programs, select hardware, and then create logo submission. You will need a CPK as mentioned in the previous section.
Understanding the Test Logs
Due to the sheer number of tests that are performed and the number of possibilities of the root causes of failures, it is almost impossible to create a knowledge base of resolutions that is easily accessible. This section can help you find the exact failure notification so that you can investigate it further.
If a test fails, you will see a red X in the Job Monitor that indicates failure.

How to Use DTM for Windows Vista System Logo Testing: A Step-by-Step Guide - 26
September 27, 2007 © 2007 Microsoft Corporation. All rights reserved.
Note It is important to understand that the top section in Job Monitor shows the machines under test, the middle section shows the jobs, and the bottom section shows the tasks. You do not need to be concerned if a job passes but shows that a task within it has failed. The DTM is concerned only with jobs.
To view job errors
1. Click the machine that you were testing in the Machine Pool, and then click a job that shows a failure notification in the Job Pool. You will then see a list of the job's tasks in the Task Pool.
2. Right-click a failed task, and then click View Task Log if available. If the log is not available, right-click Child Job Results, find the failing task, and then click View Task Log.
Job Pool
Machines in
your pool
Task Pool

How to Use DTM for Windows Vista System Logo Testing: A Step-by-Step Guide - 27
September 27, 2007 © 2007 Microsoft Corporation. All rights reserved.
The Test Log Report - Summary window appears.
3. In the upper-left corner, on the View menu, click Failure. The entire log is filtered to display only failed job results.
Note To view the detail of the task, click the plus sign (+) next to Test Cases. All failures in this view will be listed in red text, as seen in the following storage stress test failure.
Error 2/27/2007 6:01:59.338 AM
E74.BB4 : +VAR+SEV3 0 : GetDiskFreeSpace:Error accessing Drive D. Ignoring...
File: e:\vrtmtest\testsrc\driverstest\storage\wdk\sdstress\console.c
Line: 94
Error Type:
Error Code:
0x0
Error Text:
Error 0x00000000
End Test
2/27/2007 6:01:59.338 AM
GetDiskFreeSpace:Error accessing Drive D. Ignoring...
Result: Fail
Repro: C:\WTT\JobsWorkingDir\Tasks\WTTJobRunE5777568-F7E2-455B-BF52-6F482F656401\SDStress.exe (null)

How to Use DTM for Windows Vista System Logo Testing: A Step-by-Step Guide - 28
September 27, 2007 © 2007 Microsoft Corporation. All rights reserved.
Note You can use the logs to help you to identify areas that need some attention, or you can send the logs to your original design manufacturer (ODM) to help you to identify issues.
Submitting Error Logs
If you submit error logs to either your systems engineer, ODM, or Microsoft Technical Account Manager (TAM) to interpret the log results, we recommend that you create a compressed package (CPK) of your logs before you submit them as described in the To create a CPK procedure earlier in this document.