how to paint a nato truck numeros redondos1 2 how to paint a nato truck by rick lawler with the...
TRANSCRIPT
1
2
How to paint a NATO truck By Rick Lawler
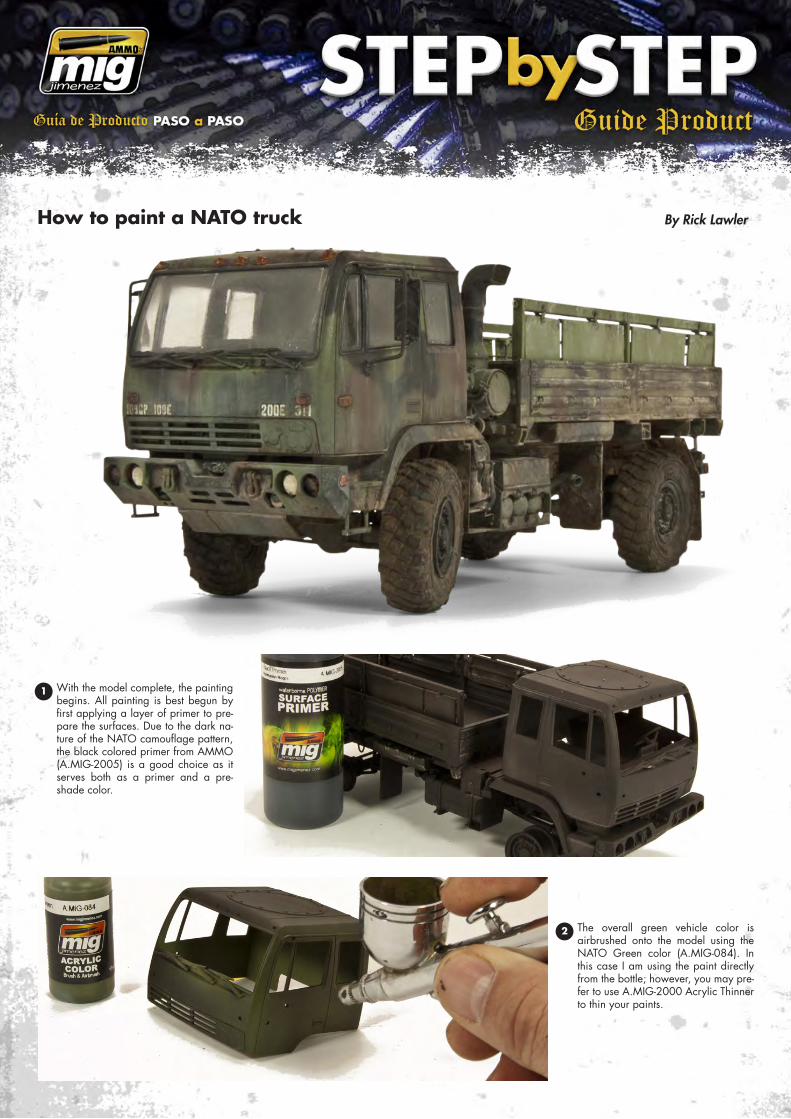
With the model complete, the painting begins. All painting is best begun by first applying a layer of primer to pre-pare the surfaces. Due to the dark na-ture of the NATO camouflage pattern, the black colored primer from AMMO (A.MIG-2005) is a good choice as it serves both as a primer and a pre-shade color.
The overall green vehicle color is airbrushed onto the model using the NATO Green color (A.MIG-084). In this case I am using the paint directly from the bottle; however, you may pre-fer to use A.MIG-2000 Acrylic Thinner to thin your paints.

3 4
5
6
7
Using reference photos, the NATO camouflage pattern is lightly outlined onto the model, this serves as a masking and painting template.
An overall view of the NATO camouflage pattern with the masking removed. The model is now ready for weathering!
I first applied the NATO Brown color (A.MIG-085) to the proper areas using my airbrush. Once the brown color has dried, the Silly Putty masks are re-positioned and the Black color (A.MIG-046) is applied.
The color boundaries of the NATO camouflage are typically a “hard/soft” edge; meaning that the edge is airbrushed but the pattern is very tight. One way to create this type of color boundary is to use a mask from Blu Tack or other type of masking putty. The child’s toy, “Silly Putty” is another good option as it easily available and inexpensive – simply roll small “snakes” and apply along the penciled pattern.
NATO Camouflage Wash (A.MIG-1008) is used to add definition to the surfaces. The dark color of this Wash is ideal for creating shadows on dark surfaces such as this NATO pattern.

10
8
9
11 12After allowing for the spayed dust areas to dry for approximately 10 minutes, a clean brush moistened with thinner is drawn downward. This process removes some of the sprayed on dust effects, creating contrast between lighter and heavier accumulations and provides realistic rain-marks.
AMMO Light Dust and Earth Effects (diluted using Odourless thinner) are washed onto the horizontal surfaces. Thinning allows the Washes to accumulate around the surface details creating a convincing dusty appearance.
Dusty accumulations created in the truck bed by applying liberal amounts of pigments onto the surface.
Heavier accumulates and splatters are created by blowing air over a brush loaded with Dust and Earth colored Effects onto the lower chassis of the vehicle.
The same Light Dust and Earth Effects are loaded into the airbrush and lightly sprayed onto the vertical surfaces to simulate dusty accumula-tions. It is advised that you use restraint when applying dust as to retain contrast between the clean areas and the lighter, dusty accumulations.

13
14 This is a similar process as was used on the roof of the truck. Once dried, the pigments create a convincing dusty appearance over-all. Once fully dry, the pigments can be ad-justed using a dry, stiff brush to remove un-wanted areas.
The pigments are moistened using Odourless Thinner and then spread over the entire sur-face.