how to customize your own logo and menu name · step 4: the logo maker interface is shown as below,...
TRANSCRIPT

How to Customize Your Own Logo and Menu Name
Detailed Tutorial
Step 1: Access the SXi-Q software, go to the logo maker interface.
Step 2: Open the upgrade file. (Very important)

Step 3: Choose the latest version of SXi firmware
Step 4: The Logo maker interface is shown as below, 48 logos are available to change except the SXmini logo.
Full Erase : Delete the logo. Reverse: Flip the color.
Left-click to add points, right-Click to erase the points.

Step 5: Choose a logo that you want to change, beware of the height and width under beneath: width=128, Height=32.
Step 6: Use Photoshop or other softwares to create your own logo.

Step 7: Change the width and the height of the image: Width=128, Height=32.
Step 8: Remember to save the picture.
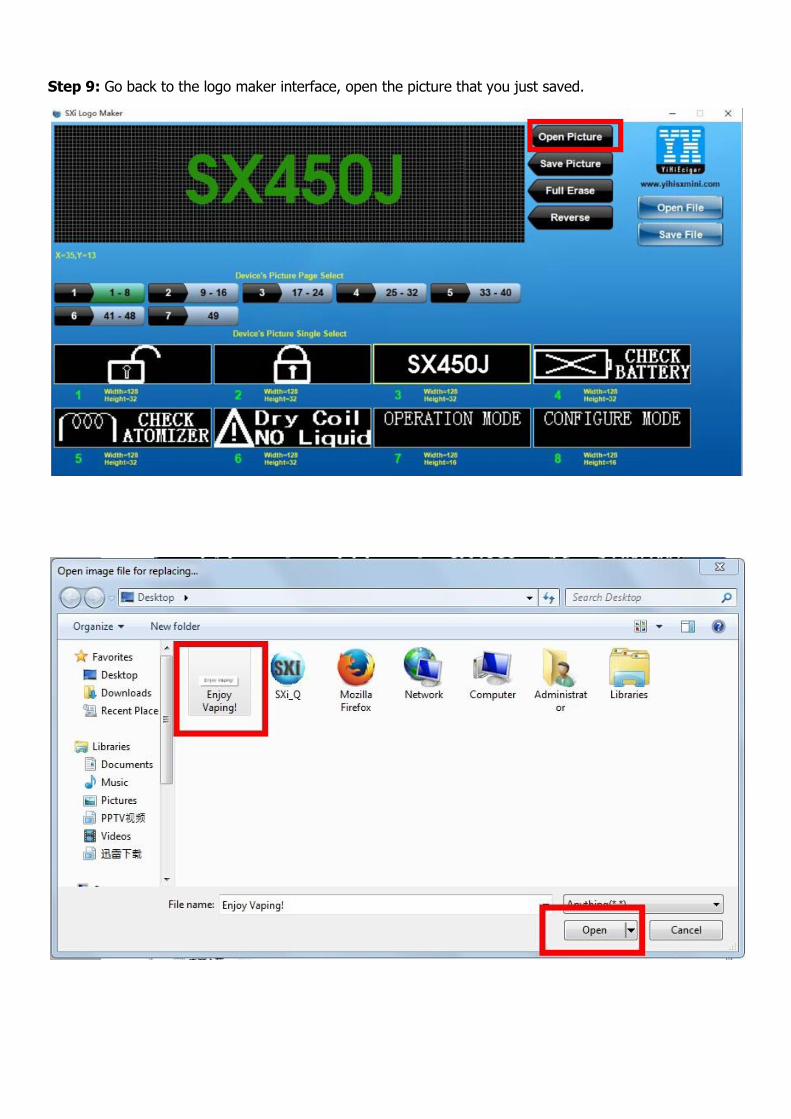
Step 9: Go back to the logo maker interface, open the picture that you just saved.

Step 10: Save the file, then you will have an SXi format upgrade file. (Very important)
Note: You can also share the file with your friends.

Step 11: Return to the Sxi interface, access the upgrade function.
Step 12: Open the SXi file and click “Upgrade”.
Note: Please make sure you have removed the atomizer from your device before upgrading.

Step 13: Please do not disconnect the USB cable or perform other operation while upgrading, Otherwise you will need to pull out the batteries and upgrade the device again.
Step 13: Disconnect the USB cable, click 5 times to turn the device on.
Now you can see your own unique logo on the device.
For more information or tutorials, please visit our website: http://www.yihisxmini.com/