how to create your own crystal report - conner ash · note: crystal reports must be loaded on any...
TRANSCRIPT
Conner Ash P.C. © 2014 Page 1
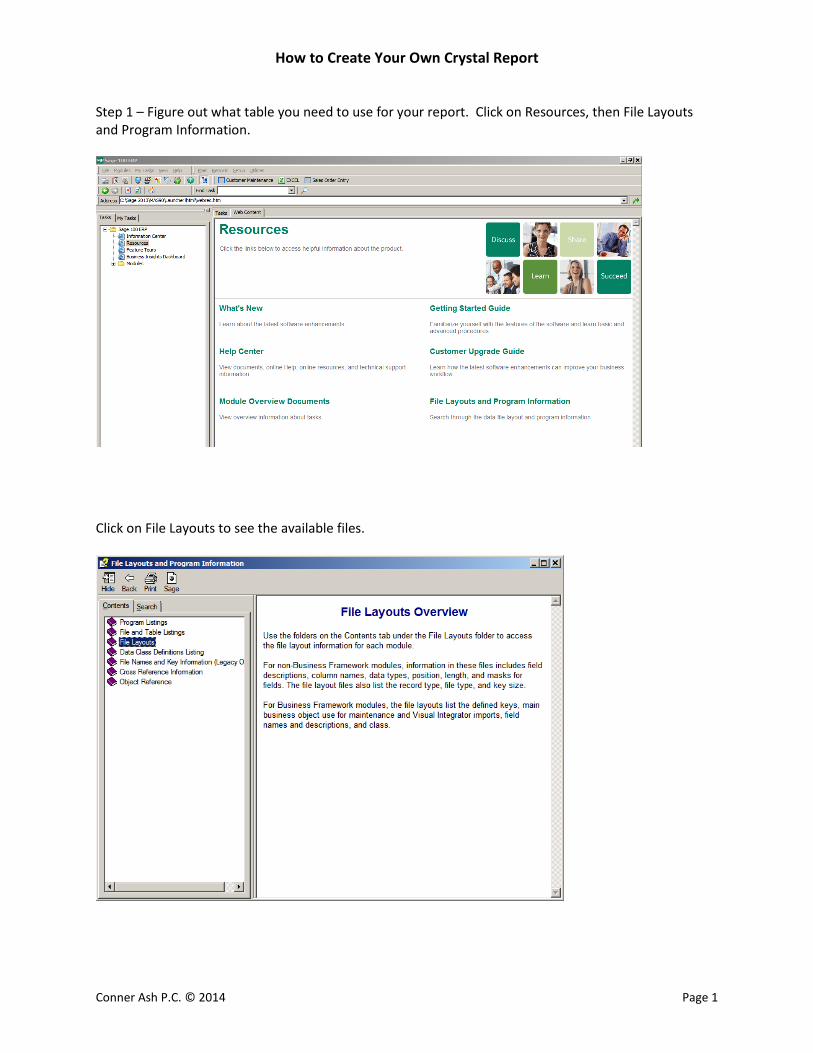
How to Create Your Own Crystal Report Step 1 – Figure out what table you need to use for your report. Click on Resources, then File Layouts and Program Information.
Click on File Layouts to see the available files.
Conner Ash P.C. © 2014 Page 2
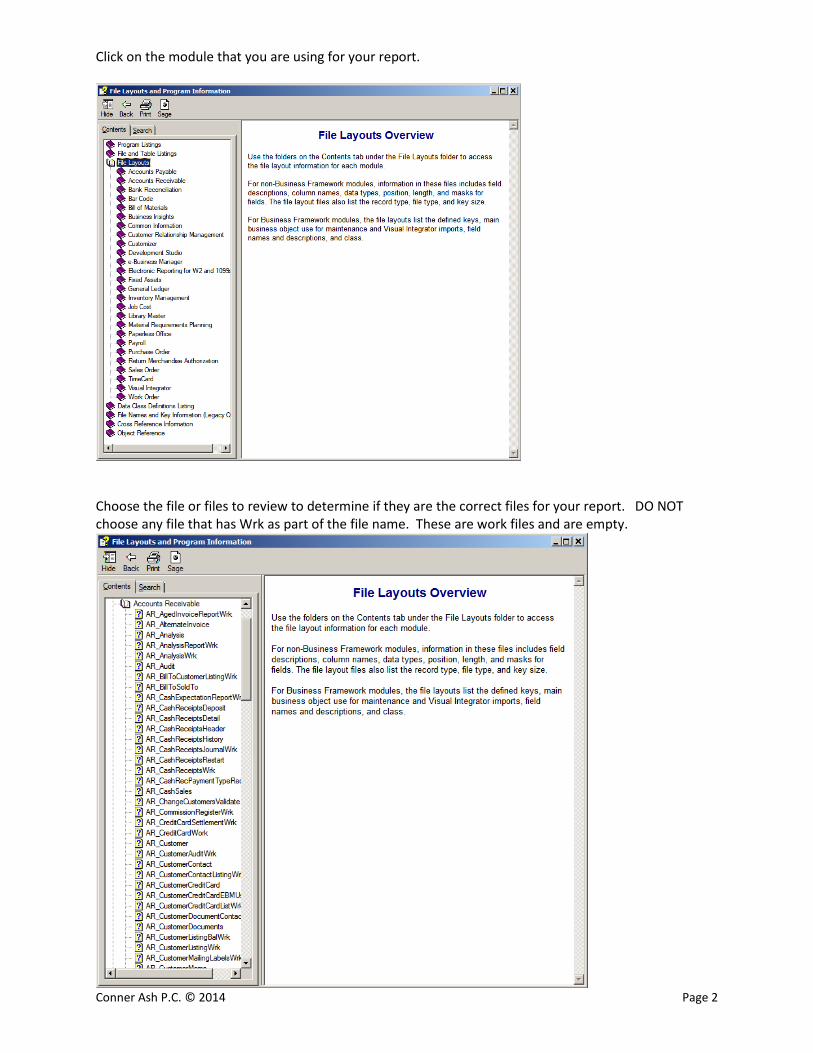
Click on the module that you are using for your report.
Choose the file or files to review to determine if they are the correct files for your report. DO NOT choose any file that has Wrk as part of the file name. These are work files and are empty.

Conner Ash P.C. © 2014 Page 3
Open Crystal Reports for Sage. Note: Crystal Reports must be loaded on any workstation that will create or edit reports and forms. If the user will not be preforming this function, then the full version of Crystal does not need to be loaded.
Click on Report Wizard.

Conner Ash P.C. © 2014 Page 4
Choose SOTAMAS90 as you Data Source.
The system will prompt you to login.

Conner Ash P.C. © 2014 Page 5
Then choose your table or tables from the Available Data Sources list.
Once you have chosen your tables, click Next.
Conner Ash P.C. © 2014 Page 6
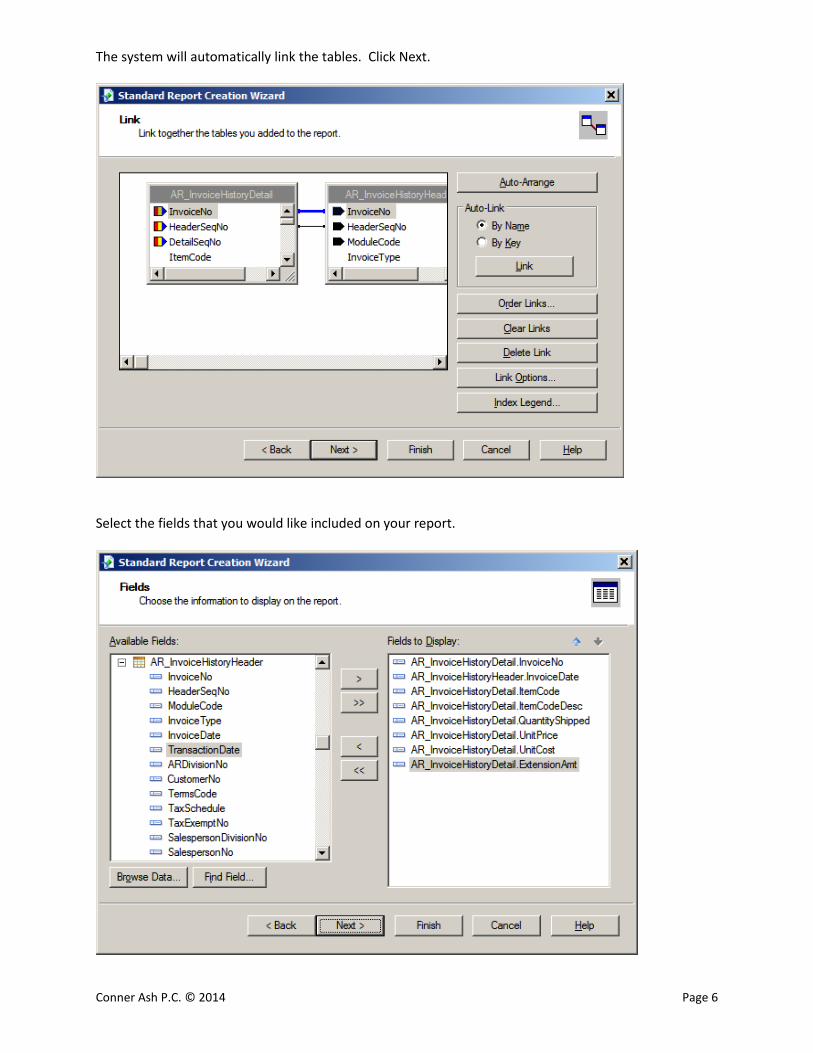
The system will automatically link the tables. Click Next.
Select the fields that you would like included on your report.
Conner Ash P.C. © 2014 Page 7
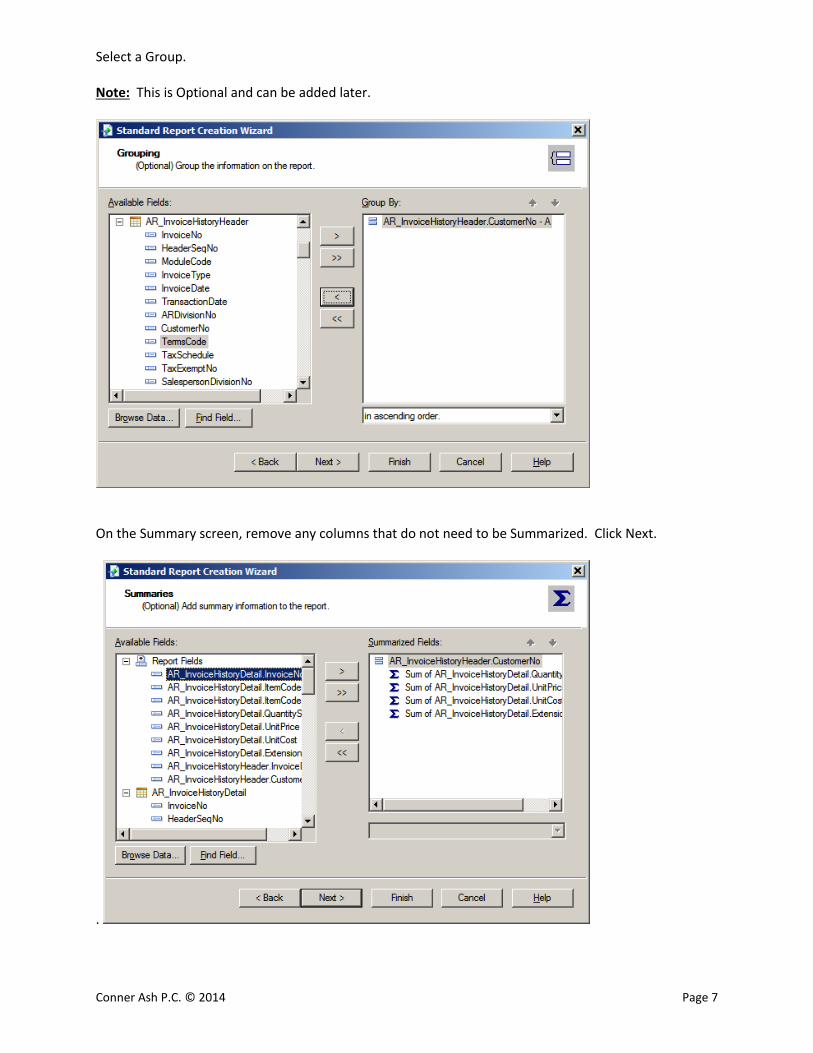
Select a Group. Note: This is Optional and can be added later.
On the Summary screen, remove any columns that do not need to be Summarized. Click Next.
.

Conner Ash P.C. © 2014 Page 8
Click Next on Group Sorting screen.
Click Next on Chart screen.
Conner Ash P.C. © 2014 Page 9
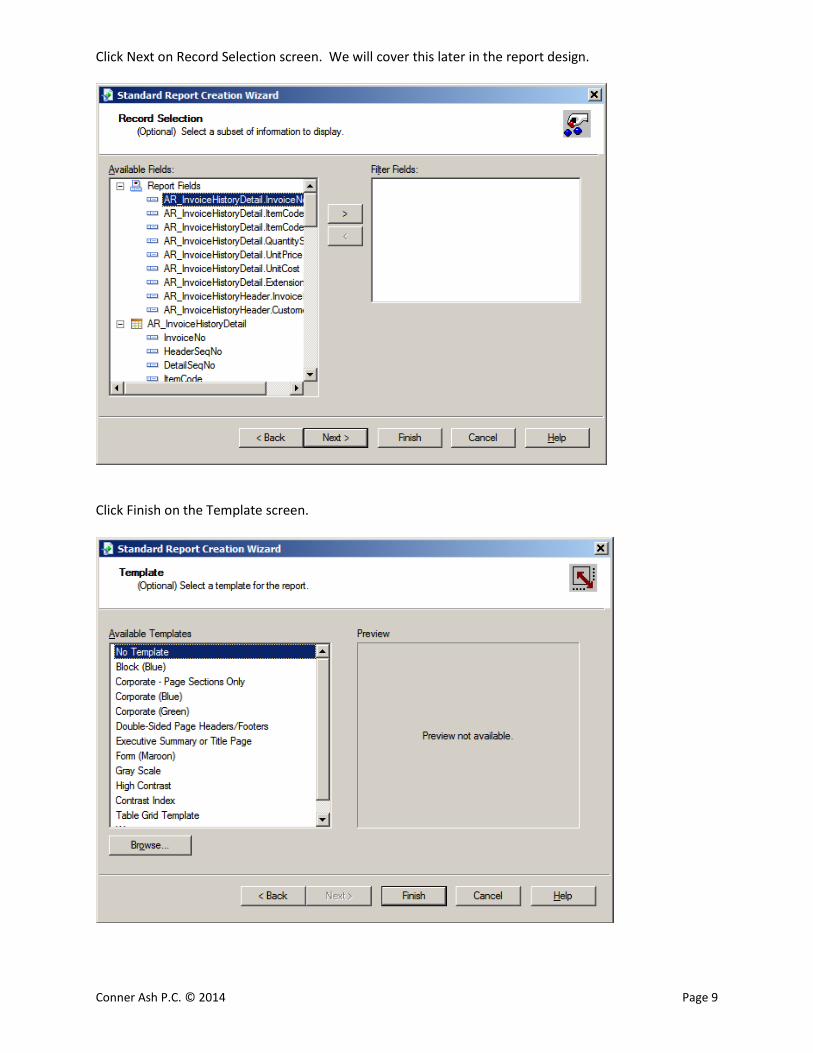
Click Next on Record Selection screen. We will cover this later in the report design.
Click Finish on the Template screen.
Conner Ash P.C. © 2014 Page 10
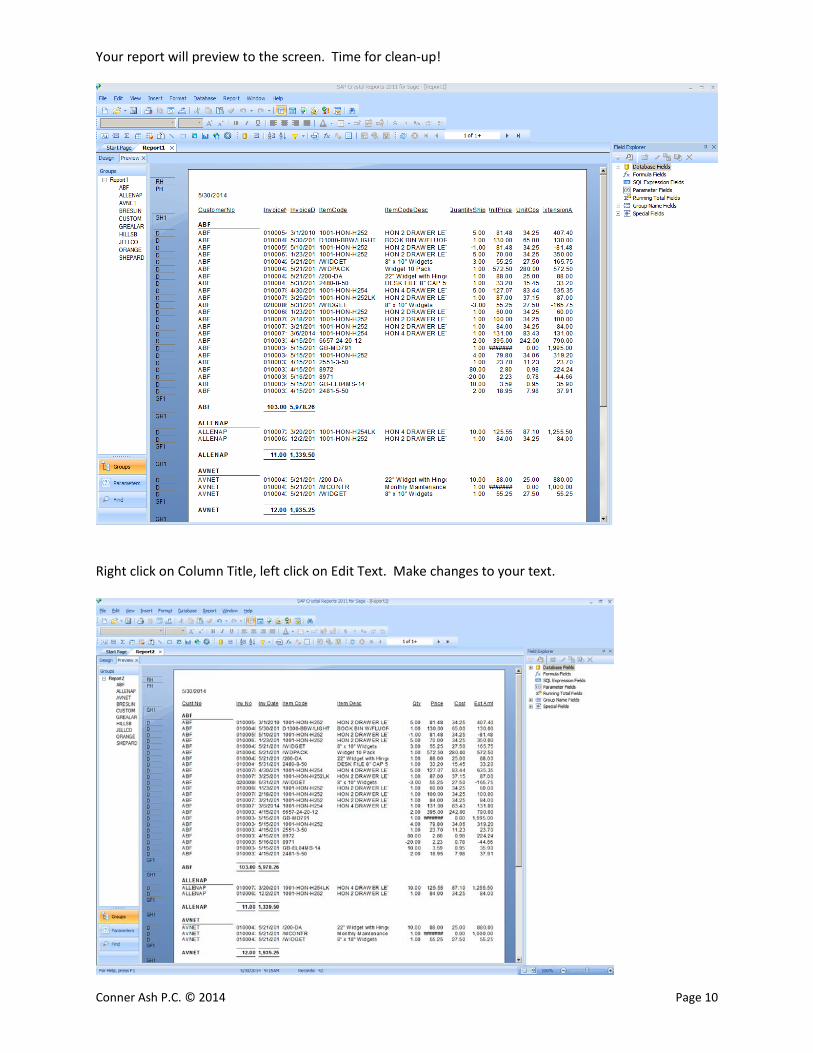
Your report will preview to the screen. Time for clean-up!
Right click on Column Title, left click on Edit Text. Make changes to your text.

Conner Ash P.C. © 2014 Page 11
Click on the Design tab. Remove Customer Number field, highlight and press Delete key. Move the InvoiceNo, InvoiceDate, ItemCode and ItemCodeDesc field to the left, by highlighting the fields and moving them to desired location. Increase the length of any fields that need extended.
Move the Qty field over slightly to the left. Increase the size of any fields that need to be increased. Next move the Summary fields for the Qty and Ext Amount over to line up under their respective columns.
Conner Ash P.C. © 2014 Page 12
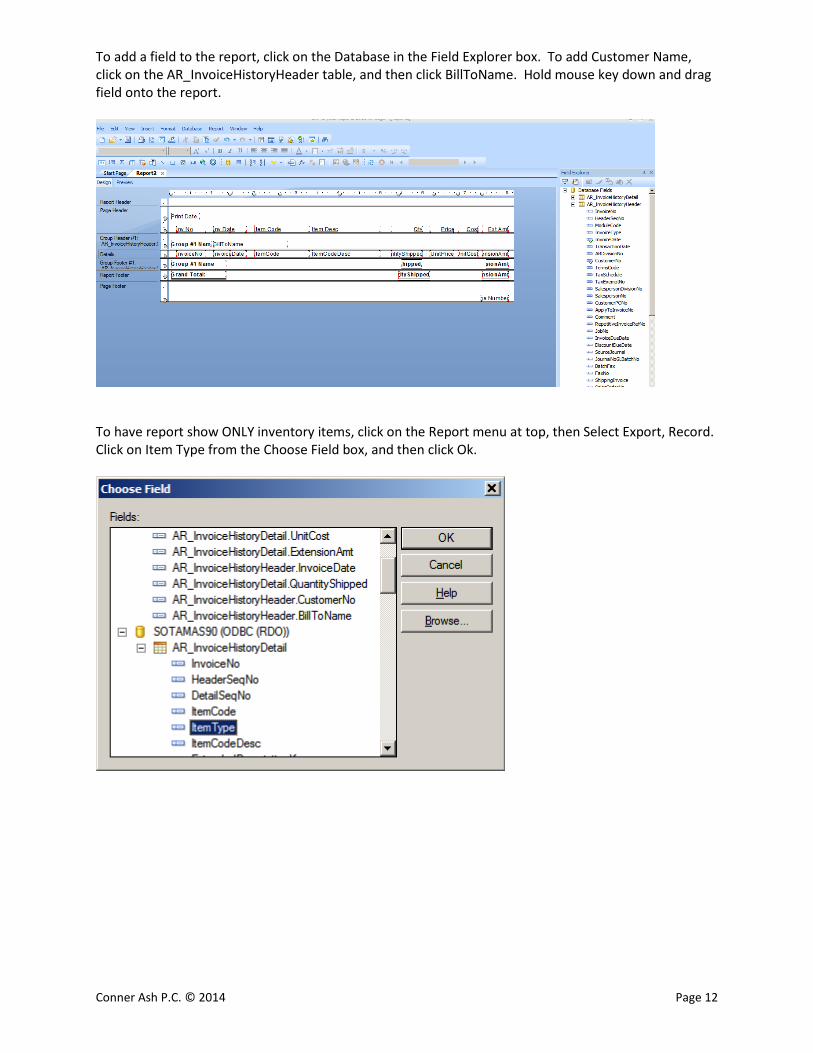
To add a field to the report, click on the Database in the Field Explorer box. To add Customer Name, click on the AR_InvoiceHistoryHeader table, and then click BillToName. Hold mouse key down and drag field onto the report.
To have report show ONLY inventory items, click on the Report menu at top, then Select Export, Record. Click on Item Type from the Choose Field box, and then click Ok.

Conner Ash P.C. © 2014 Page 13
Choose “is equal to” from the drop down box and select “1” as the default, click Ok.
To change Sort order, click on the Report menu, then Record Sort Expert. Select the ItemCode field and click Ok.
.
Conner Ash P.C. © 2014 Page 14
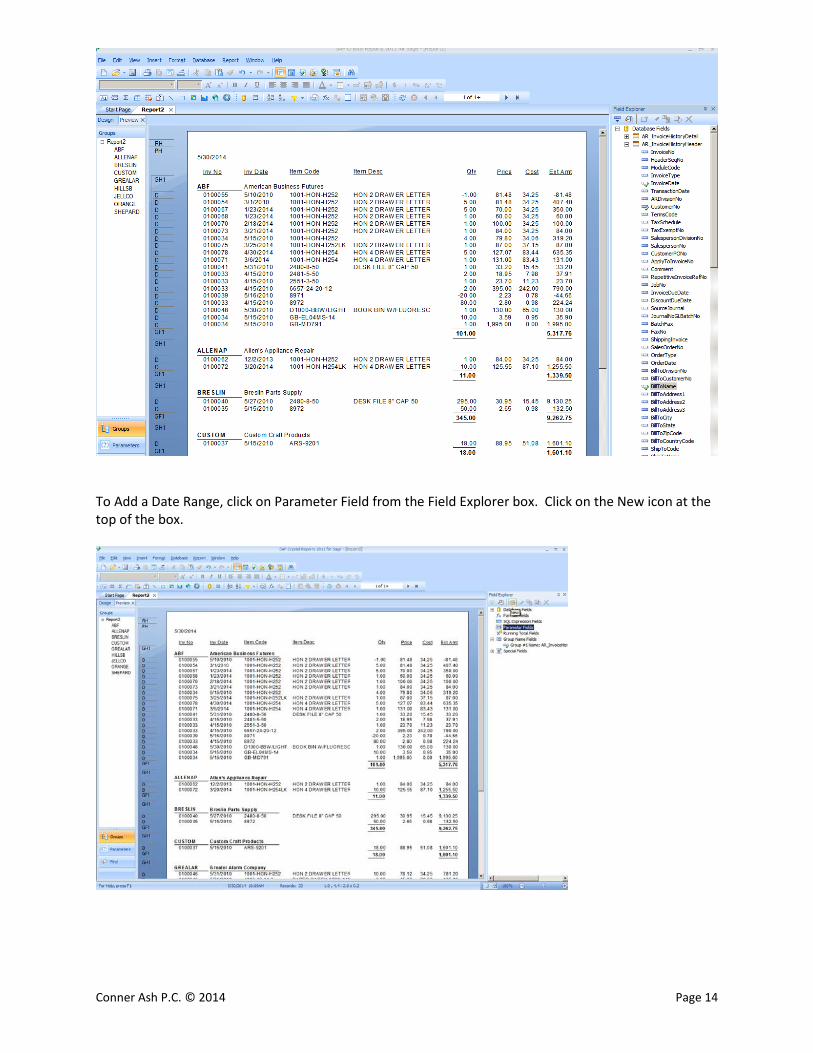
To Add a Date Range, click on Parameter Field from the Field Explorer box. Click on the New icon at the top of the box.
Conner Ash P.C. © 2014 Page 15
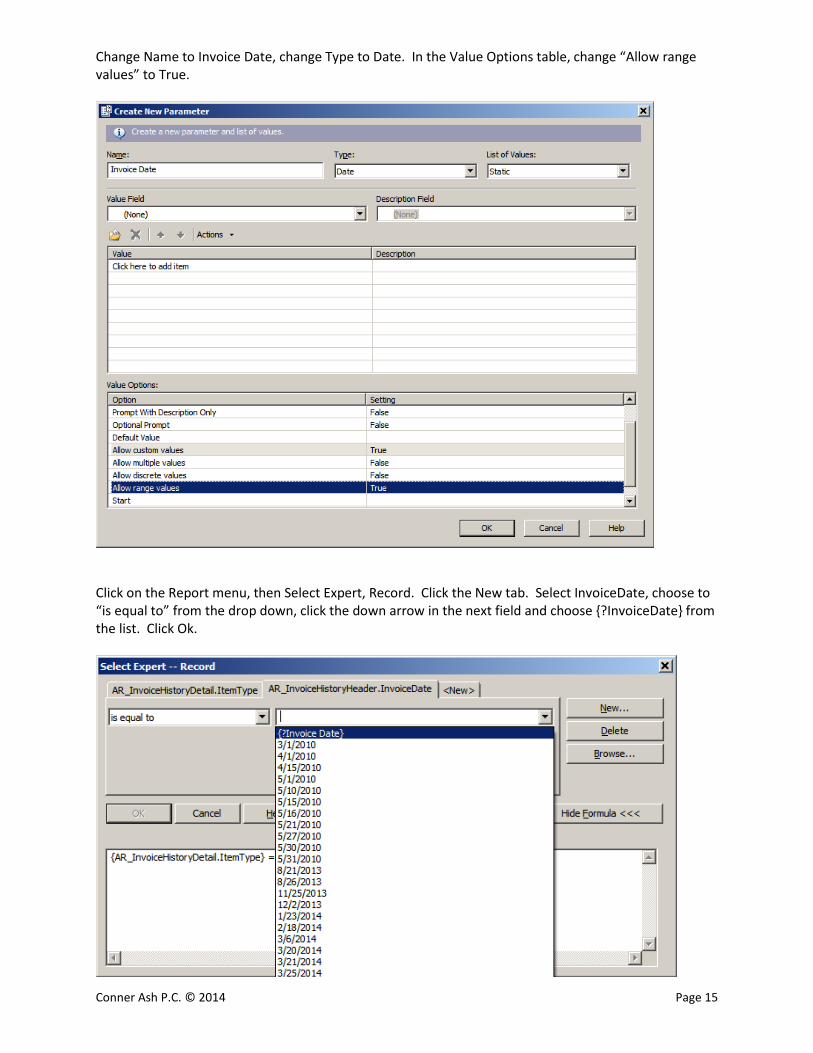
Change Name to Invoice Date, change Type to Date. In the Value Options table, change “Allow range values” to True.
Click on the Report menu, then Select Expert, Record. Click the New tab. Select InvoiceDate, choose to “is equal to” from the drop down, click the down arrow in the next field and choose {?InvoiceDate} from the list. Click Ok.
Conner Ash P.C. © 2014 Page 16
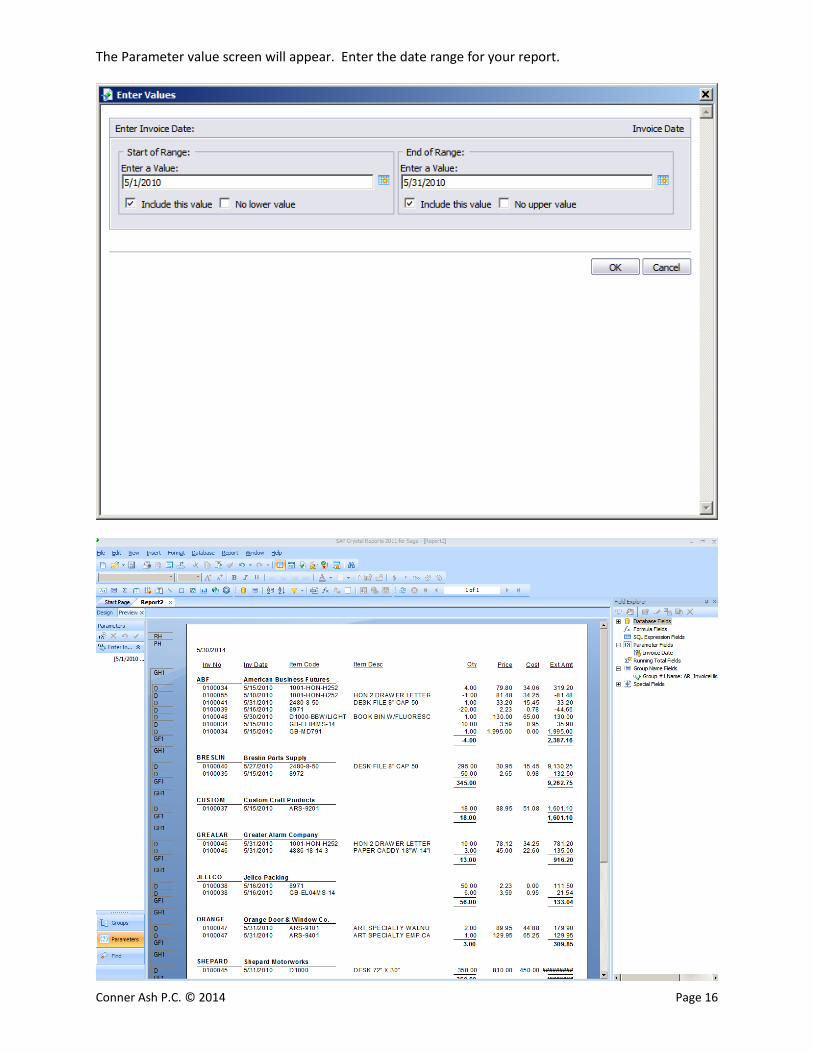
The Parameter value screen will appear. Enter the date range for your report.
Conner Ash P.C. © 2014 Page 17
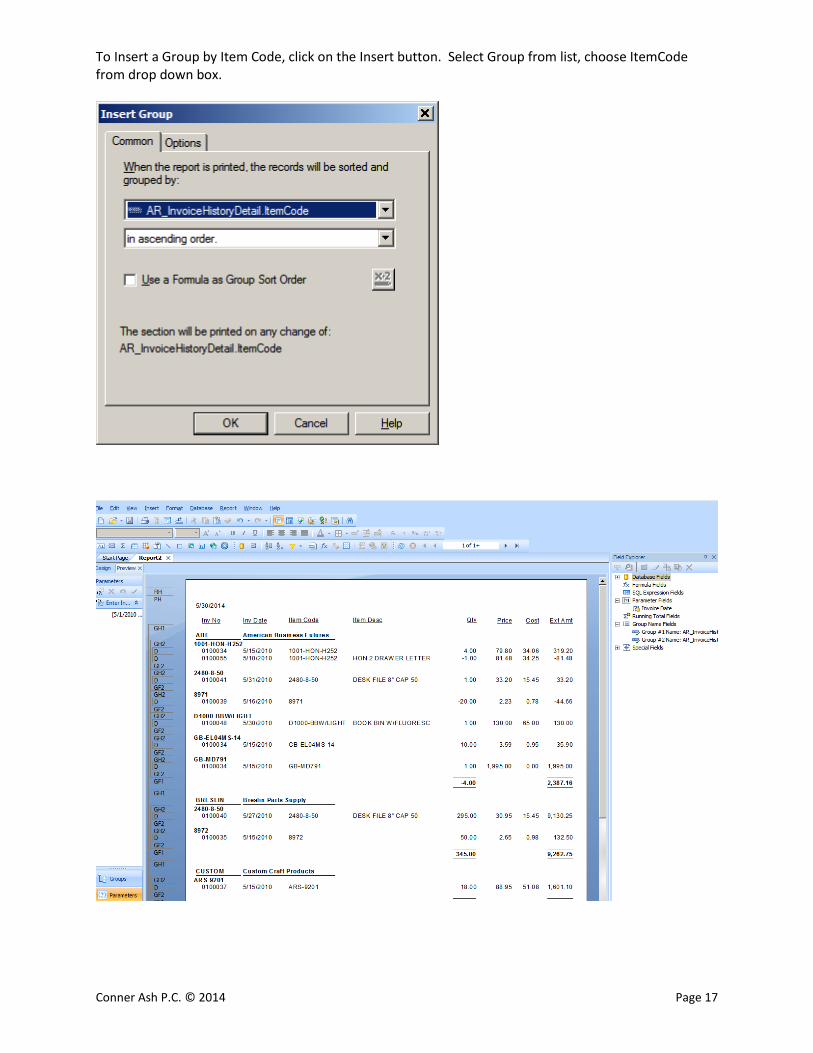
To Insert a Group by Item Code, click on the Insert button. Select Group from list, choose ItemCode from drop down box.
Conner Ash P.C. © 2014 Page 18
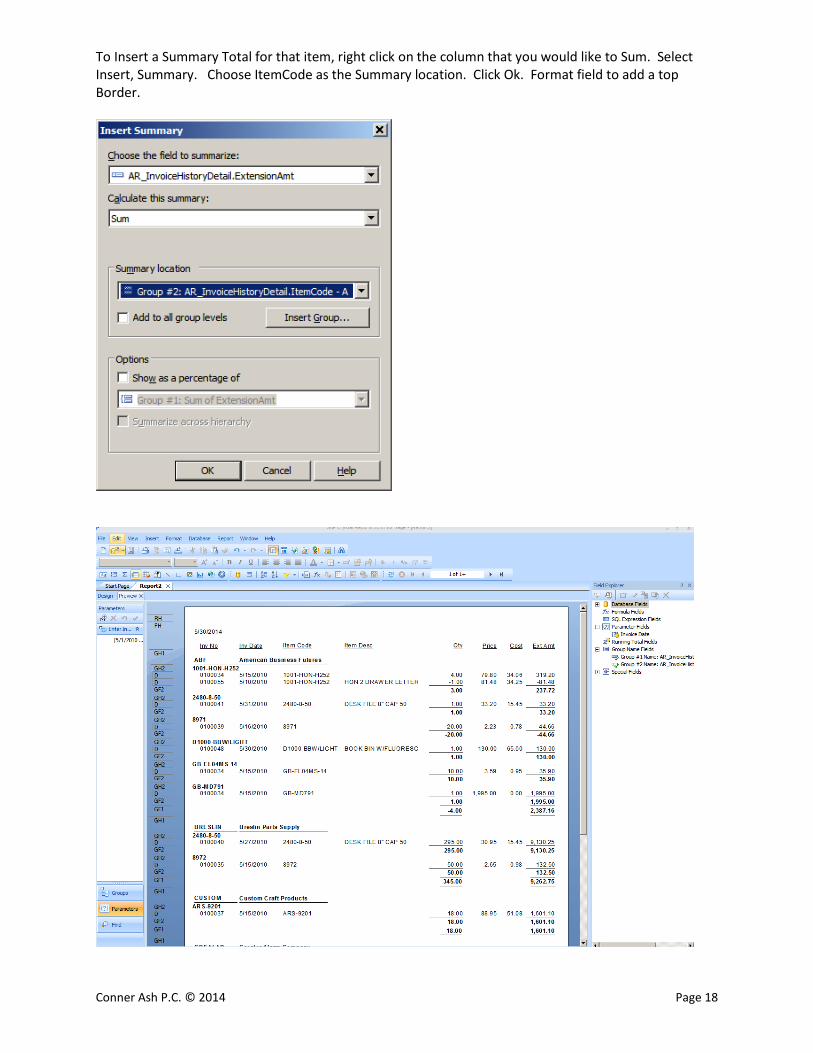
To Insert a Summary Total for that item, right click on the column that you would like to Sum. Select Insert, Summary. Choose ItemCode as the Summary location. Click Ok. Format field to add a top Border.
Conner Ash P.C. © 2014 Page 19
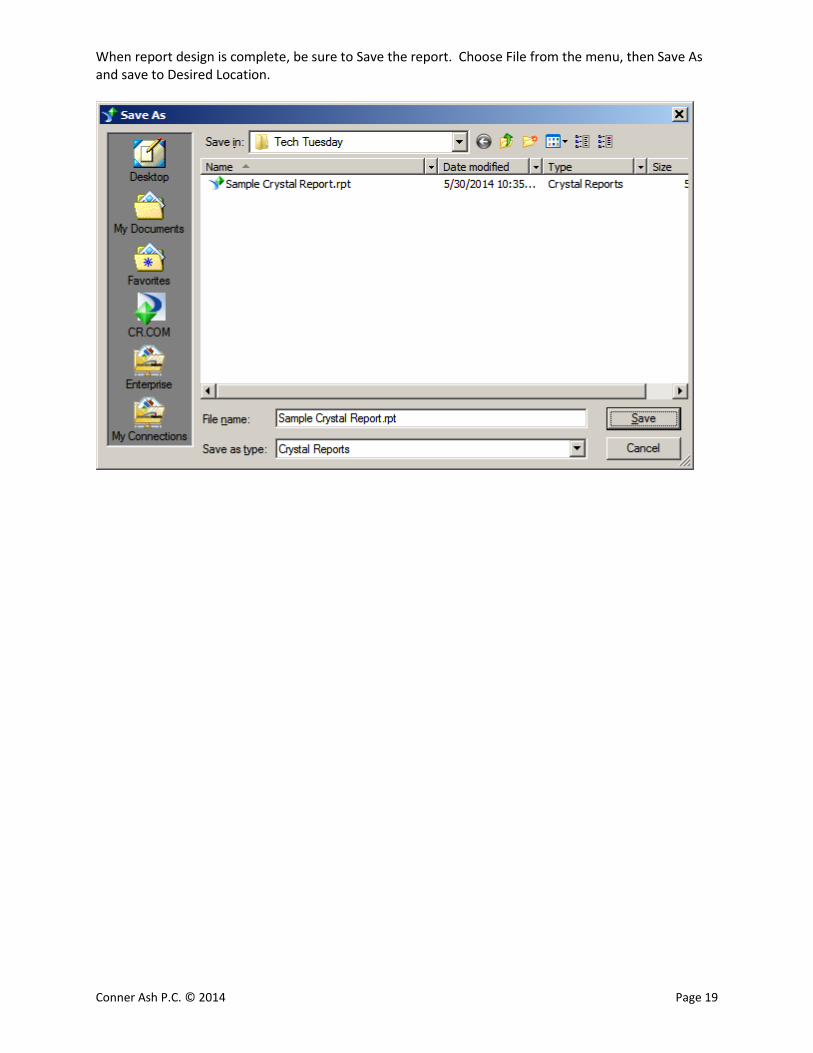
When report design is complete, be sure to Save the report. Choose File from the menu, then Save As and save to Desired Location.