hit-44 drill master owners manual
TRANSCRIPT

1825 VIA BURTON ANAHEIM, CA 92806 (714) 772-5202 FAX (714) 772-2302 WEBSITE: WWW.MAJORMFG.COM E-MAIL: [email protected]
HIT-44 DRILL MASTER OWNERS MANUAL
WHEN USING POWER TOOLS ALWAYS WEAR
EYE AND EAR PROTECTION!!

THINK SAFETY!!
WHEN USING POWER TOOLS ALWAYS WEAR
EYE PROTECTION!!
Before attempting any installation know how to safely use the power tools involved. Be sure all bits and cutters are sharp and in good condition and all power tools and extension cords are in good working order
and properly grounded. AND MOST IMPORTANTLY, BE SURE TO WEAR,
EYE AND EAR PROTECTION.

To adjust for 2-3/8” or 2-3/4” backset locks, just rotate the backset knob both on the top and bottom.
Using the supplied allen wrench, install the proper size break out plate/hole saw guide. Two 1-1/2” and two 2-1/8” guides are supplied. For wood door use mount with the washers on top of the break out plate. For steel door use, mount with the washers under the break out plate. Remove the multi-spur guide on opposite side and replace with another guide as shown in picture.
There are three drill guide bushings supplied with the HIT-44 for use when drilling the edge bore, they are held in with a clip. Choose from a 7/8”, 1” or the brass guide for use with a multi-spur bit, they just snap in.
HIT-44 ADJUSTMENTS
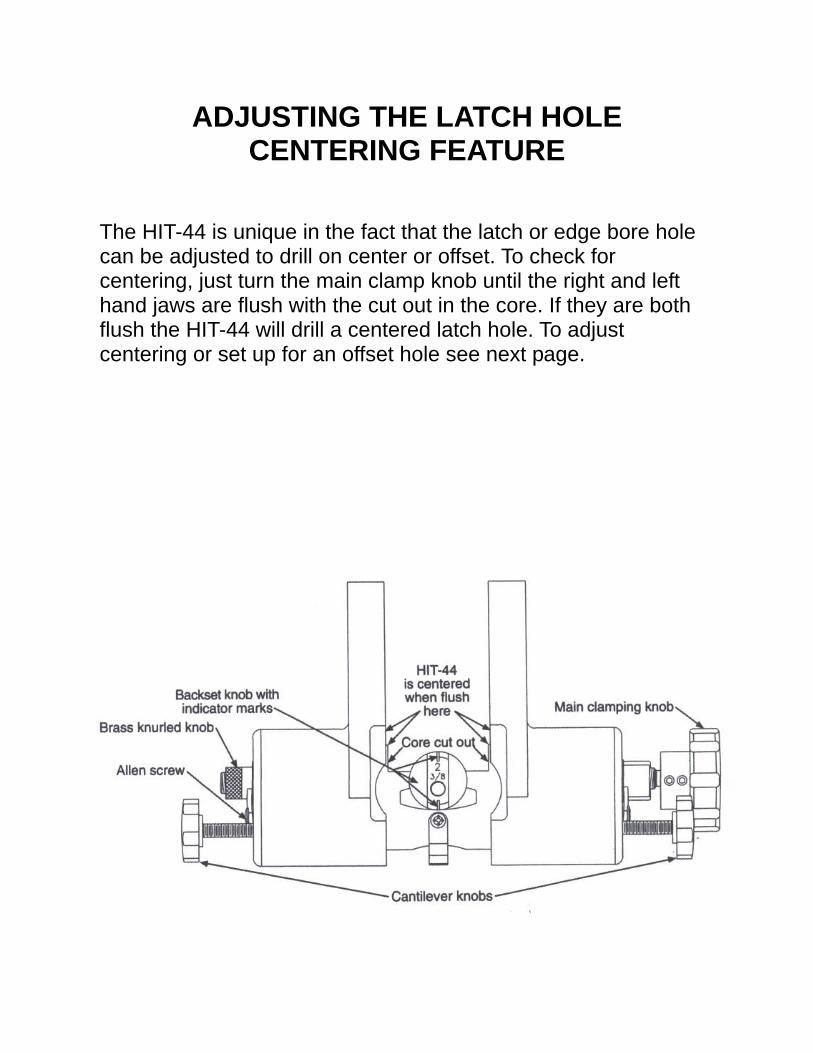
ADJUSTING THE LATCH HOLE CENTERING FEATURE
The HIT-44 is unique in the fact that the latch or edge bore hole can be adjusted to drill on center or offset. To check for centering, just turn the main clamp knob until the right and left hand jaws are flush with the cut out in the core. If they are both flush the HIT-44 will drill a centered latch hole. To adjust centering or set up for an offset hole see next page.

TO ADJUST CENTERING
The HIT-44 has a unique feature in the fact the centering can be adjusted. This will allow you to drill a centered latch hole in the edge of the door or one that is off centered. This is handy in case a door has an additional skin or plywood added on for re-enforcement. By loosening the allen screw holding the brass KNURLED knob and you can move one jaw independent from the other. This will move the centering of the latch hole by the amount you moved the jaw. Adjust the knob until you have the hole where you want it. Tighten the allen screw and drill the latch hole. It is a good idea to re-center your drill guide after use so a door won’t be mis-drilled next time. To re-center, turn the large main clamp knob until the clamp jaw on that side is flush with the core cut out . Loosen the brass KNURLED knob on the opposite side and adjust that jaw until it is also flush with the core cut out. Tighten the allen screw and the unit is now centered.
MAIN CLAMP KNOB
ALLEN SCREW
ON YOKE BY
BRASS KNOB
HIT-44 IS CENTERED WHEN RIGHT AND LEFT HAND JAW IS FLUSH WITH CORE CUT
OUT
BRASS KNURLED
KNOB
FLUSH
BOTH SIDES

Prior to clamping the HIT-44 to the door, check to make sure the backset adjustment knobs correspond to the lock you are installing. A 180 degree turn of the knob will change the backset to 2-3/8” or 2-3/4”
Clamp the HIT-44 to the door with a light pressure, just enough to hold it on the door.
Now tighten the black plastic cantilever knobs until snug.
USING THE HIT-44

One final turn of the main clamp knob will secure the HIT-44 to the door.
When the cross bore has been completed, drill the edge bore. Snap in the proper size bushing for the job.
Drill the cross bore first using the proper size multi-spur bit and corresponding break out plate on the op-posite side. USE A LOW RPM WHEN DRILLING AND BACK OUT THE BIT FROM TIME TO TIME TO REMOVE CHIP BUILDUP.

We are using a 1 inch brad point bit for drilling the edge bore. Again use a low RPM and back out the bit to help remove chips.
Remove when completed.
Here we are using our HIT-44LM3 latch marking tool to mark the area for the faceplate. There is a 1/16” shim that is used to adjust to a 1” or 1-1/8” face. With the shims on the inside, this will mark a 1-1/8” face.

The use of a combination square will help to square the marker to the door.
Mark for the faceplate.
Use a sharp box cutter to deepen the vertical outline left by the marking tool. If you use a chisel for this step you run the risk of splitting out the side of the door.

A chisel can be used to deepen the top and bottom of the outlined area. Once everything has been outlined, chisel out the latch mortise.
Don’t forget to mark the jamb for the strike plate. Shown is our HIT-44SL8 strike locator.
Use one of our centering drills to drill for the latch screw. This will assure a centered hole and will allow you to drive in the screw with out splitting the door. Do not attempt to drive in a screw without a pilot hole.
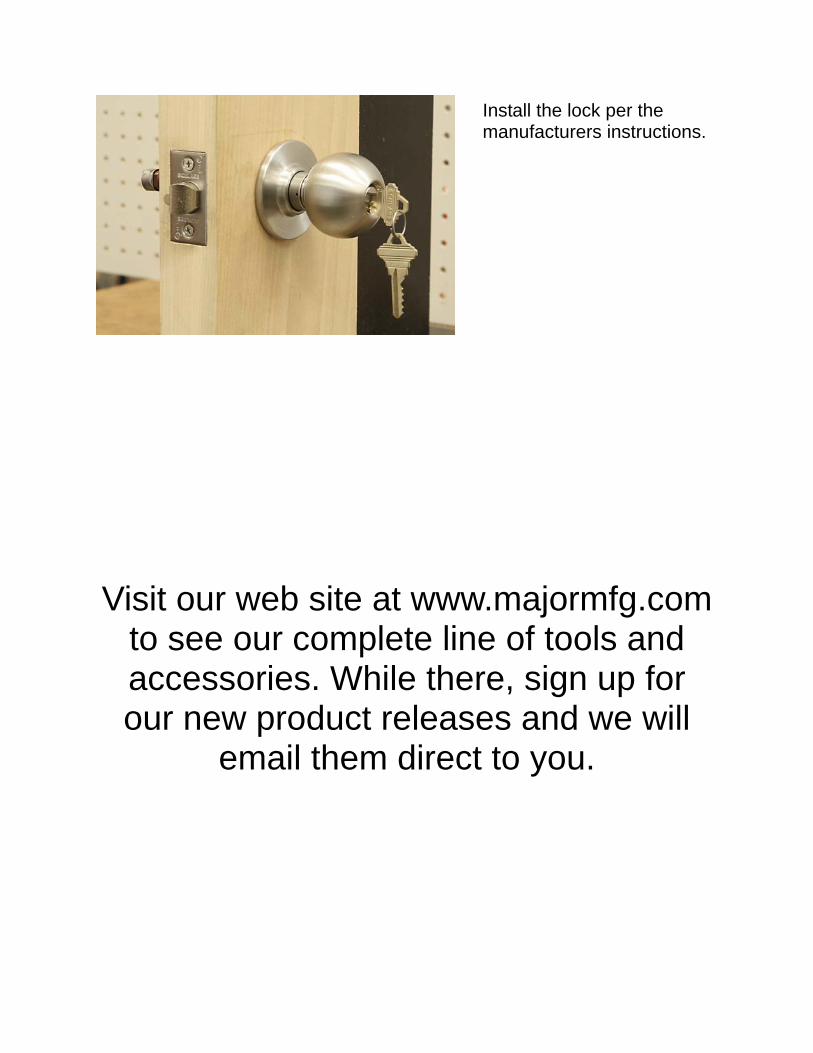
Install the lock per the manufacturers instructions.
Visit our web site at www.majormfg.com to see our complete line of tools and accessories. While there, sign up for our new product releases and we will
email them direct to you.

ITEM PART NO. DESCRIPTION ITEM PART NO. DESCRIPTION ITEM PART NO. DESCRIPTION 1 4401 R. Base 10 4412 Dowel Pin 27 4527 Shaft 2 4402 L. Base 13 4413 Multi-Spur Bit Guide 29 4429 Cap Screw 3 4403 Core 15 4415 Spring 30 4430 Button Head Screw 4 4404 Brass Knurled Nut 16 4416 Ball 31 4431 Button Head Screw 5 4405 L.H. Nut 17 4417 Screw Clamp 33 4433 Bushing Clip 6 4406 Lead Screw 20 4438 Cantilever Knob 37 4437 Spacer Washer 7 4407 Back Space Knob 21 4421 Set Screw HIT-44BP2 Hole Saw Guide/Breakout Plate (set) 8 4408 Pin 22 4422 Set Screw HIT-44A1 1" Diameter Bushing 9 4409 Main Clamp Knob 26 4426 Pad HIT-44A3 7/8" Diameter Bushing HIT-44A4 1/2" Diameter Bushing