hfh broward construction manual revised july 2013 draft 1
TRANSCRIPT

Construction
Manual
Reference for Leaders
2013

Construction Manual – July 2013 Page 2
Contents
SAFETY .......................................................................................................................... 3
MORNING CIRCLE ......................................................................................................... 4
TRUSSING ...................................................................................................................... 5
SHEATHING ................................................................................................................... 9
DRY-IN and DRIP EDGE .............................................................................................. 11
STARTER STRIP .......................................................................................................... 14
SHINGLING .................................................................................................................. 15
RIDGE VENT ................................................................................................................ 19
CEILING STRIP ............................................................................................................ 20
WALL FURRING ........................................................................................................... 22
FI-FOIL .......................................................................................................................... 24
INTERIOR PRIME / PAINT ........................................................................................... 25
EXTERIOR PRIME / PAINT .......................................................................................... 27
FASCIA BOARD, DRIP-EDGE PRIME / PAINT ............................................................ 29
INTERIOR SKILLED PAINT (Doors, Jambs) ................................................................ 30
EXTERIOR SKILLED PAINT (Stucco Accents, Doors) ................................................. 31
LANDSCAPING ............................................................................................................ 32
Hand Grading ............................................................................................................ 32
Planting Trees and Shrubs ........................................................................................ 35
Laying Sod ................................................................................................................. 37

Construction Manual – July 2013 Page 3
SAFETY A CLEAN JOB SITE…..IS A SAFE JOB SITE!!! General Safety
• Everyone must be at least 16 to be on the job site • Anyone under the age of 18 must keep his or her feet on the ground • Everyone must sign a waiver in order to work
Leader Responsibilities
• Review safety for task of the day • Make available basic safety equipment: hard hats, safety glasses, dust masks,
earplugs, etc. • Review the location of first aid, water and port-a-potties
Volunteer Responsibilities
• Wear appropriate protective equipment for the job – hard hats, eye and hearing protection and gloves
• Do not wear sandals or open toed shoes • Do not wear loose clothing • Wear sun protection: sunscreen, hat, sunglasses, etc. • Drink plenty of fluids to maintain personal hydration • Do not drink alcohol or use drugs while on site • Do not wear expensive jewelry or necklaces • Turn cell phones to “silent” or “vibrate” mode
Volunteers should be aware of their surroundings and careful not to put themselves in a dangerous situation in order to prevent them from hurting themselves and/or the people around them. All volunteers are responsible for their own safety!
ALL SITE SUPERVISORS, LEADERS, AND VOLUNTEERS ARE TO HELP MAINTAIN A SAFE AND CLEAN WORK AREA!!!

Construction Manual – July 2013 Page 4
MORNING CIRCLE
WELCOME
Intr
o
• HFH Staff • HFH Volunteer Leaders
• Homeowners • Groups
HF
H I
nfo
rma
tio
n
• “Hand up, not a hand out” • Partnership people in need & who can help
o Sponsors – contribute dollars & GIK o Volunteers – contribute labor o Homeowners – contribute both +
commitment & will to success • International
o 1976–Fullers/ Jimmy & Rosalyn Carter o Over 80 countries o 400,000 homes / 2 million people / 5
continents / 3,000 communities / top 10 building in United States (since 2010)
• Broward o Building Since 1983 o Over 300 homes built / 20-30 year
• Homeowners
o Need (substandard housing) o Ability to repay mortgage o Partner (400+ sweat equity hours)
• Financing o Mortgage
� Board set @ $125k � No interest, no profit � 7 – 30 year maturity
o Soft 2nd
Mortgage � Appraised market value � Forgiven when 1
st mortgage paid
(by original homeowner, not sold) • Sponsor
o $70k per home
Re
-S
tore
• 505 W. Broward Blvd. • Donate • Shop
PRAYER
HFH Store
Volunteer at www.habitatbroward.org
4
Wo
rds
• Patience • Flexibility
• Name Tags • Fun
Sa
fety
• Construction Site • Sunscreen • Water • Bathrooms
• Buddy • Cell Phones • Earphones • First Aid
TASKS

Construction Manual – July 2013 Page 5
TRUSSING
Tools & Materials 35 lbs 10d truss nails 10 lbs 8d duplex nails 10 lbs 16d nails 2 lbs 4d nails 2 tape measures 1 pair tin snips Carpenters pencil 2 utility knives
2 aluminum spacers TSS2’s (truss “shoes”) 10 hard hats 4’ level 25’ rope 10 hammers 10 nail pouches 2 cats paws String line
Truss package Scaffolding or 2, 8 ft. ladders Extension ladder 75 wooden cleats 1- 2x4x16’ push bar 2 x 4 x 16’ (cat/sister material) Circular saw Extension cord
Cre
w
• 1 House Leader • 3 Crew Leaders + Home Owner • 12 - 15 Volunteers
• 5 volunteers up on tie beam
o 1 in middle with rope (puller) o One on each side of the puller o One on each sidewall placing truss in cups
• 10 volunteers on ground crew carrying trusses o 2 with tape measures on step ladders to center
truss o 2 handing cleats to volunteers on tie beam
Ov
erv
iew
Wood trusses are widely used in single and multi-family residential, institutional, agricultural and commercial construction. A truss is a structural frame relying on a triangular arrangement of webs and chords to transfer loads to reaction points. This arrangement gives them high strength-to-weight ratios, which permit longer spans than conventional framing.
He
lpfu
l H
ints
• Everyone on the ground crew must be wearing a hard hat • Install your Hip Girder Trusses first. (Please see Diagram 1 for Laying Out and Setting
the Hip Girder & Diagram 2 for Truss Layout) • Be sure that each truss is sitting tight in the metal cup and is centered • Each truss strap requires 15 – 10d truss nails (Double straps on girders get 11 in each
strap – 22 total). These nails must be visible from the ground. Strap must be tight. Nail riveted side first, and then flatten the strap over the top chord of the truss. NO CUPPING of strap on top of chord. (Please see Diagram 3 for strap reference)
• 2 x 4 cats are installed on the ridgeline • 2 x 4 sister is installed on the inside edge of hip girder truss. • 2 x 3 x 3’4” sister are installed on corner truss. Rip a 2 x 4. (Please see Diagram 2 for
further instructions)
Cle
an
Up
• All volunteers should empty their nail pouches into the correct nail bucket • All volunteers should return their nail pouches, hammers, and hard hats to the
appropriate container • Return all tools and materials to the appropriate container

Construction Manual – July 2013 Page 6
DIAGRAM 1 – Setting the Hip Girders

Construction Manual – July 2013 Page 7
DIAGRAM 2 – Truss Layout

Construction Manual – July 2013 Page 8
DIAGRAM 3 – Truss Detail
Use
15
10
d t
russ
na
ils
in e
ach
str
ap
.
Truss Straps
Girder Truss has
2 Straps
Use 11 10d truss nails in
each strap. 22 total.
Make sure cup is seated correctly
under truss.
Strap must be flat against the top
of the truss. It cannot have any
crown. No nails on top.
Cut at 14 ½” on 40' w
ide lots.
On larger lots, dry line to shortest
tail and trim.
Subfacia: 2 x 4, 2 16d nails in each truss end
Must be flush top and bottom.
Joints cut at 45 degrees and caulked.
Facia: 1 x 6, 6d HDG nails 16" on center
Drip: 1 x 2 PT, 6d HDG nails 16" on center
Corner
Cuts
45o
4:12 hip/val angle
TSS2 plates (“shoes”) should be nailed at
the birds mouth of each truss (both ends)

Construction Manual – July 2013 Page 9
SHEATHING
Tools & Materials 35 lbs 8d HDG RS nails (or 10d common) 4 tape measures 3 chalk lines Carpenters pencil 2 utility knives
10 hard hats 15 hammers 15 nail pouches 2 cats paws
65 +/- sheets of plywood 2, 8 ft. step ladders Extension ladder Circular saw Extension cord 1 x 3 ladder brace
Cre
w
• House Leader • Crew Leader + Home Owner • 12 - 15 Volunteers
• 2 volunteers on ground handing up
sheathing • Remainder of volunteers on roof placing
and nailing off sheet
Ov
er-
vie
w
Sheathing, plywood panels, is the first layer of the roof nailed to the trusses. Plywood offers many benefits. It is highly stable, strong and lightweight, impact resistant and environmentally responsible.
He
lpfu
l H
ints
• Everyone on the ground must be wearing a hard hat. • Nail pattern for sheathing is 6” on the seam and in the field, 4” on the sub-fascia and
ridgeline
(Please see Diagram 4 for further instructions)
Cle
an
Up
• All volunteers should empty their nail pouches into the correct nail bucket • All volunteers should return their nail pouches, hammers, and hard hats to the appropriate
container • Return all tools and materials to the appropriate container

Construction Manual – July 2013 Page 10
Diagram 4 – Roof Sheathing Plan Detail

Construction Manual – July 2013 Page 11
DRY-IN and DRIP EDGE
Tools & Materials 35 lbs 1 ¼” HDG RS roofing nails 30 lbs tin tabs 4 tape measures 2 chalk lines 4 crayons 4 utility knives (straight)
15 hammers 15 nail pouches 2 cats paws Tin snips Speed square Sharpie
12 rolls of 30lb felt 20 drip edge pieces Extension ladder Bull Trowel Broom
Cre
w
• House Leader • Crew Leader + Home Owner • 12 - 15 Volunteers
Dry-In
• 2 volunteers on each side of house rolling felt
• 2 volunteers tacking felt down • 8-11 volunteers nailing off felt (starting
with seams) Drip Edge
• 1 volunteer working with House/Crew Leader on corners
• 2 volunteers spreading bull and placing drip edge
• Remainder of volunteers nailing off
Ov
erv
iew
Dry-In Drip Edge
Roofing felt is applied to the plywood sheathing to add a layer of weather protection. Once the felt is rolled out and nailed off, the roof is water tight.
Drip edge is a modified L-shaped flashing used along the eaves and rakes of a roof. The drip edge directs runoff water off of the roof and away from the fascia.
HIP Roof GABLE Roof

Construction Manual – July 2013 Page 12
DRY-IN and DRIP EDGE (continued)
HIP Roof
Set First Piece
Cut & Place 2nd
Piece
He
lpfu
l H
ints
Dry-In Drip Edge
• Mark your volunteers’ hammers with 6”, 8” and 10” marks • Be sure to overlap the hip 12” when starting each course –
parallel to the edge of the roof. • Keep felt tight & smooth. Tip: Do not walk on it while
unrolling, or before nailing it down. • The first course of felt needs to be flush (0 – 1/4") with the
edge of the plywood. The felt cannot hang over the plywood – this will cause problems when installing the drip edge.
• Horizontal overlaps must be 4”; vertical overlaps should be no less than 12”.
• All vertical and horizontal seams should be nailed off every 6” on the lap.
• The field is nailed off every 8” vertically and every 10” horizontally. (12” diagonally MAX)
• Start your crew of volunteers with nailing off the seams, then move to the field.
• Do not nail off the felt within 4” of the edge of the roof – this will be nailed off once the drip edge is installed.
• Drip edge must be overlapped at least 6” and each overlap should be bulled. Only bull metal to metal.
• Bull should be spread thin to prevent it from oozing onto the front. (< ¼”)This prevents a messy cleanup.
• Drip edge should be nailed off every 4” in the center of the piece.
(Please see Diagram 5 for further instructions)
Cle
an
Up
• All volunteers should empty their nail pouches into the correct nail bucket • All volunteers should return their nail pouches, hammers, and hard hats to the
appropriate container • Return all tools and materials to the appropriate container • Bull can be removed with paint thinner or GoJo and water.

Construction Manual – July 2013 Page 13
Diagram 5 – Dry In – Felt and Nail Patterns
12" 12
"
4"
4"
6"6"

Construction Manual – July 2013 Page 14
STARTER STRIP
Tools & Materials 1 ¼” HDG RS roofing nails 2 Utility knives Tape Measure
5 Hammers 5 Nail pouches 1 Cats paw 2 Trowels
Starter strip Extension ladder Bull Broom
Cre
w
• House or Crew Leader • 5 Volunteers
• 2 or 3 volunteers spreading bull • Remainder of volunteers placing and
nailing off starter strip
Ov
er-
vie
w
Starter strip is used as an extra layer of water protection by filling in the spaces under the cutouts and joints of the first course of shingles. It is composed of half of the shingle, the colored tabs are cut off and the half including the tar strip is used as the starter strip.
He
lpfu
l H
ints
• Starter strip creates the first row of shingles on each edge of the roof; no starter
shingles are used on the rake of gable roofs (this is considered the end of each row, not the starter row).
• Starter strip is made by cutting the tabs off of a shingle. Cut just above the tabs, saving the top part of the shingle with the tar strip.
• Bull should be spread on the drip edge. All bull should be spread at a thickness of 1/8” never thicker and should extend ¼” from the edge up 8”.
• Remind volunteers to be extra careful in spreading the bull, making sure not to get any on the front of the drip edge (this will be seen when the house is complete).
• Starter strip should be placed flush with the edge of the roof, tar strip at the edge. • Starter strip should be nailed off every 6” with shingle nails (6 nails per strip, evenly
spaced).
(Please see Diagrams 6 & 7 for further instructions)
Cle
an
Up
• All volunteers should empty their nail pouches into the correct nail bucket • All volunteers should return their nail pouches, hammers, and hard hats to the appropriate
container • Return all tools and materials to the appropriate container • Bull can be removed with paint thinner or GoJo and water

Construction Manual – July 2013 Page 15
SHINGLING
Tools & Materials 1 ¼” HDG RS roofing nails 4 Utility knives (2 straight; 2 hook) 2 Chalk Boxes 4 Tape Measures
15 Hammers 15 Nail pouches 2 Cats paw 2 Crayons 1 Sharpie
Shingles Extension ladder Bull 1 Trowel Broom
Cre
w
• 2 - 3 Leaders • 10 - 15 Volunteers
• Teams of 2
o 1 placing & tacking o 1 nailing off the middle
Ov
er-
vie
w
Fiberglass-based asphalt shingles are by far the most common roofing material used for residential roofing applications. Shingles are laid from the bottom edge of the roof up, with the bottom edge of each row overlapping the previous row by about one third its length to ensure a water-resistant result. The shingles we use are architectural grade and have a 50-year life.
He
lpfu
l H
ints
• Be sure that all of the starter strip has been installed. • Triangulate, measure and chalk four (4) vertical center lines from bottom edge of roof to
top of ridgeline. From the center line, mark 3 additional lines at 6”, 11” and 17”. • Lay the first row of shingles flush with the edge of the roof and offset each new row
5 5/8” up and 6” to the side starting at either “end” vertical center lines. • Lay the second, and all remaining rows, on top to the “dragon’s tooth”, to the next
vertical center line. This will be repeated, back and forth, to the top of the roof. • Nail on the green strip. • Remember to always use a full sheet on the hip ends. If a smaller piece is to be used,
make sure it’s a minimum of 18”, and place the smaller piece on the “inside” of the full piece.
• After every 5th course, take a measurement from the bottom edge of the roof at both
ends of roof and in the middle, and strike a chalk line from the center to each end, to ensure the shingles are still level.
• Remind your volunteers not to put nails on the other side of the hip – only nail off up to the ridgeline.
• Be sure each nail is hammered in completely, and is flush. Any bent nails need to be removed and the nail hole filled with “bull”. A new nail can be nailed next to the filled hole.
(Please see Diagrams 6, 7 & 8 for further instructions)
Cle
an
Up
• All volunteers should empty their nail pouches into the correct nail bucket • All volunteers should return their nail pouches, hammers, and hard hats to the appropriate
container • Return all tools and materials to the appropriate container • Bull can be removed with paint thinner or GoJo and water

Construction Manual – July 2013 Page 16
Diagram 6 – Shingling Plan Detail

Construction Manual – July 2013 Page 17
Diagram 7 – Gable Rake & Flashing Requirements

Construction Manual – July 2013 Page 18
Diagram 8 – Nail Pattern
1"
1"
7 ½ “
Nails
Nail Pattern
(Architectural Shingle)
2 nails should be placed 1" from each end of the shingle,
Then 4 nails equally spaced in the field every 7 ½ “
Tar Strip
Nails MUST be kept
out of the tar strip;
on the gray
directional strip
The Offset
5 5/8" Vertical Offset
6" Offset
7 ½ “
7 ½ “
7 ½ “
7 ½ “
11" Offset
17" Offset

Construction Manual – July 2013 Page 19
RIDGE VENT
Tools & Materials 2 ½” HDG RS nails Utility knife Tape Measure Chalk Box 20’ Roll of Sure Vent Membrane
2 Hammers 2 Nail pouches Circular Saw Extension Cord
Extension ladder Bull Trowel Broom
Cre
w
• House or Crew Leader • 1 - 2 Volunteers
• Volunteers assist Leader with
installation of ridge vent
Ov
er-
vie
w A ridge vent runs along the length of the roof peak, blending into the roofline to facilitate roof
ventilation. Air enters the overhang of the roof through soffit vents, then flows straight up through the rafters on convection currents and out through a ridge vent while deflecting weather away from the attic.
He
lpfu
l H
ints
• Use a circular saw to cut the 2” ventilation slot (1” on each side of ridge); slot must
penetrate shingles, sheet and plywood deck, however, should NOT penetrate trusses. • Vent is centered on length of the ridge; start the ventilation slot 2 feet from the point
where hip and ridge meet (vent length is 18’ max.) • Roll out or place ridge vent along the entire length of ventilation slot plus one foot over
the edge of the slot at both ends. • Install the end caps
o Pull apart a pre-cut section of the foam end cap packaged with the vent (located 3 ft. into the rolled product packaging).
o Using a utility knife, make a cut in the ridge vent fabric on each side of the vent, back from the end of the roll approximately 1” long. This cut will allow the end cap to slide under the fabric.
o Coat both sides of the foam material with bull to ensure a proper seal
o Place the foam end cap on top of the ridge vent fabric where it has been cut back at the end of the vent.
• Attach vent to the roof deck by driving a nail in each of the two corners on one end of the vent; nail every few feet to the other end. Also drive two nails through the vent and foam end cap to hold foam in place on the ends of the ridge only.
• The vent has been installed properly if the bottom of the vent is flat on the roof and the peak is slightly rounded.
• Nail ridge shingles in overlapping pattern. Start at each end and work towards the center.
Cle
an
Up
• All volunteers should empty their nail pouches into the correct nail bucket • All volunteers should return their nail pouches, hammers to the appropriate container • Return all tools and materials to the appropriate container • Bull can be removed with paint thinner or GoJo and water

Construction Manual – July 2013 Page 20
CEILING STRIP
Tools & Materials 10 lbs 1 ¼’ drywall screws Chalk Line 3 Sharpies 2 Tape Measures
5 nail pouches Tin Snips 2 Drills 2 Extension cords
75 pcs. 16’ hi hat Scaffolding 2, 8 ft. Step ladders
Cre
w
• House or Crew Leader • 4 or 5 Volunteers
• Pair off volunteers; one volunteer will
drill while the other supports ceiling strip • One volunteer cutting hi hat pieces
Ov
er-
vie
w
Ceiling strip is installed along the bottom of the trusses on the interior of the house. The drywall is screwed directly into the ceiling strip.
He
lpfu
l H
ints
• To mark your trusses – make your first mark 2” from the outer wall, then mark every 16”
moving toward the center; STOP AT THE CENTER, then do the same thing from the other side – do this in the front, middle and back of the house on the vertical trusses. Mark each line with an “X” to maintain 16” on center.
|X |X |X 16” 16”
• Mark the horizontal trusses in the back the same way. • Once all trusses are marked use a chalk line to make lines. • Install the first piece in the back corner of the house – if you start here, the ceiling strip will
automatically be staggered. You must NOT have three consecutive seams on the same truss.
• When starting a piece, place it in the middle of the truss, so that the next piece has room to butt up next to it. Do not overlap; this will use less material.
• Start by installing the first piece on the chalk line that is 2” from the wall – line the ceiling strip up so that it is to the inside of the chalk line farthest from the wall.
• Remember each piece of ceiling strip must span at least 3 trusses. Anything shorter than 48” cannot be used.
• Each strip gets two screws at every truss point. • Metal Hi-hat should NOT touch block wall
(Please see Diagram 9 for further instructions)
Cle
an
U
p
• All volunteers should empty their nail pouches into the correct bucket • All volunteers should return their nail pouches, to the appropriate container • Return all tools and materials to the appropriate container

Construction Manual – July 2013 Page 21
Diagram # 9 – CEILING STRIP
2 x 4
on Edge
Floaters may
not exceed 6"

Construction Manual – July 2013 Page 22
WALL FURRING
Tools & Materials 15 lbs 4d Masonry cut nails 1 Carpenter’s Pencil 1 Crayon 1 Tape Measure
8 Hammers 8 Nail pouches 2 Cats paws 1 pair Safety goggles
145 pieces Furring strips (1 x 2 x 8’ pieces) 2, 8 ft. Ladders Circular saw Extension cord
Cre
w
• House or Crew Leader • 5 - 8 Volunteers
• 1 or 2 volunteers cutting furring strip • Remainder of volunteers nailing off
furring strip
Ov
er-
vie
w
Furring strips are installed directly to the concrete block. Drywall will be attached to the furring with screws.
He
lpfu
l H
ints
• Mark the walls 16” on center starting from a corner or a door / window (2” from corner) • The top and bottom horizontal pieces should be installed 3/4” from the top and bottom of
the wall (use the width of the strip as a measure). Mark left to right on each wall. Run pieces continuously without gaps; 3 nails in each strip. Nails can be up to 6” from end of piece.
• When installing vertical pieces, butt them up against the top horizontal piece, leaving 2” gaps at the bottom; 1 nail at eye level.
• Do not install vertical strips within 6” of the windows. • Make sure that there is one piece on each side of all corners. Stand off 1” from corners. • Remind volunteers to firmly hold the wall furring while hammering otherwise it will come
loose. Start nail into the furring on the floor. • Remind volunteers to hammer the nail in so that the nail head is running lengthwise with
the furring strip. This will prevent the wood from cracking. • Wear goggles / safety glasses; nails chip.
(Please see Diagram 10 for further instructions)
Cle
an
U
p
• All volunteers should empty their nail pouches into the correct bucket • All volunteers should return their hammers & nail pouches, to the appropriate container • Return all tools and materials to the appropriate container

Construction Manual – July 2013 Page 23
DIAGRAM # 10 – WALL FURRING
¾” Gap
2” Gap
16" on
center
2” Gap
¾” Gap
6" 6"
3 nails
3 nails
1” Gap
No more than 6"
from end of board
3 nails per strip to set Board
Follow with power nailer every 16"
Construction Manual – July 2013 Page 24
FI-FOIL
Tools & Materials Utility knives Tape measures Crayons
Staple guns Staples Fi-foil Jig
2 ½ Rolls of Fi-foil 2, 8 ft. Ladders 1 Table
Cre
w
• House or Crew Leader • 4 or 5 Volunteers
• 1 volunteer will measure and cut pieces
of fi-foil • Other volunteers will staple fi-foil in
place
Ov
er-
vie
w
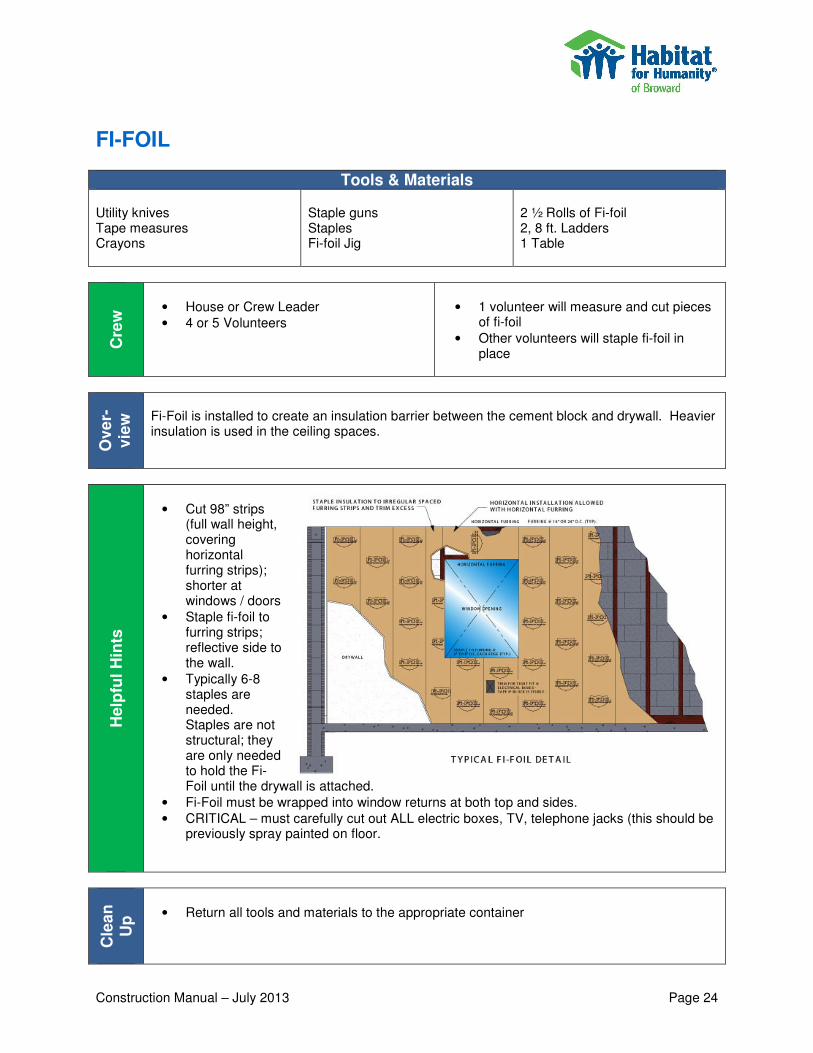
Fi-Foil is installed to create an insulation barrier between the cement block and drywall. Heavier insulation is used in the ceiling spaces.
He
lpfu
l H
ints
• Cut 98” strips
(full wall height, covering horizontal furring strips); shorter at windows / doors
• Staple fi-foil to furring strips; reflective side to the wall.
• Typically 6-8 staples are needed. Staples are not structural; they are only needed to hold the Fi-Foil until the drywall is attached.
• Fi-Foil must be wrapped into window returns at both top and sides. • CRITICAL – must carefully cut out ALL electric boxes, TV, telephone jacks (this should be
previously spray painted on floor.
Cle
an
U
p
• Return all tools and materials to the appropriate container
Construction Manual – July 2013 Page 25
INTERIOR PRIME / PAINT
Tools & Materials 1 Paint brush on a stick 2 Paint brushes 3 Paint buckets 8 Paint pans 3 pairs safety goggles
8 Roller frames 8 Interior roller covers (3/4” nap) 8 Extension sticks Rags Wire brush
30 gallons Interior Prime or 30 gallons Interior Flat Paint 5 gallons Semi-Gloss (baths/kitchens) Garden hose with nozzle
Cre
w
• House or Crew Leader • 8 - 10 Volunteers
• One volunteer with paintbrush on a stick
doing all ceiling and wall cut-in • One volunteer with paintbrush cutting in
windows • Remainder of volunteers with rollers
Ov
erv
iew
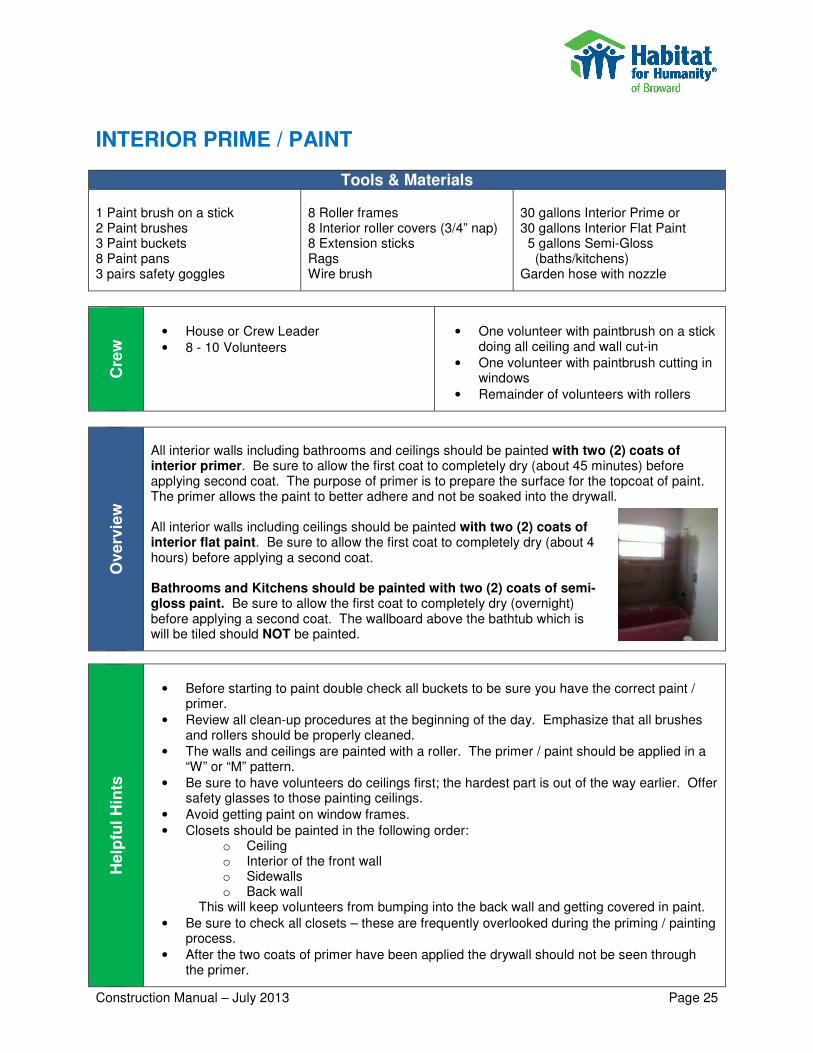
All interior walls including bathrooms and ceilings should be painted with two (2) coats of interior primer. Be sure to allow the first coat to completely dry (about 45 minutes) before applying second coat. The purpose of primer is to prepare the surface for the topcoat of paint. The primer allows the paint to better adhere and not be soaked into the drywall. All interior walls including ceilings should be painted with two (2) coats of interior flat paint. Be sure to allow the first coat to completely dry (about 4 hours) before applying a second coat. Bathrooms and Kitchens should be painted with two (2) coats of semi-gloss paint. Be sure to allow the first coat to completely dry (overnight) before applying a second coat. The wallboard above the bathtub which is will be tiled should NOT be painted.
He
lpfu
l H
ints
• Before starting to paint double check all buckets to be sure you have the correct paint /
primer. • Review all clean-up procedures at the beginning of the day. Emphasize that all brushes
and rollers should be properly cleaned. • The walls and ceilings are painted with a roller. The primer / paint should be applied in a
“W” or “M” pattern. • Be sure to have volunteers do ceilings first; the hardest part is out of the way earlier. Offer
safety glasses to those painting ceilings. • Avoid getting paint on window frames. • Closets should be painted in the following order:
o Ceiling o Interior of the front wall o Sidewalls o Back wall
This will keep volunteers from bumping into the back wall and getting covered in paint. • Be sure to check all closets – these are frequently overlooked during the priming / painting
process. • After the two coats of primer have been applied the drywall should not be seen through
the primer.

Construction Manual – July 2013
INTERIOR PRIME / PAINT
Cle
an
Up
• Be sure clean-up area is away from houses and cars.• Dip the brushes and
water to remove most of the paint from the covers. (This conserves water) After the paint has been removed from the rollers, use the hose to the roller covers to remove any remaining paint and water.
• Make sure the insipaint.
• Remove all excess water by shaking out each paint brush and roller cover.• Use a wire brush to clean paint brushes• Store all rollers in milk crate to allow rollers to drain.• Store all paintbrushes upside down in a bucket to allow brushes to dry.• Clean all buckets and trays with hose.• Store buckets and trays upside down to allow them to dry• Paint on skin can be removed with soap and water.
• Remove excess paint from roller on wall before washing
• Dip roller in bucket of water 20 times pushing paint out on dirt
• Dip roller in CLEAN bucket 10-15 more times until clean
INTERIOR PRIME / PAINT (continued)
up area is away from houses and cars. brushes and roller covers multiple times in empty paint buckets fil
water to remove most of the paint from the covers. (This conserves water) After the paint has been removed from the rollers, use the hose to spray the brushes and the roller covers to remove any remaining paint and water. Make sure the inside of roller covers and roller frames are washed and are free of
Remove all excess water by shaking out each paint brush and roller cover.Use a wire brush to clean paint brushes. Store all rollers in milk crate to allow rollers to drain.
paintbrushes upside down in a bucket to allow brushes to dry.Clean all buckets and trays with hose. Store buckets and trays upside down to allow them to dry; do not nest wet bucketsPaint on skin can be removed with soap and water.
• When water runs CLEAR out of roller, put onto clean roller frame
• Place on edge of bucket, spraying edge of roller spinning it dry
• Place brush on pallet and spray with hose, turning it back and forth, spreading bristles until water runs CLEAR.
• Stack clean brushes upside down in bucket to dry
Page 26
roller covers multiple times in empty paint buckets filled with water to remove most of the paint from the covers. (This conserves water) After the
spray the brushes and spin
de of roller covers and roller frames are washed and are free of
Remove all excess water by shaking out each paint brush and roller cover.
paintbrushes upside down in a bucket to allow brushes to dry.
; do not nest wet buckets.
Place brush on pallet and spray with hose, turning it back and forth, spreading bristles until water runs
Stack clean brushes upside down in bucket to dry

Construction Manual – July 2013 Page 27
EXTERIOR PRIME / PAINT
Tools & Materials 1 Paint brush on a stick 2-3 Paint brushes 1 Old paint brush (duster) 3-4 Paint buckets 4-5 Paint pans
4-5 Roller frames 4-5 Exterior roller covers (1 1/4”) 4-5 Extension sticks Rags 2 Shovels
25 gallons Exterior Prime OR 20 gallons Exterior Topcoat Garden hose with nozzle Wire brush Broom Step ladder
Cre
w
• House and / or Crew Leader • 7 - 9 Volunteers
• One volunteer with paintbrush on a stick
doing all ceiling and wall cut-in • One volunteer with paintbrush painting
back side of fascia board and around soffit screens
• One to two volunteer(s) with paintbrush cutting in windows and edge of porch floor (neat painter)
• Remainder of volunteers with rollers
Ov
erv
iew
All exterior walls including overhang and stucco accents should be painted with two (2) coats of exterior primer. Be sure to allow the first coat to completely dry (about 1 hour) before applying second coat. The purpose of primer is to prepare the surface for the topcoat of paint. The primer allows the paint to better adhere and not be soaked into the stucco. All exterior walls including overhang and quoins should be painted with two (2) coats of exterior top coat. Wait overnight before applying a second coat.
He
lpfu
l H
ints
• Before starting to paint double check all buckets to be sure you have the correct paint /
primer. • Review all clean-up procedures at the beginning of the day. Emphasize that all brushes
and rollers should be properly cleaned. • Before starting to paint cover entire front porch with sand to keep any spilled paint from
staining the concrete. • Before starting to paint pull dirt from away from the bottom of the house, dust off window
sills and doors, etc., using shovels, a broom, or old paintbrush. • The walls are painted with a roller. The primer / paint should be applied in a “W” or “M”
pattern. • Be sure to inform those doing cut-in not to paint the vents (Includes screen and metal
strip). • Avoid getting paint on window frames. • After the two coats of primer have been applied the stucco should not be seen through the
primer.

Construction Manual – July 2013
EXTERIOR PRIME / PAINT
Cle
an
Up
• Be sure clean-up area is away from houses and cars.• Dip the brushes and
water to remove most of the paint from the covers. (This conserves water) paint has been removed from the rollers, use the hose to the roller covers to remove any remaining paint and water.
• Make sure the inside of roller covers and roller frames are washed and are free of paint.
• Remove all excess water by shaking out each paint brush and roller cover.• Use a wire brush to clean paint brushes• Store all rollers in milk crate to allow rollers to drain.• Store all paintbrushes upside down in a bucket to allow brushes to dry.• Clean all buckets and t• Store buckets and trays upside down to allow them to dry• Paint on skin can be removed with soap and water.
• Remove excess paint from roller on wall before washing
• Dip roller in bucket of water 20 times pushing paint out on dirt
• Dip roller in CLEAN bucket 10-15 more times until clean
•
•
TERIOR PRIME / PAINT (continued)
up area is away from houses and cars. brushes and roller covers multiple times in empty paint buckets filled with
water to remove most of the paint from the covers. (This conserves water) paint has been removed from the rollers, use the hose to spray the brushes and the roller covers to remove any remaining paint and water. Make sure the inside of roller covers and roller frames are washed and are free of
cess water by shaking out each paint brush and roller cover.Use a wire brush to clean paint brushes. Store all rollers in milk crate to allow rollers to drain. Store all paintbrushes upside down in a bucket to allow brushes to dry.Clean all buckets and trays with hose. Store buckets and trays upside down to allow them to dry; do not nest wet bucketsPaint on skin can be removed with soap and water.
• When water runs CLEAR out of roller, put onto clean roller frame
• Place on edge of bucket, spraying edge of roller spinning it dry
• Place brush on pallet and spray with hose, turning it band forth, spreading bristles until water runs CLEAR.
• Stack clean brushes upside down in bucket to dry
Page 28
roller covers multiple times in empty paint buckets filled with water to remove most of the paint from the covers. (This conserves water) After the
spray the brushes and spin
Make sure the inside of roller covers and roller frames are washed and are free of
cess water by shaking out each paint brush and roller cover.
Store all paintbrushes upside down in a bucket to allow brushes to dry.
; do not nest wet buckets.
Place brush on pallet and spray with hose, turning it back and forth, spreading bristles until water runs CLEAR. Stack clean brushes upside down in bucket to dry

Construction Manual – July 2013 Page 29
FASCIA BOARD, DRIP-EDGE PRIME / PAINT
Tools & Materials 4 Paint brushes 4 Paint buckets Rags
4, 8’ Step ladders Garden hose with nozzle Wire brush Mineral spirits
1 gallon Exterior Oil-based Primer and Denatured Alcohol 5 gallons Richards Primer 2 gallons Exterior Trim Coat
Cre
w
• House or Crew Leader • 3 - 4 Volunteers
• Each volunteer with step ladder
assigned to one side of house • If terrain is very unlevel or when working
on high gables, work in pairs (one holding ladder, one painting)
Ov
erv
iew
All metal drip edge should be cleaned with denatured alcohol (wipe drip edge with rag dipped in alcohol) before applying two (2) coats of oil based SHIELDS primer. Be sure to allow the first coat to dry completely (overnight) before applying a second coat. All fascia board should be painted with two (2) coats of Richard’s exterior primer. Be sure to allow the first coat to dry completely (overnight) before applying a second coat. All fascia board and drip edge should be painted with two (2) coats of exterior semi-gloss trim coat. Be sure to allow the first coat to dry completely (overnight) before applying a second coat.
He
lpfu
l H
ints
• Before starting to paint, double check all buckets to be sure you have the correct paint /
primer. • Review all clean-up procedures at the beginning of the day. Emphasize that all brushes
and rollers should be properly cleaned. • Remember to include the trim on Boston Hips • After the two coats of primer have been applied, the fascia board and drip edge should not
be seen through the primer. • Trim color is used on drip edge, bottom edge of the 1” x 2”, front and bottom edge of
fascia board. The back edge of the fascia board is painted with the house base color matching the soffit.
• The secret to a good paint job is multiple thin coats.
Cle
an
Up
• Be sure clean-up area is away from houses and cars. • Brushes used for oil-based primer should be discarded. Old brushes should be used for
this task. • Use a wire brush to clean paint brushes • Remove all excess water by shaking out each paint brush. • Store all paintbrushes upside down in a bucket to allow brushes to dry. • Clean all buckets with hose. • Store buckets upside down to allow them to dry.

Construction Manual – July 2013
INTERIOR SKILLED PAINT (Doors, Jambs
3 Paint brushes 3 Paint buckets
Cre
w
• House or Crew Leader• 2 - 3 Volunteers
Ov
er-
vie
w
Each door and jamb should get painted with two (2) coats of semiand jamb paint should only be done by skilled painters.
He
lpfu
l H
ints
• Before starting to paint double check all b• All doors and jambs should be patched and sanded before painting.• Be sure to paint the doors in the direction of the grain of the wood.• Use cardboard scraps to paint the bottom of the doors by placing them unde
door. You may also use a paint saturated rag or piece of carpet.• Bathroom walls and ceilings are painted with semi
painted • Kitchen walls are painted with semi
completely contained kitchen doorway; semiFLAT. (see diagrams below)
FLAT Semi-Gloss FLAT Semi-Gloss
Cle
an
Up
• Be sure clean-up area is away from houses and cars.• Clean all buckets and brushes with hose.• Use a wire brush to clean paint brushes• Remove all excess water by shaking out each paint brush.• Store all paintbrushes upside down in a bucket to allow brushes to dry.• Store buckets upside down to allow them to dry.
PAINT (Doors, Jambs)
Tools & Materials Rags Cardboard scraps
5 gallons Semi-Garden hose with nozzleWire brush
House or Crew Leader
• One volunteer per door
Each door and jamb should get painted with two (2) coats of semi-gloss paint. All interior door and jamb paint should only be done by skilled painters.
Before starting to paint double check all buckets to be sure you have the correct paintAll doors and jambs should be patched and sanded before painting. Be sure to paint the doors in the direction of the grain of the wood. Use cardboard scraps to paint the bottom of the doors by placing them undedoor. You may also use a paint saturated rag or piece of carpet. Bathroom walls and ceilings are painted with semi-gloss; cement board above tub is not
Kitchen walls are painted with semi-gloss (kitchen ceiling is painted in FLAT); wall within kitchen are painted in semi-gloss; in the layout that has no
kitchen doorway; semi-gloss should be painted up to the edge of the cabinets, then use FLAT. (see diagrams below)
loss FLAT Semi-Gloss FLAT
up area is away from houses and cars. Clean all buckets and brushes with hose. Use a wire brush to clean paint brushes Remove all excess water by shaking out each paint brush.
ore all paintbrushes upside down in a bucket to allow brushes to dry. Store buckets upside down to allow them to dry.
Page 30
-gloss Paint Garden hose with nozzle
One volunteer per door
gloss paint. All interior door
have the correct paint.
Use cardboard scraps to paint the bottom of the doors by placing them underneath the
gloss; cement board above tub is not
gloss (kitchen ceiling is painted in FLAT); walls gloss; in the layout that has no
gloss should be painted up to the edge of the cabinets, then use
FLAT Semi-Gloss

Construction Manual – July 2013 Page 31
EXTERIOR SKILLED PAINT (Stucco Accents, Doors)
Tools & Materials 3 Paint brushes 3 Paint buckets Rags
1 Roller frame 1 Exterior Roller Cover (1 ¼”) 1 Paint Pan
2 gallons Accent Top Coat paint Garden hose with nozzle Wire brush
Cre
w
• House or Crew Leader • 2 - 3 Volunteers
• Assign each volunteer to one of the
following: o stucco accents o doors
Ov
er-
vie
w
Each door and jamb should get painted with two (2) coats of semi-gloss paint. All exterior doors and trim should only be done by skilled painters.
He
lpfu
l H
ints
• Before starting to paint double check all buckets to be sure you have the correct paint. • All doors and jambs should be patched and sanded before painting. • Be sure to paint the doors in the direction of the grain of the wood. • Use cardboard scraps to paint the bottom of the doors by placing them underneath the
door. You may also use a paint saturated rag or piece of carpet. • Only the “face” of the stucco accents should be painted with the trim color (the edges are
painted with the house base color; same as walls)
Cle
an
Up
• Be sure clean-up area is away from houses and cars. • Clean all buckets and brushes with hose. • Use a wire brush to clean paint brushes. • Remove all excess water by shaking out each paint brush. • Store all paintbrushes upside down in a bucket to allow brushes to dry. • Store buckets upside down to allow them to dry.

Construction Manual – July 2013 Page 32
LANDSCAPING
Tools & Materials String Tape Measures Stakes Wellington Straps Site Plan
Shovels Rakes Trowels Sledge Hammers Lopping Shears
Machetes Wheelbarrows Brooms Mulch Garden hose with sprinkler
Cre
w
Per House
• 1 House and 3 Crew Leaders • ~ 30 Volunteers
Per House
• 1 house leader, 3 crew leaders • 30 for hand grading (everyone) • 20 for laying sod • 6 for trees • 2 for shrubs
Hand Grading
Ov
erv
iew
The key to successful grading is close supervision. The ground will already be rough graded by machinery and marked out with “grade stakes”. It is the House and Crew leaders’ job to coordinate their teams and ensure that the grades are correct and that teams do not move the same dirt twice. Each crew leader will have a team of approximately 10 people.
Ha
nd
Gra
din
g
Assign 2-3 people to walk your section and remove all garbage and large rocks. Rocks larger than your fist should be removed. Rocks smaller than your fist can be pushed into the soil. The ground will be covered in grade stakes, which are marked with the proper elevation at that point. These stakes will correspond to either 12’ or 11’ above sea level. The home will be at about 13’ above sea level. The goal of grading is to direct the flow of water to areas on the property designed to retain water (retention basins).

Construction Manual – July 2013 Page 33
Ha
nd
Gra
din
g
You will receive a topographical map that will show what the final elevations of the property should look like. The example to the left shows what this map will look like. Each line corresponds to an elevation level. The space between lines indicates the slope by showing how much the elevation is to change in that distance. For example, between point A (12.0 Elevation) and point B (11.0 Elevation) the grading needs to drop one foot. Both point B and point C are at 11.0, so the ground will be level inside this region. With each of these elevations you will want to have the dirt be about 2 inches below the final elevation to allow for the height of the sod (2 inches).
Each Stake will be marked with one of three terms that will indicate what needs to be done and a line.
CUT (C): At this stake you will need to remove dirt. The amount of dirt will be determined by the number after CUT. For example, CUT 1’ indicates that the elevation at that point needs to be 1 foot below the line. Clear dirt 1 foot and 2 inches below the line to make room for the sod. Grade (GR): At this stake you will need to add or remove dirt to make the elevation even with the line (~ 2 inches for sod). FILL: At this stake you will need to add dirt. The amount of dirt will be
determined by the number after FILL. For example, FILL 1’ indicates that the elevation at this point needs to be 1’ above the line. Add 10 inches of dirt to leave room for the sod. (Not pictured and not common.)
Around the house you will want to leave the dirt at the level that it is already at. Around driveways and sidewalks please make the dirt 2-3 inches below the top of the concrete to allow for sod. Top of grass should be at or below the level of the driveway so water always drains from the driveway to the grass.

Construction Manual – July 2013 Page 34
Ha
nd
Gra
din
g
A good method for keeping even slopes and elevations is to use string. By tying taut string lines at the correct grade mark and connecting the stakes you will create a guide to follow. Your team can then level the soil to approximately 2 inches below the line.
Near the back of the house is a concrete pad for the A/C compressor. This pad should be level for 3 feet around it to place shrubs. Around the rest of the house and all other cement pads and sidewalks, there will be an immediate slope to the next elevation line. You must also allow 4’ of level ground at the front of the house where the shrubs are to be placed.
He
lpfu
l H
ints
• Do not knock the stakes • Do not remove the stakes until all the elevations are
correct and your grading has been approved by Russ or Mary Lou.
• Sprinkler lines will be run throughout the property (buried 4-6” deep). Be careful not to remove, bury or break them. During the sod portion of the day you will be feeding the black pipe through the sod or the sprinkler head.
• Around planted trees (with wooden braces), create a 10 inch high berm around the tree. The berm should be a circle with a 3 foot radius from the center of the tree.

Construction Manual – July 2013 Page 35
Planting Trees and Shrubs
Ov
er-
vie
w
This team (8 volunteers; 1 crew leader) will be responsible for planting all trees and shrubs on the property and mulching them. 6 “strong” individuals will be responsible for planting trees and 2 individuals for planting shrubs on the front of the house and around the A/C compressor.
Tre
es
Russ will let each team know which trees go where. Dig a hole that is deep enough for the root ball. The holes should be dug so that the “ball” of roots is buried with the top of the ball open to the air.
The top of the root ball MUST be 2-4 inches above the sod level. Trees do not like “Wet Feet”. Then level the tree and have someone stand back (from both sides – like a Christmas tree) and check it before filling in with dirt. Dirt should not cover the top of the ball, but should go all the way around. Once the tree is in the hole and is level AND propped in place with dirt, cut the burlap and string and remove as much as possible. This prevents air pockets and rotting from forming around the roots.
Create a small berm 2-4” away from the ball around the base of the tree. Fill the berm with mulch 2 - 4 inches thick. Water the tree.
3 Wellington Straps should be installed for each tree at 120 degree intervals around the tree trunk. 2 by 4 wooden stakes shall be installed. Strapping must be attached to TRUNK of tree above the lowest branch, but NOT to the branches. Straps should be loose on the trunk, tightened to a natural tension on the strap; “taught” but not “tight”.
He
lpfu
l H
ints
• Root ball must be 2-4” above sod level • Create small berm around base of tree; fill with 2-4” of mulch. Mulch should be pulled
back from the tree trunk 6 inches, leaving a one foot (diameter) circle of exposed dirt. • Palm tree roots should NOT be exposed.

Construction Manual – July 2013 Page 36
Sh
rub
s
Dig a hole that will accommodate the ball of roots but not cover it. Insert into ground and fill around. Do not put ANY sandy soil on top of the black dirt of the root ball. The top of the root ball should be positioned about 2 inches above the surrounding soil surface. Repeat with each shrub. Once all shrubs are planted, cover the rectangular space around the shrubs with 2 inches of mulch. Mulch should be pulled back from the shrub trunk 2-4 inches, leaving a 4 inch (diameter) circle of exposed dirt.
Front of house
Shrubs placed at the front of the house should be spread evenly, 2 foot on center, extending from the front door to the end of the house. The mulch bed will extend approximately 4 feet from the house.
Side of house
2-3 shrubs should be placed on the side of the house to block the view of the Indexing Valve from the street. Place them 3 feet in front of the indexing valve and have them extend to 3 feet away from the house. Shrubs should hide the Valve from street. DO NOT install any shrubs within 4 feet of the Irrigation Lawn Timer.
Around the A/C Disconnect
Shrubs should be placed around the A/C compressor pad located at the back of the house. Plants should be planted 2 feet away from the pad to allow for growth (2 feet from A/C pad to edge of shrub pot). Do not plant any shrubs within 4 feet of the A/C disconnect (typically the right side of the pad).
He
lpfu
l H
ints
• Dig a hole that will accommodate the ball of roots but not cover it. Root ball should be 2”
above sod. • Do not put ANY sandy soil on top of the black dirt of the root ball. • Once all shrubs are planted, cover the rectangular space around the shrubs with 2 inches
of mulch. Mulch should be pulled back from shrub trunk 2 inches, leaving a 4 inch (diameter) circle of exposed dirt.
• Water the shrubs

Construction Manual – July 2013 Page 37
Laying Sod
Ov
er-
vie
w
This group (two teams of 10 volunteers; 1 crew leader each) will be responsible for laying all sod on the property. There will be sod placed throughout the property. Do not begin to lay ANY sod until your house has been given approval by Russ or Mary Lou.
So
d
Sod is to be laid directly on the ground. Start in the front corner. The pattern to lay the sod is called “checkerboard”. This pattern is similar to a brick layout and an example diagram and sample picture. Every other row should begin with a half of a piece of sod to offset the seams. Then you can use full pieces throughout the yard. Use a machete or shovel to cut the sod as necessary. The black pipes for the sprinkler system should be poked through the sod. You will want to make the sod as tight as possible; push or kick the sod to get it as close as possible to the piece before it.
He
lpfu
l H
ints
• Checkerboard pattern • If the sod does not come up to the top of the
sidewalk, add a few shovels of dirt under the sod to make it level
• DO NOT overlap the sod
Cle
an
Up
• Return all tools to container • Throw away mulch bags • Water shrubs and trees • Sweep off driveway and sidewalks