hand innovations minimally invasive dorsal endoplate nail plate surgical... · hand innovations...
TRANSCRIPT
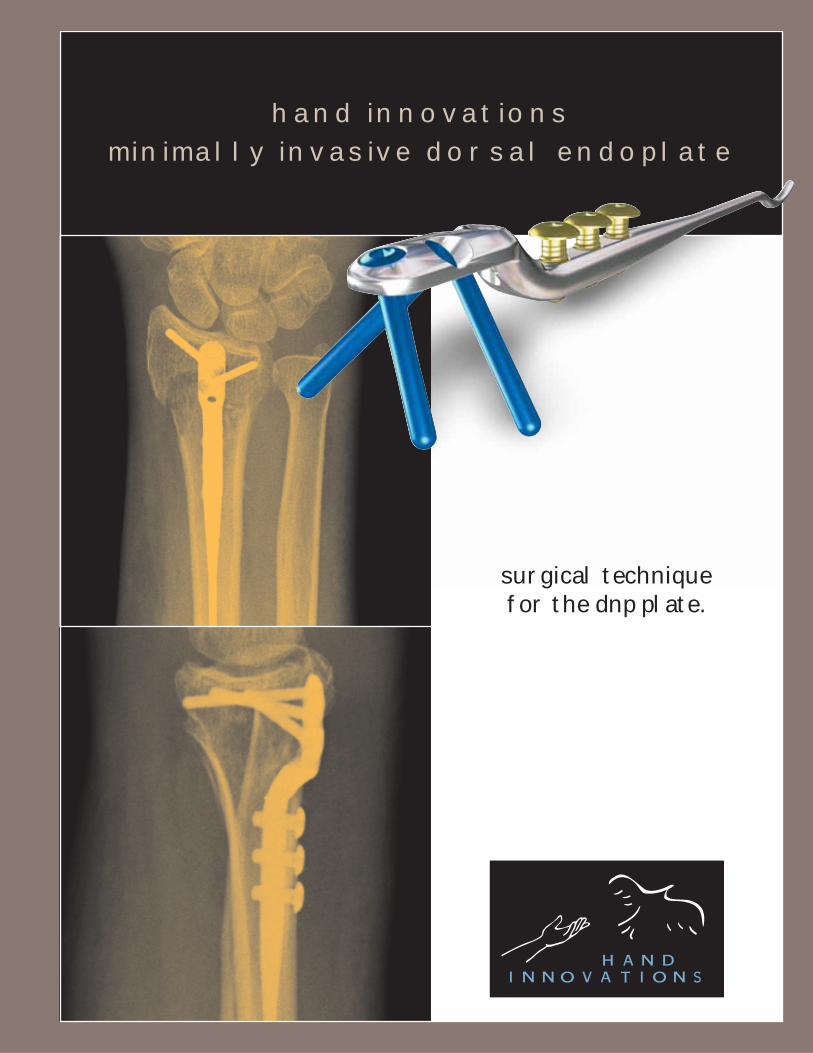
hand innovations minimally invasive dorsal endoplate
surgical techniquefor the dnp plate.

introducing the minimally invasive dorsal nail plate
minimizes extensortendon irritation…
minimally invasive distalradius fracture repair
…fixed angle support
…narrow profile
…intramedullary locked
fixation…
subchondral supportpegs
for more information contact:
8905 sw 87th avenue, suite 220miami, florida 33176
telephone: 305.412.8010fax: 305.412.8060
toll free no.: 800.800.8188www.handinnovations.com

introduction:
The Hand Innovations Dorsal Nail-Plate is a fixed angle implant designed
for minimally invasive treatment of distal radius fractures.
indications:
This device is intended for use in cases where minimal surgical exposure is
desirable, articular involvement is not severe and reduction can be
achieved by closed means. Fractures in the elderly patient where regional
anesthesia is preferred and fractures in the polytraumatized patient where
surgical time must be kept at a minimum are ideal indications.
surgical approach:
The dorsal nail-plate is applied on the dorsal aspect of the radius. It avoids
extensor tendon dysfunction by having a minimal extraoseal bulk; the head
of the implant fits on the floor of the 3rd compartment and between the
extensor tendons. Its application requires mobilization of the EPL tendon
and subperiosteal exposure of Lister’s tubercle.

Make a 3-4 cm longitudinal incision overlying the distal radius and in line with Lister’s tubercle.
1
Release the EPL tendon sheath (3rd compartment) several cm proximal and distal toLister’s tubercle. Protect branches of the radial sensory nerve especially during the
distal part of this dissection. Retract the EPL tendon towards the radial side.
2

Expose Lister’s tubercle subperiosteally.
3
Carry the dissection proximally to expose the fracture site and the dorsal radius.
4
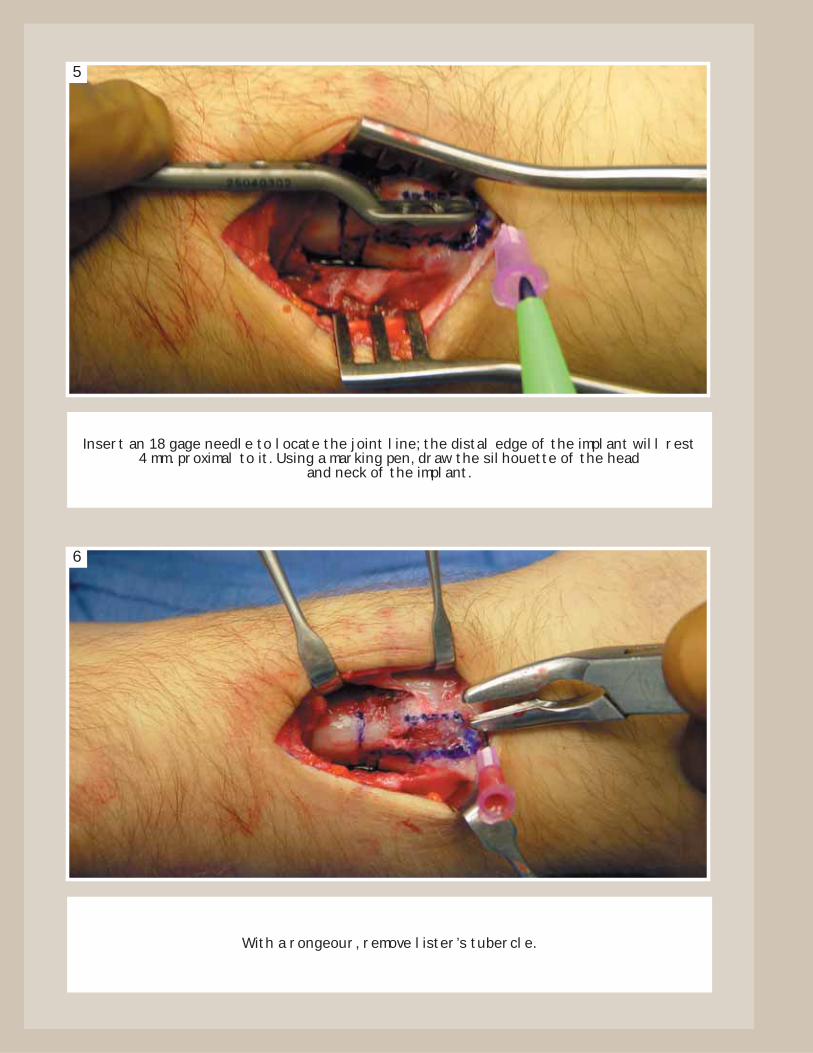
Insert an 18 gage needle to locate the joint line; the distal edge of the implant will rest4 mm. proximal to it. Using a marking pen, draw the silhouette of the head
and neck of the implant.
5
With a rongeour, remove lister’s tubercle.
6

Create a notch on the proximal fragment in line with the floor of the 3rd compartmentto receive the neck of the implant.
7
Open the medullary canal.
8
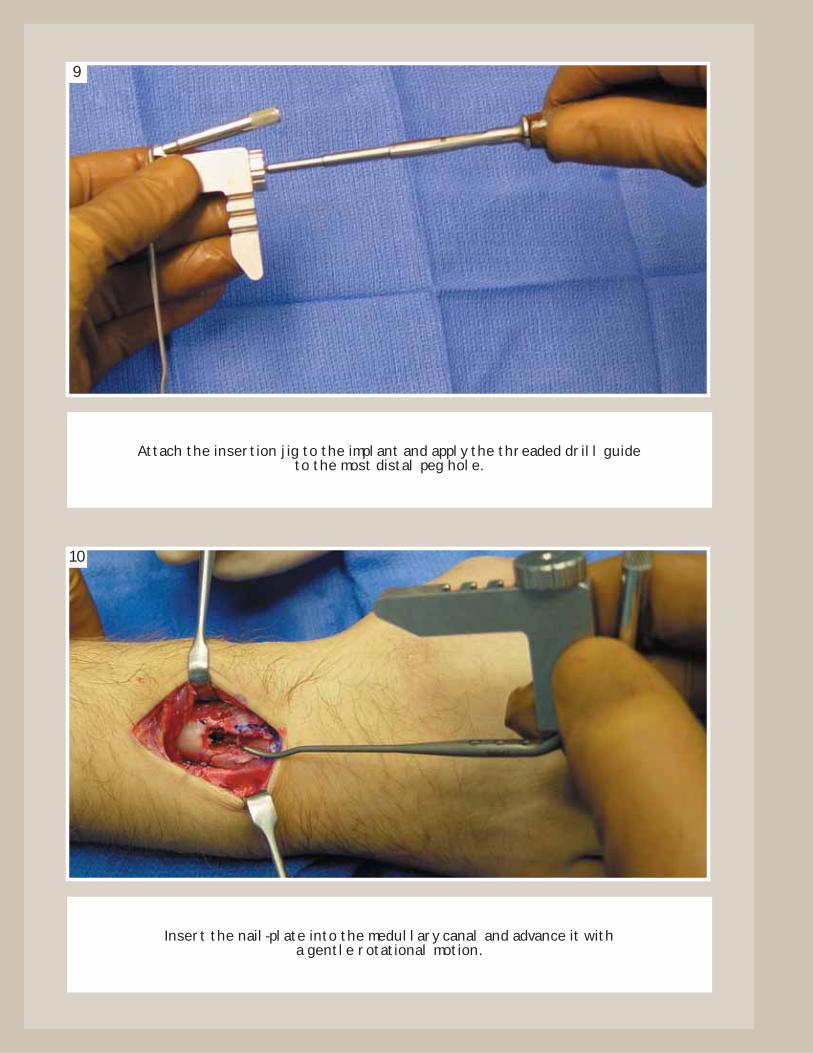
Attach the insertion jig to the implant and apply the threaded drill guide to the most distal peg hole.
9
Insert the nail-plate into the medullary canal and advance it with a gentle rotational motion.
10

Seat the head of the implant flush on the distal fragment; then assure its correct rotation.
11
Under fluoroscopic guidance and while maintaining reduction, insert a 2mm. bit through the threaded drill guide to create the tract for the central peg.
12

The drill should course immediately below the subchondral bone; this is best visualized in a 30 deg. lateral elevation view.
13
Apply the central peg after carefully measuring its length. Use a smooth peg and avoidprotrusion through the volar cortex as this may cause soft tissue problems.
14
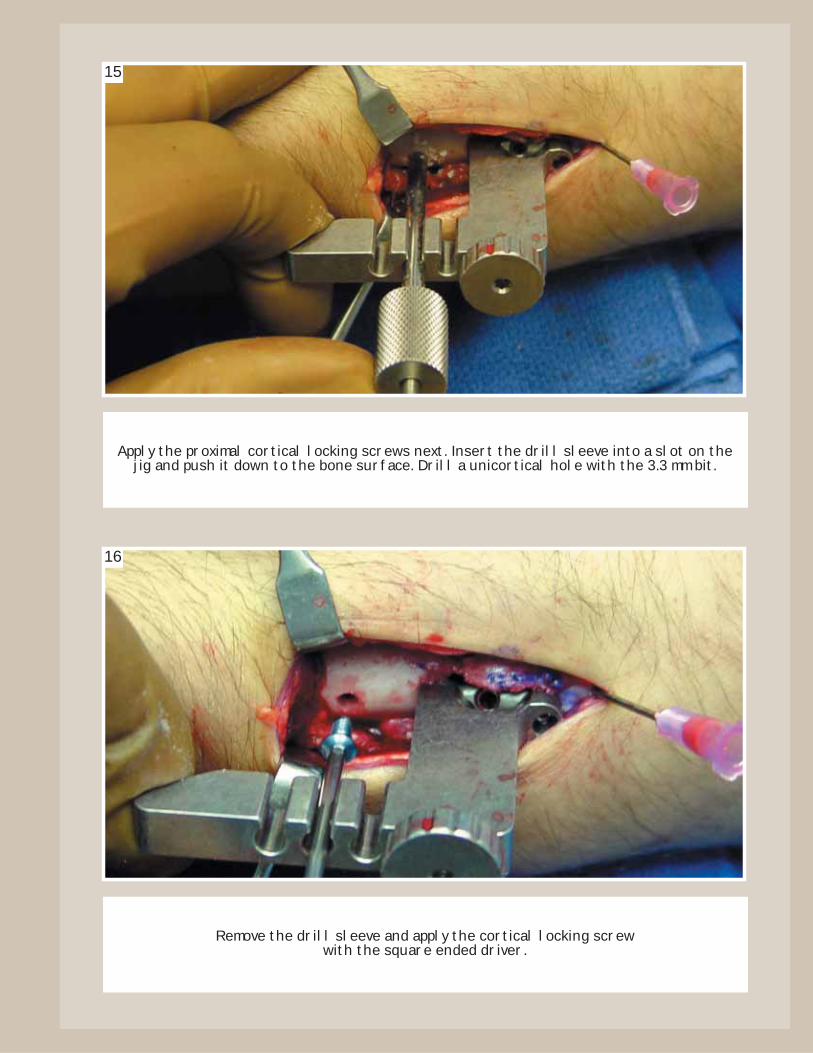
Apply the proximal cortical locking screws next. Insert the drill sleeve into a slot on thejig and push it down to the bone surface. Drill a unicortical hole with the 3.3 mm bit.
15
Remove the drill sleeve and apply the cortical locking screw with the square ended driver.
16

Repeat these steps for each proximal screw; re-tighten previous screws.
17
Remove the insertion jig and use the threaded drill guide to apply the two remaining distal pegs. While drilling, push the distal fragment up and against the implant. This willassure the head is flush with its surface. Do not protrude through the opposite cortex.
18

After proper application of the DNP, the EPL tendon should course proximal to the head of the implant and the tendons of the 2nd and 4th compartments on each side of it.
There should be no impingement.
19
Obtain final radiographic views, close the wound with proper surgical technique, apply a post-operative dressing and encourage immediate finger motion. The use of
removable splint for three to four weeks is advisable.
20

for more information contact:
8905 sw 87th avenue, suite 220miami, florida 33176
telephone: 305.412.8010fax: 305.412.8060
toll free no.: 800.800.8188www.handinnovations.com
MKT-00011-00R01